Loading ...
Loading ...
Loading ...
Initial setup 9
Height
adjustment
foot
Foot
release
slider
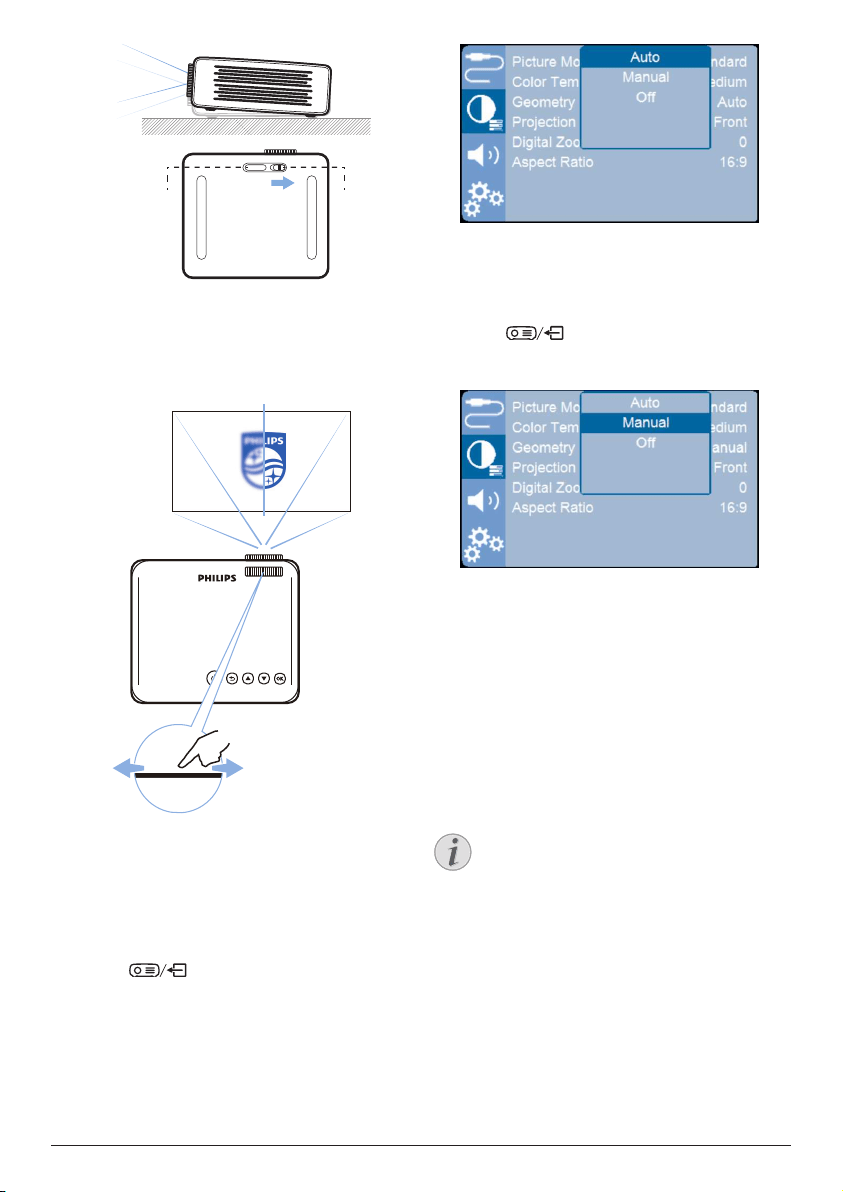
Image focus adjustment
To adjust image focus, turn the focus
adjustment knob at the top of the projector.
NeoPix
Ultra 2
TV+
Image shape adjustment
Auto correction
You can turn on auto keystone correction to
automatically make the image rectangular.
1 Press
to access the projector
settings options and select Geometry
Corrections - Auto.
Manual correction
You can manually correct the keystone and
make the image rectangular.
1 Press
to access the projector
settings options and select Geometry
Corrections - Manual.
2 On the image shape adjustment screen,
press the OK button on the remote control
to switch between different angles, and
press the navigation buttons on the remote
control to adjust image shape.
Placement
You can install the projector in four different
configurations. Follow the guidelines below
when installing the projector.
Notice
For overhead mounting on ceiling,
purchase a projector mount
recommended by an installation
professional and follow the instructions
that come with the mount.
Before mounting on the ceiling, make
sure the ceiling can support the weight
of the projector and mounting kit.
For ceiling installation, this product
must be securely attached to the ceiling
in accordance with the installation
instructions. An improper ceiling
installation may result in accident, injury
or damage.
Loading ...
Loading ...
Loading ...