
Loading ...
Loading ...
Loading ...
12 Specifications subject to change without notice. 38MARB-01SI
Use the following steps to connect the refrigerant piping:
1. Run the interconnecting piping from the outdoor unit to the indoor
unit.
2. Connect the refrigerant piping and drain line outside the indoor
unit. Complete the pipe insulation at the flare connection then
fasten the piping and wiring to the wall as required. Completely seal
the hole in the wall.
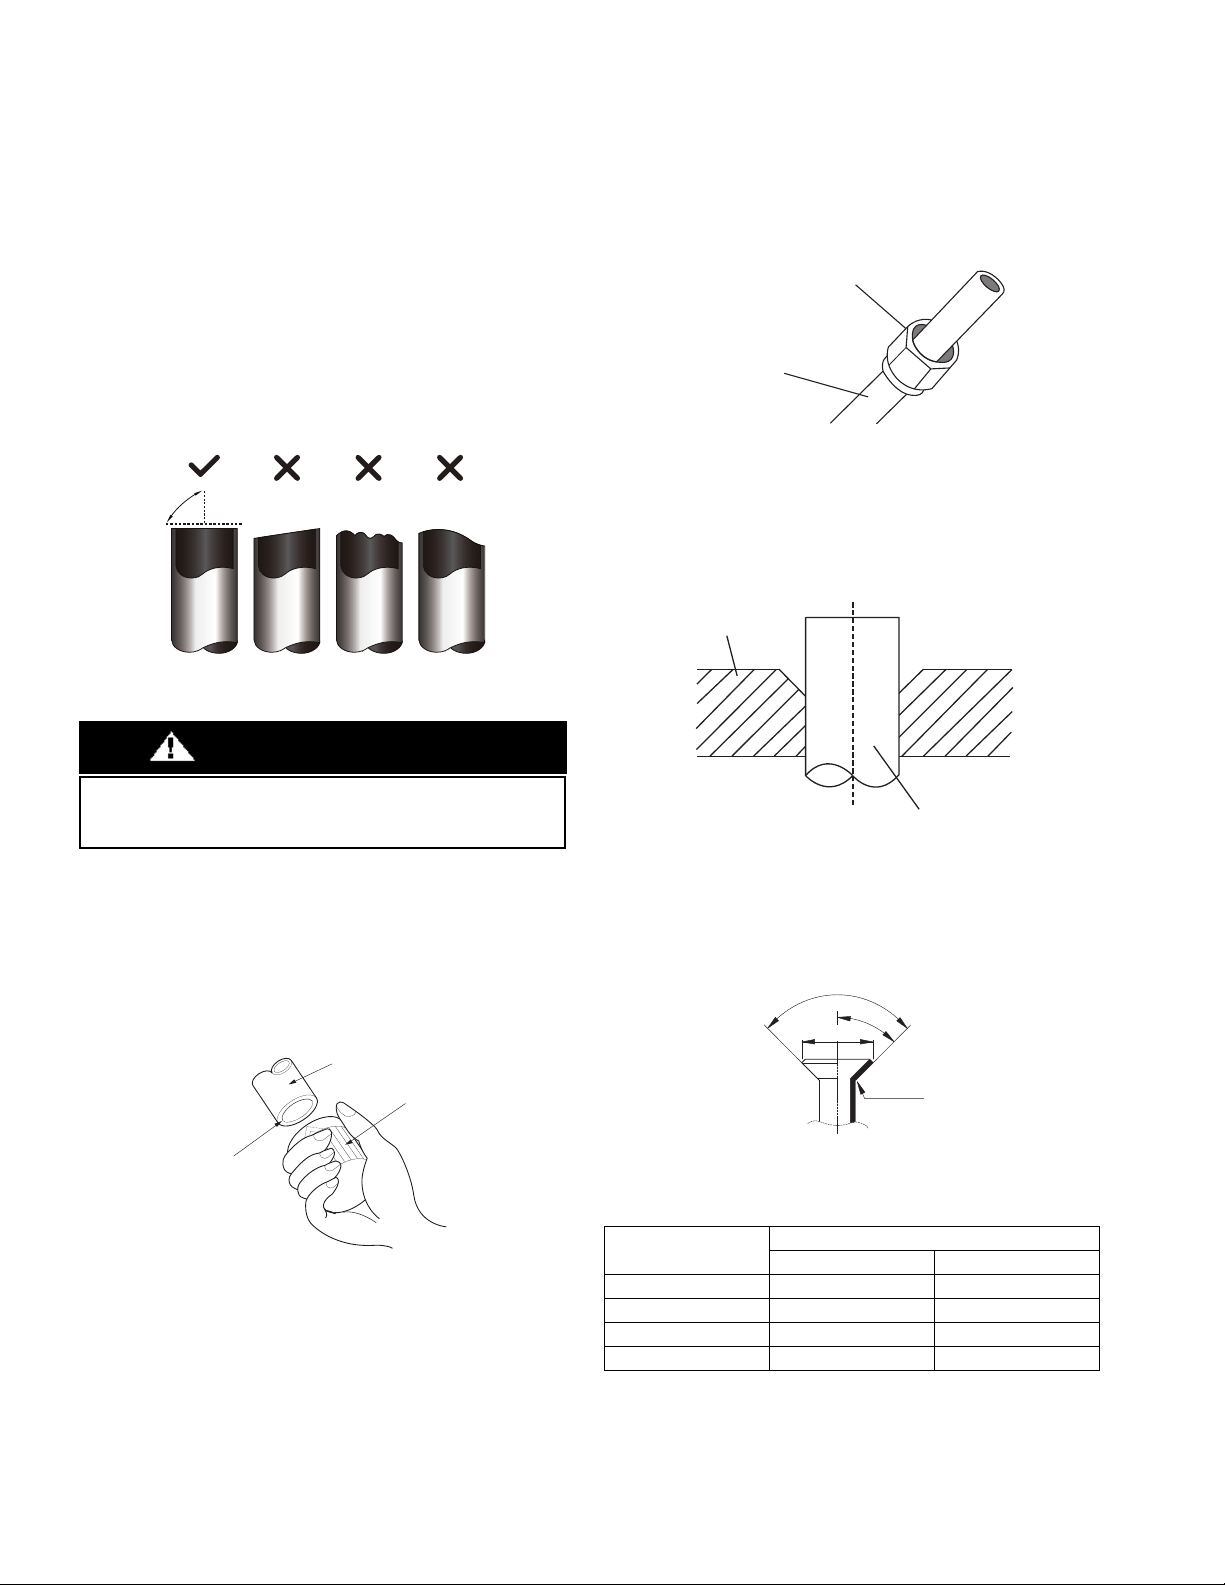
3. Cut tubing to the correct length.
When preparing refrigerant pipes, take extra care to cut and
flare them properly. This ensures efficient operation and
minimizes the need for future maintenance.
a. Measure the distance between the indoor and outdoor units.
b. Using a pipe cutter, cut the pipe a little longer than the
measured distance.
c. Make sure the pipe is cut at a perfect 90° angle.
Fig. 11 —Pipe Cutting
4. Remove Burrs
Burrs can affect the air-tight seal of the refrigerant piping connection.
Therefore, they must be completely removed. To remove:
a. Hold the pipe at a downward angle to prevent burrs from
falling into the pipe.
b. Using a reamer or deburring tool, remove all burrs from the
cut section of the pipe.
Fig. 12 — Deburring Tool
5. Flare Pipe Ends
Proper flaring is essential to achieving an airtight seal.
a. After removing the burrs from the cut pipe, seal the ends with
PVC tape to prevent foreign materials from entering the pipe.
b. Sheath the pipe with insulating material.
c. Place factory flare nut on pipe facing the proper direction.
Make sure they are facing the right direction. Once the ends are
flared, it is impossible to put them on or change their direction.
Fig. 13 — Copper pipe and flare nut
d. Remove the PVC tape from ends of pipe when ready to perform
the flaring work.
e. Clamp the flare block on the end of the pipe. The end of the
pipe must extend beyond the flare form.
Fig. 14 — Flare Block
f. Place the flaring tool onto the form.
g. Turn the handle of the flaring tool clockwise until the pipe is fully
flared. Flare the pipe in accordance with the dimensions in Table 6.
Fig. 15 — Flare Shape
Table 6 — Flare Nut Spacing
h. Remove the flaring tool and flare block, then inspect the end
of the pipe for cracks and even flaring.
Oblique Rough
Warped
90°
DO NOT DEFORM PIPE WHILE CUTTING
Be extra careful not to damage, dent, or deform the pipe while
cutting. This will drastically reduce the heating efficiency of the unit.
CAUTION
Pipe
Reamer
Point down
OUTER DIAMETER
IN (MM)
A” IN (MM)
MAX. MIN.
Ø 1/4” (6.35) 0.05 (1.3) 0.03 (0.7)
Ø 3/8” (9.52) 0.06 (1.6) 0.04 (1.0)
Ø 1/2” (12.7) 0.07 (1.8) 0.04 (1.0)
Ø 5/8” (15.88) 0.09 (2.2) 0.08 (2.0)
Flare nut
Copper pipe
Flare block
Pipe
R0.4~0.8
45
q
r
2
90
q
r
4
A
Loading ...
Loading ...
Loading ...