INSTRUCTIONS FOR ROTOR DISC SEAL KIT
7185487
7311305 (Rev. B 9/9/09)
Depressurize the Softener:
1. Push the bypass valve handle in to the “bypass” position.
2. Start a manual recharge and let it run for a minimum of
10 minutes, then unplug the softener’s transformer from
the electrical outlet.
Disassemble the Valve:
3. Remove the softener’s salt lid and top cover to get
access to the valve.
4. Remove the 8 screws around the top of the valve cover.
On some models it may be necessary to remove the
motor to get access to all cover screws.
5. Lift the valve top cover off the valve body.
6. Pull the rotor and disc out of the valve and remove the
seals from the lower valve body.
Replace the Seals and Reassemble the Valve:
NOTE: Lubricate all o-rings and seals with FDA-approved
silicone grease.
7. Install the rotor seal by first placing the seal into the
valve groove, oriented as shown in Figure 1. Apply a
light coating of silicone grease to the seal crossing ribs.
Then carefully center the wear strip on the seal and push
it downward onto the seal.
8. Install the figure 8-shaped nozzle venturi seal, making
sure the groove side is down and the larger radius is
toward the outer edge of the valve head.
9. Install the drain seal.
10. Assemble 2 o-rings and the wave washer onto the rotor
disc.
11. Center the rotor and disc above the seal in the valve
body and lower the rotor and disc into place.
12. Reinstall the 8 cover-holding screws as follows: Before
tightening the screws, install the valve cam and gear,
then turn the rotor (clockwise only) to “service” position.
Tighten the screws using a crisscross pattern. If a
torque wrench is available, set it to 30-40 inch pounds.
13. Lubricate the motor’s gear and the valve cam gear with
Molykote grease or other high quality gear lubricant.
14. Make sure the switch is oriented with the lever toward
the valve cam.
Repressurize the Softener:
15. With the valve completely reassembled, plug the
softener’s transformer back into the electrical outlet.
16. Open a few faucets in the house.
17. Slowly
pull the bypass valve handle out, moving it to the
“service” or soft water position.
18. Allow air in the tank to bleed out through the open
faucets, then close them.
19. Check for leaks as the softener completes its recharge
cycle.
20. Put the covers back on.
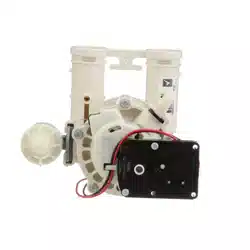
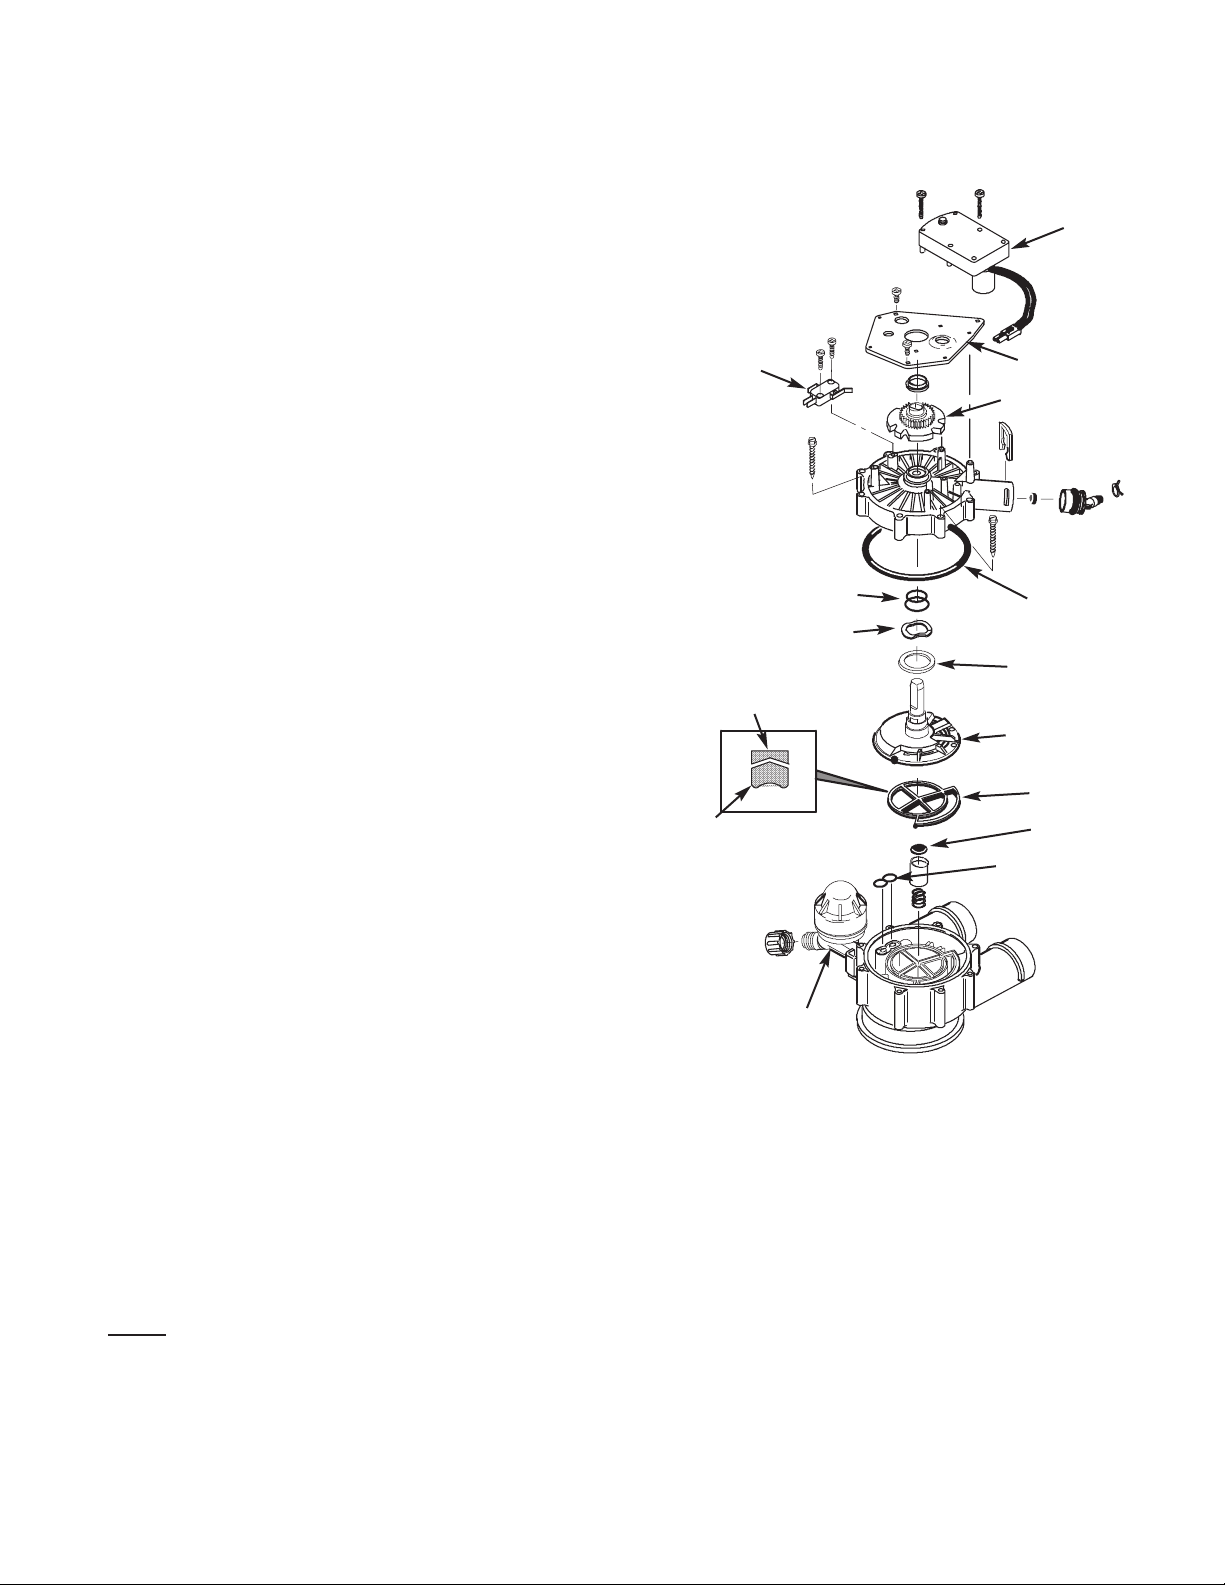
Figure 1
Motor
Motor Plate
Cam & Gear
Large
O-Ring
Rotor Seal
Drain Seal
Nozzle & Venturi
Seal
Nozzle & Venturi
Assembly
Seal
Wear Strip
Rotor & Disc
Wave Washer
2 O-Ring Seals
Switch
Bearing,
Wave Washer