Loading ...
Loading ...
Loading ...
12
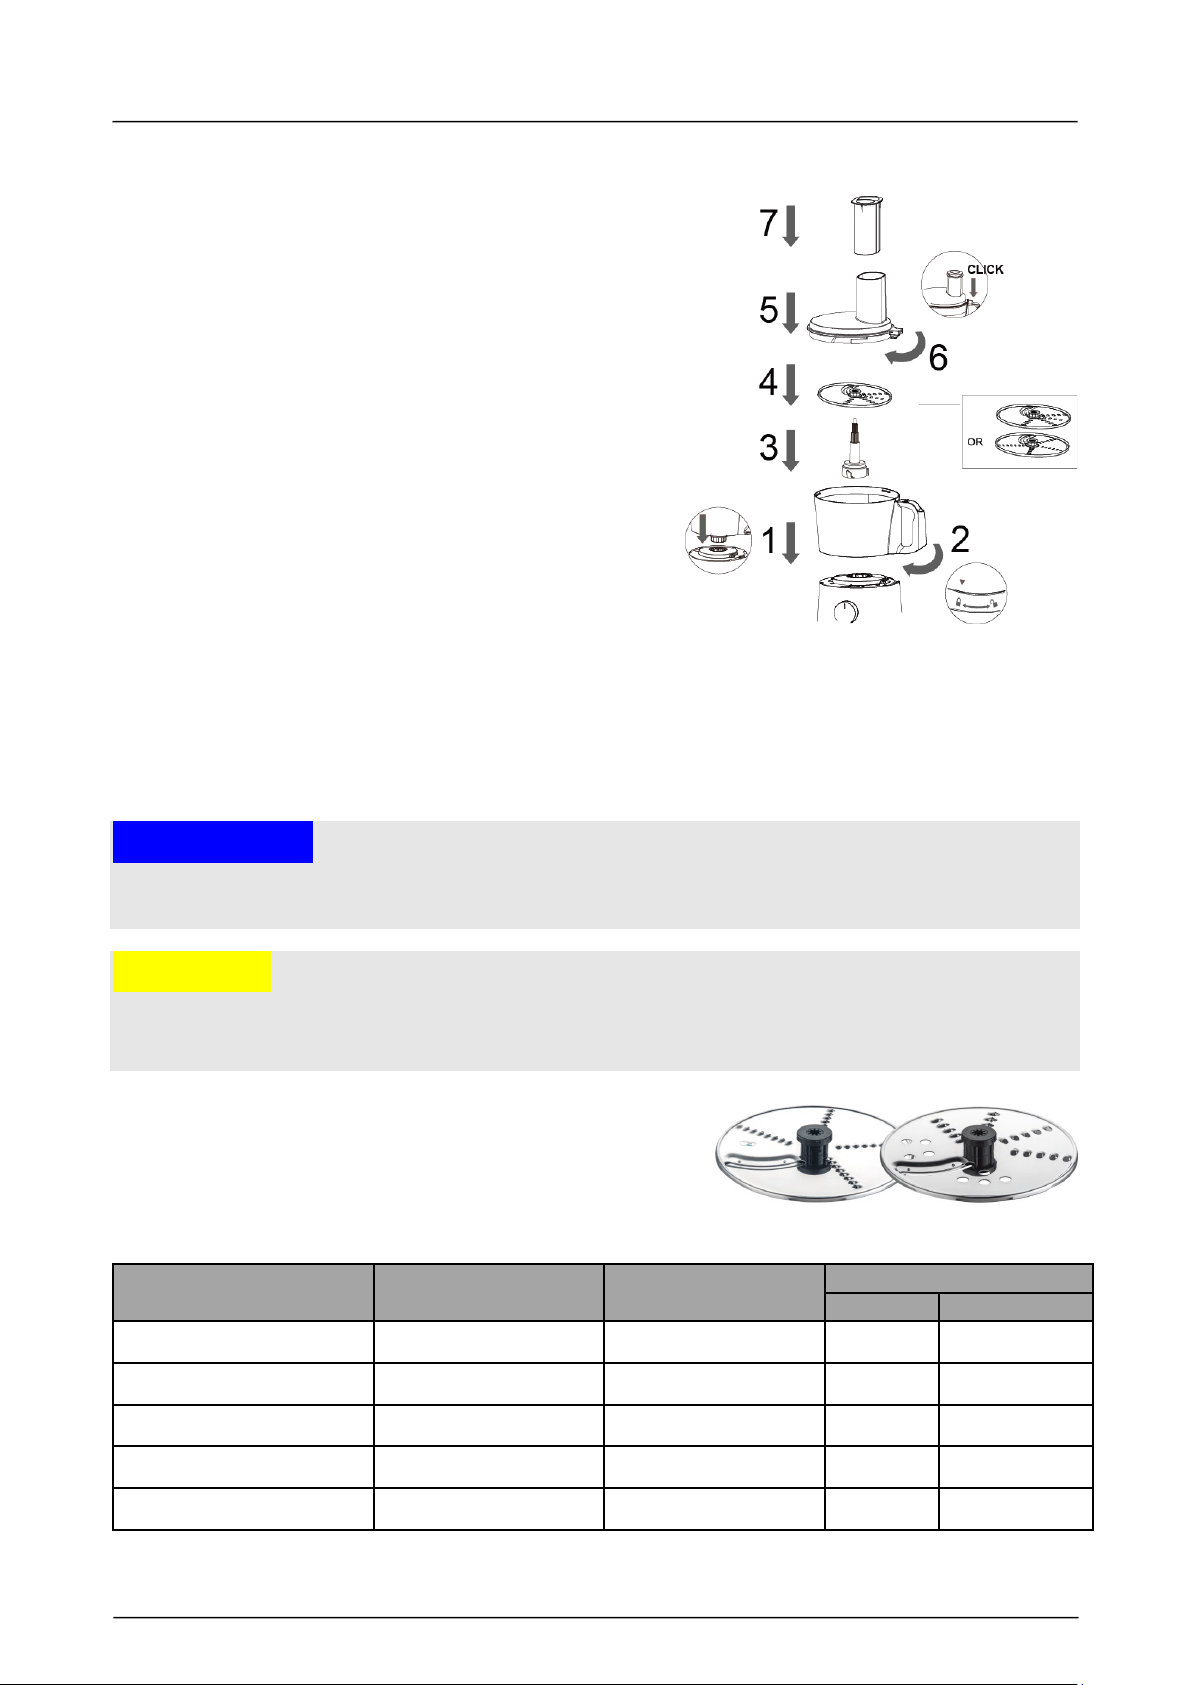
5.3 Assembling the discs
1. Clean all portable parts like described under
cleaning and maintenance.
2. Follow below flow picture step by step to
assemble the device
3. Place the container on the motor block. Turn it
clockwise to lock it.
4. Place the carrier on the pin in the middle of the
container.
5. Assemble your desired blade on the carrier like
shown in step 4. One Side of each disc is for
slicing, one side is for rasping. Ensure that it’s
fixed well on the carrier.
6. Place the lid on the container. Turn the lid
clockwise until it is locked.
7. Depending on the ingredient you want to insert, remove the pushers if necessary, so that
the ingredient fits through the respective opening.
8. Plug in the device, you can start the device with the control knob and insert the ingredients
now.
9. Press down the ingredients evenly with the Pushers.
10. After operation, you can disassemble the device by opposite flow and direction.
Please note
► Ensure that the container in step 2 and the lid in step 6 are locked well, or the device will
not work.
Attention
► Only open the lid when the discs have stopped completely.
► Always be careful when handling the discs as their blades are very sharp.
5.3.1 2-in-1 discs
The two discs can be used for fine or rough slicing and
grating. Every disc has two sides, one for slicing, the
other one for rasping.
Food Suggest quantity Processing time
Speeds
Rasp
Slicer Disc
Carrot 18 oz approx. 1 min. Medium Medium
Potato 18 oz approx. 1 min. Medium Medium
Zucchini 18 oz approx. 1 min. Medium Medium
Leek 18 oz approx. 1 min. Medium Medium
Beetroot without skin 18 oz approx. 1 min. Medium Medium
Loading ...
Loading ...
Loading ...