Loading ...
Loading ...
Loading ...
_-'iOFF
Figure 4-2
OFF -The engine and electrical system is turned off.
ON - The tractor electrical system is energized.
START - The starter motor will turn over the engine. Release
the key immediately when the engine starts
NOTE: Toprevent accidental starting and/or battery
discharge, remove the key from the ignition switch when the
tractor isnot in use.
E. Power Take-Off (PTO) Switch
The PTO switch is located on the RH console to the right of
the operator's seat.
/
/-%
Figure 4-3
The PTO switch operates the electric PTO clutch mounted
on the bottom of the engine crankshaft. Pull the switch
knob upward to engage the PTO clutch, or push the knob
downward to disengage the clutch.
The PTO switch must be in the "disengaged" position
when starting the engine.
F. Transmission Bypass Rods (Not Visible)
The transmission bypass rods (one for each the RHand LH
transmission) are located beneath the frame platform, just
inside each rear wheel.
When engaged, the two rods open a bypass within the
hydrostatic transmissions, which allows the tractor to be
pushed short distances by hand. Refer to Maintenance &
Adjustments for instructions on using the bypass feature.
CAUTION: Never tow your tractor. Towing
the tractor with the rear wheels on the
ground may cause severe damage to the
transmissions.
G. Cup Holder
The cup holder is located toward the rear of the RHconsole
to the right of the operator's seat.
H. Storage Tray
The storage tray is located at the rear of the RHconsole.
J. Seat Adjustment Lever (Not Seen)
The seat adjustment lever is located below the right/front
of the seat. The lever allows for adjustment of the fore to
aft position of the operator's seat. Refer to Maintenance
& Adjustments for instructions on adjusting the seat
position.
K. Fuel Tank Cap
The fuel tank cap is located at the rear of the LH console.
Turn the cap counterclockwise to unscrew and remove
from the fuel tank. Always re-install the fuel cap tightly
onto the fuel tank after removing.
_ ARNINGh Never fill the fuel tank when the
engine is running. If the engine is hot from
recently running, allow to cool for several
minutes before refueling. Highly flammable
gasoline could splash onto the engine and
cause a fire.
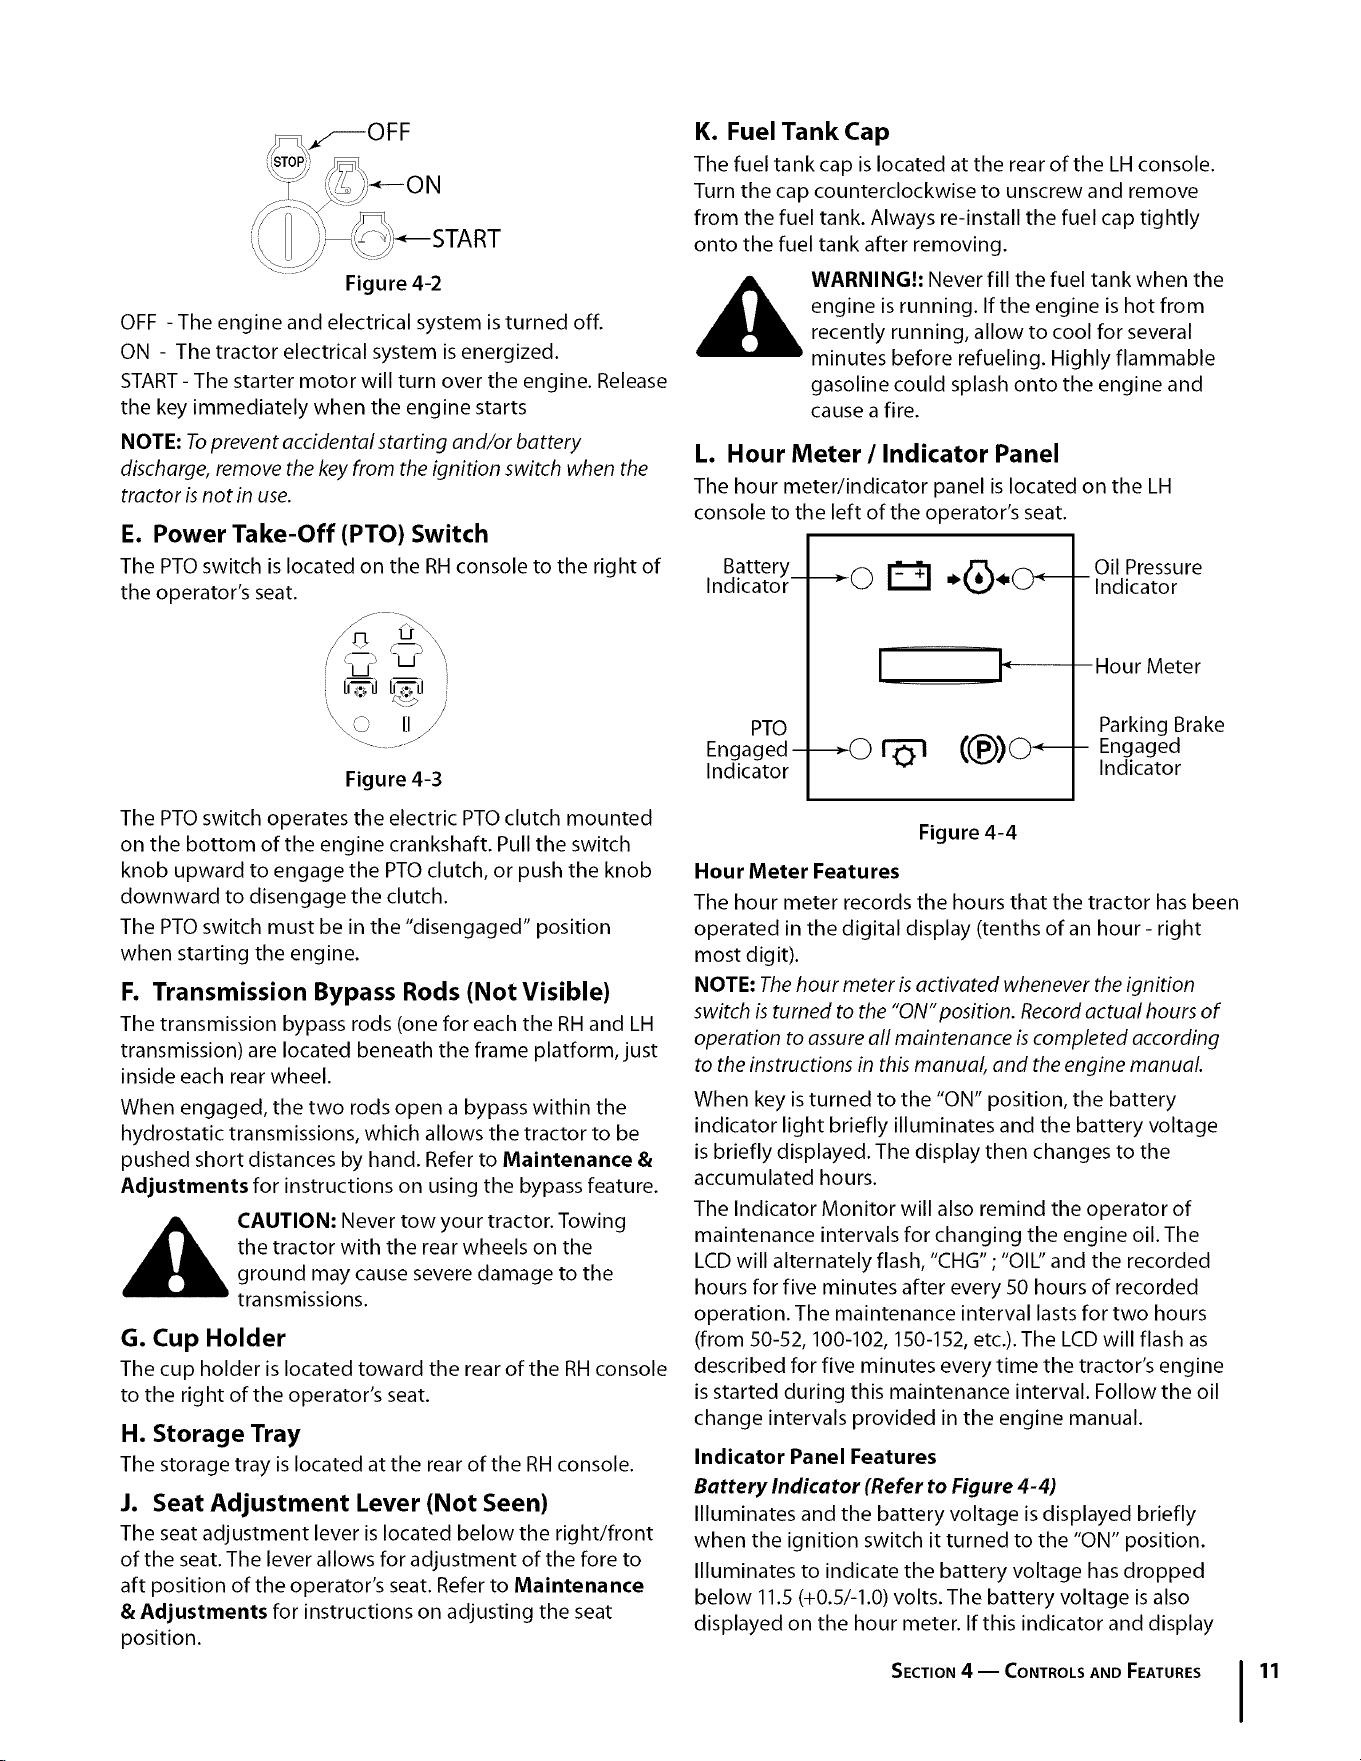
L. Hour Meter / Indicator Panel
The hour meter/indicator panel is located on the LH
console to the left of the operator's seat.
Battery
Indicator-
PTO
Engaged -
Indicator
D -6}-0
Oil Pressure
- Indicator
Hour Meter
Parking Brake
- Engaged
Indicator
Figure 4-4
Hour Meter Features
The hour meter records the hours that the tractor has been
operated in the digital display (tenths of an hour- right
most digit).
NOTE: The hour meter isactivated whenever the ignition
switch is turned to the "ON" position. Record actual hours of
operation to assure all maintenance iscompleted according
to the instructions in this manual, and the engine manual
When key is turned to the "ON" position, the battery
indicator light briefly illuminates and the battery voltage
is briefly displayed. The display then changes to the
accumulated hours.
The Indicator Monitor will also remind the operator of
maintenance intervals for changing the engine oil. The
LCD will alternately flash, "CHG" ; "OIL" and the recorded
hours for five minutes after every 50 hours of recorded
operation. The maintenance interval lasts for two hours
(from 50-52, 100-102, 150-152, etc.). The LCD will flash as
described for five minutes every time the tractor's engine
is started during this maintenance interval. Follow the oil
change intervals provided in the engine manual.
Indicator Panel Features
Battery Indicator (Refer to Figure 4-4)
Illuminates and the battery voltage isdisplayed briefly
when the ignition switch it turned to the "ON" position.
Illuminates to indicate the battery voltage has dropped
below 11.5 (+0.5/-1.0) volts. The battery voltage is also
displayed on the hour meter. If this indicator and display
SECTION4 -- CONTROLS AND FEATURES 11
Loading ...
Loading ...
Loading ...