Loading ...
Loading ...
Loading ...
— 12 —
Installation
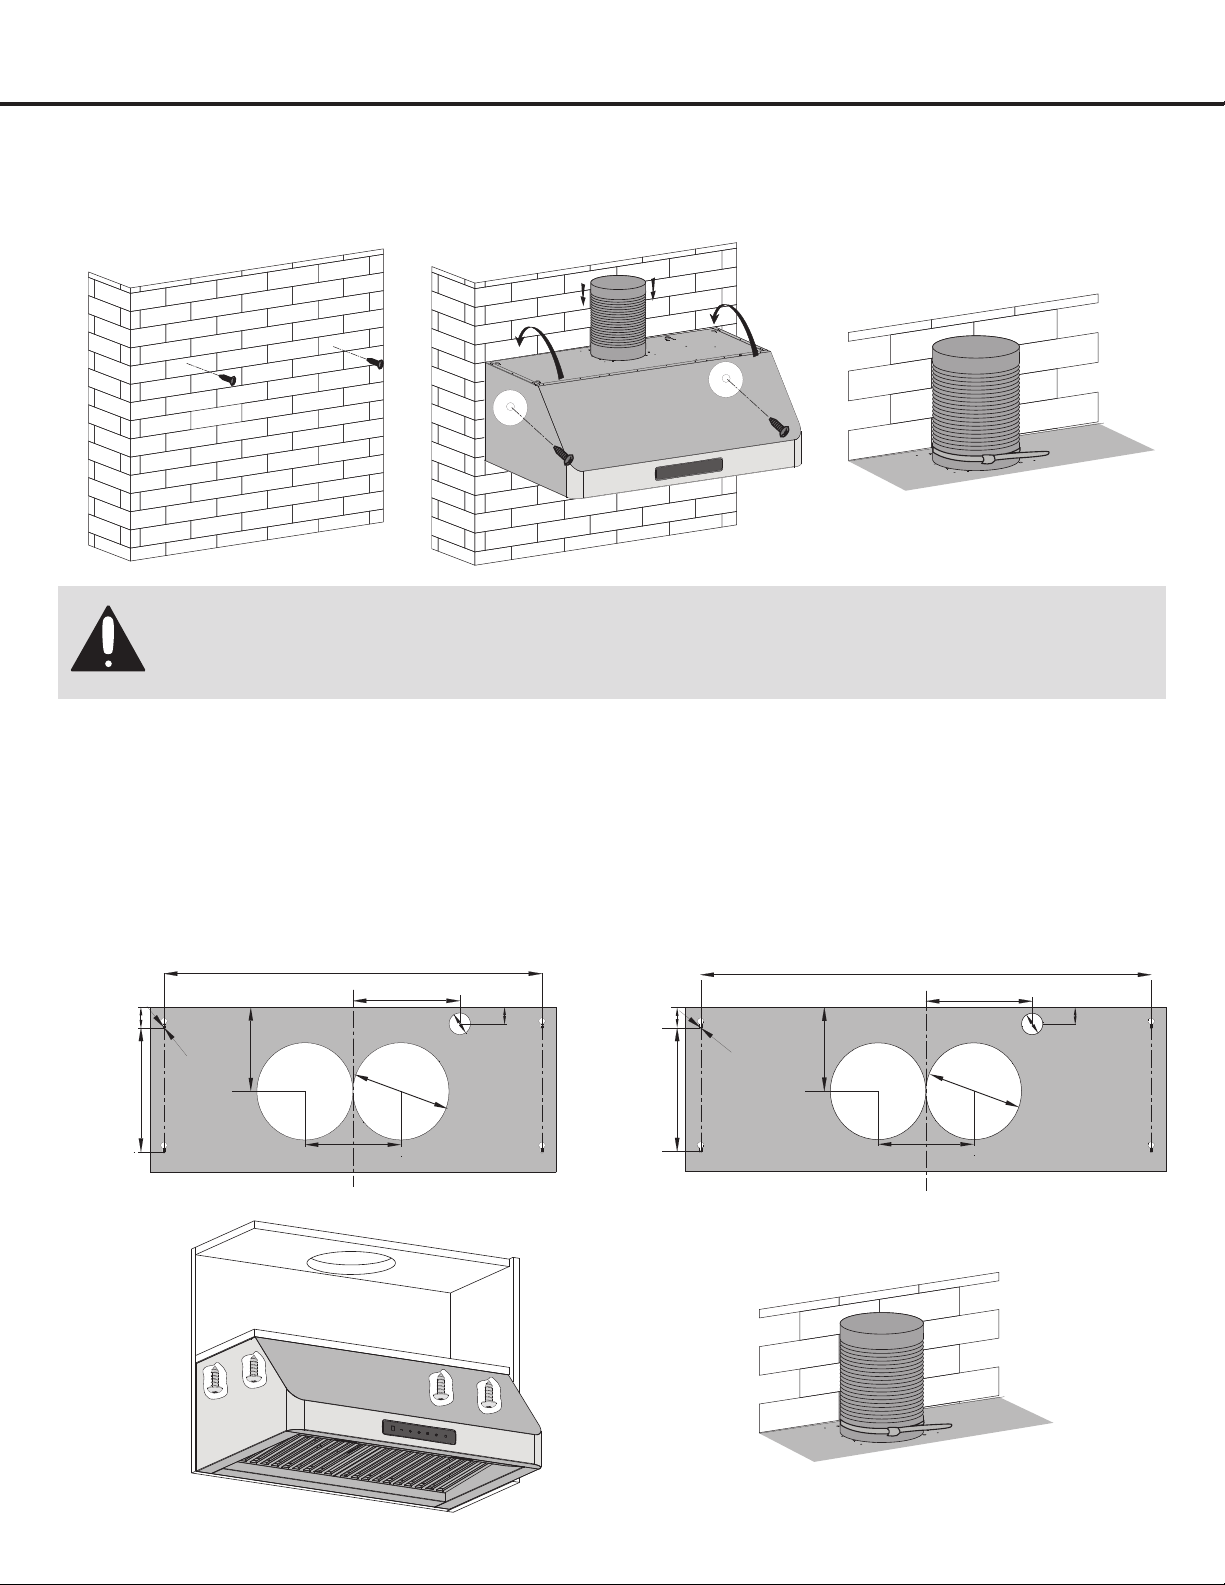
•Insertthewallplugsintheholes,thenscrew2ST4×30mmscrewsintheholes.Seefigure3.
•Hang the hood on the screw of the wall, then fix the hood body with 2 pieces ST4×30mm screws.
•Fixtheexpansionpipeontheoutletbycabletie.Note:expansionpipeandcabletiearenotincluded.Seefigure5.
Figure 3 Figure 4 Figure 5
STEP 8B
Installing the Hood: Attaching the Unit to the Cabinet
•Drill4holesonthehangingcupboard,accordingtothemountingpositiondimensions.Seefigure6-1or6-2.
•Attach the outlet to the hood, then install the cooker hood below the cupboard. Tighten the range hood with 4 screws.
Seefigure7.
•Attach the expansion pipe to the outlet. Lift up the expansion pipe through the hole on the wall. Note: expansion pipe
and cable tie are not included.
27.9 in. (70.8 cm)
33.4 in. (84.8 cm)
9 in.
(23 cm)
1.5 in.
(3.8 cm)
0.07 in.
(0.2 cm)
6.1 in.
(15.6 cm)
Ø 7 in.
(18 cm)
Ø 1.5 in.
(4 cm)
1.1 in.
(3 cm)
7.8 in. (20 cm)
9 in.
(23 cm)
1.5 in.
(3.8 cm)
Ø 7 in.
(18 cm)
0.07 in.
(0.2 cm)
Ø 1.5 in.
(4 cm)
1.1 in.
(3 cm)
7.8 in. (20 cm)
6.1 in.
(15.6 cm)
7 in. (18 cm) 7 in. (18 cm)
Figure 6-1 Figure 6-2
Figure 7 Figure 8
Hardware Note: For safety reasons, please verify provided screws are compatible with cabinetry
construction and wall material, before installation. Please consult your installation specialist regarding the
optimal type of mounting screws and wall anchors to suit your home’s construction.
Loading ...
Loading ...
Loading ...