
Loading ...
Loading ...
Loading ...
Contents of Hardware Pack
Before beginning installation, remove all the contents from the crate and all the
hardware from the pack to make sure everything is present. Hardware is listed
below. Part numbers are shown in parentheses.
• Hitch Plate
• Seat Mounting Bracket (with two shoulder bolts & lock nuts installed)
Recommended Tools for Assembly
• 3/8” Wrench (or socket) • 9/16” Socket
• 1/2” Wrench (or socket) • 7/16” wrench
• 5/8” Wrench (or socket) • Phillips Screw Driver
• 1/4” Drive Ratchet
Manually Moving the Tractor
Hydrostatic Tractors
On Hydrostatic tractors, use the transmission bypass rod located inside the right tire on
the lower right section of the frame. When engaged, the rod opens a bypass within the
hydrostatic transmissions, which allows the tractor to be pushed short distances by hand.
1. Engage the transmission bypass rod by pulling out and down to move the
tractor manually without starting it.
2. Disengage the transmission bypass rod by lifting up and allowing it to return
to its disengaged position after manually moving the tractor. See Figure 1.
Figure 1
Note: If the tractor will not move or does not move freely when pushing check if the
bypass lever is fully open or the brake is engaged.
Contents of Crate
• One Riding Mower • One Seat Assembly • One Discharge Chute Assembly
• One Steering Wheel/Shaft Assembly • One Rear Engine Cover • One Hardware Pack
• One Rear Hitch Plate • One Oil Drain Sleeve
• One Riding Mower Operator’s Manual • One Steering Pedestal Cap
Note: The transmission will NOT engage when the hydrostatic bypass rod is pulled
out. Return the rod to its normal position prior to operating the tractor. If the tractor
will not move when pushing on the forward/reverse pedals, or moves slowly, check
to see of the bypass valve is on.
6-Speed Tractors
Engage the brake pedaland put the shift lever into NEUTRAL.
CAUTION
Never tow your tractor. Towing the tractor with the rear wheels on the
ground may cause sever damage to the transmission.
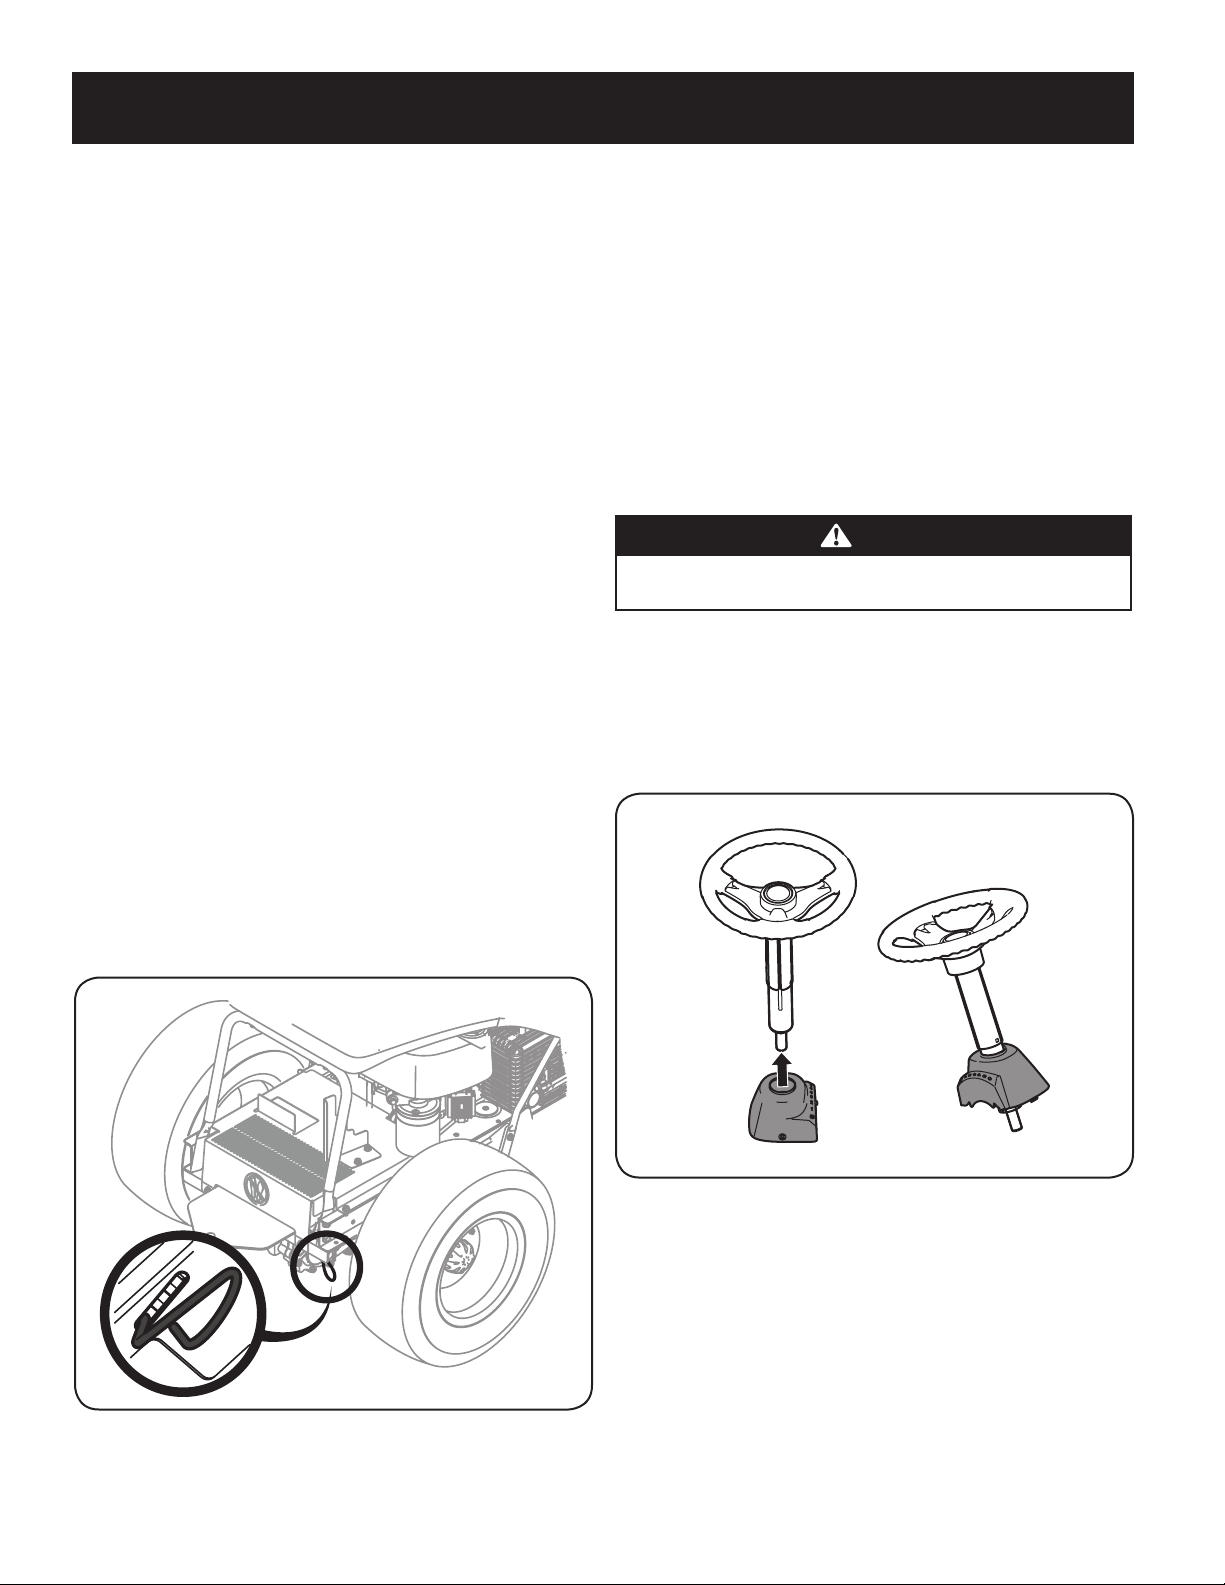
Installing The Steering Wheel Assembly
If the steering wheel assembly for your tractor did not come already installed,
follow the steps below:
1. Slide the pedestal cap onto the steering shaft so that when the steering
shaft is installed on the tractor, the pedestal cap will be upright as shown in
Figure 2.
Figure 2
2. Remove the shoulder bolt and lock nut from the steering shaft on the tractor
and retain for later steps.
3. With the steering wheel assembly upright and positioned over the lower
steering shaft on the tractor, align the steering wheel so that with the
tractor wheels straight, the large opening on the steering wheel is facing
forward.
9
ASSEMBLY
Loading ...
Loading ...
Loading ...