
Loading ...
Loading ...
Loading ...
Installing the Hitch Plate
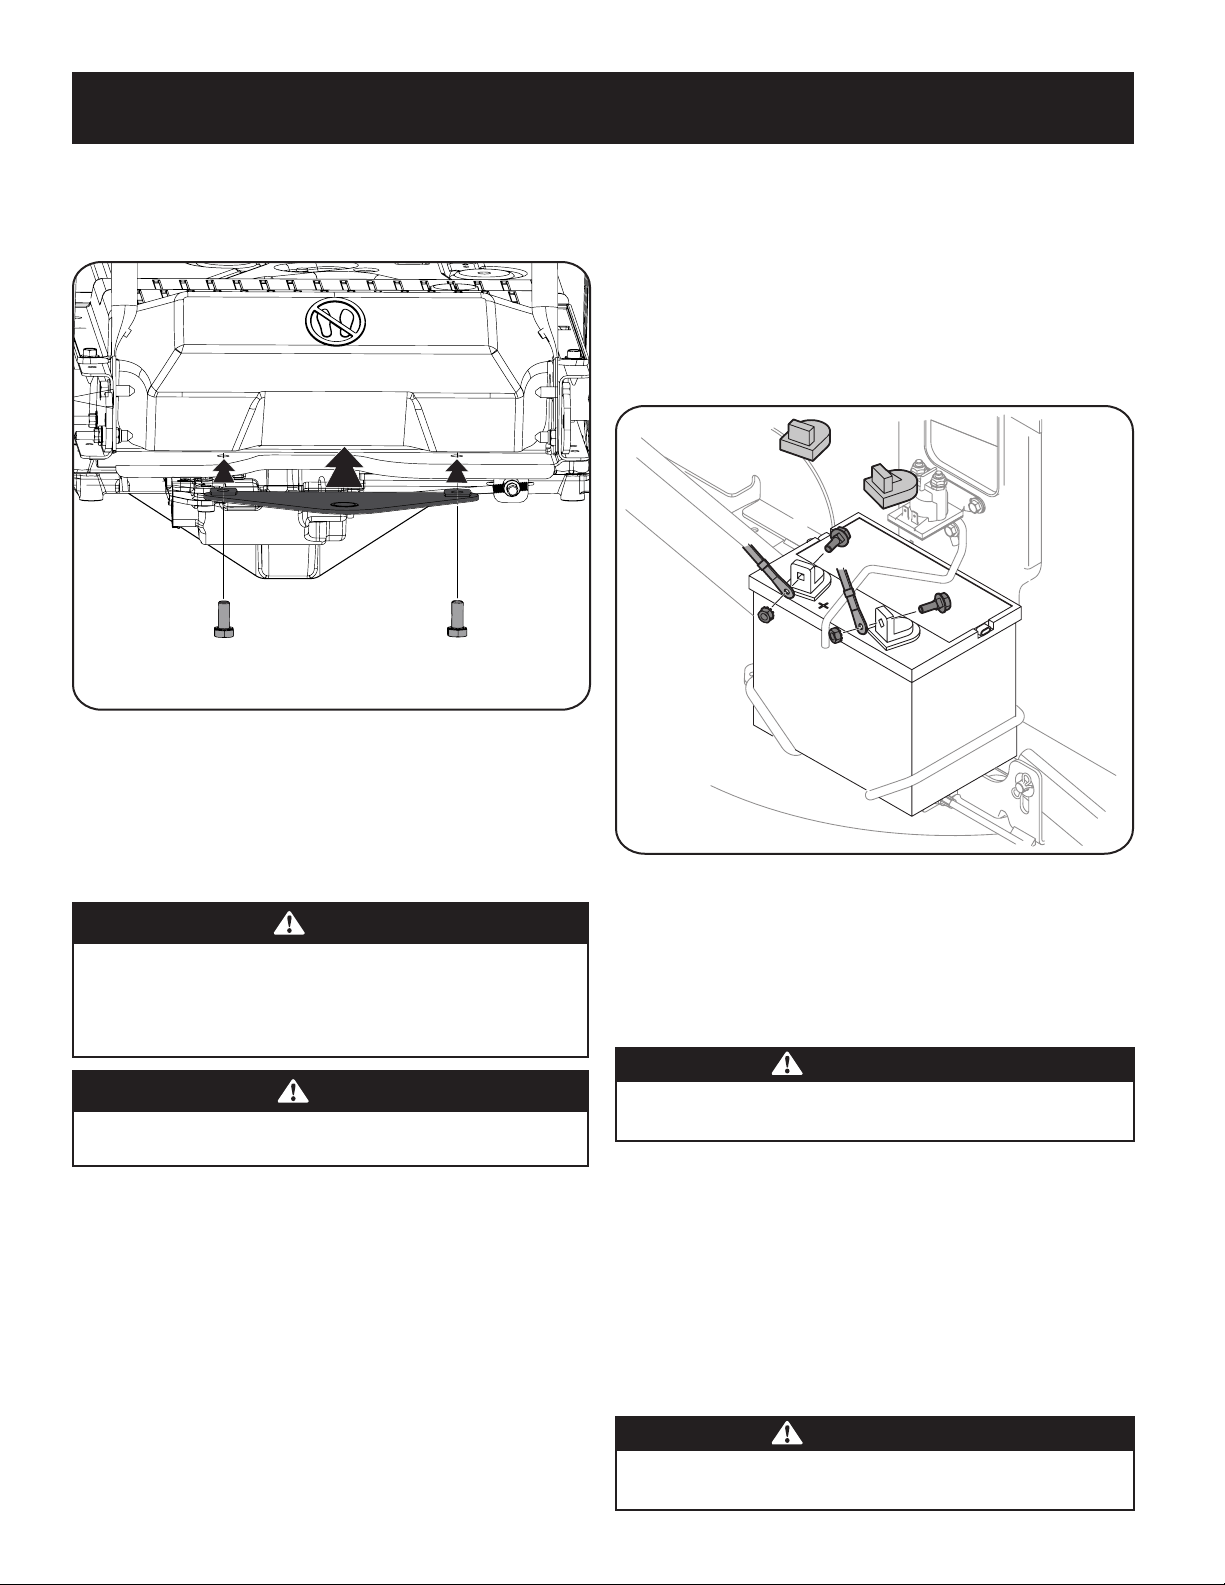
1. Slide the hitch plate in between the frame and the rear cover on your rider.
See Figure 15.
Figure 15
2. When the holes in the hitch plate and the frame are aligned, install the two
hex screws from the manual bag up through the frame and into the hitch
plate. See Figure 15.
3. Securely tighten the hitch plate.
Connecting the Battery Cables
WARNING
CALIFORNIA PROPOSITION 65
Battery posts, terminals, and related accessories contain lead and lead
compounds, chemicals known to the State of California to cause cancer and
reproductive harm. Wash hands after handling.
CAUTION
When attaching battery cables, always connect the POSITIVE (Red) wire to
its terminal first, followed by the NEGATIVE (Black) wire.
For shipping reasons, both battery cables on your equipment may have been left
disconnected from the terminals at the factory. To connect the battery cables,
proceed as follows:
NOTE: The positive battery terminal is marked Pos. (+). The negative battery
terminal is marked Neg. (–).
1. Remove the factory installed hex bolts and hex nuts located on the end of
the wiring harness. Retain the hardware for later instructions.
2. Remove the plastic cover, if present, from the positive battery terminal and
attach the red cable to the positive battery terminal (+) with one of the hex
bolt and hex nuts, using a 7/16 inch wrench and socket wrench. See Figure 16.
3. Remove the plastic cover, if present, from the negative battery terminal
and attach the black cable to the negative battery terminal (–) with the
remaining hex bolt and hex nut, using a 7/16 inch wrench and socket
wrench. See Figure 16.
4. Position the red rubber boot over the positive battery terminal to help
protect it from corrosion.
NOTE: If the battery is put into service after the date shown on top/side of battery,
charge the battery as instructed in the Maintenance section of this Operator’s
Manual prior to operating the tractor.
Figure 16
Gas & Oil
NOTE: The engine is shipped without gasoline and with motor oil in the engine.
However, you MUST check the oil level before operating. Be careful not to overfill.
Running the engine with insufficient oil can cause serious engine damage and void
the engine warranty.
WARNING
Always keep hands and feet clear of equipment moving parts. Do not use a
pressurized starting fluid. Vapors are flammable.
Oil Recommendations
Before starting engine, check oil level, capacity is 1700 ml/57.5 fl. oz. Refer to
viscosity chart in Figure 3-1 for oil recommendations. Do not over-fill. Use a
4-stroke, or an equivalent high detergent, premium quality motor oil certified
to meet or exceed U.S. automobile manufacturer’s requirements for service
classification of a minimum level SJ (higher letter ratings are acceptable such as SL
and SM grades). Motor oil will display this designation on the container.
SAE 10W-30 is recommended for general, all temperature use. If single viscosity oil
is used, select the appropriate viscosity for the average temperature in your area
from the chart below.
CAUTION
Do not use non-detergent oil or 2-stroke engine oil. It could shorten the
engine’s service life.
13
ASSEMBLY
Loading ...
Loading ...
Loading ...