Loading ...
Loading ...
Loading ...
8 805757 v1.05 06.21 Miniboil Install Instructions
Installation
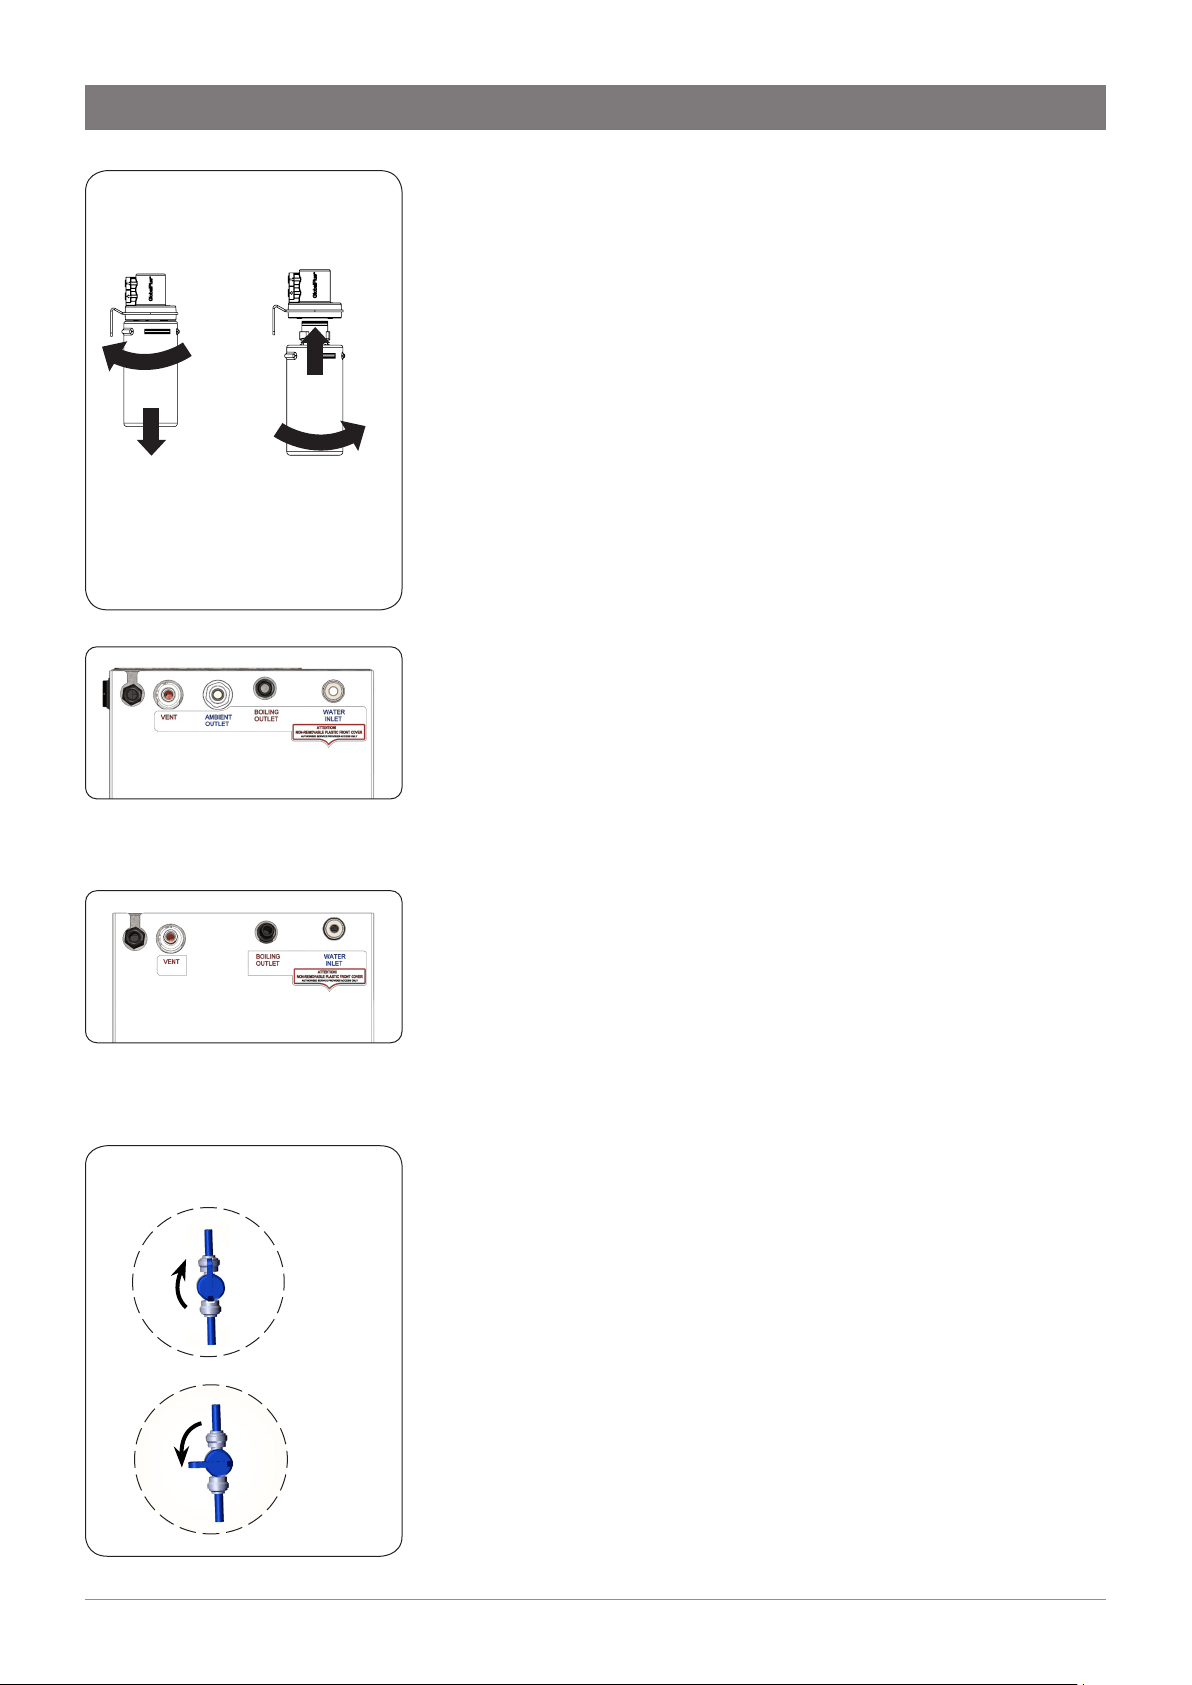
Filter insertion and replacement (Fig 3)
Align the tabs of the cartridge with the filter housing and insert it up
into the socket.
Turn the cartridge a quarter turn to the right until it locks into position.
Reverse this procedure for removal.
Step E - Connecting the tap
• Trim excess silicone tubes to ensure a continuous fall back to
the Command Centre.
• New hose sets supplied with the unit should be used. Do not
use old hose sets.
• Do not loop or allow sagging or kinking of the tubes, to
prevent water from being trapped inside.
• When connecting, slide the tube over the pipe at least 15mm.
Measure and trim the Red silicone tube and connect it to the BOILING
outlet located on the top of the Command Centre.
Measure and trim the CLEAR silicone tube and connect it to the vent
outlet located on the top of the Command Centre.
For Boiling Ambient models, measure and trim the blue LDPE tube and
connect it to the AMBIENT outlet located on the top of the Command
Centre (see Fig 4).
Connect the tap USB connector to the USB lead on the Command
Centre. It should be fitted together tightly until a "click" is felt. Failure to
fully insert the connector will prevent tap operation. Once connected,
fix the cable to the wall, ensuring it is off the floor and away from any
possible water splashes.
Turn on water and check for leaks.
Step F - Testing and commissioning
The appliance is now running in normal operating mode. The Red LED
will flash until factory set temperature is reached.
Filter flush
When commissioning, it is advisable to flush the filter for several
minutes to remove any fine filter particles. Use a bucket to collect and
dispose of the waste water.
To flush the filter, first turn on the water supply and then turn on the
flush valve (see Fig 6.). Discharge approximately 7.5L of water into the
bucket.
Once the filter has been flushed, turn the flush valve off.
Wait 5 minutes after this point to allow adequate fill time.
The unit is now ready for use. Test water delivery from the tap and
check for appropriate temperatures. Use cable clips to tidy and secure
wiring.
ON
OFF
Fig 6. Flush Valve
Open
position
Closed
position
Fig 3. Cartridge replacement
Cartridge
Removal
Cartridge
Insertion
ROTATE
PULL
DOWN
1
2
1
2
ROTATE
INSERT
Fig 5. Boiling Only model:
Connection viewed from the top
Fig 4.Boiling/Ambient models:
Connection viewed from the top
Loading ...
Loading ...
Loading ...