Loading ...
Loading ...
Loading ...
6 805757 v1.05 06.21 Miniboil Install Instructions
In addition to normal tools, the following will be required:
• 35mm diameter sheet metal hole punch for sink tops (not
supplied)
• 35mm diameter hole saw for timber bench tops (not supplied)
• Nut runner tube spanner (supplied) for fixing tap assembly.
Special tools required
Installation
Step A - Installing the tap
The vertical distance between the base of the Tap
assembly and the top of the Command Centre must be
BETWEEN 400 - 900mm. Failure to install within these
parameters may result in poor water delivery.
1. Make sure that the tap location will allow the nozzle to drain into
the sink.
2. Cut a 35mm hole in the bench / sink top.
3. Install the black plastic spacer to the base of the tap and ensure
it remains in place as this is the moisture seal against the bench /
sink top. A light smearing of silicon sealant on the underside of the
spacer will ensure a watertight fit.
4. Pass the hoses through the 35mm hole and carefully locate the
Head Assembly and black spacer on the bench / sink area.
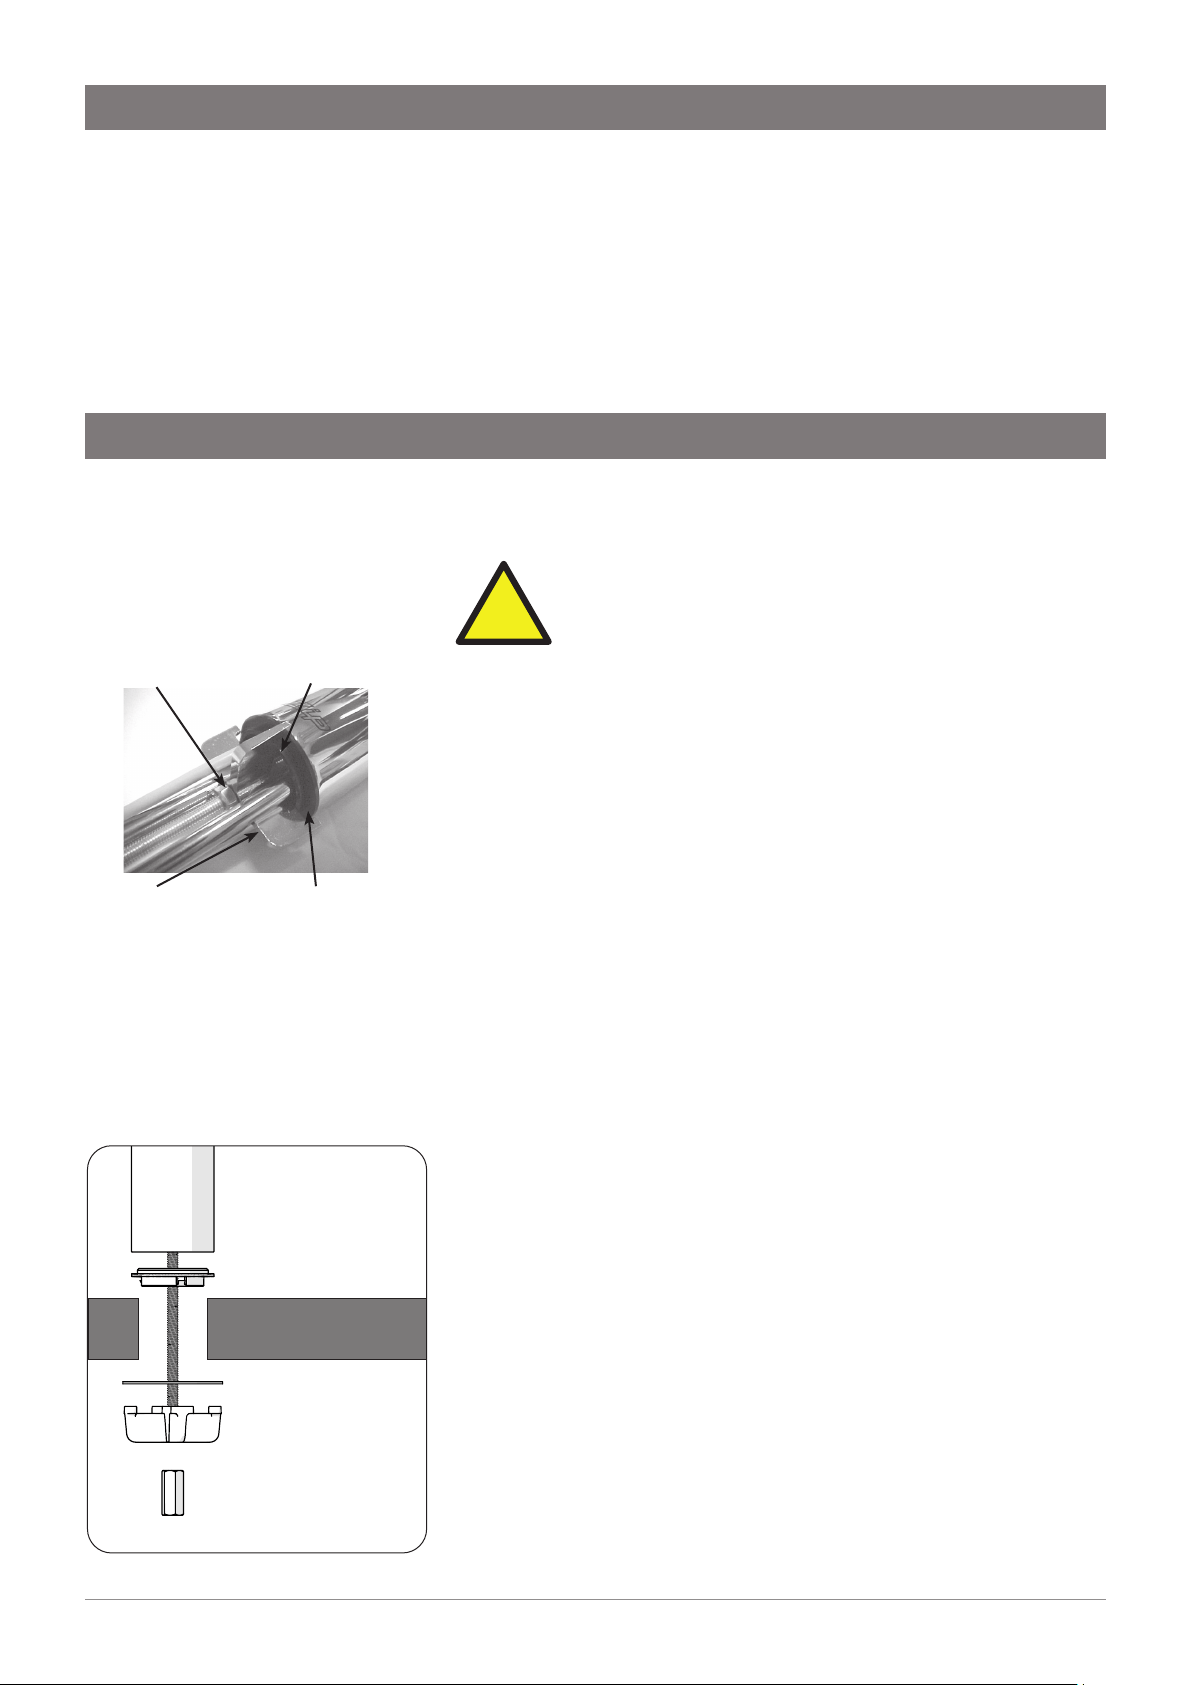
5. From the underside of the bench / sink area re-locate the S/S
washer and “Spider Clamp” by feeding each of the tubes and
electrical cable evenly in between the legs of the “Spider Clamp”.
Slide it up to meet the “All Thread”, and pass the “All Thread”
through the centre of the “Spider Clamp”.
6. Hold the “All Thread” steady and re-fit the 6mm nut to the “All
Thread” using the tube spanner supplied in the kit. Check the Tap
Head position before securing it tightly against the bench / sink
top.
Under no circumstances should the Tap be twisted after the
installation is complete.
Fixing nut Black spacer
Smear silicon on
underside of flat
surface
Tap
all-thread rod
black plastic spacer
benchtop
s/s washer
spider clamp
fixing nut
Spider
clamp
!
Loading ...
Loading ...
Loading ...