Loading ...
Loading ...
Loading ...
12
ASSEMBLY
NOTE: It will take approximately 4 hours to fully charge the
battery.
NOTE: The battery icon on the Vehicle Control Module (VCM)
will blink continuously when charging and the LCD display will
display percentage of charge. The battery is completely charged
when the battery icon is solid and the LCD displays 100%.
NOTE: When the charging cord is plugged into the tractor and
not yet plugged into the wall, the battery icon will illuminate
continuously until the cord is plugged into the wall.
If at any time your charger displays a fault while charging your
battery, follow these procedures:
1. Power off the tractor.
2. Unplug the charging cord from the tractor.
3. Unplug the charger power cord from the power source.
4. Plug the charger power cord back into the power source.
5. Plug the charging cord back into the tractor.
6. If the fault persists contact qualified service personnel.
NOTE: Rechargeable batteries degrade with time and use. The
battery may eventually need to be replaced. To have the battery
replaced, contact your authorized Service Dealer.
NOTE: Using old or faulty battery could cause a system fault that
results in loss of power.
BATTERY CHARGING TIPS
• The battery should be fully charged before the initial use.
• The battery should be fully charged after each use. Storing
the battery in a discharged state could reduce performance.
• The battery will turn off automatically after a complete
charge.
• It will take approximately 4 hours to fully charge the
battery. Leaving the battery connected to the charger for
more than 4 hours will not damage the battery.
• The battery does not develop a memory and does not need
to be fully discharged before recharging.
• Always disconnect battery charger (or extension cord, if
used) from the electrical receptacle (outlet) first, then
disconnect the charging cord from the charging port.
• Never charge a frozen battery.
• It is recommended that the tractor be charged once every
month during off-season storage.
Adjusting the Seat
WARNING
Before operating the tractor, make sure the seat is
engaged in the seat-stop. Engage the parking brake.
Stand behind the tractor and pull back on seat until it
clicks into place.
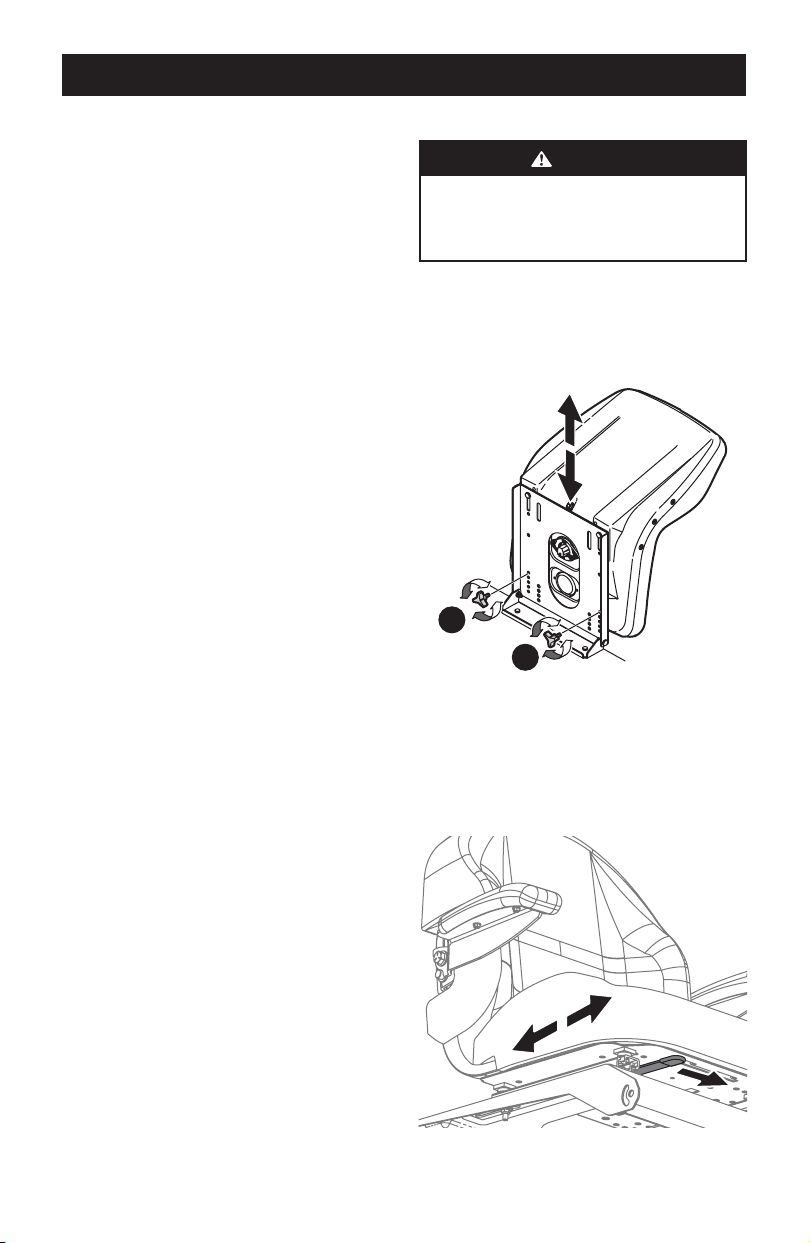
KNOB ADJUST
1. Remove the knobs (a).
2. Slide the seat up or down into the desired position.
3. Replace the knobs into one of the four hole settings and
tighten securely (Figure 12).
a
a
Figure 12
LEVER ADJUST
1. Push left and hold the seat adjustment lever to adjust the
seat position.
2. Slide seat forward or rearward to desired position.
3. Release the adjustment lever. Ensure seat is locked into
position before operation (Figure 13).
Figure 13
Loading ...
Loading ...
Loading ...