Loading ...
Loading ...
Loading ...
14
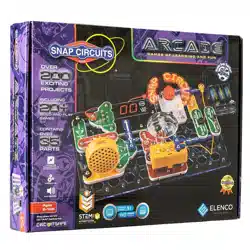
Project 10
Disco Ball
Build the circuit shown. Connect the two blue jumper wires to the snaps on
top of the disco motor (DM). Install three (3) “AA” batteries (not included)
into the battery holder (B3) if you have not done so already. Place one
of the disco covers on the disco motor shaft. Note that both sides of the
support bar are “D-t”.
Turn on the slide switch (S1) and watch the show. Place in a dark room
for best effects.
Project 12
This circuit is like project 10, but the disco cover spins in the opposite direction.
Flat side
(“D-t”)
DM
shaft
Flat side
(“D-t”)
Disco Cover
Support
Bar
Disco Cover
Assembly
Disco Cover
SUPPORT BAR
Disco Cover
SUPPORT BAR
Use any of the three preceding circuits, but replace the disco cover
with the other one included in this set. Compare the patterns on the
ceiling. Place in a dark room for best effects.
Use any of the project 10, 12, or 13 circuits, but remove the two blue
jumper wires. Now the lights do not work, so you just have a spinning
disco cover.
Project 13
Disco Ball with New Pattern
Project 14 Just the Ball
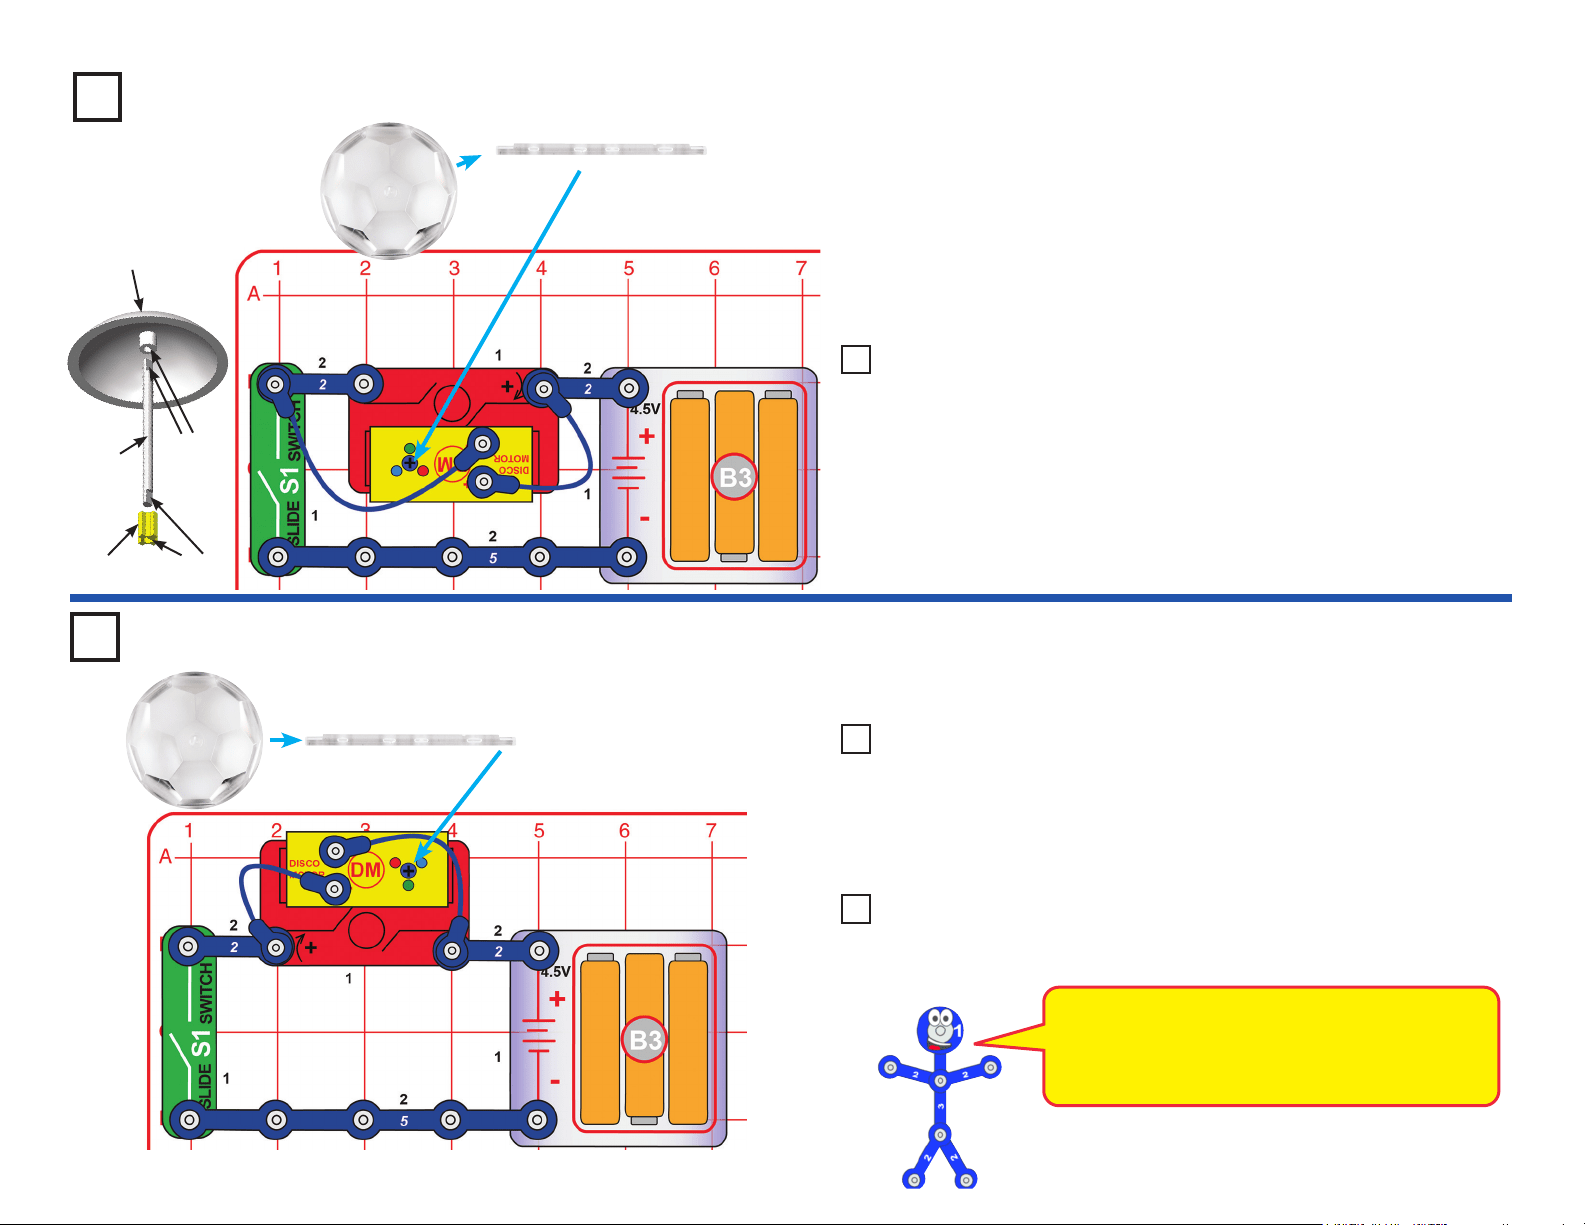
Use the preceding circuit, but remove the 2-snap wire between the
slide switch (S1) and disco motor (DM); connect the end of the blue
jumper wire directly to S1. Place in a dark room and look at the pattern
on the ceiling. The disco cover does not spin.
Project 11 Disco Pattern
Reverse Disco Ball
In this circuit we reversed the battery connections
to the disco motor (DM), so its shaft spins in the
opposite direction now. The connections to the
LEDs in the disco motor were not changed.
Loading ...
Loading ...
Loading ...