EN
USER’S GUIDE
PX
-
S
6000
Initial Setup
Preparing a Power
Supply
Turning Power On or Off Using Pedals Using Commercially
Available Headphones
Playing the Digital Piano
Playing Notes with
Different Tones
Sounding Two Different
Tones at the Same Time
(Layer)
Splitting the Keyboard
Between Two Tones
(Split)
Using the Metronome
Changing Sound Reverberation and Ambiance
Using the Sound Mode
Effects (Hall Simulator/
Reverb and Surround)
Using Chorus (Chorus,
Flanger, Short Delay)
Using Microphone Effects Adjusting Acoustic Piano
Sound Characteristics
(Acoustic Simulator)
Using the Mixer Recording Performances in Real-Time
Using DSP Effects Adjusting the Volume
Level, Stereo Pan and
Effects for Each Part
Using the MIDI Recorder
to Record Performances
Recording a Performance
with the Audio Recorder
Registering a Setup Changing the Pitch
Connecting with a
Smart Device
Saving and Recalling
Performance Setups
(Registration)
Changing the Pitch in
Semitone Steps
(Transpose)
Fine Tuning a Pitch
(Master Tuning)
Using the Dedicated App
Cover

• When the Digital Piano is being operated on battery power only, notes may sound distorted when
performing or playing back a song at maximum volume. This is due to the difference between AC
adaptor power and battery power, and does not indicate Digital Piano malfunction. If you notice
distortion, switch to AC adaptor power or lower the volume level.
• Any reproduction of the contents of this manual, either in part or its entirety, is prohibited. Except
for your own, personal use, any other use of the contents of this manual without the consent of
CASIO is prohibited under copyright laws.
• IN NO EVENT SHALL CASIO BE LIABLE FOR ANY DAMAGES WHATSOEVER (INCLUDING,
WITHOUT LIMITATION, DAMAGES FOR LOSS OF PROFITS, BUSINESS INTERRUPTION,
LOSS OF INFORMATION) ARISING OUT OF THE USE OF OR INABILITY TO USE THIS
MANUAL OR PRODUCT, EVEN IF CASIO HAS BEEN ADVISED OF THE POSSIBILITY OF
SUCH DAMAGES.
• The contents of this manual are subject to change without notice.
• The actual appearance of the product may be different from that shown in the illustrations in this
User’s Guide.
• The Bluetooth
®
word mark and logos are registered trademarks owned by Bluetooth SIG, Inc.
and any use of such marks by CASIO COMPUTER CO., LTD. is under license. Other trademarks
and trade names are those of their respective owners.
• Company and product names used in this manual may be registered trademarks of others.
Included and Optional Accessories
Use only accessories that are specified for use with this Digital Piano.
Use of unauthorized accessories creates the risk of fire, electric shock, and personal injury.
• You can get information about accessories that are sold separately for this product from the
CASIO catalog available from your retailer, and from the CASIO website.
https://support.casio.com/global/en/emi/manual/PX-S6000/

EN-1
Overview and Setup EN-6
General Guide. . . . . . . . . . . . . . . . . . . . . . . . . . . . . . . . . . . . . . . . . . . . . . . . . . . . . . . . . . . . . EN-6
Touch Operation and Notation Used in this Guide . . . . . . . . . . . . . . . . . . . . . . . . . . . . . . . . . EN-9
Preparing a Power Supply . . . . . . . . . . . . . . . . . . . . . . . . . . . . . . . . . . . . . . . . . . . . . . . . . . EN-10
Using an AC Adaptor. . . . . . . . . . . . . . . . . . . . . . . . . . . . . . . . . . . . . . . . . . . . . . . . . . . . . . . . . . . . . . EN-10
Using Batteries . . . . . . . . . . . . . . . . . . . . . . . . . . . . . . . . . . . . . . . . . . . . . . . . . . . . . . . . . . . . . . . . . . EN-12
Turning Power On or Off . . . . . . . . . . . . . . . . . . . . . . . . . . . . . . . . . . . . . . . . . . . . . . . . . . . . EN-16
Auto Resume . . . . . . . . . . . . . . . . . . . . . . . . . . . . . . . . . . . . . . . . . . . . . . . . . . . . . . . . . . . . EN-17
Auto Power Off . . . . . . . . . . . . . . . . . . . . . . . . . . . . . . . . . . . . . . . . . . . . . . . . . . . . . . . . . . . EN-17
Disabling Auto Power Off . . . . . . . . . . . . . . . . . . . . . . . . . . . . . . . . . . . . . . . . . . . . . . . . . . . . . . . . . . EN-17
Power On Alert . . . . . . . . . . . . . . . . . . . . . . . . . . . . . . . . . . . . . . . . . . . . . . . . . . . . . . . . . . . EN-18
Panel Lights Off. . . . . . . . . . . . . . . . . . . . . . . . . . . . . . . . . . . . . . . . . . . . . . . . . . . . . . . . . . . EN-18
Adjusting Display Contrast . . . . . . . . . . . . . . . . . . . . . . . . . . . . . . . . . . . . . . . . . . . . . . . . . . EN-19
Adjusting the Volume . . . . . . . . . . . . . . . . . . . . . . . . . . . . . . . . . . . . . . . . . . . . . . . . . . . . . . EN-19
Using Commercially Available Headphones . . . . . . . . . . . . . . . . . . . . . . . . . . . . . . . . . . . . . EN-19
Outputting From the Speakers While Headphones are Connected . . . . . . . . . . . . . . . . . . . . . . . . . . EN-20
Headphone Mode . . . . . . . . . . . . . . . . . . . . . . . . . . . . . . . . . . . . . . . . . . . . . . . . . . . . . . . . . . . . . . . . EN-20
Using a Commercially Available Microphone . . . . . . . . . . . . . . . . . . . . . . . . . . . . . . . . . . . . EN-21
Operation Lock . . . . . . . . . . . . . . . . . . . . . . . . . . . . . . . . . . . . . . . . . . . . . . . . . . . . . . . . . . . EN-22
Options for Connecting to Smart Devices, Computers, and External Audio Devices . . . . . . EN-23
Using the Included Wireless MIDI & Audio Adaptor . . . . . . . . . . . . . . . . . . . . . . . . . . . . . . . . . . . . . . EN-24
Returning to Initial Factory Defaults . . . . . . . . . . . . . . . . . . . . . . . . . . . . . . . . . . . . . . . . . . . EN-24
Operations Common to All Modes EN-25
Using the Touch Buttons and Touch Ring . . . . . . . . . . . . . . . . . . . . . . . . . . . . . . . . . . . . . . EN-25
Touch Ring Basic Operation . . . . . . . . . . . . . . . . . . . . . . . . . . . . . . . . . . . . . . . . . . . . . . . . . . . . . . . . EN-25
Setting the Sensitivity of the Touch Buttons and Touch Ring . . . . . . . . . . . . . . . . . . . . . . . . . . . . . . . EN-26
Setting the Volume of the Sound Made When the Touch Ring is Used (Operation Click Volume). . . EN-26
Basic Operation for Contents of the Display . . . . . . . . . . . . . . . . . . . . . . . . . . . . . . . . . . . . . EN-27
Selecting Operation Items . . . . . . . . . . . . . . . . . . . . . . . . . . . . . . . . . . . . . . . . . . . . . . . . . . . . . . . . . . EN-27
Navigating the Hierarchy of Setting Items . . . . . . . . . . . . . . . . . . . . . . . . . . . . . . . . . . . . . . . . . . . . . . EN-30
The F Button Menu and FUNCTION Menu. . . . . . . . . . . . . . . . . . . . . . . . . . . . . . . . . . . . . . EN-31
Using the F Button Menu. . . . . . . . . . . . . . . . . . . . . . . . . . . . . . . . . . . . . . . . . . . . . . . . . . . . . . . . . . . EN-31
Using the FUNCTION Menu . . . . . . . . . . . . . . . . . . . . . . . . . . . . . . . . . . . . . . . . . . . . . . . . . . . . . . . . EN-33
Text Character Input . . . . . . . . . . . . . . . . . . . . . . . . . . . . . . . . . . . . . . . . . . . . . . . . . . . . . . . EN-35
Acoustic Settings for the Digital Piano and Playback of the Demo Songs EN-38
Selecting the Piano Position Setting . . . . . . . . . . . . . . . . . . . . . . . . . . . . . . . . . . . . . . . . . . . EN-38
Listening to the Demo Songs . . . . . . . . . . . . . . . . . . . . . . . . . . . . . . . . . . . . . . . . . . . . . . . . EN-39
Playing Notes with Different Tones EN-41
Selecting a Single Tone . . . . . . . . . . . . . . . . . . . . . . . . . . . . . . . . . . . . . . . . . . . . . . . . . . . . EN-41
Selecting a Tone by Number. . . . . . . . . . . . . . . . . . . . . . . . . . . . . . . . . . . . . . . . . . . . . . . . . . . . . . . . EN-41
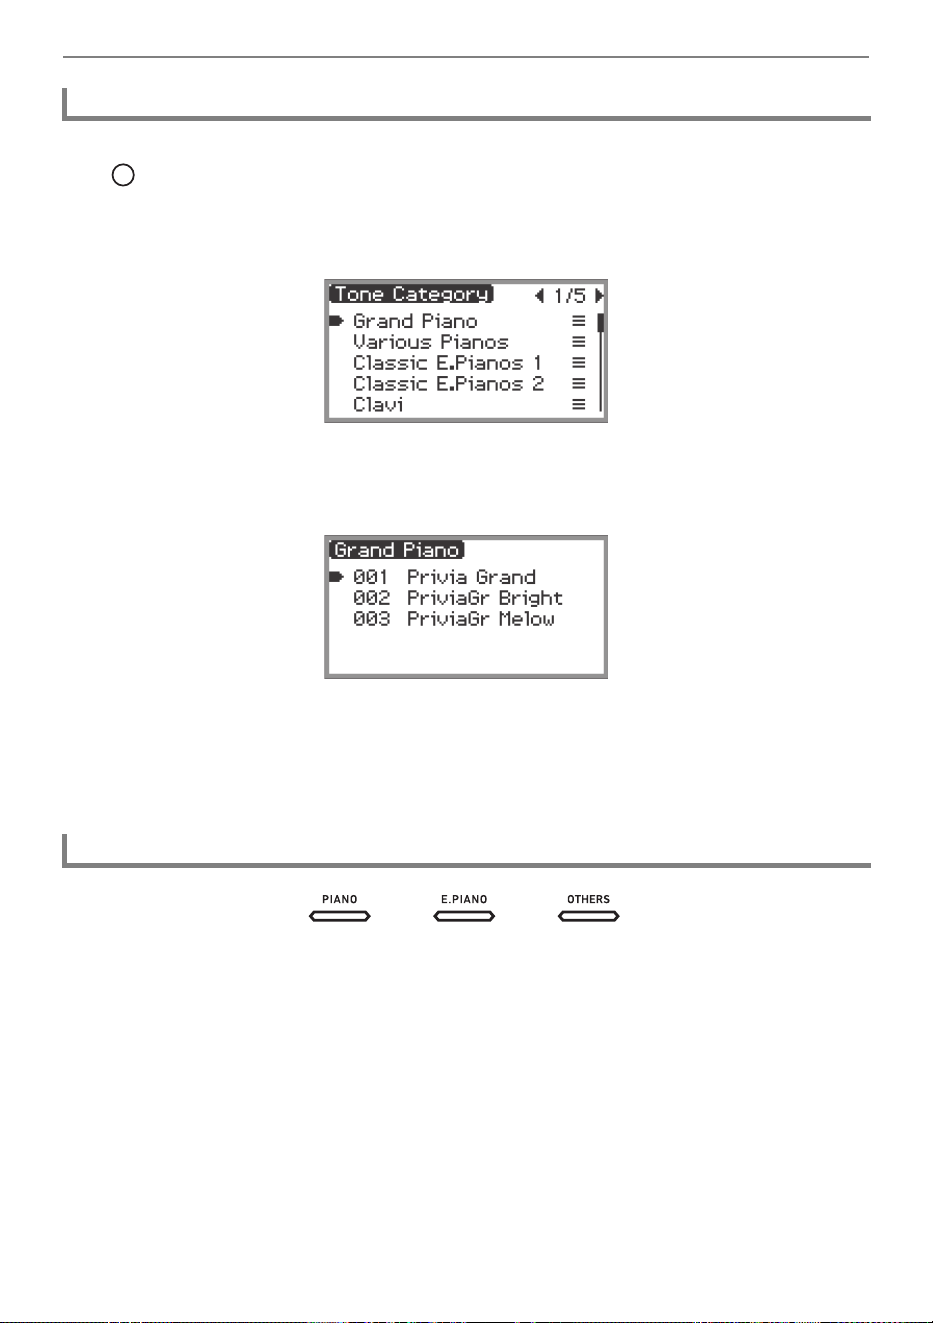
Selecting a Tone by Category . . . . . . . . . . . . . . . . . . . . . . . . . . . . . . . . . . . . . . . . . . . . . . . . . . . . . . . EN-42
Selecting a Tone with the Touch Buttons . . . . . . . . . . . . . . . . . . . . . . . . . . . . . . . . . . . . . . . . . . . . . . EN-42
Selecting a Tone with the F Buttons . . . . . . . . . . . . . . . . . . . . . . . . . . . . . . . . . . . . . . . . . . . . . . . . . . EN-43
Guitar and Bass Tones . . . . . . . . . . . . . . . . . . . . . . . . . . . . . . . . . . . . . . . . . . . . . . . . . . . . . . . . . . . . EN-43
Contents

Contents
EN-2
Sounding Two Different Tones at the Same Time (Layer) . . . . . . . . . . . . . . . . . . . . . . . . . . EN-44
Layering Two Tones . . . . . . . . . . . . . . . . . . . . . . . . . . . . . . . . . . . . . . . . . . . . . . . . . . . . . . . . . . . . . . EN-44
Unlayering the Keyboard. . . . . . . . . . . . . . . . . . . . . . . . . . . . . . . . . . . . . . . . . . . . . . . . . . . . . . . . . . . EN-45
Splitting the Keyboard Between Two Tones (Split). . . . . . . . . . . . . . . . . . . . . . . . . . . . . . . . EN-46
Splitting the Keyboard Between Two Different Tones . . . . . . . . . . . . . . . . . . . . . . . . . . . . . . . . . . . . . EN-46
Changing the Split Point . . . . . . . . . . . . . . . . . . . . . . . . . . . . . . . . . . . . . . . . . . . . . . . . . . . . . . . . . . . EN-47
Unsplitting the Keyboard . . . . . . . . . . . . . . . . . . . . . . . . . . . . . . . . . . . . . . . . . . . . . . . . . . . . . . . . . . . EN-47
Changing Part Settings (Volume Level, Octave Shift, Tuning, etc.) . . . . . . . . . . . . . . . . . . . EN-48
Applying Effects EN-49
Using the Sound Mode Effects (Hall Simulator/Reverb and Surround) . . . . . . . . . . . . . . . . EN-49
Enabling or Disabling the Hall Simulator/Reverb and Surround Effects . . . . . . . . . . . . . . . . . . . . . . . EN-49
Specifying the Hall Simulator/Reverb Type . . . . . . . . . . . . . . . . . . . . . . . . . . . . . . . . . . . . . . . . . . . . . EN-50
Adjusting the Depth of the Hall Simulator/Reverb Effect. . . . . . . . . . . . . . . . . . . . . . . . . . . . . . . . . . . EN-51
Specifying the Surround Type . . . . . . . . . . . . . . . . . . . . . . . . . . . . . . . . . . . . . . . . . . . . . . . . . . . . . . . EN-51
Using DSP Effects. . . . . . . . . . . . . . . . . . . . . . . . . . . . . . . . . . . . . . . . . . . . . . . . . . . . . . . . . EN-52
Enabling or Disabling DSP . . . . . . . . . . . . . . . . . . . . . . . . . . . . . . . . . . . . . . . . . . . . . . . . . . . . . . . . . EN-52
Selecting a DSP Type . . . . . . . . . . . . . . . . . . . . . . . . . . . . . . . . . . . . . . . . . . . . . . . . . . . . . . . . . . . . . EN-53
Configuring DSP Settings . . . . . . . . . . . . . . . . . . . . . . . . . . . . . . . . . . . . . . . . . . . . . . . . . . . . . . . . . . EN-53
Using Chorus (Chorus, Flanger, Short Delay) . . . . . . . . . . . . . . . . . . . . . . . . . . . . . . . . . . . EN-57
Changing the Chorus Type . . . . . . . . . . . . . . . . . . . . . . . . . . . . . . . . . . . . . . . . . . . . . . . . . . . . . . . . . EN-57
Adjusting the Depth of the Chorus Effect . . . . . . . . . . . . . . . . . . . . . . . . . . . . . . . . . . . . . . . . . . . . . . EN-57
Adjusting Brilliance . . . . . . . . . . . . . . . . . . . . . . . . . . . . . . . . . . . . . . . . . . . . . . . . . . . . . . . . EN-58
Adjusting Acoustic Piano Sound Characteristics (Acoustic Simulator) . . . . . . . . . . . . . . . . . EN-59
List of Acoustic Piano Sound Setting Items. . . . . . . . . . . . . . . . . . . . . . . . . . . . . . . . . . . . . . . . . . . . . EN-60
Using Microphone Effects . . . . . . . . . . . . . . . . . . . . . . . . . . . . . . . . . . . . . . . . . . . . . . . . . . . EN-61
Enabling or Disabling the Microphone Effect . . . . . . . . . . . . . . . . . . . . . . . . . . . . . . . . . . . . . . . . . . .EN-61
Specifying the Microphone Effect Type. . . . . . . . . . . . . . . . . . . . . . . . . . . . . . . . . . . . . . . . . . . . . . . . EN-62
Changing Microphone Effect Settings . . . . . . . . . . . . . . . . . . . . . . . . . . . . . . . . . . . . . . . . . . . . . . . . . EN-63
Using the Mixer EN-65
Adjusting the Volume Level, Stereo Pan and Effects for Each Part . . . . . . . . . . . . . . . . . . . EN-65
List of Mixer Setting Items. . . . . . . . . . . . . . . . . . . . . . . . . . . . . . . . . . . . . . . . . . . . . . . . . . . EN-66
Changing the Sound During a Performance EN-67
Using Pedals . . . . . . . . . . . . . . . . . . . . . . . . . . . . . . . . . . . . . . . . . . . . . . . . . . . . . . . . . . . . . EN-67
PEDAL UNIT jack . . . . . . . . . . . . . . . . . . . . . . . . . . . . . . . . . . . . . . . . . . . . . . . . . . . . . . . . . . . . . . . . EN-67
EXPRESSION/ASSIGNABLE jack . . . . . . . . . . . . . . . . . . . . . . . . . . . . . . . . . . . . . . . . . . . . . . . . . . .EN-68
Enabling/Disabling the Pedal Operation for Each Part (Upper 1/Upper 2/Lower). . . . . . . . . . . . . . . . EN-71
Using the Knobs . . . . . . . . . . . . . . . . . . . . . . . . . . . . . . . . . . . . . . . . . . . . . . . . . . . . . . . . . . EN-72
Using the Knobs to Change Parameters. . . . . . . . . . . . . . . . . . . . . . . . . . . . . . . . . . . . . . . . . . . . . . .EN-72
Changing the Function Assigned to a Knob . . . . . . . . . . . . . . . . . . . . . . . . . . . . . . . . . . . . . . . . . . . .EN-73
Resetting the Parameters of the Functions Currently Assigned to the Knobs . . . . . . . . . . . . . . . . . . EN-76
Using the CONTROL Button . . . . . . . . . . . . . . . . . . . . . . . . . . . . . . . . . . . . . . . . . . . . . . . . . EN-77
Selecting the Function Assigned to the CONTROL Button . . . . . . . . . . . . . . . . . . . . . . . . . . . . . . . . . EN-77
Using the Pitch Bend Wheel . . . . . . . . . . . . . . . . . . . . . . . . . . . . . . . . . . . . . . . . . . . . . . . . . EN-79
Changing the Pitch Bend Range . . . . . . . . . . . . . . . . . . . . . . . . . . . . . . . . . . . . . . . . . . . . . . . . . . . . . EN-79
Enabling/Disabling the Pitch Bend Wheel Operation for Each Part (Upper 1/Upper 2/Lower) . . . . . . EN-80

Contents
EN-3
Using the Metronome EN-81
Starting or Stopping the Metronome . . . . . . . . . . . . . . . . . . . . . . . . . . . . . . . . . . . . . . . . . . . . . . . . . . EN-81
Changing the Metronome Settings (Tempo, Beat, Pattern, etc.) . . . . . . . . . . . . . . . . . . . . . . . . . . . . EN-81
Using the Arpeggiator EN-84
Enabling or Disabling the Arpeggiator . . . . . . . . . . . . . . . . . . . . . . . . . . . . . . . . . . . . . . . . . . . . . . . . . EN-84
Changing the Arpeggiator Pattern and Other Settings . . . . . . . . . . . . . . . . . . . . . . . . . . . . . . . . . . . . EN-84
Saving and Recalling Performance Setups (Registration) EN-86
Saving a Setup Registration . . . . . . . . . . . . . . . . . . . . . . . . . . . . . . . . . . . . . . . . . . . . . . . . . EN-87
Changing a Registration Bank Name . . . . . . . . . . . . . . . . . . . . . . . . . . . . . . . . . . . . . . . . . . EN-88
Recalling a Setup Registration . . . . . . . . . . . . . . . . . . . . . . . . . . . . . . . . . . . . . . . . . . . . . . . EN-89
Freeze Function . . . . . . . . . . . . . . . . . . . . . . . . . . . . . . . . . . . . . . . . . . . . . . . . . . . . . . . . . . . . . . . . . EN-90
Using a Pedal to Cycle Through Multiple Setup Registrations (Sequential Recall) . . . . . . . . . . . . . . EN-91
Registration Memory Data . . . . . . . . . . . . . . . . . . . . . . . . . . . . . . . . . . . . . . . . . . . . . . . . . . EN-92
Saving to an External Device . . . . . . . . . . . . . . . . . . . . . . . . . . . . . . . . . . . . . . . . . . . . . . . . EN-93
Using the F Button Set EN-94
Preset F Button Set List . . . . . . . . . . . . . . . . . . . . . . . . . . . . . . . . . . . . . . . . . . . . . . . . . . . . EN-94
Editing an F Button Set . . . . . . . . . . . . . . . . . . . . . . . . . . . . . . . . . . . . . . . . . . . . . . . . . . . . . EN-95
Assigning a Function to an F Button (Creating a User F Button Set) . . . . . . . . . . . . . . . . . . . . . . . . . EN-95
Changing the Name of an F Button Set . . . . . . . . . . . . . . . . . . . . . . . . . . . . . . . . . . . . . . . . . . . . . . EN-100
Erasing an F Button Set . . . . . . . . . . . . . . . . . . . . . . . . . . . . . . . . . . . . . . . . . . . . . . . . . . . . . . . . . . EN-102
F Button Function List . . . . . . . . . . . . . . . . . . . . . . . . . . . . . . . . . . . . . . . . . . . . . . . . . . . . . EN-103
Listening to Songs (SONG Mode) EN-106
Data Types of Playable Songs . . . . . . . . . . . . . . . . . . . . . . . . . . . . . . . . . . . . . . . . . . . . . . EN-106
Playing Back MIDI Data or Audio Data . . . . . . . . . . . . . . . . . . . . . . . . . . . . . . . . . . . . . . . . EN-107
Operations While Playing Back MIDI Data . . . . . . . . . . . . . . . . . . . . . . . . . . . . . . . . . . . . . EN-109
Sounding Metronome While Playing Back MIDI Data . . . . . . . . . . . . . . . . . . . . . . . . . . . . . . . . . . . . EN-109
Adjusting the Volume Level of MIDI Data Playback (MIXER Settings) . . . . . . . . . . . . . . . . . . . . . . . EN-109
Deleting a User Song . . . . . . . . . . . . . . . . . . . . . . . . . . . . . . . . . . . . . . . . . . . . . . . . . . . . . . . . . . . . EN-109
Operations While Playing Back Audio Data . . . . . . . . . . . . . . . . . . . . . . . . . . . . . . . . . . . . EN-110
Audio Center Cancel (Vocal Cut) . . . . . . . . . . . . . . . . . . . . . . . . . . . . . . . . . . . . . . . . . . . . . . . . . . . EN-110
Adjusting the Volume Level or Effect Depth of Audio Data Playback (MIXER Settings). . . . . . . . . . EN-110
Recording Performances EN-111
MIDI Recorder and Audio Recorder Features. . . . . . . . . . . . . . . . . . . . . . . . . . . . . . . . . . . EN-111
Using the MIDI Recorder to Record Performances. . . . . . . . . . . . . . . . . . . . . . . . . . . . . . . EN-113
Recording with the MIDI Recorder . . . . . . . . . . . . . . . . . . . . . . . . . . . . . . . . . . . . . . . . . . . . . . . . . . EN-113
Recording a Second Track Over the First (System Track + Solo Track) . . . . . . . . . . . . . . . . . . . . . EN-117
Playing Back MIDI Recorder Songs . . . . . . . . . . . . . . . . . . . . . . . . . . . . . . . . . . . . . . . . . . . . . . . . . EN-118
Deleting a MIDI Recorder Song (Entire Song/Individual Tracks) . . . . . . . . . . . . . . . . . . . . . . . . . . . EN-119
Items Reflected in Contents When Recording to the MIDI Recorder Song. . . . . . . . . . . . . . . . . . . . EN-120
Recording a Performance with the Audio Recorder . . . . . . . . . . . . . . . . . . . . . . . . . . . . . . EN-122
Recording Using the Audio Recorder . . . . . . . . . . . . . . . . . . . . . . . . . . . . . . . . . . . . . . . . . . . . . . . . EN-122
Playing Back a Song from the Audio Recorder . . . . . . . . . . . . . . . . . . . . . . . . . . . . . . . . . . . . . . . . . EN-125
Deleting a Song from the Audio Recorder. . . . . . . . . . . . . . . . . . . . . . . . . . . . . . . . . . . . . . . . . . . . . EN-126

Contents
EN-4
Adjusting Keyboard Sensitivity EN-127
Changing Keyboard Response to Key Velocity (Touch Response) . . . . . . . . . . . . . . . . . . EN-127
Changing Touch Response Sensitivity . . . . . . . . . . . . . . . . . . . . . . . . . . . . . . . . . . . . . . . . . . . . . . . EN-127
Adjusting the Timing of Key Press to Sound (Hammer Response) . . . . . . . . . . . . . . . . . . EN-128
Adjusting the Hammer Response . . . . . . . . . . . . . . . . . . . . . . . . . . . . . . . . . . . . . . . . . . . . . . . . . . . EN-128
Adjusting the Timing of Key Release to Sound Damping (Key-off Response) . . . . . . . . . . EN-129
Adjusting the Key-off Response . . . . . . . . . . . . . . . . . . . . . . . . . . . . . . . . . . . . . . . . . . . . . . . . . . . . EN-129
Changing the Pitch EN-130
Changing the Pitch in Semitone Steps (Transpose) . . . . . . . . . . . . . . . . . . . . . . . . . . . . . . EN-130
Changing the Transpose Setting. . . . . . . . . . . . . . . . . . . . . . . . . . . . . . . . . . . . . . . . . . . . . . . . . . . . EN-130
Fine Tuning a Pitch (Master Tuning). . . . . . . . . . . . . . . . . . . . . . . . . . . . . . . . . . . . . . . . . . EN-130
Adjusting the Tuning Separately for Each Part (Upper 1/Upper 2/Lower) (Part Fine Tune) . . . . . . . EN-131
Changing the Pitch in Octave Units (Octave Shift) . . . . . . . . . . . . . . . . . . . . . . . . . . . . . . . EN-132
Using Octave Shift Separately for Each Part (Upper 1/Upper 2/Lower) . . . . . . . . . . . . . . . . . . . . . . EN-132
Changing the Scale Tuning (Temperament) of the Keyboard. . . . . . . . . . . . . . . . . . . . . . . EN-133
Changing the Scale . . . . . . . . . . . . . . . . . . . . . . . . . . . . . . . . . . . . . . . . . . . . . . . . . . . . . . . . . . . . . . EN-133
Enabling or Disabling Piano Stretch Tuning . . . . . . . . . . . . . . . . . . . . . . . . . . . . . . . . . . . . . . . . . . . EN-134
Splitting the Keyboard for Duet Play EN-135
Using the Duet. . . . . . . . . . . . . . . . . . . . . . . . . . . . . . . . . . . . . . . . . . . . . . . . . . . . . . . . . . . . . . . . . . EN-135
Configuring Duet Settings . . . . . . . . . . . . . . . . . . . . . . . . . . . . . . . . . . . . . . . . . . . . . . . . . . . . . . . . . EN-137
USB Flash Drive EN-138
Preparing a USB Flash Drive . . . . . . . . . . . . . . . . . . . . . . . . . . . . . . . . . . . . . . . . . . . . . . . EN-138
Supported USB Flash Drives . . . . . . . . . . . . . . . . . . . . . . . . . . . . . . . . . . . . . . . . . . . . . . . . . . . . . . EN-138
Data Types Supported by the Digital Piano . . . . . . . . . . . . . . . . . . . . . . . . . . . . . . . . . . . . . . . . . . . EN-139
Connecting a USB Flash Drive to and Detaching It from the Digital Piano. . . . . . . . . . . . . . . . . . . . EN-141
Formatting a USB Flash Drive. . . . . . . . . . . . . . . . . . . . . . . . . . . . . . . . . . . . . . . . . . . . . . . . . . . . . . EN-142
Saving MIDI Files or Audio Files for Playback on your Digital Piano to
a USB Flash Drive . . . . . . . . . . . . . . . . . . . . . . . . . . . . . . . . . . . . . . . . . . . . . . . . . . . . . . EN-143
Saving Digital Piano Data to a USB Flash Drive. . . . . . . . . . . . . . . . . . . . . . . . . . . . . . . . . EN-143
Loading USB Flash Drive Data into the Digital Piano’s Internal Memory . . . . . . . . . . . . . . EN-145
Deleting a USB Flash Drive File . . . . . . . . . . . . . . . . . . . . . . . . . . . . . . . . . . . . . . . . . . . . . EN-146
Renaming a USB Flash Drive File . . . . . . . . . . . . . . . . . . . . . . . . . . . . . . . . . . . . . . . . . . . EN-147
Configuring MIDI Settings EN-148
Wireless Connections EN-149
Configuring Wireless (Bluetooth) Connection Settings . . . . . . . . . . . . . . . . . . . . . . . . . . . . EN-149
Checking the Wireless Connection Status . . . . . . . . . . . . . . . . . . . . . . . . . . . . . . . . . . . . . . . . . . . . EN-149
Enabling and Disabling the Digital Piano’s Wireless Function . . . . . . . . . . . . . . . . . . . . . . . . . . . . . EN-149
Notification Tones . . . . . . . . . . . . . . . . . . . . . . . . . . . . . . . . . . . . . . . . . . . . . . . . . . . . . . . . . . . . . . . EN-150
Connecting the Digital Piano with a Bluetooth Low Energy MIDI Device . . . . . . . . . . . . . . EN-151
Connecting the Digital Piano with a Bluetooth Audio Device . . . . . . . . . . . . . . . . . . . . . . . EN-152
Pairing the Digital Piano with a Bluetooth Audio Device . . . . . . . . . . . . . . . . . . . . . . . . . . . . . . . . . . EN-152
Deleting Bluetooth Audio Device Pairing Registration . . . . . . . . . . . . . . . . . . . . . . . . . . . . . . . . . . . EN-153

Contents
EN-5
Using the Dedicated App EN-155
About the App for Smart Devices (CASIO MUSIC SPACE) . . . . . . . . . . . . . . . . . . . . . . . . EN-155
Connecting with External Devices EN-157
Playing Sound from a Smart Device on This Digital Piano
(Bluetooth Audio Connection) . . . . . . . . . . . . . . . . . . . . . . . . . . . . . . . . . . . . . . . . . . . . . EN-157
Playing Audio from a Smart Device or Other Bluetooth-compatible Device on this Digital Piano. . . EN-157
Adjusting the Volume Level or Effect Depth of Bluetooth Audio (MIXER Settings). . . . . . . . . . . . . . EN-157
Bluetooth Audio Center Cancel (Vocal Cut) . . . . . . . . . . . . . . . . . . . . . . . . . . . . . . . . . . . . . . . . . . . EN-158
Using MIDI with a Connected Computer or Smart Device . . . . . . . . . . . . . . . . . . . . . . . . . EN-159
Connecting the Digital Piano with a Computer via USB MIDI . . . . . . . . . . . . . . . . . . . . . . . . . . . . . . EN-159
Connecting the Digital Piano with a Smart Device via USB MIDI . . . . . . . . . . . . . . . . . . . . . . . . . . . EN-161
Outputting Digital Piano Notes Through an Amplifier or Audio Equipment
(LINE OUT jacks). . . . . . . . . . . . . . . . . . . . . . . . . . . . . . . . . . . . . . . . . . . . . . . . . . . . . . . EN-163
Connecting to Audio Equipment . . . . . . . . . . . . . . . . . . . . . . . . . . . . . . . . . . . . . . . . . . . . . . . . . . . . EN-163
Connecting to a Musical Instrument Amplifier . . . . . . . . . . . . . . . . . . . . . . . . . . . . . . . . . . . . . . . . . . EN-164
Deleting All Data in the Digital Piano’s Internal Memory EN-165
Troubleshooting EN-166
Error Messages. . . . . . . . . . . . . . . . . . . . . . . . . . . . . . . . . . . . . . . . . . . . . . . . . . . . . . . . . . EN-168
Reference EN-170
Product Specifications. . . . . . . . . . . . . . . . . . . . . . . . . . . . . . . . . . . . . . . . . . . . . . . . . . . . . EN-170
Operating Precautions . . . . . . . . . . . . . . . . . . . . . . . . . . . . . . . . . . . . . . . . . . . . . . . . . . . . EN-173
FUNCTION Menu Items . . . . . . . . . . . . . . . . . . . . . . . . . . . . . . . . . . . . . . . . . . . . . . . . . . . EN-176
DSP List . . . . . . . . . . . . . . . . . . . . . . . . . . . . . . . . . . . . . . . . . . . . . . . . . . . . . . . . . . . . . . . EN-184
Preset DSP List . . . . . . . . . . . . . . . . . . . . . . . . . . . . . . . . . . . . . . . . . . . . . . . . . . . . . . . . . . . . . . . . . EN-184
List of Effects in the DSP Modules . . . . . . . . . . . . . . . . . . . . . . . . . . . . . . . . . . . . . . . . . . . . . . . . . . EN-187
Parameter List of DSP Module Effects . . . . . . . . . . . . . . . . . . . . . . . . . . . . . . . . . . . . . . . . . . . . . . . EN-189
Amp Cab Type List . . . . . . . . . . . . . . . . . . . . . . . . . . . . . . . . . . . . . . . . . . . . . . . . . . . . . . . . . . . . . . EN-202
IR Type List . . . . . . . . . . . . . . . . . . . . . . . . . . . . . . . . . . . . . . . . . . . . . . . . . . . . . . . . . . . . . . . . . . . . EN-204
Microphone Effects List. . . . . . . . . . . . . . . . . . . . . . . . . . . . . . . . . . . . . . . . . . . . . . . . . . . . EN-226
Microphone Effect Type List . . . . . . . . . . . . . . . . . . . . . . . . . . . . . . . . . . . . . . . . . . . . . . . . . . . . . . . EN-226
List of Effects in the Microphone Effects Module . . . . . . . . . . . . . . . . . . . . . . . . . . . . . . . . . . . . . . . EN-227
Parameter List of Module Effects . . . . . . . . . . . . . . . . . . . . . . . . . . . . . . . . . . . . . . . . . . . . . . . . . . . EN-228
Arpeggiator List . . . . . . . . . . . . . . . . . . . . . . . . . . . . . . . . . . . . . . . . . . . . . . . . . . . . . . . . . . EN-233
MIDI Implementation Chart
B
EN-6
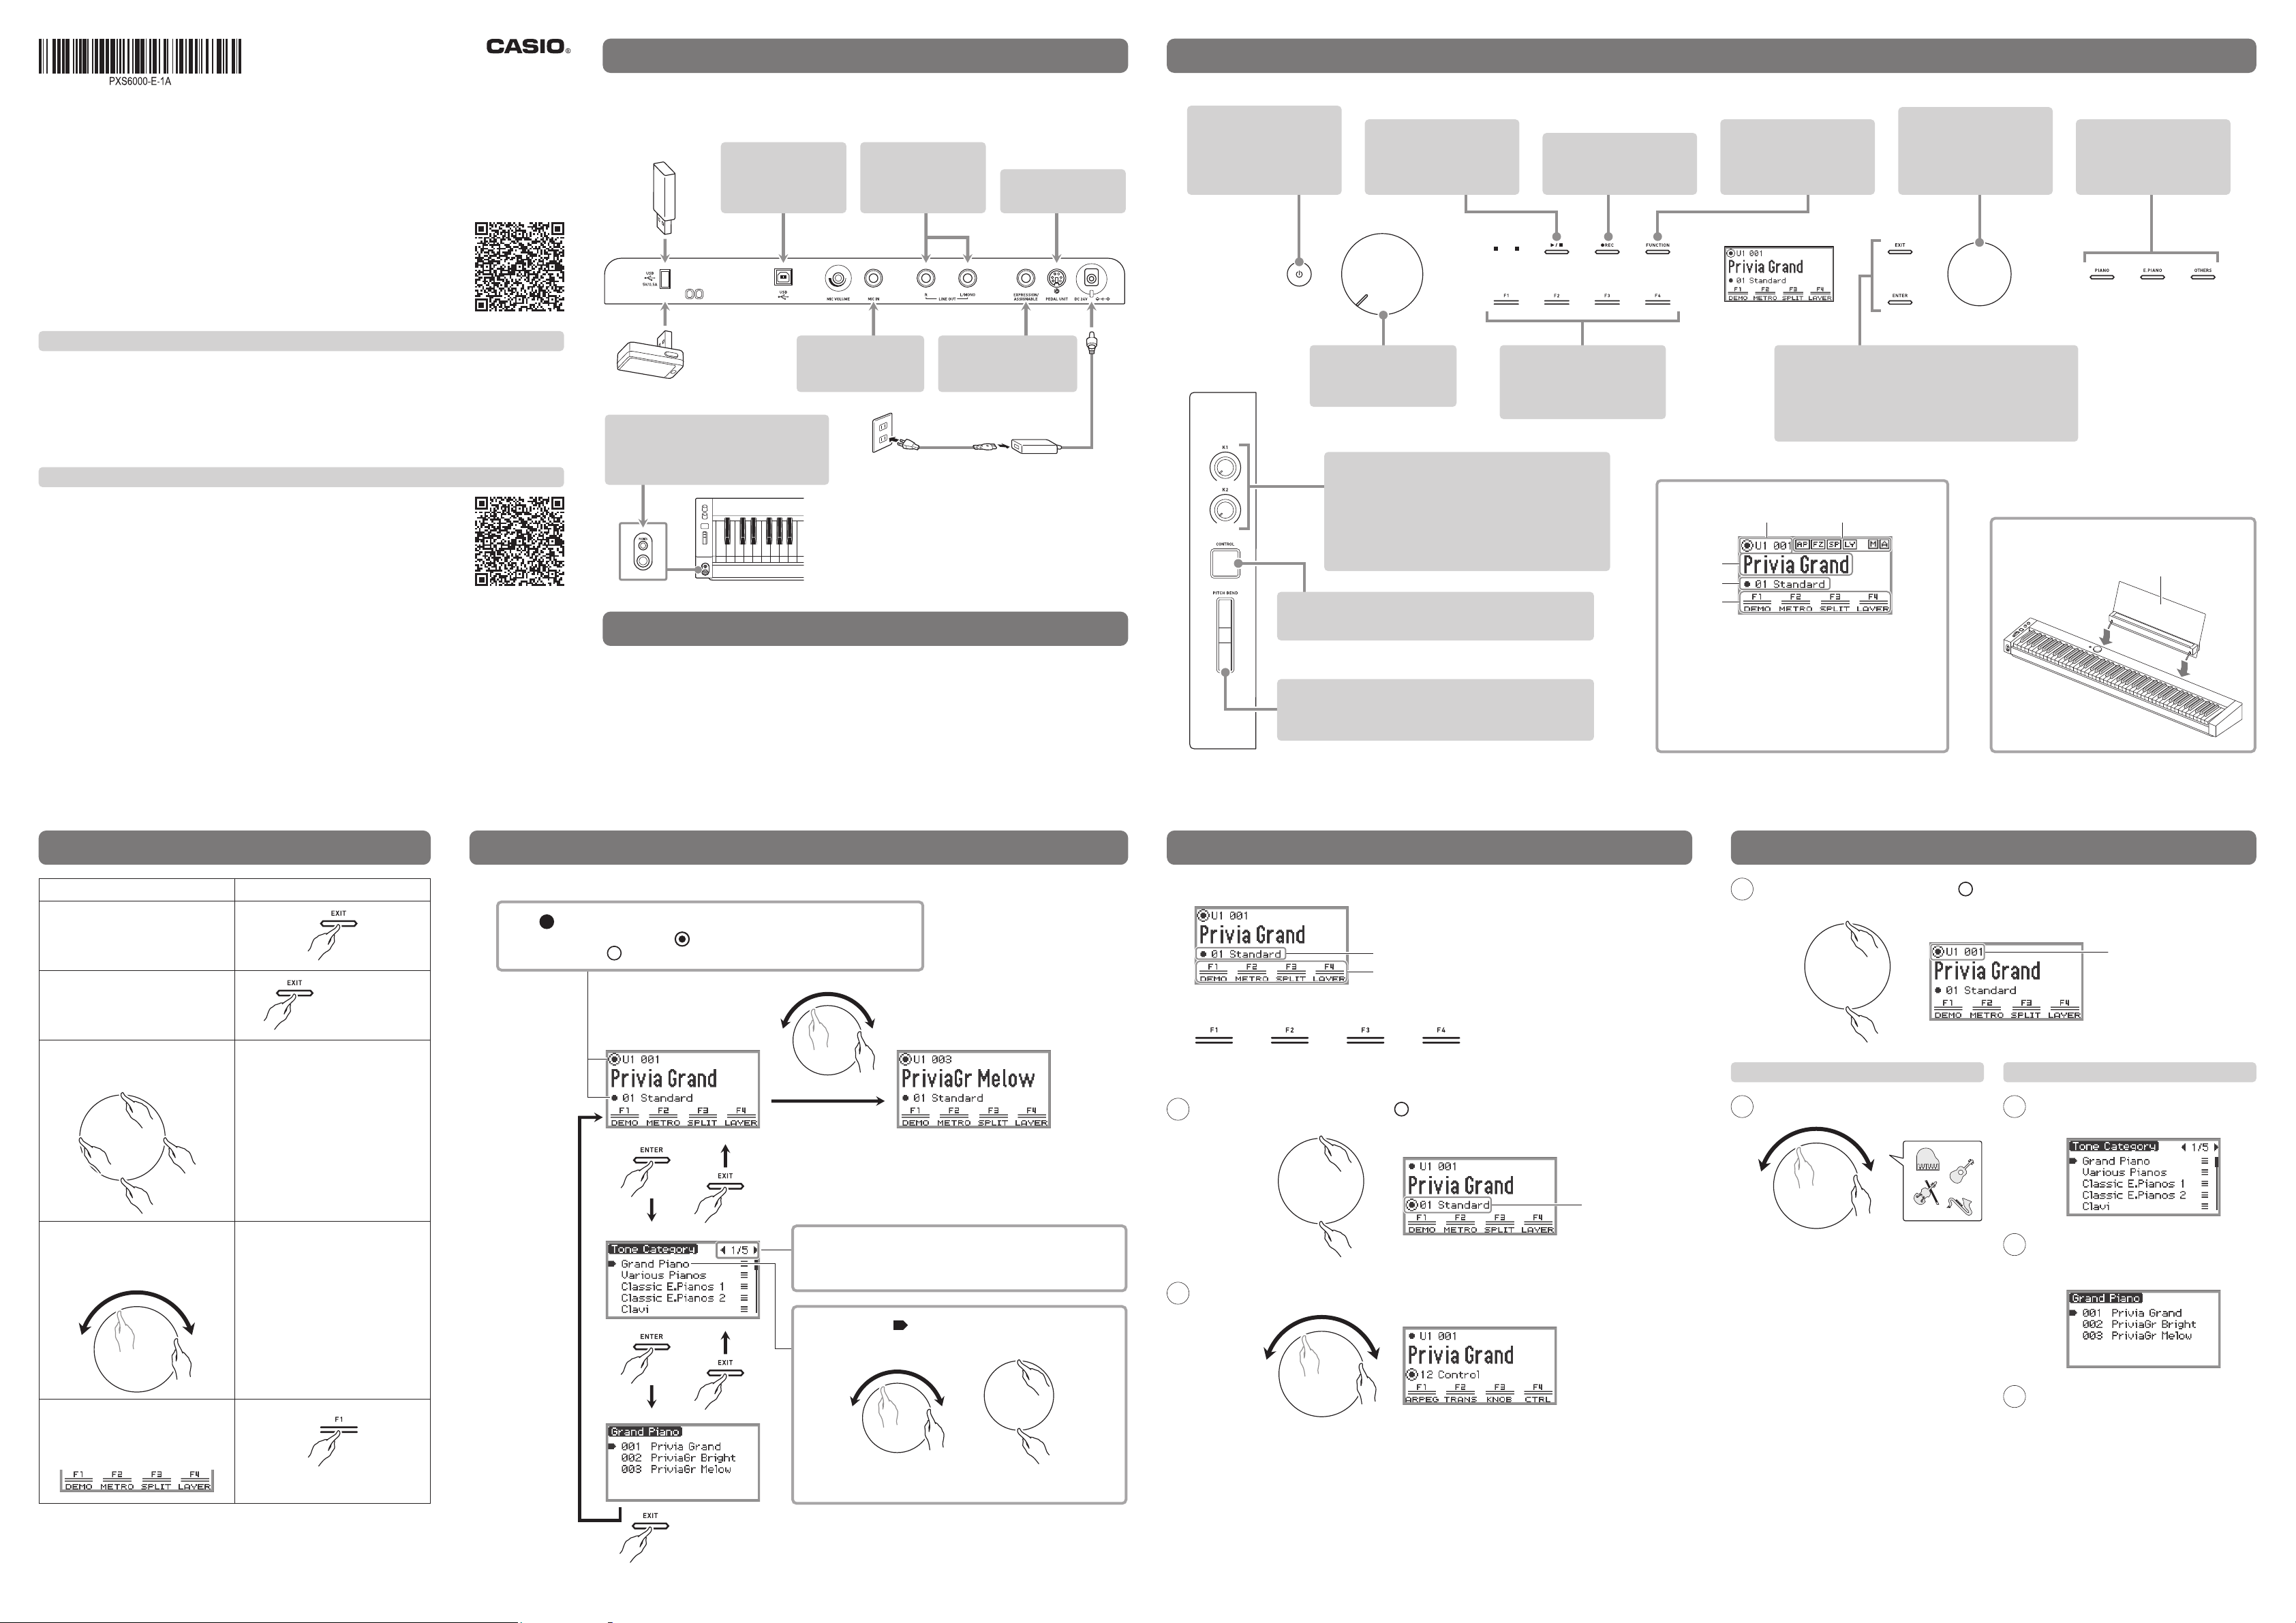
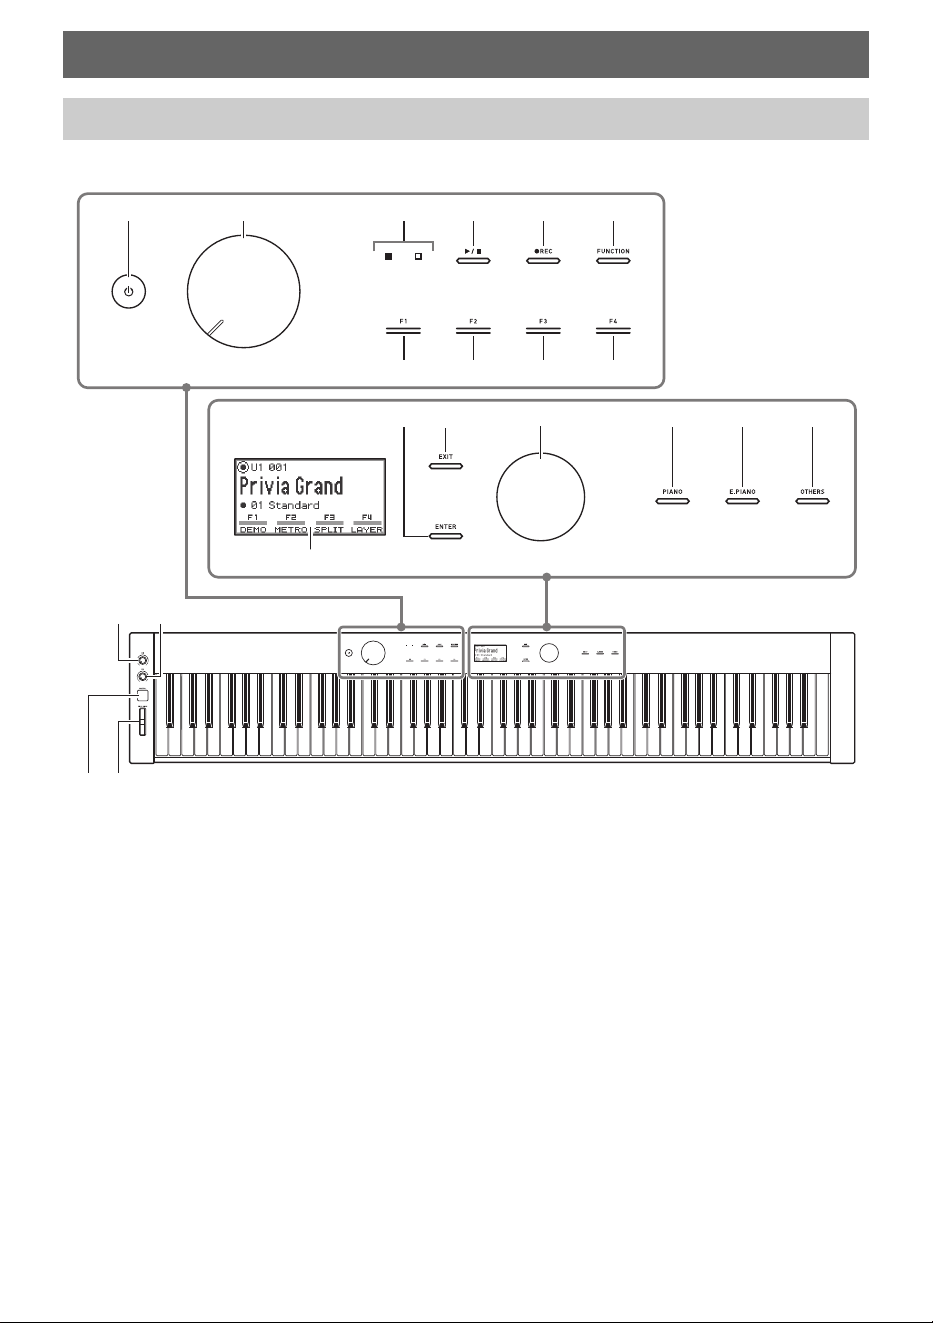
■ Front Panel
Overview and Setup
General Guide
1 P (Power) button
2 Volume knob
3 LED (Red, White)
4 a button
5 0REC button
6 FUNCTION button
7 F1 button
8 F2 button
9 F3 button
bk F4 button
bl ENTER button
bm EXIT button
bn Touch ring
bo PIANO button
bp E. PIANO button
bq OTHERS button
br Display
bs K1 knob
bt K2 knob
ck CONTROL button
cl PITCH BEND wheel
bs
clck
bt
1 2 3 4 5 6
7
bm
br
bo bp bqbnbl
8 9 bk
Overview and Setup
EN-7
Touch Buttons and Touch Ring
Turning on Digital Piano power causes all of the touch buttons (4 to bm, bo to bq) and the touch ring
(bn) to light. The above illustration shows when all buttons are lit. During actual operation, only the
buttons that are currently enabled are lit or flashing.
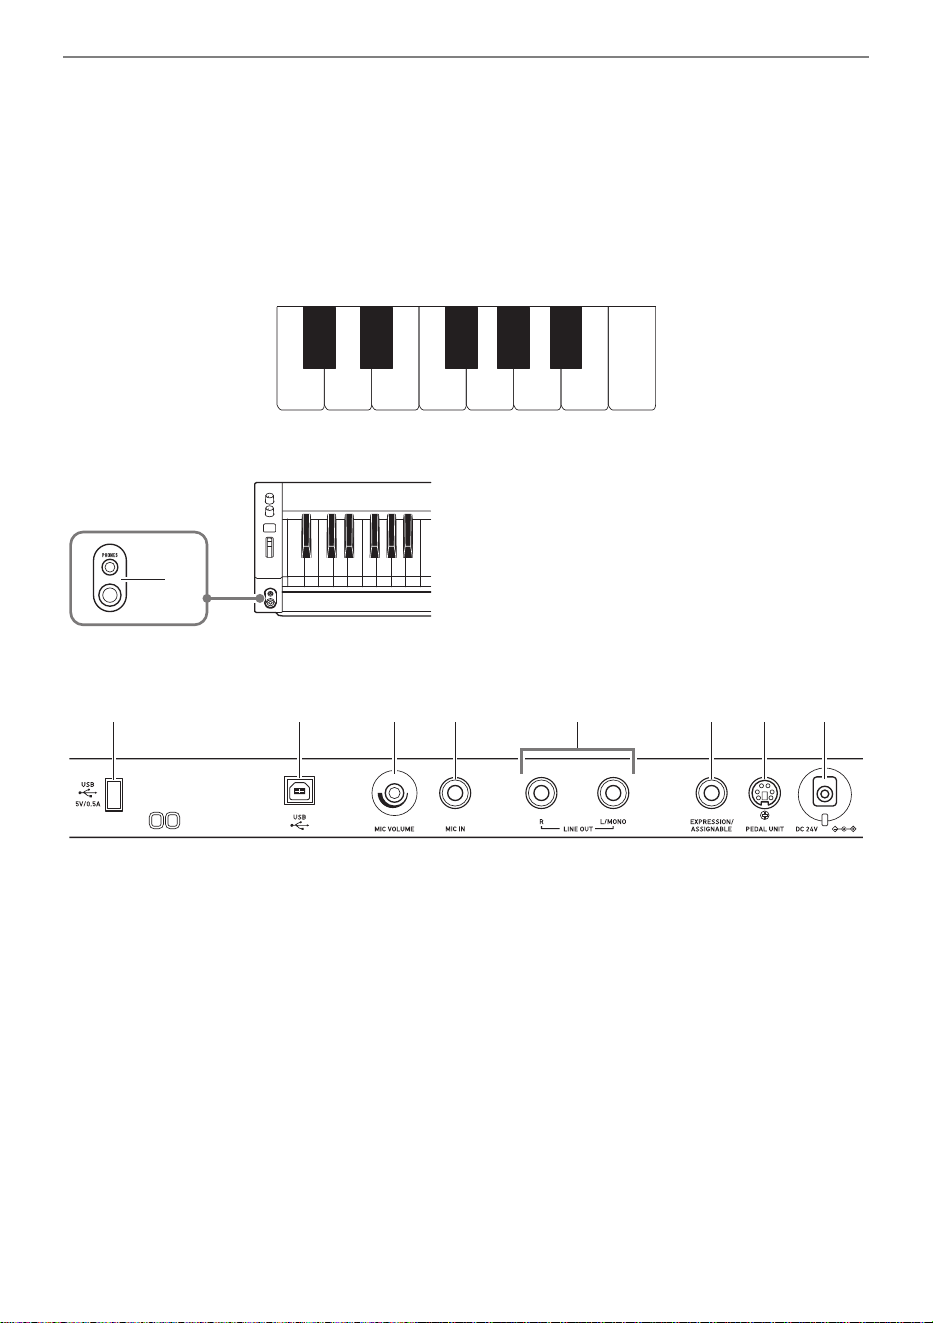
Keyboard note names and pitches
The keyboard note names and pitches used in this manual follow the international standard. Middle C is
C4, the lowest C is C1, and the highest C is C8. The illustration below shows keyboard key note names
from C4 through C5.
■ Front
■ Back
cm PHONES jacks
Top: stereo mini phone jack
(Mini TRS phone)
Bottom: stereo standard phone jack
(TRS phone)
cn USB Type A port
co USB Type B port
cp MIC VOLUME knob
cq MIC IN jack
cr LINE OUT R, L/MONO jacks
cs EXPRESSION/ASSIGNABLE jack
ct PEDAL UNIT jack
dk DC 24V terminal
C4 D4 E4 F4 G4 A4 B4 C5
C{4E}4F{4A}4B}4
cm
cn co cp cq cs ct dkcr
Overview and Setup
EN-8
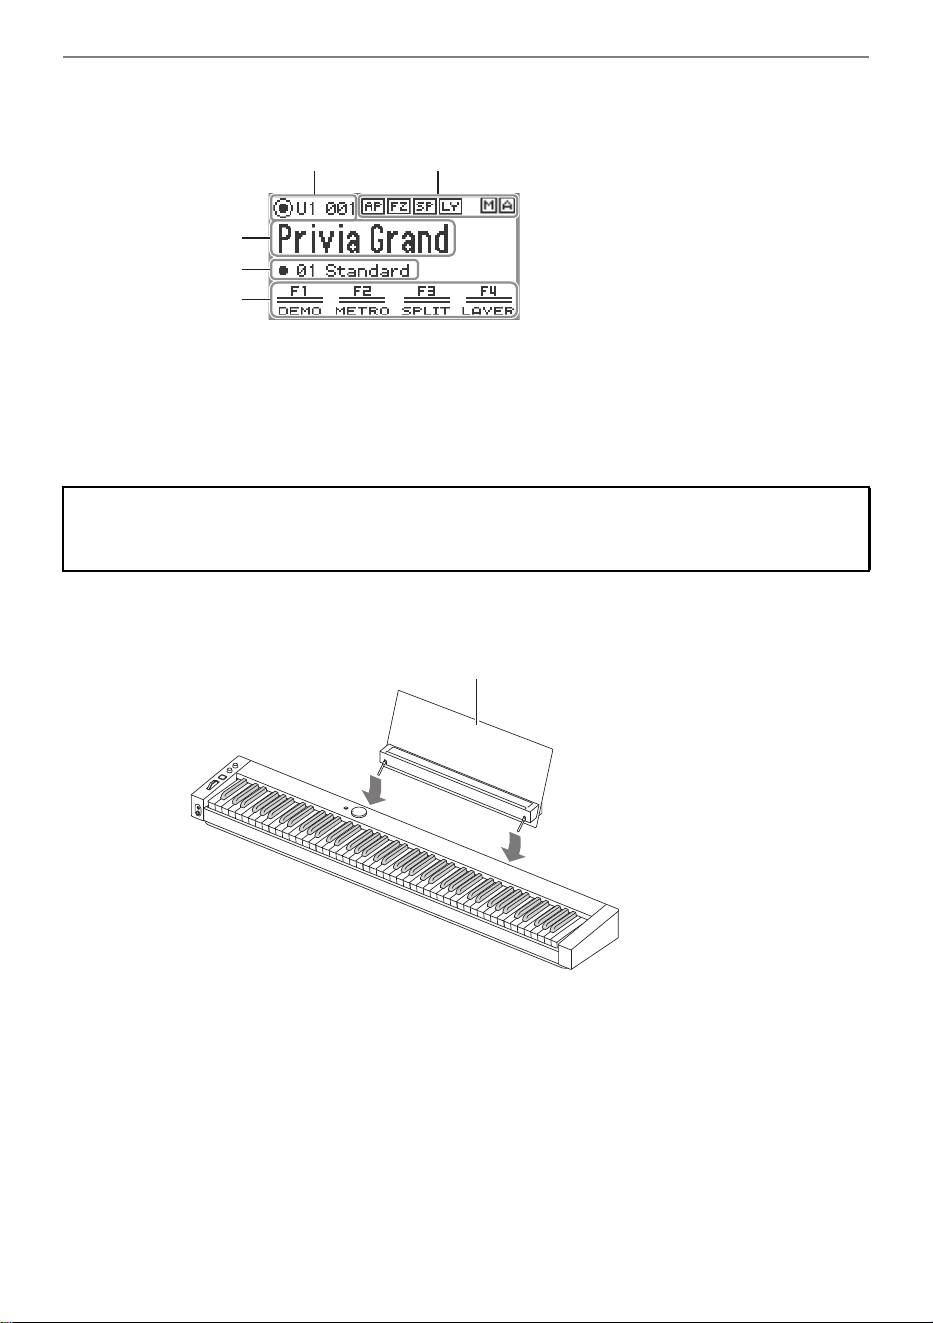
■ Display (Top Screen)
The top screen is the screen that appears on the display when the Digital Piano is turned on.
Part name, Tone number
Indicators
Tone name
F Button Set name
F Button Menu
■ Preparing the Music Stand
Inverted screens
The display of this Digital Piano shows screens white on a black background; however, this guide
depicts them as black on a white background.
c
e
f
g
d
Music Stand
Overview and Setup
EN-9
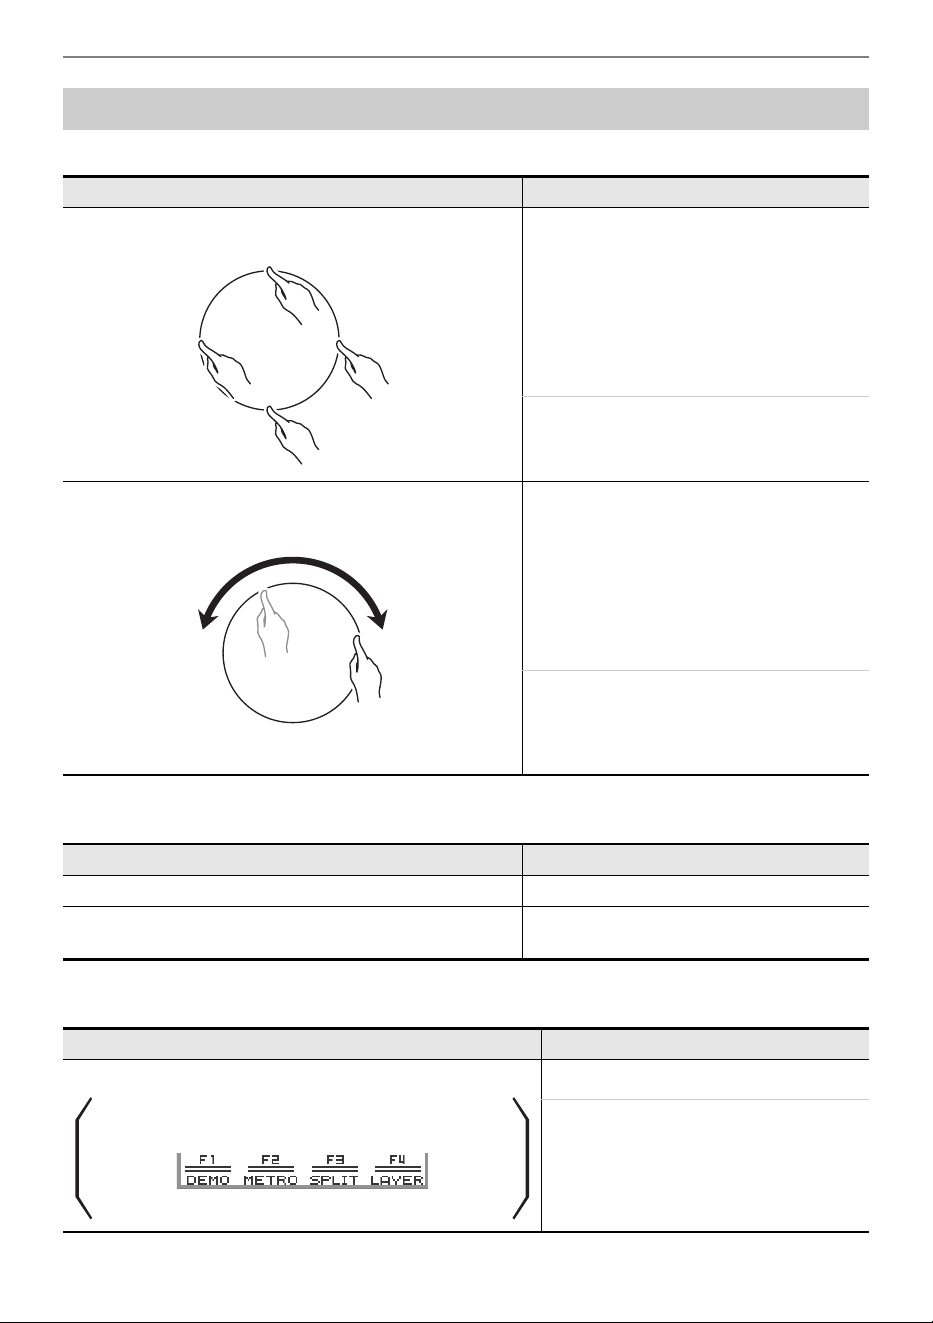
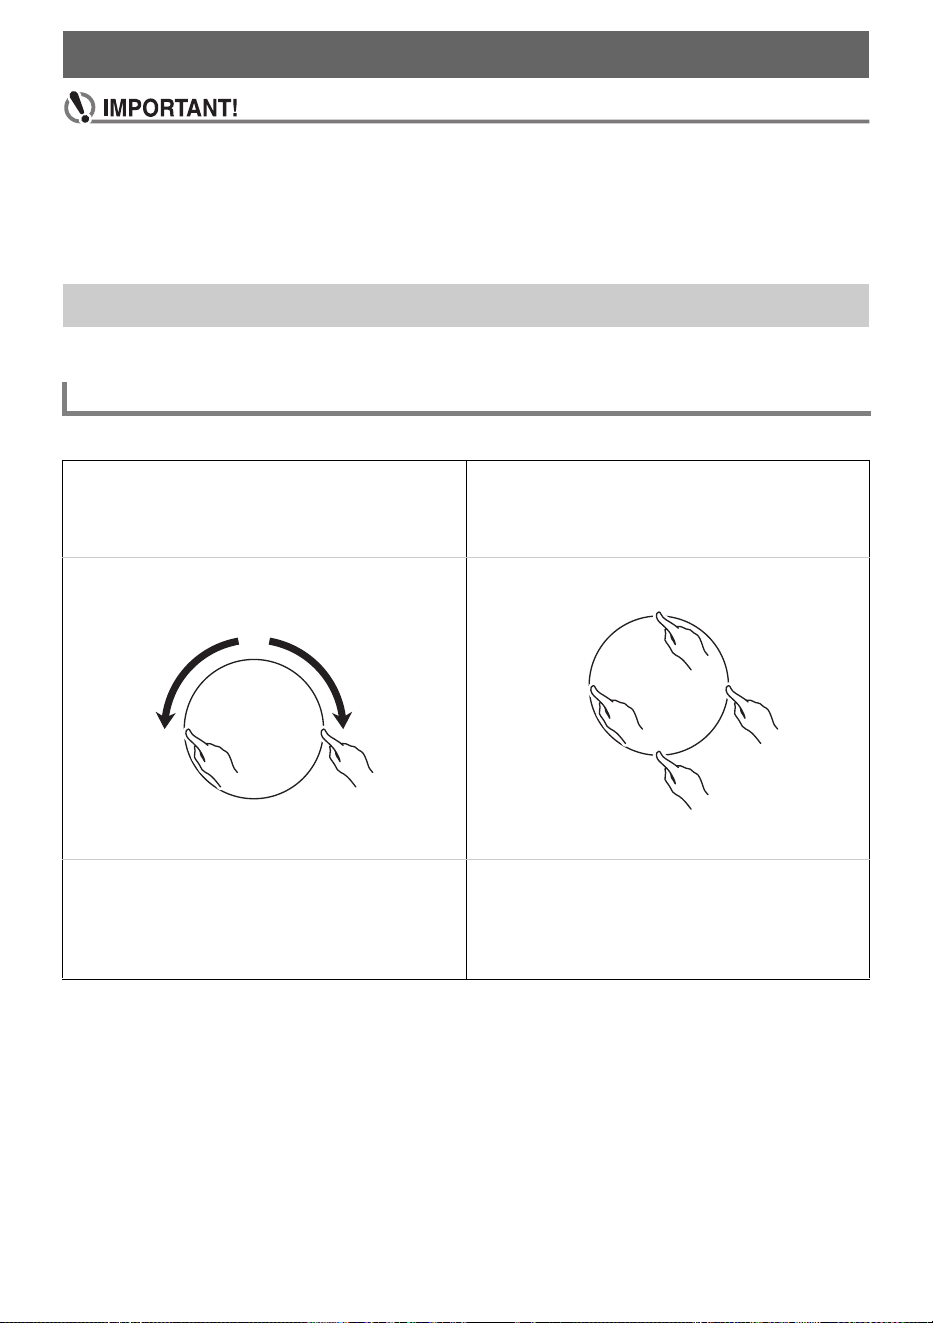
■ Touch Ring Operation and Notation
■ Touch Button Operation and Notation
■ F Buttons (F1 to F4) Operation and Notation
Touch Operation and Notation Used in this Guide
This operation is shown like this
Touch and immediately release the top, bottom, left or
right edge of the touch ring
Touch top, bottom, left or right on the
touch ring.
It is also written as follows:
• Use the touch ring to change the value.
• Use the touch ring to select “___”.
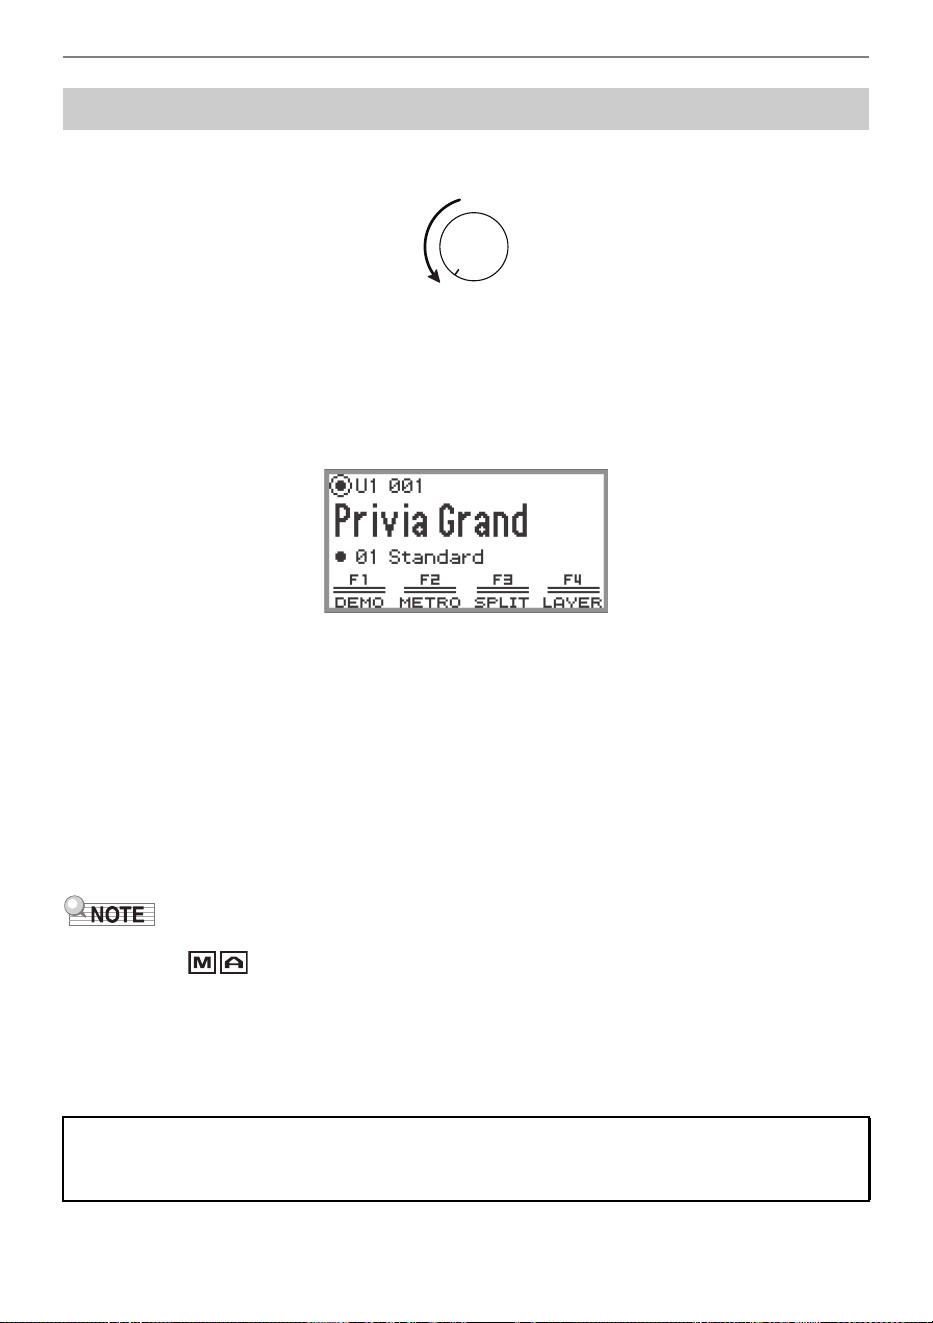
Trace the circumference of the touch ring with your finger
in a counterclockwise or clockwise direction
(Acts as a controller to change settings.)
Trace on the touch ring.
It is also written as follows:
• Use the touch ring to change the value.
• Use the touch ring to select “___”.
This operation is shown like this
Touch and immediately release the EXIT button Touch the EXIT button.
Hold the EXIT button down for about 2 seconds and
then release it
Touch and hold the EXIT button.
This operation is shown like this
Touch and immediately release the F1 button Touch the F1 button (DEMO).
It is also written as follows:
• Touch the F button to which “DEMO”
is assigned.
F Button Menu on the display:
Overview and Setup
EN-10
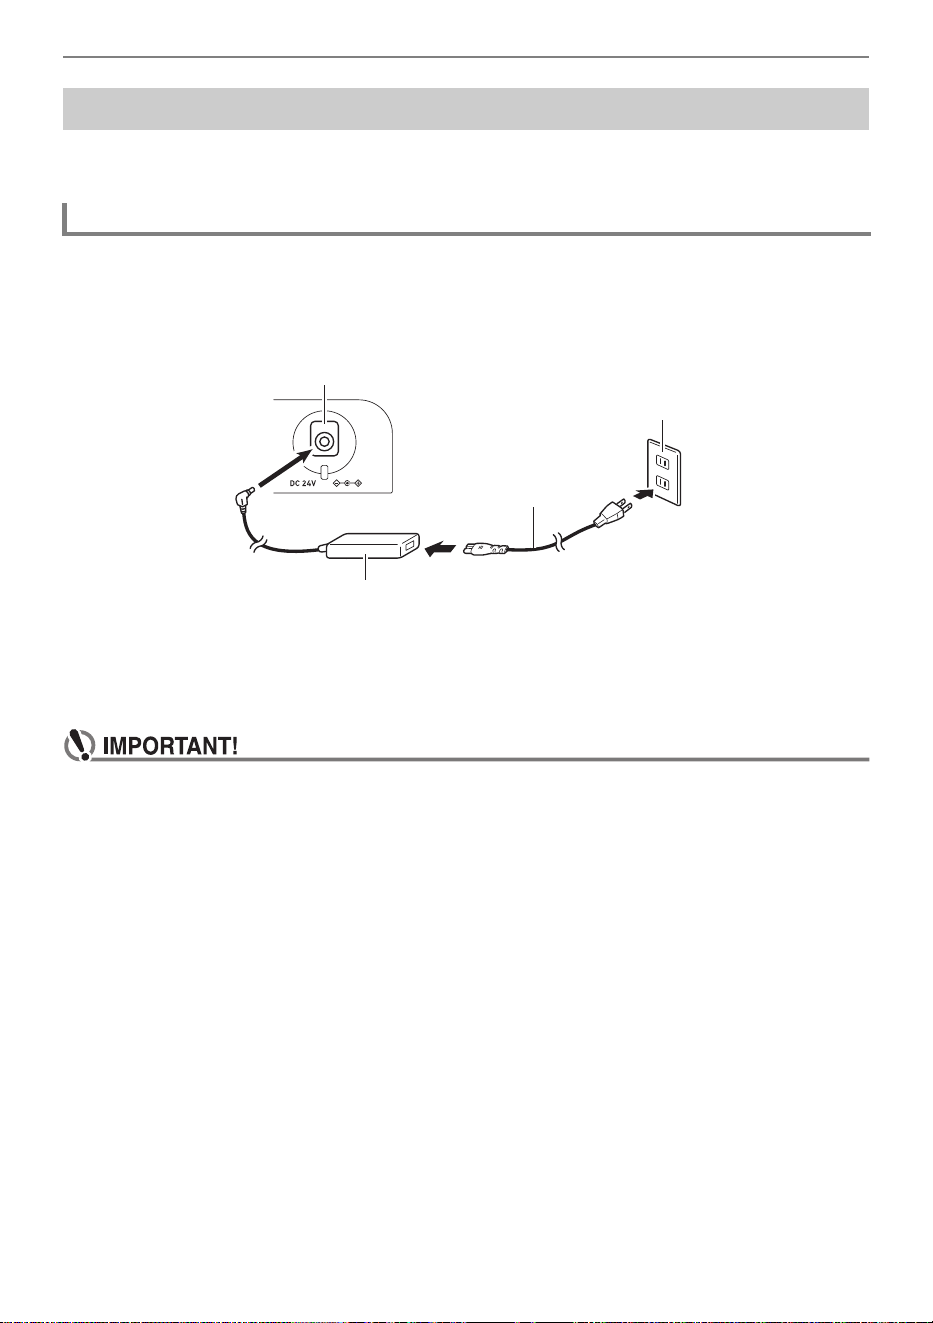
The Digital Piano can be powered by an AC adaptor or AA batteries (alkaline or rechargeable nickel-
metal-hydride).
Use only the AC adaptor (JEITA Standard, with unified polarity plug) that comes with this Digital Piano.
Use of a different type of AC adaptor can cause malfunction of the Digital Piano.
<Specified AC Adaptor: AD-E24250LW>
Use the supplied power cord to connect the AC adaptor.
The AC adaptor cannot be repaired.
AC Adaptor Usage Environment Temperature: 0 to 40°C
Humidify: 10% to 90%RH
Output Polarity: &
• Never connect the AC adaptor that comes with this Digital Piano to any other device besides
this Digital Piano. Doing so creates the risk of malfunction.
• Make sure the Digital Piano is turned off before plugging in or unplugging the AC adaptor.
• The AC adaptor will become warm to the touch after very long use. This is normal and does
not indicate malfunction.
• Unplug the AC adaptor from the power outlet if you do not plan to use the Digital Piano for a
long time.
Preparing a Power Supply
Using an AC Adaptor
Household power outlet
AC adaptor
DC 24V terminal
Power cord
Overview and Setup
EN-11
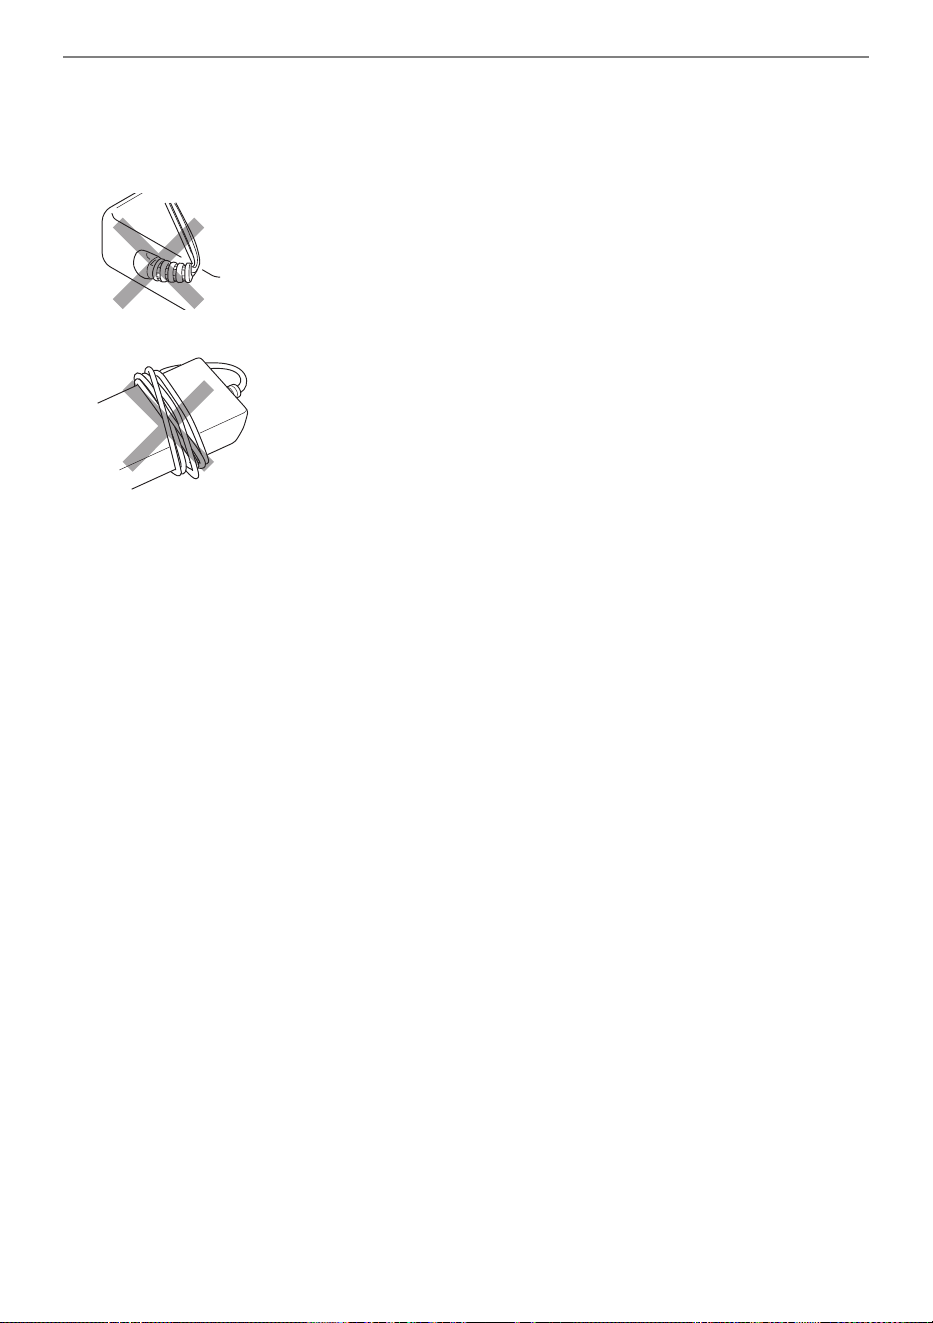
■ Disconnect Protection Precautions
(1) Never pull on the cord with excessive force.
(2) Never repeatedly pull on the cord.
(3) Never twist the cord at the base of the plug or connector.
(4) Loop and bundle the power cord, but never wind it around the AC adaptor.
(5) Before moving the Digital Piano, be sure to unplug the AC adaptor from the power outlet.
■ Locating the AC Adaptor for Use
• When using the AC adaptor, put in a location that satisfies the conditions below.
– A location free of splashing liquids.
The AC adaptor is designed for indoor use only. Do not put it in a location where it may become
wet and do not place a vase or any other container of liquid on top of it.
– A location that is not humid.
– A roomy, well ventilated location.
Do not cover the AC adaptor with newspaper, table cloth, curtain, or any other type of fabric.
– Use a power outlet that is located near the Digital Piano.
This will let you immediately unplug from the power outlet should any problem occur.
• When using the AC adaptor, place it on the floor with its label surface downwards. The AC adaptor
becomes prone to emitting electromagnetic waves when the label surface is facing upwards.

Overview and Setup
EN-12
• Be sure to turn off power before loading batteries.
• Use commercially available AA-size alkaline batteries or AA-size eneloop rechargeable
batteries.
• Low battery power can cause abnormal operation. If this happens, replace batteries with new
ones. If you are using rechargeable batteries, charge them.
• Note the precautions below while the Digital Piano is turned upside down to load batteries.
− Take care to avoid injury due to pinching your fingers under the Digital Piano.
− Do not allow the Digital Piano to tip over or otherwise be subjected to strong impact. Impact
can damage the volume knob and keyboard keys.
• Be sure to replace batteries at least once a year, even if there is no indication of low battery
power. Dead rechargeable batteries in particular may deteriorate if they are left in the product.
Remove rechargeable batteries from the product as soon as possible after they go dead.
■ Rechargeable Batteries
Note the precautions below when using rechargeable batteries.
• Use Panasonic Group AA-size eneloop rechargeable batteries. Do not use any other type of
batteries.
• Use only the specified charger to charge batteries.
• Rechargeable batteries must be removed from the product for charging.
• Dead rechargeable batteries may deteriorate if they are left in the product. Remove rechargeable
batteries from the product as soon as possible after they go dead.
• For information about using rechargeable batteries or their specified charger, be sure to read the
user documentation and precautions that come with each item, and use them only as directed.
Using Batteries

Overview and Setup
EN-13
■ To load batteries
1.
Open the battery cover on the bottom of the Digital Piano.
2.
Load eight AA-size batteries into the battery compartment.
• Load batteries with their positive + and negative - ends facing correctly.
3.
Insert the tabs of the battery cover into the holes along the side of the battery
compartment, and close the cover.
• Configure the setting below to specify the type of batteries you loaded.
Tab

Overview and Setup
EN-14
■ To select the Battery Type
Select the battery type that matches the battery installed in this Digital Piano’s battery case.
1.
Touch the FUNCTION button.
The FUNCTION menu appears.
2.
Touch the top or bottom of the touch ring to select “SYSTEM” and then touch the
ENTER button.
3.
Touch the top or bottom of the touch ring to select “Battery Type” and then touch
the ENTER button.
The “Battery Type” screen appears.
4.
Touch the top or bottom of the touch ring to select the battery type.
Alkaline: Alkaline batteries
Ni-MH: Rechargeable nickel metal hydride batteries
Overview and Setup
EN-15
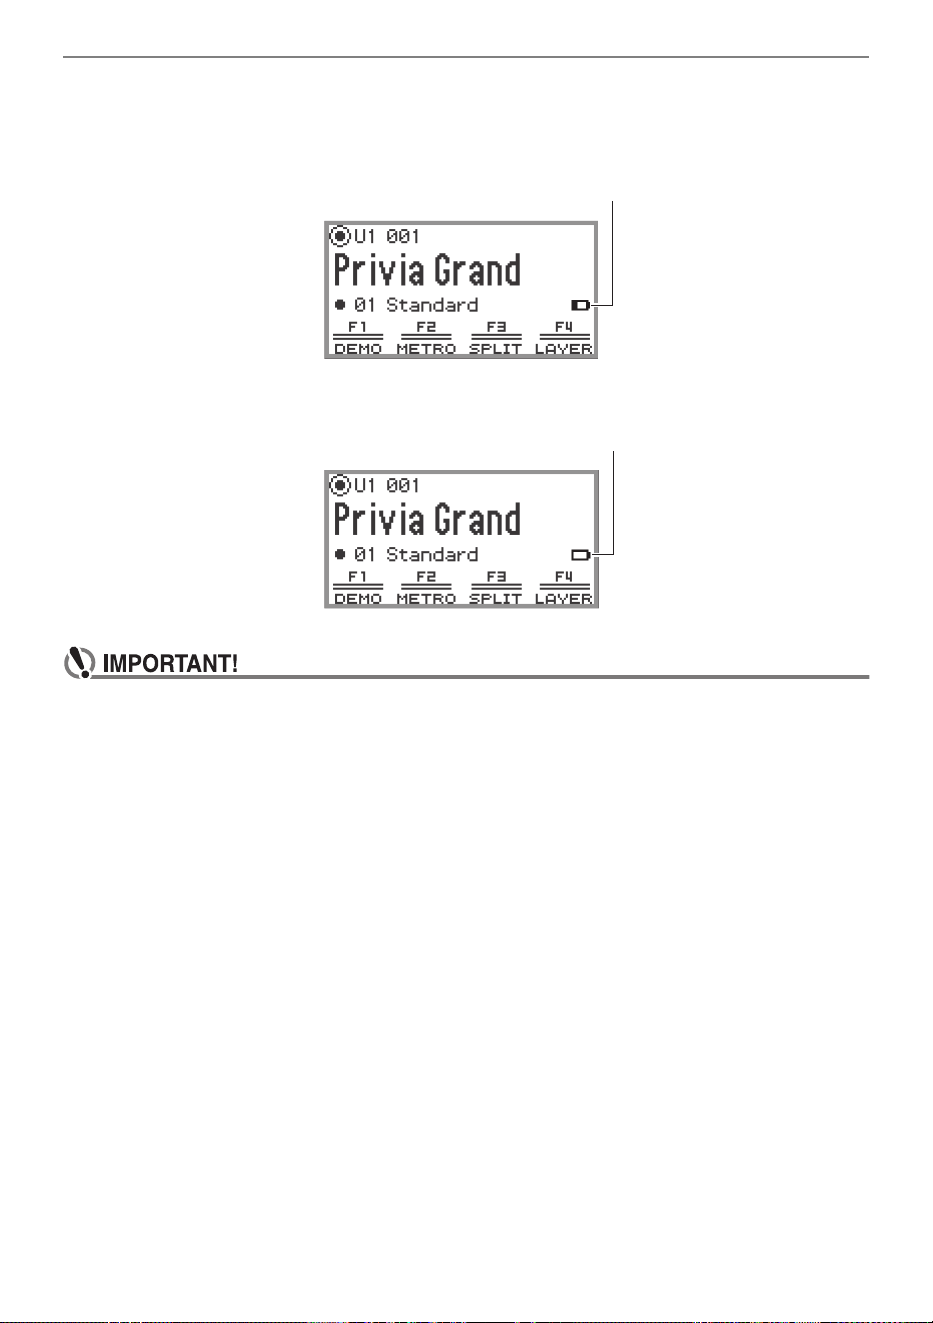
■ Low Battery and Replace Battery Notifications
A battery icon appears on the display to let you know when battery power is getting low.
Low Battery Indicator
Replace Battery Indicator
• To avoid possible injury, close the cover of the battery compartment before using the Digital
Piano.
• Note that the battery compartment on the bottom of the Digital Piano may become hot in use.
• Using the Digital Piano while batteries are very low can cause it to turn off suddenly. This can
cause data stored in the Digital Piano’s internal memory to be corrupted or lost.
Low battery icon (not flashing)
Replace battery icon (flashing)
Overview and Setup
EN-16
1.
Before turning on the power, turn the volume knob to the position shown below.
2.
Press the P (Power) button to turn on the Digital Piano.
When the power is turned on, “Welcome” appears on the display.
• When the display changes to the top screen, the Digital Piano is ready to use.
• The time it takes for the Digital Piano to become ready to use depends on the internal memory
usage.
• Do not touch the pitch bend wheel when turning on the power.
• After pressing the P (Power) button, do not step on any pedals until the top screen appears.
• The Digital Piano may not turn on if the P (Power) button is pressed lightly, but this is not a
malfunction. If this happens, firmly press the P (Power) button again.
3.
Use the volume knob to adjust the volume.
4.
To turn off the Digital Piano, press and hold the P (Power) button for a moment.
• The light of the touch ring goes around once and goes out, and the message “Bye” appears on
the display.
• In its initial state, when the Digital Piano is turned on without the Wireless MIDI & Audio Adaptor
installed, the indicator flashes briefly in the upper-right corner of the top screen to indicate
that the Wireless MIDI & Audio Adaptor is not installed.
• Even after the power is turned off using the P (Power) button, the Digital Piano remains in standby
mode with a small current flowing through it. Always disconnect the AC adaptor from the power outlet
when the Digital Piano will not be used for an extended period or when there is a risk of lightning.
• When Auto Resume (page EN-17) is set to “Off”, turning off the power will reset various settings, but
the Digital Piano still retains the following settings.
Turning Power On or Off
Tuning, LCD Contrast, pairing information (Bluetooth connection history), expression pedal type,
expression pedal calibration, Touch Button Sensitivity, Touch Ring Sensitivity, Operation Click
Volume, Auto Power Off, Wireless Notification Volume, Battery Type
Top screen
Overview and Setup
EN-17
When the Digital Piano is turned off, various settings such as tone numbers are reset. If “SYSTEM” >
“Auto Resume” is set to “On” in the FUNCTION menu (page EN-33), most settings will be retained even
when the power is turned off.
This Digital Piano is designed to turn off automatically to avoid wasting power after no operation is
performed for a preset amount of time. The Auto Power Off trigger time is about four hours when power
is being supplied by the AC adaptor, or six minutes under battery power.
You can disable Auto Power Off to ensure that power does not turn off automatically during a concert,
etc.
• The Auto Power Off function does not work when there is any input from a smart device that is
wirelessly connected to the Digital Piano.
1.
Touch the FUNCTION button.
The FUNCTION menu appears.
2.
Touch the top or bottom of the touch ring to select “SYSTEM” and then touch the
ENTER button.
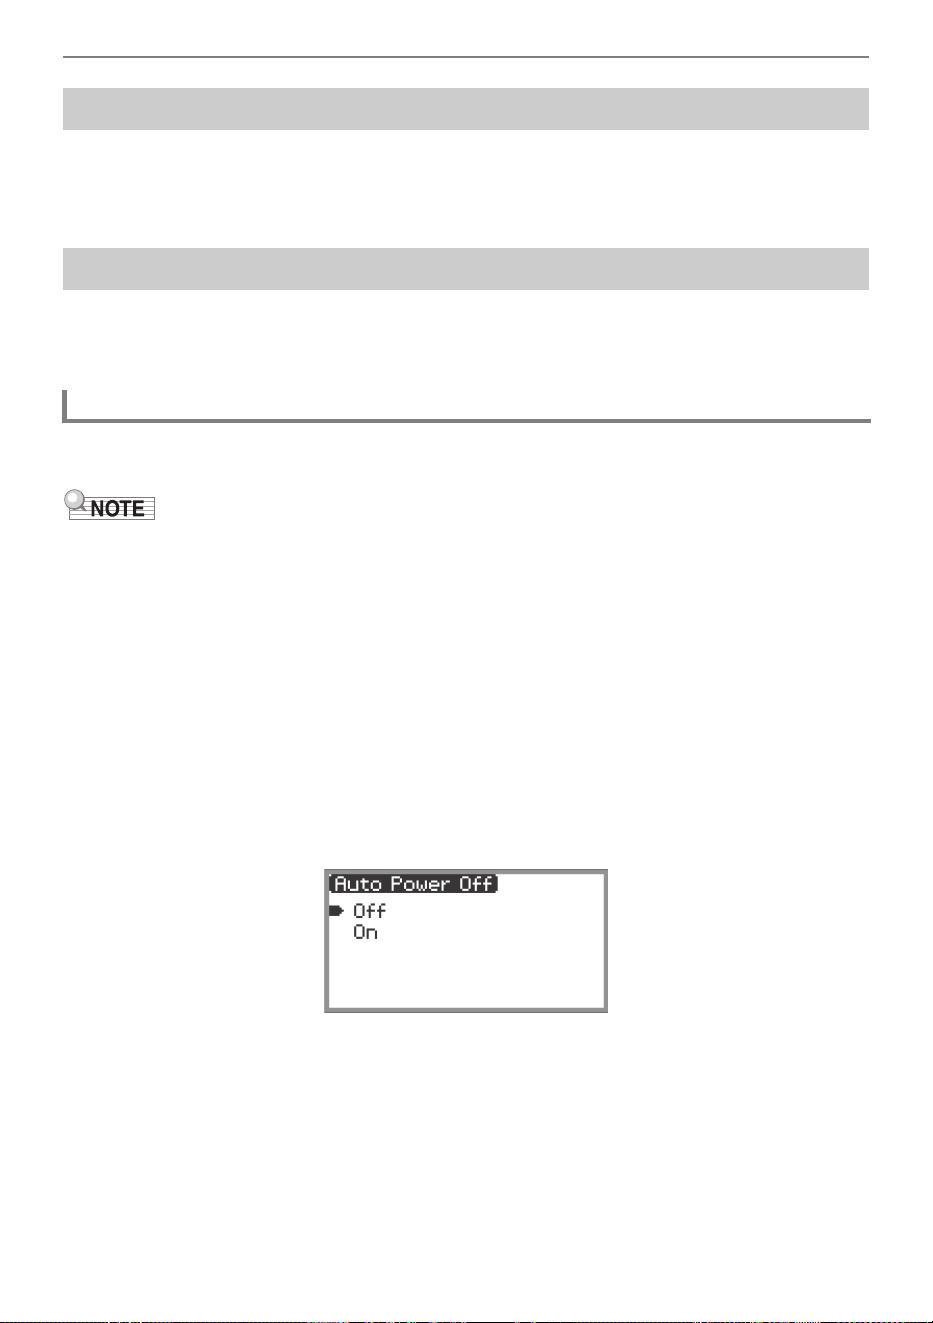
3.
Touch the top or bottom of the touch ring to select “Auto Power Off” and then
touch the ENTER button.
The “Auto Power Off” screen appears.
4.
Touch the top or bottom of the touch ring and select “Off”.
Auto Resume
Auto Power Off
Disabling Auto Power Off

Overview and Setup
EN-18
When the AC adaptor is used, the touch button will flash after six minutes of inactivity to notify the user
that the power has not been turned off. The power-off notification function works when “SYSTEM” >
“Power On Alert” in the FUNCTION menu (page EN-33) is set to “On” (default). If set to “Off”, no alert
will be given.
Note that the “Power On Alert” does not function if battery power is being used. After about one minute
of inactivity, all LEDs except the FUNCTION button will turn off. See “Panel Lights Off” (page EN-18).
While the top screen (the screen that appears immediately after the power is turned on) is displayed,
touching and holding the EXIT button until the light of the touch ring goes around once and then goes
out will turn off most of the lights on the front panel, except the FUNCTION button and touch ring (the
state the panel lights off). The front panel gives off a small amount of light, conserving power and
making it easier to concentrate on playing the keyboard.
The Digital Piano maintains the state the panel lights off even when you play the keyboard or operate
the pedals, pitch bend wheel, K1 and K2 knobs, or CONTROL button. Touch the FUNCTION
button or press the P (Power) button briefly to deactivate it.
• When the battery is used as the power source for the Digital Piano, it will automatically enter the
“panel lights off” state to conserve power if the front panel (touch buttons, touch ring, etc.) is not used
for about one minute.
• Even when using the AC adaptor, the lights can be set to turn off automatically after a set period to
conserve power when no buttons are pressed for a certain amount of time (the light does not turn off
automatically under initial default settings). Use “SYSTEM” > “Panel Light” in the FUNCTION menu
(page EN-33) to specify the time (5, 30, 60, or 120 seconds) before the lights turn off.
• The panel light does not turn off during song playback or recording, or while there is an input from a
smart device.
Power On Alert
Panel Lights Off
Overview and Setup
EN-19
To adjust the contrast of the display, use “SYSTEM” > “LCD Contrast” in the FUNCTION menu (page
EN-33).
Control the master volume of the Digital Piano using the volume knob.
• The mixer function (page EN-65) allows you to individually adjust the volume of the keyboard, song
playback volume, and input volume from the MIC IN jack.
Using headphones cuts off output from the built-in speakers, which means you can practice playing
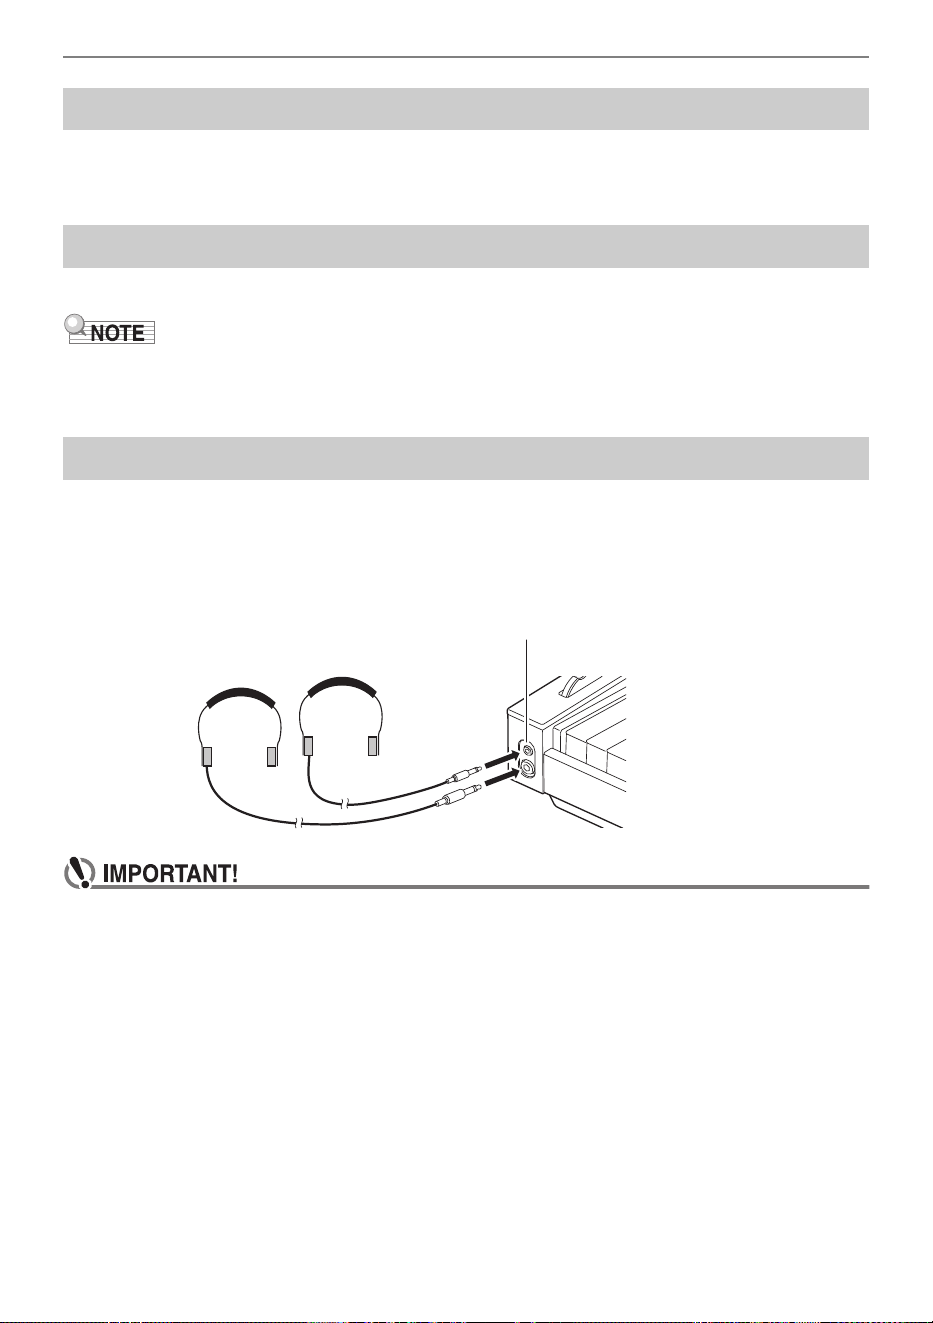
even late at night without disturbing others.
• Be sure to turn down the volume level before connecting headphones to the PHONES jack.
• Do not listen to very high volume output over headphones for long periods. Doing so creates
the risk of hearing damage.
• When connecting headphones to the stereo mini phone jack, be sure to use a stereo mini
phone plug (Mini TRS phone). Use of other types of plugs is not supported.
• If you are using headphones that require an adaptor plug, make sure you do not leave the
adaptor plugged in when you unplug the headphones. If you do, nothing will sound from the
speakers when you play.
• Use commercially available headphones that meet the following conditions.
− Maximum input: 150mW or greater
− Impedance: 32Ω or greater
• Use of the optional CP-16 headphones is not recommended.
Adjusting Display Contrast
Adjusting the Volume
Using Commercially Available Headphones
PHONES jacks
(Top: stereo mini phone jack (Mini TRS phone)/
Bottom: stereo standard phone jack (TRS phone))
Overview and Setup
EN-20
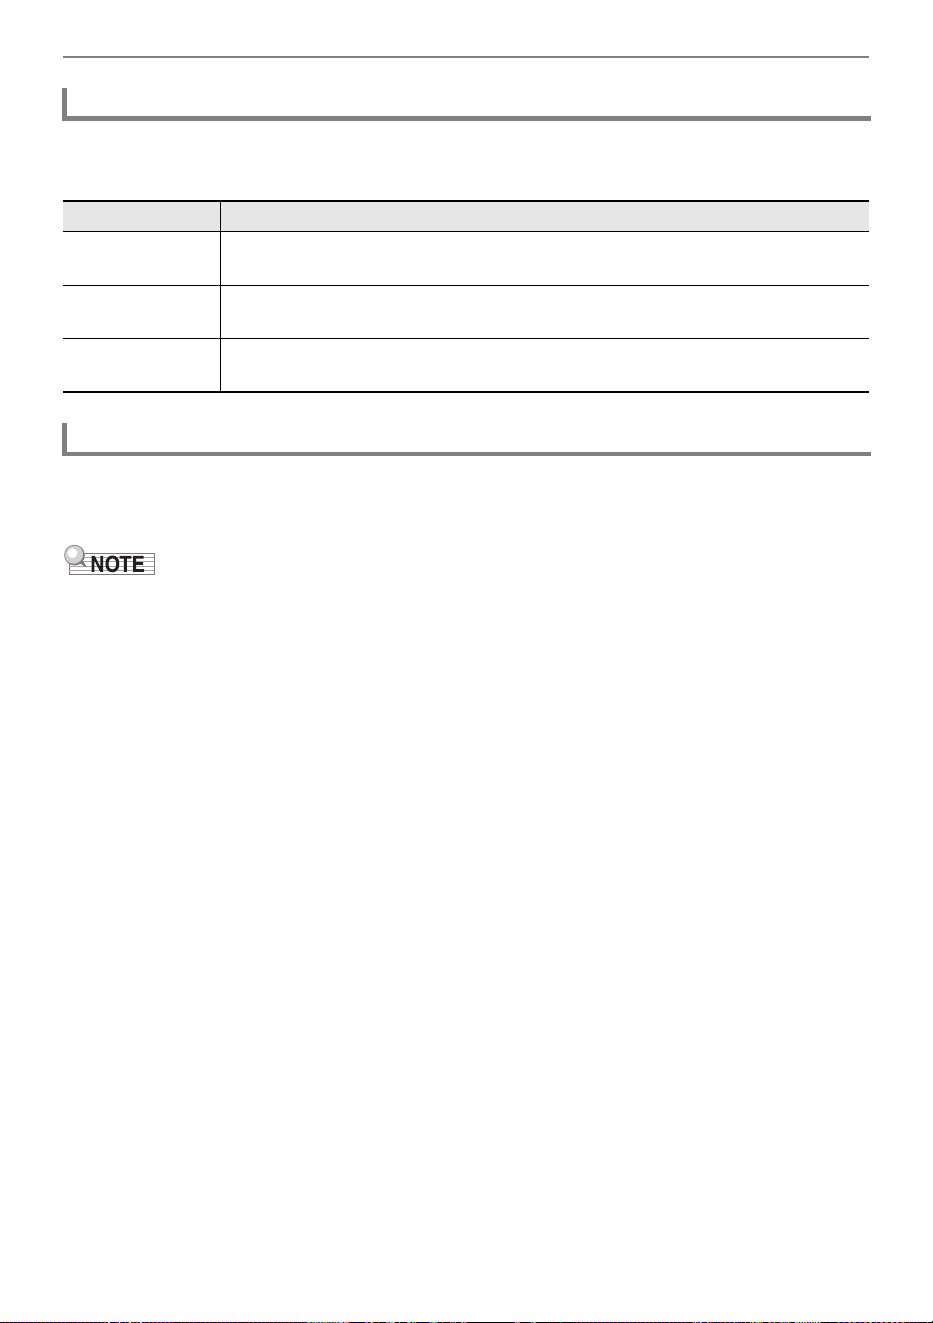
If “SYSTEM” > “Speaker Out” in the FUNCTION menu (page EN-33) is set to “On”, sound will come out
of the speakers even if headphones are plugged into either PHONES jack.
• The setting values and details for this are as follows:
When “SYSTEM” > “Headphone Mode” in the FUNCTION menu (page EN-33) is set to “On” (the initial
default setting) and headphones are used, the sound quality is automatically corrected to reproduce
how an acoustic piano would sound when it naturally reaches the ears of a listener.
• The Headphone Mode setting is enabled when a plug is inserted into either PHONES jack.
• Regardless of the Headphone Mode setting, the sound output from the PHONES jacks and the
LINE OUT jacks are the same.
Outputting From the Speakers While Headphones are Connected
Setting value Description
Off The speakers do not output sound regardless of whether a plug is inserted into
the PHONES jack.
On The speakers output sound regardless of whether a plug is inserted into the
PHONES jack.
Auto When a plug is inserted into the PHONES jack, the Digital Piano’s speakers do
not output sound; when a plug is not inserted, the speakers output sound.
Headphone Mode
Overview and Setup
EN-21
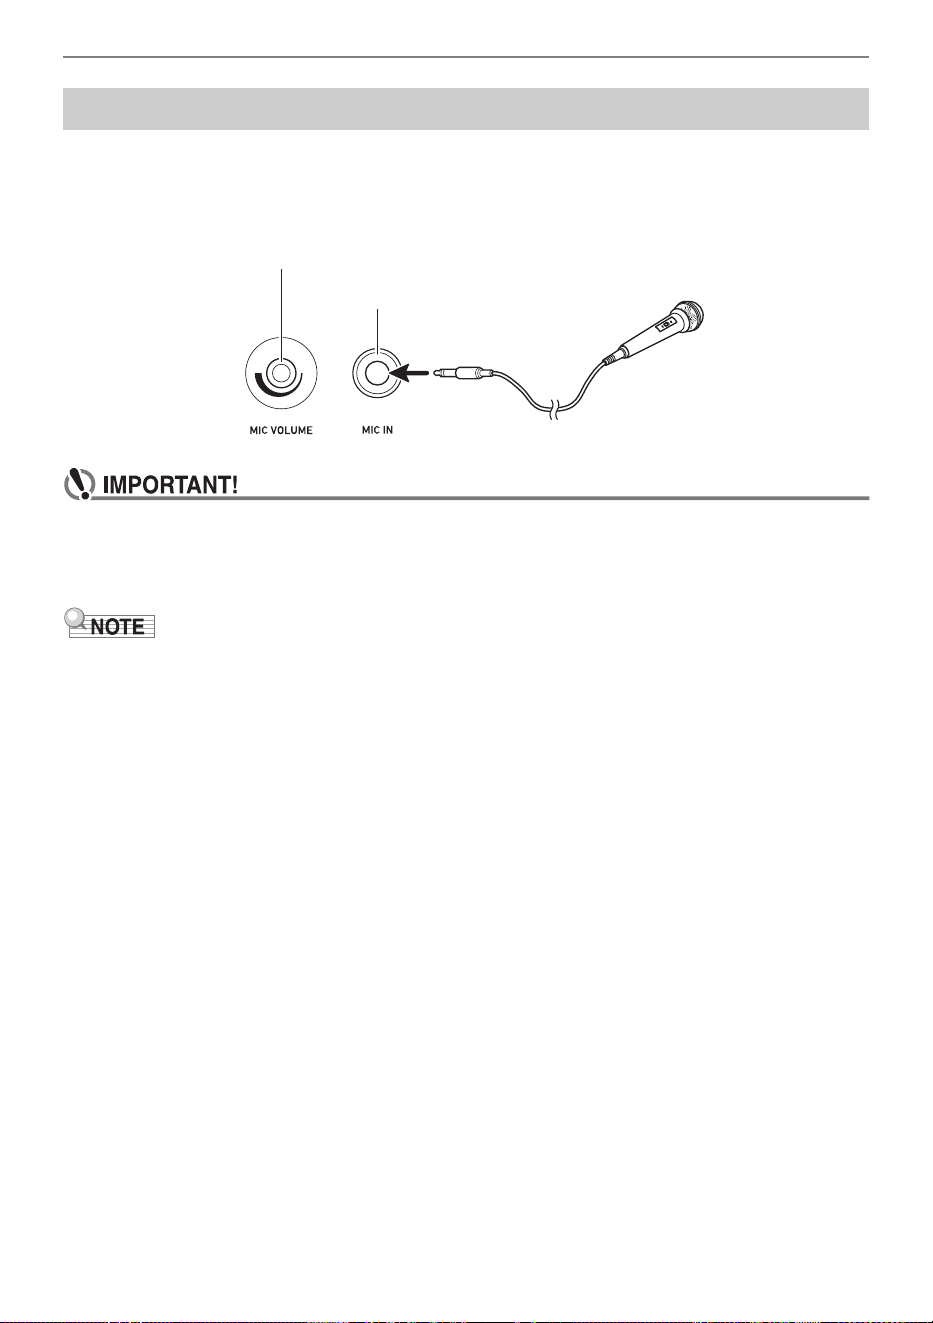
You can connect a commercially available dynamic microphone to the MIC IN jack and sound audio
from the microphone with the Digital Piano.
You can adjust the volume level of microphone input with the MIC VOLUME knob. Microphone
volume control is independent from overall Digital Piano volume.
• Before connecting a microphone, make sure that the Digital Piano and microphone are turned
off.
• Before connecting, set both overall Digital Piano volume and mic volume to their lowest
levels. Adjust volume settings to appropriate levels after connecting the microphone.
• When connecting a microphone to the MIC IN jack, be sure to use a standard phone plug
(TS phone). Use of other types of plugs is not supported.
• Various effects can be applied to the microphone input. For more information, see “Using
Microphone Effects” (page EN-61).
• The mixer function allows you to independently adjust the volume of the microphone input audio and
the send value to the Hall Simulator/Reverb. For more information, see “Using the Mixer” (page
EN-65).
Using a Commercially Available Microphone
MIC VOLUME knob
MIC IN jack
Overview and Setup
EN-22
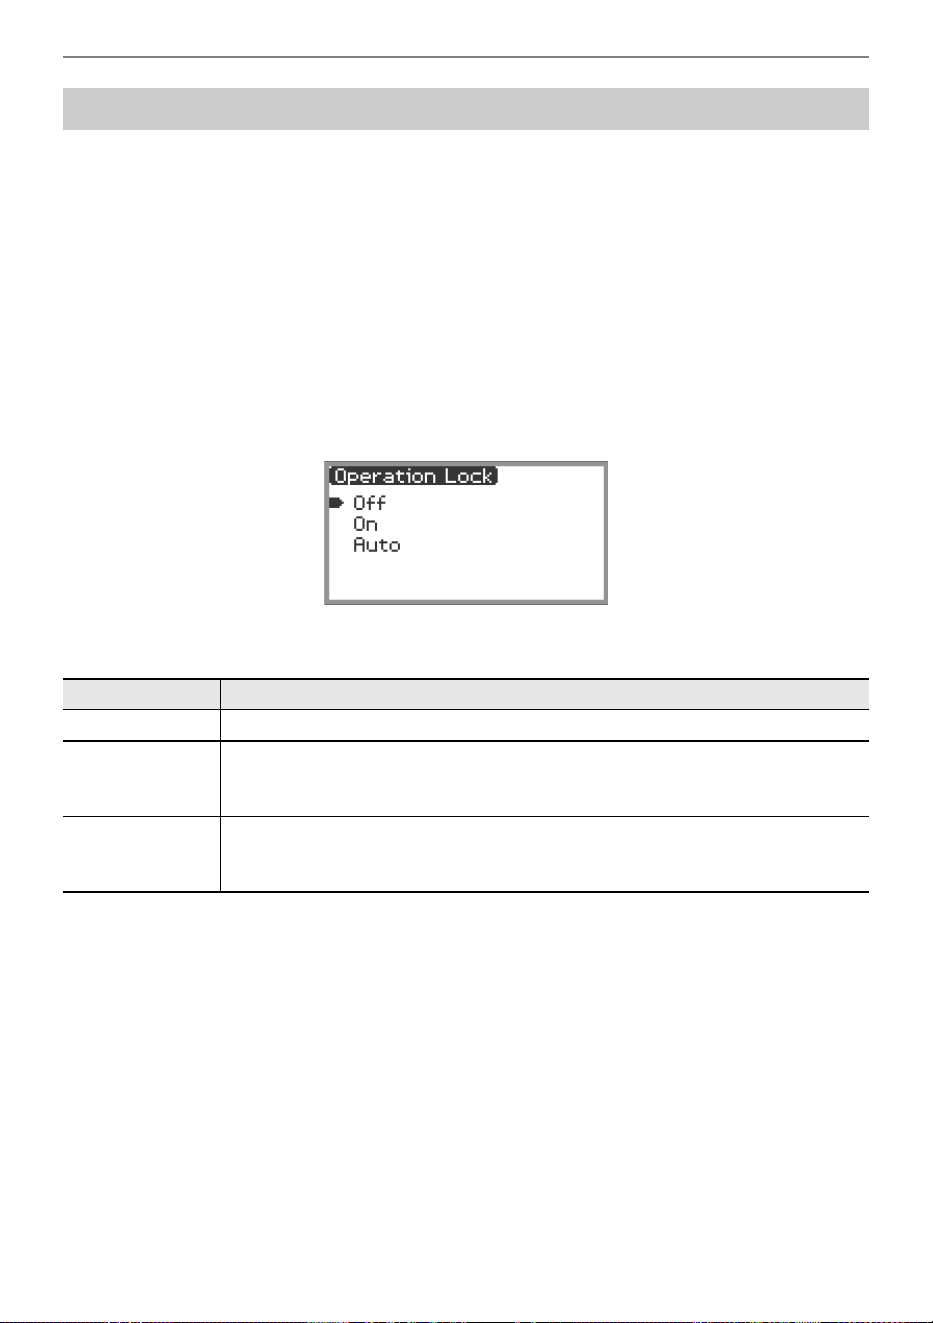
When Operation Lock is enabled (“On” or “Auto”), all button operations except the P (Power) button
and the Operation Lock release operation are disabled to prevent accidental operation during a
performance.
1.
Touch the FUNCTION button.
The FUNCTION menu appears.
2.
Touch the top or bottom of the touch ring to select “SYSTEM” and then touch the
ENTER button.
3.
Touch the top or bottom of the touch ring to select “Operation Lock” and then
touch the ENTER button.
The “Operation Lock” screen appears.
4.
Touch the top or bottom of the touch ring to change the setting value.
5.
Touch and hold the EXIT button to exit settings.
When “On” is selected, all buttons except the FUNCTION button are disabled.
Operation Lock
Setting value Description
Off Disables the Operation Lock.
On The lights of all buttons except the FUNCTION button turn off, and all button
operations except the P (Power) button and the FUNCTION button are
disabled.
Auto All button operations are disabled while playing. When you stop playing, it will
return to the normal state (the same state as when “Operation Lock” is “Off”) after
about one second.
Overview and Setup
EN-23
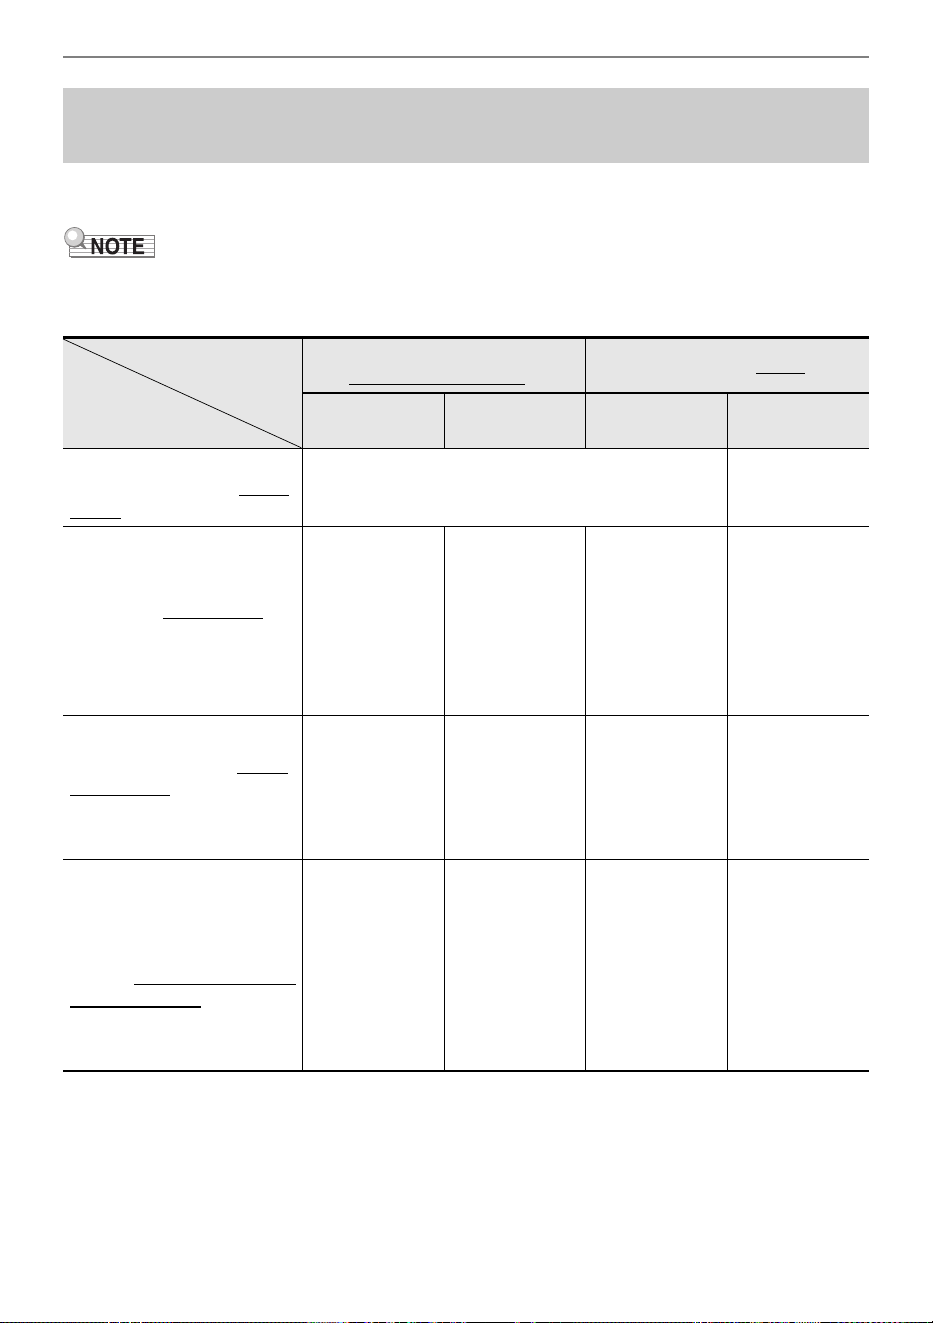
The connection method for an external device depends on what you want to do. Refer to the section
indicated for “Connection method” that matches “What you want to do” in the table below.
• “Smart devices” in the table below means smartphones (iPhone, Android) or tablets (iPad, Android).
• For details about “CASIO’s dedicated app” mentioned in the table below, see “About the App for
Smart Devices (CASIO MUSIC SPACE)” (page EN-155).
*1 Using the included Wireless MIDI & Audio Adaptor.
*2 Use with apps other than CASIO’s dedicated app is not guaranteed to work.
Options for Connecting to Smart Devices, Computers,
and External Audio Devices
Connect via
Wireless Connection
*1
Connect via Cable
Bluetooth
audio
Bluetooth Low
Energy MIDI
USB cable Audio cable
I want to use CASIO’s
dedicated app on my smart
device
“Using the Dedicated App”
(page EN-155)
—
I want to play the sound
output by a smart device
from this Digital Piano using
Bluetooth audio
“Playing Sound
from a Smart
Device on This
Digital Piano
(Bluetooth
Audio
Connection)”
(page EN-157)
———
I want to connect my PC or
smart device to the Digital
Piano and use MIDI
— *2
“Using MIDI
with a
Connected
Computer or
Smart Device”
(page EN-159)
—
I want to output the sound
from this Digital Piano
through external speakers or
audio equipment
———
“Outputting
Digital Piano
Notes Through
an Amplifier or
Audio
Equipment
(LINE OUT
jacks)”
(page EN-163)
Connection method
What you want to do
Overview and Setup
EN-24
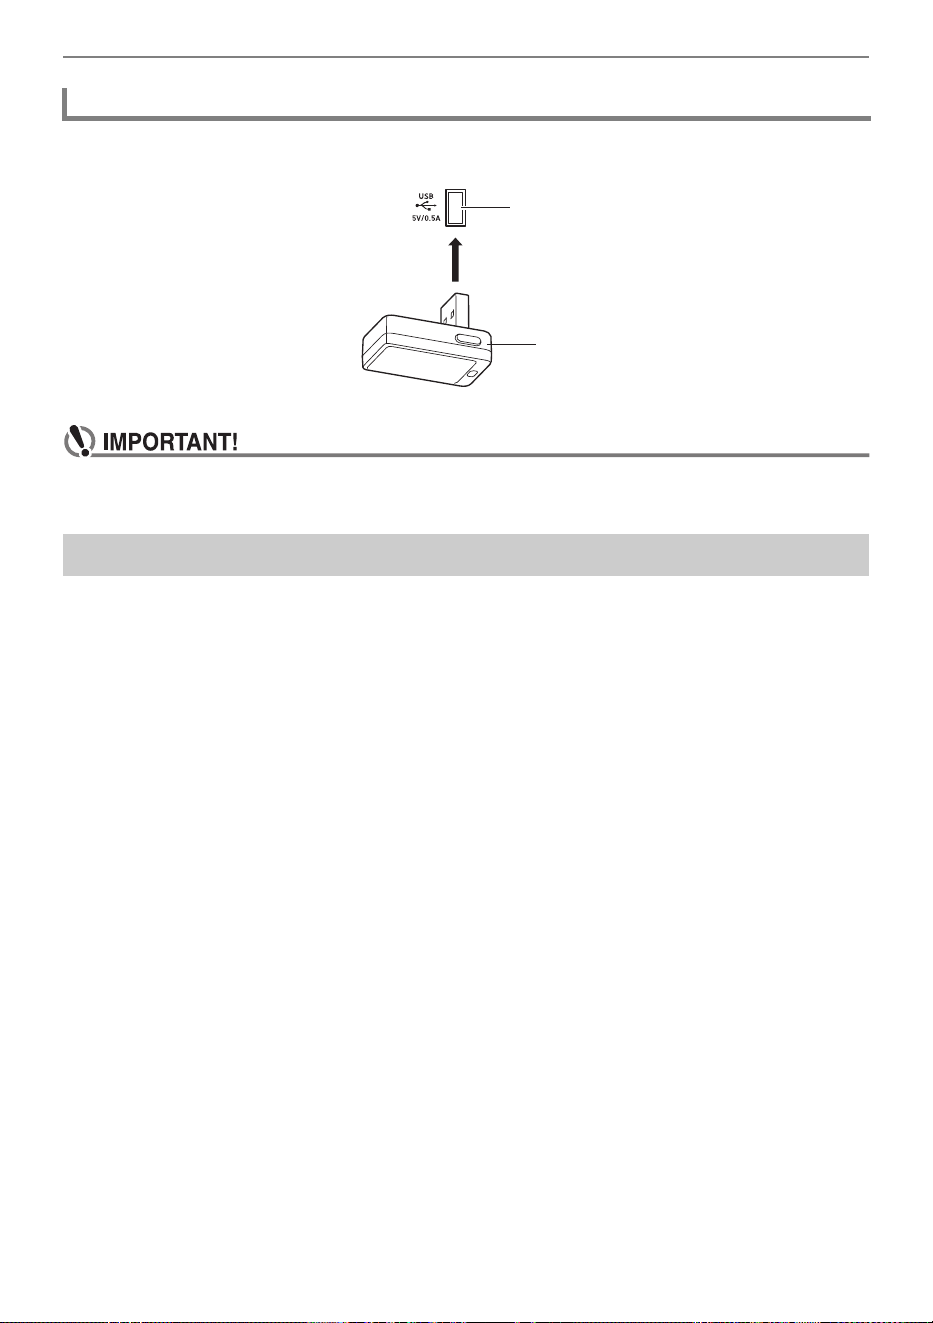
To pair this Digital Piano with a Bluetooth
®
wireless technology-capable external device, you need to
plug the Wireless MIDI & Audio Adaptor into the Digital Piano’s USB Type A port.
• Turn off the Digital Piano before disconnecting the Wireless MIDI & Audio Adaptor.
You can use Factory Reset to return the Digital Piano’s stored data and settings to their initial factory
defaults any time you want. For more information, see “To return all Digital Piano settings and data to
their initial factory defaults (Factory Reset)” (page EN-165).
Using the Included Wireless MIDI & Audio Adaptor
Returning to Initial Factory Defaults
USB Type A port
Wireless MIDI & Audio Adaptor
EN-25
• Unless otherwise specifically noted, all of the procedures in this manual assume that the
Digital Piano is in its initial power on state (immediately after you turn on power). If you run
into problems with a procedure, turn Digital Piano power off and back on, and then try
performing the procedure again.
• Note that turning off Digital Piano power during a procedure causes any pending unsaved
data to be deleted.
Turning on Digital Piano power causes the touch buttons and touch ring to light.
The touch ring is used to move the cursor between items on a list and to change values.
* While the close-up screen (page EN-29) or the value list screen (page EN-30) is being displayed,
touching the top or bottom of the touch ring changes values.
Operations Common to All Modes
Using the Touch Buttons and Touch Ring
Touch Ring Basic Operation
• Trace along the touch ring to continuously
change the value of the currently selected item
on the screen.
• Touch the left or right of the touch ring to
change the value one unit at a time. Touch the
top or bottom of the touch ring to move the
cursor between items
*
.
Tracing clockwise (+) along the touch ring until
the value becomes its maximum value, it will stop
at that value. Likewise, tracing counterclockwise
(–) along the touch ring until the value becomes
its minimum value, it will stop at that value.
Touching the left of the touch ring (–) after the
minimum value is reached sets the maximum
value. Likewise, touching the right of the touch
ring (+) after the maximum value is reached sets
the minimum value.
Decrease the
value (–)
Increase the
value (+)
Move the cursor up (↑)
*
Decrease the
value (–)
Increase the
value (+)
Move the cursor down (↓)
*
Operations Common to All Modes
EN-26
• For an example of a specific operation using the touch ring, see “Basic Operation for Contents of the
Display” (page EN-27).
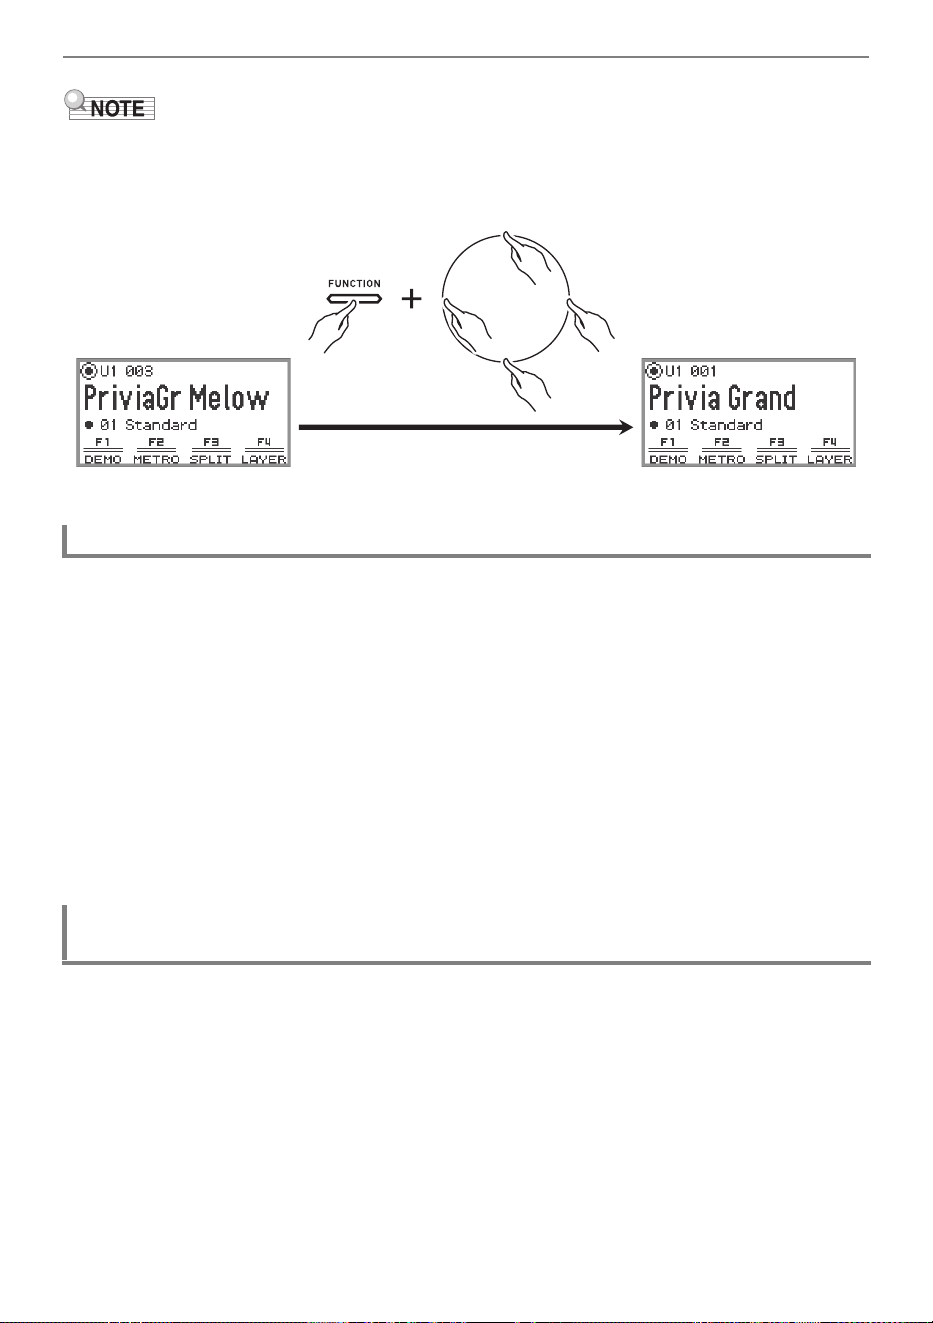
• To reset the value of the item currently selected on the screen to its initial default value, touch and
hold the FUNCTION button and touch the top, bottom, left, or right of the touch ring.
The sensitivity of the touch buttons can be adjusted using “SYSTEM” > “Touch Btn Sense” in the
FUNCTION menu (page EN-33). You can also adjust the sensitivity of the touch ring using “SYSTEM” >
“Touch Ring Sense”.
■ If Operation Becomes Difficult Due to Low Sensitivity Settings
If operation becomes difficult or impossible after using the FUNCTION menu to lower the touch button
and touch ring sensitivity, you can set the touch button and touch ring sensitivity to a higher level than
normal using the procedure below.
1.
Turn off the Digital Piano.
2.
While pressing the C8 key (rightmost key), press the P (Power) button.
• You can release the P (Power) button immediately, but do not release the C8 key until
“Welcome” appears on the display.
The “SYSTEM” > “Op. Click Volume” in the FUNCTION menu (page EN-33) can be used to adjust the
volume of the click sound made when the touch ring is used.
Setting the Sensitivity of the Touch Buttons and Touch Ring
Setting the Volume of the Sound Made When the Touch Ring is Used
(Operation Click Volume)
Operations Common to All Modes
EN-27
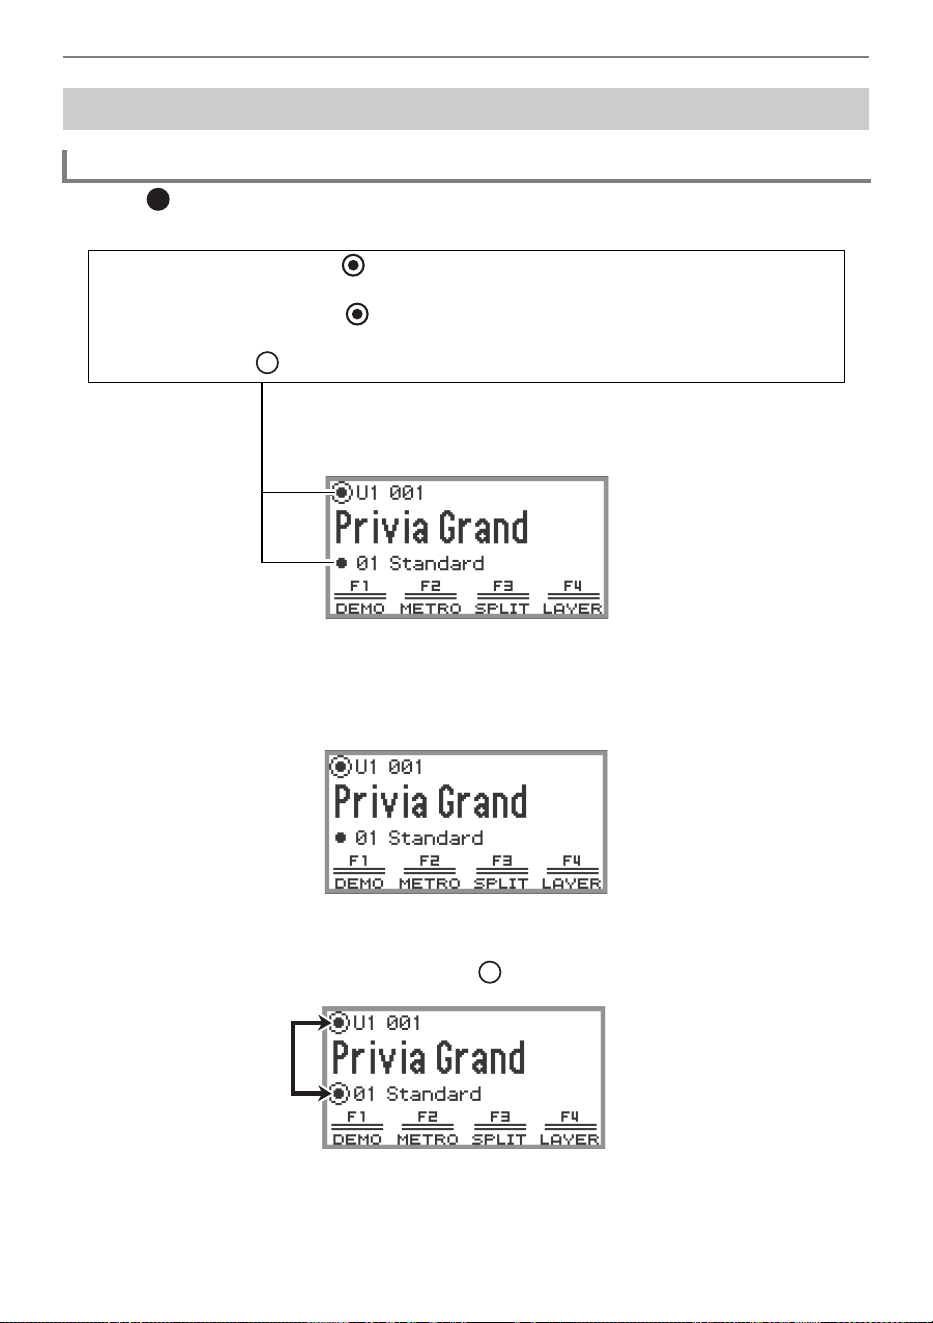
The dots ( ) shown on the display of the Digital Piano indicate items that can be used with the touch
ring or ENTER button.
Select the item to adjust and use the touch ring to change its value. Try out the following operations.
1.
Turn on the Digital Piano.
The top screen appears.
2.
Touch the top or bottom of the touch ring.
Each touch of the touch ring moves the cursor ( ) between the dots.
Basic Operation for Contents of the Display
Selecting Operation Items
− When the cursor is on a dot ( ), you can change the value of that item by tracing along the
touch ring.
− When the cursor is on a dot ( ), touch the ENTER button to display the list screen
(category list screen or value list screen) corresponding to that item*.
− Move the cursor ( ) by touching the top or bottom of the touch ring.
* Operations after touching the ENTER button are described in a later
section.
Operations Common to All Modes
EN-28
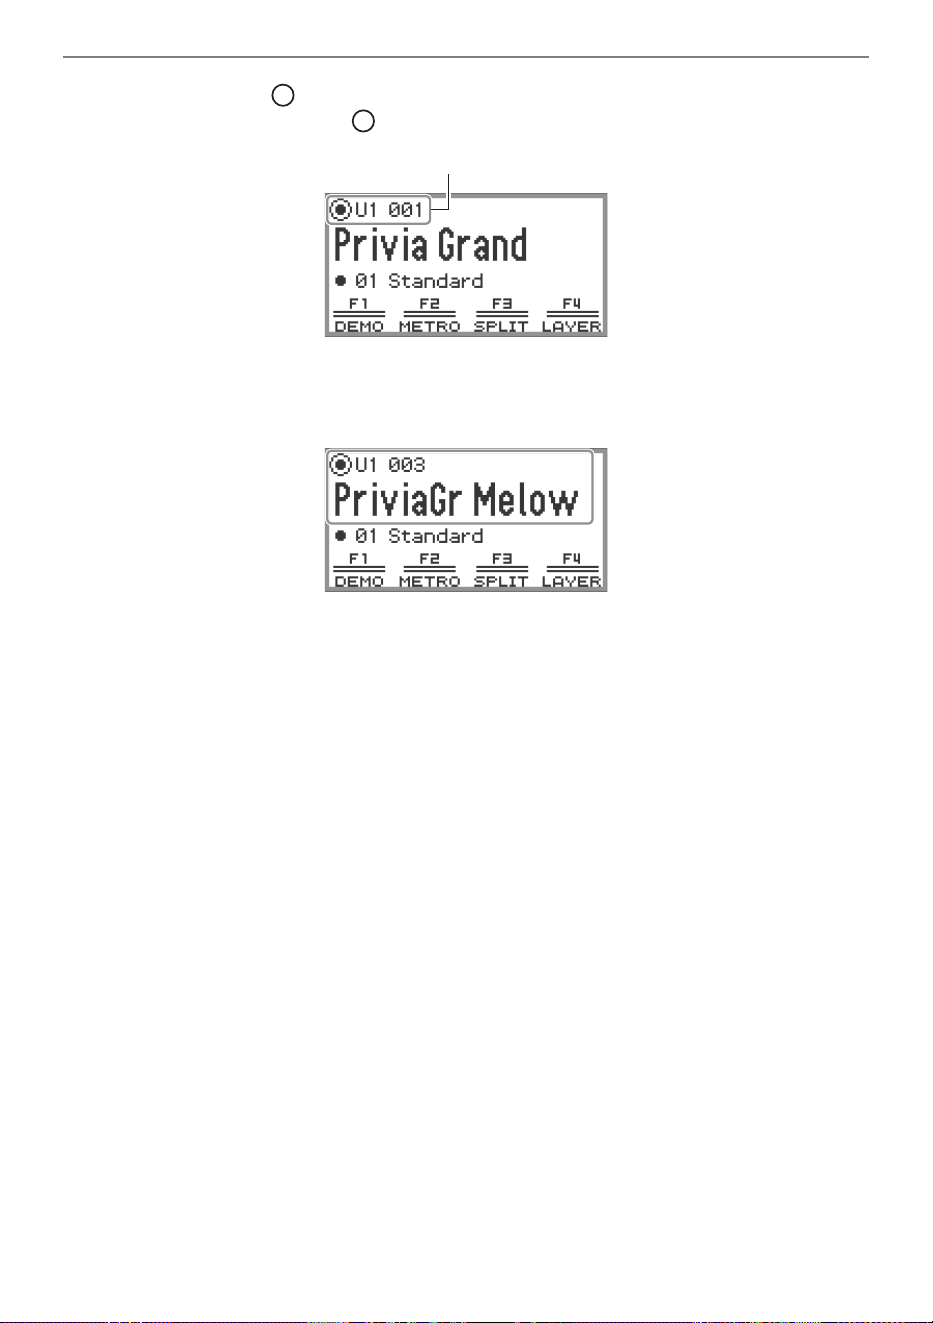
3.
Move the cursor ( ) to the item whose value you want to change.
For example, move the cursor ( ) to “Part name and tone number”.
4.
Touch the left or right or trace along the touch ring.
The value at the cursor position (tone number in this example) changes.
• Instead of touching the left or right or tracing along the touch ring, you can use the value list that
appears when you touch the ENTER button. Refer to the following to use this method.
“Navigating the Hierarchy of Setting Items” (page EN-30)
“Using the F Button Menu” (page EN-31)
“Using the FUNCTION Menu” (page EN-33)
Part name and tone number

Operations Common to All Modes
EN-29
■ Close-Up Screen
If the setting of “SYSTEM” > “Close-up” in the FUNCTION menu (page EN-33) is changed from “Off”
(default value) to “On”, the display will show a “close-up screen” that magnifies the value whenever you
trace along the touch ring to change a value. For example, in Step 4 above, the following screen will
appear.
• While the close-up screen is displayed, you can also change values by touching the top, bottom, left,
or right of the touch ring.
• The display returns to the original screen after about 5 seconds once you remove your finger from
the touch ring.
• To immediately return to the previous screen, touch the EXIT button.
Operations Common to All Modes
EN-30
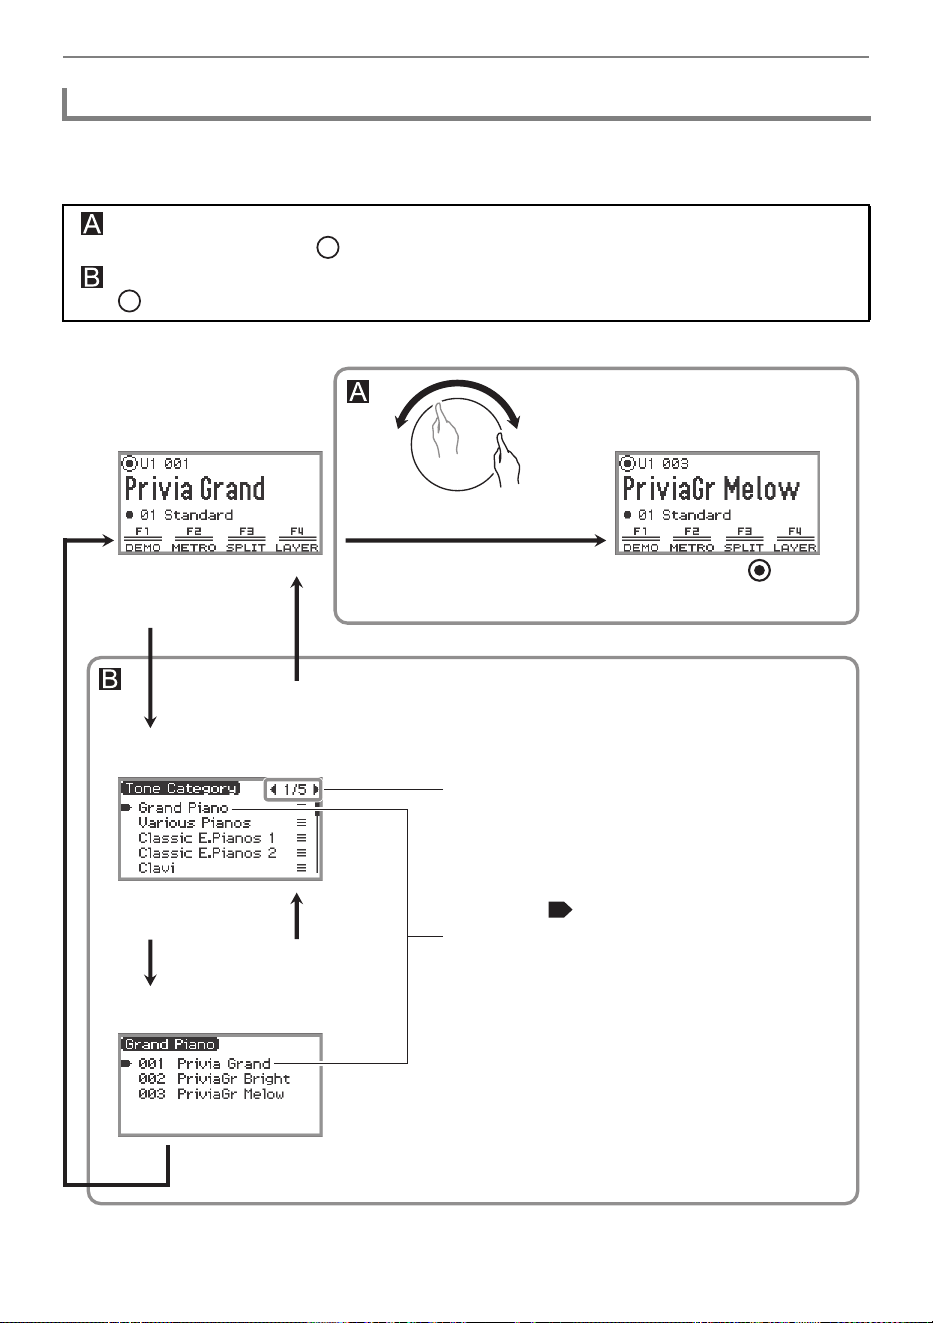
Use the settings list screen to select from many options for tones, functions, or specific settings. The
following is a schematic for navigating the hierarchy of setting items and for the sequence of operations
when selecting categories, setting values, etc.
Try out using the ENTER button, EXIT button, and touch ring while referring to the following.
Navigating the Hierarchy of Setting Items
Touch left or right or trace along the touch ring to directly select the setting value of the item
highlighted by the cursor ( ).
Touching the ENTER button brings up a list of options for the item highlighted by the cursor
( ), allowing you to select a setting value using the touch ring while viewing the list.
Indicates the currently displayed page/total
number of pages. You can turn the page by
touching the left or right of the touch ring.
The cursor ( ) indicates the currently
selected item.
You can move the cursor by touching the top or
bottom or by tracing along the touch ring.
The value at the position
changes
(or touch left or right)
Trace along the touch ring
Touch and hold the EXIT button (returns to
Top screen)
Top screen
Category list screen
List of values
Touch the EXIT button
Touch the EXIT button
Touch the
ENTER button
Touch the ENTER button
Operations Common to All Modes
EN-31
• Touch and hold the EXIT button to return to the top screen.
• The description of each operating procedure in this manual omits the step of returning to the first
screen using the EXIT button at the end of each procedure.
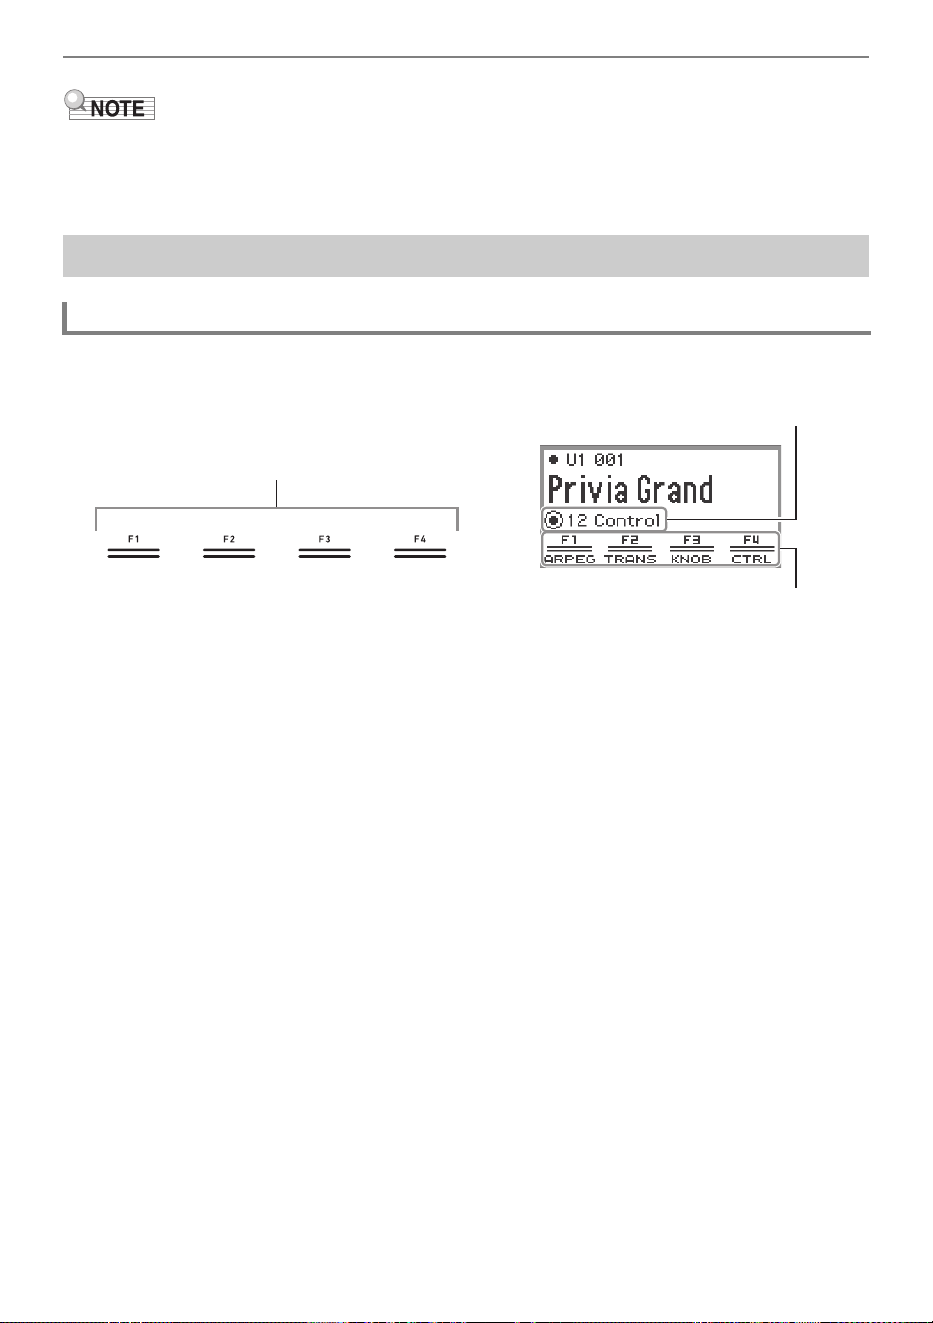
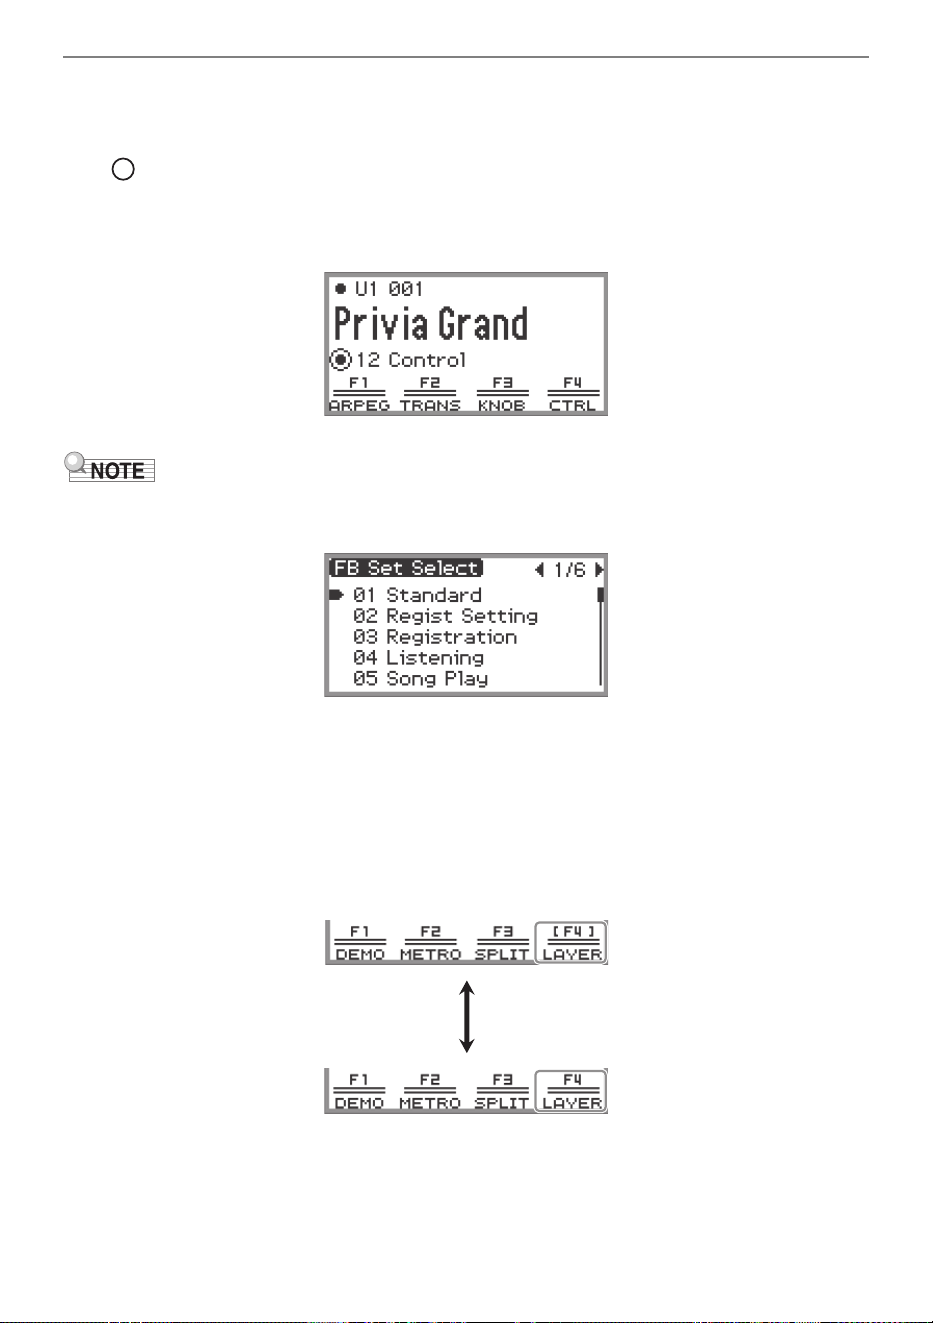
The F button menu shown at the bottom of the display represents the functions that will be activated
when you touch the F buttons (F1 to F4).
The functions displayed in the F button menu are switched by changing the F Button Set (01 to 30).
The F Button Menu and FUNCTION Menu
Using the F Button Menu
F Button Set
F Button Menu
F buttons (F1 to F4)
Operations Common to All Modes
EN-32
■ To change the F Button Set
1.
Touch the top or bottom of the touch ring on the top screen to move the cursor
( ) to the F Button Set row.
2.
Touch the left or right or trace along the touch ring.
The F Button Set changes and the content of the F button menu changes, as well.
• You can also change the F Button Set using the F Button Set list screen that appears when you
touch the ENTER button in Step 2.
• The 30 F Button Sets include 14 presets (fixed F button functions and set names) and 16 open slots
where users can freely assign functions and set names (user F Button Sets). For more information,
see “Using the F Button Set” (page EN-94).
■ Significance of [ ] in the F Button Menu
If an F button is assigned a function that is toggled on and off each time the button is touched, the
F button name appears in brackets [ ] when the function is on. When off, the brackets [ ] will disappear.
Operations Common to All Modes
EN-33
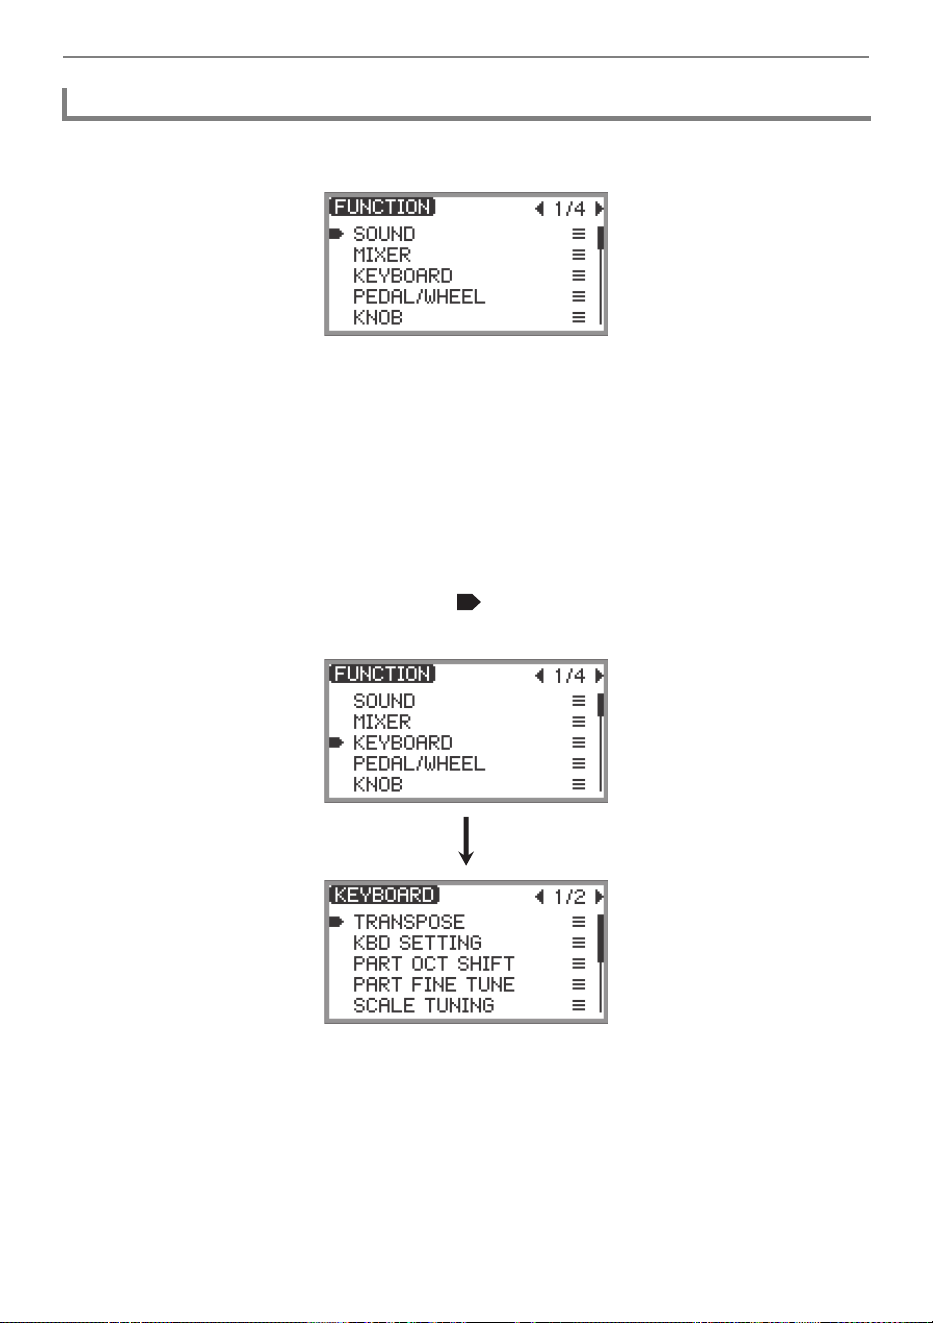
Touch the FUNCTION button to display the FUNCTION menu. This menu can be used to access
most of the functions and settings of the Digital Piano.
■ FUNCTION Menu Operation Example
As an example, this section describes how to change the “Hammer Response” setting.
1.
Touch the FUNCTION button.
The FUNCTION menu appears.
2.
Use the touch ring to select “KEYBOARD” > “KBD SETTING” > “Hammer
Response”, in that order.
• In this manual, menu operations are written as shown above. Specific operations are as follows.
(1) Trace the touch ring to move the cursor ( ) to “KEYBOARD”, and then touch the ENTER
button.
Using the FUNCTION Menu
Operations Common to All Modes
EN-34
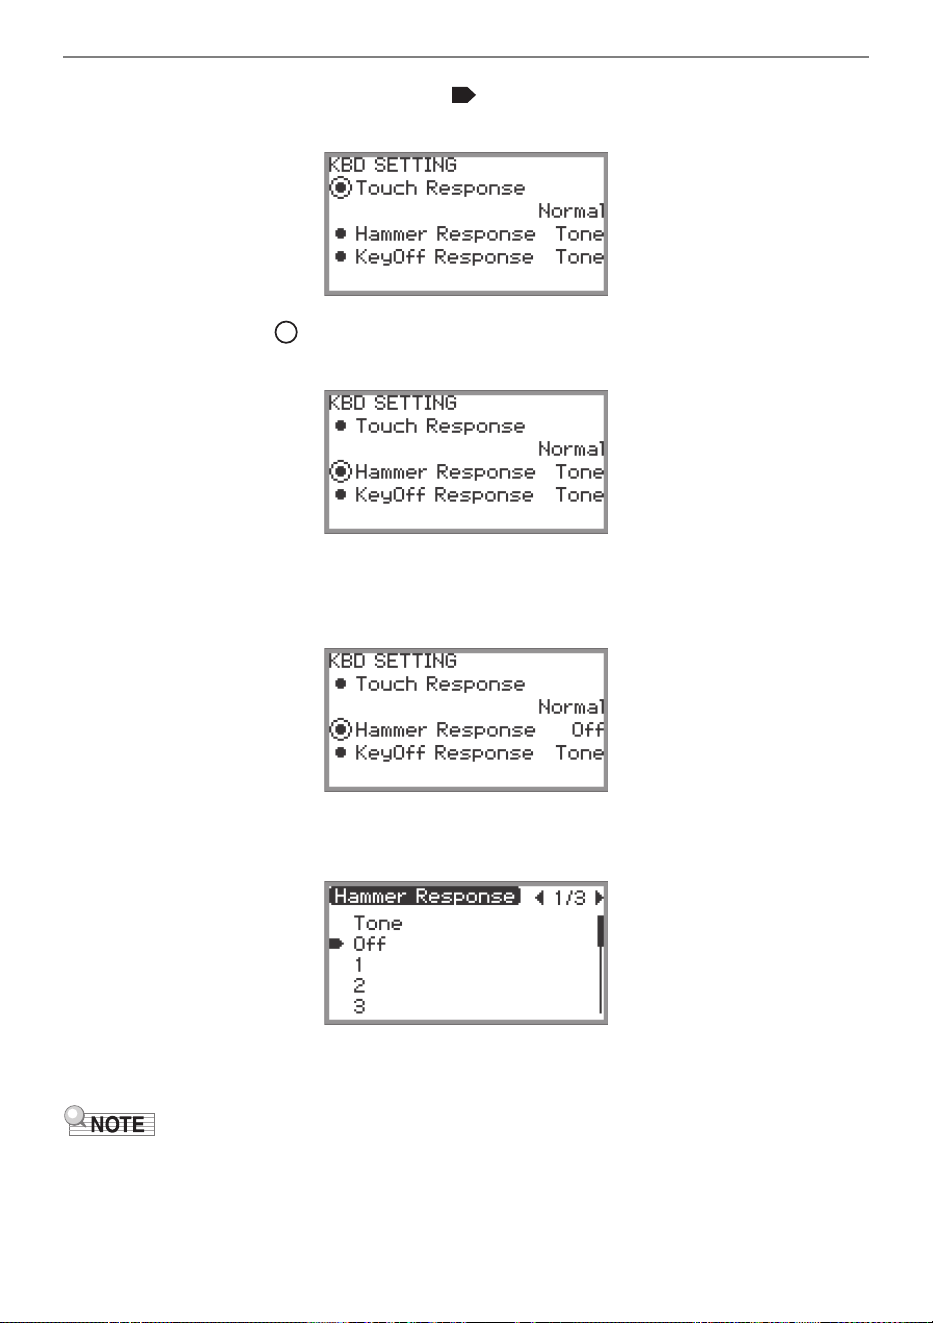
(2) Trace the touch ring to move the cursor ( ) to “KBD SETTING”, and then touch the ENTER
button.
(3) Move the cursor ( ) to “Hammer Response” by touching the top or bottom of the touch ring.
(This time, it is not necessary to touch the ENTER button.)
3.
Change the value.
• Touch the left or right or trace along the touch ring.
• You can also touch the ENTER button to display the value list screen and change the value
there.
• While touching and holding the FUNCTION button, touching the top, bottom, left, or right of the
touch ring will return it to the initial default value.
• In the FUNCTION menu, each touch of the EXIT button moves one level up from the currently
displayed level. Touch and hold the EXIT button to return to the top screen from any level.
• For details on all FUNCTION menu items, see “FUNCTION Menu Items” (page EN-176).
Operations Common to All Modes
EN-35
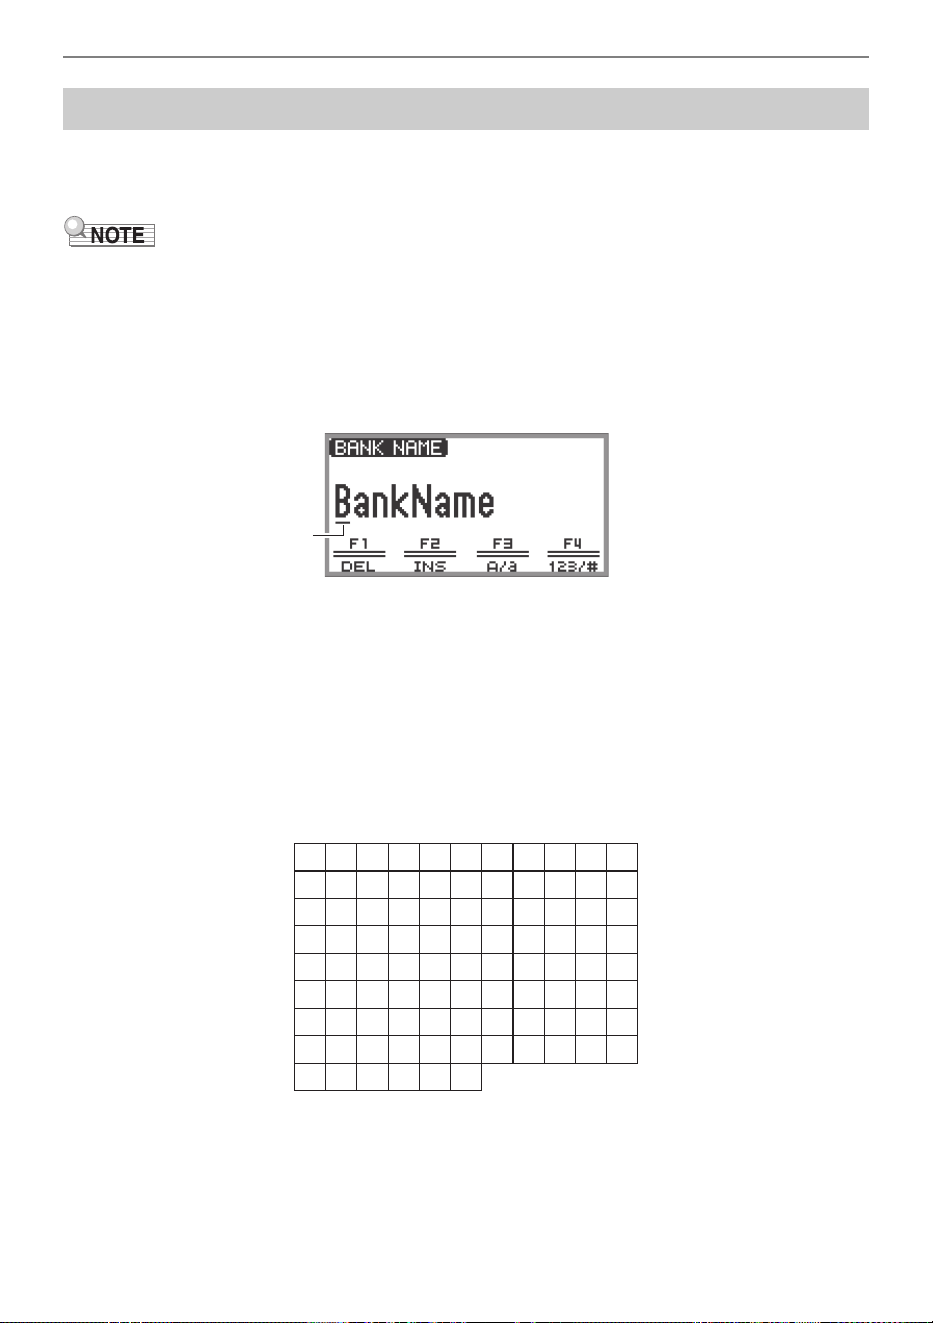
Use the procedure below when you need to change the name of Registration Bank (page EN-88),
F Button Set (page EN-100), data saved on a USB flash drive or to input or edit other text (page
EN-143).
• USB flash drive (page EN-138) file names can be up to 231 characters long.
• Up to 8 characters can appear on the display at a time.
■ To change a character
1.
Touch the left or right of the touch ring on the text editing screen to move the
cursor to the character you want to change.
2.
Trace the touch ring to change the character.
• Touching the F3 button (A/a) switches between uppercase and lowercase letters when the
cursor is located at a letter of the alphabet. When the cursor is located at a number or symbol, it
switches to “A”.
• Touching the F4 button (123/#) switches between numbers and symbols when the cursor is
located at a number or symbol. If the cursor is located at a letter of the alphabet, it switches to
“0”.
• The characters that can be used in the names of F Button Sets and Registration Banks are
listed in the table below.
Text Character Input
Cursor (flashing)
(First cell in the above table is blank.)
A
L
W
h
s
$
/
^
0
B
M
X
i
t
%
:
_
1
C
N
Y
j
u
&
;
`
2
D
O
Z
k
v
'
<
{
3
E
P
a
l
w
(
>
}
4
F
Q
b
m
x
)
=
|
5
G
R
c
n
y
*
?
6
H
S
d
o
z
+
@
7
I
T
e
p
!
,
[
8
J
U
f
q
ފ
-
]
9
K
V
g
r
#
.
\
Operations Common to All Modes
EN-36
• The characters shown in the table below are supported for file names on an exFAT formatted
USB flash drive.
• The characters shown in the table below are supported for file names on a FAT 32 formatted
USB flash drive.
3.
Repeat steps 1 and 2 as many times as necessary.
■ To insert a character
1.
Touch the left or right of the touch ring on the text editing screen to move the
cursor to the position where you want to insert characters.
• To insert a character at the end of a string (append), move the cursor to the rightmost character
and then touch the right of the touch ring again.
2.
Touch the F2 button (INS).
An “A” is inserted at the cursor position.
• In this state, the inserted “A” can be changed to another character. Perform Step 2 onward of
“To change a character” above.
■ To delete a character
1.
Touch the left or right of the touch ring on the text editing screen to move the
cursor to the character you want to delete.
2.
Touch the F1 button (DEL).
(First cell in the above table is blank.)
A
L
W
h
s
%
@
0
B
M
X
i
t
&
[
1
C
N
Y
j
u
'
]
2
D
O
Z
k
v
(
^
3
E
P
a
l
w
)
_
4
F
Q
b
m
x
+
`
5
G
R
c
n
y
,
{
6
H
S
d
o
z
-
}
7
I
T
e
p
!
.
~
8
J
U
f
q
#
;
9
K
V
g
r
$
=
0
A
K
U
)
1
B
L
V
-
2
C
M
W
@
3
D
N
X
^
4
E
O
Y
_
5
F
P
Z
`
6
G
Q
$
{
7
H
R
&
}
8
I
S
'
~
9
J
T
(
Operations Common to All Modes
EN-37
■ To save edited text
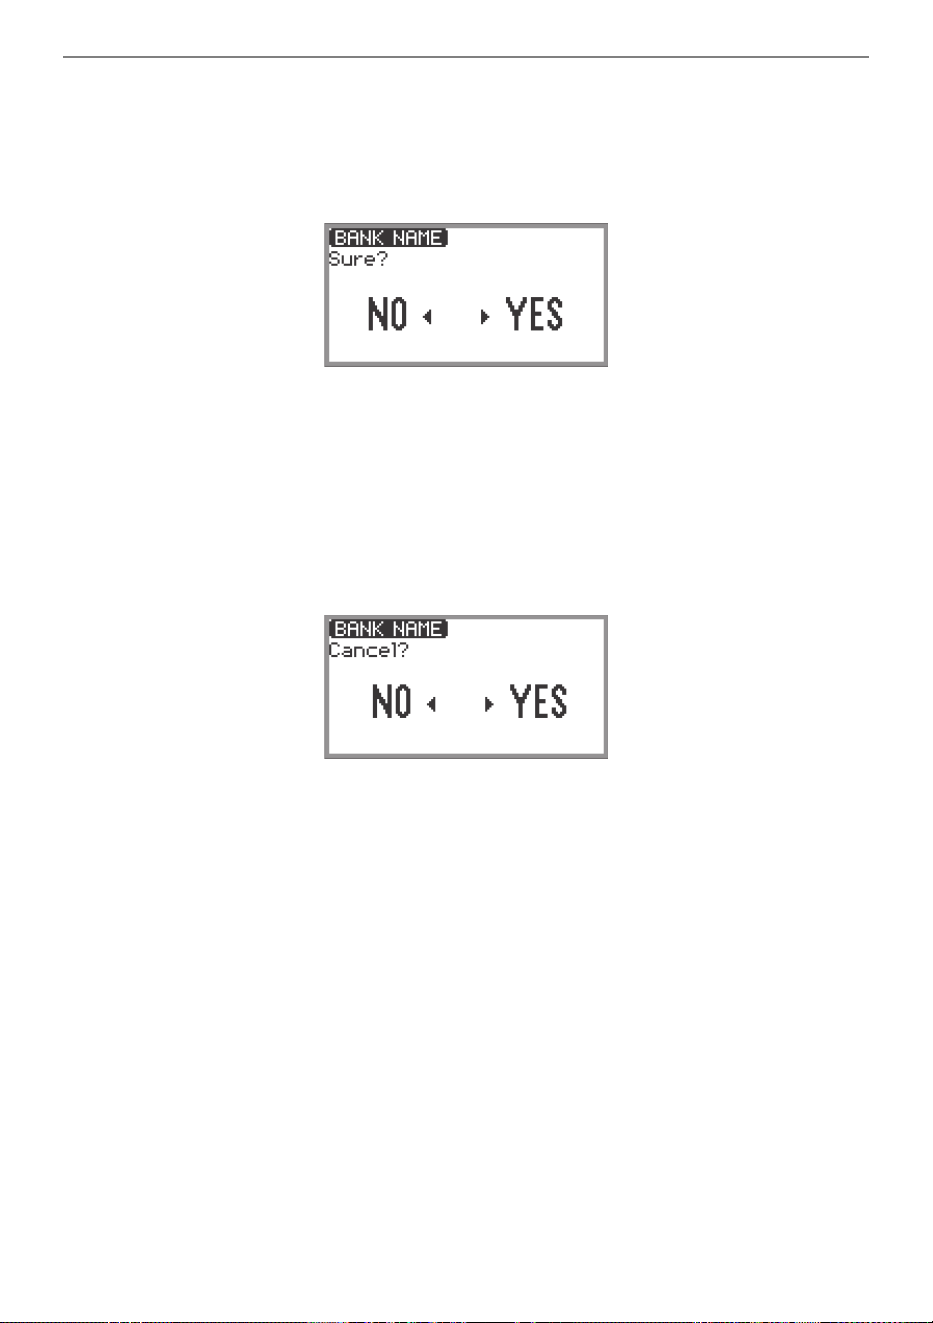
1.
Touch the ENTER button on the text editing screen.
A confirmation screen appears. To return to the text editing screen and continue editing, touch the
left (NO) of the touch ring.
2.
To save your edits, touch the right (YES) of the touch ring.
“Complete” appears, and the display returns to the screen that preceded the text editing screen.
■ To discard edited text
1.
Touch the EXIT button on the text editing screen.
A confirmation screen appears. To return to the text editing screen and continue editing, touch the
left (NO) of the touch ring.
2.
To discard the edits, touch the right (YES) of the touch ring.
Returns to the screen used before editing started.
EN-38
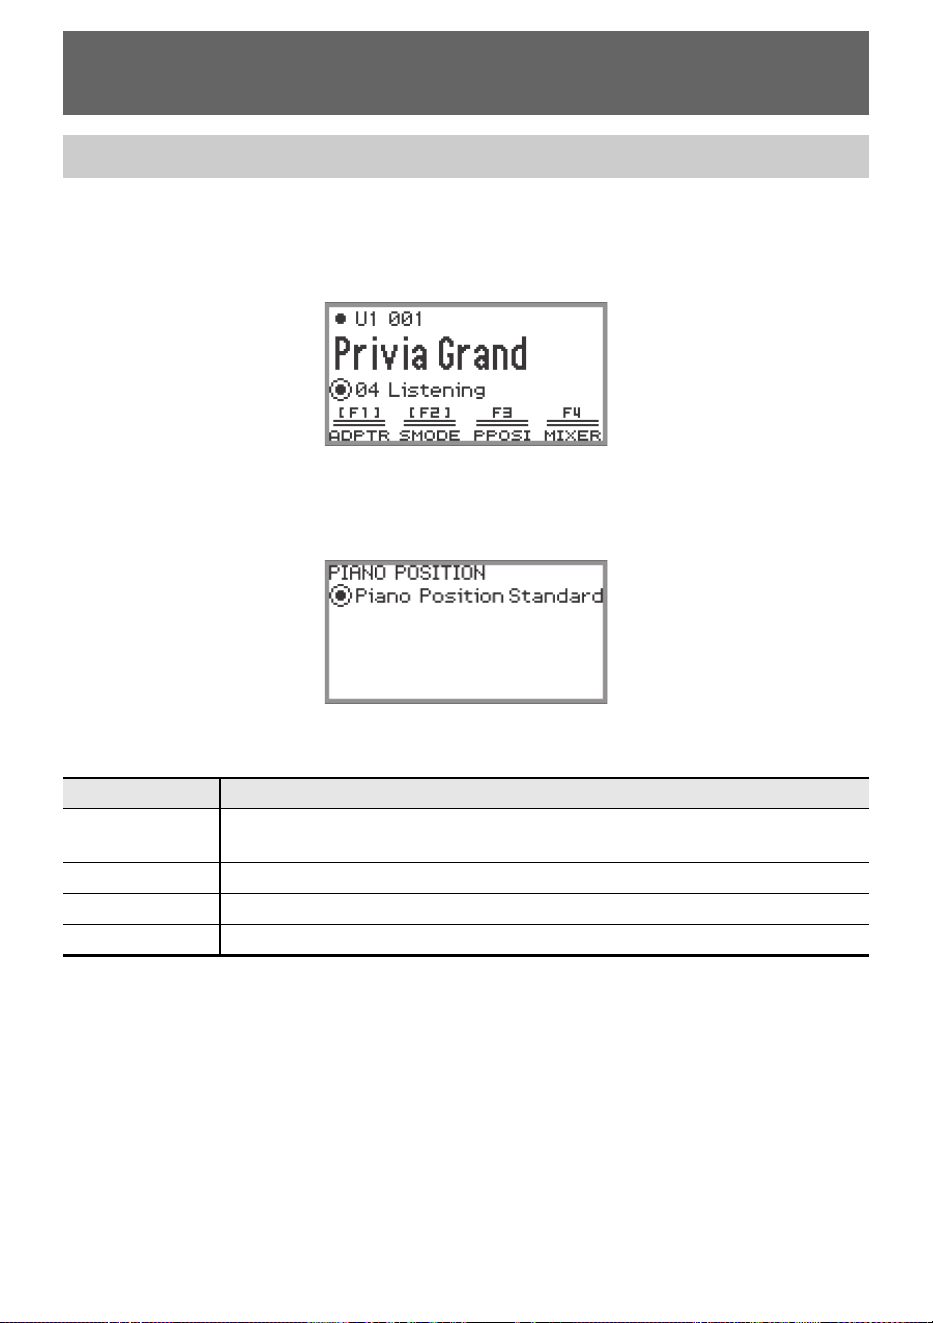
You can select the acoustic settings appropriate for the Digital Piano’s location.
1.
Select “04 Listening” of the F Button Set. See “To change the F Button Set” (page
EN-32).
2.
Touch the F3 button (PPOSI).
The “PIANO POSITION” screen appears.
3.
Trace the touch ring to select the setting that fits the location of the Digital Piano.
Select a setting you like in accordance with the Digital Piano’s actual positioning.
Acoustic Settings for the Digital Piano and
Playback of the Demo Songs
Selecting the Piano Position Setting
Setting value Description
Standard
Standard setting when the Digital Piano is on a stand and is against (or near) a
wall.
Wall Assumed when the back of this Digital Piano is against a wall.
Center Assumed when this Digital Piano is in the center of a room.
Table Standard setting when the Digital Piano is placed on top of a table.

Acoustic Settings for the Digital Piano and Playback of the Demo Songs
EN-39
Follow the steps below to play back the built-in demo songs in sequence.
1.
Select the “01 Standard” of the F button set. See “To change the F Button Set”
(page EN-32).
2.
Touch the F1 button (DEMO).
The a button flashes and the demo song is waiting to start.
3.
To select a song, trace the touch ring.
• You can also select a song as follows.
(1) Touch the ENTER button to display the song list screen.
(2) Trace the touch ring or touch the top or bottom of the touch ring to move the cursor to the song
you want to select.
(3) Touch the EXIT button to return to the screen displayed in step 2.
• The steps to select a song can also be performed during demo song playback.
Listening to the Demo Songs

Acoustic Settings for the Digital Piano and Playback of the Demo Songs
EN-40
4.
To start the demo song, touch the a button.
• Each time the a button is touched after this, the demo song is stopped or resumed.
5.
To return to the top screen, touch the EXIT button.
• If Auto Power Off (page EN-17) is enabled, power will turn off automatically at the applicable trigger
time after a period of non-use, even if a demo song is being played back.
• You can play along with the demo song on the keyboard. The keyboard tone will be the melody tone
of the song being played (the tone cannot be changed).
• During the demo song, the following functions are assigned to the CONTROL button, and K1 and
K2 knobs, respectively (the functions cannot be changed).
CONTROL button: Modulation
K1 knob: Cutoff Freq.
K2 knob: Resonance
EN-41
This Digital Piano has many tones available. Choose your favorite tone and play it.
• For details about tone categories and the names of tones included in each category, refer to the
separate “Built-in Music Data Lists”.
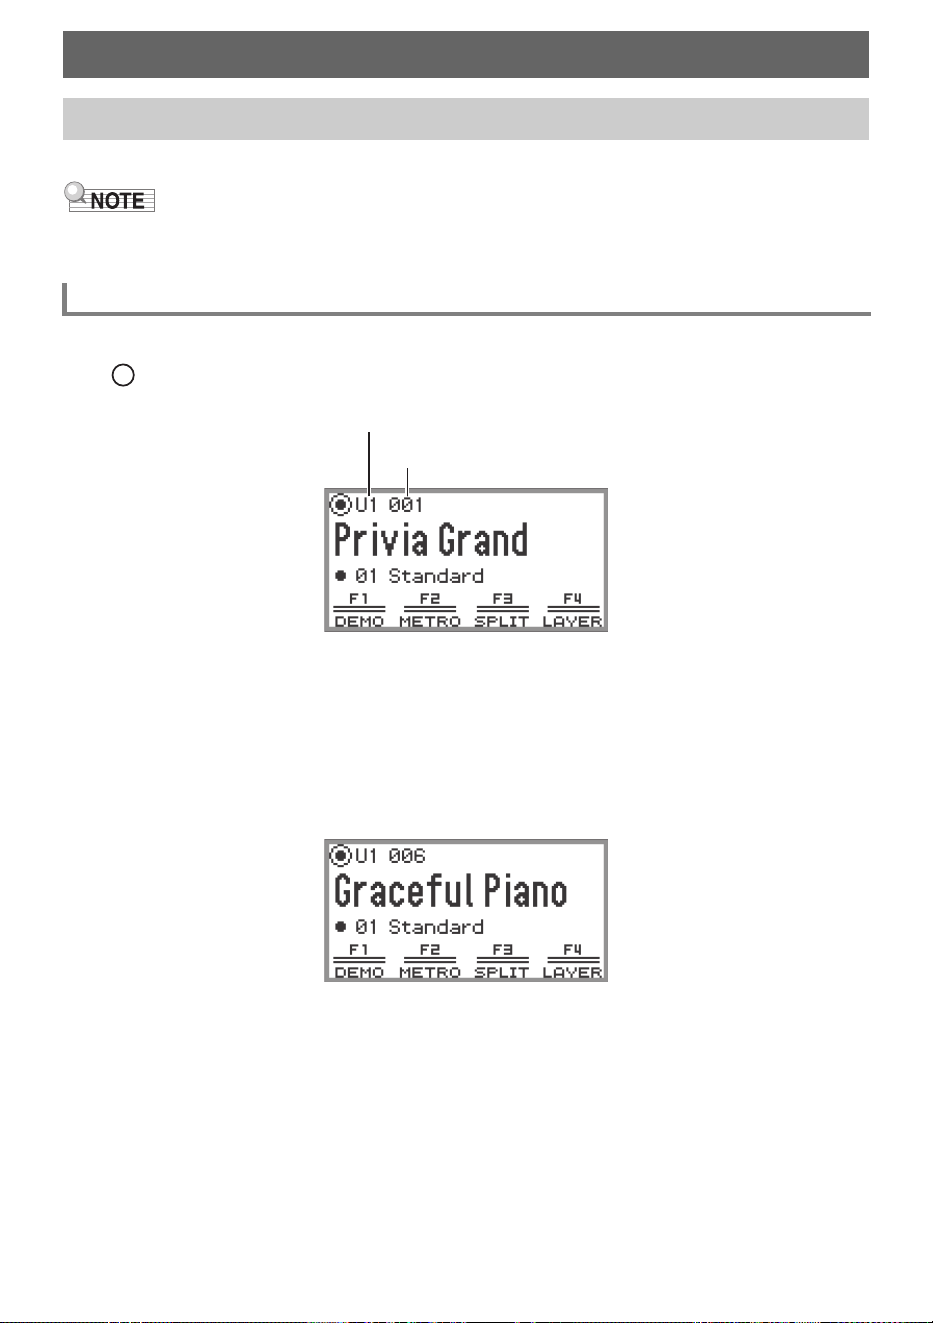
1.
Touch the top or bottom of the touch ring on the top screen to move the cursor
( ) to the part name and tone number.
• When “U1” is displayed as the part name, the tone of the “Upper 1” part sounds when you play a
keyboard key. For more information about parts, see “Sounding Two Different Tones at the
Same Time (Layer)” (page EN-44) and “Splitting the Keyboard Between Two Tones (Split)”
(page EN-46).
2.
Trace the touch ring.
Tones are switched in numerical order.
3.
When the desired tone name appears, take your finger off the touch ring.
Playing Notes with Different Tones
Selecting a Single Tone
Selecting a Tone by Number
Part name: U1 (Upper 1)
Tone number
Playing Notes with Different Tones
EN-42
1.
Touch the top or bottom of the touch ring on the top screen to move the cursor
( ) to the part name and tone number.
2.
Touch the ENTER button.
A list of tone category names is displayed.
3.
Use the touch ring to select a tone category then touch the ENTER button.
A list of tone names is displayed.
4.
Use the touch ring to select a tone.
5.
After selecting the desired tone, touch and hold the EXIT button.
Return to the top screen.
With each touch of the tone buttons, the first tone of each tone category is selected in turn.
Selecting a Tone by Category
Selecting a Tone with the Touch Buttons
Playing Notes with Different Tones
EN-43
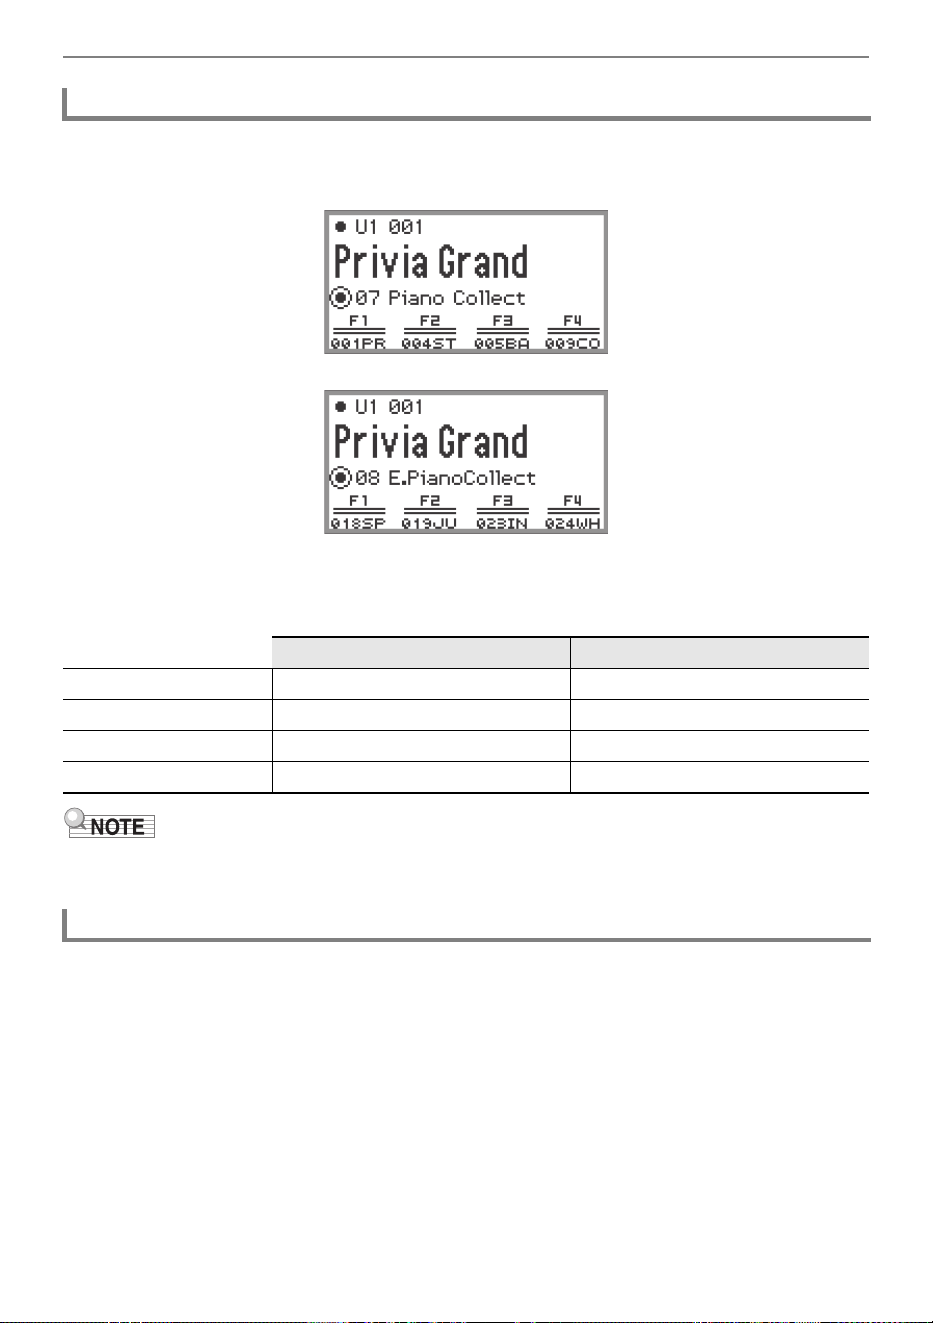
1.
Select the “07 Piano Collect” or “08 E.PianoCollect” of the F button set. See “To
change the F Button Set” (page EN-32).
2.
Touch one of the F1 to F4 buttons, to select the tone you want.
• The tones in the table below can be selected with a single touch.
• You can assign your own favorite tones to each F button using the F button set for which functions
have not yet been assigned. For more information, see “Using the F Button Set” (page EN-94).
The built-in guitar and bass tones may contain strum noise, ghost notes, or other sound effects
depending on the sound (pitch and intensity). For more information, refer to the separate “Built-in Music
Data Lists”.
Selecting a Tone with the F Buttons
07 Piano Collect 08 E.PianoCollect
F1 button 001 Privia GRAND 018 SPACE BOY EP
F2 button 004 STAGE PIANO 019 JUST THE WAY EP
F3 button 005 BALLAD PIANO 023 INDESTRUCTIBLE EP
F4 button 009 COOL GRAND 024 WHERE IT IS EP
Guitar and Bass Tones
Playing Notes with Different Tones
EN-44
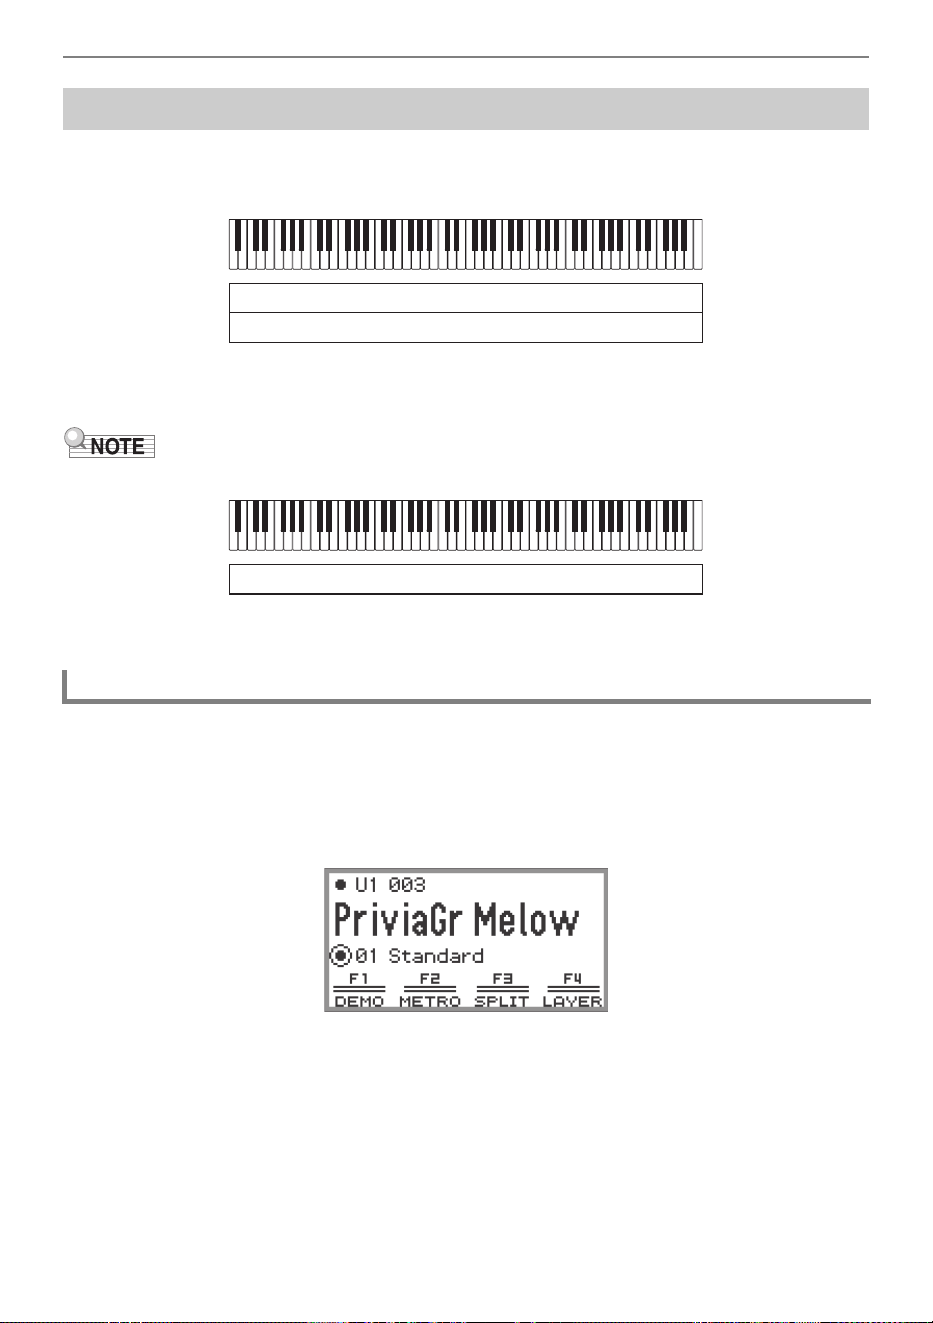
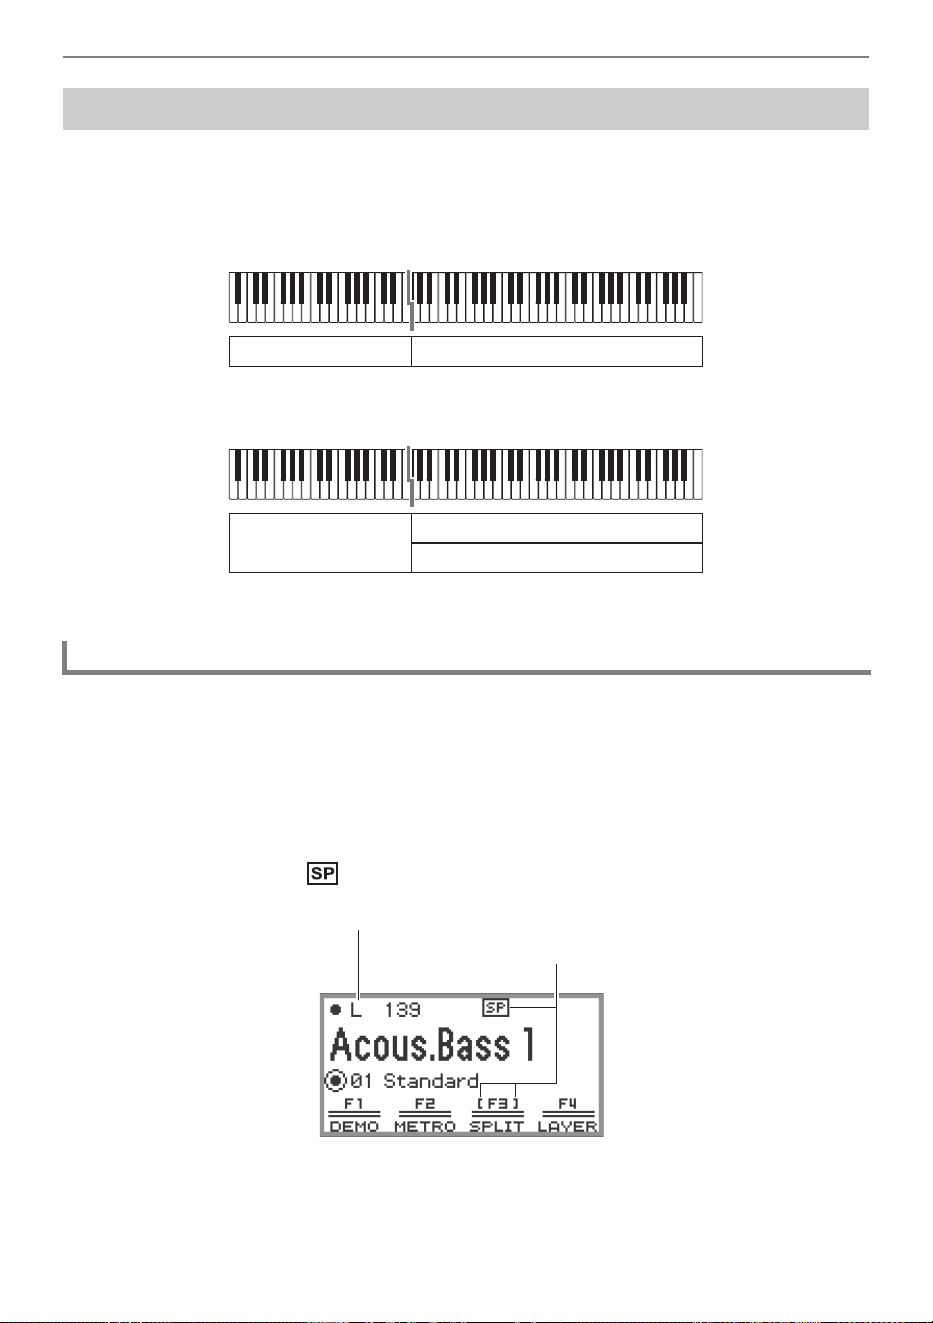
As shown in the figure below, by assigning different tones to the “Upper 1” and “Upper 2” parts, two
tones can be played simultaneously when the keyboard is played. This feature is called “Layer”. When
Layer is turned on, both the Upper 1 and Upper 2 parts sound simultaneously.
* For details on Split, see “Splitting the Keyboard Between Two Tones (Split)” (page EN-46).
• If you play the keyboard when both Layer and Split are off, only the Upper 1 part will sound.
1.
Perform the operation described in “Selecting a Single Tone” (page EN-41)
operation to select the Upper 1 tone.
2.
Select the “01 Standard” of the F button set. See “To change the F Button Set”
(page EN-32).
Sounding Two Different Tones at the Same Time (Layer)
Layering Two Tones
Layer: On, Split: Off*
Upper 1
Upper 2
Layer: Off, Split: Off
Upper 1
Playing Notes with Different Tones
EN-45
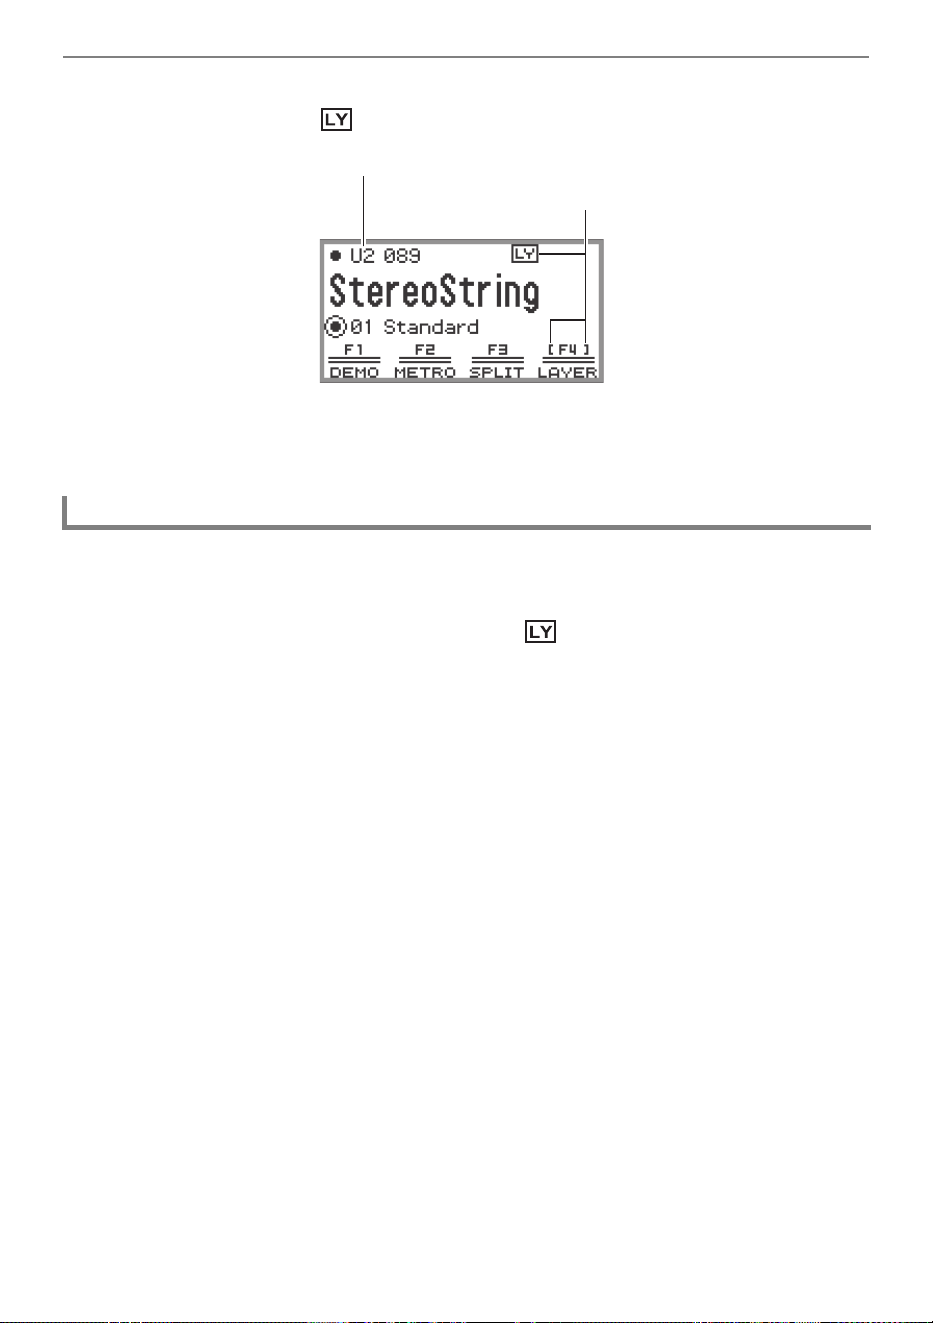
3.
Touch the F4 button (LAYER).
Layer is turned ON and the indicator appears on the display.
4.
Perform the operation described in “Selecting a Single Tone” (page EN-41)
operation to select the Upper 2 tone.
1.
Select the “01 Standard” of the F button set. See “To change the F Button Set”
(page EN-32).
2.
Touch the F4 button (LAYER) to turn off the indicator on the display.
Unlayering the Keyboard
Part name: U2 (Upper 2)
Displayed when Layer is on
Playing Notes with Different Tones
EN-46
By assigning a “Lower” part to the lower range of the keyboard (as shown in the figure below), the lower
range and upper range of the keyboard can play different tones. This function is called “Split”. With Split
turned on, you can do the following.
• The lower (left side) range of the keyboard sounds the tone of the Lower part while the upper (right
side) range of the keyboard sounds the tone of the Upper 1 part (when Layer is off
*
).
• The lower (left side) range of the keyboard sounds the tone of the Lower part while the upper (right
side) range of the keyboard sounds the tone of the Upper 1 and Upper 2 parts (when Layer is on
*
).
* For details on layering, see “Sounding Two Different Tones at the Same Time (Layer)” (page EN-44).
1.
Perform the operation described in “Selecting a Single Tone” (page EN-41)
operation to select the upper range tone (Upper 1 tone).
2.
Select the “01 Standard” of the F button set. See “To change the F Button Set”
(page EN-32).
3.
Touch the F3 button (SPLIT).
SPLIT is enabled and the indicator appears on the display.
Splitting the Keyboard Between Two Tones (Split)
Splitting the Keyboard Between Two Different Tones
Lower Upper 1
Lower
Upper 1
Upper 2
Part name: L (Lower)
Displayed when SPLIT is on
Playing Notes with Different Tones
EN-47
4.
Perform the operation described in “Selecting a Single Tone” (page EN-41)
operation to select the lower range tone (Lower tone).
• To use both SPLIT and LAYER at the same time, perform steps 3 to 4 of the above operation
following the operation described in “Layering Two Tones” (page EN-44).
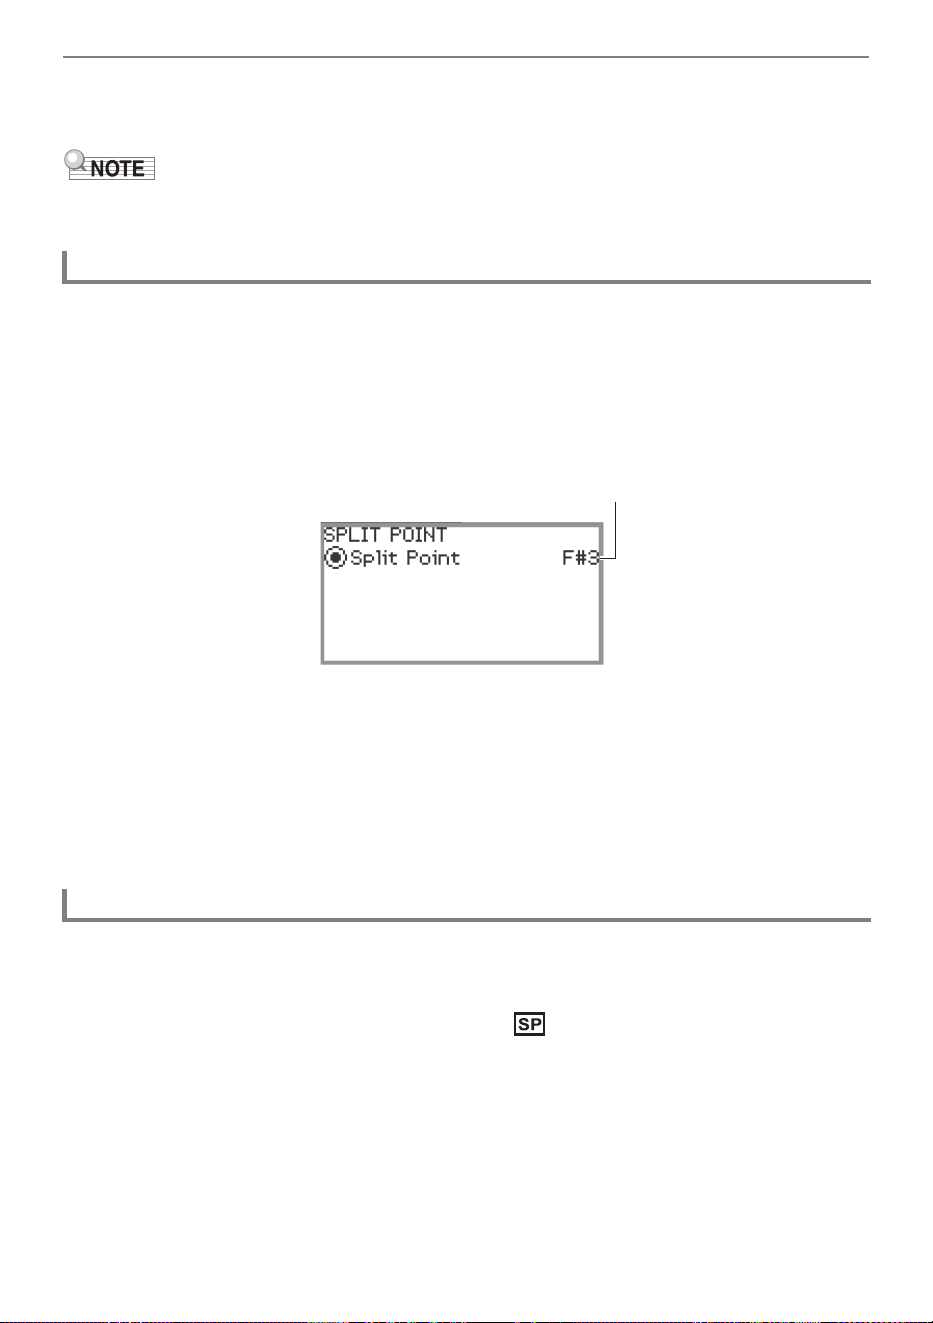
Under initial default settings, the lowest note of the upper range (called the split point) is F{3.
1.
Select the “01 Standard” of the F button set. See “To change the F Button Set”
(page EN-32).
2.
Touch and hold the F3 button (SPLIT).
The “SPLIT POINT” screen appears.
3.
Press the keyboard key you want to be the split point (lowest note of the upper
range).
The note of the split point is changed to that of the key pressed.
• You can also change the split point using the touch ring or touching the ENTER button to
display a list of note names.
4.
Touch the EXIT button to exit the setup.
1.
Select the “01 Standard” of the F button set. See “To change the F Button Set”
(page EN-32).
2.
Touch the F3 button (SPLIT) to turn off the indicator on the display.
Changing the Split Point
Unsplitting the Keyboard
Split point note
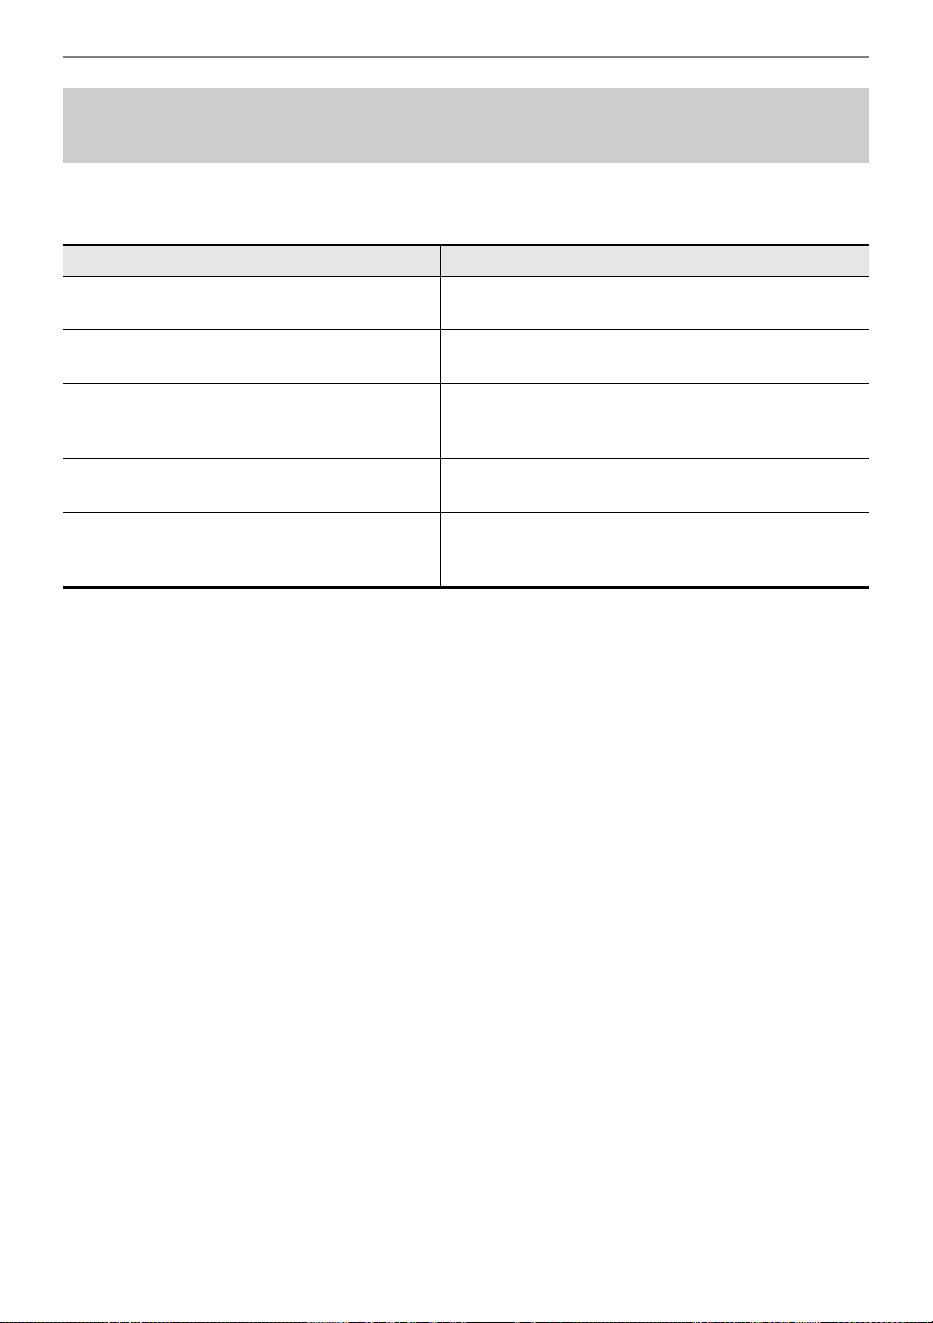
Playing Notes with Different Tones
EN-48
You can change the volume, octave shift, tuning, and other settings for the Upper 1 and Upper 2 parts
when using Layer (page EN-44), and the Lower part when using Split (page EN-46), individually for
each part. For more information, see the references in the table below.
Changing Part Settings (Volume Level, Octave Shift,
Tuning, etc.)
Configuration items Reference
Volume of each part, stereo pan, Hall
Simulator/Reverb, Chorus
“Using the Mixer” (page EN-65)
Octave shift for each part “Changing the Pitch in Octave Units (Octave Shift)”
(page EN-132)
Fine tuning of each part “Adjusting the Tuning Separately for Each Part
(Upper 1/Upper 2/Lower) (Part Fine Tune)”
(page EN-131)
Enable/disable pedal operation for each part “Enabling/Disabling the Pedal Operation for Each
Part (Upper 1/Upper 2/Lower)” (page EN-71)
Enable/disable pitch bend wheel operation for
each part
“Enabling/Disabling the Pitch Bend Wheel Operation
for Each Part (Upper 1/Upper 2/Lower)”
(page EN-80)
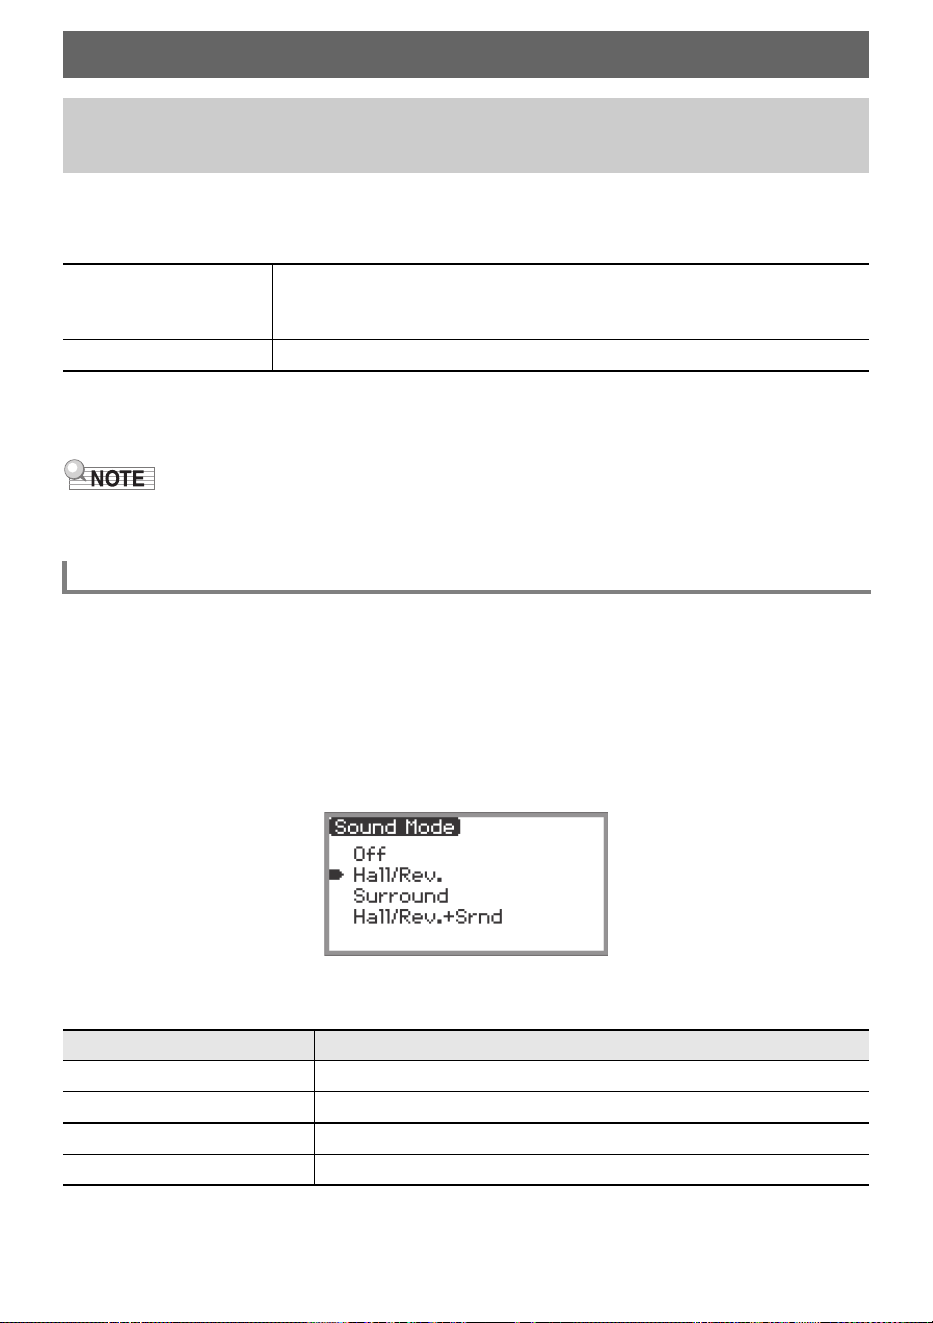
EN-49
The “Sound Mode” of this Digital Piano includes the following effects.
• Hall Simulator/Reverb
Hall Simulator and Reverb are both effects that change the reverberation of the sound.
• Surround
A surround effect (an effect that adds breadth to the sound) is applied to the sound output from the
built-in speakers.
• The Surround effect is not applied to the output from the Digital Piano’s PHONES jacks or LINE
OUT R, L/MONO jacks.
Under initial default settings, the Hall Simulator/Reverb is on and Surround is off. Each can be turned
on and off as follows.
1.
Select the “04 Listening” of the F button set. See “To change the F Button Set”
(page EN-32).
2.
Touch the F2 button (SMODE).
The “Sound Mode” screen appears.
3.
Touch the top or bottom of the touch ring to change the setting value.
Applying Effects
Using the Sound Mode Effects (Hall Simulator/Reverb
and Surround)
Hall Simulator
The hall simulator effect simulates the rich clarity, unconstrained brilliance,
and other distinctive acoustic characteristics of world-famous concert halls
and structures.
Reverb Reverb simulates ambient spaces, such as a room or hall.
Enabling or Disabling the Hall Simulator/Reverb and Surround Effects
Setting value Description
Off Disables both effects
Hall/Rev. Enables Hall Simulator/Reverb only
Surround Enables Surround only
Hall/Rev. + Srnd Enables both effects
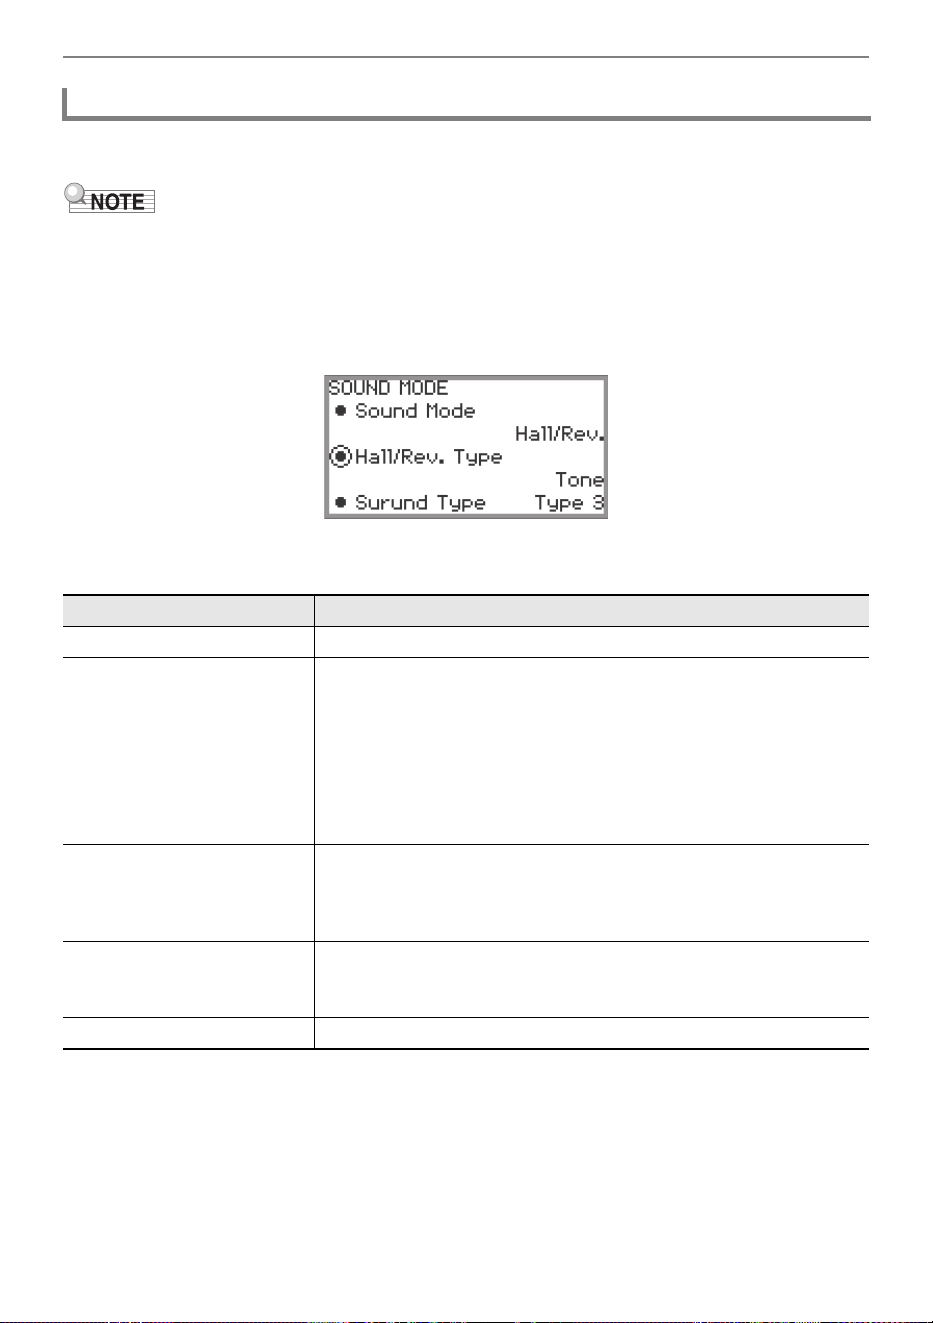
Applying Effects
EN-50
Before selecting a Hall Simulator/Reverb type, make sure to enable the Hall Simulator/Reverb. For
details, see “Enabling or Disabling the Hall Simulator/Reverb and Surround Effects” (page EN-49).
• The “SOUND MODE” screen shown in step 2 can also be displayed by touch and hold the F button
to which “SMODE” is assigned.
1.
Touch the FUNCTION button to display the FUNCTION menu.
2.
Use the touch ring to select “SOUND” > “SOUND MODE” > “Hall/Rev. Type”.
3.
Trace the touch ring to change the setting value.
Specifying the Hall Simulator/Reverb Type
Setting value Description
Tone The type is automatically set to match the selected tone.
Salon
N.Y. Club
Scoring Stage
Opera Hall
Viennese Hall
L.A. Hall
Berlin Hall
BritishStadium
Various types of hall simulator. For example, “N.Y. Club” simulates
the acoustics of a music club in Manhattan, while “Berlin Hall”
simulates a classical arena-style concert hall in Berlin.
Room 1
Room 2
Room 3
Large Room
Simulates the reverberation of a room.
Hall 1
Hall 2
Hall 3
Simulates the reverberation of a small hall.
Stadium Simulates the reverberation of a stadium.
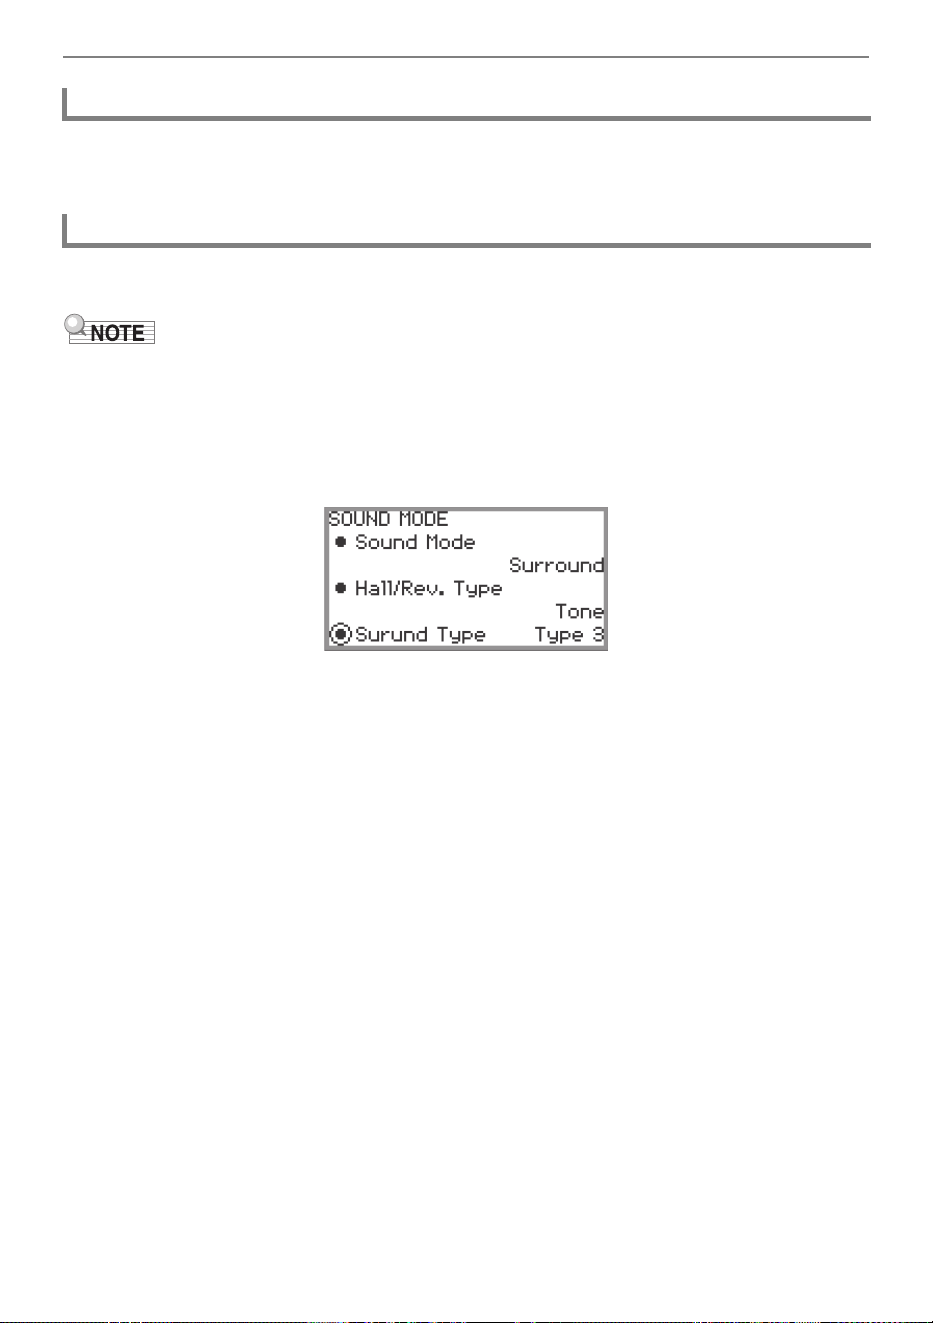
Applying Effects
EN-51
The mixer can be used to individually adjust the Hall Simulator/Reverb for each part (Upper 1/Upper 2/
Lower), audio input from the MIC IN jack, etc. For more information, see “Using the Mixer” (page
EN-65).
Before selecting the Surround type, make sure to enable Surround. For details, see “Enabling or
Disabling the Hall Simulator/Reverb and Surround Effects” (page EN-49).
• The “SOUND MODE” screen shown in step 2 can also be displayed by touch and hold the F button
to which “SMODE” is assigned.
1.
Touch the FUNCTION button to display the FUNCTION menu.
2.
Use the touch ring to select “SOUND” > “SOUND MODE” > “Surund Type”.
3.
Trace the touch ring to change the desired setting value.
• You can choose from Type 1 (small effect), Type 2 (medium effect), and Type 3 (large effect).
*
* Depending on the tone selected and the characteristics of the audio being played back, the
effect may not be obvious.
Adjusting the Depth of the Hall Simulator/Reverb Effect
Specifying the Surround Type

Applying Effects
EN-52
The Digital Piano’s DSP (Digital Signal Processor) can be used to apply various effects to the built-in
tones. Effects include equalizer, tremolo, limiter, wah-wah, among others.
Preset DSPs
This Digital Piano is equipped with 100 preset DSP effects. These effects can be applied to any of the
built-in tones, and the effect settings adjusted as you like.
DSP Tones
DSP effects can be switched ON (enabled) or OFF (disabled) for each tone. Some DSP effects are
preset to ON or OFF depending on the built-in tone. For tones that use DSP effects, a preset
appropriate for the tone is assigned as the default DSP. This is called a “DSP tone.”
• To check whether a particular tone is a DSP tone, refer to “Tone Lists” in the separate “Built-in Music
Data Lists”.
1.
Perform the operation described in “Selecting a Single Tone” (page EN-41)
operation to select a tone.
2.
Select the “10 Effect” F button set. See “To change the F Button Set” (page
EN-32).
3.
Touch the F4 button (DSP).
DSP is enabled and the F button menu F4 appears enclosed in brackets [ ].
4.
To disable DSP, touch the F4 button (DSP). The enclosing brackets [ ] disappear.
Using DSP Effects
Enabling or Disabling DSP
Displayed when DSP is enabled
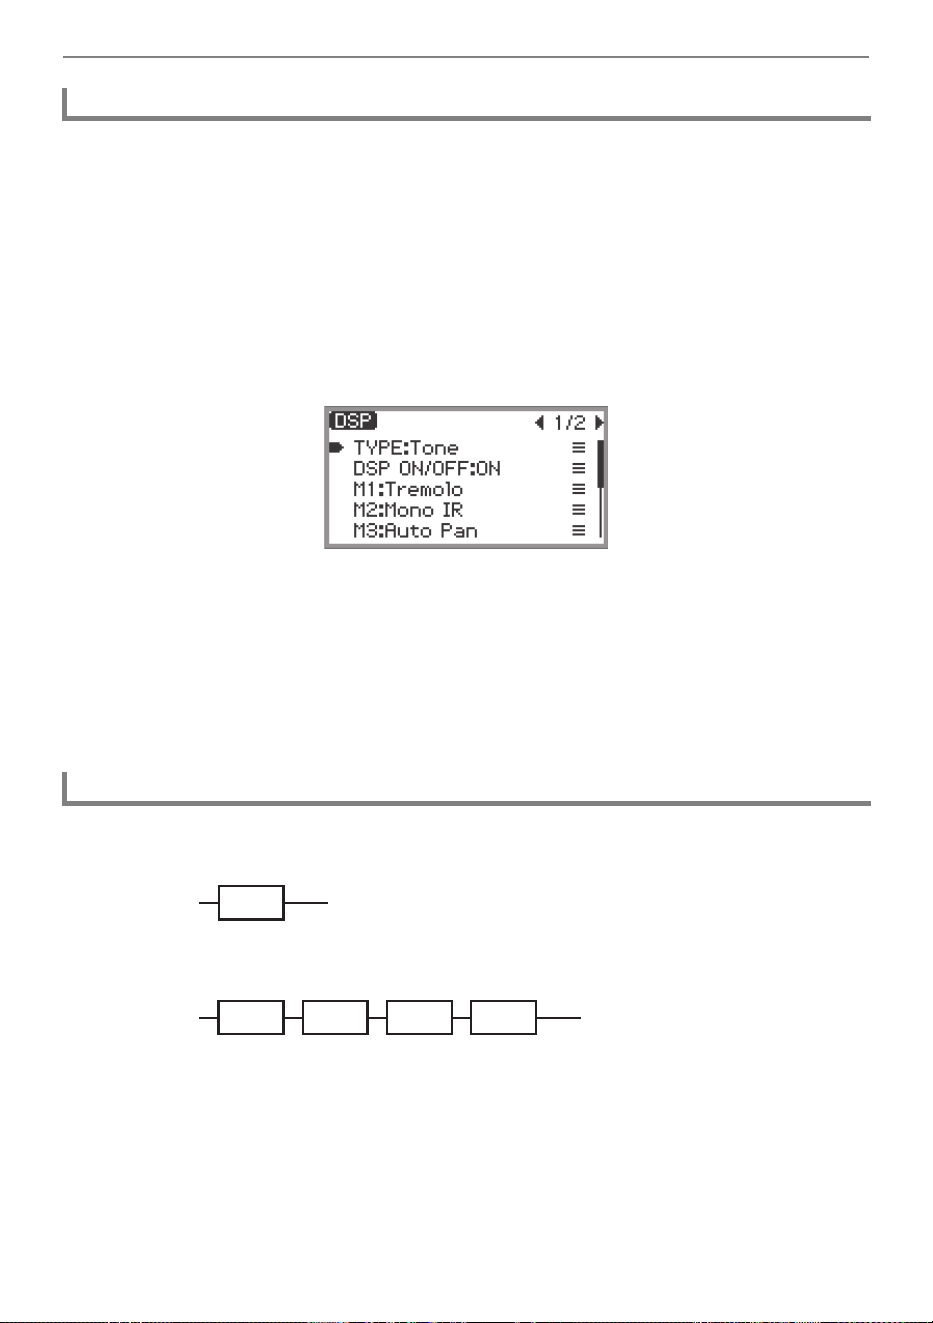
Applying Effects
EN-53
To quickly switch the DSP effect type applied to a tone, select one of the “Preset DSPs” (DSP type
numbers 001 to 100) using the following operation:
1.
Perform the operation described in “Selecting a Single Tone” (page EN-41)
operation to select a tone.
2.
Select the “10 Effect” F button set. See “To change the F Button Set” (page
EN-32).
3.
Touch and hold the F4 button (DSP).
The “DSP” screen appears.
4.
Touch the ENTER button to display the “DSP TYPE” screen.
5.
Use the touch ring to select the type of DSP you want.
• “000 Tone” is the default DSP type for each tone.
• “001 Mono 1BandEQ” and after are “Preset DSPs” with their own names, such as equalizer or
compressor. See “Preset DSP List” (page EN-184) for details on the name and configuration of
each preset DSP.
The DSP of this Digital Piano consists of up to four modules (M1–M4) as shown in the figures below.
• In the case of a single module:
• In the case of four modules:
• Each module can contain various effects (equalizer, tremolo, compressor, etc.).
• Each DSP type has a specific module configuration (number of modules and effects inside). For
more information, see “Preset DSP List” (page EN-184).
When changing the DSP settings, adjust the parameters of the effects contained in each module.
Selecting a DSP Type
Configuring DSP Settings
M1
OutputSound Source
M1 M2 M3 M4
OutputSound Source
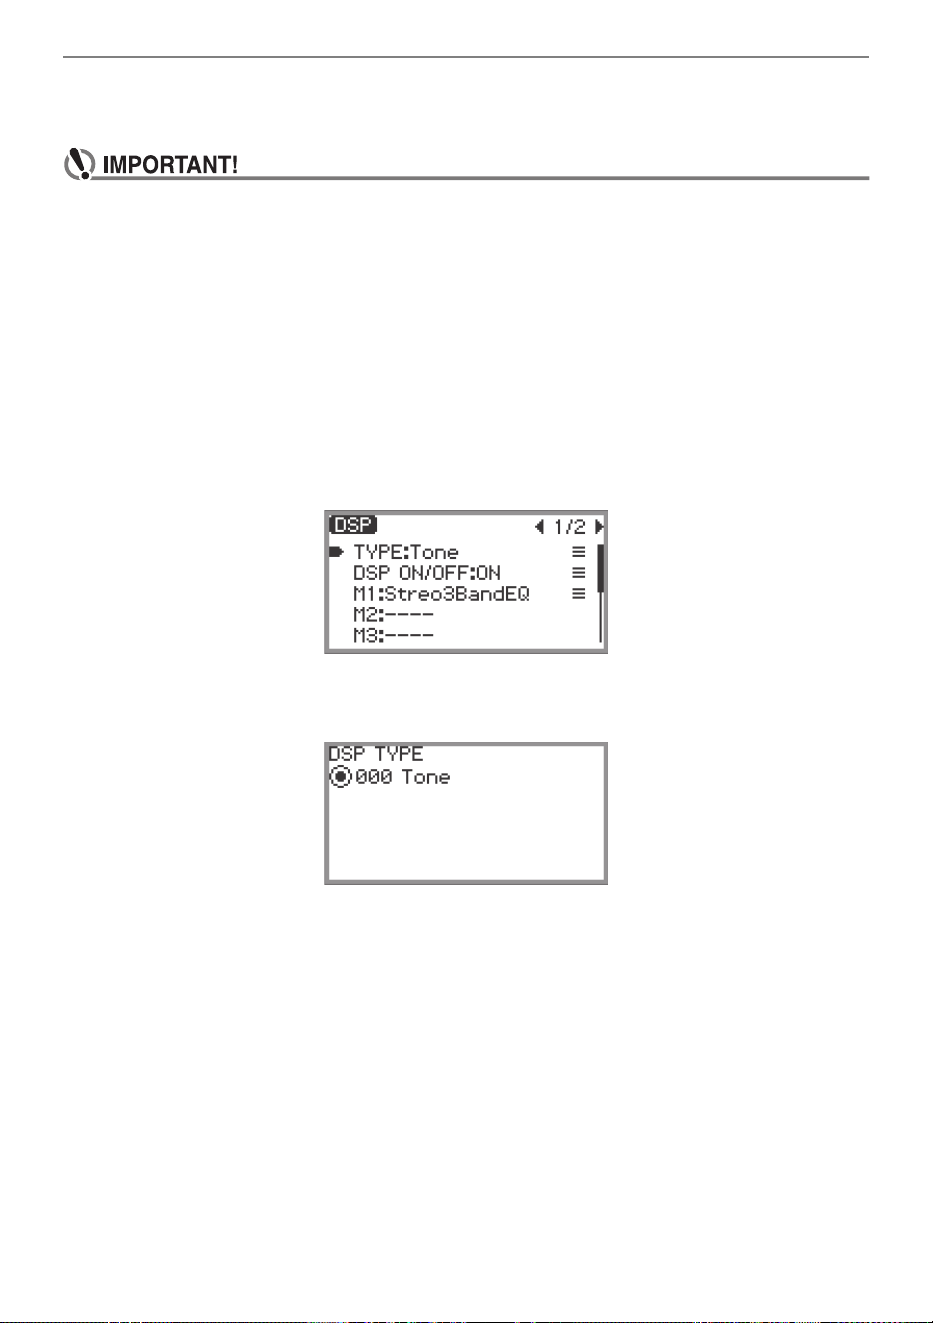
Applying Effects
EN-54
■ To change DSP settings
Use the “DSP” screen to change DSP settings.
• Note that any changes you make to DSP settings are cleared whenever you change the tone
or turn off Digital Piano power. If you want to retain DSP changes you make, use the
registration function (page EN-86) to save the setup so you can recall it later.
1.
Perform the operation described in “Selecting a Single Tone” (page EN-41)
operation to select a tone.
• If you want to change the default DSP of a DSP tone (page EN-52), select the DSP tone here.
2.
Select the “10 Effect” F button set. See “To change the F Button Set” (page
EN-32).
3.
Touch and hold the F4 button (DSP).
The “DSP” screen appears.
4.
Touch the ENTER button to display the “DSP TYPE” screen.
5.
Use the touch ring to select the type of DSP for which you want to change the
settings.
• If you want to change the default DSP settings of the tone you selected in step 1, select “000
Tone”.
• If you want to change settings of a preset DSP that is applied to the tone you selected in step 1,
select one from “001 Mono 1BandEQ” to “100 Stereo IR+EQ”.
• After making your selection, touch the EXIT button to return to the “DSP” screen.
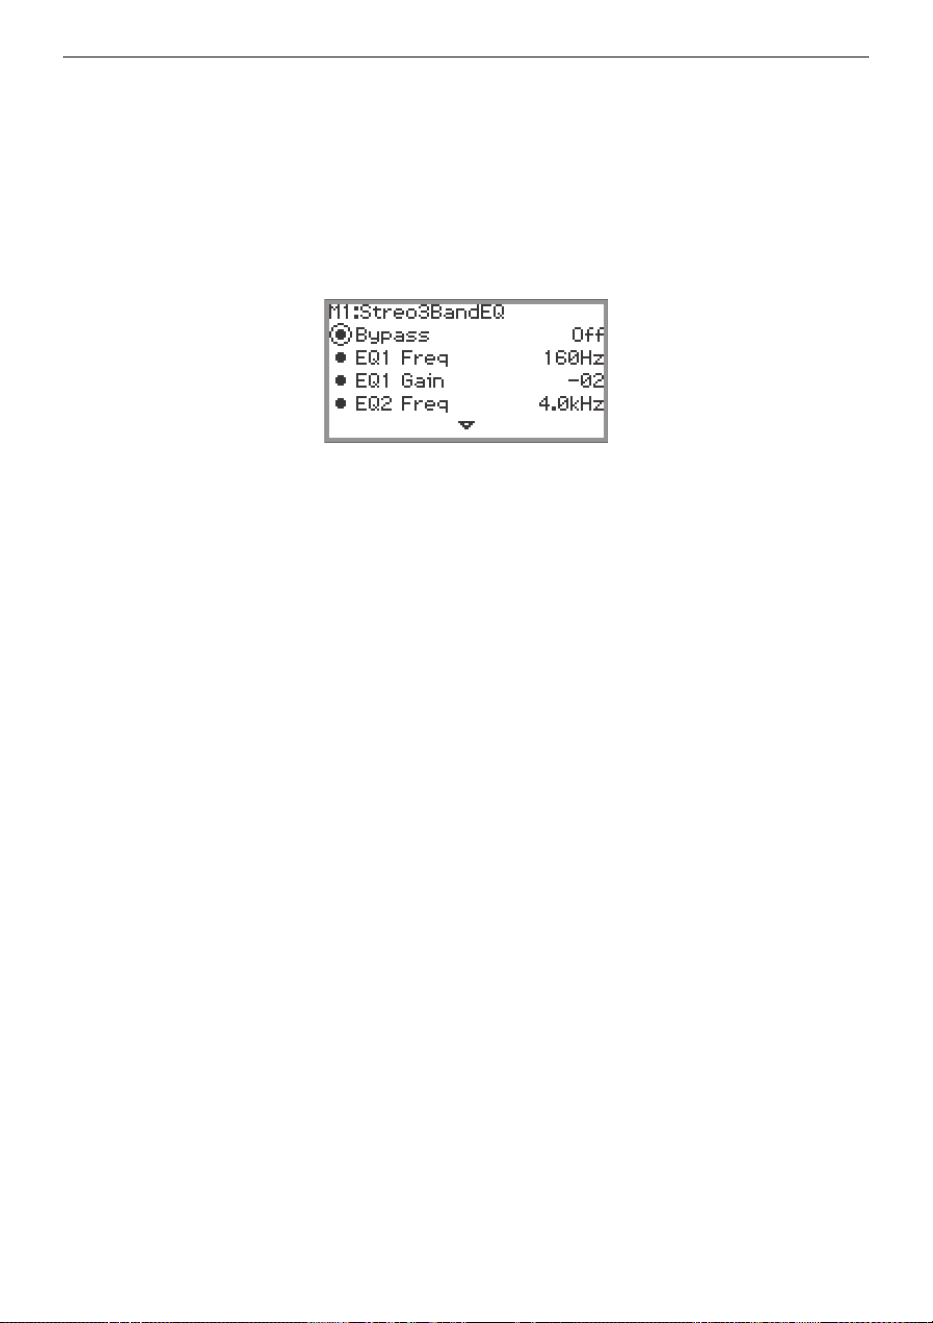
Applying Effects
EN-55
6.
If DSP ON/OFF:OFF is displayed, switch it to ON by the following operation.
(1) Use the touch ring to select “DSP ON/OFF:OFF” and touch the ENTER button.
(2) Use the touch ring to set the value to “On”.
(3) Touch the EXIT button to return to the “DSP” screen.
7.
Use the touch ring to select the module (from “M1” to “M4”) whose settings you
want to change, and touch the ENTER button.
A list of parameters for the effect in the selected module is displayed.
• “Bypass” is common to all modules. Set to “On” if you do not want to use the effect in the
currently displayed module. For more information, see “About Bypass” (page EN-56).
8.
Change the parameter settings.
(1) Touch the top or bottom of the touch ring to select the parameter you want to change.
(2) Use the touch ring to change the value of the selected parameter.
For parameters and values, see “Parameter List of DSP Module Effects” (page EN-189).
(3) Repeat steps (1) and (2) as many times as necessary.
(4) Touch the EXIT button to return to the “DSP” screen.
9.
If necessary, adjust other parameters in the other modules in the same way
following steps 7 to 8.
10.
When all necessary settings have been made, touch and hold the EXIT button to
return to the top screen.
11.
If you want to save the modified settings, follow the operation described in
“Saving a Setup Registration” (page EN-87) to save the registration.
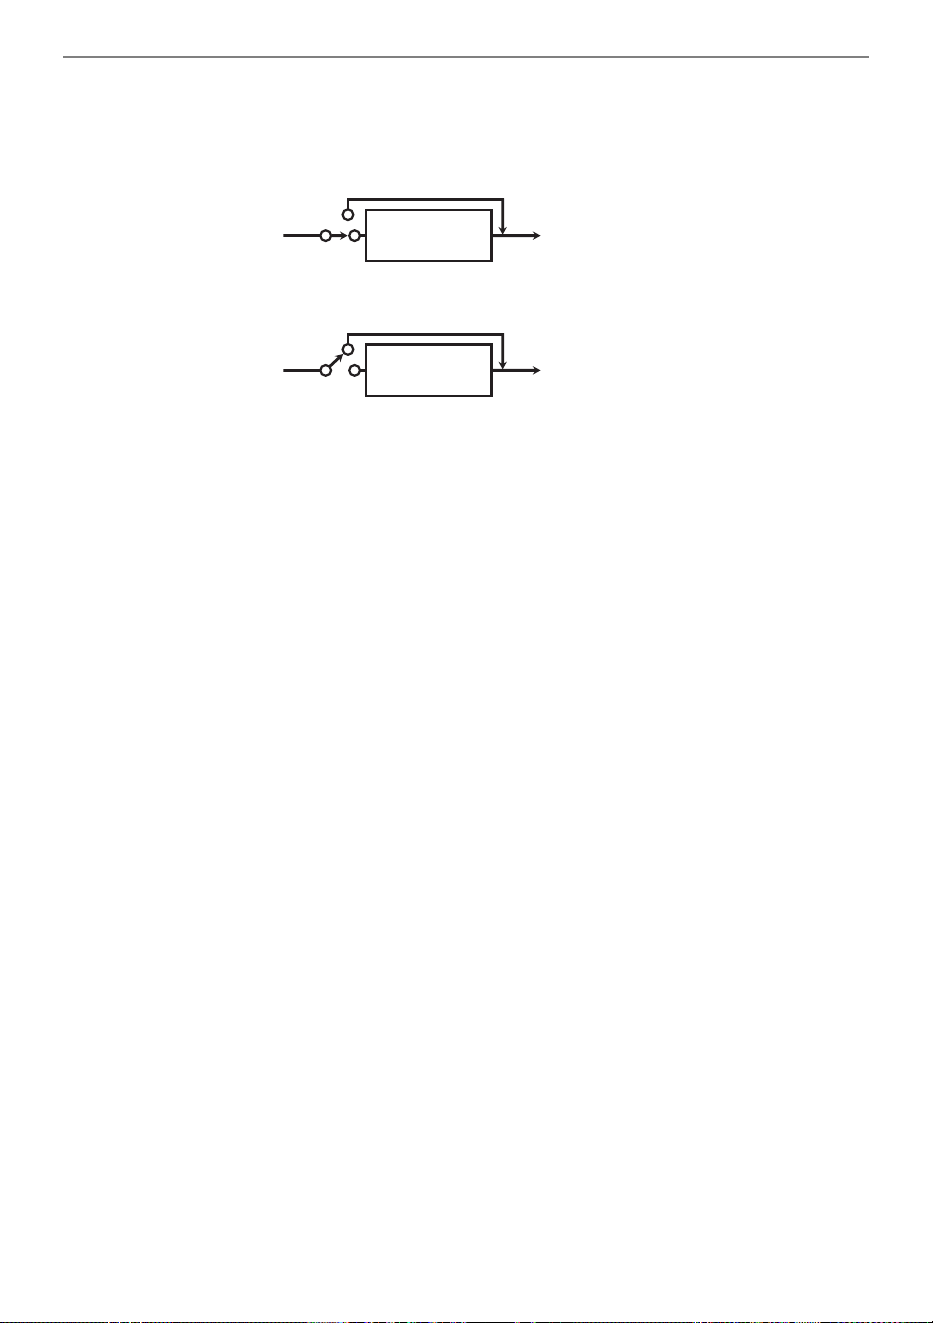
Applying Effects
EN-56
■ About Bypass
All modules contain a “Bypass” parameter. When set to “Off” (default), the effects in that module are
enabled. When set to “On”, the module is “bypassed” from the line connecting the sound source to the
output, disabling the effects in the module.
If there is a module with unnecessary effects in a DSP consisting of multiple modules, set “Bypass” to
“On” for that module.
Module
Bypass: Off
Module
Bypass: On
Output
Output
Sound Source
Sound Source
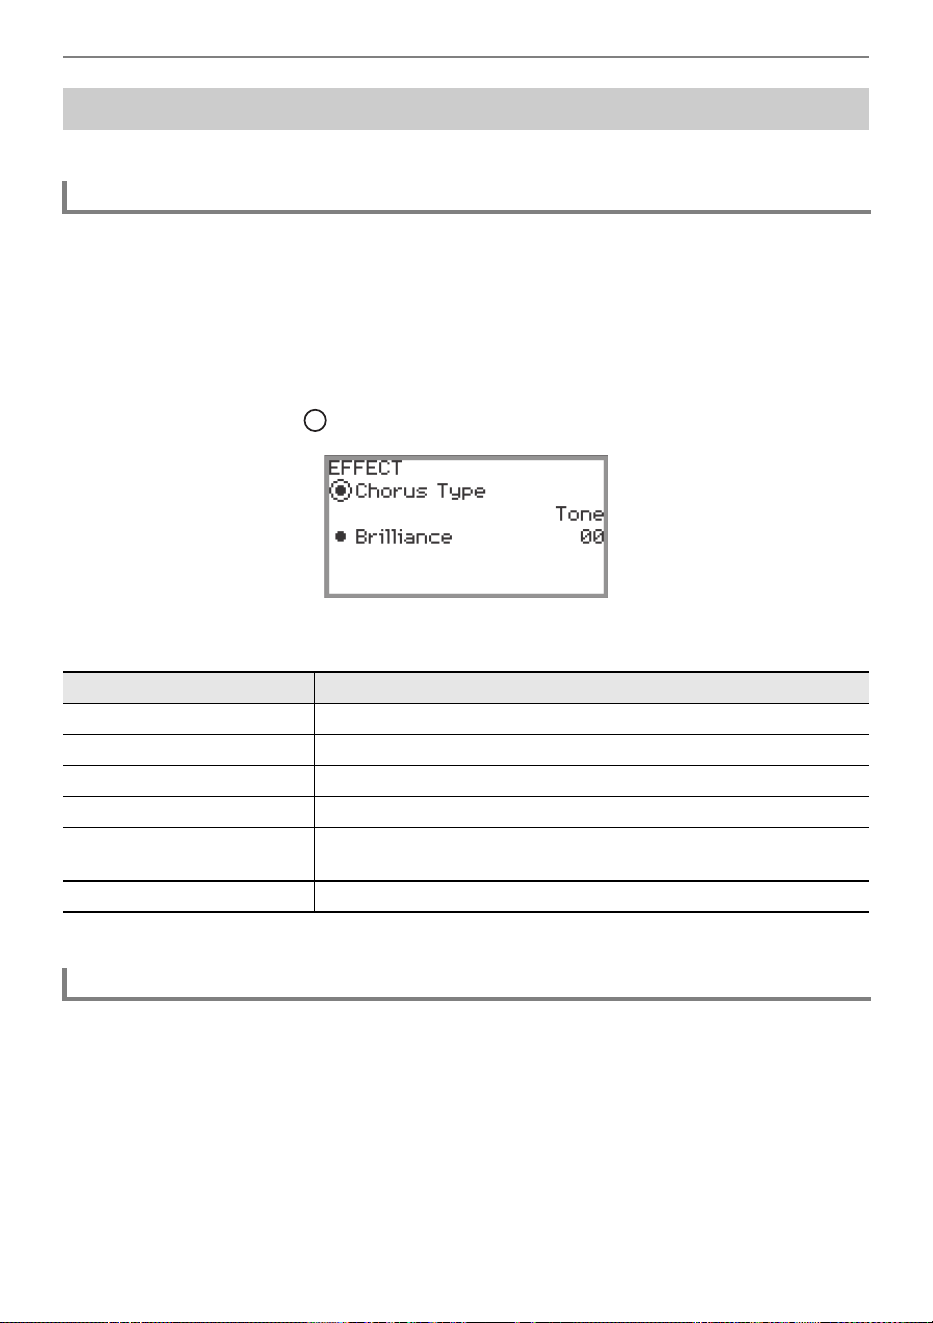
Applying Effects
EN-57
The chorus effect thickens the sound.
This Digital Piano has a preset chorus effect assigned to each tone, but you can select a different type
by following the operation below.
1.
Select the “09 Favorite Piano” of the F button set. See “To change the F Button
Set” (page EN-32).
2.
Touch the F2 button (EFECT).
The “EFFECT” screen appears.
• Check that the cursor ( ) is on the “Chorus Type”.
3.
Change the value of the “Chorus Type” setting.
• Use the touch ring to change the desired setting value.
The mixer can be used to adjust the chorus applied to each part (Upper 1/Upper 2/Lower) separately.
For more information, see “Using the Mixer” (page EN-65).
Using Chorus (Chorus, Flanger, Short Delay)
Changing the Chorus Type
Setting value Description
Tone The chorus type is automatically set to match the selected tone.
Chorus 1 to 4 Four chorus types with different characteristics.
FB Chorus Chorus with feedback.
Deep Chorus Chorus with the deepest, thickest sound.
Flanger 1 to 4
Four types of flanger with different sound undulations and
fluctuations.
Short Delay 1, 2 Short delay. There are two types to choose from.
Adjusting the Depth of the Chorus Effect
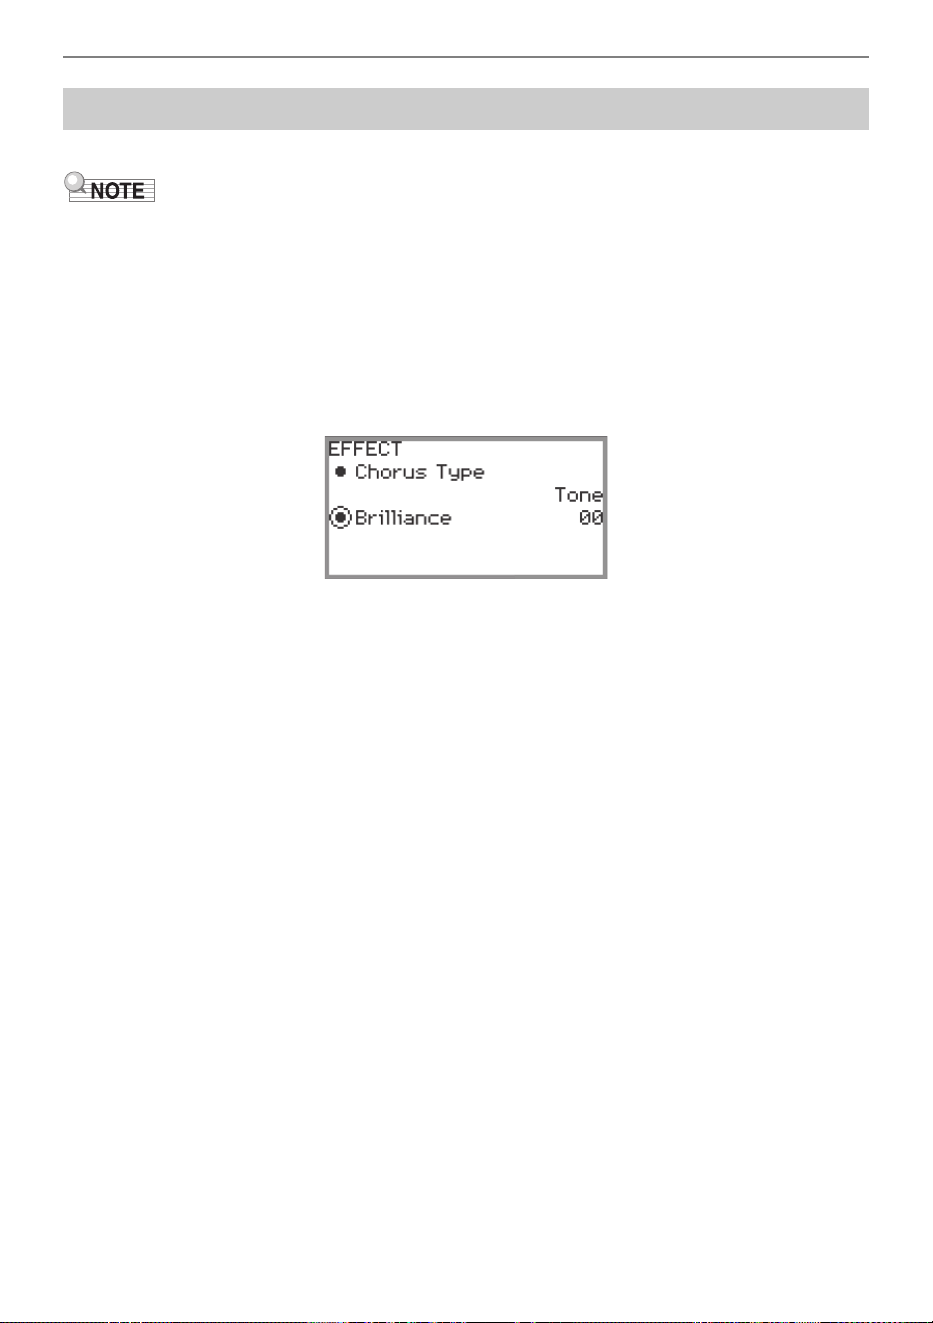
Applying Effects
EN-58
Brilliance is an effect that adjusts the brightness of a sound.
• The brilliance effect is applied to the entire sound output from the Digital Piano.
1.
Select the “09 Favorite Piano” of the F button set. See “To change the F Button
Set” (page EN-32).
2.
Touch the F2 button (EFECT).
The “EFFECT” screen appears.
3.
Touch the top or bottom of the touch ring to select “Brilliance”.
4.
Change the “Brilliance” setting.
• Use the touch ring to change the desired setting.
• You can adjust the setting between –12 and +12. When +1 or higher, the sound is brighter;
when –1 or lower, the sound is darker.
Adjusting Brilliance
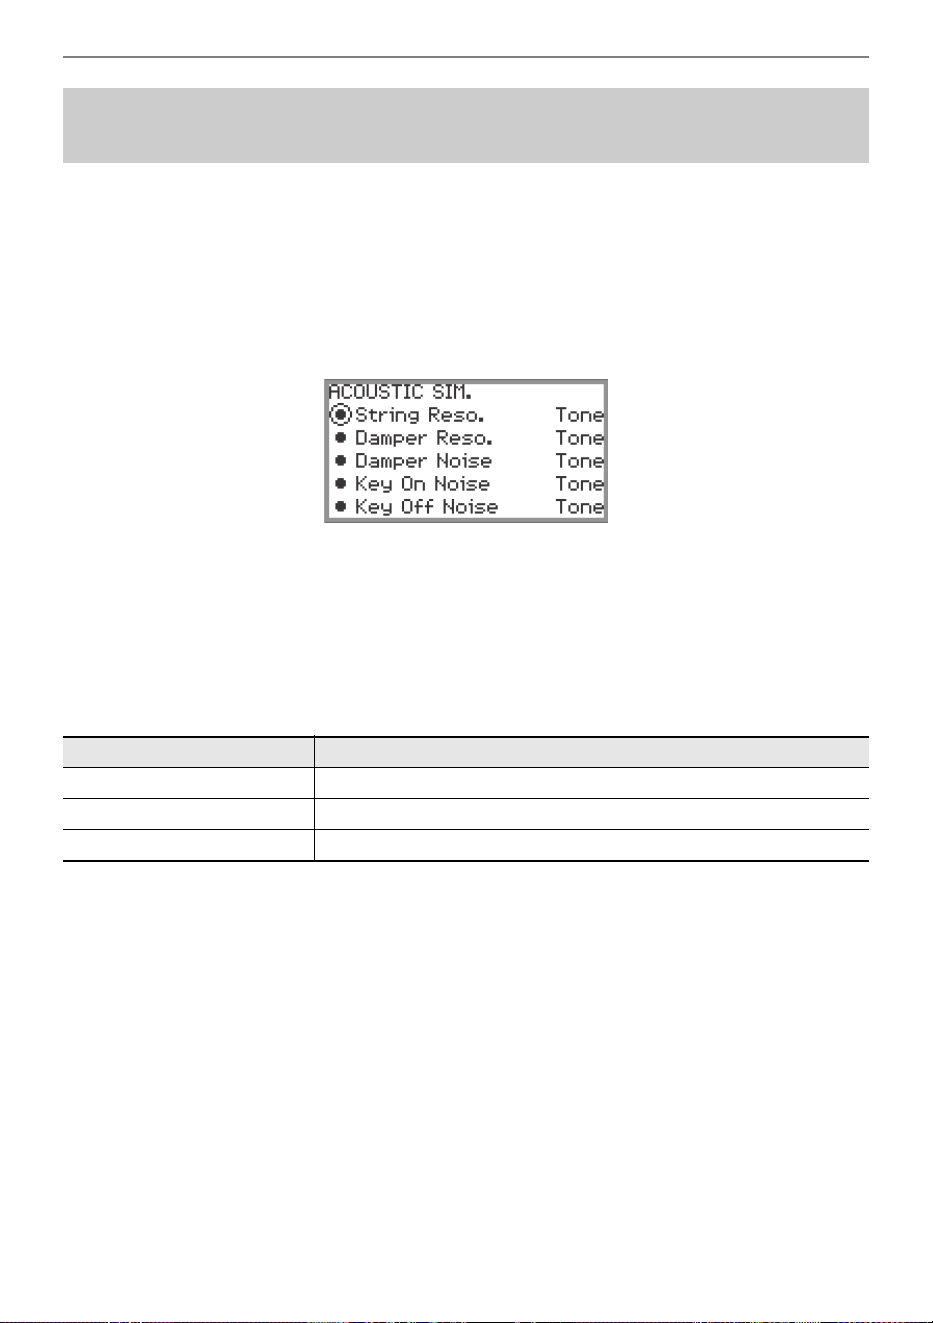
Applying Effects
EN-59
The piano tones of this Digital Piano include elements characteristic of the sound of an acoustic piano.
Follow the procedure below to adjust them.
1.
Select the “09 Favorite Piano” of the F button set. See “To change the F Button
Set” (page EN-32).
2.
Touch the F1 button (ACSIM).
The “ACOUSTIC SIM.” screen will appear.
3.
Touch the top or bottom of the touch ring to select the item whose settings you
want to change.
• For more information on each setting item, see “List of Acoustic Piano Sound Setting Items”
(page EN-60).
4.
Changes the setting value of the selected item.
• The setting value of each item can be changed within the following range.
• Trace the touch ring to change the desired setting value.
5.
Repeat steps 3 and 4 as necessary.
Adjusting Acoustic Piano Sound Characteristics
(Acoustic Simulator)
Setting value Description
Tone A value appropriate for the selected tone is automatically set.
Off Turn off the effect.
1 to 10 The higher the number, the stronger the effect.

Applying Effects
EN-60
List of Acoustic Piano Sound Setting Items
Setting Items Description
String Reso.
String Resonance. Playing on an acoustic piano causes the strings
that are harmonics of the played strings to resonate. You can use this
setting item to adjust the level of resonance.
Damper Reso.
Damper Resonance. Pressing the damper pedal on an acoustic
piano opens all the strings of 88 keys, causing all of the strings that
are harmonics of the keys that are played to resonate. You can use
this setting item to adjust the level of resonance.
Damper Noise
Damper Noise. Damper noise is a slight metallic ringing sound that is
generated as the damper of an acoustic piano separates from the
strings when the damper pedal is pressed. You can use this setting
item to adjust the volume level of the noise.
Key On Noise
Key On Action Noise. When the keys of an acoustic piano are tapped
with extremely light pressure, piano mechanism operation sound
(noise) is produced without the hammers reaching the strings. You
can use this setting item to adjust the volume level of the noise.
Key Off Noise
Key Off Action Noise. Releasing the keyboard keys of acoustic piano
generates piano mechanism operation sound (noise). You can use
this setting item to adjust the volume level of the noise.
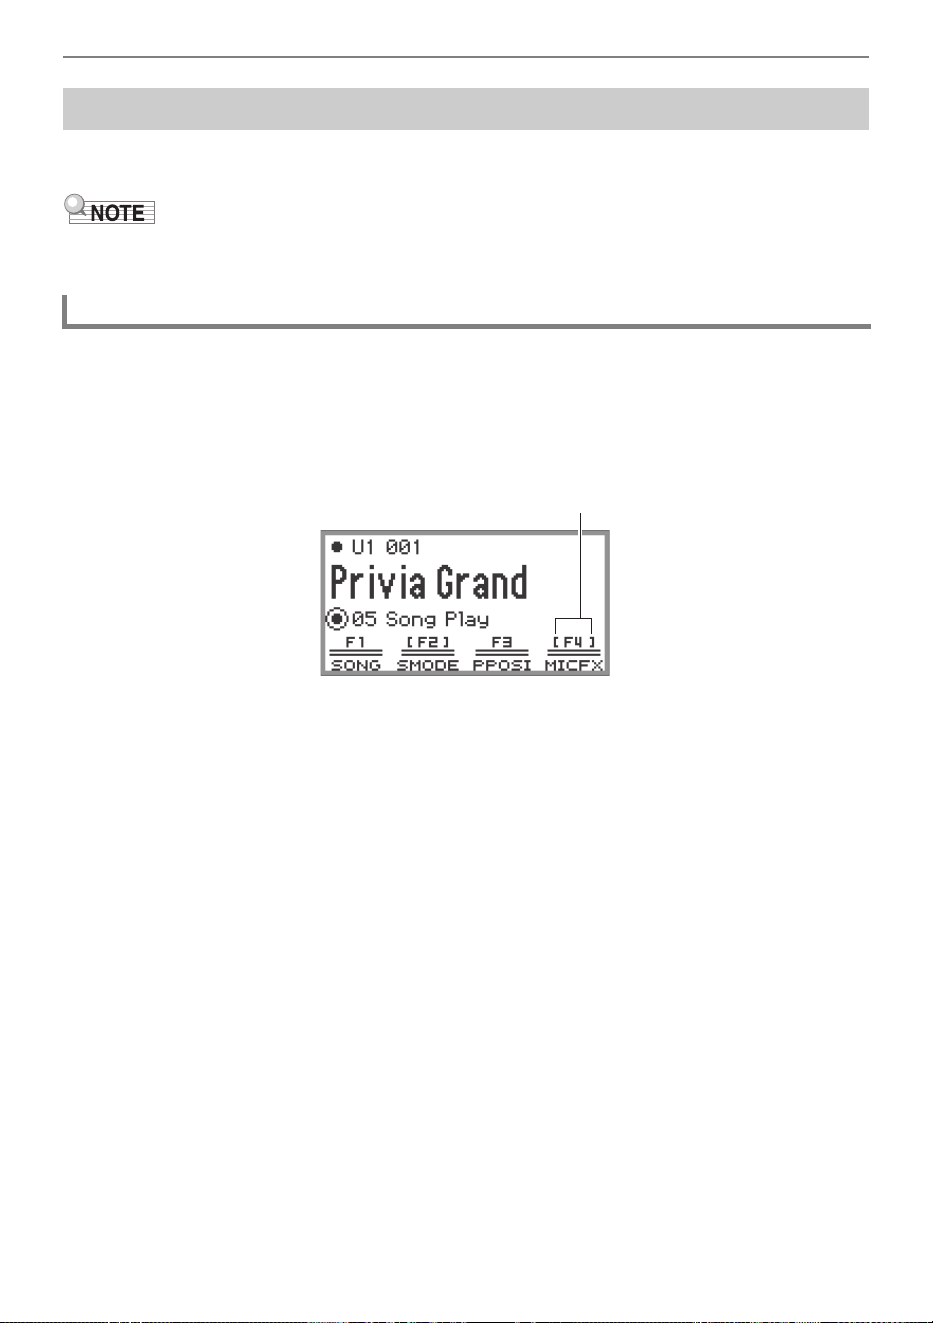
Applying Effects
EN-61
Various effects can be applied to the audio from a microphone connected to the MIC IN jack. In
addition to the 25 preset types, you can change the effect settings to your liking.
• You can also adjust settings for the volume, stereo pan, and Hall Simulator/Reverb applied to audio
input from the MIC IN jack. For more information, see “Using the Mixer” (page EN-65).
1.
Select the “05 Song Play” of the F button set. See “To change the F Button Set”
(page EN-32).
2.
Touch the F4 button (MICFX).
The microphone effect is enabled and the F button menu F4 appears enclosed in brackets [ ].
3.
To disable the microphone effect, touch the F4 button (MICFX). The enclosing
brackets [ ] disappear.
Using Microphone Effects
Enabling or Disabling the Microphone Effect
Displayed when the microphone effect is enabled
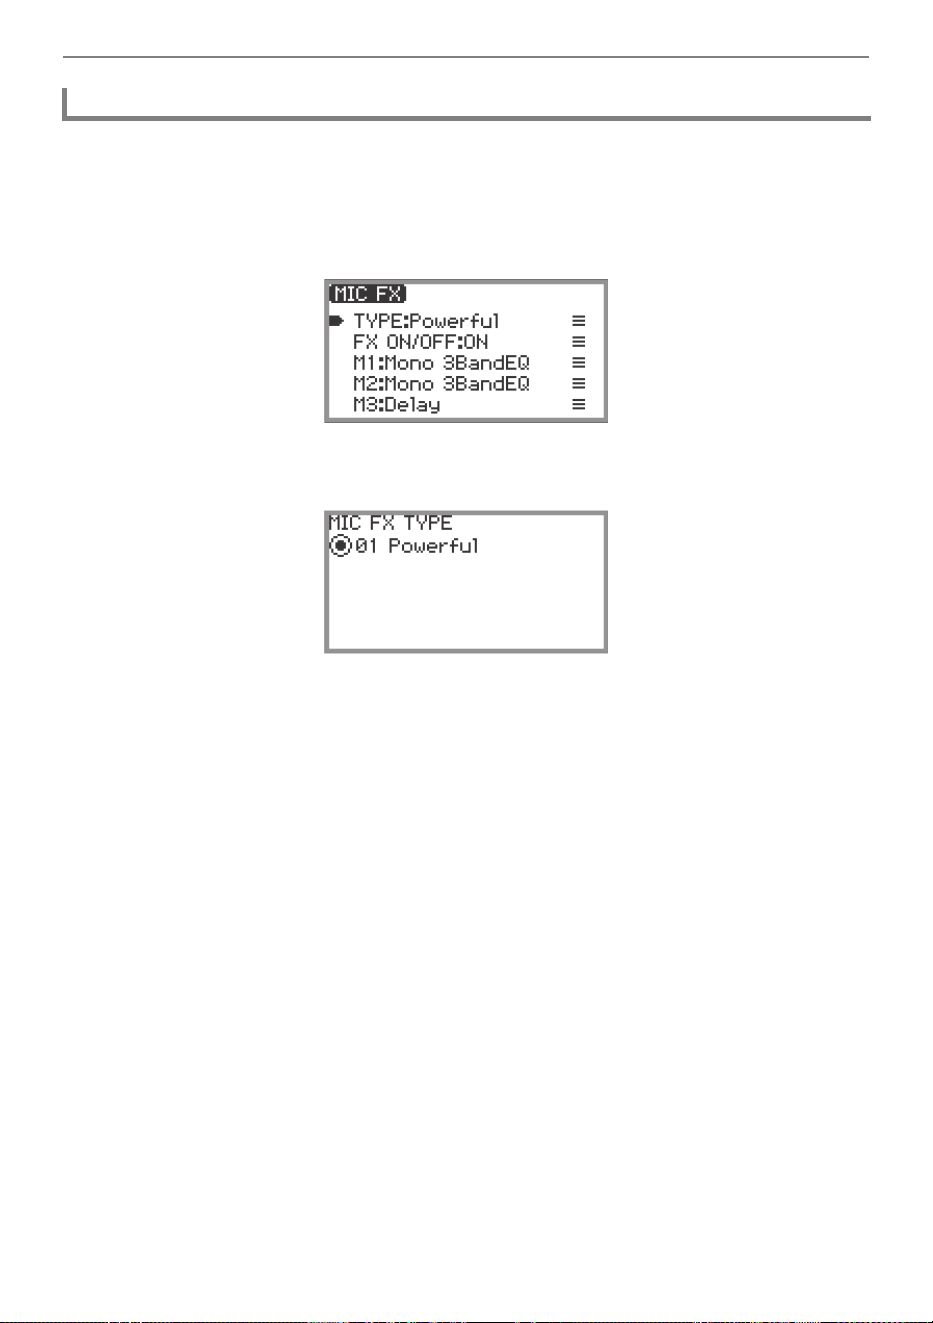
Applying Effects
EN-62
1.
Select the “05 Song Play” of the F button set. See “To change the F Button Set”
(page EN-32).
2.
Touch and hold the F4 button (MICFX).
The “MIC FX” screen appears.
3.
Touch the ENTER button to display the “MIC FX TYPE” screen.
4.
Use the touch ring to select the type of microphone effect.
• There are 25 effect types to choose from. For more information, see “Microphone Effect Type
List” (page EN-226).
Specifying the Microphone Effect Type

Applying Effects
EN-63
The microphone effect is made up of three modules (M1 to M3) as shown in the figure below.
• Each module contains different effects (equalizer, delay, limiter, etc.).
• Each type of microphone effect has a specific set of effects in each module. For more information,
see “Microphone Effect Type List” (page EN-226).
To change microphone effect settings, adjust the parameters of the effect inside each module.
• Settings changed by the following operations will be erased when the Digital Piano is turned
off. If you want to save the modified settings, use the registration function (page EN-86) to
save them.
1.
Select the “05 Song Play” of the F button set. See “To change the F Button Set”
(page EN-32).
2.
Touch and hold the F4 button (MICFX).
The “MIC FX” screen appears.
3.
Touch the ENTER button to display the “MIC FX TYPE” screen.
4.
Use the touch ring to select the type of microphone effect for which you want to
change the settings.
• After making your selection, touch the EXIT button to return to the “MIC FX” screen.
5.
If “FX ON/OFF:OFF” is displayed, switch it to ON by the following operation.
(1) Use the touch ring to select “FX ON/OFF:OFF” and touch the ENTER button.
(2) Use the touch ring to set the value to “On”.
(3) Touch the EXIT button to return to the “MIC FX” screen.
Changing Microphone Effect Settings
M1 M2 M3
Output Sound Source
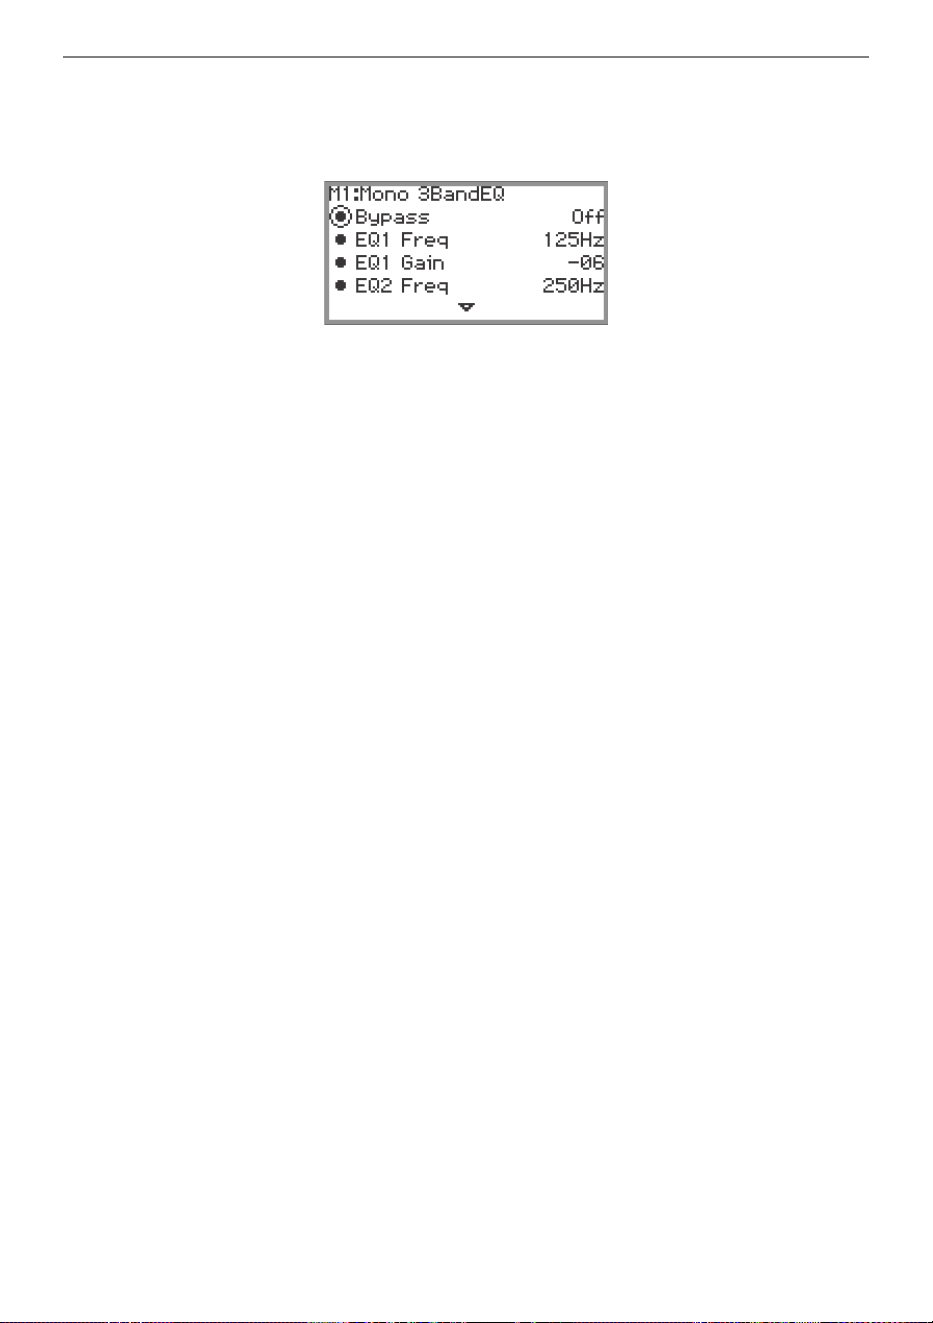
Applying Effects
EN-64
6.
Use the touch ring to select the module (from “M1” to “M3”) whose settings you
want to change, and touch the ENTER button.
A list of parameters for the effect in the selected module is displayed.
• “Bypass” is common to all modules. Set to “On” if you do not want to use the effect in the
currently displayed module.
7.
Change the parameter settings.
(1) Touch the top or bottom of the touch ring to select the parameter you want to change.
(2) Use the touch ring to change the value of the selected parameter.
For parameters and values, see “Parameter List of Module Effects” (page EN-228).
(3) Repeat steps (1) and (2) as many times as necessary.
(4) Touch the EXIT button to return to the “MIC FX” screen.
8.
If necessary, adjust other parameters in the other modules in the same way
following steps 6 to 7.
9.
When all necessary settings have been made, touch and hold the EXIT button to
return to the top screen.
10.
If you want to save the modified settings, follow the operation described in
“Saving a Setup Registration” (page EN-87) to save the registration.
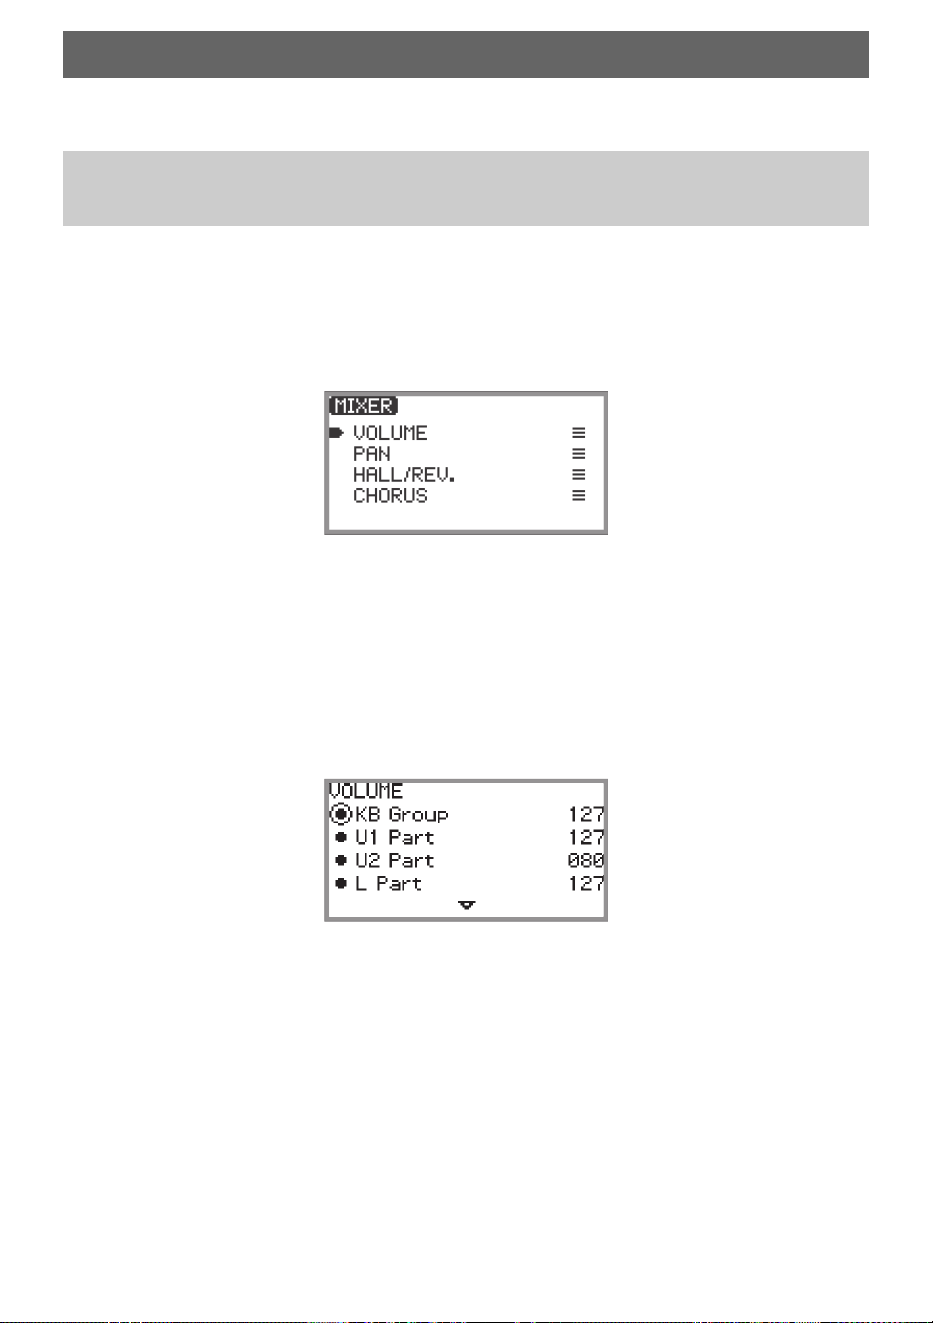
EN-65
The mixer allows you to individually adjust the volume, stereo pan, and effects for each part (Upper 1/
Upper 2/Lower) and audio input from the MIC IN jack.
1.
Select the “04 Listening” of the F button set. See “To change the F Button Set”
(page EN-32).
2.
Touch the F4 button (MIXER).
The “MIXER” screen appears. This screen contains four parameter categories.
VOLUME: Adjust volume
PAN: Adjust stereo pan (pan)
HALL/REV.: Adjust the depth of the Hall Simulator/Reverb effect
CHORUS: Adjust the depth of the chorus effect
3.
Use the touch ring to select the parameter category you want to adjust then
touch the ENTER button.
• For example, if you select “VOLUME” and touch the ENTER button, the following screen will
appear.
4.
Touch the top or bottom of the touch ring to select the item whose value you
want to change.
5.
Change the value of the selected item.
• Trace the touch ring to change the value.
• For more information on items and values, see “List of Mixer Setting Items” (page EN-66).
6.
When done, touch the EXIT button to return to the “MIXER” screen.
7.
Repeat steps 3 to 6 as necessary.
Using the Mixer
Adjusting the Volume Level, Stereo Pan and Effects for
Each Part
Using the Mixer
EN-66
List of Mixer Setting Items
Parameter
Category
Setting items Description Range of values
VOLUME
KB Group
Adjusts the overall volume of the Upper 1,
Upper 2, and Lower parts while maintaining
their relative volumes.
000 to 127
U1 Part
U2 Part
L Part
Adjusts the individual volume of the Upper 1,
Upper 2, and Lower parts.
Audio Song
Adjusts the volume of audio data played in
SONG mode (page EN-106).
Wireless Audio
Adjusts the volume of input audio from
wirelessly connected external devices.
Mic In
Adjusts the volume of the input audio from
the MIC IN jack.
MIDI Song
Adjusts the volume of MIDI data played in
SONG mode (page EN-106).
PAN
U1 Part
U2 Part
L Part
Adjusts the stereo pan of the Upper 1,
Upper 2, and Lower parts.
–64 to 00 to +63
–64: Left-most
00: Central
+63: Right-most
Mic In
Adjusts the stereo pan of input audio from
the MIC IN jack.
HALL/REV.
Hall/Rev. Return
Adjusts the overall depth (Return value)
while maintaining the balance of the
currently set Hall Simulator/Reverb depth
(Send value) for each part of the following
items (U1 Part Send - Mic In Send).
000 to 127
U1 Part Send
U2 Part Send
L Part Send
Adjusts the Send value to the Hall Simulator/
Reverb for the Upper 1, Upper 2, and Lower
parts.
AudioSongSend
Adjusts the Send value to the Hall Simulator/
Reverb for audio data played in SONG mode
(page EN-106).
Wireless A Send
Adjusts the Send value of input audio from a
wirelessly connected external device to the
Hall Simulator/Reverb.
Mic In Send
Adjusts the Send value of the input audio
from the MIC IN jack to the Hall Simulator/
Reverb.
CHORUS
U1 Part Send
U2 Part Send
L Part Send
Adjusts the Send value to the chorus for the
Upper 1, Upper 2, and Lower parts.
000 to 127
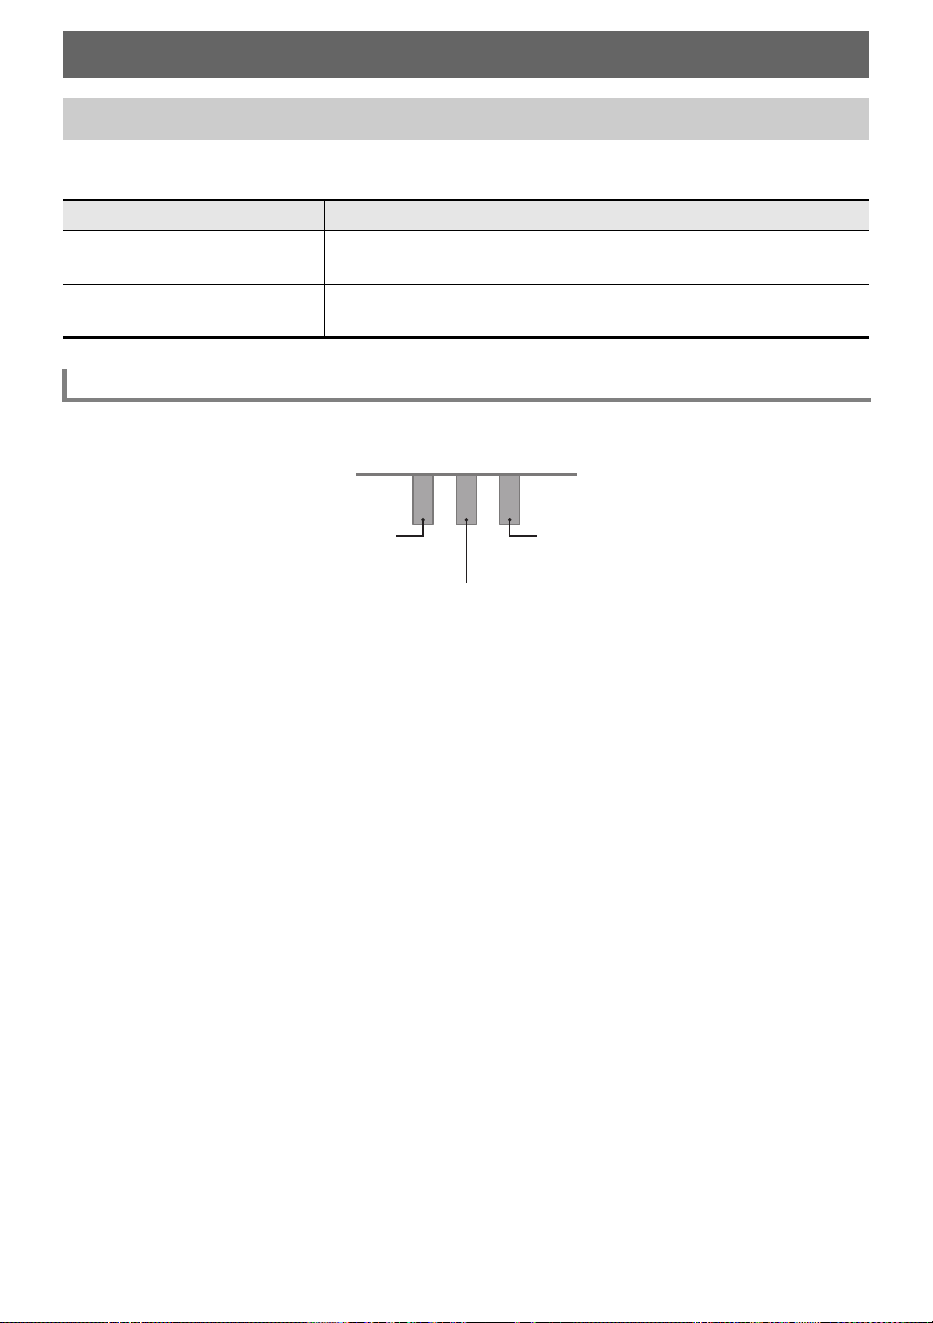
EN-67
This Digital Piano is equipped with two jacks for pedal connections. Pedals can be connected to both
jacks and used at the same time.
Use the PEDAL UNIT jack to connect a separately available pedal unit. You can then use the pedals
for expression that is similar to that available on an acoustic piano.
Damper Pedal
Pressing the damper pedal while playing will cause the notes you play to be sustained.
• When Grand Piano is selected as the tone, using this pedal generates harmonic and other
resonance, just like the damper pedal on an acoustic grand piano. The strength of the pedal’s effect
varies continuously with the depth to which you depress the pedal.
Soft Pedal
Pressing this pedal while playing suppresses notes played on the keyboard after the pedal was
pressed, and makes them sound softer.
Sostenuto Pedal
Only the notes of the keys that are depressed when this pedal is pressed are sustained, even if the
keyboard keys are released, until the pedal is released.
Changing the Sound During a Performance
Using Pedals
Jack Connectable Pedal
PEDAL UNIT
Separately available pedal unit
(three pedals: damper, soft, and sostenuto)
EXPRESSION/ASSIGNABLE
Commercially available expression pedal, the included sustain pedal
(SP-3), separately available sustain pedal
PEDAL UNIT jack
Soft Pedal
Damper Pedal
Sostenuto Pedal

Changing the Sound During a Performance
EN-68
Use the EXPRESSION/ASSIGNABLE jack to connect the included sustain pedal (SP-3), a
commercially available expression pedal or a separately available sustain pedal.
■ Connectable Expression Pedals
• Maximum resistance value: 10kΩ±20% to 50kΩ±20%
• Use of a pedal whose operation has been confirmed (see below) is recommended.
Operation Confirmed Pedals (Polarity Type 2
*
)
Roland EV-5 (Set minimum volume to 0.)
KURZWEIL CC-1
FATAR VP-25, VP-26
* Use the procedure under “To specify the pedal type” (page EN-68) to select “Exp.Type2”.
■ To specify the pedal type
1.
Select the “13 KB Setting” of the F button set. See “To change the F Button Set”
(page EN-32).
2.
Touch the F3 button (PEDAL).
The “EXP/ASGN. PEDAL” screen appears.
• Confirm that the cursor ( ) is on “Pedal Type”.
3.
Use the touch ring to change the desired setting.
• The polarity of expression pedals varies by manufacturer. When connecting an expression
pedal, select “Exp.Type1” or “Exp.Type2” according to the polarity of the pedal.
EXPRESSION/ASSIGNABLE jack
Setting value Description
Exp.Type1
Polarity Type 1 (see the illustration below) expression pedal
Exp.Type2
Polarity Type 2 (see the illustration below) expression pedal
SW
The included sustain pedal (SP-3) or a separately available sustain
pedal
Changing the Sound During a Performance
EN-69
■ To specify the pedal function
Display the “EXP/ASGN. PEDAL” screen by performing the procedure under “To specify the pedal
type” (page EN-68) and change the value of the “Pedal Target” setting. The following setting values are
for the expression pedal only: “Expression”, “Master Vol”, “Tempo”, and “LY Balance”.
• The “EXP/ASGN. PEDAL” screen can also be displayed by touching and holding the FUNCTION
button and depressing a pedal connected to the EXPRESSION/ASSIGNABLE jack (if the
connected pedal matches the currently selected pedal type).
Setting value Description
Expression Controls Expression (MIDI Control Change 11).
Master Vol Controls overall Digital Piano volume level.
Tempo Controls tempo.
LY Balance Controls Upper 1 part and Upper 2 part volume level balance.
Damper
Sustains notes played while the pedal is depressed, even if the keys
are subsequently released. Organ and other tones that are sustained
as long as keys are depressed continue to sound as long as the
pedal is depressed.
Sostenuto
Sustains only the notes of the keys that are depressed when the
pedal is pressed until the pedal is released, even if the keyboard keys
are released first.
Soft
While the pedal is depressed, slightly lowers the volume of notes
played and also softens them.
Arpeggio Hold
When the Arpeggiator (page EN-84) is enabled, Arpeggio Hold can
be enabled or disabled when the pedal is depressed.
Start/Stop Performs the same operations as the a button.
Seq Recall Inc
Seq Recall Dec
Each press of a pedal scrolls through and selects setups you
registered with the registration function. For more information, see
“Using a Pedal to Cycle Through Multiple Setup Registrations
(Sequential Recall)” (page EN-91).
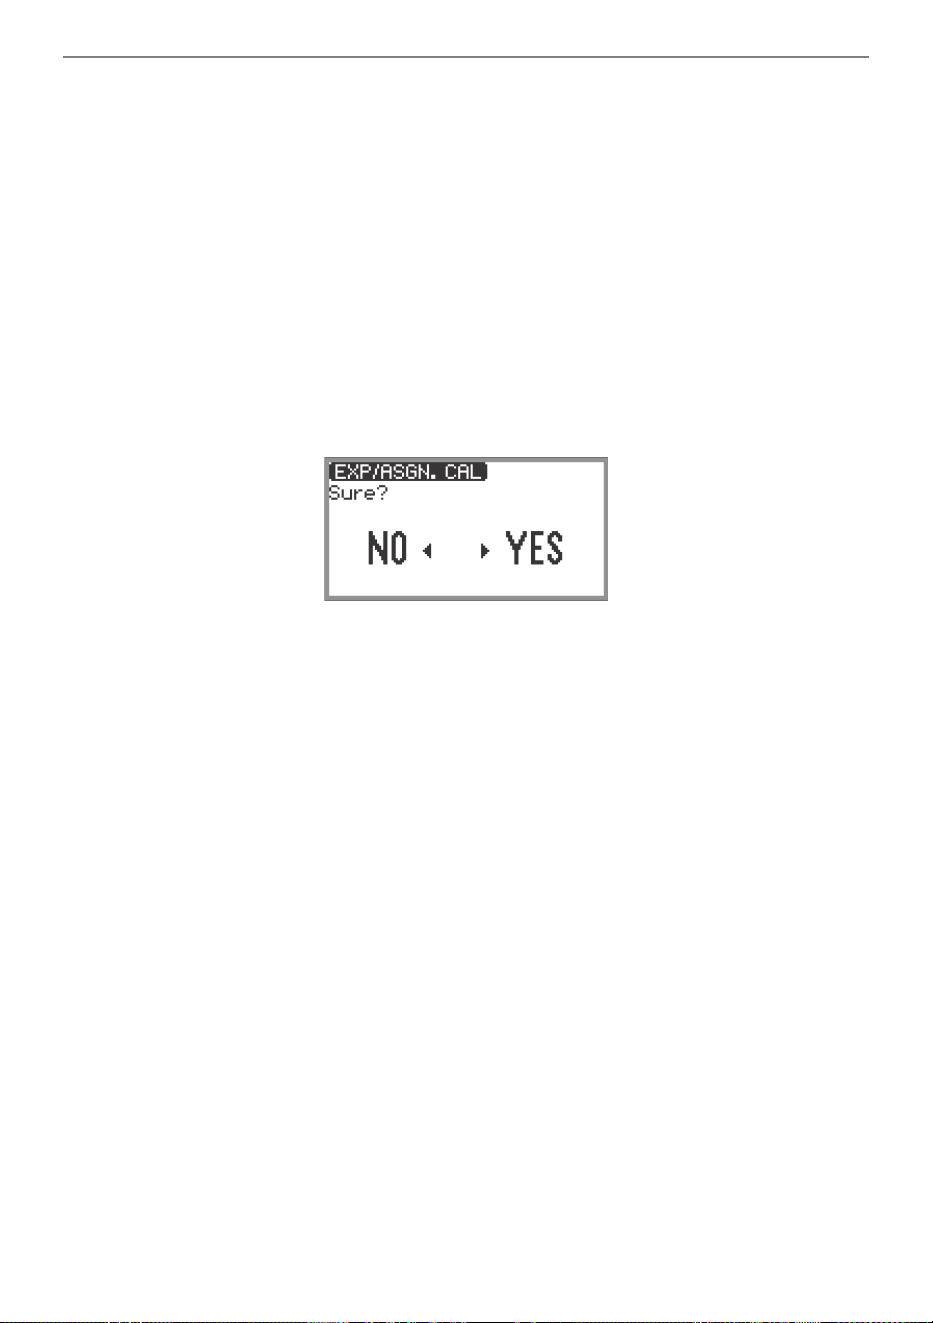
Changing the Sound During a Performance
EN-70
■ Expression Pedal Calibration
When connecting an expression pedal to the EXPRESSION/ASSIGNABLE jack for the first time,
perform calibration (adjustment) as follows.
1.
Connect an expression pedal to the EXPRESSION/ASSIGNABLE jack.
2.
Select the “13 KB Setting” of the F button set. See “To change the F Button Set”
(page EN-32).
3.
Touch the F3 button (PEDAL).
The “EXP/ASGN. PEDAL” screen appears.
4.
Touch the top or bottom of the touch ring to select “Exp Calibration” then touch
the ENTER button.
A confirmation screen will appear. To cancel the operation, touch the left (NO) of the touch ring.
5.
To start calibration, touch the right (YES) of the touch ring.
6.
When “Highest” is displayed, press the toe end of the pedal down as far as it will
go, then touch the ENTER button.
7.
When “Lowest” is displayed, press the heel end of the pedal down as far as it will
go, then touch the ENTER button.
When calibration has successfully completed, “Complete” is displayed.
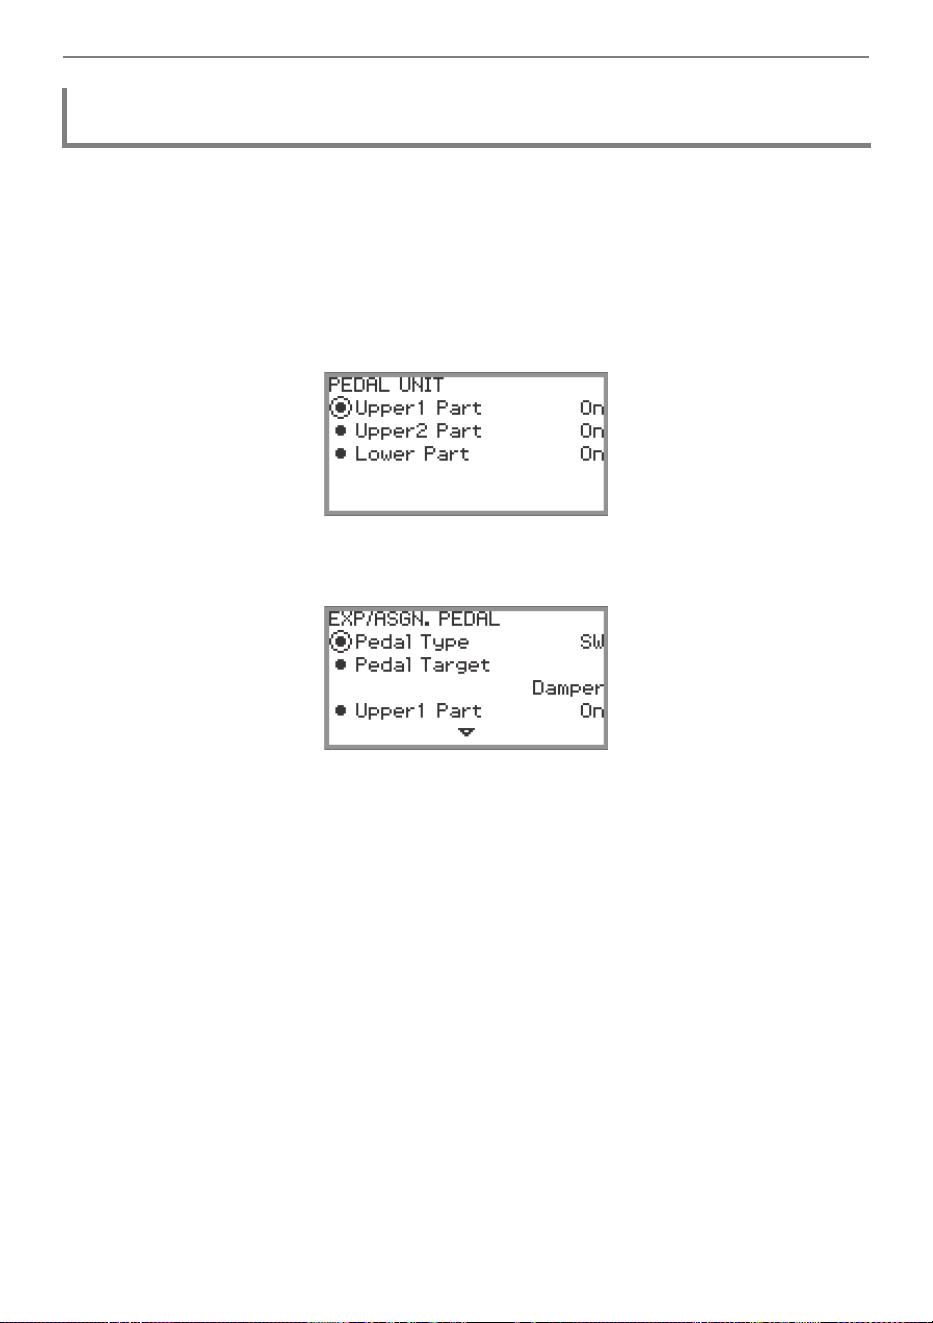
Changing the Sound During a Performance
EN-71
1.
Touch the FUNCTION button to display the FUNCTION menu.
2.
Use the touch ring to select “PEDAL/WHEEL” then touch the ENTER button.
3.
Select from the menu the jack to which the pedal whose settings you want to
change is connected.
• To change the settings of the pedal connected to the PEDAL UNIT jack:
Use the touch ring to select “PEDAL UNIT” then touch the ENTER button.
• To change the settings of the pedal connected to the EXPRESSION/ASSIGNABLE jack:
Use the touch ring to select “EXP/ASGN. PEDAL” then touch the ENTER button.
4.
Touch the top or bottom of the touch ring to select “Upper 1 Part”, “Upper 2
Part”, or “Lower Part”
5.
Use the touch ring to change the desired setting.
• Select “On” to enable pedal operation for the part selected in step 4 or “Off” to disable it.
6.
Repeat steps 4 and 5 as necessary.
Enabling/Disabling the Pedal Operation for Each Part (Upper 1/Upper 2/
Lower)
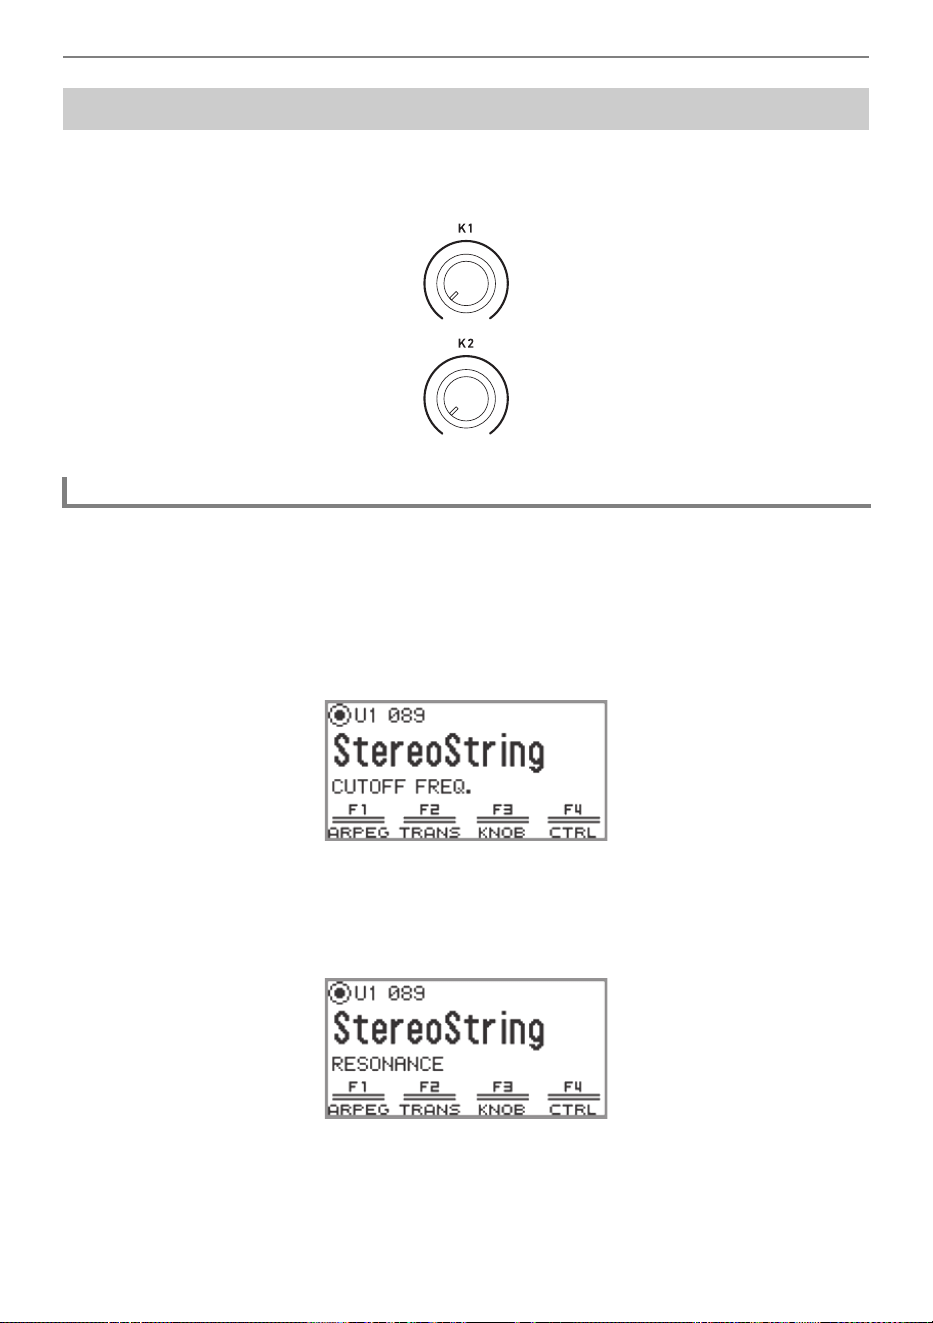
Changing the Sound During a Performance
EN-72
The two knobs are used by assigning different functions to each. Assignable functions include
modifying tones, adjusting effects, or controlling the volume of specific parts. By turning the knobs, the
parameter values of the assigned functions can be changed in real time while playing.
Under initial default settings, the functions that modifies the frequency characteristics of your
performance sound are assigned to each of the knobs as follows: K1 knob: Cutoff Freq., K2 knob:
Resonance. The operation below shows an example of knob usage under initial default settings.
1.
Rotate the K1 knob.
This temporarily displays the function name “CUTOFF FREQ.” that is currently assigned to the K1
knob. The parameter value changes in accordance with the position of the K1 knob.
2.
Rotate the K2 knob.
This temporarily displays the function name “RESONANCE” that is currently assigned to the K2
knob. The parameter value changes in accordance with the position of the K2 knob.
Using the Knobs
Using the Knobs to Change Parameters
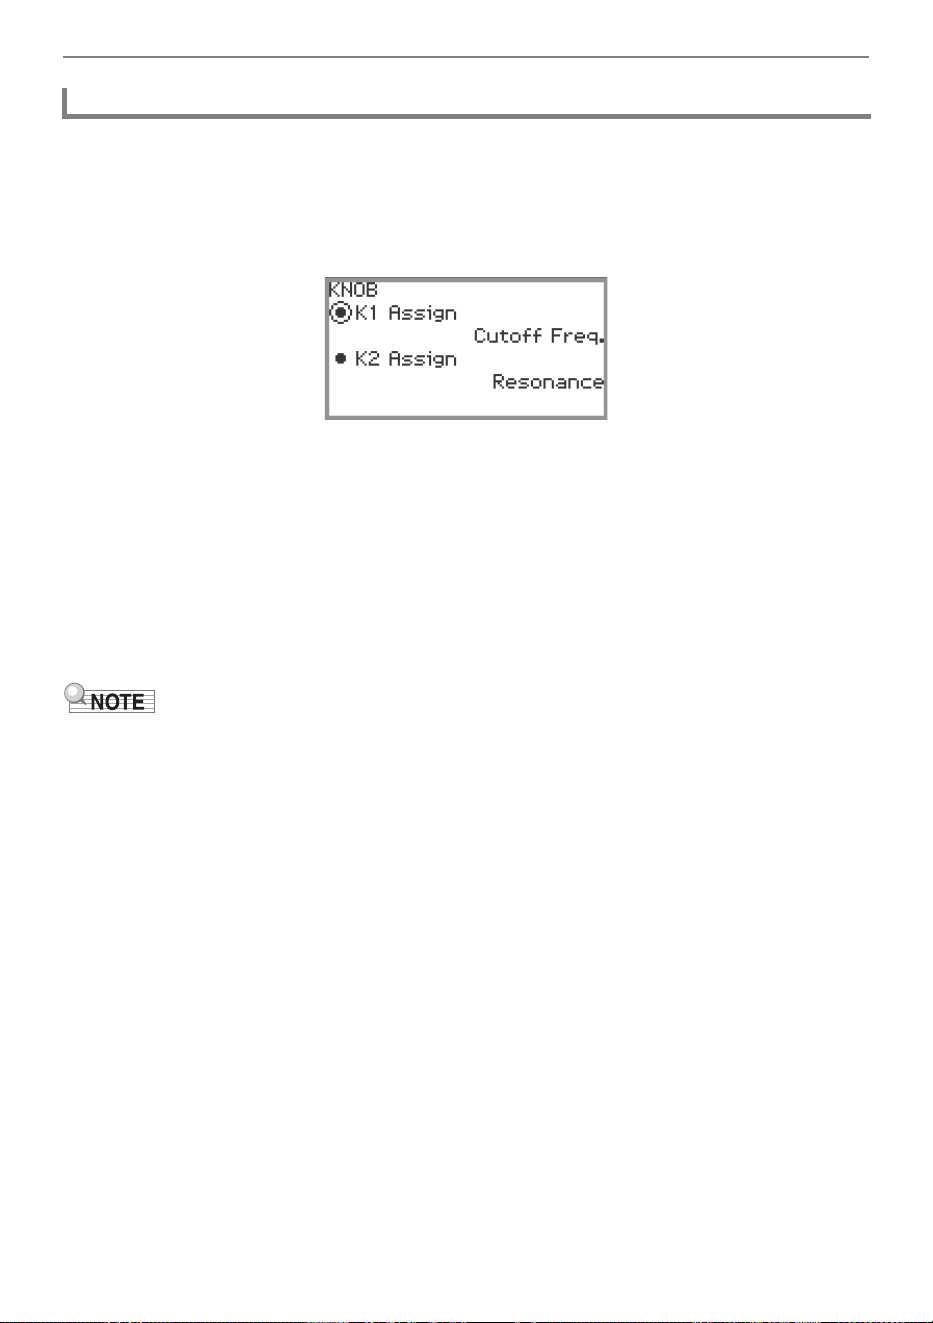
Changing the Sound During a Performance
EN-73
1.
Select the “12 Control” F button set. See “To change the F Button Set” (page
EN-32).
2.
Touch the F3 button (KNOB).
The “KNOB” screen appears.
3.
Touch the top or bottom of the touch ring to select the item whose setting value
you want to change.
• Select “K1 Assign” to change the function of the K1 knob or “K2 Assign” to change the function
of the K2 knob.
4.
Use the touch ring to select the function you want to assign to the knob.
• For more information, see “List of Assignable Functions to the Knobs” (page EN-74).
5.
Repeat steps 3 and 4 as necessary.
• Instead of steps 1 and 2 above, the “KNOB” screen can also be displayed by rotating the K1 or K2
knob while touching the FUNCTION button. (If the K1 knob is rotated, “K1 Assign” is selected; if
the K2 knob is rotated, “K2 Assign” is selected.)
Changing the Function Assigned to a Knob
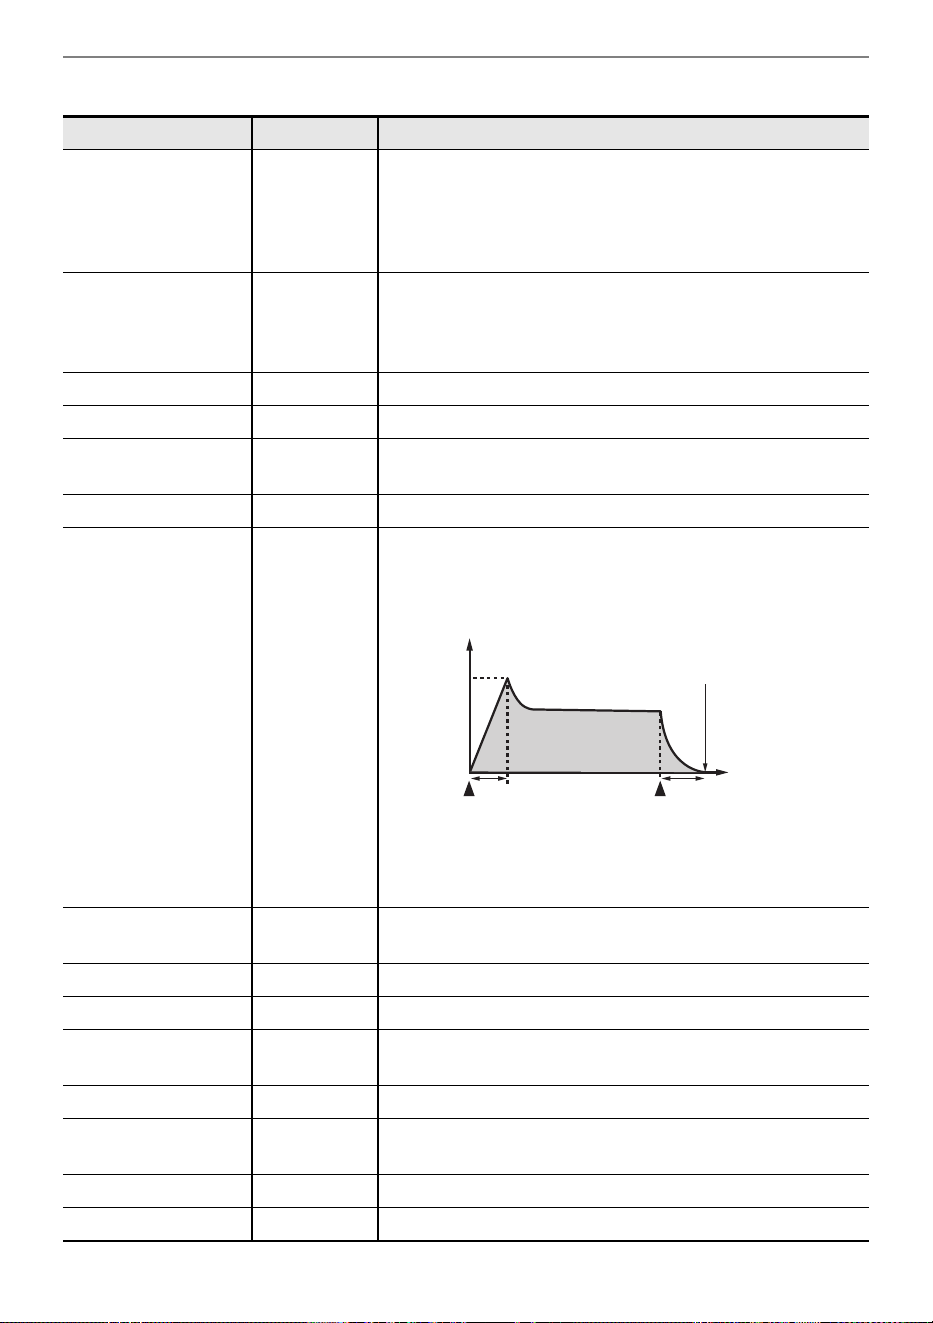
Changing the Sound During a Performance
EN-74
■ List of Assignable Functions to the Knobs
Function Category
*1
Description
Cutoff Freq. Knob/CTRL Adjusts timbre by attenuating the components of a note’s
frequency characteristics that are higher than a certain
frequency (cutoff frequency). A larger value specifies a
brighter, harder sound, while a lower value specifies a
mellower, softer sound.
Resonance Knob/CTRL Adjusts the degree to which the gain of the overtone
component is increased near the frequency specified by
“Cutoff Freq.” above. A larger value specifies a more unusual
sound.
Modulation Knob/CTRL Adjusts the level of the modulation effect.
Brilliance Effect Adjusts the brightness of a sound.
Hall/Rev. Send Mixer Adjusts the send value to the Hall Simulator/Reverb for the
Upper 1 part.
Chorus Send Mixer Adjusts the send value to the chorus for the Upper 1 part.
Attack Time Knob/CTRL Adjusts the time after a key is pressed from when the note
starts to sound until it reaches maximum volume. A larger
value specifies a slower attack.
Release Time Knob/CTRL Adjusts how long notes linger after keyboard keys are
released. A larger value specifies a longer release.
Vibrato Rate Knob/CTRL Adjusts the speed of vibrato of a tone.
Vibrato Depth Knob/CTRL Specifies the depth of vibrato of a tone.
Delay Vib Time Knob/CTRL Adjusts the time until the vibrato of the tone starts after a
note is sounded.
Portamento Time Tone Adjusts the duration of the portamento notes.
Layer Balance Mixer Adjusts the Upper 1 part and Upper 2 part volume level
balance.
Upper1 Pan Mixer Adjusts the stereo pan of the Upper 1 part.
Upper2 Fine Tune Tone Adjusts the part fine tune of the Upper 2 part.
AR
Key press
Key release
Note End
Time
A: Attack Time
R: Release Time
Note Volume
Changing the Sound During a Performance
EN-75
*1 This column shows the names of parameters included in the “FREEZE” screen of the registration
function (page EN-90).
*2 The parameters affected by DSP Parameter 1 and DSP Parameter 2 are two parameters that are
automatically selected as being the most applicable to the currently selected DSP. DSP Parameter
1 and DSP Parameter 2 are fixed according to the selected DSP. For example, when preset DSP
“15. Auto Pan” is selected, DSP Parameter 1 is Rate, and DSP Parameter 2 is Manual.
Upper2 Pan Mixer Adjusts the stereo pan of the Upper 2 part.
Lower Volume Mixer Adjusts the volume of the Lower part.
Lower Pan Mixer Adjusts the stereo pan of the Lower part.
KB Hall/Rev. Send Mixer Adjust the send value to the Hall Simulator/Reverb for all the
keyboard parts (Upper 1, Upper 2, and Lower).
KB Chorus Send Mixer Adjust the send value to the chorus for all the keyboard parts
(Upper 1, Upper 2, and Lower).
KB Group Volume Mixer Adjust the group volume level of the keyboard parts
(Upper 1, Upper 2, and Lower).
MIDISongVolume Mixer Adjusts playback volume level of the MIDI song data.
DSP Parameter 1 Tone Adjusts DSP parameters. The target parameters for
adjustment changes in accordance with the DSP type that is
currently selected.
*2
DSP Parameter 2 Tone
WirelesAudioVol Mixer Adjusts the volume of input audio from wirelessly connected
external devices.
Audio Song Vol. Mixer Adjusts playback volume level of the audio song data.
Arpeg Note Len Arpeggiator Adjusts the arpeggiator note lengths.
Upper Pan Bal. Mixer Adjusts the Upper 1 part and Upper 2 part stereo pan
balance.
Off — Disables knob functions.
Function Category
*1
Description
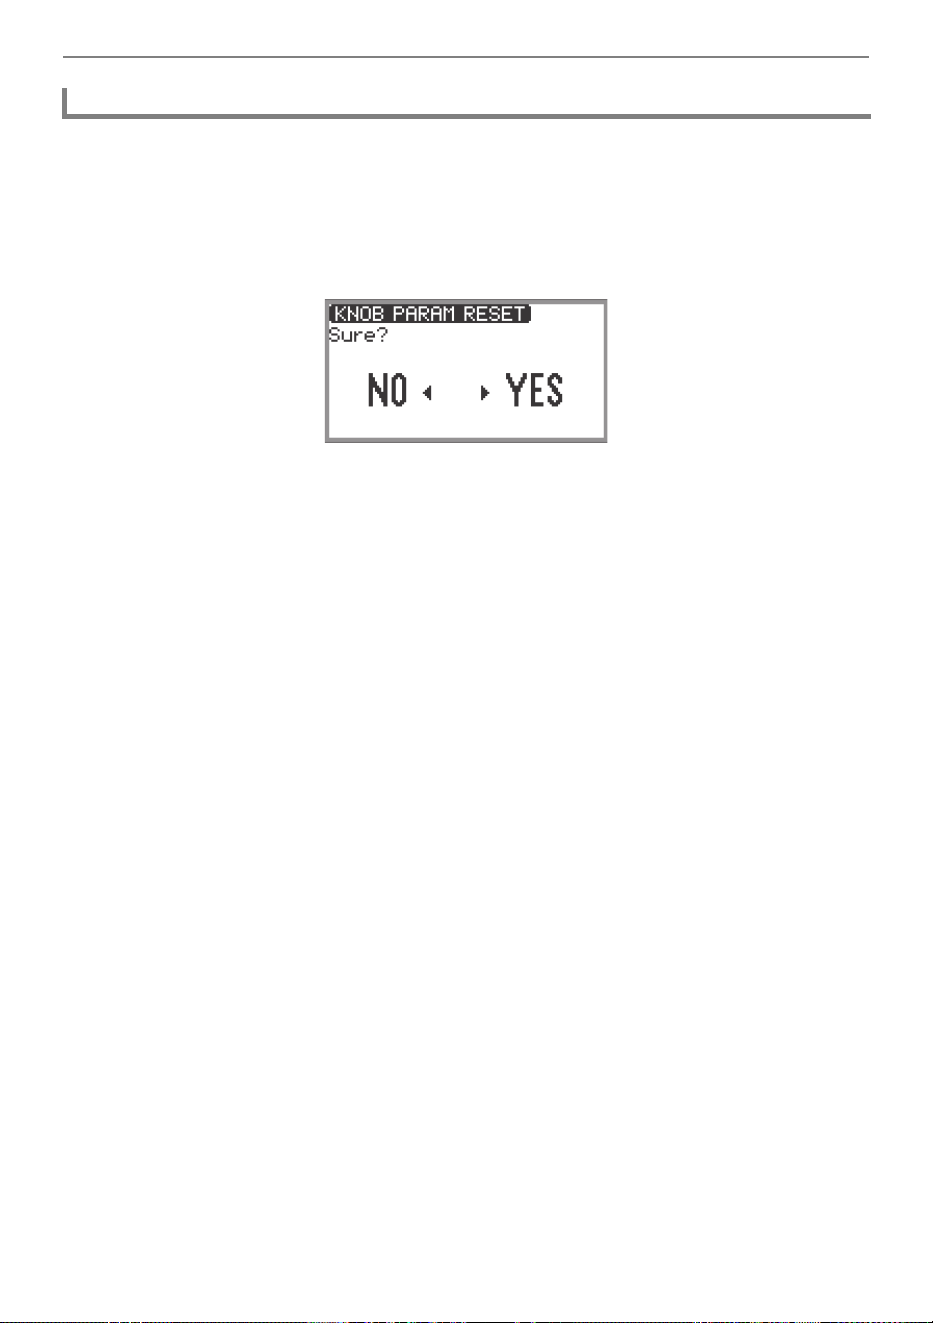
Changing the Sound During a Performance
EN-76
1.
Select the “12 Control” F button set. See “To change the F Button Set” (page
EN-32).
2.
Touch and hold the F3 button (KNOB).
A confirmation screen will appear. To cancel the operation, touch the left of the touch ring (NO) at
this point.
3.
To reset, touch the right of the touch ring (YES).
“Complete” appears, and the display returns to the screen shown in Step 1.
Resetting the Parameters of the Functions Currently Assigned to the Knobs
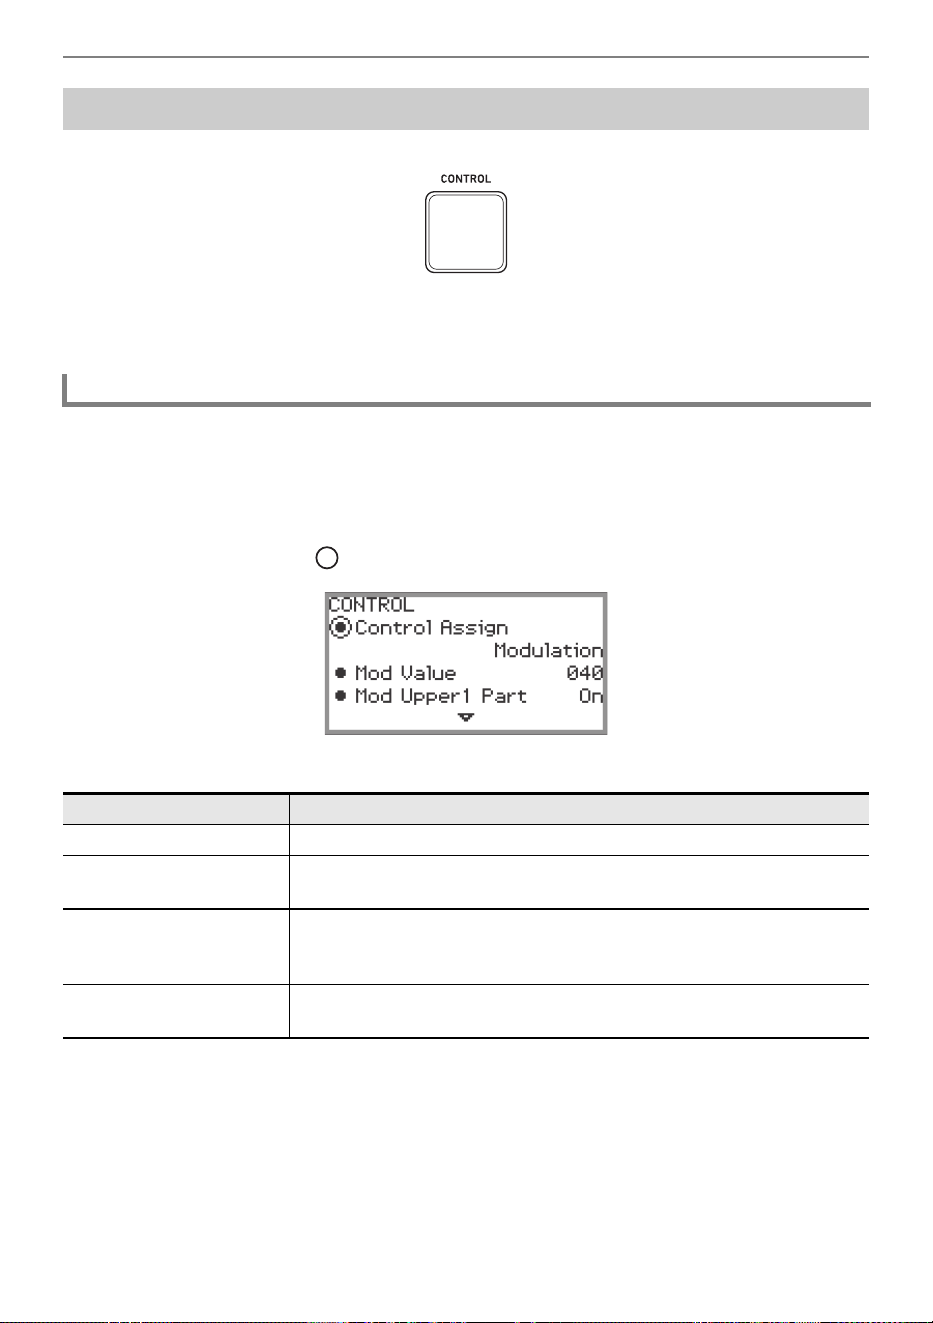
Changing the Sound During a Performance
EN-77
This button is used to control the sound while playing.
Under initial default settings, modulation is applied while the CONTROL button is held down. By
changing the setting, other functions can be assigned, such as switching portamento (an effect that
smoothly glides between notes) on and off.
1.
Select the “12 Control” of the F button set. See “To change the F Button Set”
(page EN-32).
2.
Touch the F4 button (CTRL).
The “CONTROL” screen appears.
• Confirm that the cursor ( ) is on “Control Assign”.
3.
Use the touch ring to change the setting value.
* A “DSP tone” is a tone that includes a preset DSP effect. Please refer to the separate “Built-in Music
Data Lists” for a list of tones with built-in DSP effects.
The DSP tones that include the rotary effect are organ tones numbered 61, 62, 65, 66, 67, 71, 72, 73,
74, 75, 76, 79, 80, 81.
Using the CONTROL Button
Selecting the Function Assigned to the CONTROL Button
Setting value Description
Modulation Modulation is applied while the CONTROL button is held down.
Portamento
Each press of the CONTROL button toggles the portamento of the
Upper 1 part on/off.
Rotary
When a DSP tone
*
that uses the rotary effect is selected, each press of
the CONTROL button toggles the rotary speaker setting between Slow
and Fast.
Arpeg Note Len
Each press of the CONTROL button toggles the arpeggiator note
lengths between normal and half.
Changing the Sound During a Performance
EN-78
4.
If “Control Assign” is set to “Modulation”, change the modulation settings as
necessary.
• Touch the top or bottom of the touch ring to set each item, such as “Mod Value”. For more
information, see “To change the Modulation settings” (page EN-78).
• The “CONTROL” screen can also be displayed by pressing the CONTROL button while touching
the FUNCTION button instead of steps 1 and 2 above.
• When “Control Assign” is set to “Portamento”, the duration of the portamento can be changed using
the knob. Assign “Portamento Time” as the function of the knob. For details, see “Changing the
Function Assigned to a Knob” (page EN-73).
■ To change the Modulation settings
The settings shown in the table below, which appear in the “CONTROL” screen of “Selecting the
Function Assigned to the CONTROL Button” (page EN-77), can be used to change the settings when
modulation is assigned to the CONTROL button.
Setting item Values Description
Mod Value 000 to 127 Sets the intensity at which modulation is applied.
Mod Upper1 Part
Mod Upper2 Part
Mod Lower Part
On, Off
Selects whether to apply modulation to the
Upper 1/Upper 2/Lower parts (On) or not (Off).

Changing the Sound During a Performance
EN-79
By moving the pitch bend wheel up and down, the pitch of the currently sounding notes can be
smoothly raised or lowered, producing an effect similar to saxophone or electric guitar pitch bending
techniques.
• The pitch of the sound changes with the amount the wheel is moved.
• Do not touch the wheel when turning on the Digital Piano.
You can adjust the amount of pitch change that happens when the wheel is moved to the upper or
lower limit in semitone steps. For example, when set to “2”, the pitch rises 2 semitones when the wheel
is moved to the upper limit and falls 2 semitones at the lower limit.
1.
Select the “13 KB Setting” of the F button set. See “To change the F Button Set”
(page EN-32).
2.
Touch the F2 button (WHEEL).
The “WHEEL” screen appears.
• Confirm that the cursor ( ) is on “P Bend Range”.
3.
Change the value of the “P Bend Range” setting.
• Set between 0 and 24.
Using the Pitch Bend Wheel
Changing the Pitch Bend Range

Changing the Sound During a Performance
EN-80
Display the “WHEEL” screen by performing the operation under “Changing the Pitch Bend Range”
(page EN-79) then adjust the settings below.
Enabling/Disabling the Pitch Bend Wheel Operation for Each Part (Upper 1/
Upper 2/Lower)
Setting item Values Description
Upper1 Part
Upper2 Part
Lower Part
On, Off
Enables (On) or disables (Off) the pitch bend wheel
operation for the Upper 1/Upper 2/Lower parts.
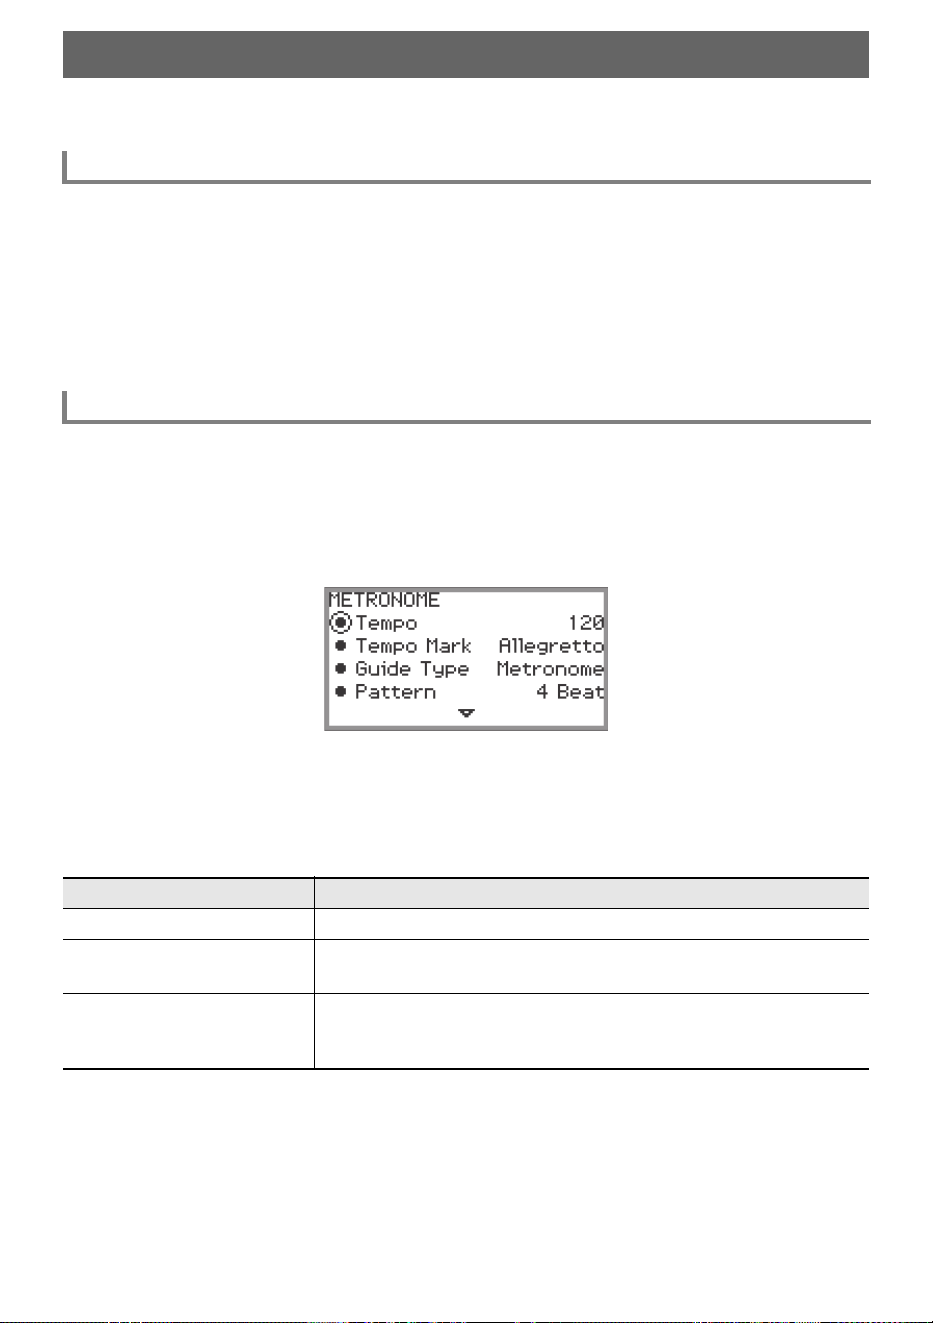
EN-81
The Digital Piano’s metronome can play a variety of drum patterns in addition to a standard metronome
sound.
1.
While touching the FUNCTION button, touch the a button.
The metronome starts.
• The red and white LEDs to the left of the a button will flash in time with the metronome beat
(first beat: red; remaining beats: white).
2.
To stop the metronome, while touching the FUNCTION button touch the a
button.
1.
Select the “01 Standard” of the F Button Set. See “To change the F Button Set”
(page EN-32).
2.
Touch the F2 button (METRO).
The “METRONOME” screen appears.
3.
Touch the top or bottom of the touch ring to select the setting you want to
change.
• The table below shows the available settings and values.
• The Tempo setting and Tempo Mark setting are linked to each other.
Using the Metronome
Starting or Stopping the Metronome
Changing the Metronome Settings (Tempo, Beat, Pattern, etc.)
Setting item Setting value and description
Tempo Sets the tempo between 20 and 255 (BPM).
Tempo Mark
Sets the tempo from a tempo marking such as “Andante” or “Allegro”.
For more information, see “Tempo Markings” (page EN-82).
Guide Type
Choose from one of the following:
Metronome: Plays a metronome tone.
Drum: Plays a drum pattern.
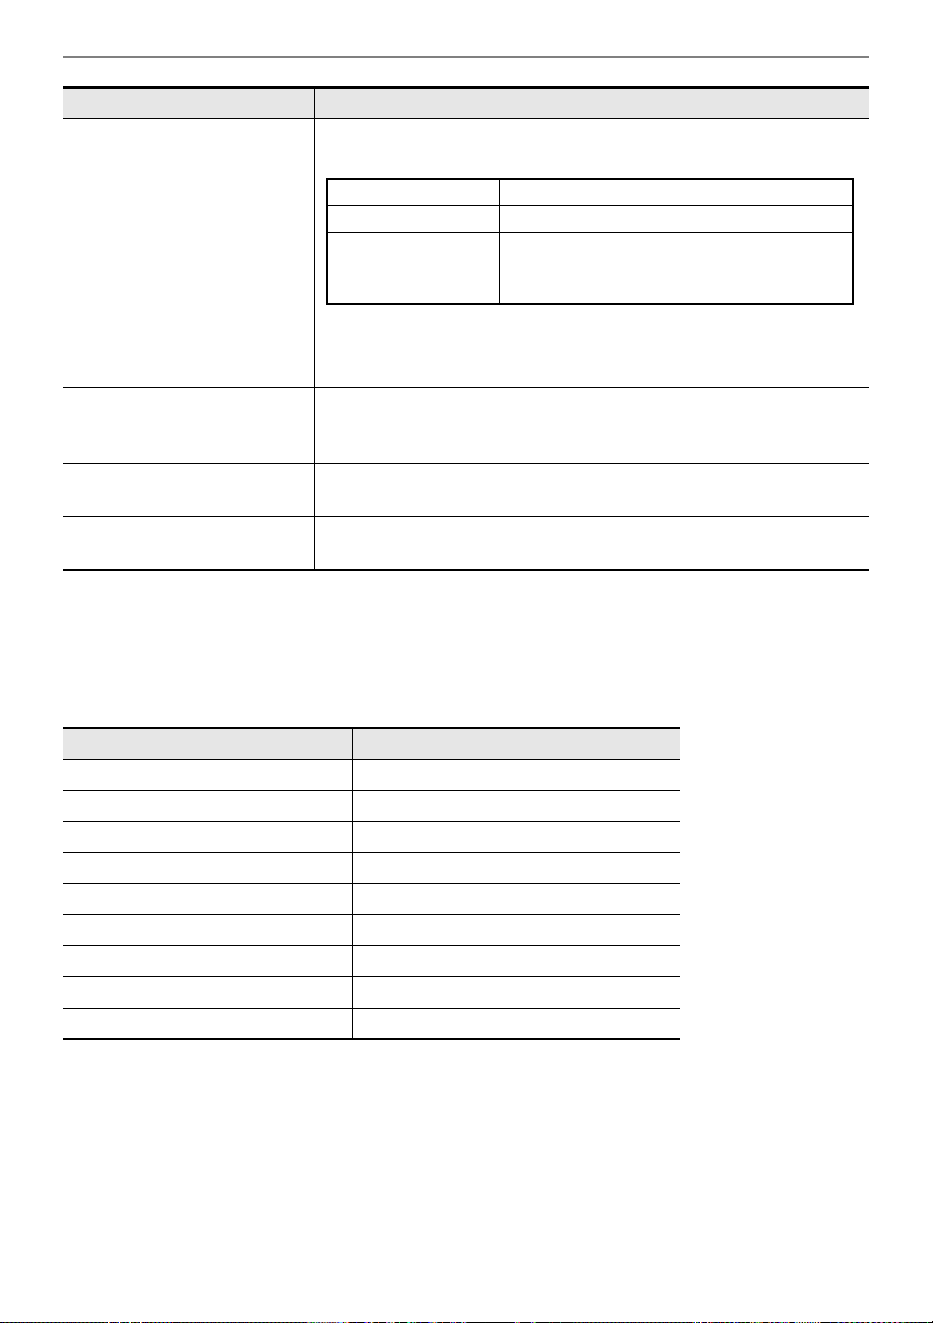
Using the Metronome
EN-82
4.
Change the value of the selected setting.
• Trace the touch ring to change the desired setting.
5.
Repeat Steps 3 and 4 as necessary.
■ Tempo Markings
Pattern
If “Guide Type” is “Metronome”:
Sets the metronome’s beat.
If the “Guide Type” is “Drum”:
You can choose any pattern from the list of drum patterns displayed.
For more information, see “Drum Pattern List” (page EN-83).
Volume
Sets the metronome volume relative to the overall volume of the
Digital Piano as a number between 0 (silent) and 127 (maximum
volume).
While Playing
Sets whether the metronome will play a sound (On) or not (Off)
during playback of MIDI data songs in SONG mode (page EN-106).
While Recording
Sets whether the metronome will play a sound (On) or not (Off) while
recording with the MIDI recorder (page EN-113).
Selecting this setting: Sets this tempo (BPM)
Largo 46
Lento 52
Adagio 56
Andante 72
Moderato 96
Allegretto 108
Allegro 132
Vivace 160
Presto 184
Setting item Setting value and description
Bell Off Plays a click sound on every beat.
1 Beat Plays a bell sound on every beat.
2 Beat to 9 Beat
Sets the number of beats between 2 and 9.
Plays a bell sound on the first beat and a
click sound on the remaining beats.
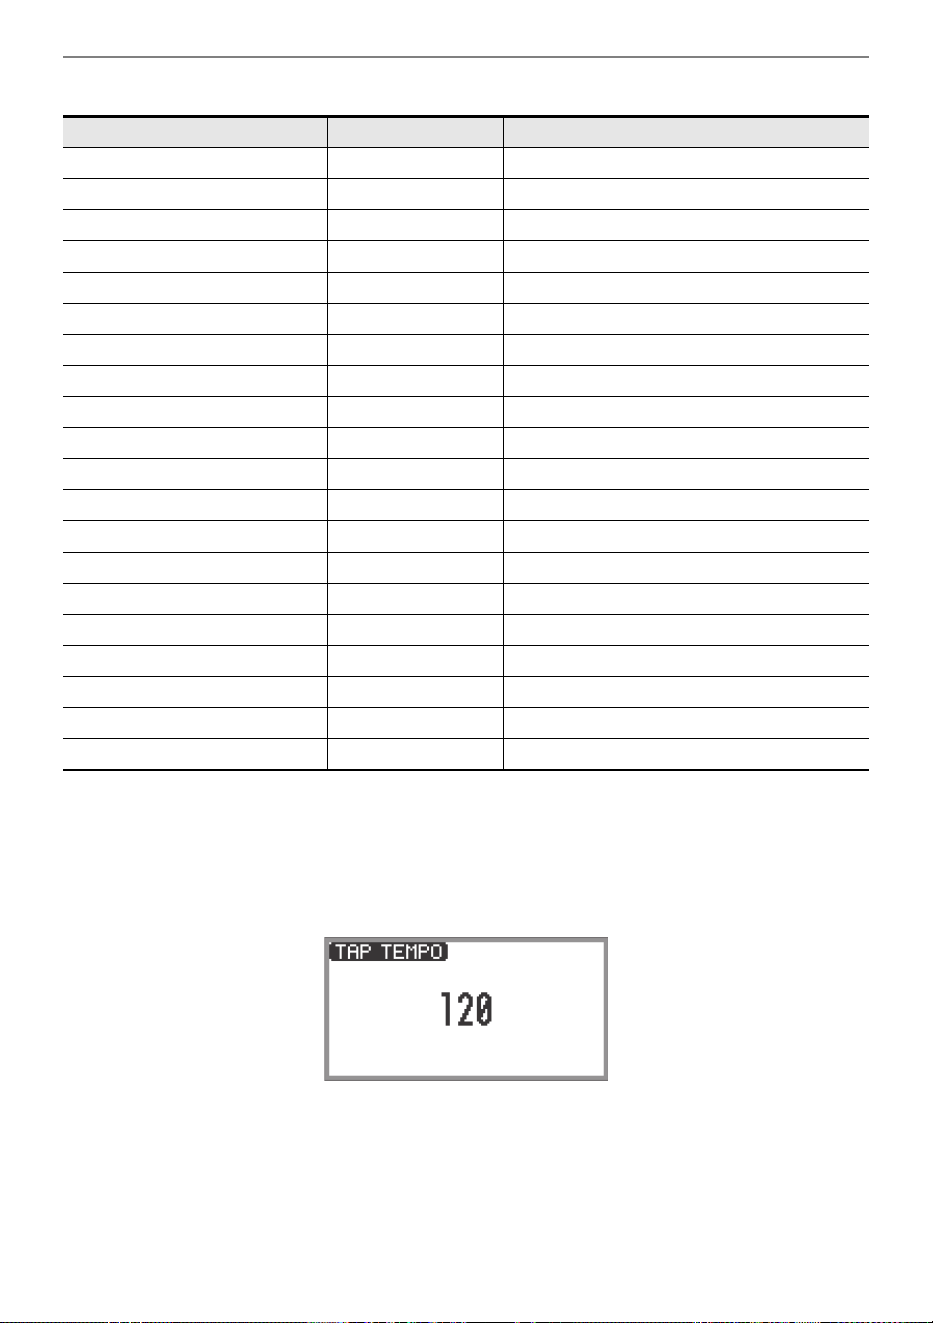
Using the Metronome
EN-83
■ Drum Pattern List
■ To set the tempo by tapping a beat with the keyboard keys
1.
While touching the FUNCTION button, touch the ENTER button.
The “TAP TEMPO” screen appears.
2.
Press a keyboard key two or more times in succession.
• This sets the tempo according to the interval between key presses. The display shows the set
tempo value.
Drum Pattern Name Beat Description
8 Beat 1 4 Simple 8-beat rhythm
8 Beat 2 4 Simple 8-beat rhythm
8 Beat Shuffle 4 8-beat shuffle rhythm
Triplet8Beat 1 4 Triplet 8-beat rhythm
Triplet8Beat 2 4 Triplet 8-beat rhythm
6/8 Pop 6 6-beat rhythm for slow tempo
16 Beat 4 Simple 16-beat rhythm
16 Beat Shuffle 4 16-beat shuffle rhythm
Ballad 8 Beat 4 8-beat rhythm for slow tempo
Ballad 16 Beat 4 16-beat rhythm for slow tempo
Dance Beat 4 Simple dance beat
Dance Shuffle 4 Dance beat shuffle
Waltz 3 Waltz rhythm
March 2 2-beat march rhythm
Bossa Nova 4 Bossa nova rhythm
Salsa 4 Salsa rhythm with percussion
Swing 4 Swing rhythm for jazz
Slow Swing 4 Swing rhythm for slow jazz
Jazz Waltz 3 Jazz waltz rhythm
5/4 Jazz 5 5-beat jazz rhythm

EN-84
The Arpeggiator automatically plays arpeggios (broken chords) and various other patterns with a single
press of the keys. There are many types to choose from, including patterns that play arpeggios from
chords being played and many more.
1.
Select the “12 Control” of the F button set. See “To change the F Button Set”
(page EN-32).
2.
Touch the F1 button (ARPEG).
The Arpeggiator turns on and appears on the display.
• When a chord or single note is pressed on the keyboard, the Digital Piano plays an arpeggio of
the currently selected type.
3.
To turn off the Arpeggiator, touch the F1 button (ARPEG) so is not displayed.
1.
Select the “12 Control” of the F button set. See “To change the F Button Set”
(page EN-32).
2.
Touch and hold the F1 button (ARPEG).
The “ARPEGGIATOR” screen appears.
Using the Arpeggiator
Enabling or Disabling the Arpeggiator
Changing the Arpeggiator Pattern and Other Settings
Appears when the Arpeggiator is on
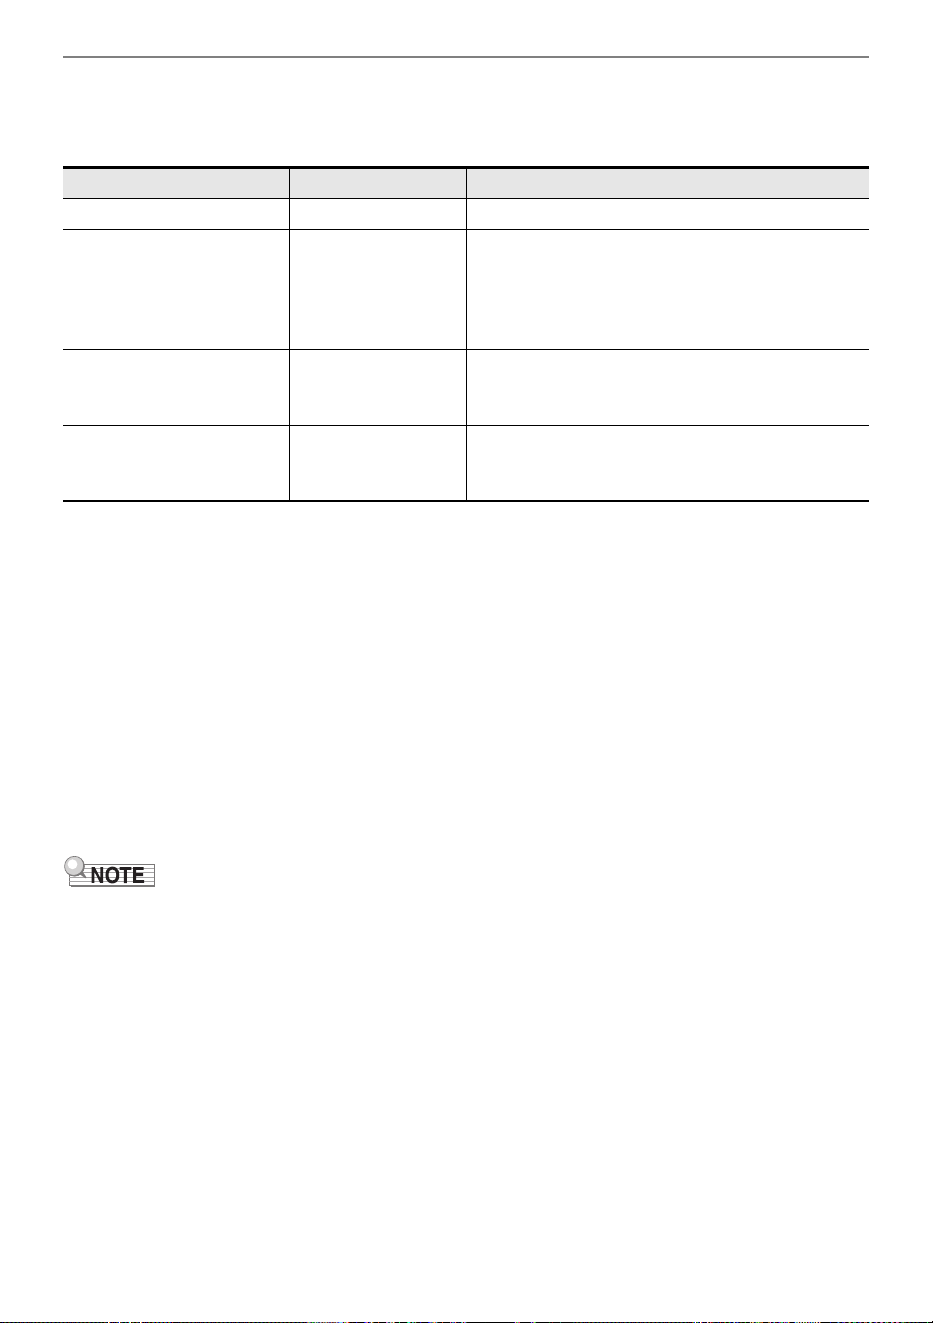
Using the Arpeggiator
EN-85
3.
Touch the top or bottom of the touch ring to select the setting you want to
change.
• The table below shows the setting items, values and descriptions of each.
*1 See “Arpeggiator List” (page EN-233).
*2 Items that are automatically set when this setting is “On” include the following:
• The key range (the Split Point between Upper and Lower Parts) in which the Arpeggiator plays is
set automatically. For this reason, depending on the keys pressed, the Arpeggiator may not play.
• Enabling/disabling the use of the pedal for each part (Upper 1/Upper 2/Lower) is set automatically.
The applicable pedals are those connected to the PEDAL UNIT jack and those connected to the
EXPRESSION/ASSIGNABLE jack (only when “Damper” is selected as the pedal’s function).
*3 Even if these settings are “Off”, if “Recommended Setup” is “On”, the recommended settings are
given priority and applied. For details on recommended settings for each pattern, see “Arpeggiator
List” (page EN-233).
4.
Change the value of the selected item.
• Trace the touch ring to change the desired value.
5.
Repeat Steps 3 and 4 as necessary.
• The arpeggio speed depends on the tempo setting. For more information, see “Changing the
Metronome Settings (Tempo, Beat, Pattern, etc.)” (page EN-81).
• You can assign turning the Arpeggio Hold on/off to a pedal connected to the EXPRESSION/
ASSIGNABLE jack. For more information, see “Using Pedals” (page EN-67).
• Assigning “Arpeg Note Len” to the CONTROL button allows you to change the length of notes in
some Arpeggiator patterns. For more information, see “Selecting the Function Assigned to the
CONTROL Button” (page EN-77).
• Assigning “Arpeg Note Len” to either of the K1 or K2 knob allows you to change the length of notes
in some Arpeggiator patterns. For more information, see “Changing the Function Assigned to a
Knob” (page EN-73).
Setting item Values Description
Pattern
*1
Selects the pattern the Arpeggiator will play.
Recommended Setup On, Off
*2
When “On”, the Digital Piano automatically
applies the recommended tones and settings for
the Arpeggiator’s pattern whenever you switch
the Arpeggiator from Off to On or whenever you
switch to “Pattern” while the Arpeggiator is on.
Arpeggio Hold On, Off
*3
Toggles Arpeggio Hold On/Off. When “On”, the
arpeggio will continue to play even after you lift
your finger from the keys.
Upper1 Part
Upper2 Part
Lower Part
On, Off
*3
Selects whether the Arpeggiator will play (On) or
not play (Off) in the Upper 1, Upper 2, or Lower
Parts.
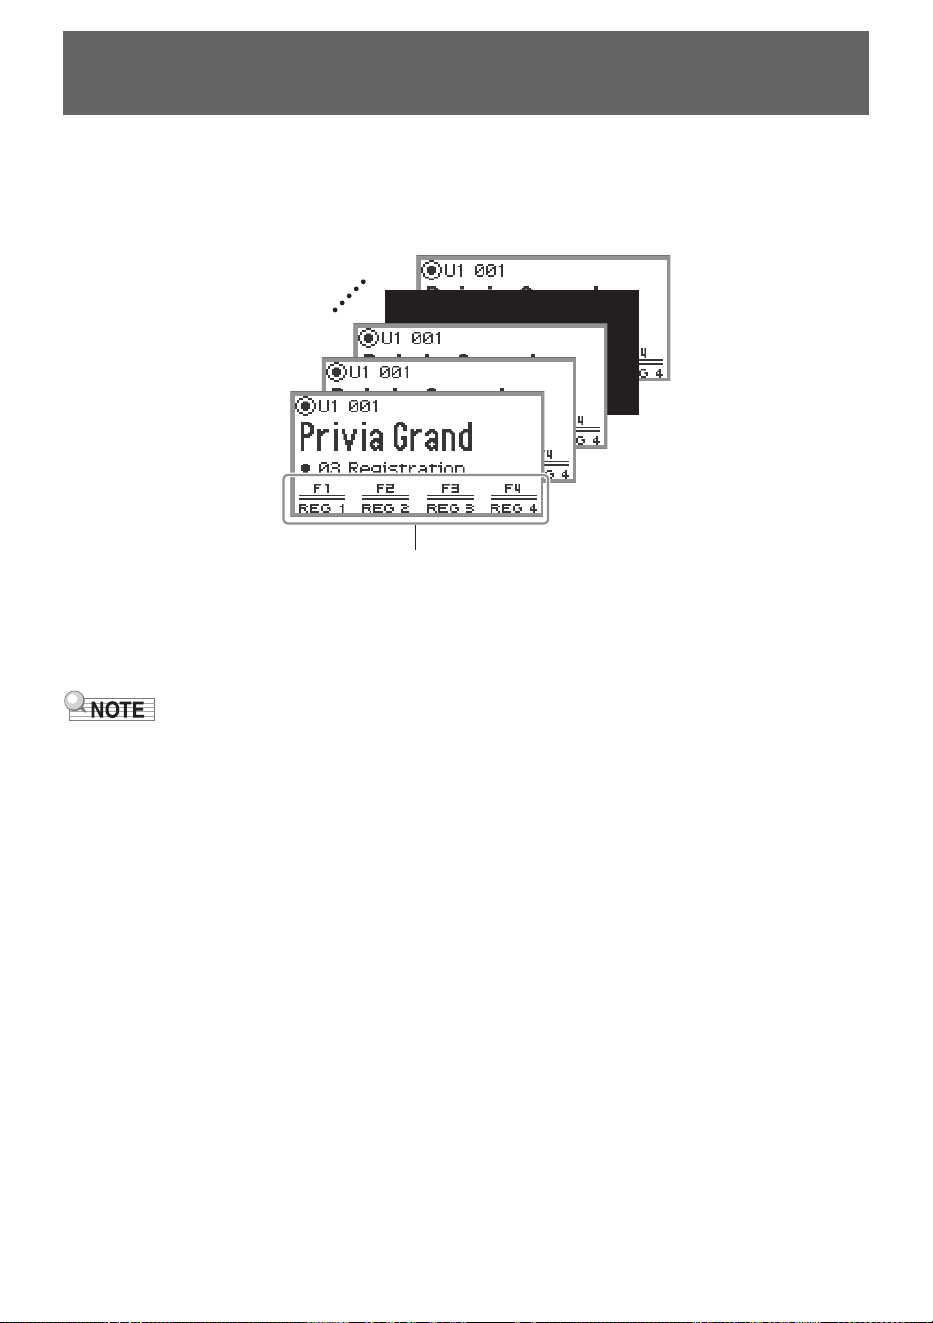
EN-86
The state of various settings such as tone selection, Layers, Splits, and effects can be registered as a
performance setup. Registered settings can also be recalled
*
together simultaneously. This function is
called “Registration”.
* By using it with the Freeze function (page EN-90), it is possible to recall only a portion of the
registered settings.
There are four registration areas, REG 1 to REG 4, corresponding to the F1 (REG 1) to F4 (REG 4)
buttons, respectively. A set of REG 1 to REG 4 is called a “bank”, and there are 24 banks in total,
meaning you can register up to 96 setting states.
• Registration is not available during demo song playback (page EN-39), SONG mode (page EN-106),
or during various setting operations.
Saving and Recalling Performance Setups
(Registration)
Storage area (REG 1 to REG 4)
BANK1
BANK2
BANK3
BANK24
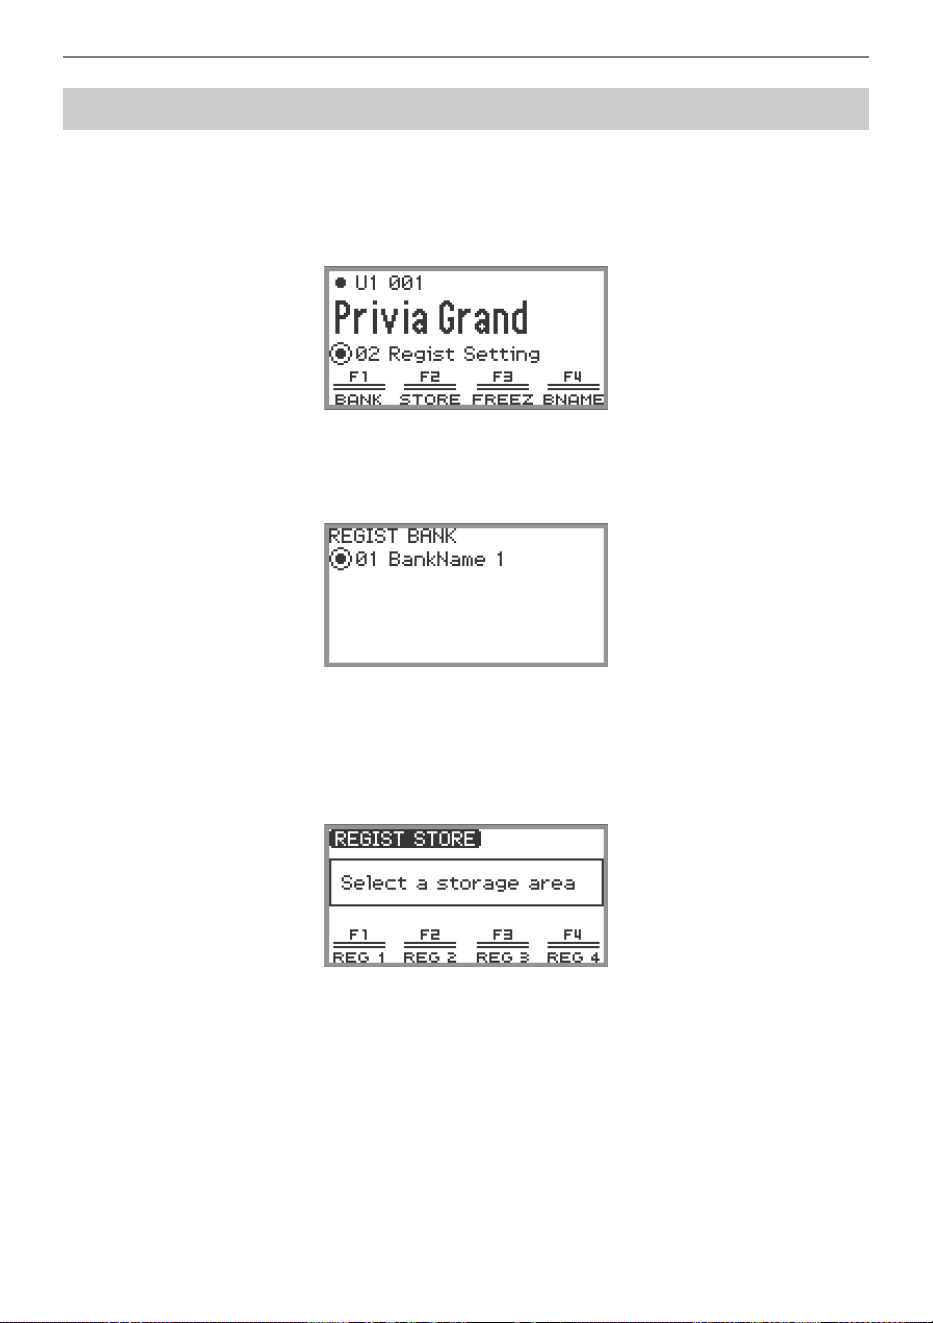
Saving and Recalling Performance Setups (Registration)
EN-87
1.
Set as many tones, effects, and other registrable items (page EN-92) as you need.
2.
Select the “02 Regist Setting” of the F Button Set. See “To change the F Button
Set” (page EN-32).
3.
Touch the F1 button (BANK).
The “REGIST BANK” screen appears.
4.
Trace the touch ring to select the destination bank, then touch the EXIT button.
5.
Touch the F2 button (STORE).
The “REGIST STORE” screen appears.
Saving a Setup Registration
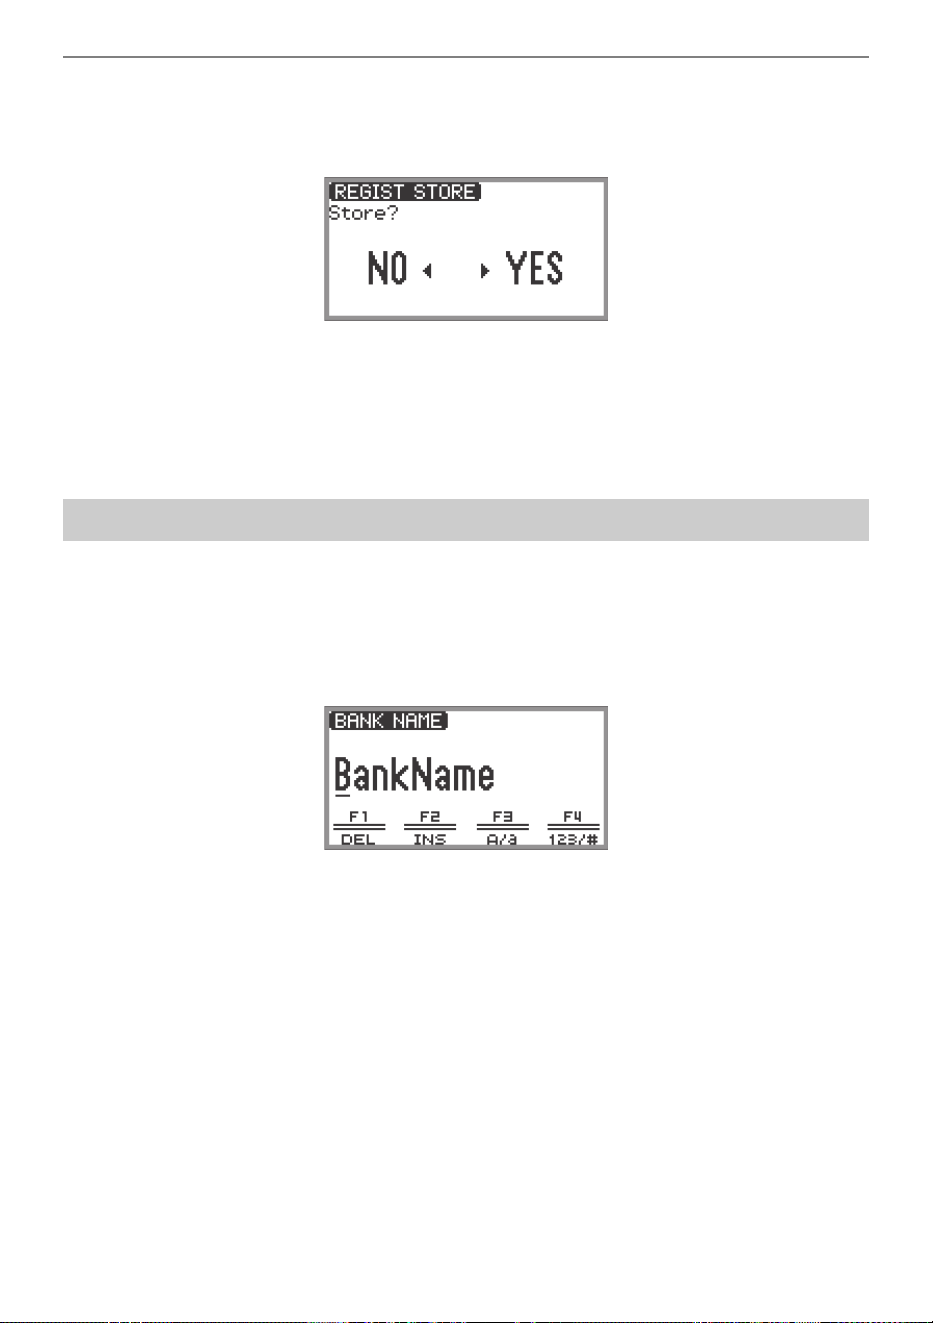
Saving and Recalling Performance Setups (Registration)
EN-88
6.
Touch one of the F buttons (F1 to F4) to select the destination (REG 1 to REG 4).
A confirmation screen appears. To exit the operation without saving, touch the left of the touch ring
(NO).
7.
Touch the right of the touch ring (YES) to save the registration.
“Complete” appears, and the display returns to the screen shown in Step 5.
8.
Touch the EXIT button to return to the top screen.
1.
Select the bank you want to rename using Steps 2 through 4 of “Saving a Setup
Registration” (page EN-87).
2.
Touch the F4 button (BNAME).
The bank name editing screen appears.
3.
Change the bank name to the desired name.
• For details on the subsequent steps, see “Text Character Input” (page EN-35).
Changing a Registration Bank Name
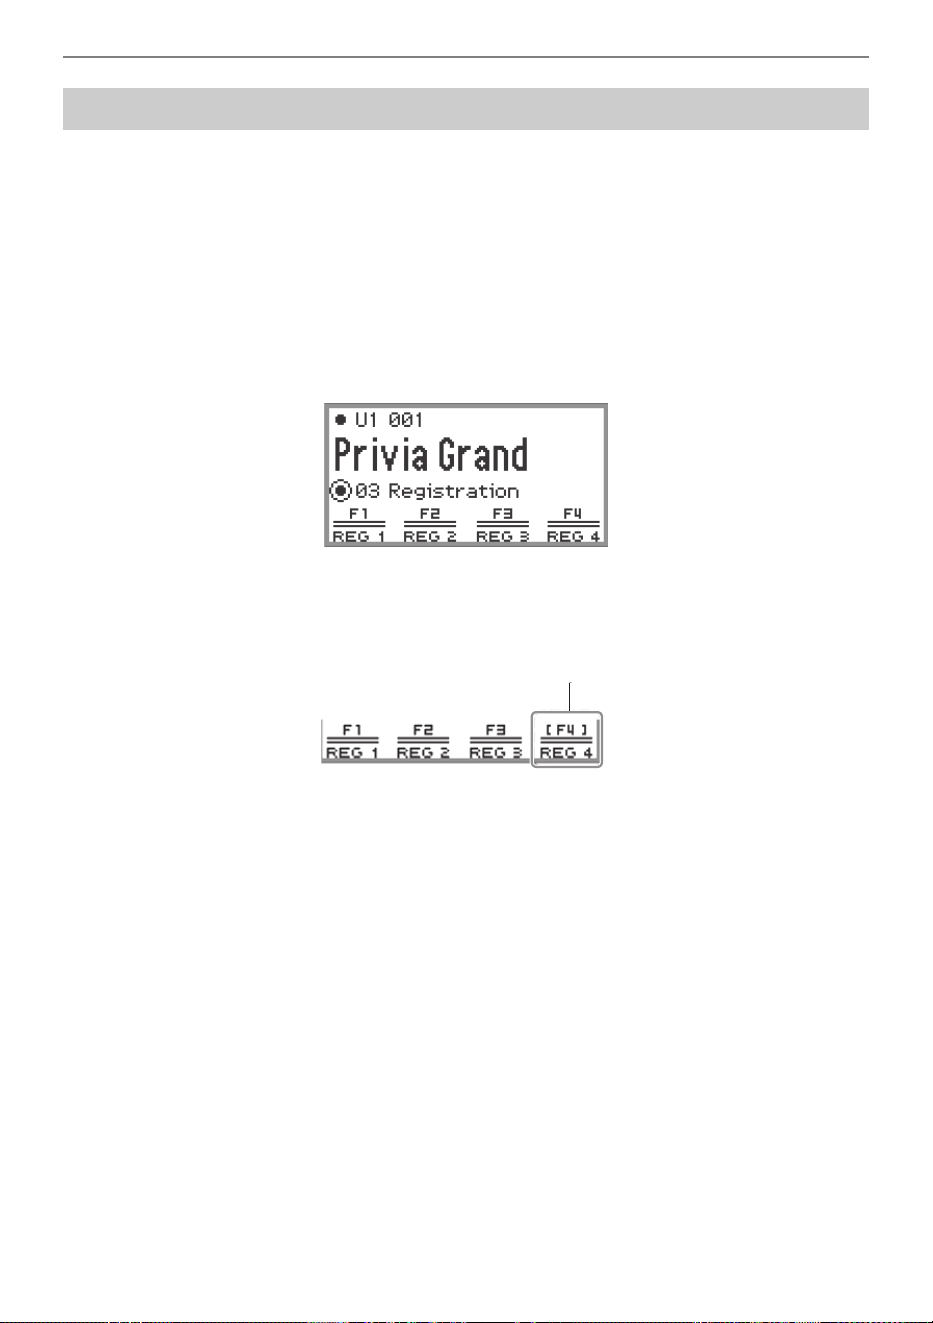
Saving and Recalling Performance Setups (Registration)
EN-89
1.
Select the bank of the setup you want to recall by performing Steps 2 through 4
of “Saving a Setup Registration” (page EN-87).
• This procedure is not necessary if you want to recall the registration from the currently selected
bank.
2.
Turn the Freeze function on or off as needed.
• For more information, see “Freeze Function” (page EN-90).
3.
Select the “03 Registration” of the F Button Set. See “To change the F Button
Set” (page EN-32).
4.
Touch one of the F buttons (F1 to F4).
The corresponding registration (REG 1 to REG 4) is recalled.
Recalling a Setup Registration
The [ ] indicates that registration was recalled
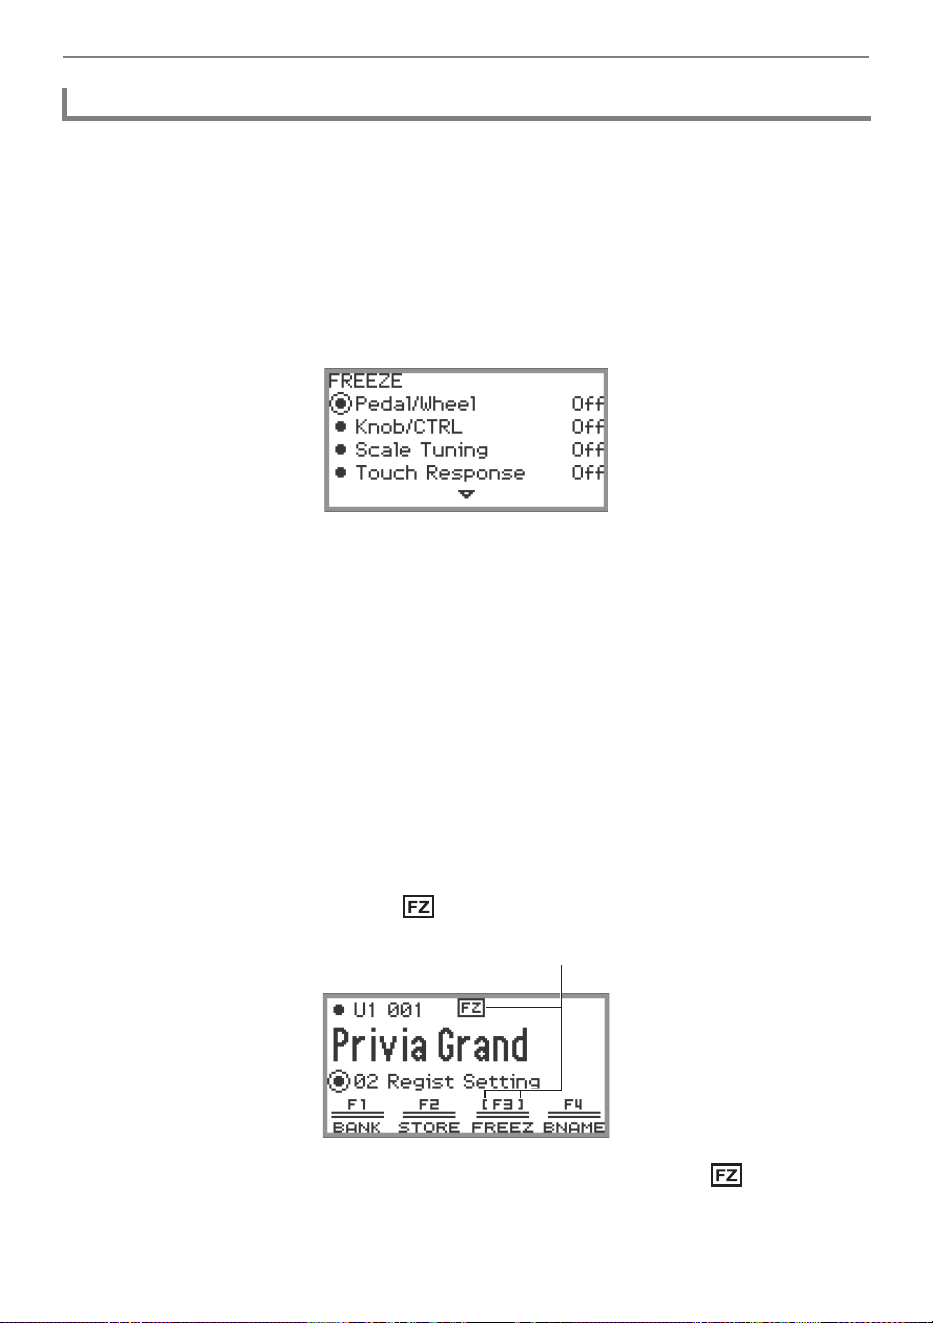
Saving and Recalling Performance Setups (Registration)
EN-90
By turning on the Freeze function, you can prevent certain setting items from being changed when the
registration is recalled. Use the following procedure to select which setting item to freeze.
■ To select freeze items
1.
Select “02 Regist Setting” as the F Button Set. See “To change the F Button Set”
(page EN-32).
2.
Touch and hold the F3 button (FREEZ).
The “FREEZE” screen appears.
3.
Touch the top or bottom of the touch ring to select the setting item you want to
change.
• For details on the setting items, see “Registration Memory Data” (page EN-92).
4.
Switch the setting value of the selected item between “On” (freeze) and “Off” (do
not freeze).
5.
Repeat Steps 3 and 4 as necessary.
■ To enable or disable freeze
1.
Select the “02 Regist Setting” of the F Button Set. See “To change the F Button
Set” (page EN-32).
2.
Touch the F3 button (FREEZ).
The Freeze function is turned on, and appears on the display.
3.
To turn off the Freeze function, touch the F3 button (FREEZ) so is not
displayed.
Freeze Function
Appears when Freeze is on

Saving and Recalling Performance Setups (Registration)
EN-91
Registrations can be sequentially recalled using a pedal connected to the EXPRESSION/
ASSIGNABLE jack.
1.
Connect a pedal to the EXPRESSION/ASSIGNABLE jack.
• Make sure the pedal type corresponds to the connected pedal (see “To specify the pedal type”
(page EN-68)).
2.
Refer to “To select freeze items” (page EN-90) to switch the “Pedal/Wheel”
setting to “On”.
3.
Refer to “To enable or disable freeze” (page EN-90) to turn on the Freeze
function.
4.
Refer to “To specify the pedal function” (page EN-69) to change the value of
“Pedal Target” to “Seq Recall Inc” or “Seq Recall Dec”.
5.
Step on the pedal to recall a registration.
• When the set value is “Seq Recall Inc”:
Briefly stepping on the pedal recalls registrations in ascending order of “bank number –
registration number” (i.e., 1-1, 1-2, 1-3, 1-4, 2-1, 2-2...). Stepping on the pedal and holding it
recalls registrations in reverse order (i.e., 2-2, 2-1, 1-4, 1-3...).
• When the set value is “Seq Recall Dec”:
Briefly stepping on the pedal recalls registrations in descending order of “bank number -
registration number” (i.e., 24-4, 24-3, 24-2, 24-1, 23-4, 23-3...). Stepping on the pedal and
holding it recalls registrations in reverse order (i.e., 23-3, 23-4, 24-1, 24-2...).
Using a Pedal to Cycle Through Multiple Setup Registrations (Sequential
Recall)
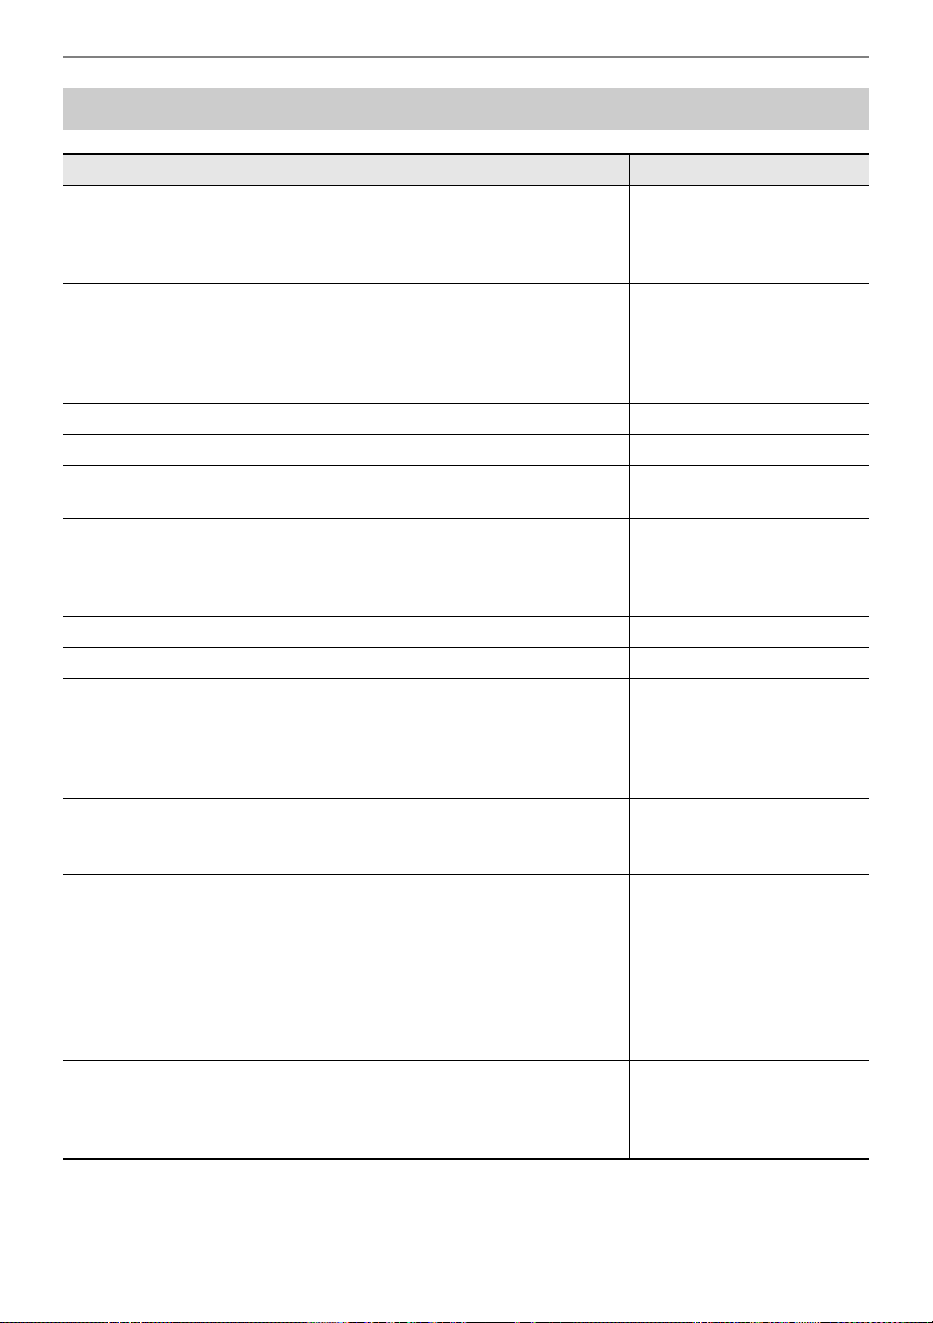
Saving and Recalling Performance Setups (Registration)
EN-92
Registration Memory Data
Setting Items Freeze
*1
• Pedal unit, EXPRESSION/ASSIGNABLE pedal, and pitch bend
wheel Part On/Off settings
• EXPRESSION/ASSIGNABLE pedal functions
• Pitch Bend Range
Pedal/Wheel
• CONTROL Button settings
• Knob settings
• Portamento On/Off, Rotary Slow/Fast, and Modulation (value, Part
On/Off) settings by CONTROL button operations
• Settings by knob operations
*2
Knob/CTRL
• Scale settings (type, base note, stretch tuning) Scale Tuning
• Touch Response settings Touch Response
• Hall Simulator/Reverb (On/Off, Type)
• Surround (On/Off, Type)
Sound Mode
• Chorus type
• Brilliance setting
• Microphone Effect (Type, Effect On/Off, M1 to M3 settings)
• Brilliance setting by knob operations
Effect
• Transpose setting Transpose
• Split Point setting Split Point
• Arpeggiator (On/Off, Type, and other settings)
• Arpeggio Hold On/Off setting by a pedal connected to the
EXPRESSION/ASSIGNABLE jack
• Arpeggio Note Length settings by CONTROL button or knob
operations
Arpeggiator
• Metronome settings (Tempo, Tempo Mark, Guide Type, Pattern)
• Tempo setting by a pedal connected to the EXPRESSION/
ASSIGNABLE jack
Tempo
• Tone number (Upper 1, Upper 2, Lower)
• Layer On/Off, Split On/Off
• DSP (Type, parameters)
• Hammer Response, Key Off Response
• Octave Shift
• Part Fine Tune
• Duet settings
• Tone related settings by knob operations
*3
Tone
• Mixer settings
• Mixer related settings by knob operations
*4
• Layer Balance setting by a pedal connected to the EXPRESSION/
ASSIGNABLE jack
Mixer

Saving and Recalling Performance Setups (Registration)
EN-93
*1 The “Freeze” column shows the names of parameters included in the “FREEZE” screen. For more
information, see “To select freeze items” (page EN-90).
*2 Corresponds to the functions displayed as “Knob/CTRL” in the “Category” column of “List of
Assignable Functions to the Knobs” (page EN-74).
*3 Corresponds to the functions displayed as “Tone” in the “Category” column of “List of Assignable
Functions to the Knobs” (page EN-74).
*4 Corresponds to the functions displayed as “Mixer” in the “Category” column of “List of Assignable
Functions to the Knobs” (page EN-74).
Registration data can be saved to a USB flash drive as banks. For more information, see “Saving
Digital Piano Data to a USB Flash Drive” (page EN-143).
Saving to an External Device
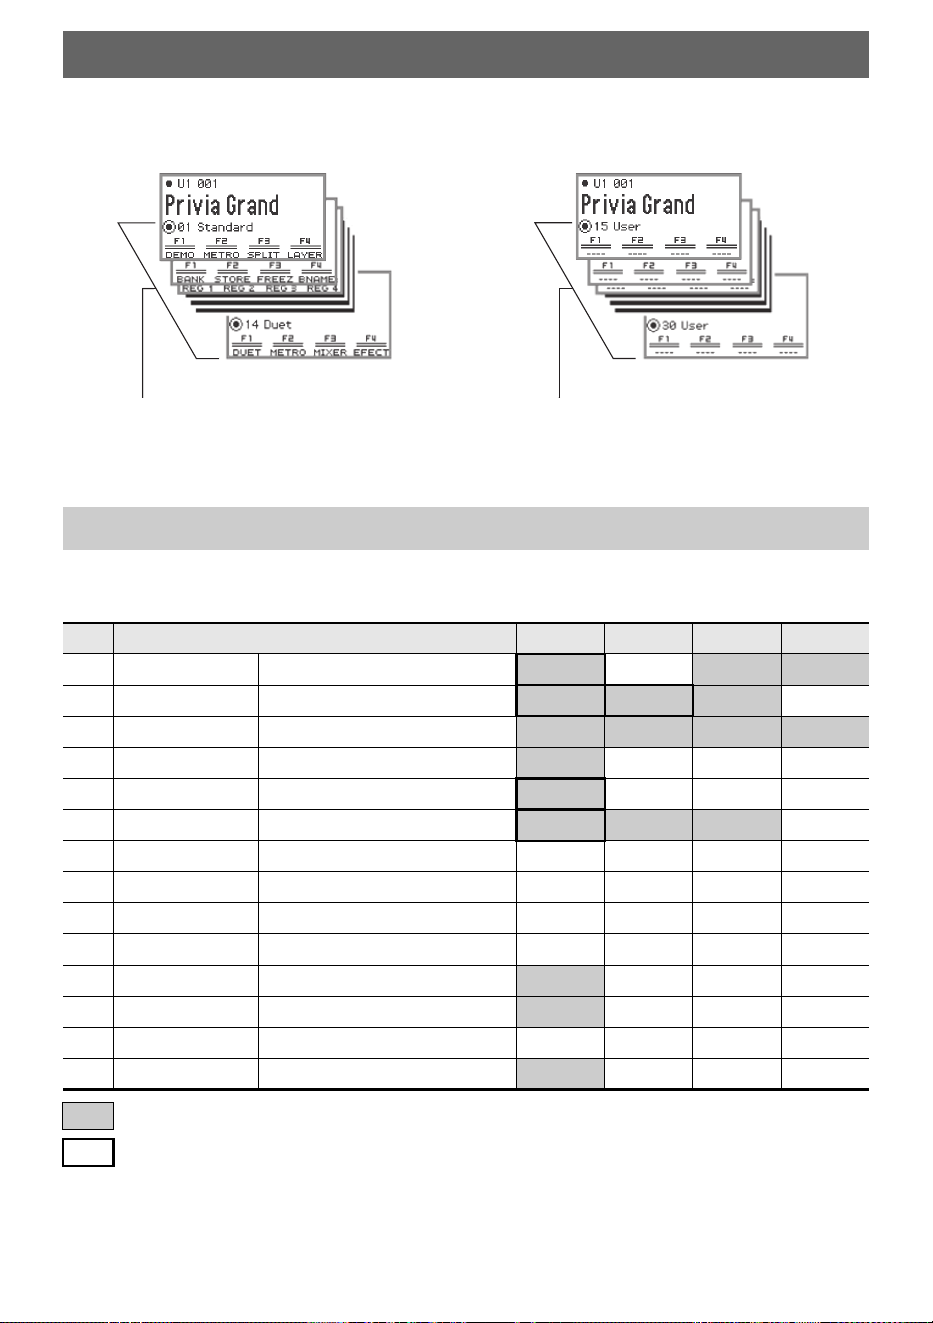
EN-94
A set of four F buttons, each assigned a function, is called an F Button Set. There are 14 preset
F Button Sets that have predefined names and functions and 16 user F Button Sets that the user can
freely assign names and functions to.
Assign frequently used tones, functions, etc. to a user F Button Set according to the song you are
playing.
The names of F Button Sets 01 to 14 and the functions assigned to each F button are shown in the
table below.
Using the F Button Set
Preset F Button Set List
No. F Button Set Name F1 F2 F3 F4
01 Standard (Standard)
DEMO METRO SPLIT LAYER
02 Regist Setting (Registration Setting)
BANK STORE FREEZ BNAME
03 Registration (Registration)
REG 1 REG 2 REG 3 REG 4
04 Listening (Listening)
ADPTR SMODE PPOSI MIXER
05 Song Play (Song Play)
SONG SMODE PPOSI MICFX
06 Song Lesson (Song Lesson)
SONG s d METRO
07 Piano Collect (Piano Collection) 001PR 004ST 005BA 009CO
08 E.PianoCollect (Electric Piano Collection) 018SP 019JU 023IN 024WH
09 Favorite Piano (Favorite Piano) ACSIM EFECT SMODE PPOSI
10 Effect (Effect) SMODE PPOSI EFECT DSP
11 Vocal (Vocal)
ADPTR MICFX SMODE MIXER
12 Control (Control)
ARPEG TRANS KNOB CTRL
13 KB Setting (Keyboard Setting) KEYBD WHEEL PEDAL CTRL
14 Duet (Duet)
DUET METRO MIXER EFECT
This function can only be used with an F button (not included in the FUNCTION menu).
Recalls a dedicated screen.
Preset F Button Sets (01–14) User F Button Sets (15–30)
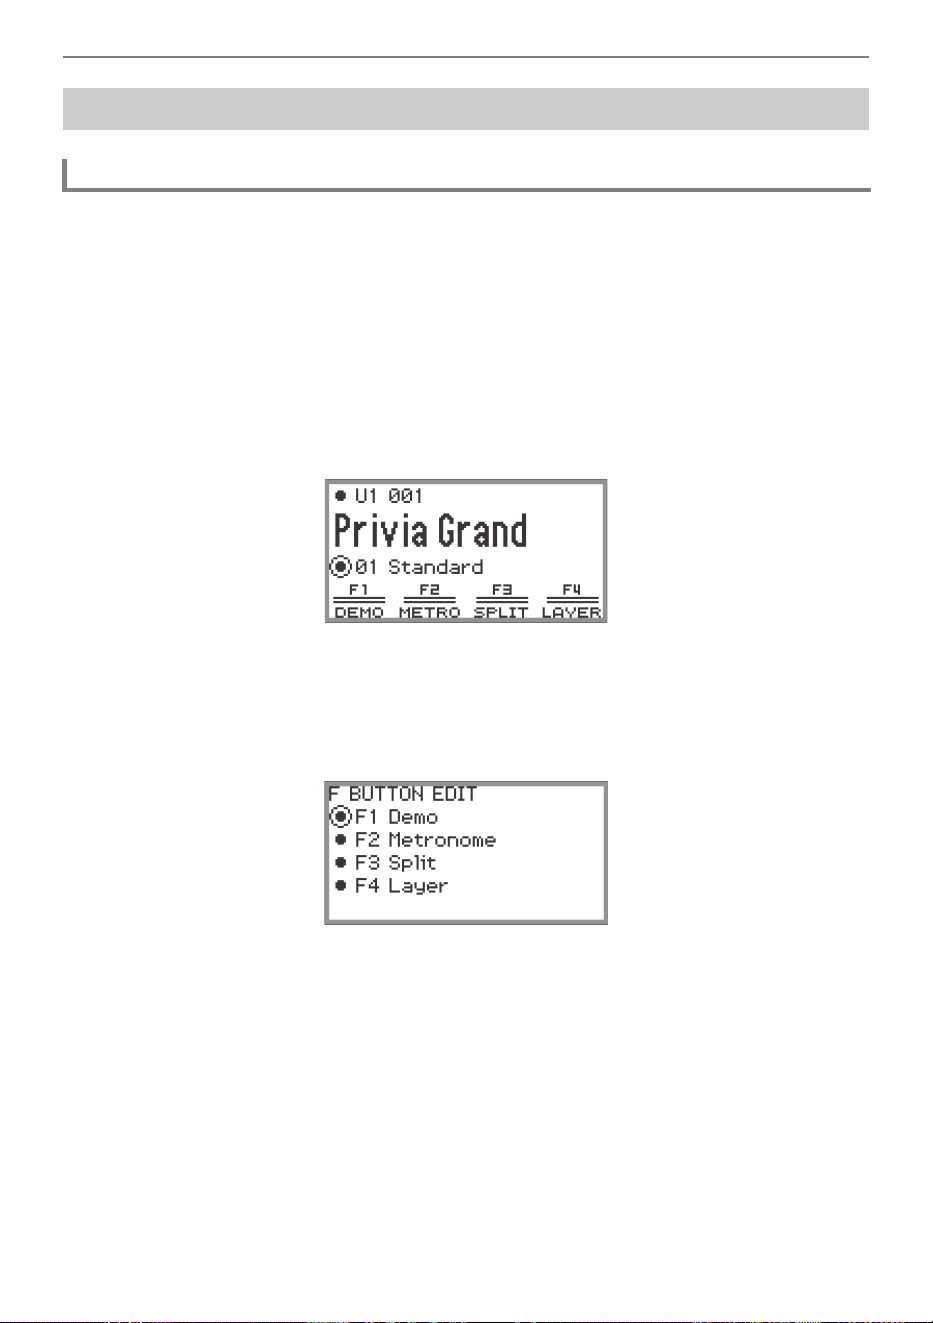
Using the F Button Set
EN-95
There are two ways to assign desired functions to F buttons, creating a user F Button Set:
• Edit the preset F Button Set (or a user F Button Set that has already been assigned functions) and
save it as a user F Button Set (see [Example 1]).
• Assign new functions to an empty user F Button Set and save it (see [Example 2]).
[Example 1]: Editing the “01 Standard” preset F Button Set and saving it as a user F
Button Set
1.
Select the “01 Standard” of the F Button Set. See “To change the F Button Set”
(page EN-32).
2.
While touching the FUNCTION button, touch the F1 button.
The “F BUTTON EDIT” screen appears.
• Since you touched the F1 button, the F1 button is selected as the target for assigning a
different function.
Editing an F Button Set
Assigning a Function to an F Button (Creating a User F Button Set)
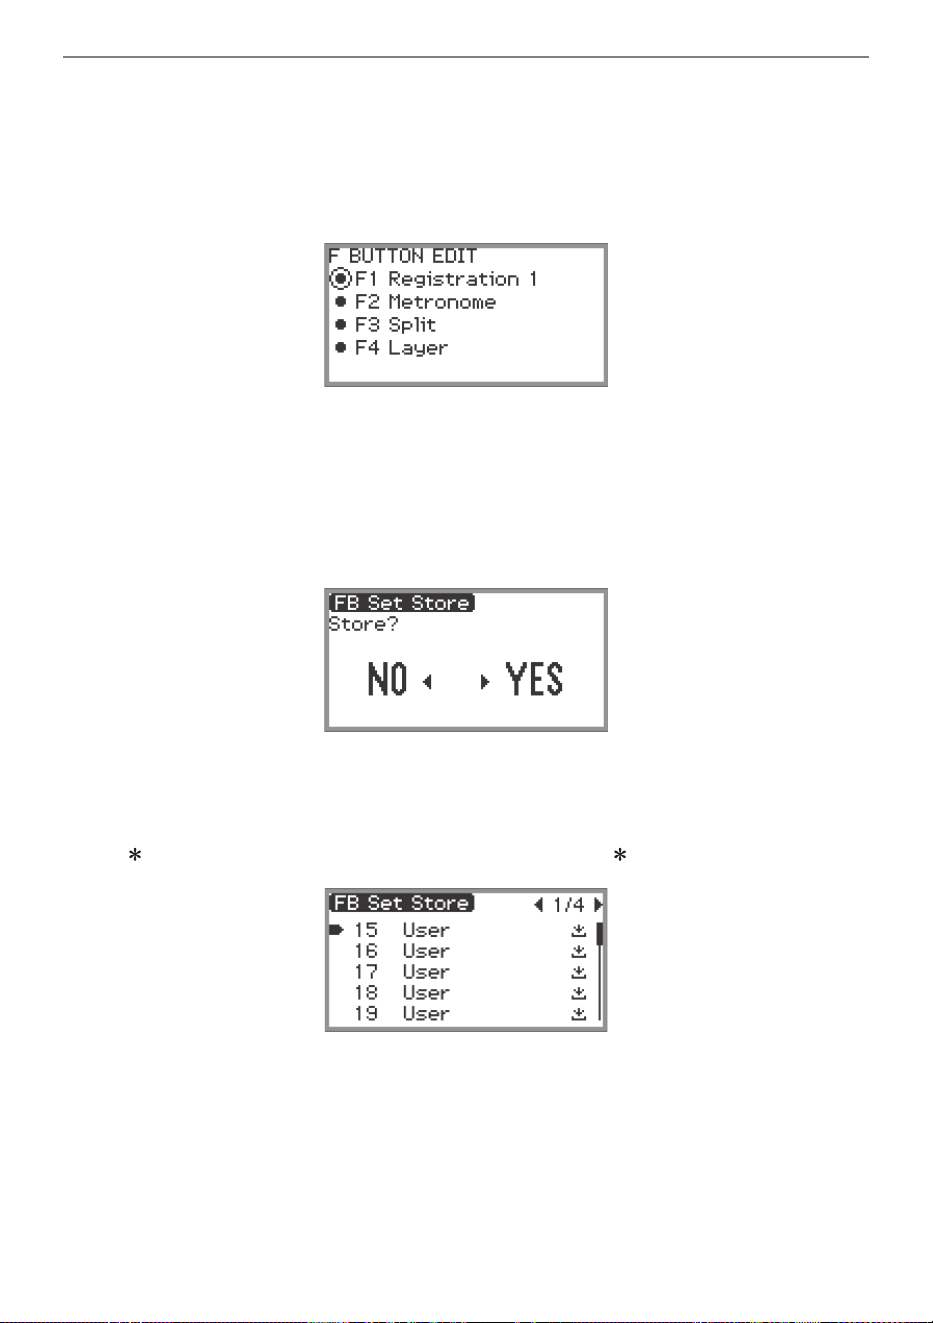
Using the F Button Set
EN-96
3.
Trace the touch ring to change the setting value for the F1 button.
• For details on the displayed settings and the corresponding functions, see “F Button Function
List” (page EN-103).
• To assign a tone to an F button, you must change the setting value to “Tone Category” and
touch the ENTER button to select a tone. For more information, see “Assigning a tone to an F
button” (page EN-99).
• To change the function assignments of other F buttons, touch the top or bottom of the touch ring
while the “F BUTTON EDIT” screen is displayed to select “F2”, “F3”, or “F4”, then change the
setting of the selected button.
4.
When you are done making the necessary changes, touch the EXIT button.
A screen appears to confirm whether you want to save the F Button Set. To exit the operation
without saving, touch the left of the touch ring (NO).
5.
Touch the right of the touch ring (YES) to save.
A screen appears to select which user F Button Set to use as the save destination.
• The user F Button Sets that have already been assigned functions and saved are marked with a
“ ” to the right of their numbers. Selecting a set marked with “ ” will overwrite it.
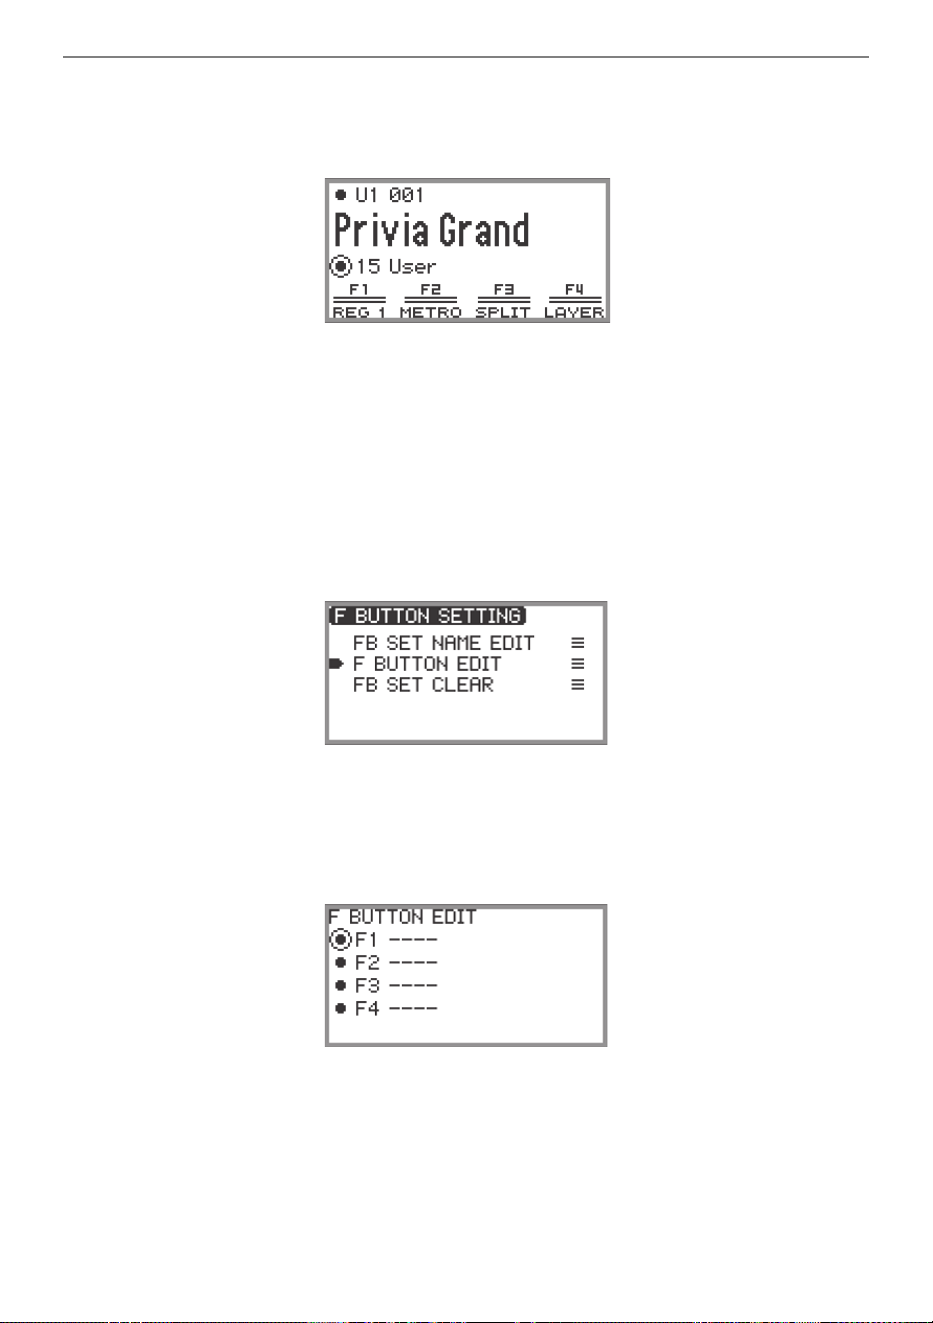
Using the F Button Set
EN-97
6.
Trace the touch ring to select a user F Button Set as the save destination then
touch the ENTER button.
After “Complete” appears, the display returns to the top screen.
[Example 2]: Assigning new functions to an empty user F Button Set and saving it
1.
Select an empty user F Button Set. See “To change the F Button Set” (page
EN-32).
2.
Touch the FUNCTION button to display the FUNCTION menu.
3.
Use the touch ring to select “F BUTTON SETTING” > “F BUTTON EDIT”.
4.
Touch the ENTER button.
The “F BUTTON EDIT” screen appears.
• The F1 button is now selected as the target that will be assigned a different function.
• “----” appears to the right of the F buttons that do not have an assigned function.
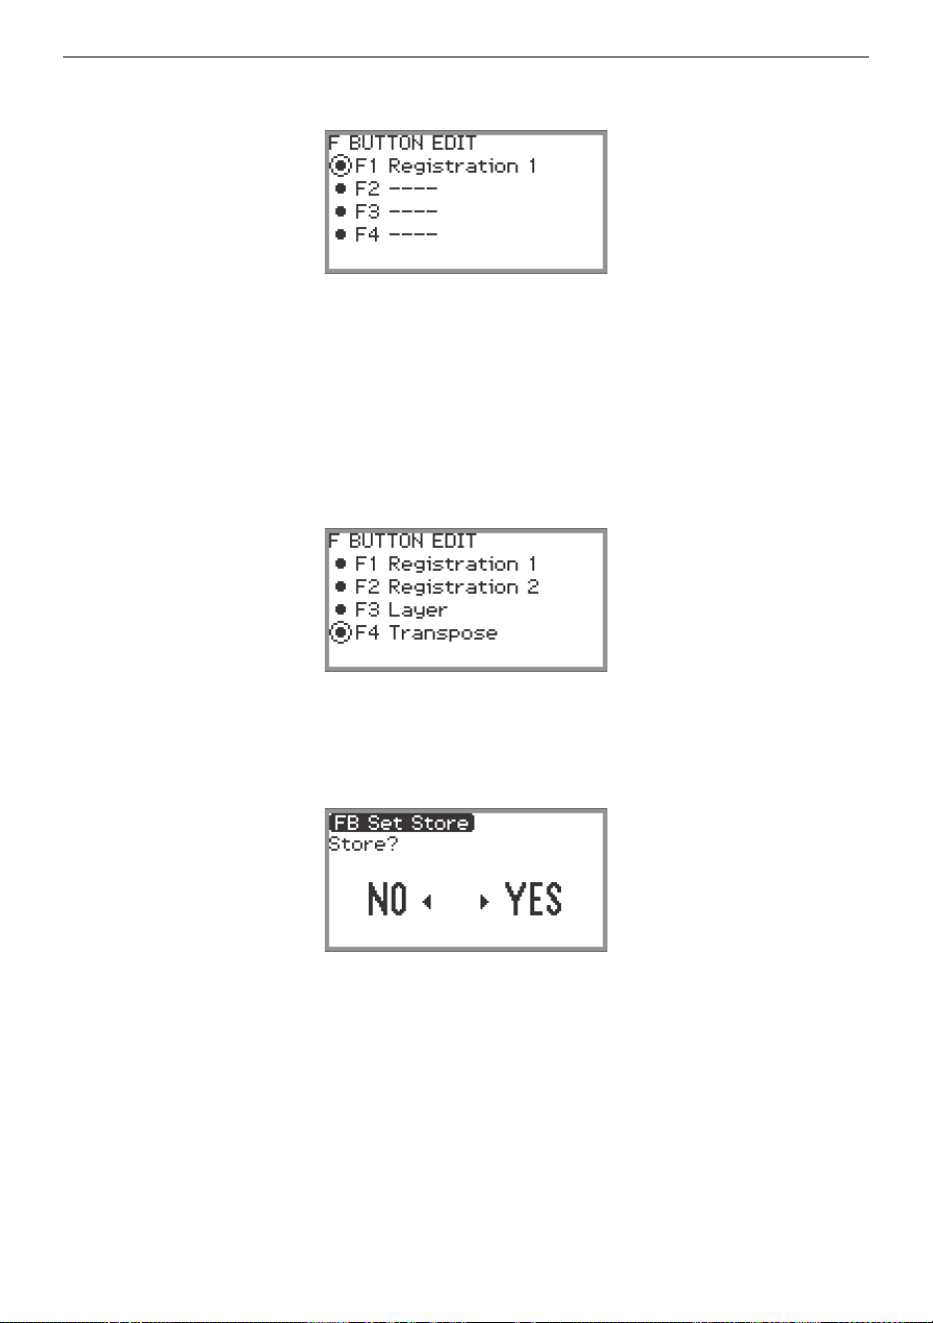
Using the F Button Set
EN-98
5.
Trace the touch ring to change the desired setting.
• For more information on the displayed settings and the assignable F button functions
corresponding to those settings, see “F Button Function List” (page EN-103).
• To assign a tone to the F button, you must change the setting value to “Tone Category” and
touch the ENTER button to select a tone. For more information, see “Assigning a tone to an F
button” (page EN-99).
6.
Touch the top or bottom of the touch ring while the “F BUTTON EDIT” screen is
displayed to select “F2”, “F3”, or “F4”, and then change the setting of the
selected button.
7.
When you are done making the necessary changes, touch the EXIT button.
A screen appears to confirm whether you want to save the F Button Set. To exit the operation
without saving, touch the left of the touch ring (NO).

Using the F Button Set
EN-99
8.
Touch the right of the touch ring (YES) to save.
A screen appears to select which user F Button Set to use as the save destination.
• User F Button Sets that have already been assigned functions and saved are marked with a “ ”
to the right of their numbers. Selecting a set marked with “ ” will overwrite it.
9.
Trace the touch ring to select the user F Button Set to use as the save destination
then touch the ENTER button.
After “Complete” appears, the display returns to the “F BUTTON SETTING” screen.
10.
Touch and hold the EXIT button to return to the top screen.
■ Assigning a tone to an F button
Perform the following during Step 3 of [Example 1] (page EN-95) or Step 4 of [Example 2] (page
EN-97).
1.
Touch the ENTER button to display the list of settings and select “Tone
Category”.
2.
Touch the ENTER button.
A list of tone categories is displayed.
3.
Use the touch ring to select a tone category, then touch the ENTER button.
A list of tone names is displayed.
4.
Use the touch ring to select a tone.
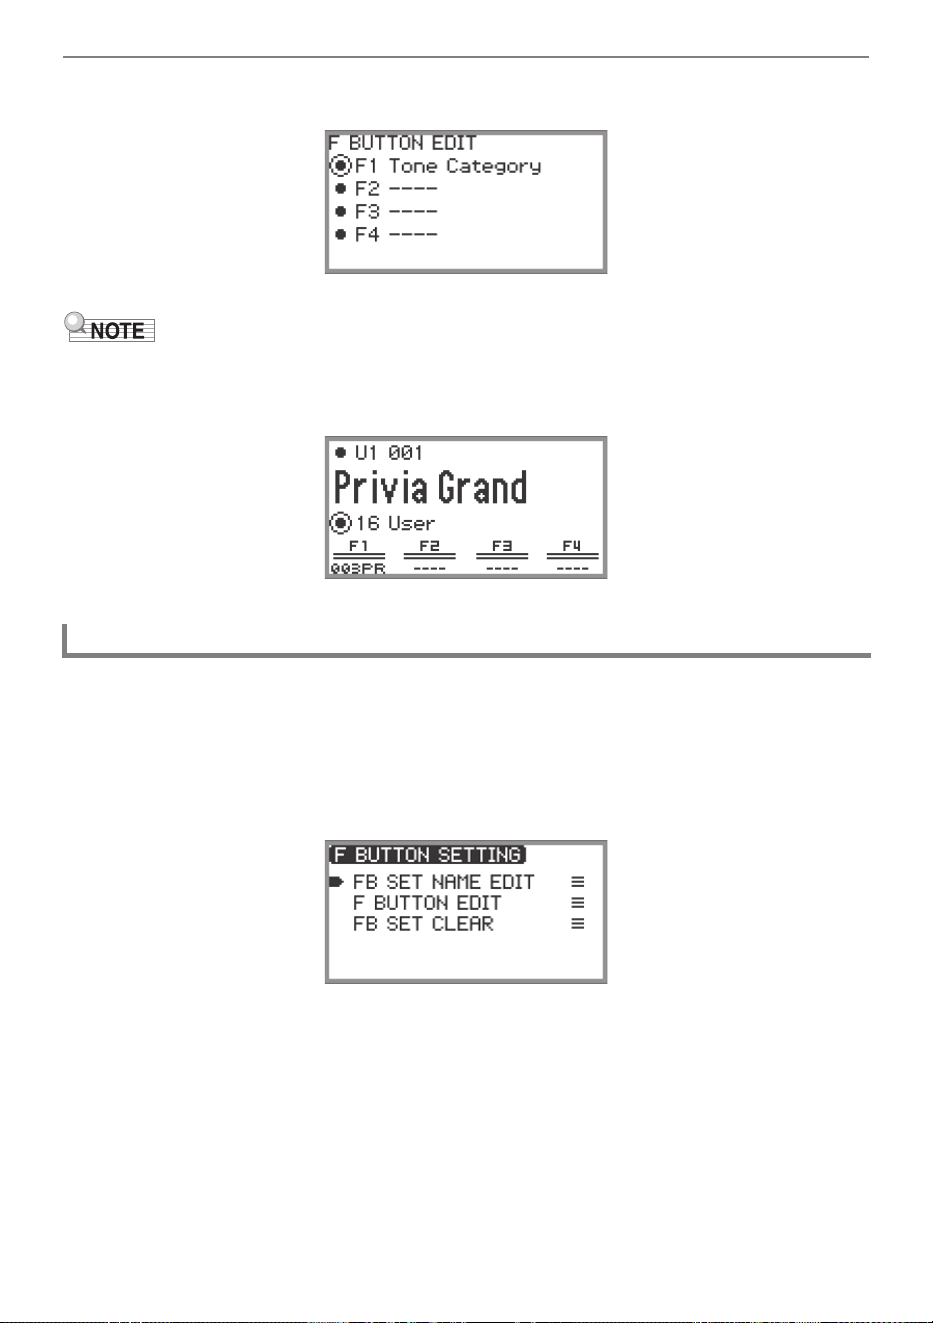
Using the F Button Set
EN-100
5.
Touch the EXIT button three times to return to the “F BUTTON EDIT” screen.
• Regardless of the tone selected in Step 4 above, the “F BUTTON EDIT” screen will display “Tone
Category” as the setting value. When you return to the top screen after saving the F Button Set, the
tone number and the first two letters of the tone name appear in the F button menu, as shown below.
1.
Select the F Button Set you want to rename. See “To change the F Button Set”
(page EN-32).
2.
Touch the FUNCTION button to display the FUNCTION menu.
3.
Use the touch ring to select “F BUTTON SETTING” > “FB SET NAME EDIT”.
Changing the Name of an F Button Set
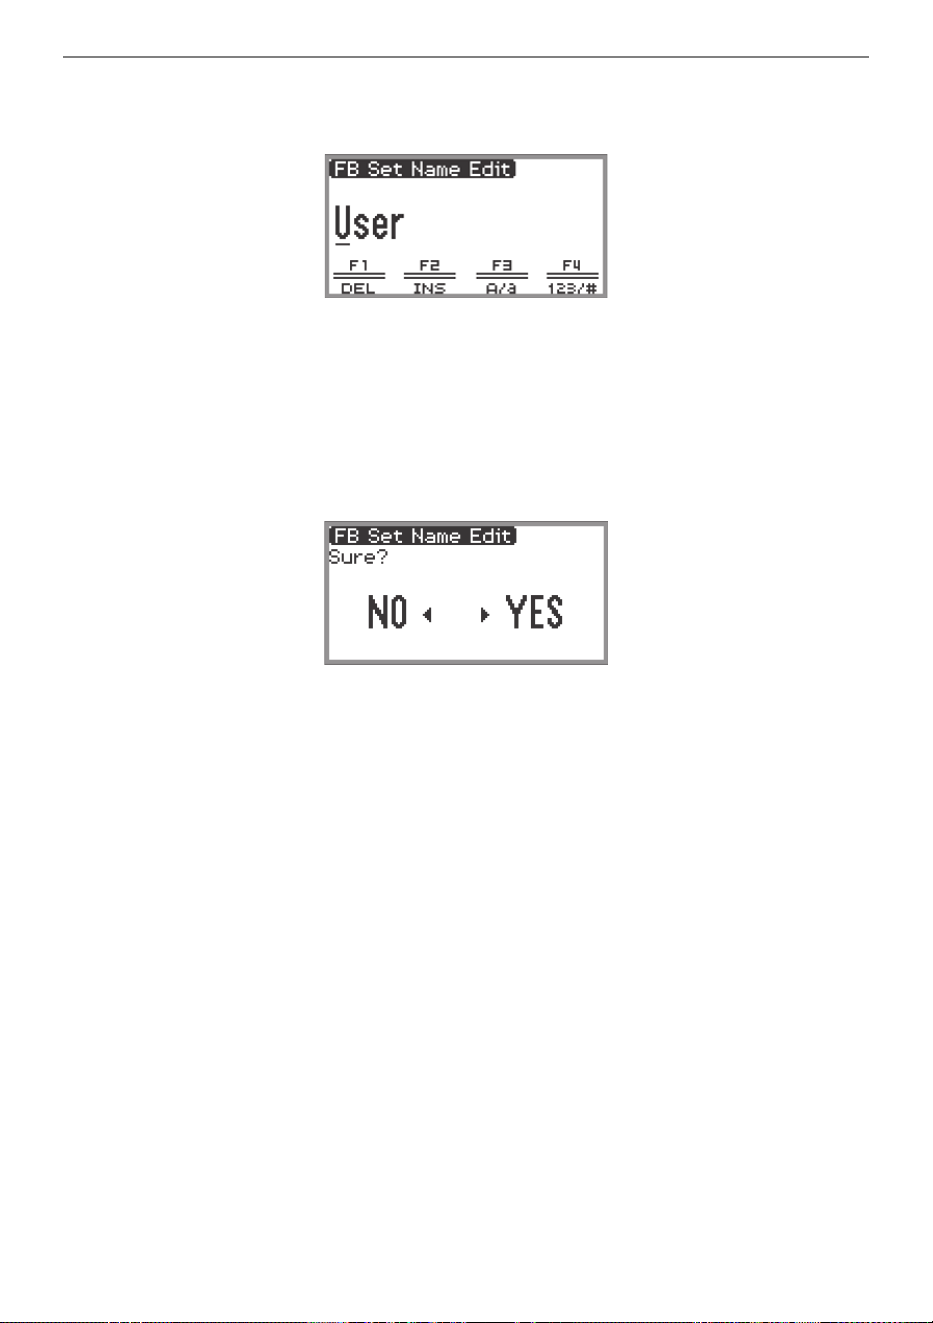
Using the F Button Set
EN-101
4.
Touch the ENTER button.
The F Button Set name editing screen appears.
5.
Change the F Button Set name to the desired name.
• For more information on operations, see “To change a character” (page EN-35), “To insert a
character” (page EN-36), and “To delete a character” (page EN-36).
6.
When you are done making your changes, touch the ENTER button.
A screen appears to confirm whether you want to save the name of the F Button Set. To return to
the editing screen without saving, touch the left of the touch ring (NO).
7.
Touch the right of the touch ring (YES).
A screen appears to select which user F Button Set to use as the save destination.
8.
Trace the touch ring to select the user F Button Set to use as the save
destination, then touch the ENTER button.
After “Complete” appears, the display returns to the “F BUTTON SETTING” screen.
9.
Touch and hold the EXIT button to return to the top screen.
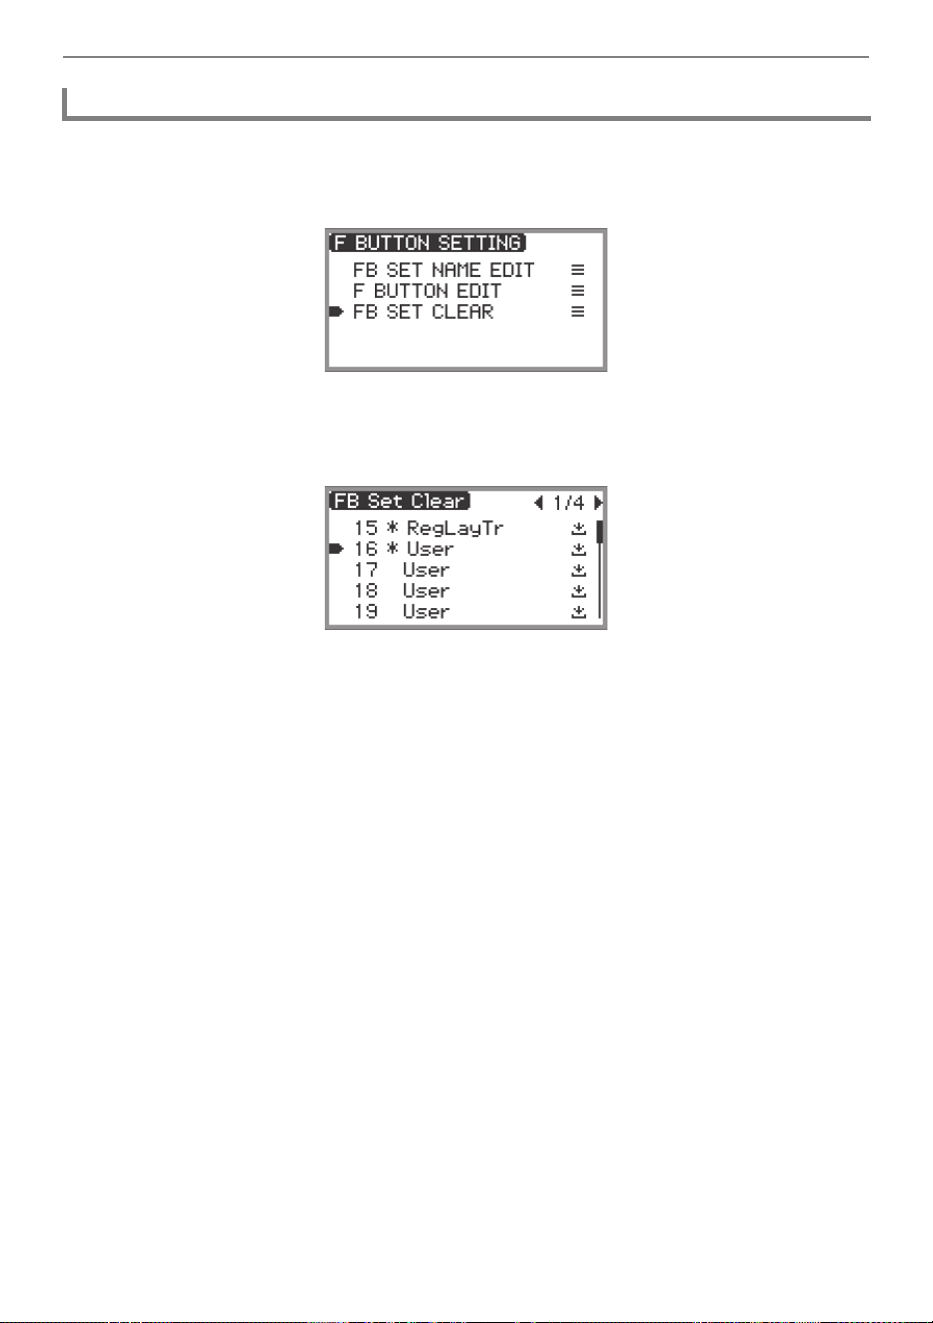
Using the F Button Set
EN-102
1.
Touch the FUNCTION button to display the FUNCTION menu.
2.
Use the touch ring to select “F BUTTON SETTING” > “FB SET CLEAR”.
3.
Touch the ENTER button.
A screen appears to select the F button set to erase.
4.
Touch the top or bottom of the touch ring to select the F button set to erase, then
touch the ENTER button.
A screen appears to confirm whether you want to erase the F Button Set. To cancel, touch the left
of the touch ring (NO).
5.
Touch the right of the touch ring (YES) to erase.
After “Complete” appears, the display returns to the “F BUTTON SETTING” screen.
6.
Touch and hold the EXIT button to return to the top screen.
Erasing an F Button Set
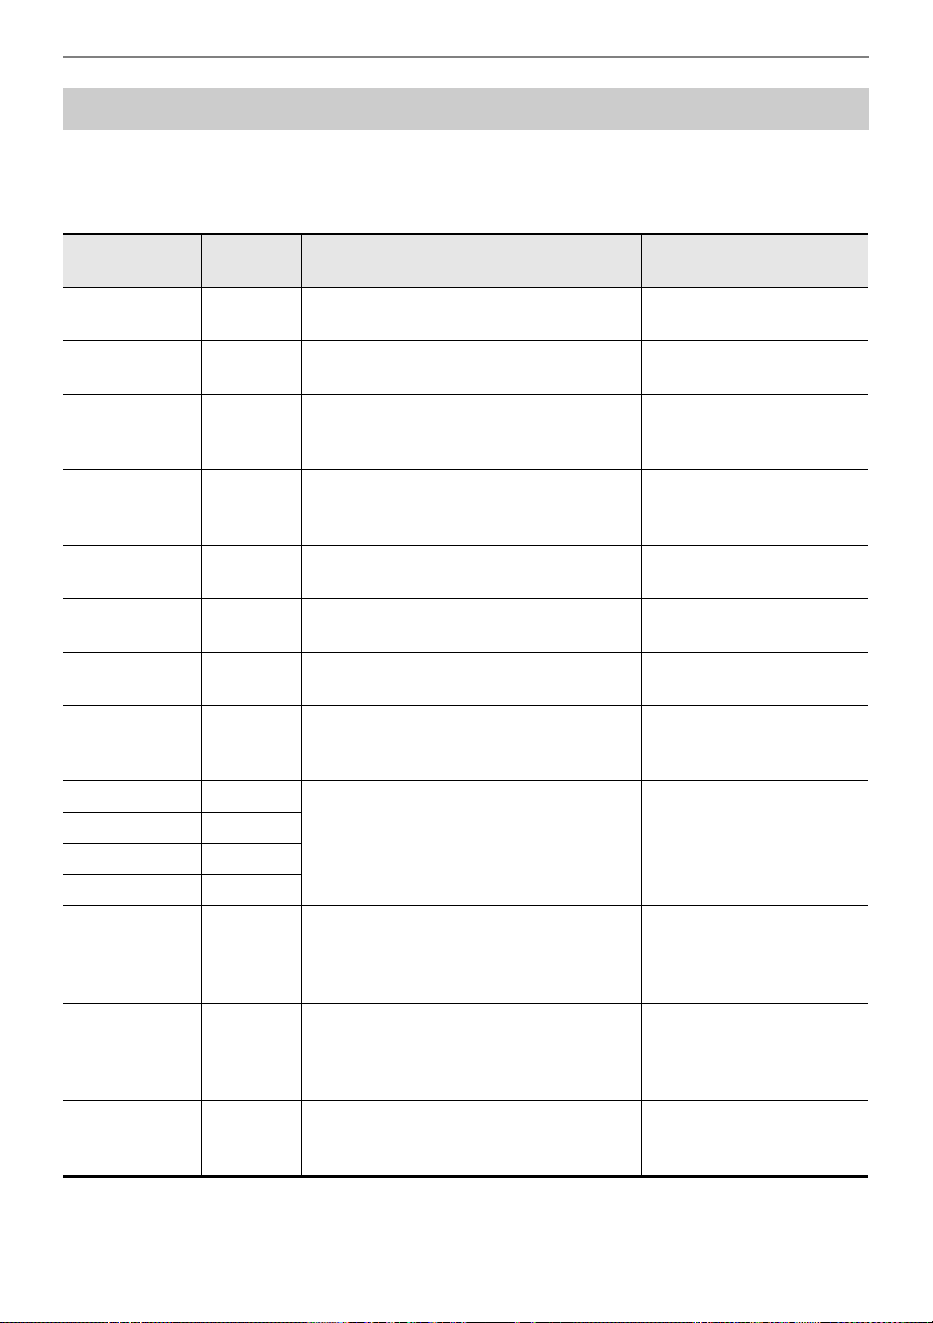
Using the F Button Set
EN-103
• The “Function Name” column indicates the value displayed on the “F BUTTON EDIT” screen.
• The “F Button Display” column is the text that appears in the F button menu.
• The “Function” column indicates the function to be performed when the F button is touched.
indicates the function to be performed when the F button is pressed and held.
F Button Function List
Function
Name
F Button
Display
Function Reference
Demo DEMO
The Digital Piano will wait for the demo
song to start.
“Listening to the Demo
Songs” (page EN-39)
Metronome METRO Displays the metronome setting screen.
“Using the Metronome”
(page EN-81)
Split SPLIT
Turns Split on and off.
Displays the Split Point setting screen.
“Splitting the Keyboard
Between Two Tones
(Split)” (page EN-46)
Layer LAYER Turns Layer on and off.
“Sounding Two Different
Tones at the Same Time
(Layer)” (page EN-44)
Bank BANK
Displays the Registration Bank selection
screen.
“Saving a Setup
Registration” (page EN-87)
Bank Name BNAME
Displays the Registration Bank name edit
screen.
“Changing a Registration
Bank Name” (page EN-88)
Store STORE
Displays the “REGIST STORE” screen
(for saving a setup registration).
“Saving a Setup
Registration” (page EN-87)
Freeze FREEZ
Turns Freeze function on/off.
Displays the Freeze function setting
screen.
“Freeze Function”
(page EN-90)
Registration 1 REG 1
Recalls registration area numbers 1
through 4.
“Recalling a Setup
Registration” (page EN-89)
Registration 2 REG 2
Registration 3 REG 3
Registration 4 REG 4
Adaptor ADPTR
Turns the Wireless MIDI & Audio Adaptor
on and off.
Displays the wireless setup screen.
“Enabling and Disabling
the Digital Piano’s
Wireless Function”
(page EN-149)
Sound Mode SMODE
Displays the Sound Mode selection
screen.
Displays the Sound Mode setting
screen.
“Enabling or Disabling the
Hall Simulator/Reverb and
Surround Effects”
(page EN-49)
Piano Position PPOSI
Displays the Piano Position setting
screen.
“Selecting the Piano
Position Setting”
(page EN-38)
Using the F Button Set
EN-104
Effect EFECT
Displays the “EFFECT” screen where you
can select the Chorus Type and adjust
the Brilliance.
“Using Chorus (Chorus,
Flanger, Short Delay)”
(page EN-57),
“Adjusting Brilliance”
(page EN-58)
Mic Effect MICFX
Turns the Microphone Effect on and off.
Displays the Microphone Effect setting
screen.
“Using Microphone Effects”
(page EN-61)
DSP DSP
Turns DSP on and off.
Displays the DSP setting screen.
“Using DSP Effects”
(page EN-52)
Acoustic Sim. ACSIM
Displays the Acoustic Simulator settings
screen.
“Adjusting Acoustic Piano
Sound Characteristics
(Acoustic Simulator)”
(page EN-59)
Mixer MIXER Displays the Mixer settings screen.
“Using the Mixer”
(page EN-65)
Song SONG
Displays the SONG mode screen for
song playback.
“Playing Back MIDI Data or
Audio Data”
(page EN-107)
Arpeggiator ARPEG
Turns the Arpeggiator on and off.
Displays the Arpeggiator setting
screen.
“Using the Arpeggiator”
(page EN-84)
Duet DUET
Turns the Duet function on and off.
Displays the Duet function setting
screen.
“Splitting the Keyboard for
Duet Play” (page EN-135)
Keyboard KEYBD
Displays the “KEYBOARD” screen in the
FUNCTION menu.
“Using the FUNCTION
Menu” (page EN-33)
Knob KNOB
Displays the KNOB setting screen.
Resets the parameters of the functions
that are currently assigned to the knobs.
“
Using the Knobs”
(page EN-72)
Control CTRL
Displays the CONTROL button setting
screen.
“Using the CONTROL
Button” (page EN-77)
Pedal PEDAL
Displays the setting screen for the pedal
connected to the EXPRESSION/
ASSIGNABLE jack.
“EXPRESSION/
ASSIGNABLE jack”
(page EN-68)
Wheel WHEEL
Displays the pitch bend wheel setting
screen.
“Using the Pitch Bend
Wheel” (page EN-79)
Function
Name
F Button
Display
Function Reference
Using the F Button Set
EN-105
* The tone number (3 digits) of the specified tone followed by the first two letters of the tone name are
displayed.
ss
Backs up the song a little.
Rewinds the song.
“Playing Back MIDI Data or
Audio Data”
(page EN-107)
dd
Advances the song a little.
Fast-forwards the song.
“Playing Back MIDI Data or
Audio Data”
(page EN-107)
kkPauses the currently playing song.
“Playing Back MIDI Data or
Audio Data”
(page EN-107)
Song Type STYPE Displays the song setting screen.
“Playing Back MIDI Data or
Audio Data”
(page EN-107)
Transpose TRANS Displays the Transpose setting screen.
“Changing the Pitch in
Semitone Steps
(Transpose)”
(page EN-130)
Tone Category Recalls the specified tone.
“Assigning a tone to an F
button” (page EN-99)
– – – – – – – – No function assigned to the F button. –
Function
Name
F Button
Display
Function Reference
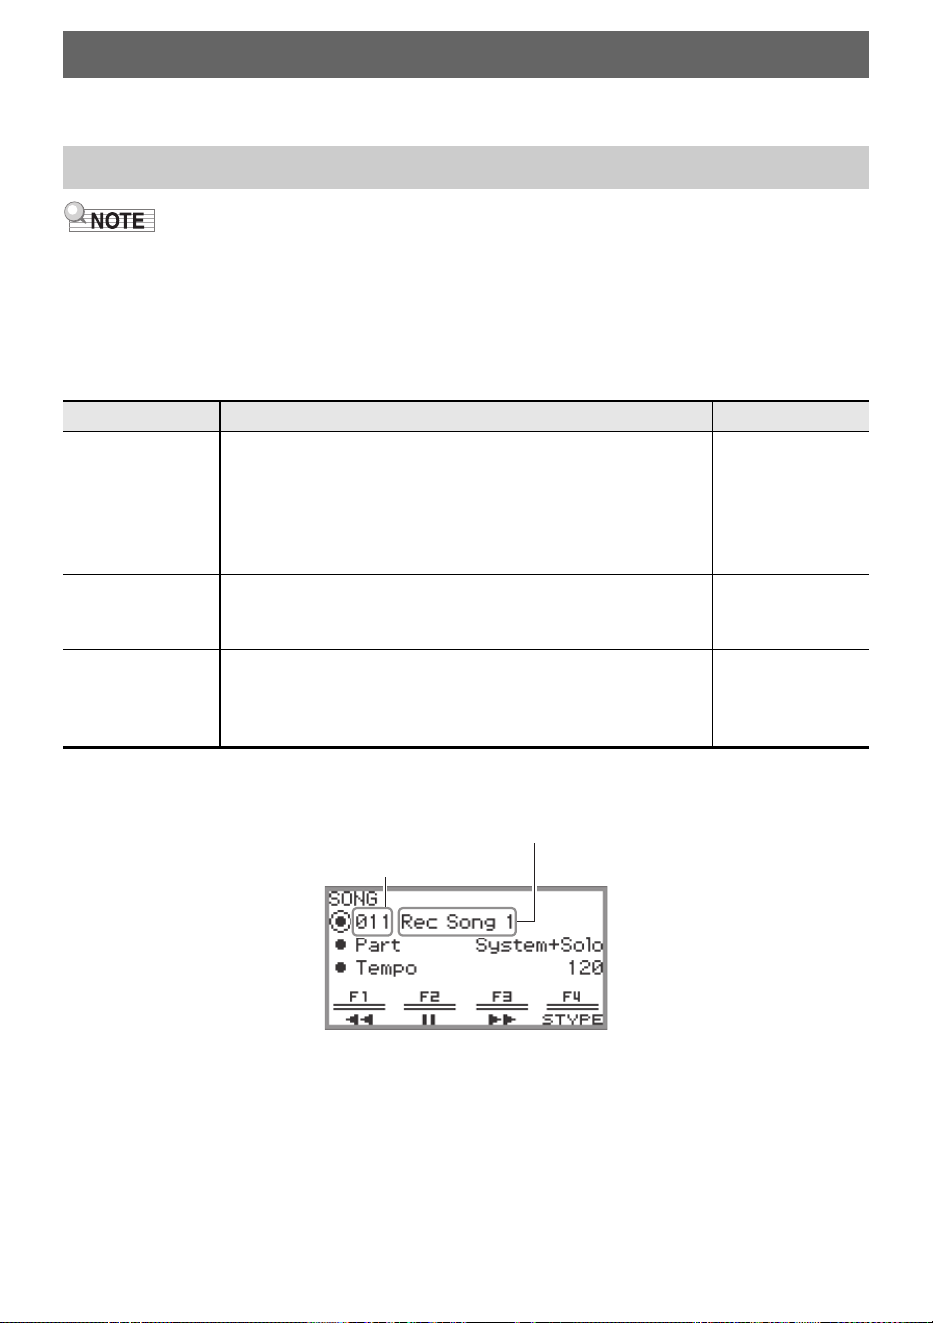
EN-106
MIDI and audio data can be played back in the SONG mode screen that appears when you touch the
a button.
• For details on saving MIDI and audio data that can be played back on this Digital Piano to a USB
flash drive, see “Saving MIDI Files or Audio Files for Playback on your Digital Piano to a USB Flash
Drive” (page EN-143).
■ MIDI Data
The table below shows the types of MIDI data saved in either the Digital Piano’s internal memory or
USB flash drive that can be played back.
*1 The song number is displayed to the left of the song data name in the SONG mode screen. You can
identify the type of MIDI song by the song number.
*2 The extension is displayed when the file is viewed on a computer or other device. It does not appear
in the SONG mode screen.
MID: Standard MIDI file (SMF format 0/1)
CMF: CASIO MIDI file (CASIO’s proprietary extended MIDI format)
MRF: Dedicated format for MIDI recorder songs recorded with this Digital Piano
Listening to Songs (SONG Mode)
Data Types of Playable Songs
Song Number
*1
Type of Song File Extension
*2
001 to 010
User songs: Up to 10 of your favorite songs can be stored in
the Digital Piano’s internal memory. The data can be
transferred to the Digital Piano from a USB flash drive or
smart device. For more information, see “Loading USB Flash
Drive Data into the Digital Piano’s Internal Memory” (page
EN-145) and “Using the Dedicated App” (page EN-155).
MID, CMF
011 to 015
MIDI recorder songs: Songs recorded by the Digital Piano’s
MIDI recorder. For more information, see “Using the MIDI
Recorder to Record Performances” (page EN-113).
MRF
016 to 999
USB flash drive songs: Standard MIDI files (SMF format 0/1)
or CASIO MIDI files (CMF format) stored on a USB flash
drive can be played back without having to transfer them to
the Digital Piano.
MID, CMF
SONG mode screen (in MIDI mode)
Song number
Data name (File name)
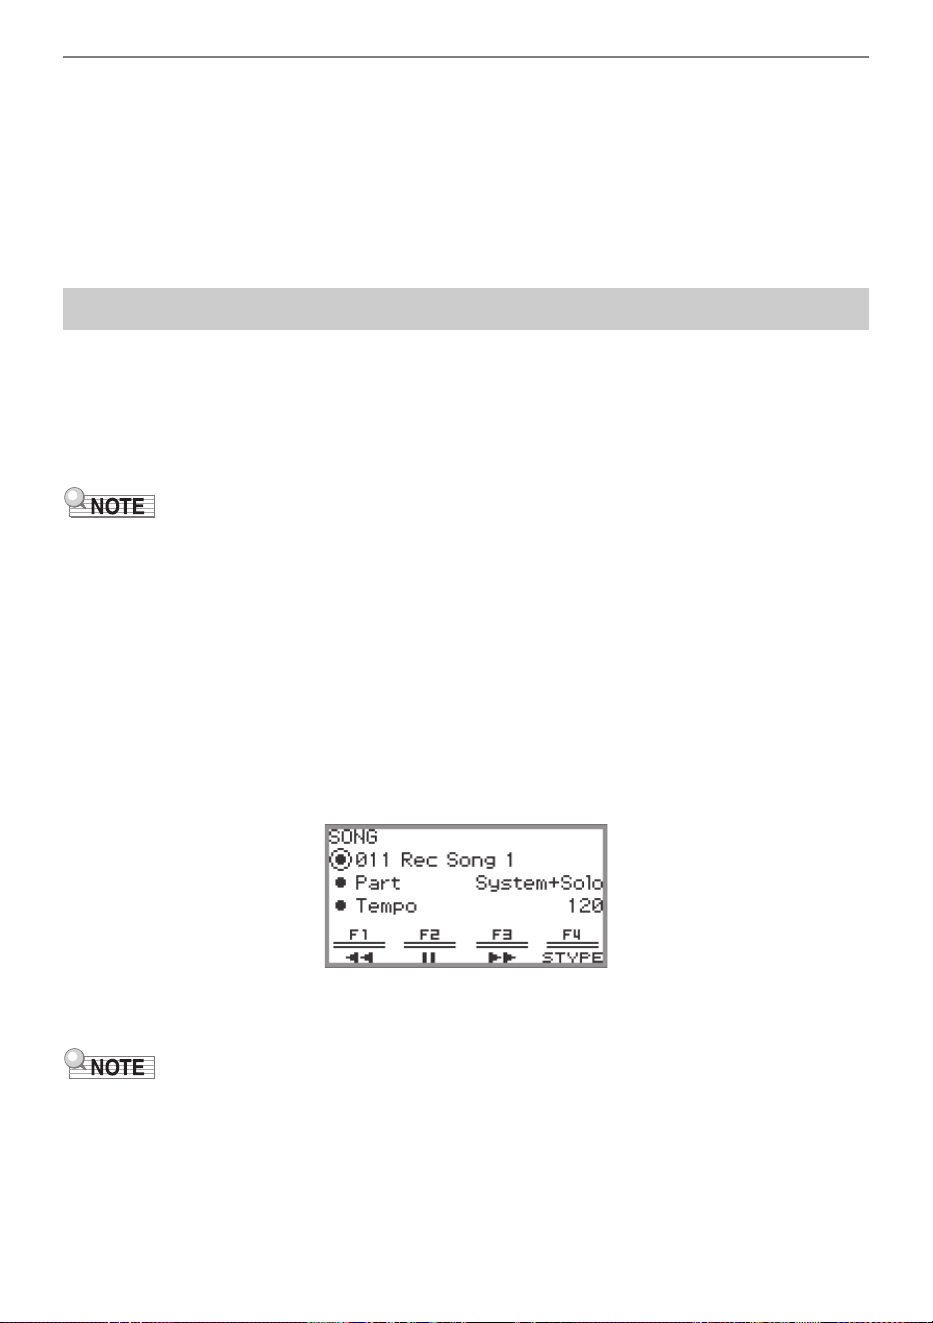
Listening to Songs (SONG Mode)
EN-107
■ Audio Data
The following audio data stored in a USB flash drive can be played back.
• WAV file (Linear PCM, 16-bit, 44.1kHz, stereo, file name extension: .WAV)
• MP3 file (MPEG-1 Audio Layer3, 44.1kHz/48kHz, 32 to 320kbps variable bit rate (VBR), monaural/
stereo, file name extension: .MP3)
Audio recorder songs recorded with this Digital Piano are WAV files (file names “TAKE01.wav” to
“TAKE99.wav”).
To play back songs stored on a USB flash drive, plug the USB flash drive into the USB Type A port of
the Digital Piano in advance.
• When a USB flash drive is inserted, “MOUNTING” will be displayed briefly. It may take a minute or so
for the message to disappear.
• For information on handling USB flash drives and plugging/unplugging them from the Digital Piano,
see “Preparing a USB Flash Drive” (page EN-138).
• For details on saving MIDI data and audio data to a USB flash drive for playback on this Digital
Piano, see “Saving MIDI Files or Audio Files for Playback on your Digital Piano to a USB Flash Drive”
(page EN-143).
• For details on loading MIDI data (user songs) from a USB flash drive to the internal memory of this
Digital Piano, see “Loading USB Flash Drive Data into the Digital Piano’s Internal Memory” (page
EN-145).
• The metronome can be used during MIDI data playback. For more information, see “Changing the
Metronome Settings (Tempo, Beat, Pattern, etc.)” (page EN-81). In the “METRONOME” screen, set
“While Playing” to “On”.
1.
Touch the a button.
The SONG mode screen appears.
• If a song has been recorded (or played) since the Digital Piano was turned on, the last song
recorded (or played) will be played. To stop playback, touch the a button.
• The SONG mode screen can also be displayed by performing the following operations.
(1) Select the “05 Song Play” of the F button set. See “To change the F Button Set” (page EN-32).
(2) Touch the F1 button (SONG).
Playing Back MIDI Data or Audio Data
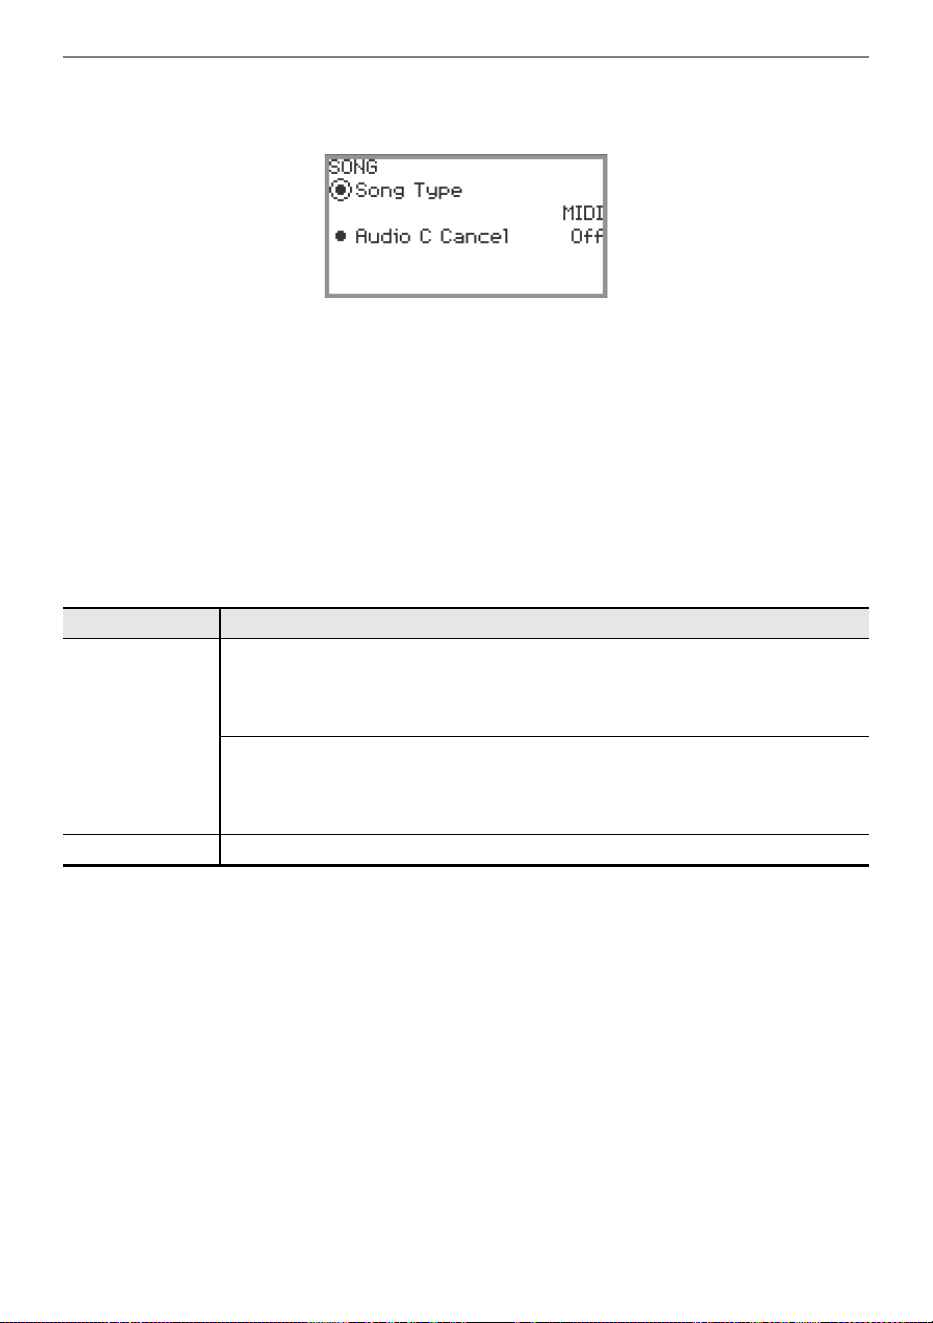
Listening to Songs (SONG Mode)
EN-108
2.
Select “Song Type” according to the song you want to play.
(1) Touch the F4 button (STYPE).
(2) Trace the touch ring to select the “Song Type” setting from the following:
“MIDI” … Play MIDI data from the internal memory or a USB flash drive (MIDI Mode)
“Audio(USB Drv)” … Play audio data from a USB flash drive (Audio Mode)
(3) Touch the EXIT button to return to the SONG mode screen.
3.
Trace the touch ring to select the song you want to play.
• For MIDI data and audio data for each song, see “Data Types of Playable Songs” (page
EN-106).
4.
When playing back MIDI data, set the part and tempo to be played back as
needed.
• Touch the top or bottom of the touch ring to select the item whose setting you want to change.
5.
To start playback, touch the a button.
• During playback, the following operations are available:
Touch the F1 button (s): Backs up the song a little.
Touch and hold the F1 button (s): While held down, the song will rewind.
Touch the F2 button (k): Pauses the currently playing song. Touch while paused to resume
playback.
Touch the F3 button (d): Advances the song a little.
Touch and hold the F3 button (d): While held down, the song will fast-forward.
• When the song reaches the end, playback will stop. Touch the a button to stop midway.
Setting item Setting values and descriptions
Part
For user songs and USB flash drive songs
L+R: Plays both parts
L: Plays only the left-hand part
R: Plays only the right-hand part
For MIDI recorder songs
System + Solo: Plays both tracks
System: Plays only the system track
Solo: Plays only the solo track
Tempo Sets the tempo of the song between 20 and 255 (beats/minute)
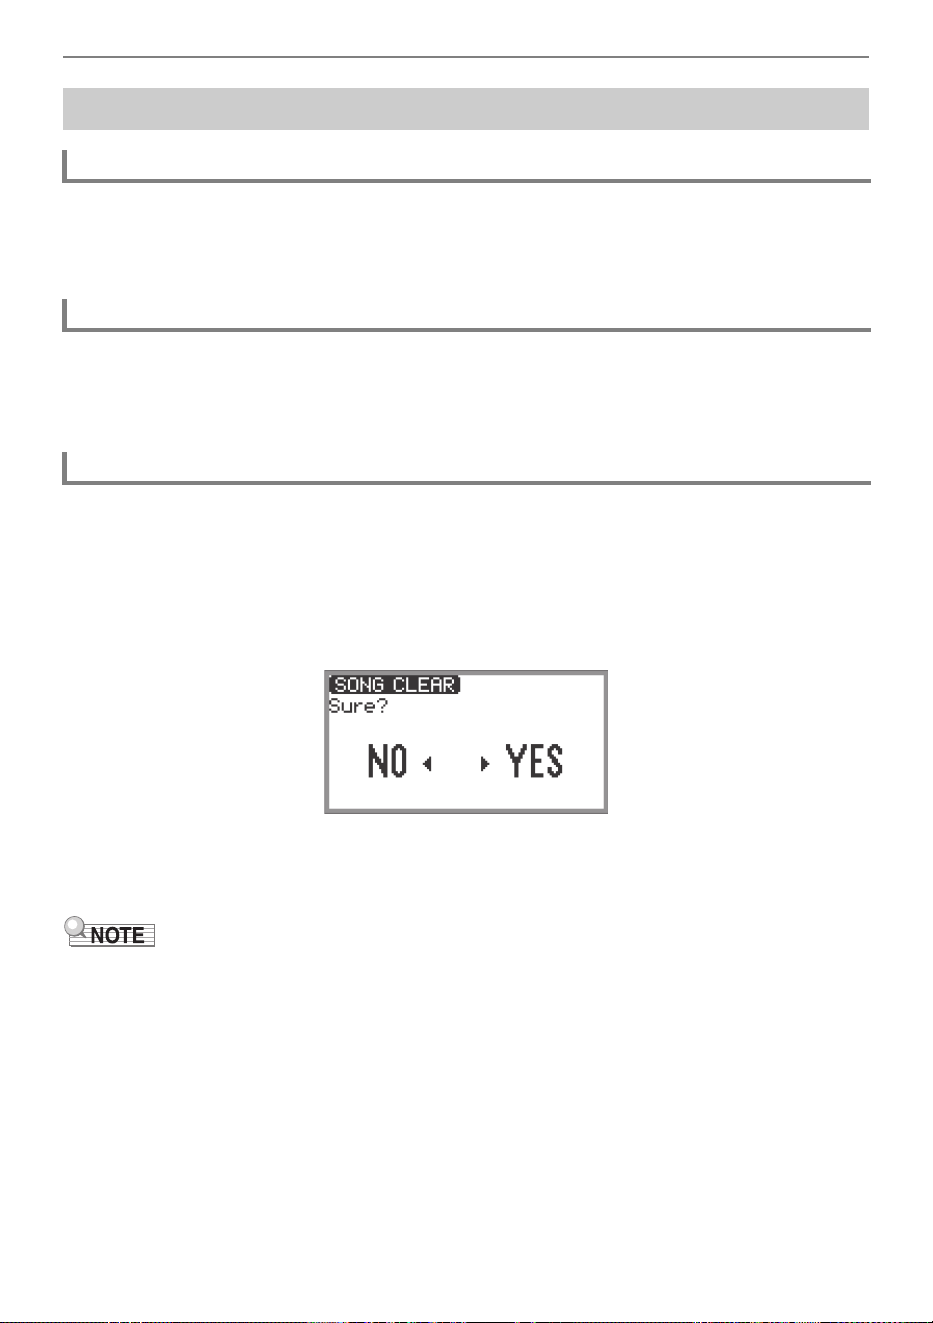
Listening to Songs (SONG Mode)
EN-109
In the “METRONOME” screen, turn “While Playing” to “On” to have the Metronome sound during MIDI
data playback.
For more information, see “Changing the Metronome Settings (Tempo, Beat, Pattern, etc.)” (page
EN-81).
Use “MIXER” > “VOLUME” > “MIDI Song” to adjust the playback volume of MIDI data relative to the
overall volume.
For more information, see “Adjusting the Volume Level, Stereo Pan and Effects for Each Part” (page
EN-65).
1.
Follow steps 1 through 3 of “Playing Back MIDI Data or Audio Data” (page
EN-107) to select the user song (song numbers 001 to 010) you want to delete.
2.
Touch and hold the 0REC button.
A confirmation screen will appear. To cancel the operation, touch the left of the touch ring (NO) at
this point.
3.
Touch the right of the touch ring (YES) to delete.
“Complete” is displayed and the display returns to the SONG mode screen.
• For details on deleting a MIDI recorder song, see “Deleting a MIDI Recorder Song (Entire Song/
Individual Tracks)” (page EN-119).
Operations While Playing Back MIDI Data
Sounding Metronome While Playing Back MIDI Data
Adjusting the Volume Level of MIDI Data Playback (MIXER Settings)
Deleting a User Song
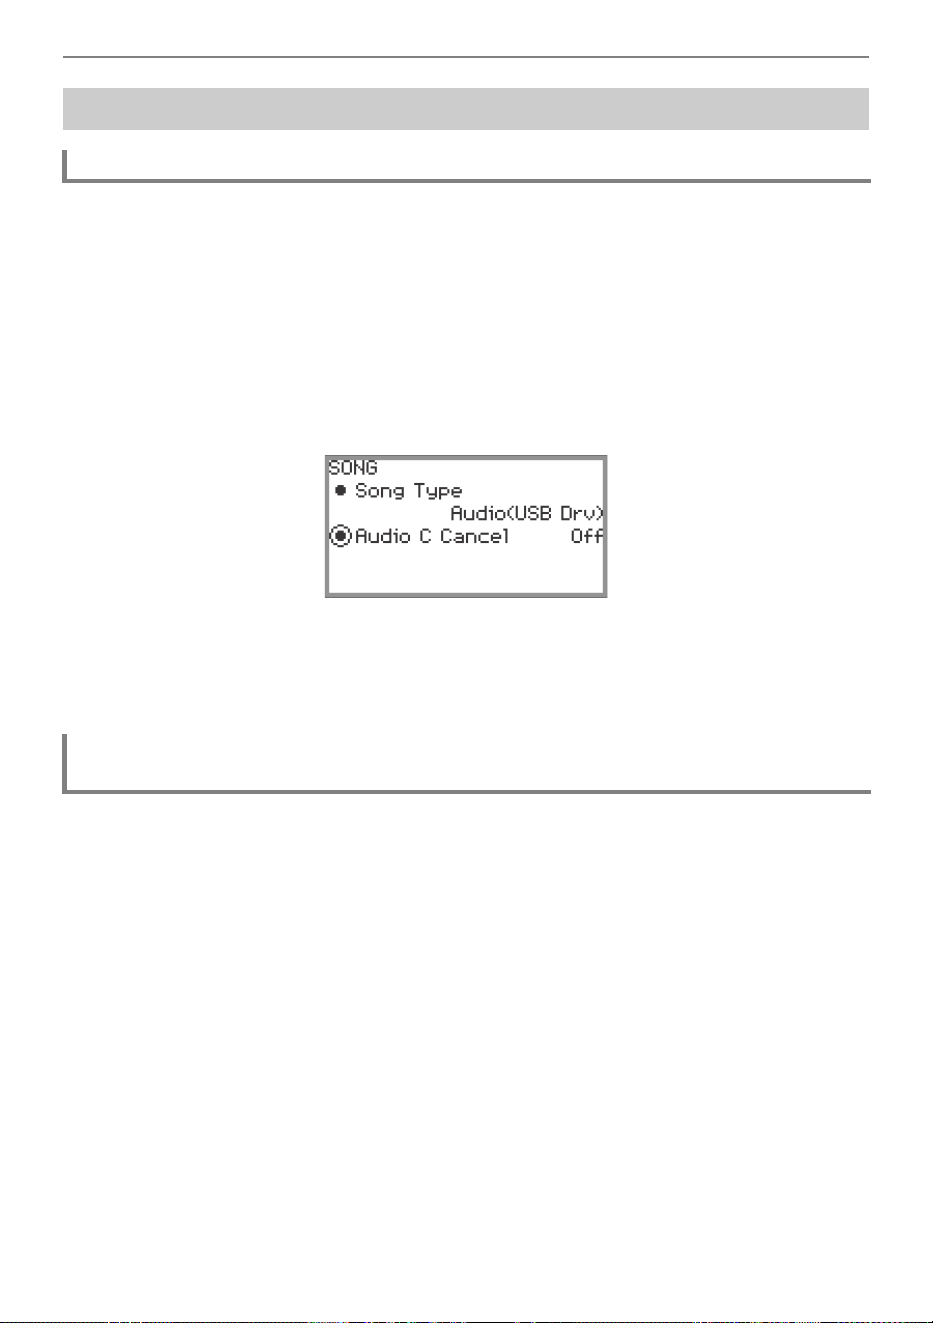
Listening to Songs (SONG Mode)
EN-110
Audio Center Cancel cuts (eliminates or reduces) vocals in the playback audio. Since this function
cancels the center-localized sound, sounds other than vocals may also be cut. The degree of the effect
depends on the audio data being played.
■ Enabling or Disabling Audio Center Cancel
1.
Touch the a button to display the SONG mode screen.
2.
Touch the F4 button (STYPE).
3.
Touch the top or bottom of the touch ring to select “Audio C Cancel”.
4.
Trace the touch ring to toggle the setting between “On” and “Off”.
5.
Touch the EXIT button to return to the SONG mode screen.
See “Adjusting the Volume Level, Stereo Pan and Effects for Each Part” (page EN-65).
• Use “MIXER” > “VOLUME” > “Audio Song” to adjust the playback volume of audio data relative to the
overall volume.
• Use “MIXER” > “HALL/REV.” > “AudioSongSend” to adjust the send value of audio data to the Hall
Simulator/Reverb by changing the value of the “HALL/REV.” > “AudioSongSend” setting.
Operations While Playing Back Audio Data
Audio Center Cancel (Vocal Cut)
Adjusting the Volume Level or Effect Depth of Audio Data Playback (MIXER
Settings)
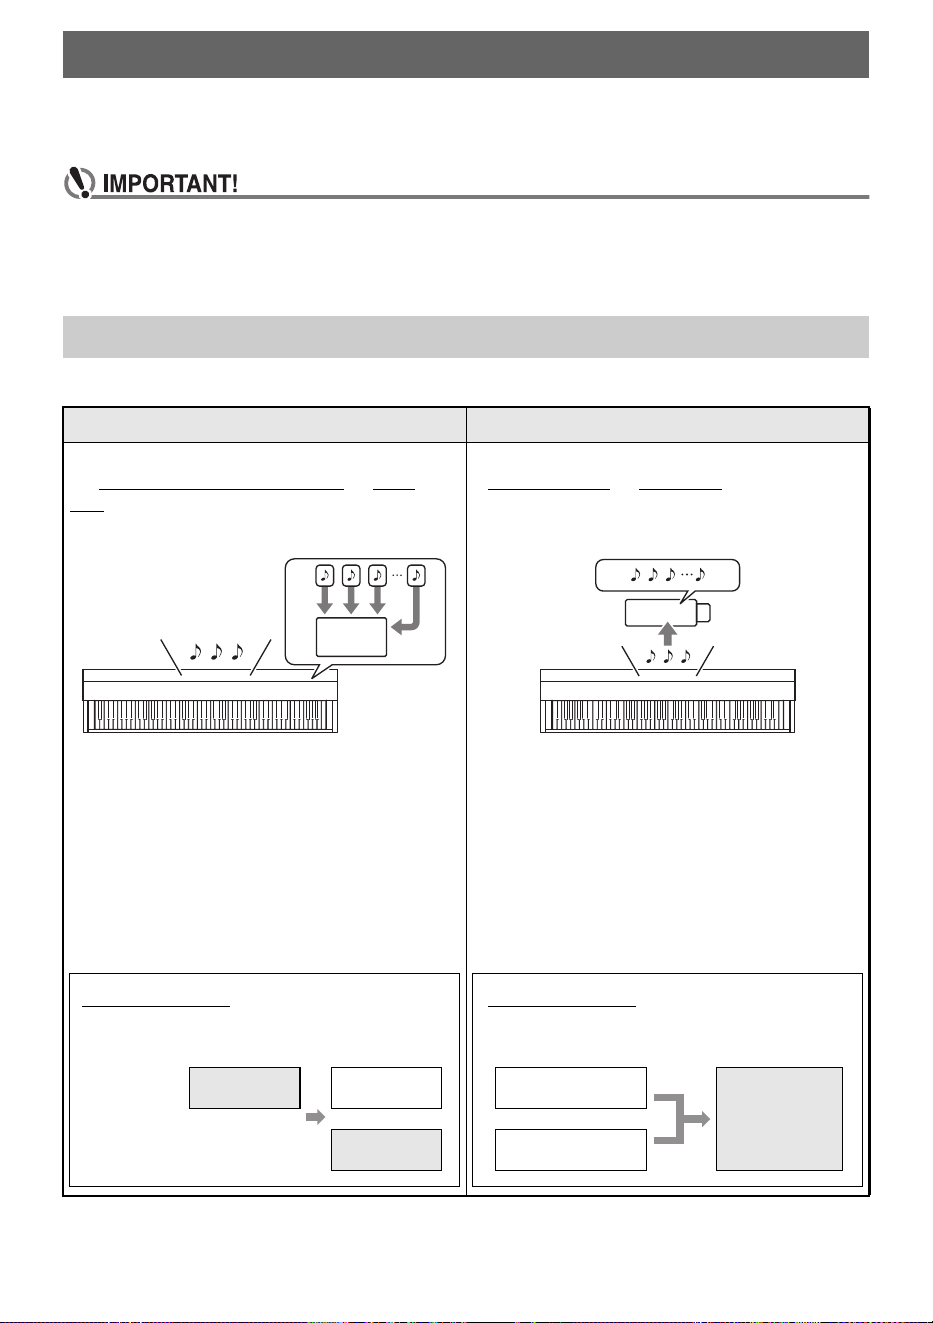
EN-111
Your Digital Piano can record what you play on the keyboard and play it back when you want. The
Digital Piano has two recording functions: a MIDI Recorder and an Audio Recorder. Select the function
that suits the needs for the type of recording you want to make.
• CASIO COMPUTER CO., LTD. takes no responsibility for any damages, lost profits, or claims
by third parties arising from the deletion of recorded data due to malfunction, repair, or for
any other reason.
• Should power fail during recording, all of the data in the song you are recording will be deleted.
■ Recording Features
Recording Performances
MIDI Recorder and Audio Recorder Features
MIDI Recorder Audio Recorder
Keyboard performance information is recorded to
the Digital Piano’s internal memory
as MIDI
data
*1
to two tracks (storage areas for keyboard
performance data).
• Keyboard performance information (keyboard
keys press/ release, key velocity, etc.) is
recorded as MIDI data.
• The size of MIDI data is much smaller when
compared with audio data, making it easier to
edit later on a computer, etc.
• Supported recording capacity: Up to five songs,
each song up to approximately 30,000 notes
(total of system track and solo track)
Keyboard performance information is recorded to
a USB flash drive
as audio data
*2
.
• Like a portable music player or tape recorder,
notes are recorded as audio data.
• Audio data files are much larger compared to
MIDI data files. The advantage of audio data
files is that they can be easily played back on a
computer, portable music player, etc.
• Supported recording capacity: Up to 99 files,
each song up to a maximum length of
approximately 25 minutes
MIDI
What you can do...
Record to one track while playing back from
the other track
System track Keyboard play
while playing
back...
Solo track
Keyboard play
USB
What you can do...
Connect a microphone to record vocals
and the keyboard at the same time
Microphone input
Simultaneous
recording
Keyboard play
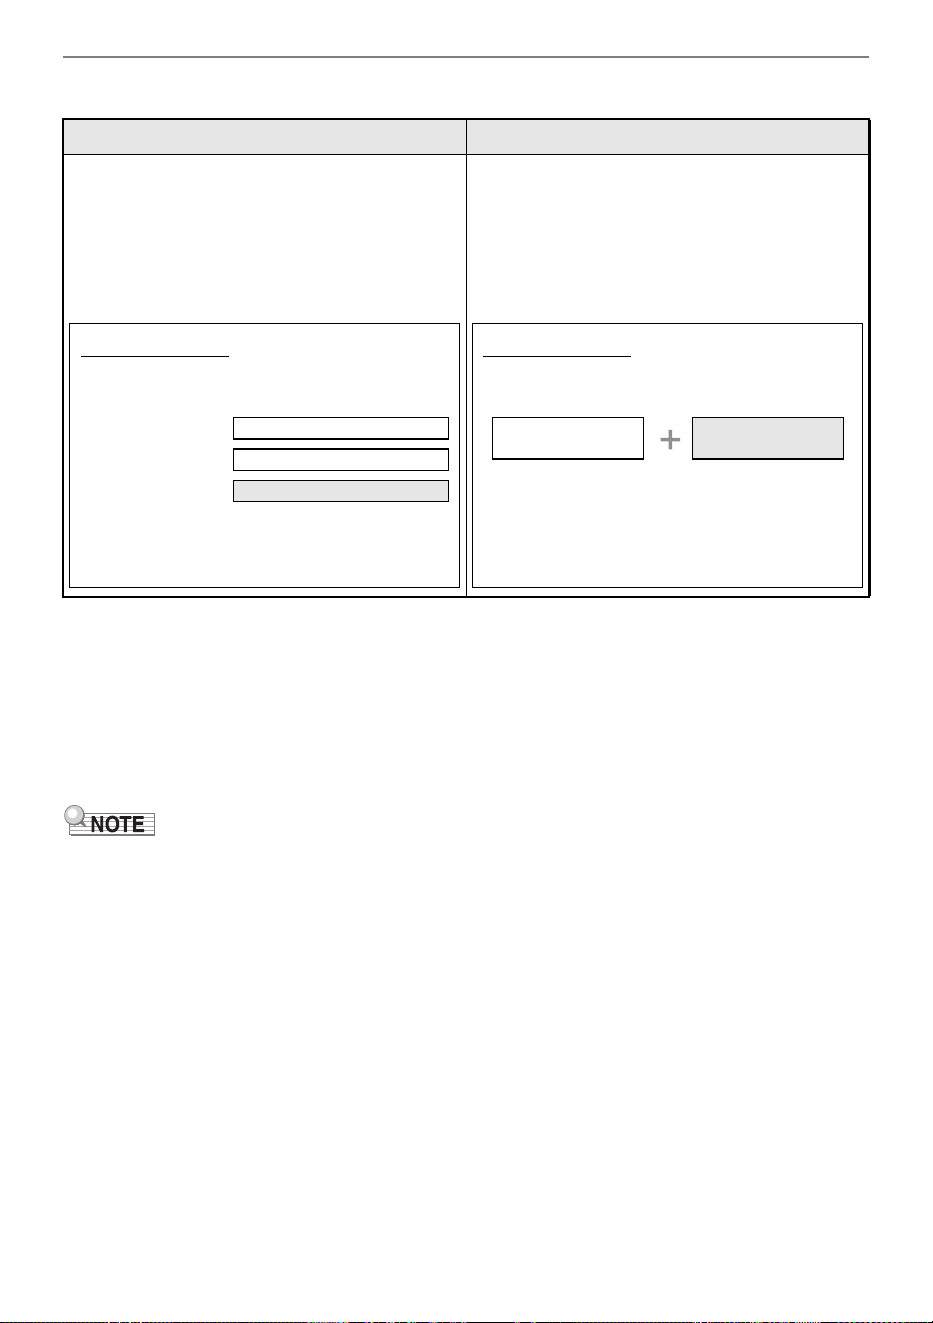
Recording Performances
EN-112
■ Playback Features
*1 MIDI
MIDI is short for “Musical Instrument Digital Interface”. It is a universal standard that makes it possible
for musical instruments, computers, and other devices to exchange performance information (keyboard
key press/release, key velocity, etc.) regardless of manufacturer. Performance data in this case is
called “MIDI data”.
*2 Audio data
Audio data recorded with this Digital Piano is saved in WAV file format (linear PCM, 16bit, 44.1kHz,
stereo).
• For details about the file formats of data supported by this Digital Piano, see “Data Types Supported
by the Digital Piano” (page EN-139).
• Data recorded on the Digital Piano can be saved to a USB flash drive. For more information, see
“Saving Digital Piano Data to a USB Flash Drive” (page EN-143).
MIDI Recorder Audio Recorder
Plays back system track and solo track
(simultaneously or individually).
• With the MIDI Recorder, the Digital Piano
automatically performs playback using its
internal sound source in accordance with the
performance information recorded as MIDI
data.
You can play back audio data from a USB flash
drive.
• The Audio Recorder plays back the waveform
of sound recorded as audio data.
What you can do...
Play on the keyboard along with playback of
system track and solo track
System track While playing back...
Solo track While playing back...
Keyboard play
After recording, change the tempo
For example, you can record at a slow tempo
and then play back at a faster tempo.
What you can do...
Play along on the keyboard while the audio
data is playing
Playback of
audio data
Keyboard play

Recording Performances
EN-113
The MIDI recorder records keyboard performances and pedal operations as MIDI data.
1.
Put the Digital Piano into MIDI Mode.
• Under the initial default settings, the Digital Piano is in MIDI Mode. In this case, proceed to step
2.
(1) Touch the FUNCTION button to display the FUNCTION menu.
(2) Use the touch ring to select “SONG” and touch the ENTER button.
(3) Trace the touch ring to set the “Song Type” to “MIDI” (MIDI Mode).
(4) Touch and hold the EXIT button to exit the setup screen.
2.
If necessary, set tones, effects, tempo, etc. for recording.
• See “Changing the Metronome Settings (Tempo, Beat, Pattern, etc.)” (page EN-81) for beat and
tempo settings, and whether the metronome should sound during recording. To have the
Metronome sound while recording, set “While Recording” to “On” in the “METRONOME” screen.
• A MIDI recorder song has two recording tracks (a system track and a solo track), and some
settings (such as effects) are recorded only on the system track. For what’s recorded on each
track, see “Items Reflected in Contents When Recording to the MIDI Recorder Song” (page
EN-120).
3.
If necessary, select the song number to record to before recording.
• This operation may be omitted.
• If you select a song number that has already been recorded, the previous recording will be
overwritten. Only when you want to intentionally overwrite or select a specific song number,
perform the following operation.
(1) Touch the a button to display the SONG mode screen.
Using the MIDI Recorder to Record Performances
Recording with the MIDI Recorder
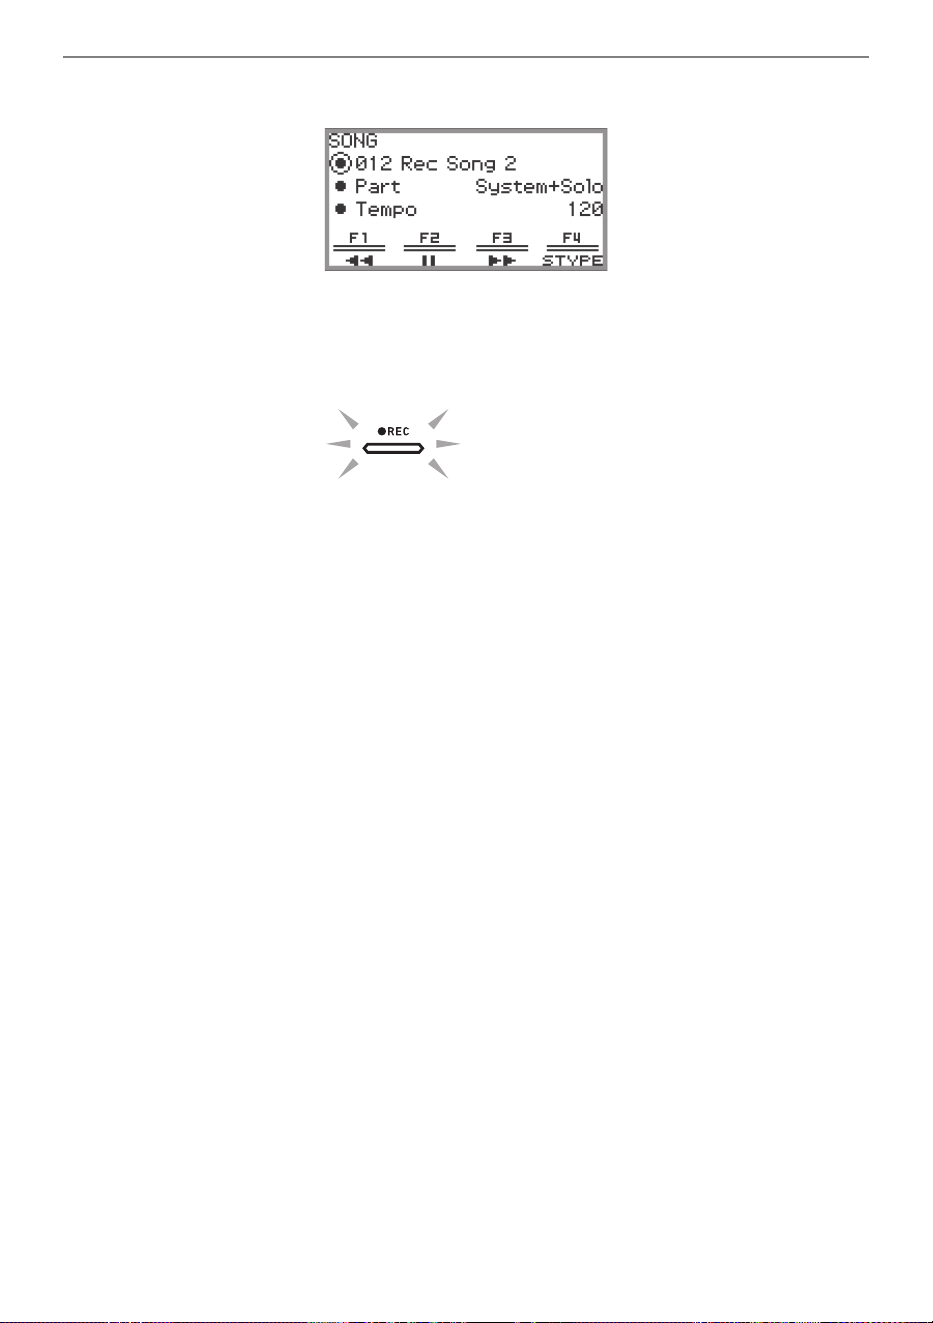
Recording Performances
EN-114
(2) Trace the touch ring to select one of the song numbers 011 to 015.
• See “NOTE” on page EN-115 for the song number of the MIDI recorder song.
4.
Touch the 0REC button.
The 0REC button flashes red and the Digital Piano is ready to record.
• Touching the 0REC button again here exits record standby.
• Touch and hold the 0REC button to select the recording track and pre-count settings. For more
information, see “MIDI Recorder Recording Settings” (page EN-116).
5.
To start recording, touch the a button.
When recording starts, the 0REC button lights up red.
• Recording can also be started automatically by pressing a keyboard key and starting to play.
Recording can also be started with any of the following operations:
− Pressing down on the pedal
− Recalling a registration (page EN-89)
− Pressing the CONTROL button
− Rotating either of the knob
− Moving the pitch bend wheel up or down
• When the remaining available capacity is low during recording, the 0REC button will flash.
When no more capacity is available, the 0REC button light will turn off and recording will stop.
• If you want to redo the recording due to a mistake while playing, touch and hold the 0REC
button during recording. The recorded data will be discarded, and the Digital Piano will return to
recording standby.
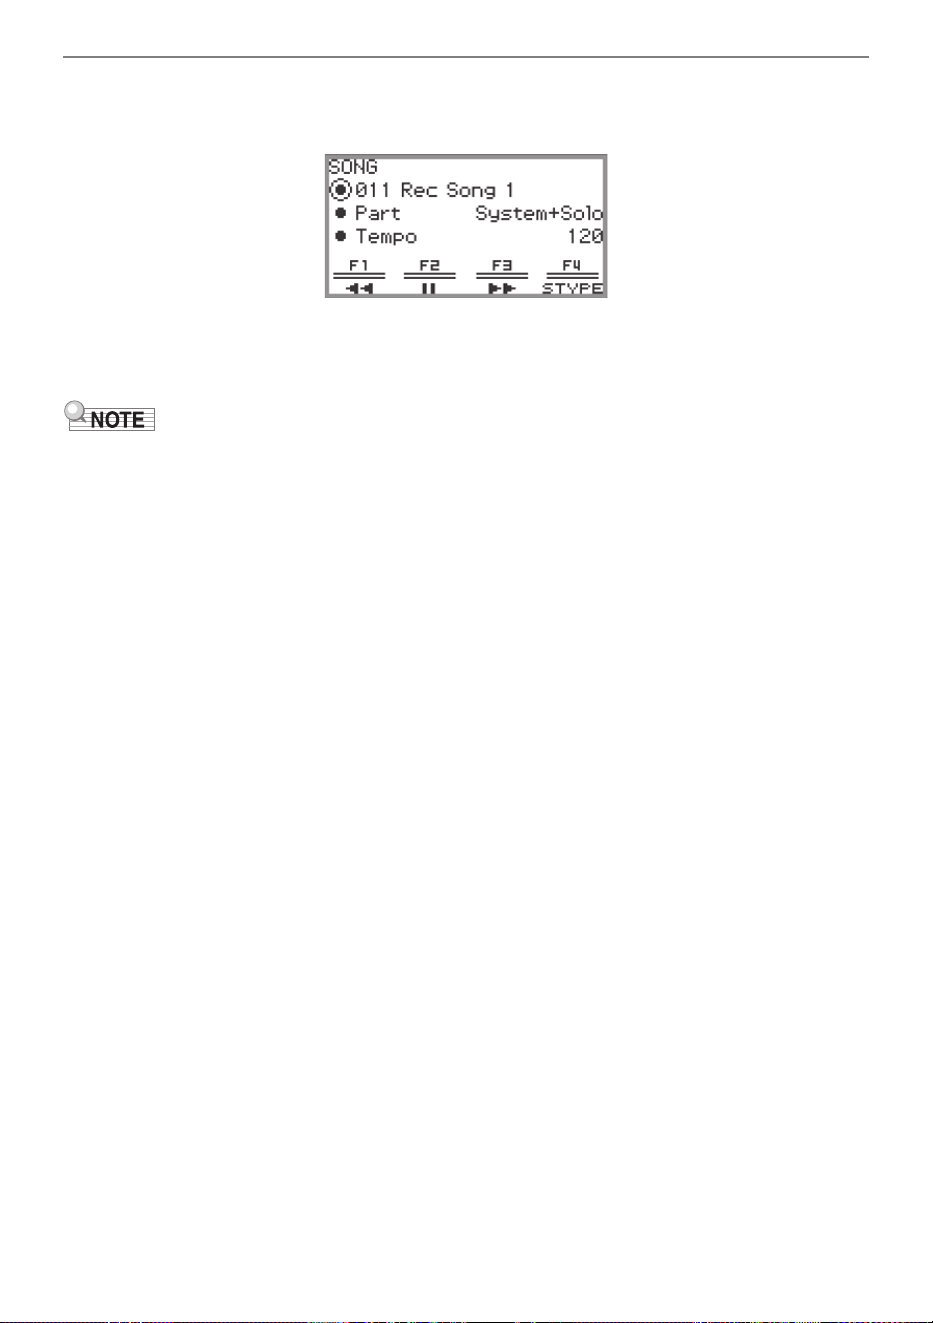
Recording Performances
EN-115
6.
To end recording, touch the 0REC button.
The 0REC button will show a white light once again and the SONG mode screen will appear.
• If you want to immediately play back the recorded MIDI recorder song, touch the a button.
• For more information on playback operations, see “Playing Back MIDI Recorder Songs” (page
EN-118).
• MIDI recorder songs are stored in song numbers 011 to 015, “011 Rec Song 1” to “015 Rec Song 5”
in the internal memory. Up to five songs can be recorded. Each time you record, the lowest song
number that has not yet been recorded is automatically selected. However, please note the following:
– When the SONG mode screen is displayed in step 3 or step 6, and a song number between 011
and 015 is selected, touching the 0REC button to start recording will overwrite the selected song
number.
– If all five songs have been recorded and step 3 is omitted, when the 0REC button is touched in
step 4, “Data Full” will be displayed and recording will not begin. See “Deleting a MIDI Recorder
Song (Entire Song/Individual Tracks)” (page EN-119) to erase songs so that you can record again.
• The FUNCTION button is inoperative during recording. In addition, the function names of the
functions in the F Button Menu that cannot be used are displayed as “----”.
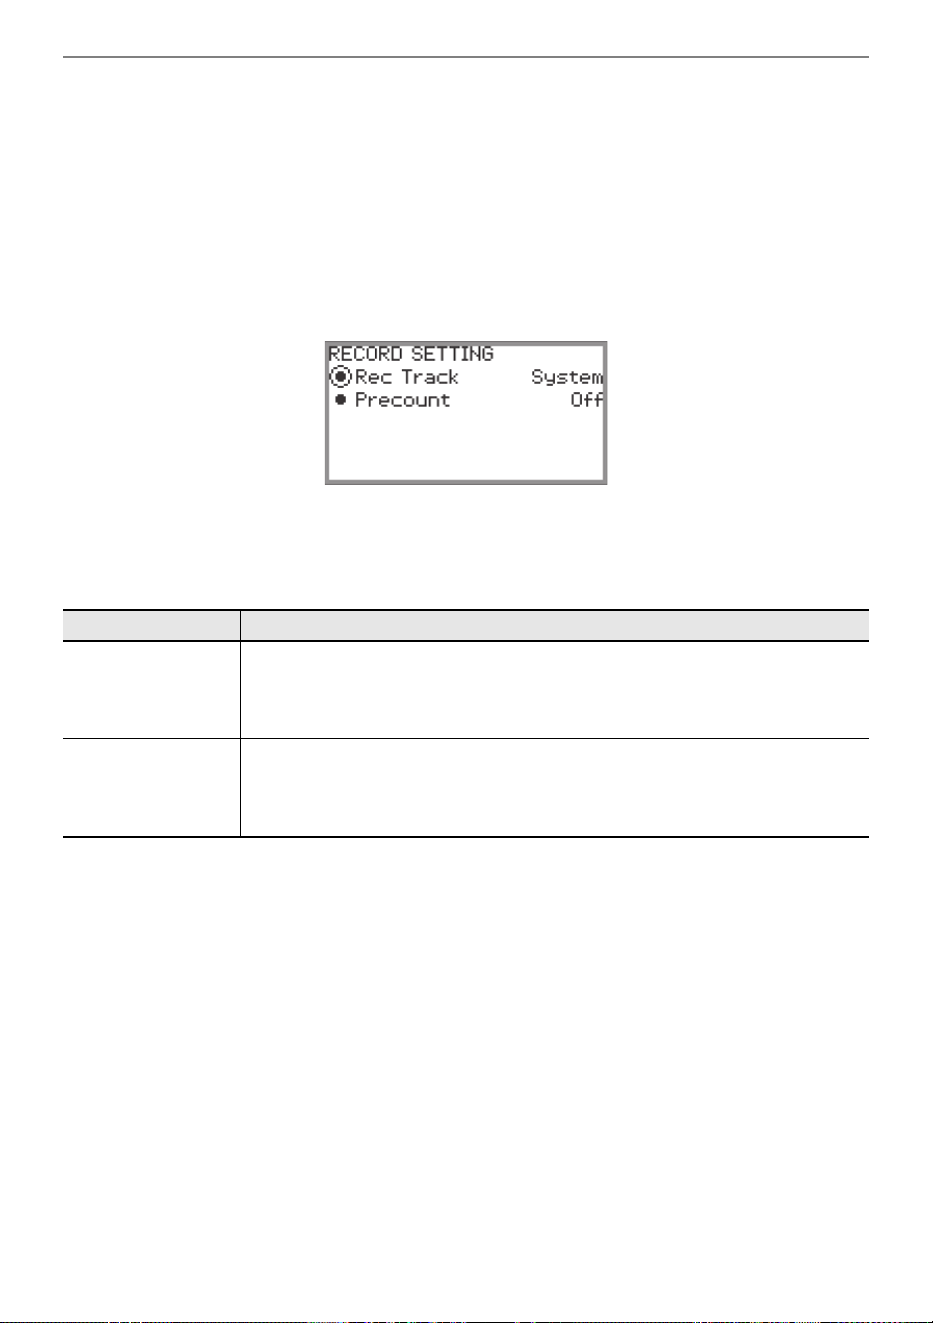
Recording Performances
EN-116
■ MIDI Recorder Recording Settings
A MIDI recorder song has two recording tracks (system track and solo track), and you can choose
which track to record to. A precount can also be set to indicate when recording will begin.
1.
Perform the operation described in steps 1 through 4 of “Recording with the MIDI
Recorder” (page EN-113).
The 0REC button flashes red and the Digital Piano is ready to record.
2.
Touch and hold the 0REC button.
The “RECORD SETTING” screen appears (record standby is maintained).
3.
Touch the top or bottom of the touch ring to select the setting you want to
change.
• The table below shows the setting values and settings for each setting item.
4.
Change the setting of the selected item.
• Trace the touch ring to change the desired setting.
5.
Repeat steps 3 and 4 as necessary.
6.
To start recording with the changed settings, resume operation from step 5 of
“Recording with the MIDI Recorder” (page EN-113).
• To stop recording at this point, touch the 0REC button. The 0REC button will light up white
again.
Setting item Setting values and descriptions
Rec Track
System: Records to the system track.
Solo: Records to the solo track.
For the recording content of each track see “Items Reflected in Contents When
Recording to the MIDI Recorder Song” (page EN-120).
Precount
Sets the pre-count before recording begins
Off: Pre-count is not sounded
1 Measure: One-bar measure pre-count
2 Measures: Two-bar measure pre-count
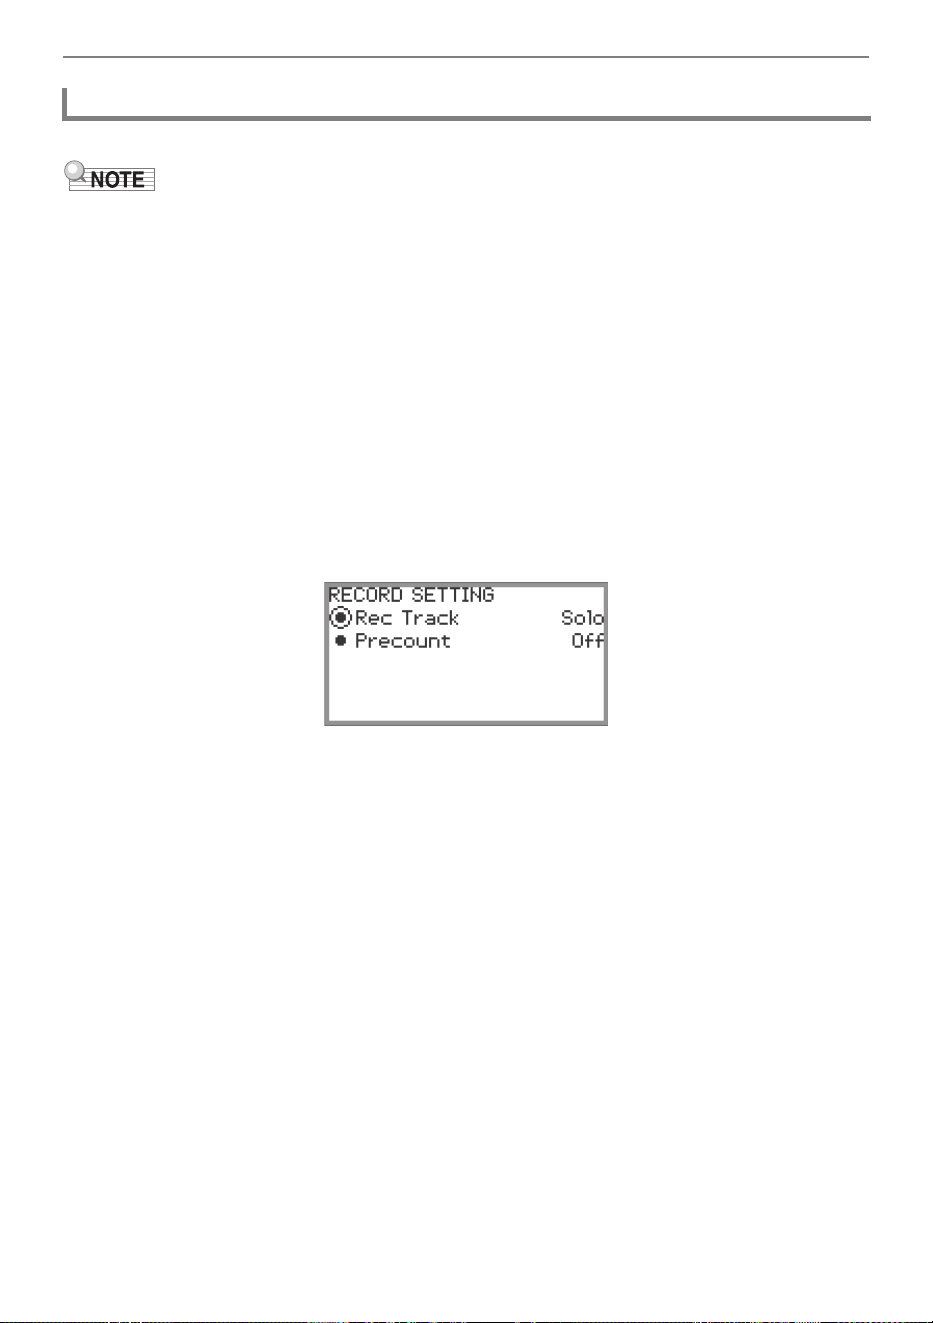
Recording Performances
EN-117
You can record to one track while playing back a pre-recorded track of a MIDI recorder song.
• If you make a mistake while overdub recording, you can erase and re-record the overdubbed track.
For more information, see “Deleting a MIDI Recorder Song (Entire Song/Individual Tracks)” (page
EN-119).
1.
See “Playing Back MIDI Recorder Songs” (page EN-118) to select a pre-recorded
MIDI recorder song.
• Play the selected song to check the recording and the tracks that have already been recorded.
2.
Touch the 0REC button.
The 0REC button flashes red and the Digital Piano is ready to record.
3.
Touch and hold the 0REC button to display the “RECORD SETTING” screen.
4.
Trace the touch ring to set the “Rec Track” to “System” or “Solo”.
• Select “Solo” to record the solo track while playing the pre-recorded system track, or “System” to
record the system track while playing the pre-recorded solo track.
5.
Start and stop recording as shown in step 5 and after in “Recording with the MIDI
Recorder” (page EN-113).
Recording a Second Track Over the First (System Track + Solo Track)
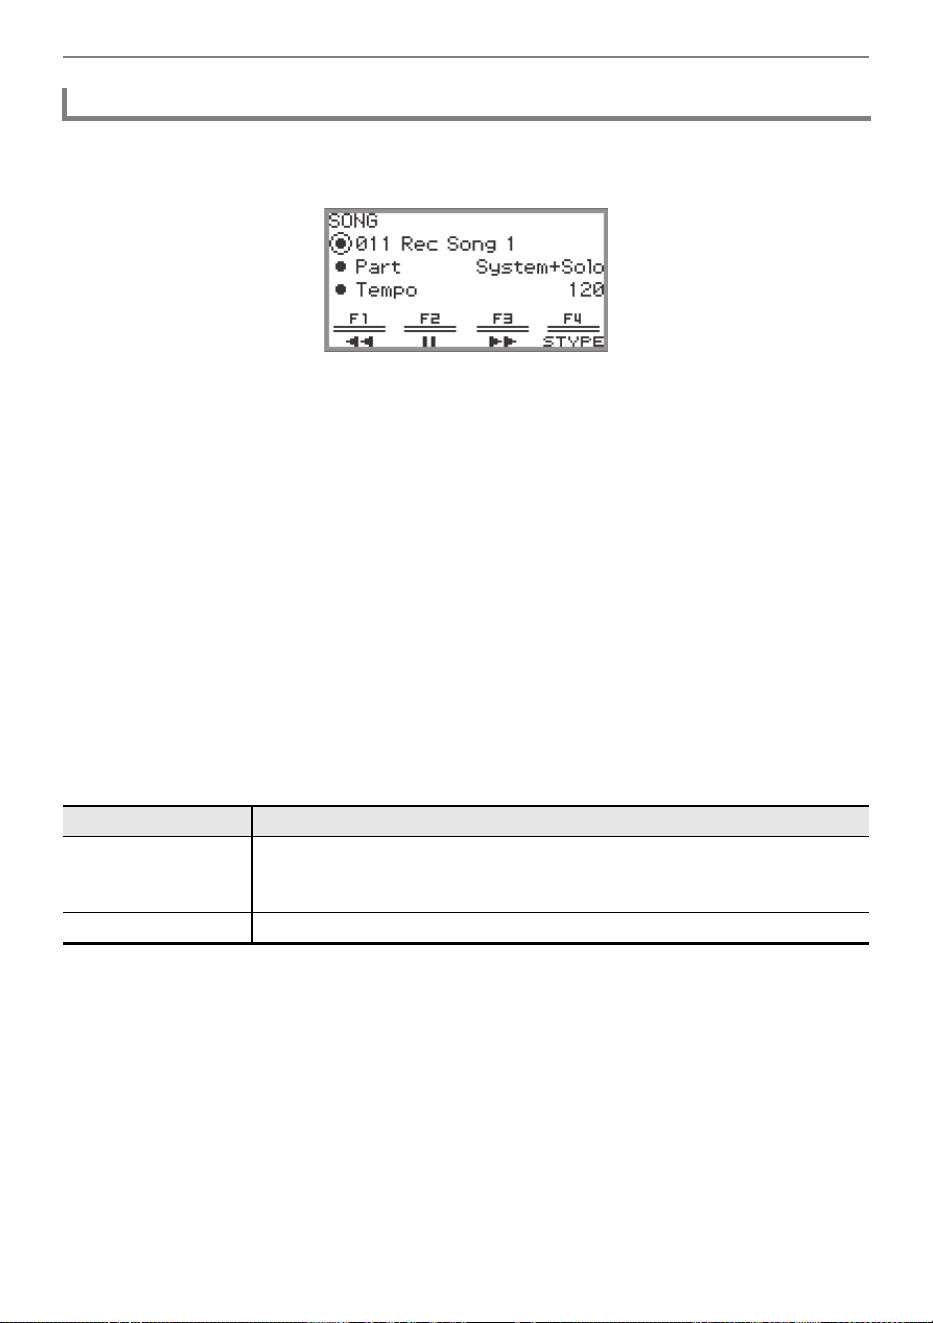
Recording Performances
EN-118
1.
Touch the a button.
The SONG mode screen appears.
• If any songs have been recorded (or played) since the Digital Piano was turned on, the last song
recorded (or played) will be played. To stop playback, touch the a button.
• From the SONG mode screen, you can play MIDI recorder songs as well as MIDI and audio
data in various formats. For more information, see “Listening to Songs (SONG Mode)” (page
EN-106).
2.
If in Audio Mode, change to MIDI Mode.
• If “Part” and “Tempo” are not displayed in the SONG mode screen, the Digital Piano is in Audio
Mode. Perform the following operation to change it to MIDI Mode.
(1) Touch the F4 button (STYPE).
(2) Trace the touch ring to change the “Song Type” setting to “MIDI”.
(3) Touch the EXIT button to return to the SONG mode screen.
3.
Trace the touch ring to select the MIDI recorder song you want to play.
The five MIDI recorder songs are named “011 Rec Song 1” to “015 Rec Song 5”. Select the
number of a song that has already been recorded.
4.
If necessary, set the part and tempo to be played.
Touch the top or bottom of the touch ring to select the setting you want to change.
5.
To start playback, touch the a button.
• During playback, the following operations are available.
Touch the F1 button (s): Backs up the song a little.
Touch and hold the F1 button (s): While held down, the song will rewind.
Touch the F2 button (k): Pauses the currently playing song. Touch while paused to resume
playback.
Touch the F3 button (d): Advances the song a little.
Touch and hold the F3 button (d): While held down, the song will fast-forward.
• When the song reaches the end, playback will stop. Touch the a button to stop midway.
Playing Back MIDI Recorder Songs
Setting item Setting values and descriptions
Part
System + Solo: Plays both tracks
System: Plays only the system track
Solo: Plays only the solo track
Tempo Sets the playback tempo from 20 to 255 (beats/minute).
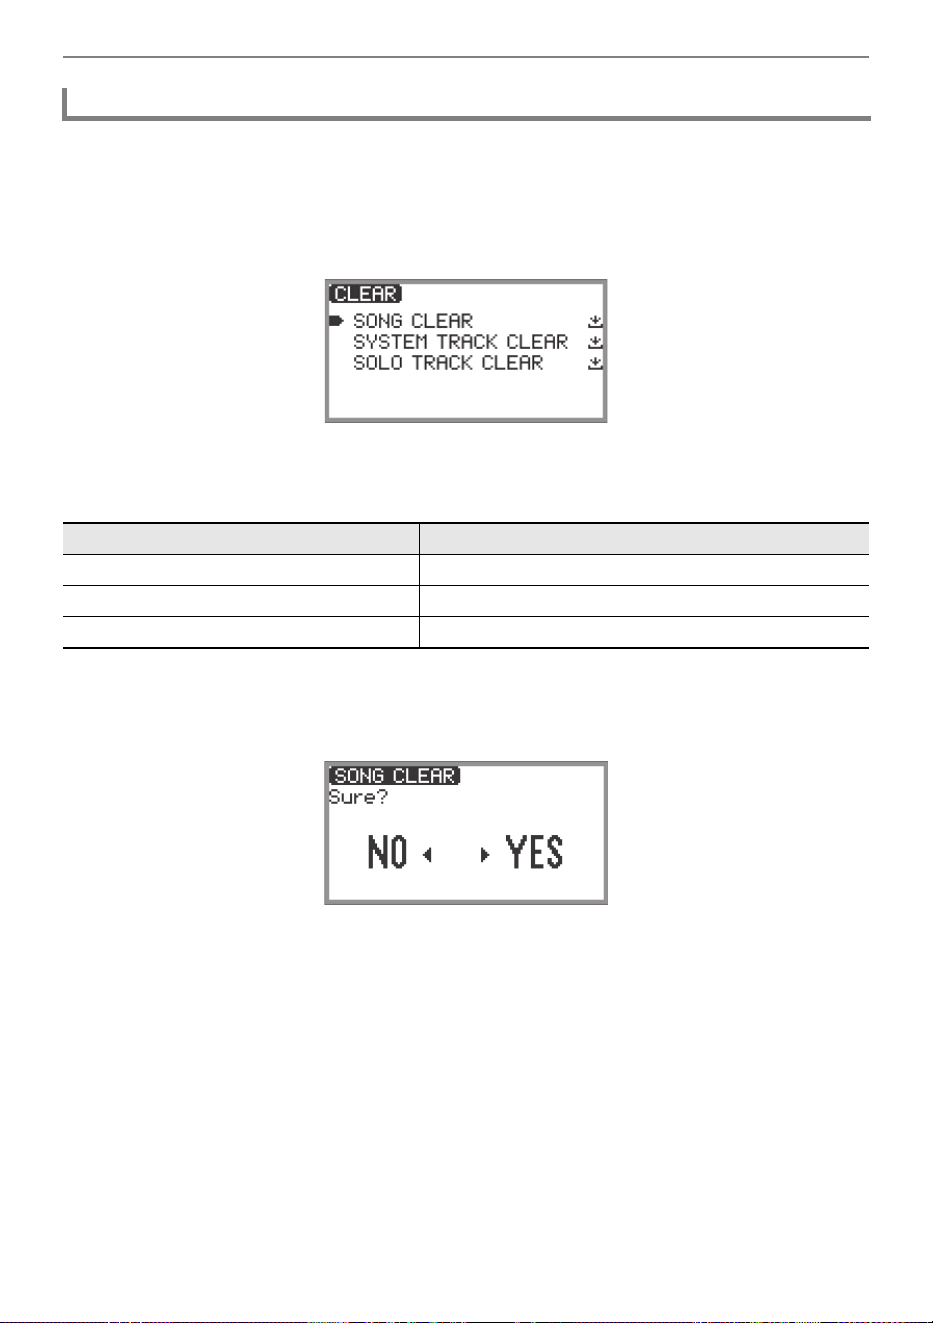
Recording Performances
EN-119
1.
“Playing Back MIDI Recorder Songs” (page EN-118) operation to select the MIDI
recorder song you want to erase.
2.
Touch and hold the 0REC button.
The “CLEAR” screen appears.
3.
Touch the top or bottom of the touch ring to select the target (the entire song or a
track) you want to erase.
4.
Touch the ENTER button.
A confirmation screen will appear. To cancel the operation, touch the left of the touch ring (NO)
here.
5.
To erase, touch the right of the touch ring (YES).
“Complete” is displayed and the display returns to the SONG mode screen.
Deleting a MIDI Recorder Song (Entire Song/Individual Tracks)
Menu item What will be erased
SONG CLEAR Erases the entire song
SYSTEM TRACK CLEAR Erases the system track only
SOLO TRACK CLEAR Erases the solo track only
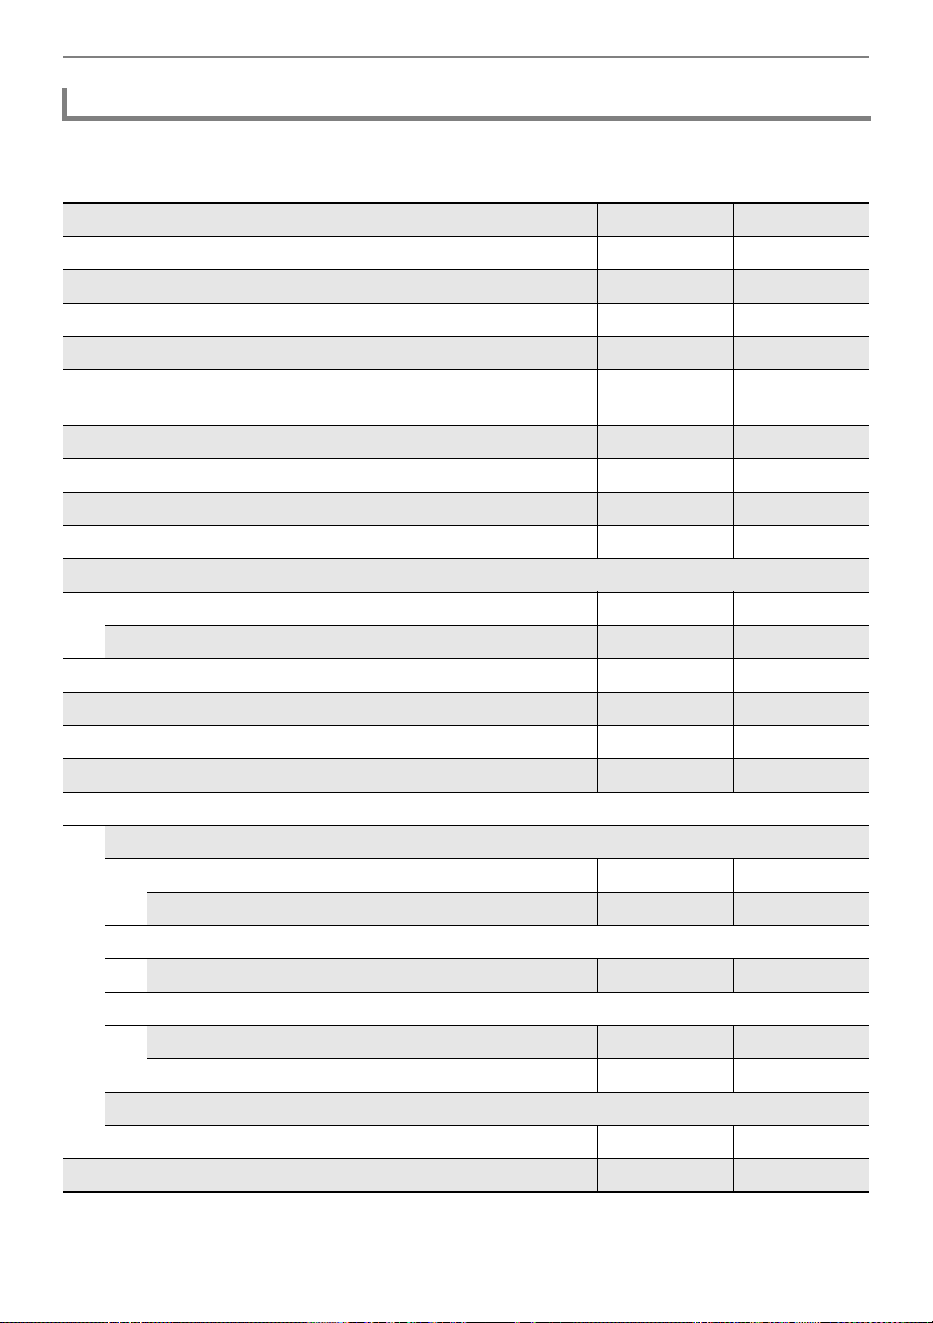
Recording Performances
EN-120
The symbols below are used in the “System” column to indicate items that can be recorded to the
system track, and in the “Solo” column to indicate items that can be recorded to the solo track.
✓… Recorded — … Not recorded
Items Reflected in Contents When Recording to the MIDI Recorder Song
Operation or Setting System Solo
Keyboard operations ✓✓
Pedal operations
*1
✓
*2
✓
*2
Pitch Bend Wheel operations ✓✓
Pitch bend range ✓ ✓
The parameter settings with the knob operations (Portamento
Time setting, etc.)
✓
*3
✓
*3 *4
CONTROL button operations ✓ ✓
Acoustic Simulator settings ✓ —
Chorus type ✓ —
Brilliance setting ✓ —
Hall Simulator/Reverb settings
On/Off ✓ —
Type ✓ —
Surround settings ✓ —
Portamento On/Off ✓ ✓
*5
Tone number ✓✓
*5
Layer, Split ✓ —
Mixer
Volume
Keyboard overall volume ✓ —
Upper1, Upper2, Lower part volume ✓ ✓
*5
Pan
Upper1, Upper2, Lower part pan ✓ ✓
*5
Hall Simulator/Reverb
Overall reverb depth (reverb return) ✓ —
Upper1, Upper2, Lower part send ✓✓
*5
Chorus
Upper1, Upper2, Lower part send ✓✓
*5
Octave Shift ✓
*6
✓
*5 *6

Recording Performances
EN-121
*1 Operation of pedals connected to this Digital Piano
*2 Not recorded depending on the function assigned to the pedal that is connected to the
EXPRESSION/ASSIGNABLE jack.
*3 Not recorded when one of the functions below is assigned to the knob.
“MIDISongVolume”, “WirelessAudioVol”, “AudioSongVolume”
*4 Not recorded when one of the functions below is assigned to the knob.
“Brilliance”, “Layer Balance”, “Upper2 Fine Tune”, “Upper2 Pan”, “Lower Volume”, “Lower Pan”,
“KB Group Volume”
When one of the functions below is assigned to the knob, only the setting changes to the Upper 1
part are recorded.
“KB Reverb Send”, “KB Chorus Send”, “UpperPanBalance”
*5 Upper 1 only
*6 Octave-shifted notes are recorded.
Part Fine Tune ✓✓
*5
Scale settings ✓ —
Duet settings ✓ —
Metronome
Tempo ✓ —
Beat ✓ —
Operation or Setting System Solo
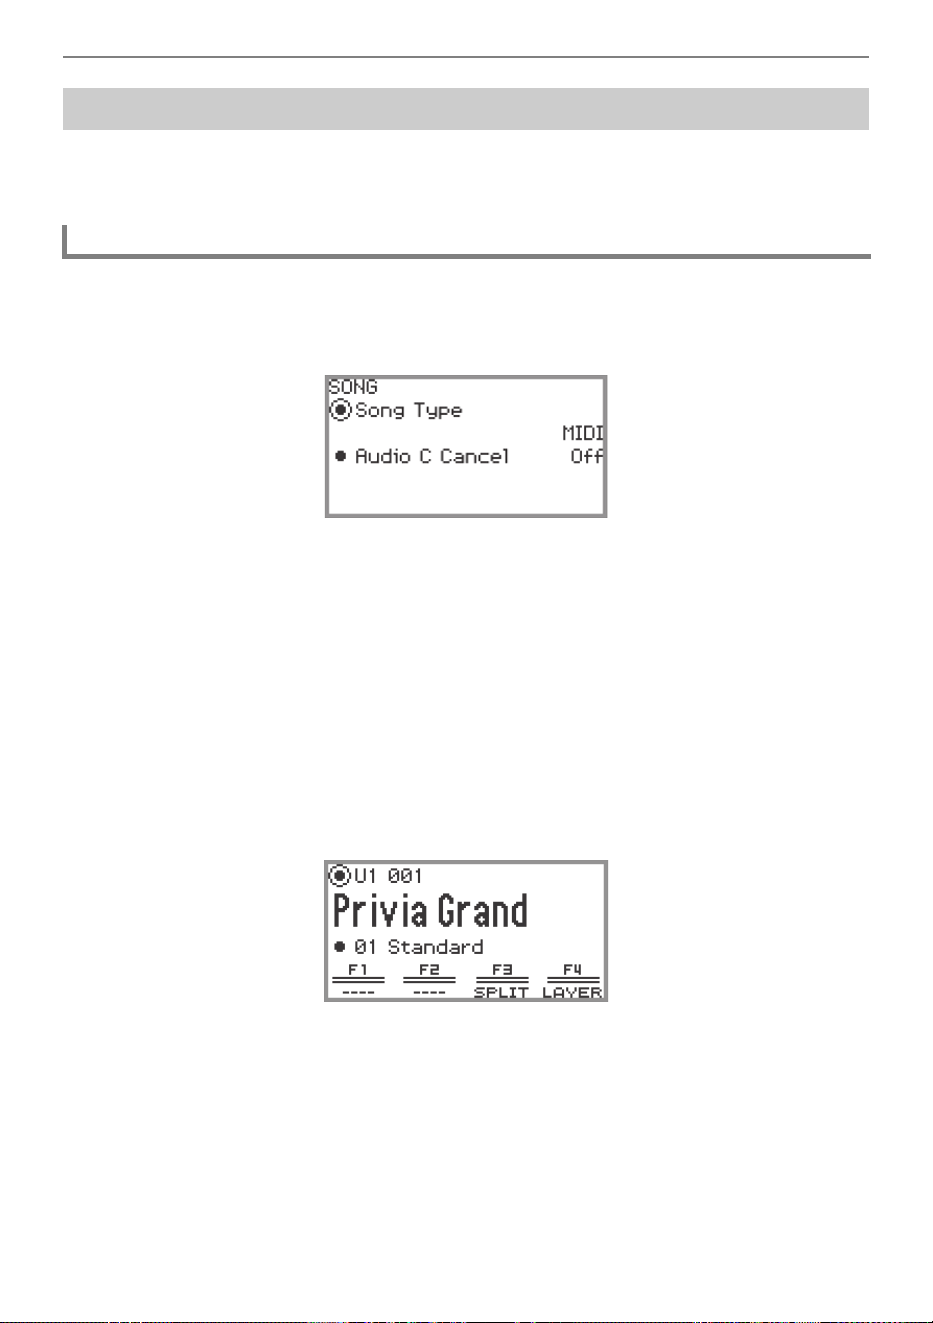
Recording Performances
EN-122
The audio recorder records the sound output from the Digital Piano as audio data, as shown below.
• Keyboard playing
• Audio input from microphone, etc.
1.
Put the Digital Piano into Audio Mode.
(1) Touch the FUNCTION button to display the FUNCTION menu.
(2) Use the touch ring to select “SONG” then touch the ENTER button.
(3) Trace the touch ring to set the “Song Type” to “Audio(USB Drv)” (Audio Mode).
(4) Touch and hold the EXIT button to exit the setup.
2.
Plug a USB flash drive into the USB Type A port on this Digital Piano.
• When a USB flash drive is plugged in, “MOUNTING” will be displayed for a while. It may take a
minute or so for the display to disappear.
• For information on handling USB flash drives and installing and removing them from the Digital
Piano, see “Connecting a USB Flash Drive to and Detaching It from the Digital Piano” (page
EN-141).
3.
Touch the 0REC button.
The 0REC button flashes red and the Digital Piano is ready to record.
• Touching the 0REC button again here cancels record standby.
Recording a Performance with the Audio Recorder
Recording Using the Audio Recorder
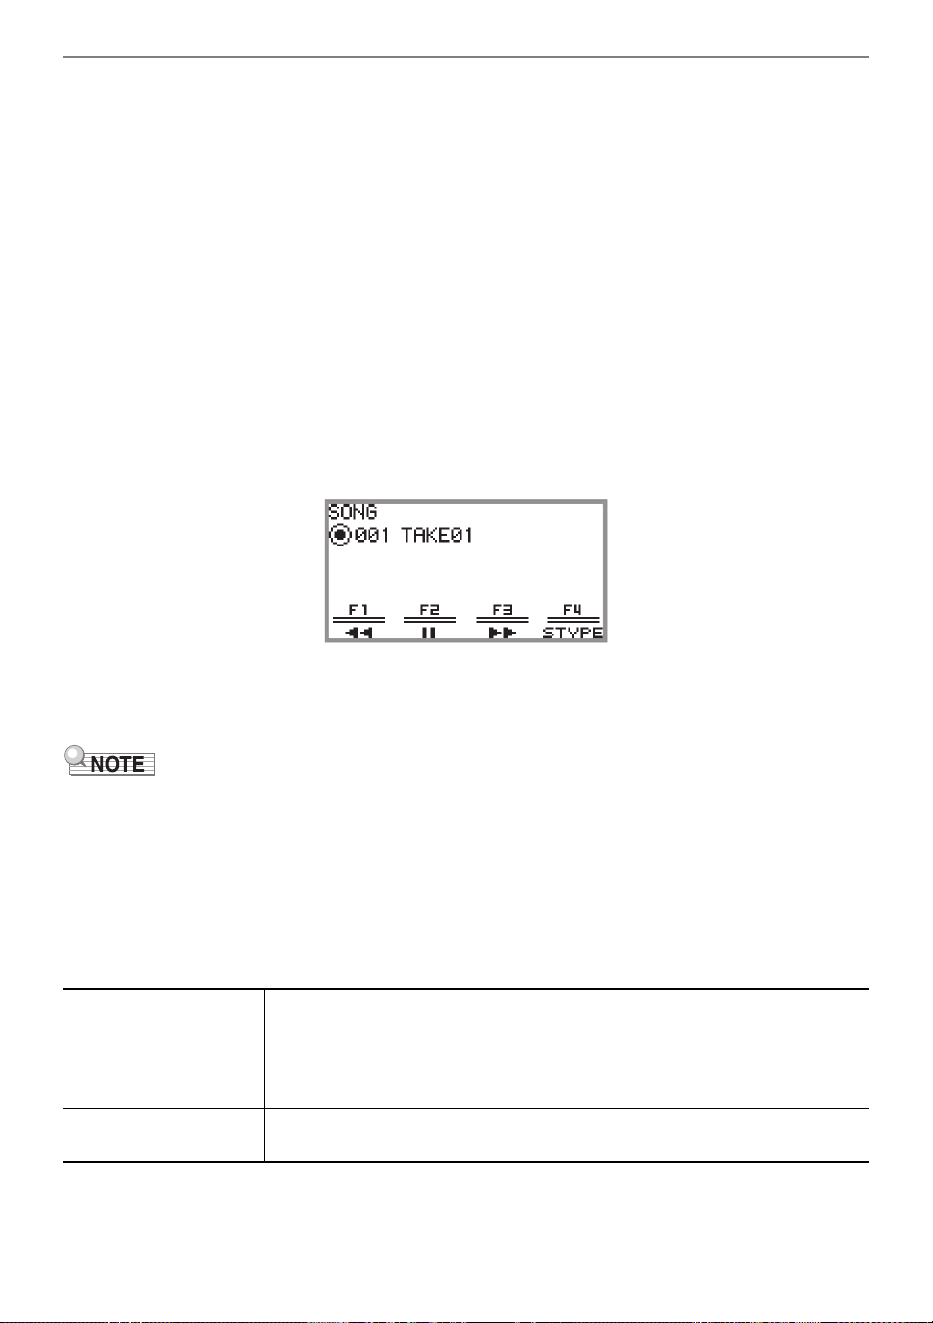
Recording Performances
EN-123
4.
To start recording, touch the a button.
When recording starts, the 0REC button lights up red.
• Recording can also be started automatically by pressing a keyboard key and starting to play.
Recording can also be started with any of the following operations:
− Pressing down on a foot pedal
− Recalling a registration (page EN-89)
− Pressing the CONTROL button
− Rotating either of the knob
− Moving the pitch bend wheel up or down
• When the remaining available capacity is low during recording, the 0REC button will flash.
When no more capacity is available, the 0REC button light will turn off and recording will stop.
• If you want to redo the recording due to a mistake while playing, touch and hold the 0REC
button during recording. The recorded data will be discarded, and the Digital Piano will return to
recording standby.
5.
To stop recording, touch the 0REC button.
The 0REC button will show a white light once again and the SONG mode screen will appear.
• If you want to play the recorded audio recorder song immediately, touch the a button.
• For more information on playback operations, see “Playing Back a Song from the Audio
Recorder” (page EN-125).
• Audio recorder songs are saved with the file name “TAKE**.wav” (where ** is 01 to 99). Up to 99
songs can be recorded to the USB flash drive. Each time a recording is made, a file is automatically
created with the next number in sequence in the destination memory (internal or USB). For
information on what to do if you get a “Too Many Files” message and cannot start recording, see
“Error Messages” (page EN-168).
• The FUNCTION button is inoperative during recording. In addition, the function names of the
functions in the F Button Menu that cannot be used are displayed as “----”.
• The Digital Piano’s audio recorder records in WAV format. Recording in MP3 format is not supported.
• The table below lists the audio data that can be recorded and played back on the Digital Piano.
WAV format
(Record and playback)
• The maximum recorded length of a file is approximately 25 minutes, and
up to 99 files can be recorded (however, this depends on the available
capacity of the USB flash drive used).
• There is no limit to the playback time of a single file (depends on the
available capacity of the USB flash drive).
MP3 format
(Playback only)
There is no limit to the playback time of a single file (depends on the
available capacity of the USB flash drive).
Recording Performances
EN-124
• The formats of audio data that can be played on this Digital Piano are shown below. (For playback
operations, see “Playing Back a Song from the Audio Recorder” (page EN-125).)
WAV format audio data
MP3 format audio data
File name extension .WAV
Format Linear PCM
Sampling frequency 44.1kHz
Bit depth 16bit
Channel Stereo
File name extension .MP3
Format MPEG-1 Audio Layer3
Sampling frequency 44.1kHz/48kHz
Bit rate 32 to 320kbps variable bit rate (VBR)
Channel Monaural/Stereo
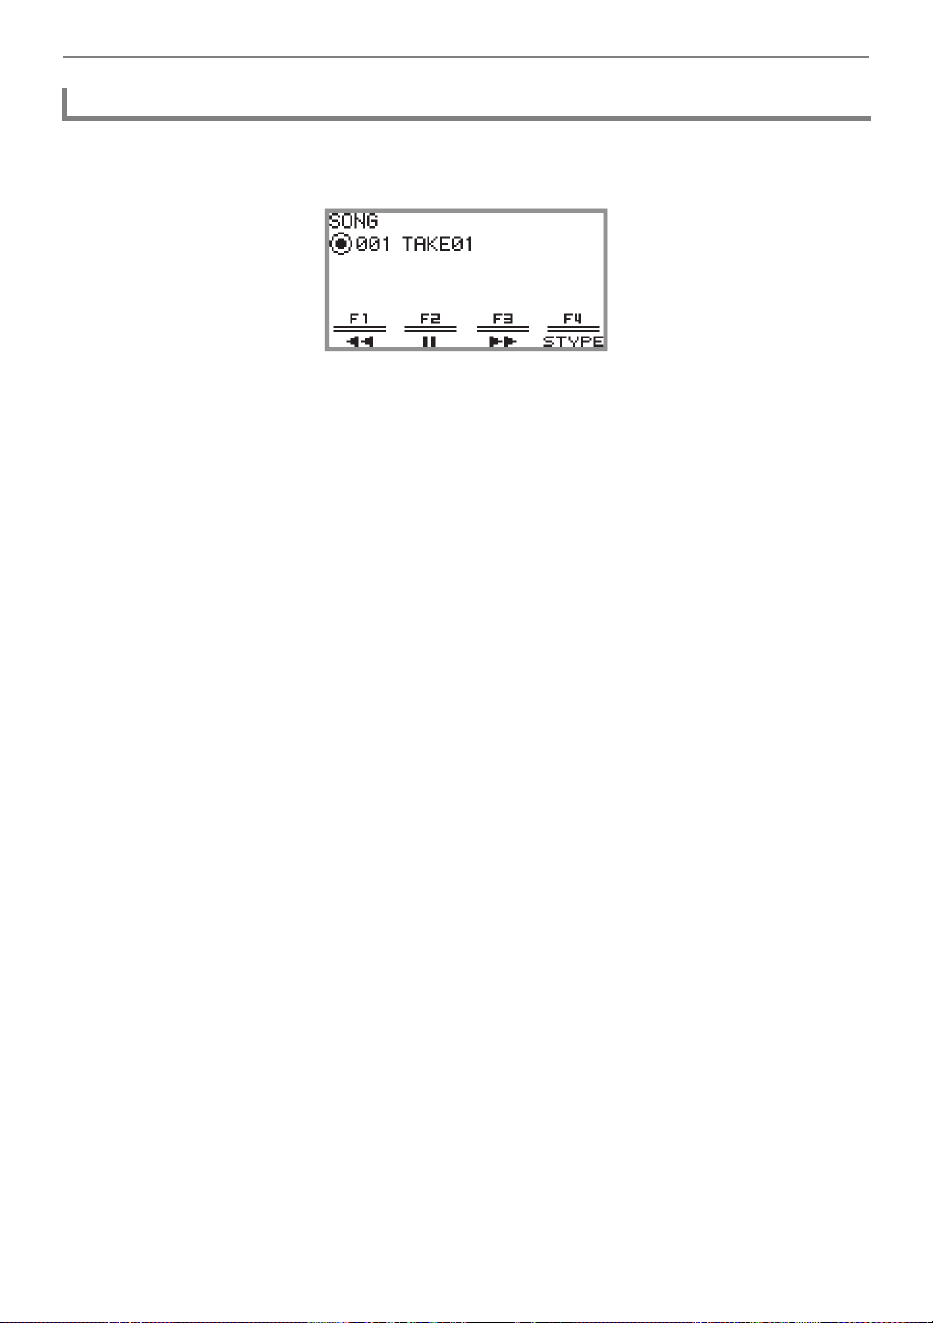
Recording Performances
EN-125
1.
Touch the a button.
The SONG mode screen appears.
• If any songs have been recorded (or played) since the Digital Piano was turned on, the last song
recorded (or played) will be played. To stop playback, touch the a button.
• The SONG mode screen allows playback of MIDI data and audio data in various formats as well
as audio recorder songs. For more information, see “Listening to Songs (SONG Mode)” (page
EN-106).
2.
If the Digital Piano is in MIDI Mode, change to Audio Mode.
• When “Part” or “Tempo” is displayed on the SONG mode screen, the Digital Piano is in MIDI
Mode. Use the following operation to change to Audio Mode.
(1) Touch the F4 (STYPE) button.
(2) Trace the touch ring to change the “Song Type” setting to “Audio(USB Drv)”.
(3) Touch the EXIT button to return to the SONG mode screen.
3.
Trace the touch ring to select the audio recorder song you want to play.
4.
To start playback, touch the a button.
• During playback, the following operations are available.
Touch the F1 button (s): Backs up the song a little.
Touch and hold the F1 button (s): While held down, the song will rewind.
Touch the F2 button (k): Pauses the currently playing song. Touch while paused to resume
playback.
Touch the F3 button (d): Advances the song a little.
Touch and hold the F3 button (d): While held down, the song will fast-forward.
• When the song reaches the end, playback will stop. Touch the a button to stop midway.
Playing Back a Song from the Audio Recorder
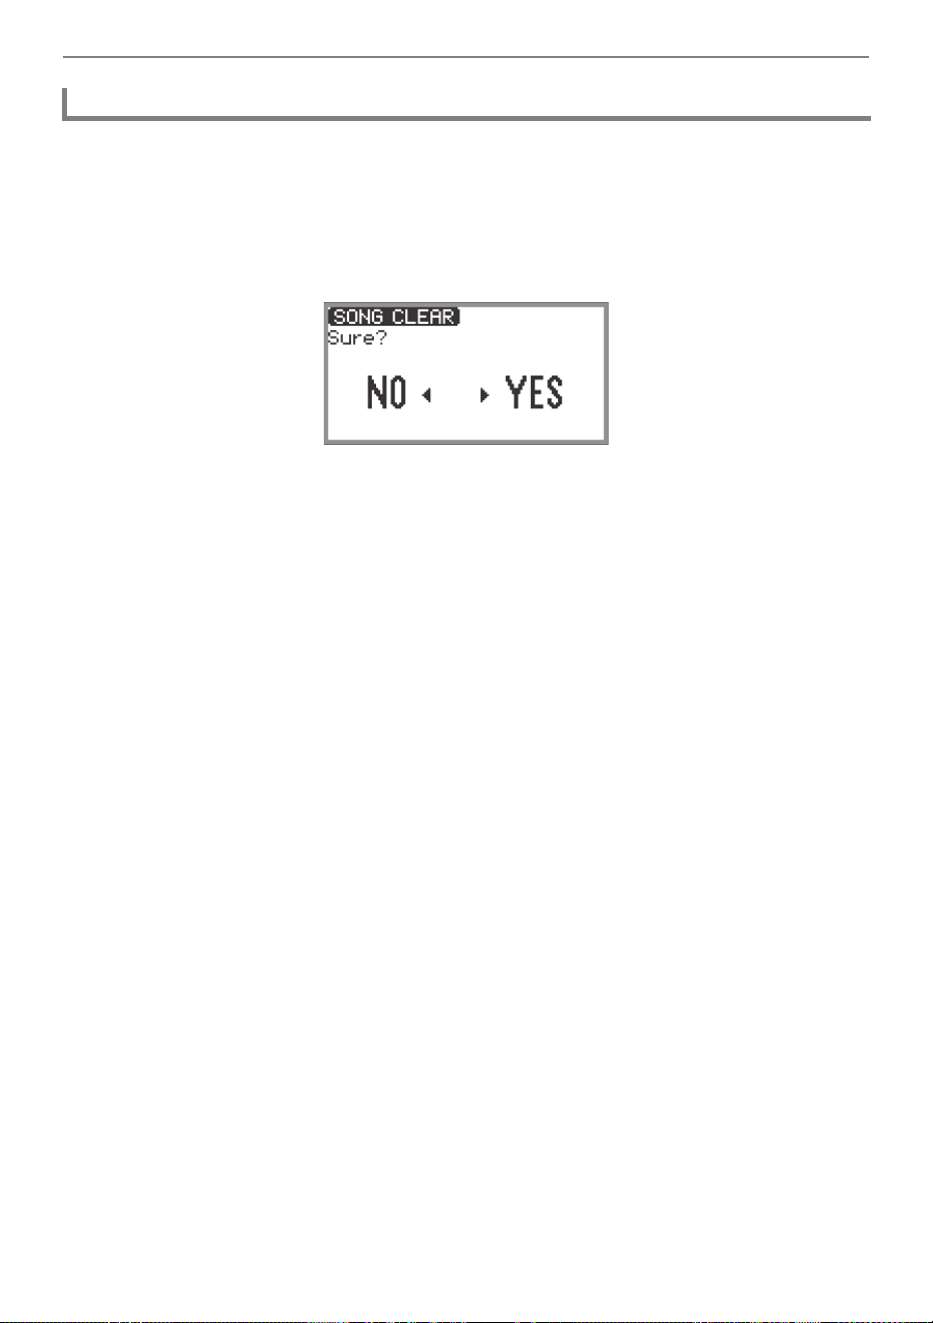
Recording Performances
EN-126
1.
See “Playing Back a Song from the Audio Recorder” (page EN-125) to select the
audio recorder song you want to erase.
2.
Touch and hold the 0REC button.
A confirmation screen will appear. To cancel the operation, touch the left of the touch ring (NO) at
this point.
3.
To erase, touch the right of the touch ring (YES).
“Wait...” is displayed during the erase process. When done, “Complete” is displayed and the
display returns to the SONG mode screen.
Deleting a Song from the Audio Recorder

EN-127
Touch Response alters tone volume in accordance with keyboard velocity (speed). This provides you
some of the same expressivity you get on an acoustic piano.
1.
Touch the FUNCTION button to display the FUNCTION menu.
2.
Use the touch ring to select “KEYBOARD” > “KBD SETTING” then touch the
ENTER button.
The “KBD SETTING” screen appears.
• Confirm that the cursor ( ) is on “Touch Response”.
Adjusting Keyboard Sensitivity
Changing Keyboard Response to Key Velocity (Touch
Response)
Pressing fast produces louder notes.
Pressing slowly produces softer notes.
Do not try to use too much pressure.
Changing Touch Response Sensitivity
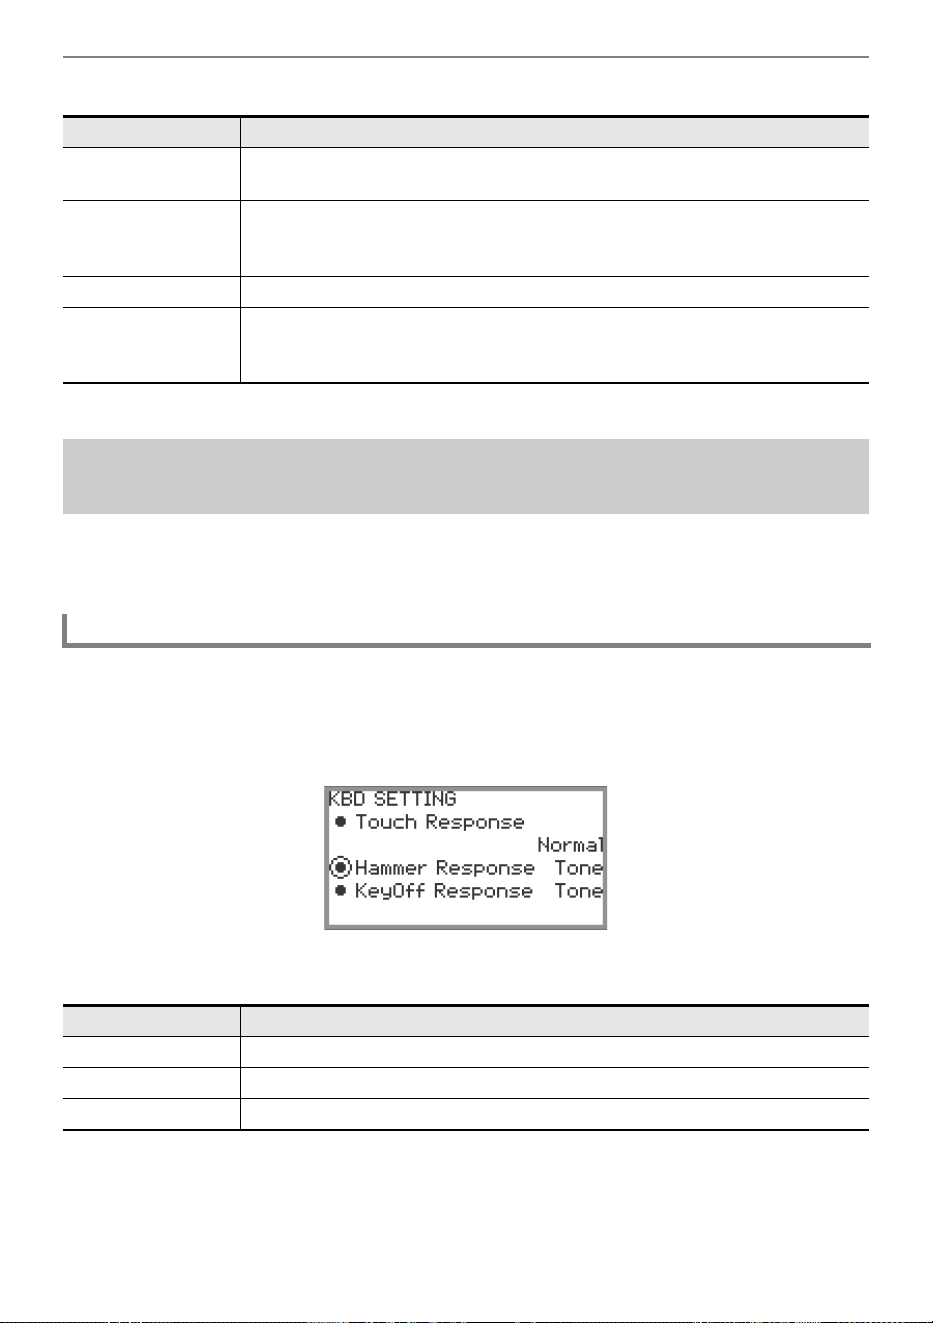
Adjusting Keyboard Sensitivity
EN-128
3.
Change the value of the “Touch Response” setting.
• Trace the touch ring to change the desired setting value.
An acoustic piano has hammers of different sizes that strike the strings in different key ranges, so the
timing of the sound is different for each key range. “Hammer Response” in the FUNCTION menu can
be used to select the timing of the sound.
1.
Touch the FUNCTION button to display the FUNCTION menu.
2.
Use the touch ring to select “KEYBOARD” > “KBD SETTING” > “Hammer
Response”.
3.
Change the “Hammer Response” setting.
• Use the touch ring to change the desired value.
Setting value Description
Off
Disables Touch Response. Sound volume is fixed, regardless of key press
speed.
Light 2
Light 1
Makes production of a louder sound easier, so touch feels lighter than
“Normal”.
“Light 2” is lighter to the touch than “Light 1”.
Normal Specifies normal sensitivity.
Heavy 1
Heavy 2
Makes production of a louder sound more difficult, so touch Heavy feels
heavier than “Normal”.
“Heavy 2” is heavier to the touch than “Heavy 1”.
Adjusting the Timing of Key Press to Sound (Hammer
Response)
Adjusting the Hammer Response
Setting value Description
Tone A value appropriate for the selected tone is automatically set.
Off Fastest response in all key ranges.
1 to 10 The higher the value, the slower the timing of the sound.
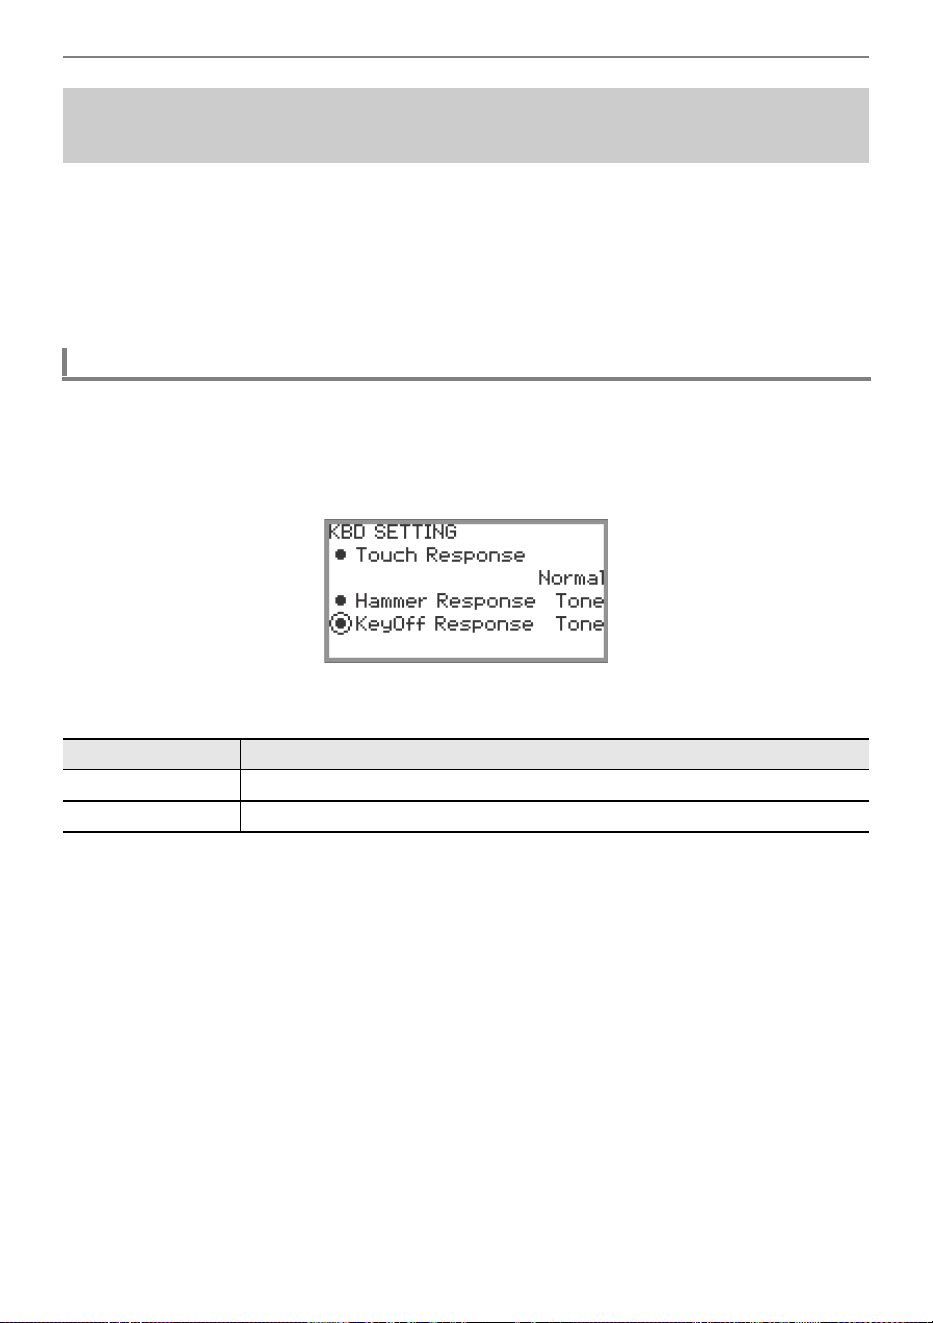
Adjusting Keyboard Sensitivity
EN-129
On a grand piano, when a key is released, the damper comes down on the strings and the note is
damped. The Digital Piano’s Key-off Response function simulates digitally the timing of the note
damping based on how the key is released.
Using this function, you can set it to allow subsequent key strikes to sound even if the key is not fully
released during a series of same-note hits – just like a grand piano. This makes possible detailed touch
expressions such as whether notes are connected or cut off, allowing for a natural playing feel.
The “KeyOff Response” in the FUNCTION menu can be used to adjust the timing of the damping.
1.
Touch the FUNCTION button to display the FUNCTION menu.
2.
Use the touch ring to select “KEYBOARD” > “KBD SETTING” > “KeyOff
Response”.
3.
Change the “KeyOff Response” setting.
• Use the touch ring to change the desired setting value.
Adjusting the Timing of Key Release to Sound Damping
(Key-off Response)
Adjusting the Key-off Response
Setting value Description
Tone A value appropriate for the selected tone is automatically set.
1 to 3 The higher the value, the slower the timing of the sound.
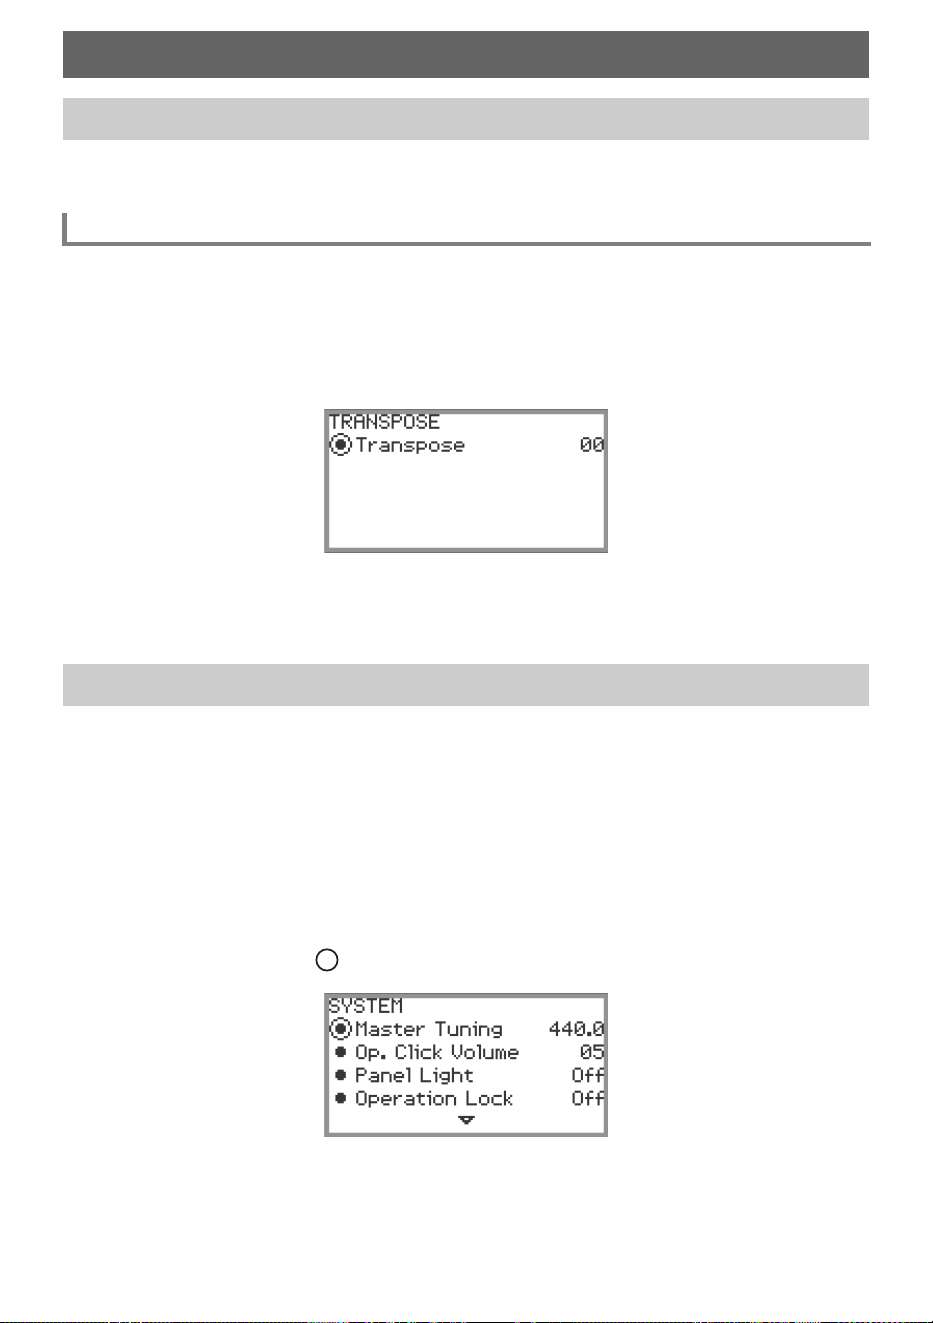
EN-130
Use the transpose feature to raise or lower the pitch of all notes in semitone steps. This allows you to
transpose the key of your playing to another key.
1.
Select the “12 Control” of the F Button Set. See “To change the F Button Set”
(page EN-32).
2.
Touch the F2 button (TRANS).
The “TRANSPOSE” screen appears.
3.
Trace the touch ring to change the setting value.
• It can be changed to a value between –12 and +12 semitones.
Use the tuning feature when you need to adjust the overall pitch of the Digital Piano.
• The tuning feature specifies the frequency of the A4 note. You can set a frequency within the range
of 415.5 to 465.9 Hz. The initial default setting is 440.0 Hz.
• You can change the frequency in 0.1 Hz steps.
1.
Touch the FUNCTION button to display the FUNCTION Menu.
2.
Touch the top or bottom of the touch ring to select “SYSTEM”, then touch the
ENTER button.
The “SYSTEM” screen appears.
• Confirm that the cursor ( ) is on “Master Tuning”.
3.
Change the value of the “Master Tuning” setting.
• Trace the touch ring to change the desired setting value.
Changing the Pitch
Changing the Pitch in Semitone Steps (Transpose)
Changing the Transpose Setting
Fine Tuning a Pitch (Master Tuning)
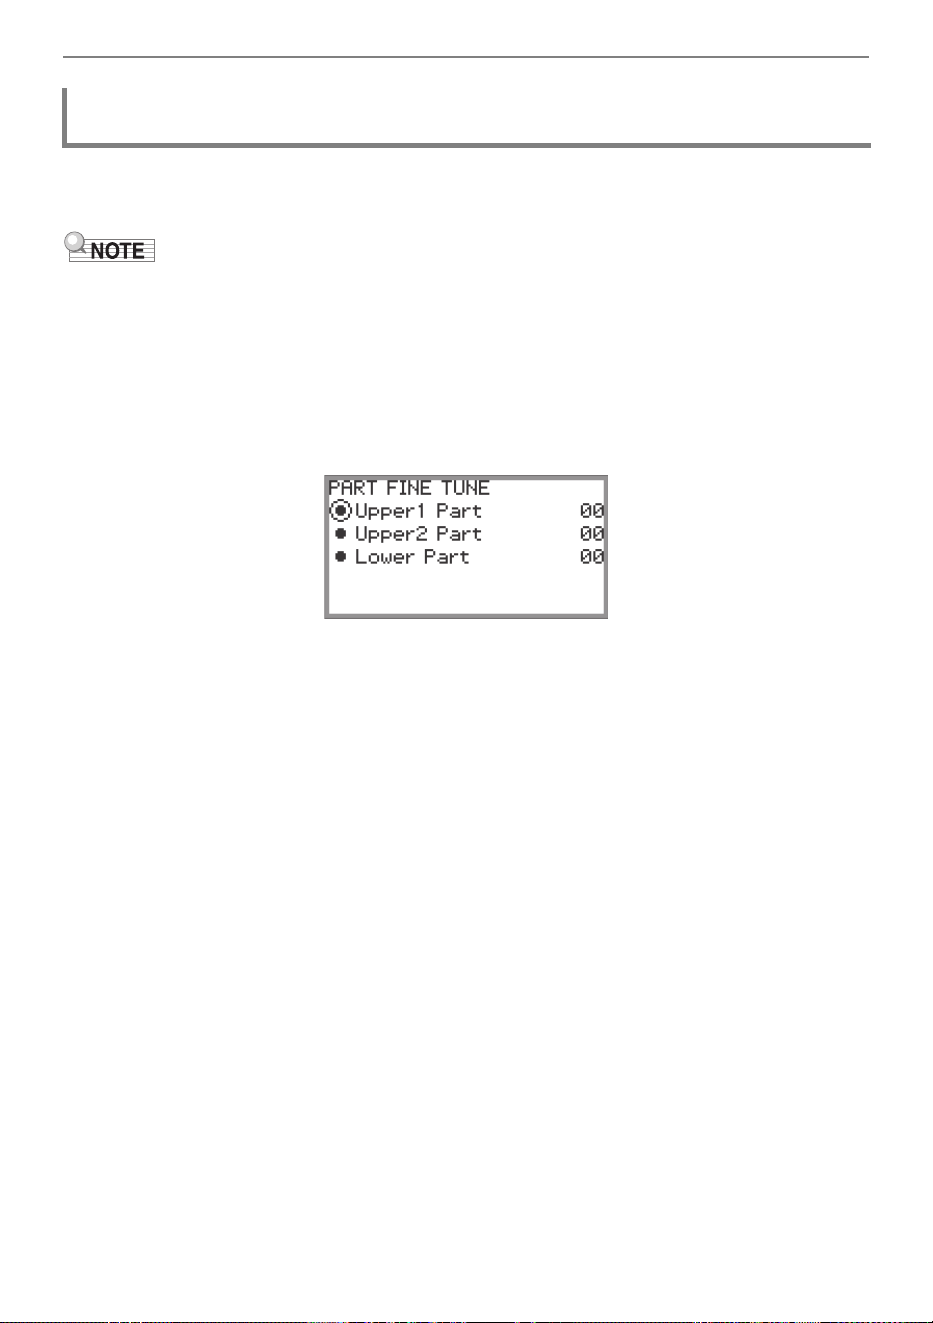
Changing the Pitch
EN-131
Each part can be individually fine-tuned between –99 and +99 cents (100 cents = 1 semitone) relative
to the tuning of the entire instrument. By shifting the tuning of each part slightly, you can create a full-
bodied ensemble feel.
• For details on parts, see “Sounding Two Different Tones at the Same Time (Layer)” (page EN-44)
and “Splitting the Keyboard Between Two Tones (Split)” (page EN-46).
1.
Touch the FUNCTION button to display the FUNCTION Menu.
2.
Use the touch ring to select “KEYBOARD” > “PART FINE TUNE”, then touch the
ENTER button.
The “PART FINE TUNE” screen appears.
3.
Touch the top or bottom of the touch ring to select the part you want to fine-tune.
4.
Change the setting value of the selected part.
• Trace the touch ring to change the desired setting value.
5.
Repeat Steps 3 and 4 as necessary.
Adjusting the Tuning Separately for Each Part (Upper 1/Upper 2/Lower)
(Part Fine Tune)
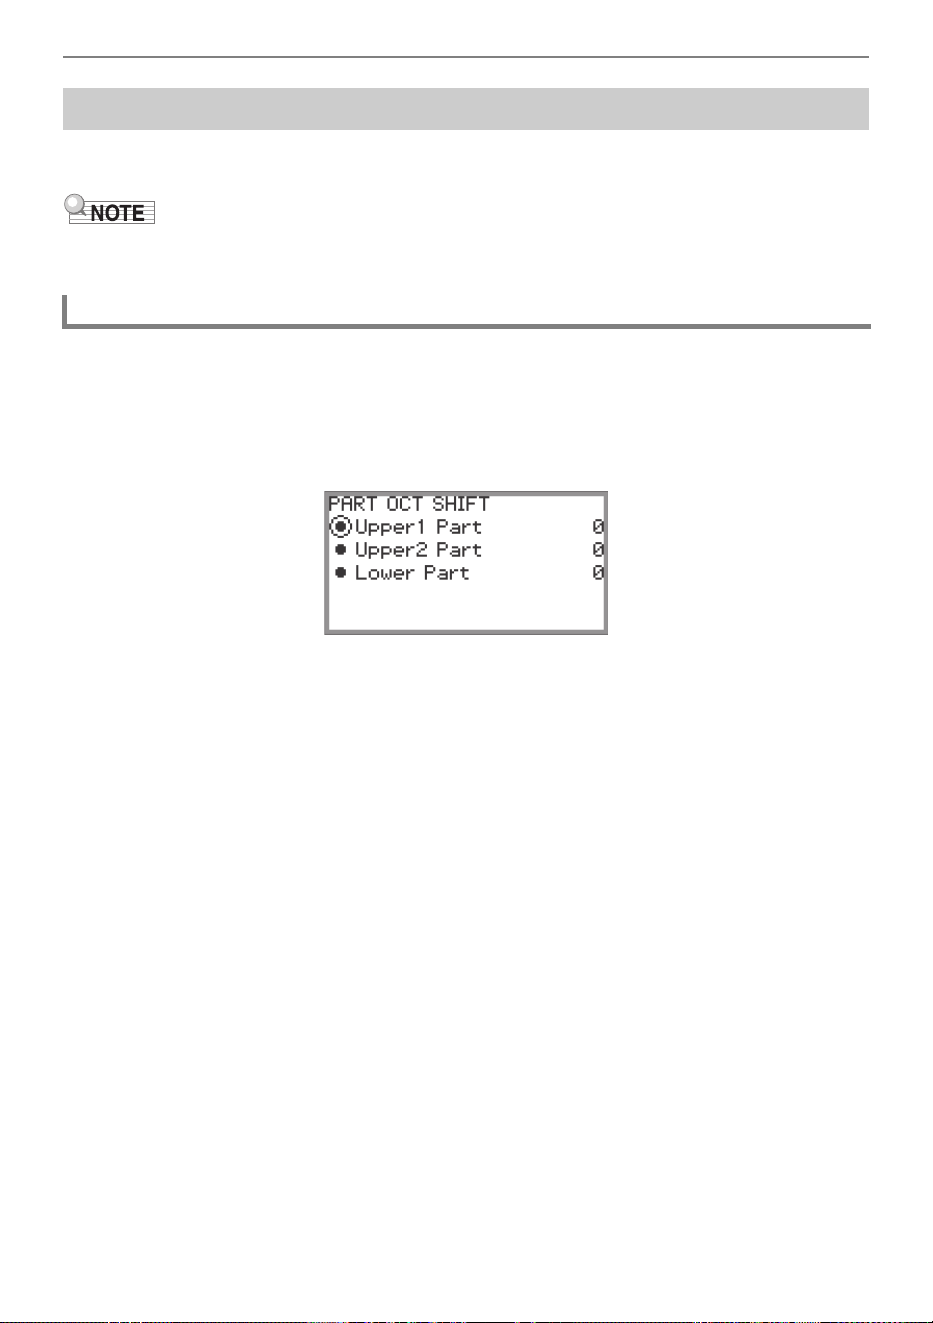
Changing the Pitch
EN-132
Use the Octave Shift feature to raise or lower the pitch of all notes in octave units. Each part (Upper 1,
Upper 2, Lower) can be set individually when using the Layer or Split functions.
• For details on parts, see “Sounding Two Different Tones at the Same Time (Layer)” (page EN-44)
and “Splitting the Keyboard Between Two Tones (Split)” (page EN-46).
1.
Touch the FUNCTION button to display the FUNCTION Menu.
2.
Use the touch ring to select “KEYBOARD” > “PART OCT SHIFT”, then touch the
ENTER button.
The “PART OCT SHIFT” screen appears.
3.
Touch the top or bottom of the touch ring to select the part to octave shift.
4.
Change the setting value of the selected part.
• Trace the touch ring to change the desired setting value.
5.
Repeat Steps 3 and 4 as necessary.
Changing the Pitch in Octave Units (Octave Shift)
Using Octave Shift Separately for Each Part (Upper 1/Upper 2/Lower)
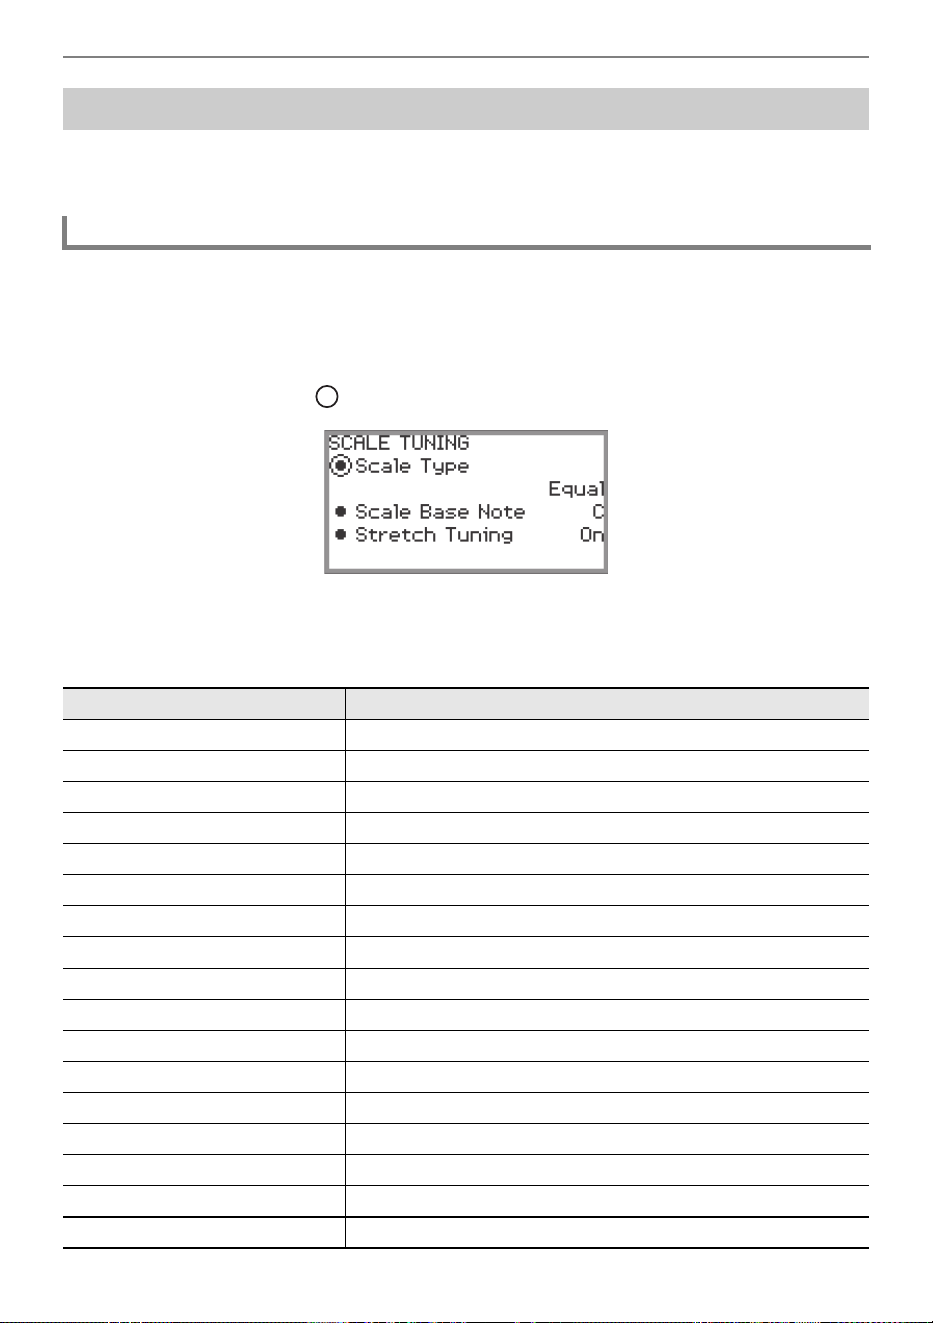
Changing the Pitch
EN-133
You can change the scale of the keyboard from the standard equal temperament to another tuning that
is more suitable for playing Indian music, Arabic music, classical music, etc. You can select from
among the 17 preset scales described below.
1.
Touch the FUNCTION button to display the FUNCTION Menu.
2.
Use the touch ring to select “KEYBOARD” > “SCALE TUNING”, then touch the
ENTER button.
The “SCALE TUNING” screen appears.
• Confirm that the cursor ( ) is on “Scale Type”.
3.
Change the “Scale Type” setting value.
• Trace the touch ring to change the desired setting value.
• You can choose from the temperaments in the table below.
Changing the Scale Tuning (Temperament) of the Keyboard
Changing the Scale
Setting Value Scale (Temperament) Name
Equal Equal Temperament
Pure Major Pure Major Temperament
Pure Minor Pure Minor Temperament
Pythagorean Pythagorean Temperament
Kirnberger 3 Kirnberger 3 Temperament
Werckmeister Werckmeister Temperament
Mean-Tone Mean-Tone Temperament
Rast Rast
Bayati Bayati
Hijaz Hijaz
Saba Saba
Dashti Dashti
Chahargah Chahargah
Segah Segah
Gurjari Todi Gurjari Todi
Chandrakauns Chandrakauns
Charukeshi Charukeshi
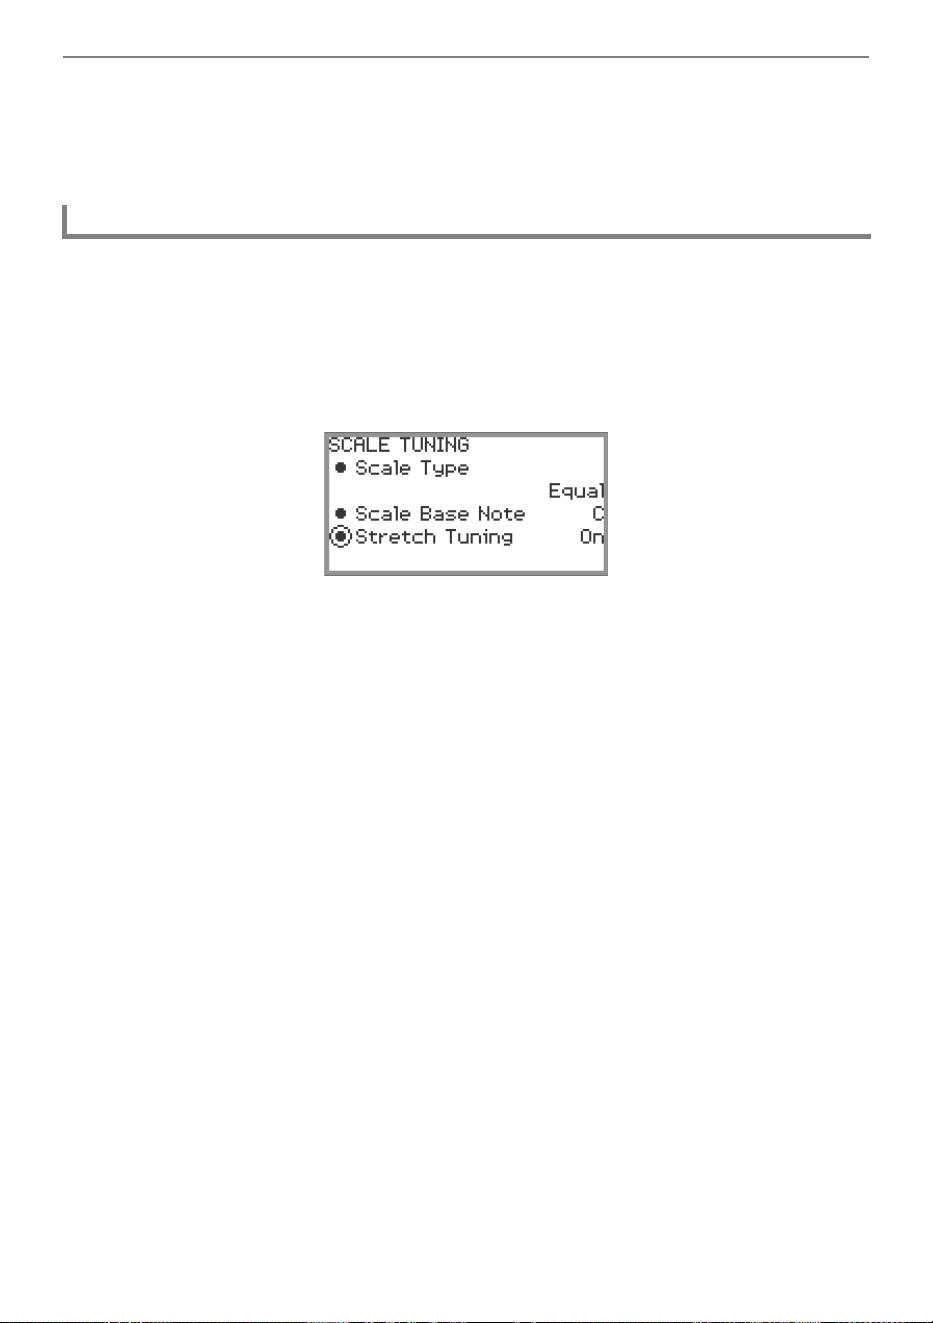
Changing the Pitch
EN-134
4.
If necessary, change the base note of the scale.
(1) In the “SCALE TUNING” screen, touch the top or bottom of the touch ring to select the “Scale
Base Note”.
(2) Trace the touch ring to change the desired base note.
Generally, a piano is tuned so high notes are relatively higher and low notes are relatively lower. This
type of tuning is called “stretch tuning”. You can disable Stretch Tuning, if you want.
1.
Touch the FUNCTION button to display the FUNCTION Menu.
2.
Use the touch ring to select “KEYBOARD” > “SCALE TUNING” > “Stretch
Tuning”.
3.
Trace the touch ring to toggle the setting value between “On” and “Off”.
Enabling or Disabling Piano Stretch Tuning
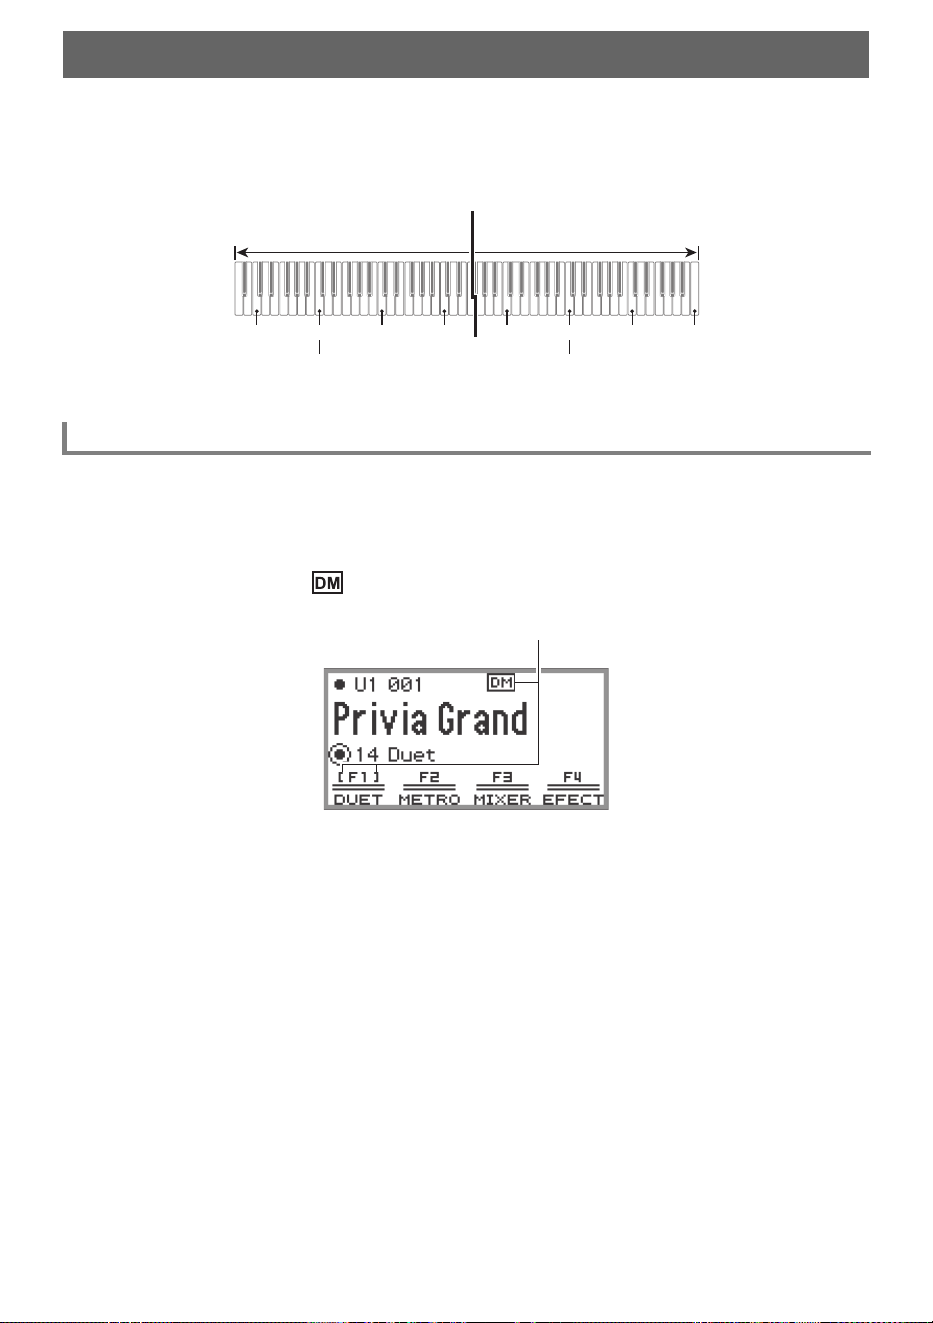
EN-135
You can split the keyboard in the center for duet play so the left and right sides have the same ranges.
The Duet function is the perfect way to conduct lessons, with the teacher playing on the left side as the
student plays the same song on the right side. You can also change the ranges of the left and right
keyboards in octave units from their initial default settings.
1.
Select the “14 Duet” of the F Button Set. See “To change the F Button Set” (page
EN-32).
2.
Touch the F1 button (DUET).
Duet is turned on, and the indicator appears on the display.
3.
If necessary, change the settings for the Duet function.
• The keyboard range can be changed in octave units, and the sound output by the left and right
side of the keyboard can be split between the left and right speakers. For more information, see
“Configuring Duet Settings” (page EN-137).
Splitting the Keyboard for Duet Play
Using the Duet
C3 C4 C5 C6 C3 C4 C5
C6
Split point
Left keyboard Right keyboard
(middle C) (middle C)
Displayed when Duet is on
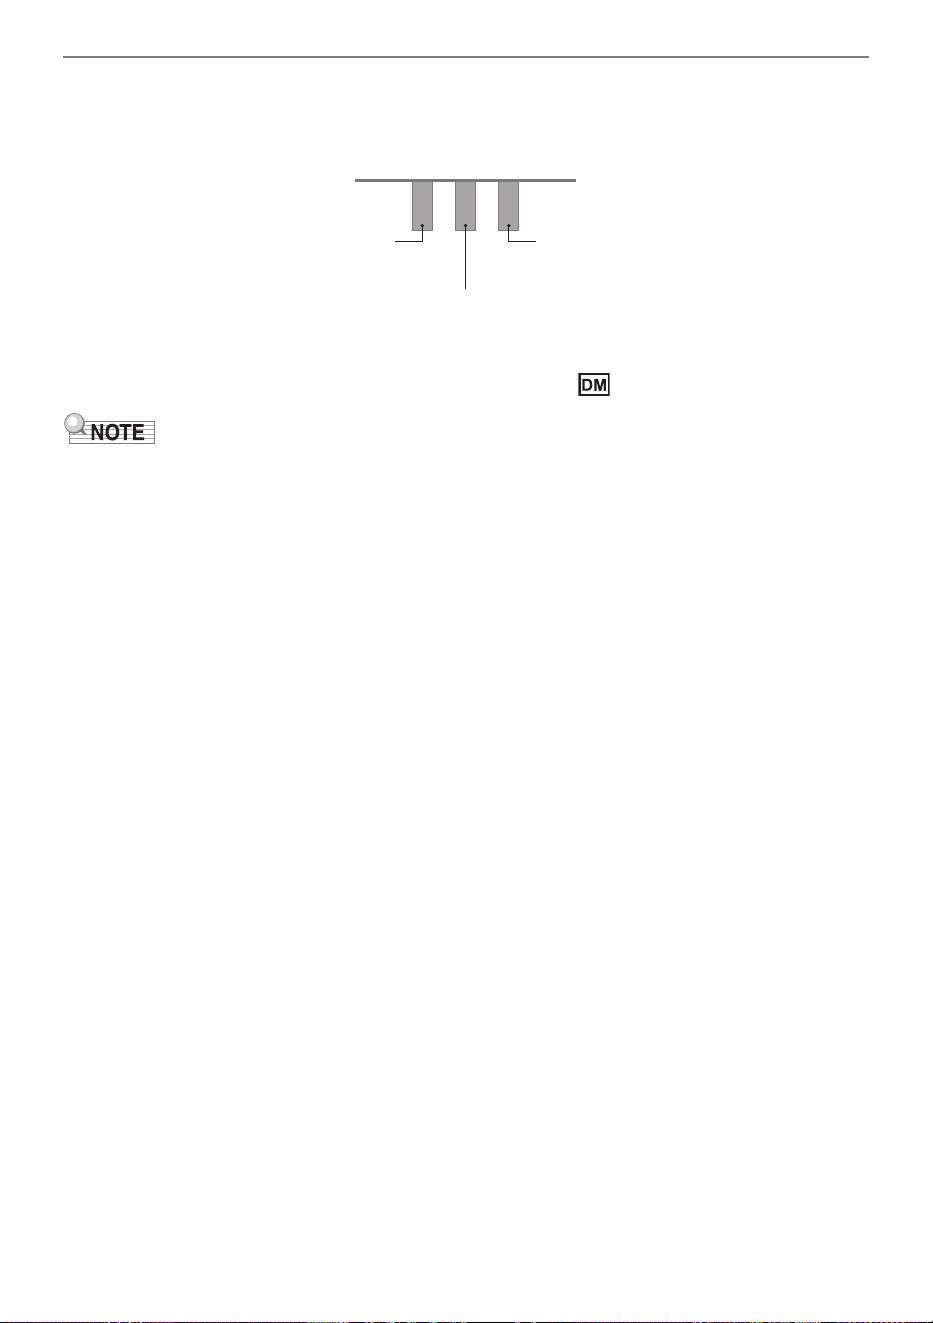
Splitting the Keyboard for Duet Play
EN-136
4.
Play duets using the left and right sides of the keyboard.
• When Duet is active, the left and right pedals serve as damper pedals for the left and right-side
of the keyboard, respectively, and the center pedal serves a damper pedal for both left and right.
5.
To turn off Duet, touch the F1 button (DUET). The indicator disappears.
• A sustain pedal (sold separately) can be connected to the EXPRESSION/ASSIGNABLE jack and
used as a shared (left and right) damper pedal. Half-pedal operation is not supported.
• Some settings cannot be changed while Duet is active.
• The following functions are assigned to the CONTROL button, and K1 and K2 knobs, respectively,
while Duet is active (they cannot be changed).
CONTROL button: Modulation
K1 knob: KB Group Volume
K2 knob: WirelesAudioVol
Left side damper pedal
Left and right side damper pedal
Right side damper pedal

Splitting the Keyboard for Duet Play
EN-137
1.
Select the “14 Duet” of the F Button Set. See “To change the F Button Set” (page
EN-32).
2.
Touch and hold the F1 button (DUET).
The “DUET” screen appears.
3.
Touch the top or bottom of the touch ring to select the item whose setting value
you want to change.
• The table below shows the setting values and details for each setting item.
4.
Change the setting value of the selected item.
• Trace the touch ring to change the desired setting value.
5.
Repeat Steps 3 and 4 as necessary.
• When “Duet Mode” is set to “Duet Pan”, the Hall Simulator/Reverb (page EN-49), Surround (page
EN-49), DSP (page EN-52), Chorus (page EN-57), and Acoustic Simulator (page EN-59) functions
and some Mixer settings (page EN-65) are not available.
Configuring Duet Settings
Setting Item Setting Value Description
Duet Mode
Duet On
Both speakers output sound from both the left and
right sides of the keyboard.
Duet Pan
The left speaker outputs sound from the left side of
the keyboard only, and the right speaker outputs
sound from the right side of the keyboard only.
Upper Octave,
Lower Octave
–2, –1, 0, +1, +2
“Upper Octave” raises or lowers the range of the right
side of the keyboard, while “Lower Octave” raises or
lowers the range of the left side of the keyboard, both
in octave units. Increasing the setting value by one
raises the keys one octave. Decreasing it by one
lowers the keys one octave (initial default setting: 0).
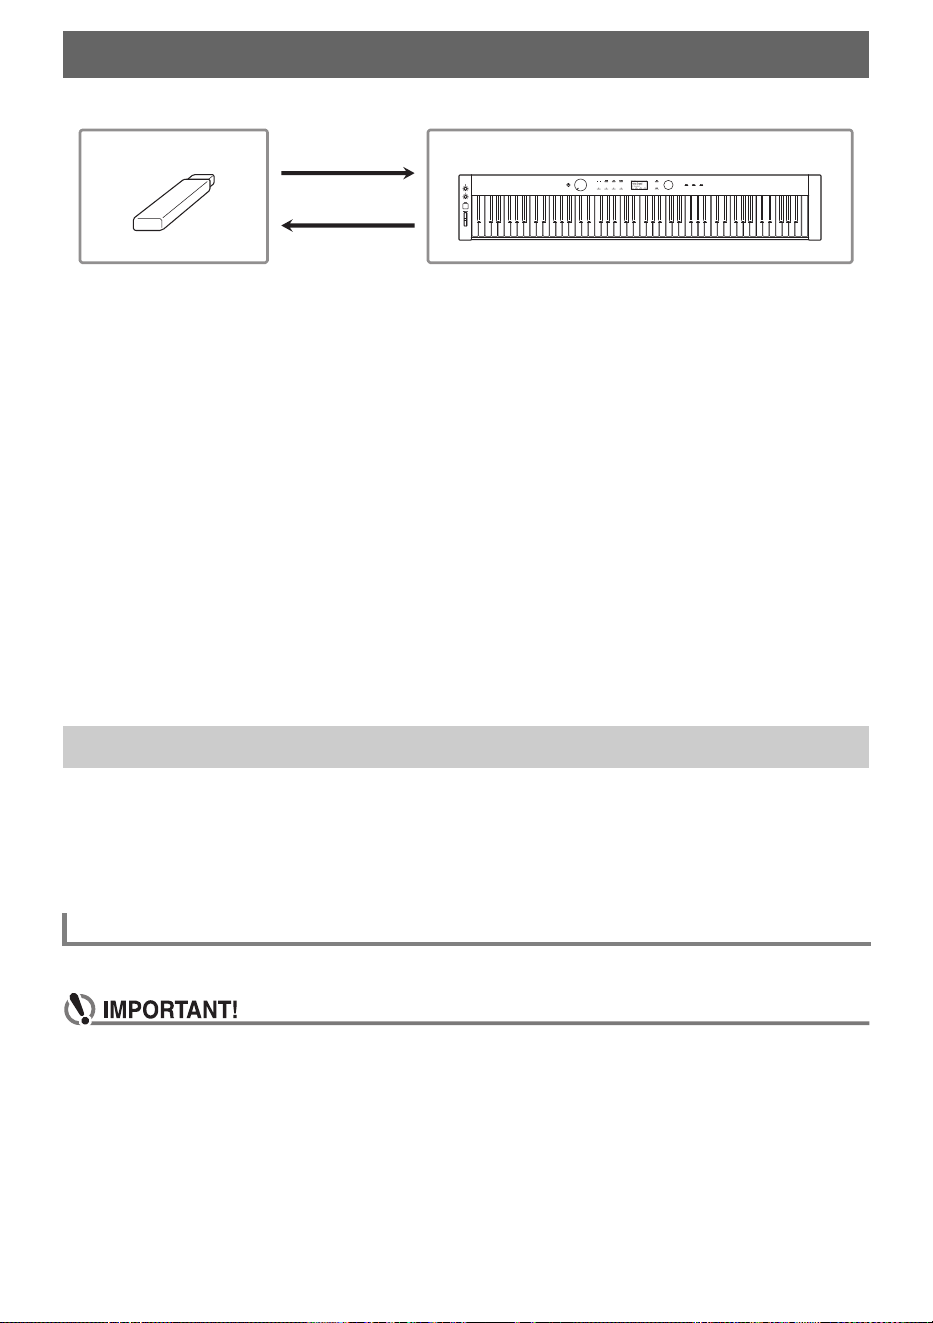
EN-138
Your Digital Piano supports the following USB flash drive operations.
(1) USB Flash Drive on the Digital Piano
• Playing back audio data on a USB flash drive
“Listening to Songs (SONG Mode)” (page EN-106)
• Playing back MIDI files on a USB flash drive
“Listening to Songs (SONG Mode)” (page EN-106)
• Loading compatible files on a USB flash drive into the Digital Piano’s Internal Memory
“Loading USB Flash Drive Data into the Digital Piano’s Internal Memory” (page EN-145)
• Deleting USB flash drive files
“Deleting a USB Flash Drive File” (page EN-146)
• Renaming USB flash drive files
“Renaming a USB Flash Drive File” (page EN-147)
(2) Saving Digital Piano Data to a USB Flash Drive
Saving the following data recorded by this Digital Piano to a USB flash drive allows you to load and
use the data in the future.
• MIDI recorder songs
• Registration data
• All user data
“Saving Digital Piano Data to a USB Flash Drive” (page EN-143)
This section explains the information below.
• USB flash drive supported for use with the Digital Piano
• Data types supported by the Digital Piano using a USB flash drive
• Connecting a USB flash drive to and detach it from the Digital Piano
• Formatting a USB flash drive
Capacity: 32GB or less recommended
• Use a FAT (FAT32 or exFAT) format USB flash drive.
• You may not be able to use a USB flash drive that is recognized as multiple drives on your
computer.
• A USB flash drive that is recognized as a CD-ROM on your computer is not supported.
• A USB flash drive with an anti-virus function and/or security functions is not supported.
USB Flash Drive
Preparing a USB Flash Drive
Supported USB Flash Drives
(1)
(2)
USB Flash Drive Digital Piano
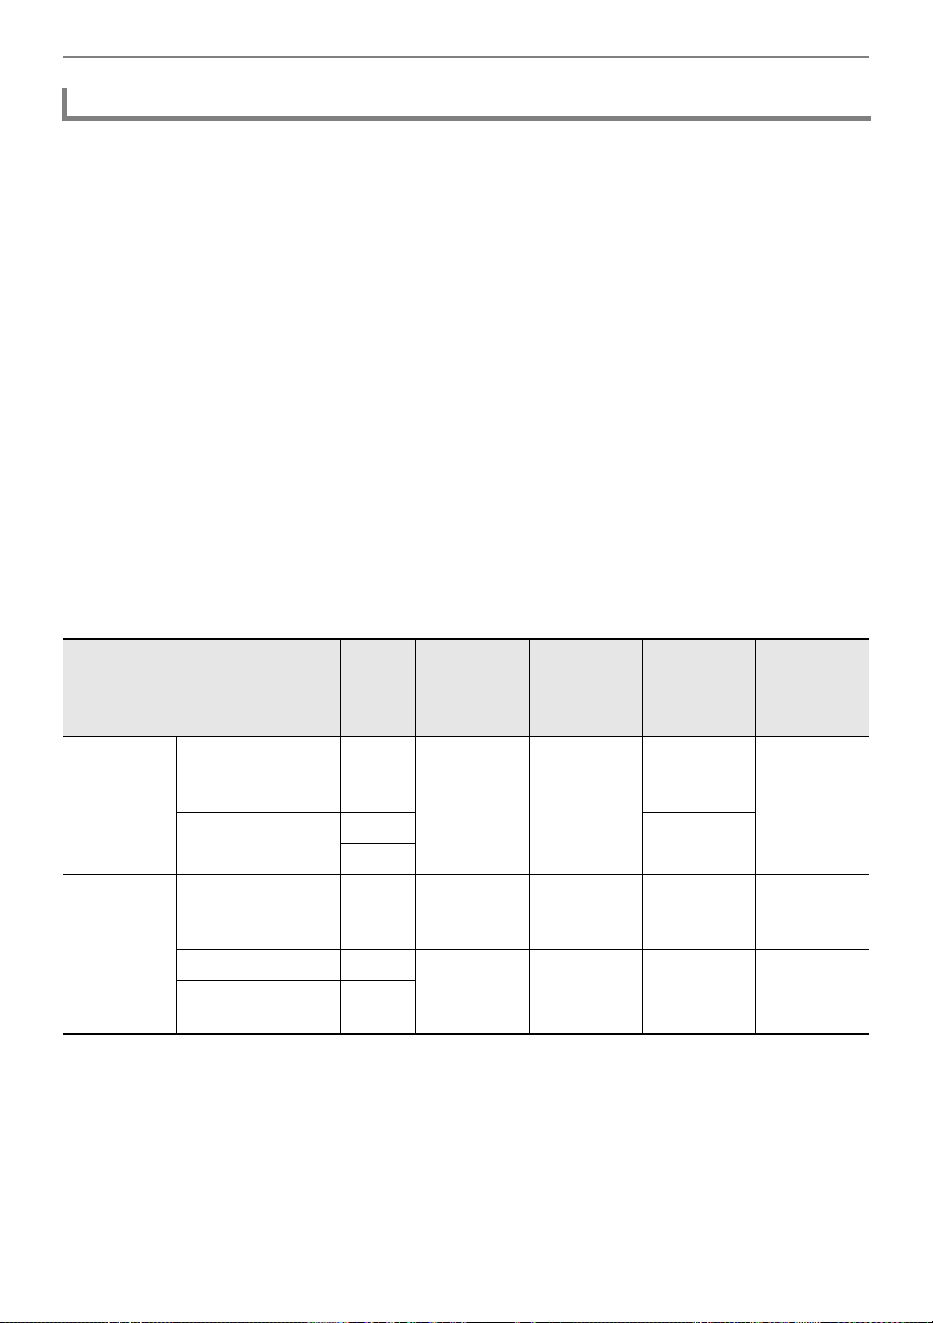
USB Flash Drive
EN-139
Data from a USB flash drive that can be read by the Digital Piano includes song data (MIDI and audio
data), registration data, and all user data stored in the Digital Piano.
■ Song Data
Audio Data
• WAV format:
This is a standard audio file format used primarily by Windows. The Digital Piano supports the
following WAV file format:
Linear PCM, 16-bit, 44.1kHz, stereo, file name extension: .WAV
• MP3 format:
This is a common audio file format used widely in online music distribution, etc. This Digital Piano
supports the following MP3 file formats:
MPEG-1 Audio Layer3, 44.1kHz/48kHz, 32 to 320kbps variable bit rate (VBR), monaural/stereo, file
name extension: .MP3
MIDI Data
• MRF format (CASIO original file format):
MIDI data recorded with the Digital Piano’s MIDI Recorder. (file name extension: .MRF)
• CMF format (CASIO original file format):
This file format adds CASIO proprietary data to MIDI data. (file name extension: .CMF)
• SMF (Standard MIDI File) Format 0/1:
Standard MIDI file format that can be exchanged with a compatible device from another
manufacturer. (File name extension: .MID)
*1 Can be converted to Standard MIDI file (SMF format 0, File name extension: .MID) for save.
– Saving as a MRF format file
In addition to performance information, model-specific settings (such as Acoustic Simulator)
are also saved to the file, so you can reproduce the original performance in its entirety after
reloading the data.
Note, however, that MRF file data is not compatible with other musical instrument types and
models.
Data Types Supported by the Digital Piano
Data Type
File
Name
Exten-
sion
Save
(Digital Piano
→ USB Flash
Drive)
Load
(USB Flash
Drive →
Digital Piano)
Direct
Recording to
USB Flash
Drive
Direct USB
Flash Drive
Playback
Audio Data
Audio Recorder
song file
(page EN-122)
.WAV
——
Yes
Yes
General audio file
.WAV
—
.MP3
MIDI Data
MIDI Recorder
song files
(page EN-113)
.MRF Yes
*1
Yes — —
CASIO MIDI file
*2
.CMF
—Yes
*3
—Yes
Standard MIDI file
(SMF format)
.MID

USB Flash Drive
EN-140
– Saving as an SMF format file
Performance information is saved, but models specific-settings are not saved. Because of
this, playback of a reloaded file will be in accordance with the current Digital Piano setup,
which may be different from the original setup. If you want to play with the original setup, you
will need to configure it manually. Since this is an SMF file, it can be used on another musical
instrument that supports SMF. Of course, playback will be somewhat different when played
on another musical instrument.
*2 Songs downloaded from the CASIO website, etc.
*3 The song is loaded as a user song (song number 001 to 010). See “Data Types of Playable Songs”
(page EN-106).
■ Registration Data
Registration data from the Digital Piano can be saved to a USB flash drive as banks (extension: .RBK).
RBK files can be loaded into the Digital Piano from a USB flash drive.
For details on registration, see “Saving and Recalling Performance Setups (Registration)” (page
EN-86).
■ All User Data
All user data stored in the Digital Piano can be saved as a single file to a USB flash drive (extension:
.DAL). Saved DAL files can be loaded into the Digital Piano from a USB flash drive.
Copyrights
The rights of creators and copyright holders of music, images, computer programs, databases, and
other data are protected by copyright laws. You are allowed to reproduce such works for personal
or noncommercial use only. For any other purpose, all reproduction (including data format
conversion), modification, transfer of reproductions, distribution over a network, or any other use
without permission of the copyright holder exposes you to claims for damages and criminal
prosecution for copyright infringement and violation of the author’s personal rights. Be sure to
reproduce and otherwise use copyrighted works only in accordance with applicable copyright laws.
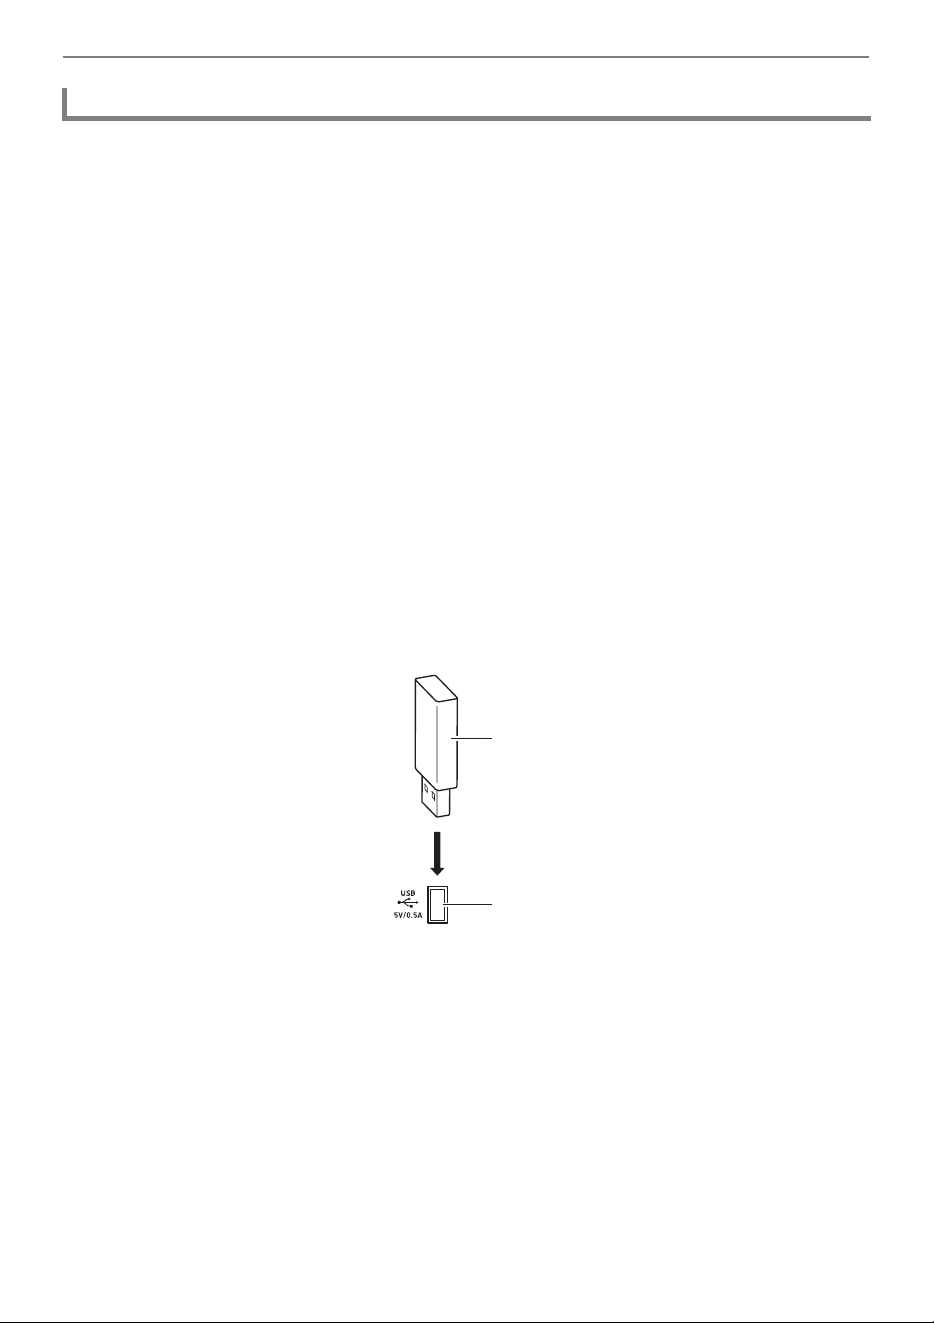
USB Flash Drive
EN-141
• Be sure to observe the precautions provided in the documentation that comes with the USB flash drive.
• Avoid using a USB flash drive under the following conditions. Such conditions can corrupt data
stored on the USB flash drive.
– Areas subjected to high temperature, high humidity, or corrosive gas
– Areas subjected to strong electrostatic charge and electrical noise
• Never remove the USB flash drive while data is being written to or loaded from it. Doing so can
corrupt the data on the USB flash drive and damage the USB Type A port.
• Never insert anything besides a USB device that is specified for use with this Digital Piano into the
USB Type A port. Doing so creates the risk of malfunction.
• When you perform a USB flash drive operation while a USB flash drive is plugged in, the Digital
Piano initially needs to perform a “mounting” sequence to prepare for data exchange with the USB
flash drive. Digital Piano operations may be momentarily difficult while a mounting sequence is being
performed. The message “MOUNTING” is displayed while the USB flash drive is being mounted. It
may take up to 10 or 20 seconds or even longer for a USB flash drive to be mounted. We
recommend that you do not attempt to perform any operation on the Digital Piano while a mounting
sequence is in progress. A USB flash drive needs to be mounted each time it is connected to the
Digital Piano.
■ To insert a USB flash drive
1.
As shown in the illustration below, insert the USB flash drive into the Digital
Piano’s USB Type A port.
• Carefully push the USB flash drive in as far as it will go. Do not use undue force when inserting
the USB flash drive.
• Static electricity conducted to the USB Type A port from your hand or from a USB flash drive
can cause malfunction of the Digital Piano. If this happens, turn the Digital Piano off and then
back on again.
■ To remove a USB flash drive
1.
Check to confirm that no data read/write operation is in progress.
• Do not proceed to step 2 if data is being read or written, as in the following cases:
− If “MOUNTING” or “Wait...” is displayed on screen
− If the USB flash drive is in use by the audio recorder or SONG mode.
2.
Pull the USB flash drive straight out.
• A USB flash drive can become warm after very long use. This is normal and does not indicate
malfunction.
Connecting a USB Flash Drive to and Detaching It from the Digital Piano
USB flash drive
USB Type A port
B
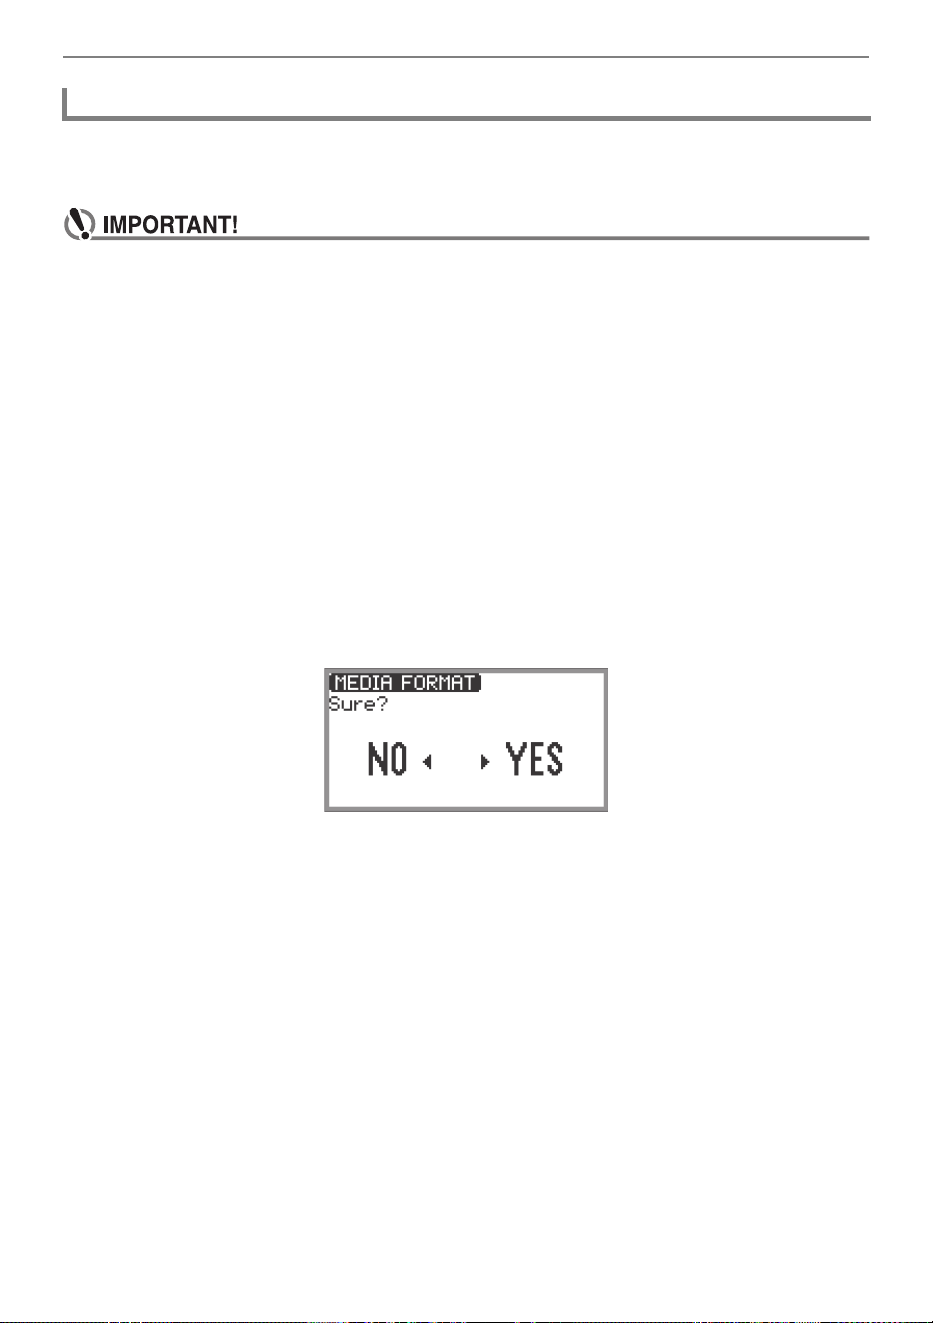
USB Flash Drive
EN-142
Formatting a USB flash drive on the Digital Piano will create a folder named MUSICDAT in the drive’s
root directory if a MUSICDAT folder does not already exist there. Use this folder when exchanging data
between the Digital Piano and USB flash drive.
• Be sure to format a USB flash drive on the Digital Piano before using it for the first time.
• Formatting a USB flash drive deletes all data currently stored on it. Before formatting a USB
flash drive, make sure it does not have any valuable data stored on it.
• The format operation performed by this Digital Piano is a “quick format”. If you want to
completely delete all of the data in the USB flash drive, format it on your computer or some
other device before formatting it with this Digital Piano.
• In the case of an exFAT format USB flash drive, the number of importable files may be limited
if long file names are used.
1.
Insert the USB flash drive you want to format into the USB Type A port on the
Digital Piano.
2.
Touch the FUNCTION button to display the FUNCTION Menu.
3.
Use the touch ring to select “MEDIA” > “FORMAT”, then touch the ENTER
button.
A confirmation screen appears. To cancel the operation, touch the left of the touch ring (NO).
4.
To confirm the formatting, touch the right of the touch ring (YES).
• Formatting begins and “Wait...” appears. Do not perform any action using the Digital Piano
during this period. Formatting a large-capacity USB flash drive may take several minutes.
• When formatting is complete, “Complete” appears.
Formatting a USB Flash Drive
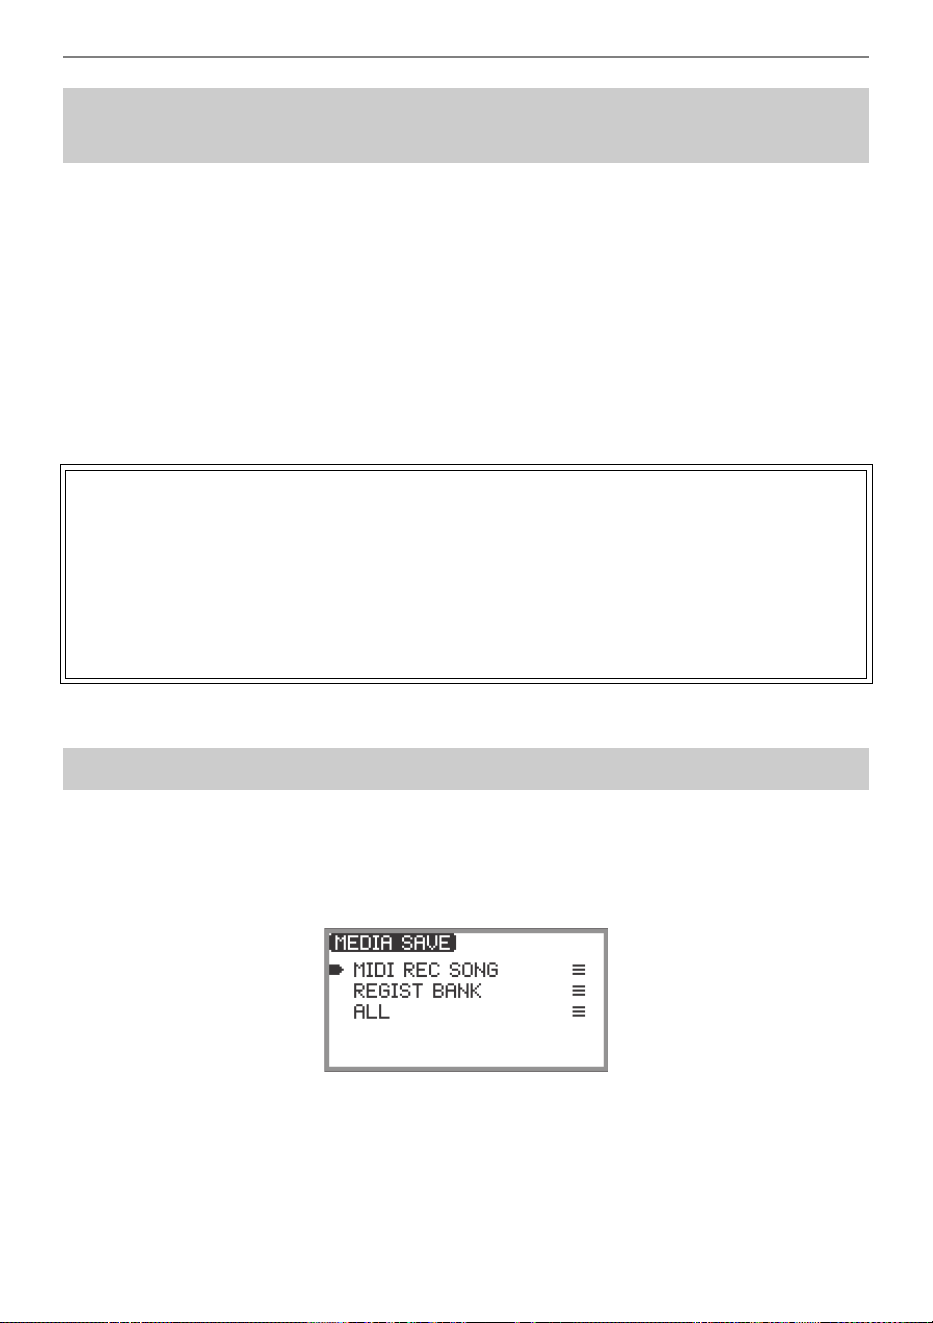
USB Flash Drive
EN-143
The procedure below can be used to save MIDI files (SMF or CMF) and audio files (WAV or MP3) to a
USB flash drive and play them back on the Digital Piano.
1.
Connect the USB flash drive to your computer.
2.
Create a folder named MUSICDAT in the root directory of the USB flash drive.
• This step is not required if there is already a MUSICDAT folder in the USB flash drive’s root
directory.
3.
Move the MIDI files or audio files you want to play back to the MUSICDAT folder
on the USB flash drive.
• For information about playback see “Listening to Songs (SONG Mode)” (page EN-106).
1.
Touch the FUNCTION button to display the FUNCTION Menu.
2.
Use the touch ring to select “MEDIA” > “SAVE”, then touch the ENTER button.
The “MEDIA SAVE” screen displays a menu for selecting the type of data that can be saved.
“MIDI REC SONG” … MIDI recorder songs
“REGIST BANK” … Registration Bank
“ALL” … All user data in the Digital Piano’s internal memory
Saving MIDI Files or Audio Files for Playback on your
Digital Piano to a USB Flash Drive
Copyrights
You are allowed to use recordings for your personal use. Any reproduction of an audio or music
format file without the permission of its copyright holder is strictly prohibited under copyright laws
and international treaties. Also, making such files available on the Internet or distributing them to
third parties, regardless of whether such activities are conducted with or without compensation, is
strictly prohibited under copyright laws and international treaties. CASIO COMPUTER CO., LTD.
shall not be held in any way liable for any use of this Digital Piano that is illegal under copyright
laws.
Saving Digital Piano Data to a USB Flash Drive

USB Flash Drive
EN-144
3.
Touch the top or bottom of the touch ring to select the type of data to save, then
touch the ENTER button.
• If you choose “ALL”, after touching the ENTER button the file name edit screen will be
displayed so proceed to Step 5. Otherwise, the screen for selecting the type of data to save will
be displayed so proceed to Step 4.
4.
Perform the following actions depending on the type of data you selected.
■ If you selected “MIDI REC SONG”:
(1) Touch the top or bottom of the touch ring to select the data to save, then touch the ENTER
button.
A screen appears for selecting the file format (MRF or MID) to save the data in.
(2) Touch the top or bottom of the touch ring to select “MRF” (dedicated format for this Digital
Piano) or “MID” (SMF format), then touch the ENTER button.
The file name editing screen appears.
■ If you selected “REGIST BANK”:
(1) Touch the top or bottom of the touch ring to select the data to save, then touch the ENTER
button.
The file name editing screen appears.
5.
Rename the file if necessary.
• For details, see “To change a character” (page EN-35), “To insert a character” (page EN-36),
and “To delete a character” (page EN-36).
6.
To confirm the file name, touch the ENTER button.
“Sure?” or “Replace?” appears in the screen confirming whether you want to save the file.
“Sure?” .............. Appears when there are no files with the same name on the destination USB
flash drive.
“Replace?”......... Confirms whether you want to overwrite an existing file with the same name on
the destination USB flash drive.
• To exit the operation without saving, touch the left of the touch ring (NO).
7.
To save, touch the right of the touch ring (YES).
“Wait...” is displayed during the save process. Do not perform any action on the Digital Piano while
this is happening. When saving is complete, “Complete” appears.
• It may take several minutes to save all user data, depending on the size of the data.
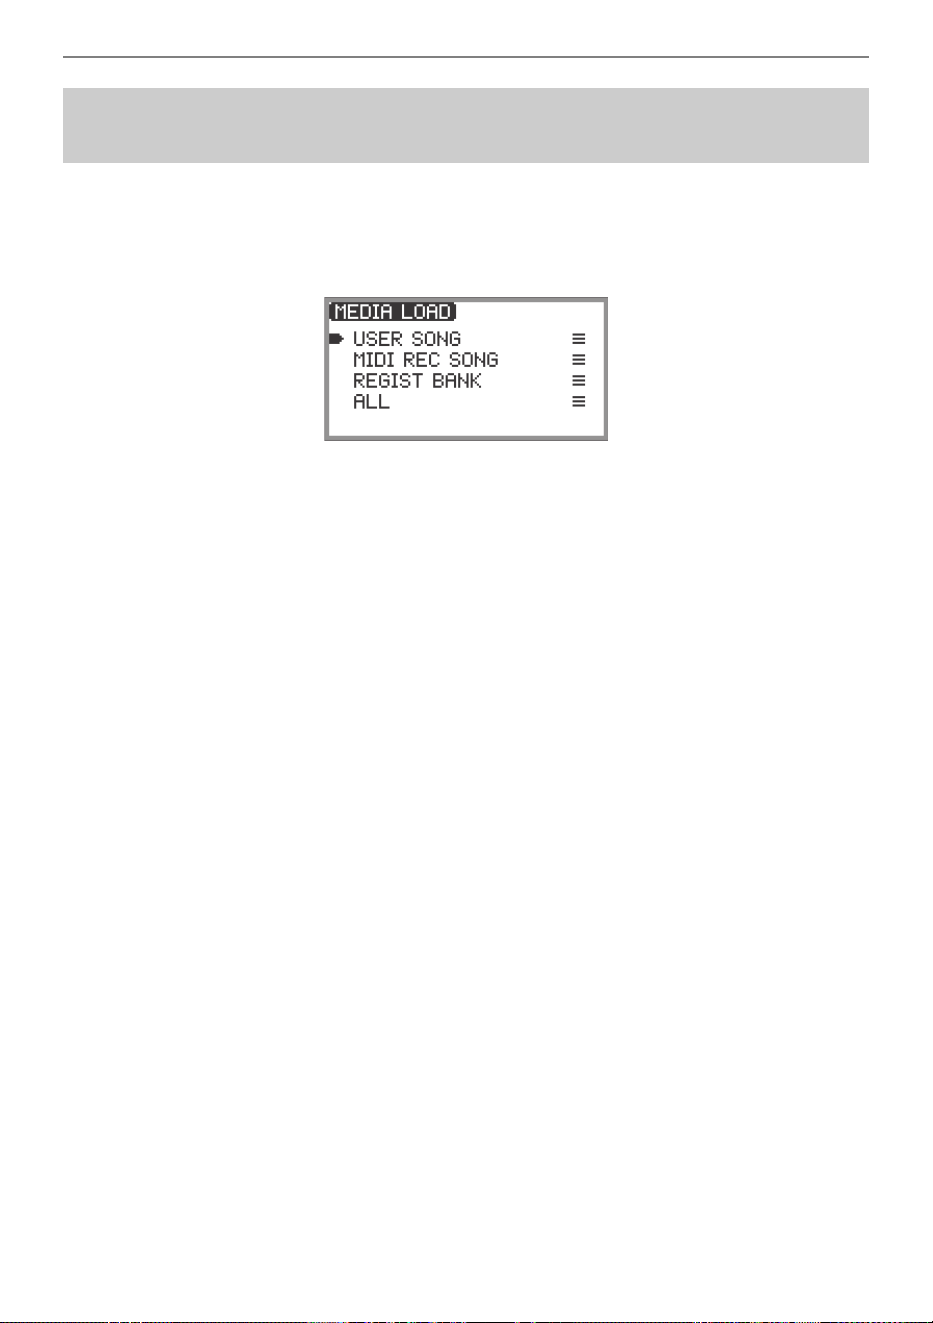
USB Flash Drive
EN-145
1.
Touch the FUNCTION button to display the FUNCTION Menu.
2.
Use the touch ring to select “MEDIA” > “LOAD”, then touch the ENTER button.
The “MEDIA LOAD” screen displays a menu for selecting the type of data you want to load.
“USER SONG” … User songs
“MIDI REC SONG” … MIDI recorder songs
“REGIST BANK” … Registration Bank
“ALL” … All user data in the Digital Piano’s internal memory
3.
Touch the top or bottom of the touch ring to select the type of data, a file to load,
then touch the ENTER button.
A screen appears to select which area of the Digital Piano to load.
• If “ALL” is selected, touching the ENTER button immediately displays the confirmation screen
in Step 4 (“Replace?”).
4.
Touch the top or bottom of the touch ring to select the area to load from, then
touch the ENTER button.
The “Sure?” or “Replace?” message appears in the screen confirming whether you want to load
the file.
“Sure?” .............. Appears when there is no data in the load destination.
“Replace?”......... Checks whether you want to overwrite the data, since there is data in the load
destination.
• To exit the operation without loading any data, touch the left of the touch ring (NO).
5.
To load a file into the Digital Piano, touch the right of the touch ring (YES).
“Wait...” is displayed during the loading process. Do not perform any action on the Digital Piano
while this is happening. When loading is complete, “Complete” appears.
• It may take several minutes to load all user data, depending on the size of the data.
Loading USB Flash Drive Data into the Digital Piano’s
Internal Memory
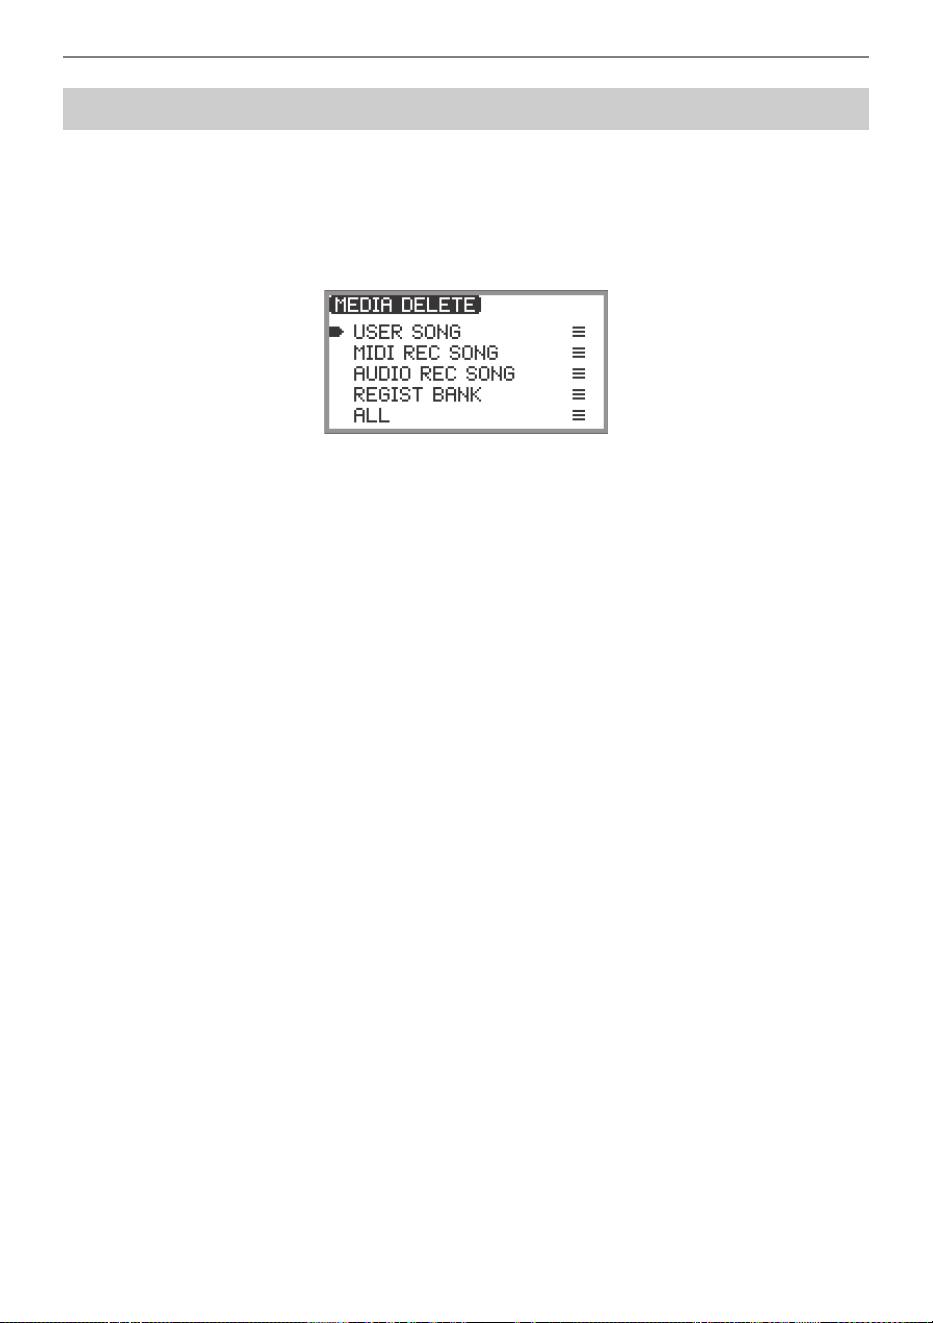
USB Flash Drive
EN-146
1.
Touch the FUNCTION button to display the FUNCTION Menu.
2.
Use the touch ring to select “MEDIA” > “DELETE”, then touch the ENTER
button.
The “MEDIA DELETE” screen displays a menu for selecting the types of files that can be deleted.
“USER SONG” … User songs
“MIDI REC SONG” … MIDI recorder songs
“AUDIO REC SONG” … Audio recorder songs, general audio file
“REGIST BANK” … Registration Bank
“ALL” … All user data in the Digital Piano’s internal memory
3.
Touch the top or bottom of the touch ring to select the type of file to delete, then
touch the ENTER button.
4.
Touch the top or bottom of the touch ring to select the file you want to delete.
5.
Touch the ENTER button.
A screen (“Sure?”) appears to confirm whether you want to delete it.
• To exit the operation without deleting it, touch the left of the touch ring (NO).
6.
To delete it, touch the right of the touch ring (YES).
“Wait...” is displayed during the delete process. Do not perform any action on the Digital Piano
while this is happening. When deletion is complete, “Complete” appears.
• It may take several minutes to delete audio recorder songs or all user data, depending on the
size of the data.
Deleting a USB Flash Drive File
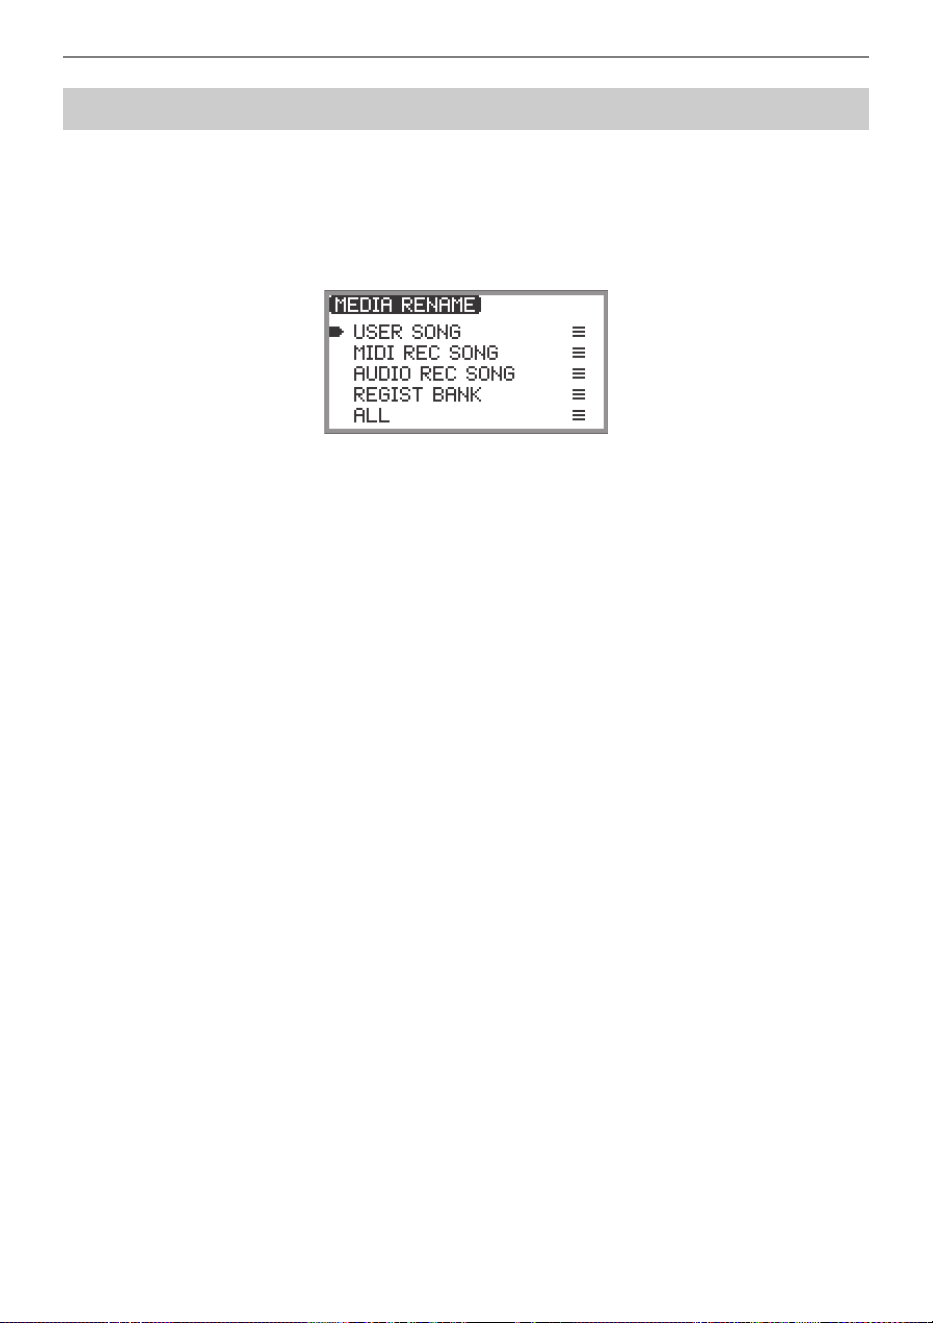
USB Flash Drive
EN-147
1.
Touch the FUNCTION button to display the FUNCTION Menu.
2.
Use the touch ring to select “MEDIA” > “RENAME”, then touch the ENTER
button.
“MEDIA RENAME” screen appears with a menu to select the types of files that can be renamed.
“USER SONG” … User songs
“MIDI REC SONG” … MIDI recorder songs
“AUDIO REC SONG” … Audio recorder songs, general audio file
“REGIST BANK” … Registration Bank
“ALL” … All user data in the Digital Piano’s internal memory
3.
Touch the top or bottom of the touch ring to select the type of file to rename, then
touch the ENTER button.
4.
Touch the top or bottom of the touch ring to select the file to rename.
5.
Touch the ENTER button.
The file name editing screen appears.
6.
Rename the file.
• For details of the procedure, see “To change a character” (page EN-35), “To insert a character”
(page EN-36), and “To delete a character” (page EN-36).
7.
To confirm the file name, touch the ENTER button.
The confirmation screen displays “Sure?” or “Replace?”.
“Sure?” .............. Appears when there are no files with the same name on the destination USB
flash drive.
“Replace?”......... Confirms whether you want to overwrite a file with the same file name on the
destination USB flash drive.
• To exit the operation without renaming (or without overwriting a file with the same name), touch
the left of the touch ring (NO).
8.
To rename (or to overwrite a file with the same name), touch the right of the touch
ring (YES).
“Wait...” appears during the process. Do not perform any action on the Digital Piano while this is
happening. When the process is complete, “Complete” appears.
Renaming a USB Flash Drive File

EN-148
To change the MIDI settings of the Digital Piano, use the setting items of the FUNCTION Menu (page
EN-33) listed in the table below.
Configuring MIDI Settings
Setting Item Setting Values and Descriptions
“MIDI” > “Keyboard Ch”
The keyboard channel is the MIDI channel that performance
data of the Digital Piano is transmitted on to external devices.
Set between 01 (default) and 16.
“MIDI” > “Local Control”
Using the Local Control setting, you can disconnect the
Digital Piano’s keyboard from the internal ‘local’ sound
source so that MIDI data is only output to an external
instrument. The initial default setting is “On”. When set to
“Off”, the Digital Piano outputs performance data (MIDI data),
but the Digital Piano itself does not produce any sound.
“MIDI” > “Hi-Reso MIDI Out”
Switches High Resolution Velocity MIDI Out on/off. Sets
whether the key-on and key-off velocities are output as high-
resolution MIDI output.
• When set to on, high-resolution velocity information
compatible with the high-resolution velocity MIDI standard
is sent to the MIDI OUT port.
• When set to off, high-resolution velocity data is not sent to
the MIDI OUT port. (Standard 127-step velocity data is
sent to the MIDI OUT port.)
• Turning this setting on/off only affects the data sent to the
MIDI OUT port. The Digital Piano’s built-in sound source
always uses high-resolution velocity data.
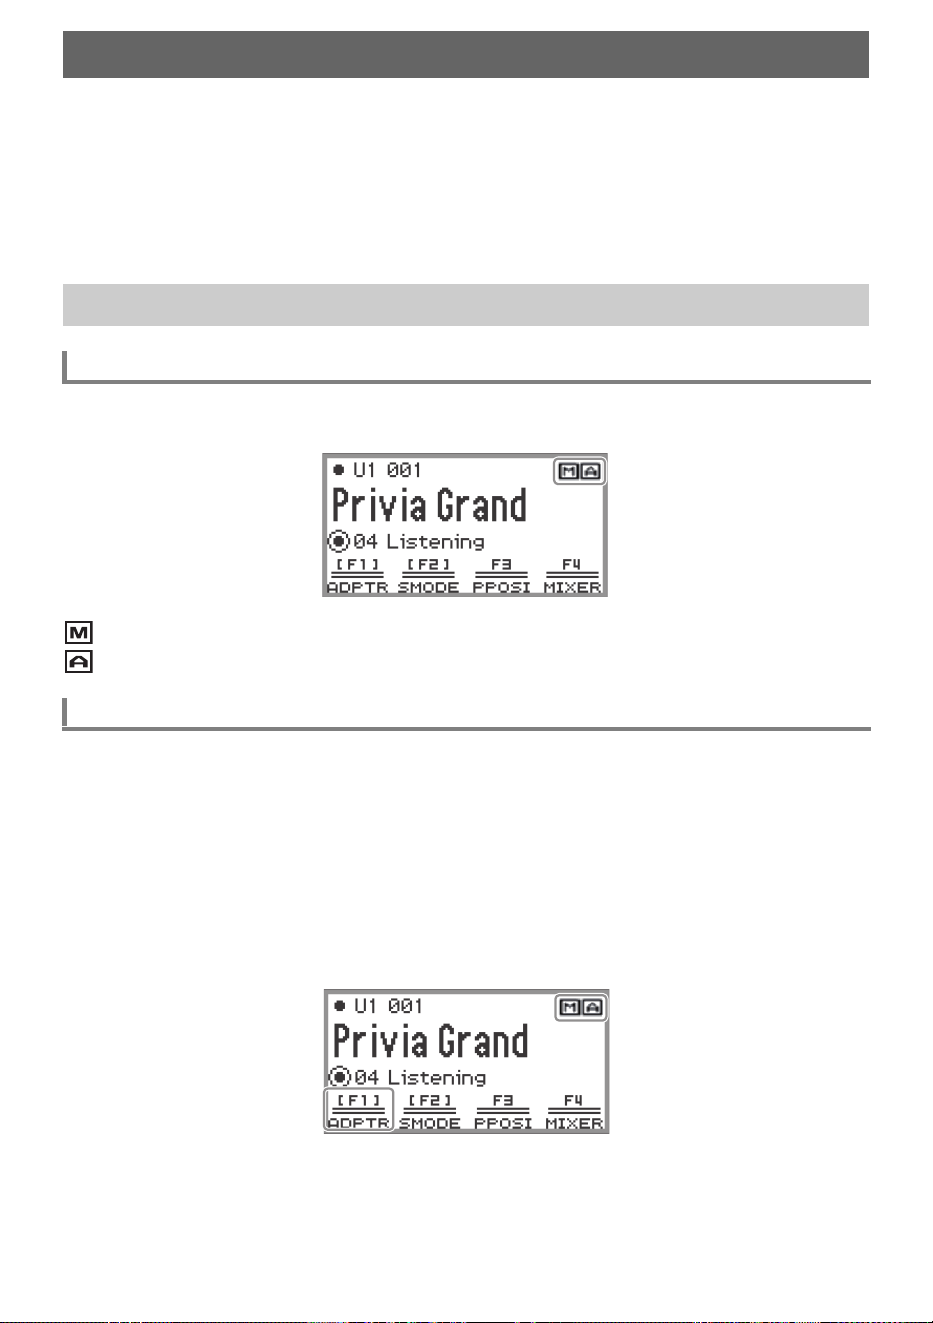
EN-149
The included Wireless MIDI & Audio Adaptor can be used to wirelessly connect the Digital Piano to
external devices. This connection uses Bluetooth
®
wireless technology, and the following two types of
connections are possible:
• Bluetooth Low Energy MIDI connection … Transmits MIDI data between the Digital Piano and a
smart device.
*
• Bluetooth audio connection … The Digital Piano produces the sound for playback of audio from the
external device.
* This requires the dedicated app (page EN-155) to be installed.
You can check the wireless connection status by referring to the indicator in the upper right corner of
the top screen.
....Lights while connected to a Bluetooth Low Energy MIDI-compatible device.
....Lights while connected to a Bluetooth audio-compatible device.
The wireless functionality of this Digital Piano is turned on under the initial default settings. The wireless
functionality can be turned off when necessary, such as when you do not want the Digital Piano to send
out a signal.
1.
Select the “04 Listening” of the F button set. See “To change the F Button Set”
(page EN-32).
• When the wireless functionality is on, the F1 button (ADPTR) in the F button menu is
surrounded by brackets [ ]. In addition, the indicator lights according to the status of the wireless
connection. For more information, see “Checking the Wireless Connection Status” (page
EN-149).
Wireless Connections
Configuring Wireless (Bluetooth) Connection Settings
Checking the Wireless Connection Status
Enabling and Disabling the Digital Piano’s Wireless Function
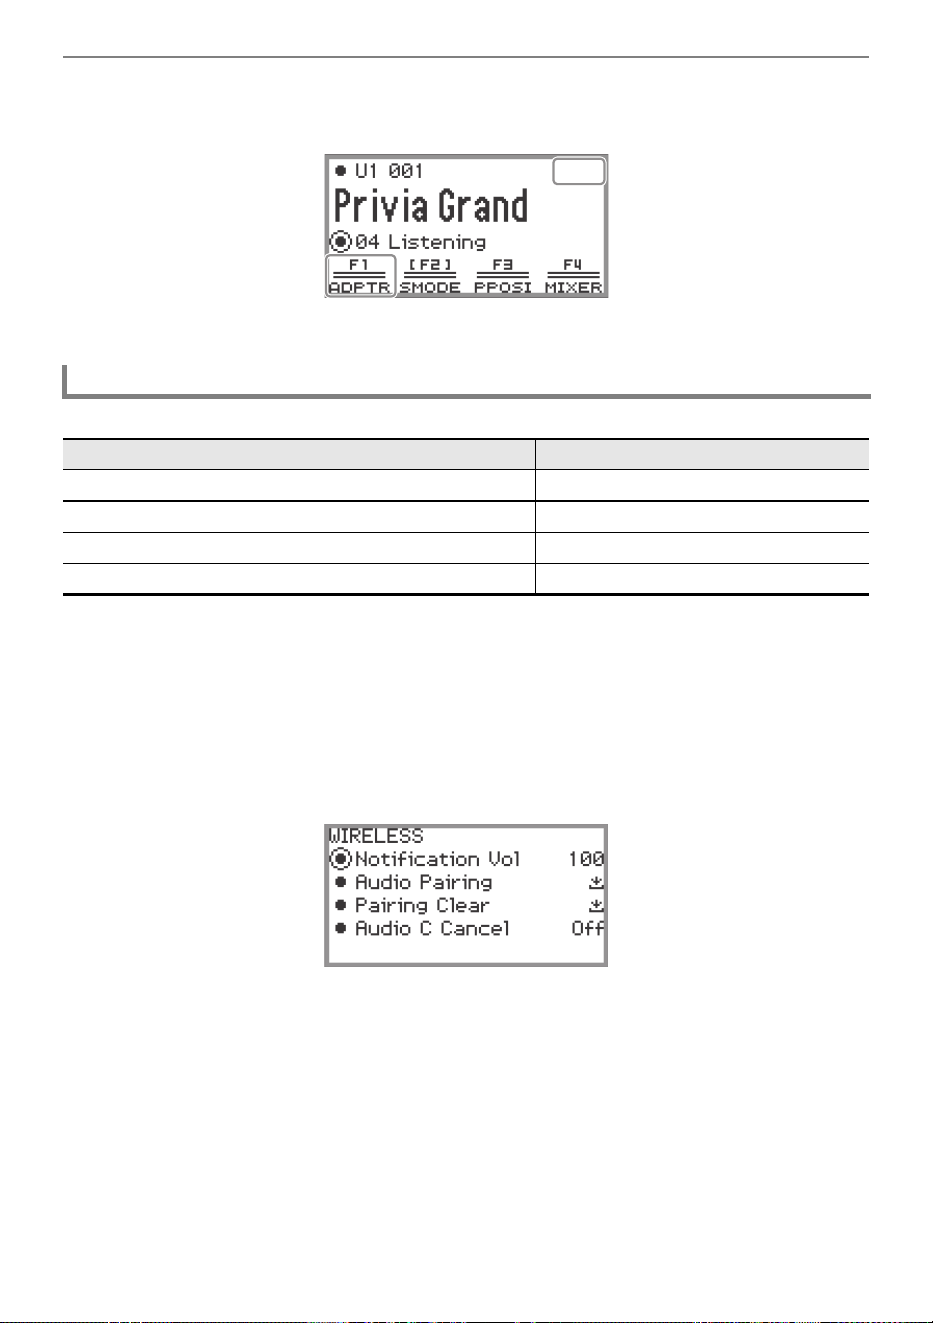
Wireless Connections
EN-150
2.
Touch the F1 button (ADPTR).
The wireless functionality turns off.
• Touching the F1 button (ADPTR) toggles the wireless functionality on and off.
A change in the Bluetooth connection causes a notification tone to sound.
■ To adjust the notification tone volume level
1.
Select the “04 Listening” of the F button set. See “To change the F Button Set”
(page EN-32).
2.
Touch and hold the F1 button (ADPTR).
The “WIRELESS” screen appears.
3.
Trace the touch ring to change the “Notification Vol” setting value.
• The volume can be changed to a value between 0 and 127.
Notification Tones
This type of connection: Sounds this notification tone:
Connection with a Bluetooth audio device Rising piano tone melody
Disconnection from a Bluetooth audio device Falling piano tone melody
Connection with a Bluetooth Low Energy MIDI device Rising vibraphone tone melody
Disconnection from a Bluetooth Low Energy MIDI device Falling vibraphone tone melody
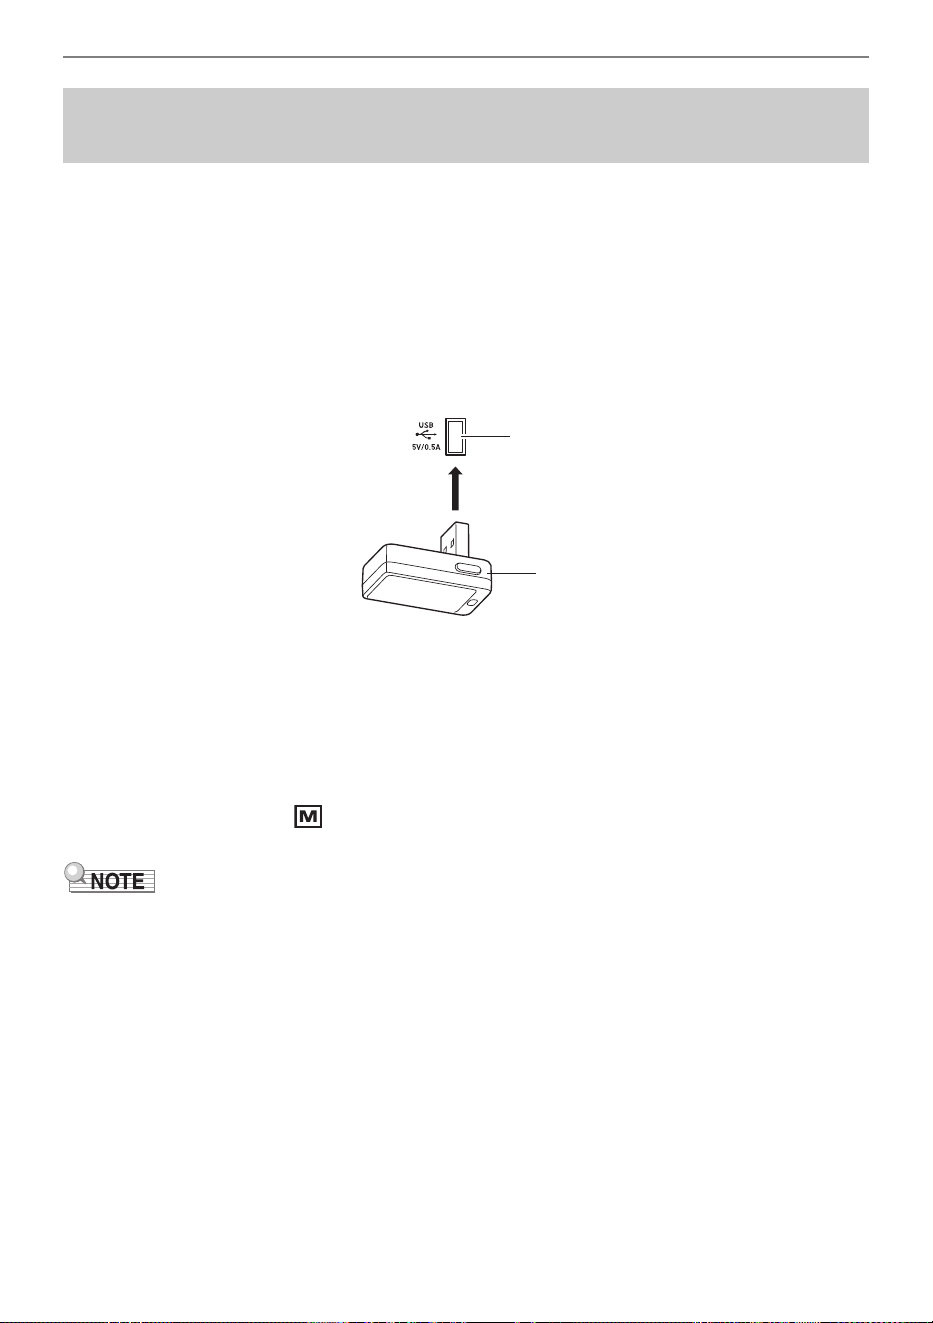
Wireless Connections
EN-151
Connecting the Digital Piano and a smart device over a Bluetooth Low Energy MIDI connection enables
various actions using the dedicated app. For details about the dedicated app, see “About the App for
Smart Devices (CASIO MUSIC SPACE)” (page EN-155).
1.
If the Digital Piano’s wireless functionality is turned off, turn it on.
• For more information, see “Enabling and Disabling the Digital Piano’s Wireless Function” (page
EN-149).
2.
Plug the included Wireless MIDI & Audio Adaptor into the Digital Piano’s USB
Type A port.
3.
Open the settings screen of the smart device and turn on the Bluetooth function
if it is off.
4.
In the settings screen of the dedicated app installed on your smart device, select
“WU-BT10 MIDI”.
• Do not operate the Digital Piano while it is connecting to a smart device.
• When connected, the indicator appears in the upper right corner of the Digital Piano’s top
screen and a notification tone sounds.
• The procedure in Step 4 above is necessary every time you use the dedicated app.
• When this Digital Piano and an external device are connected via Bluetooth Low Energy MIDI and
Bluetooth audio simultaneously, MIDI functionality may become unstable depending on the type of
connected device, its OS version, etc. If this occurs, terminate the Bluetooth audio connection using
the external device.
Connecting the Digital Piano with a Bluetooth Low
Energy MIDI Device
USB Type A port
Wireless MIDI & Audio Adaptor
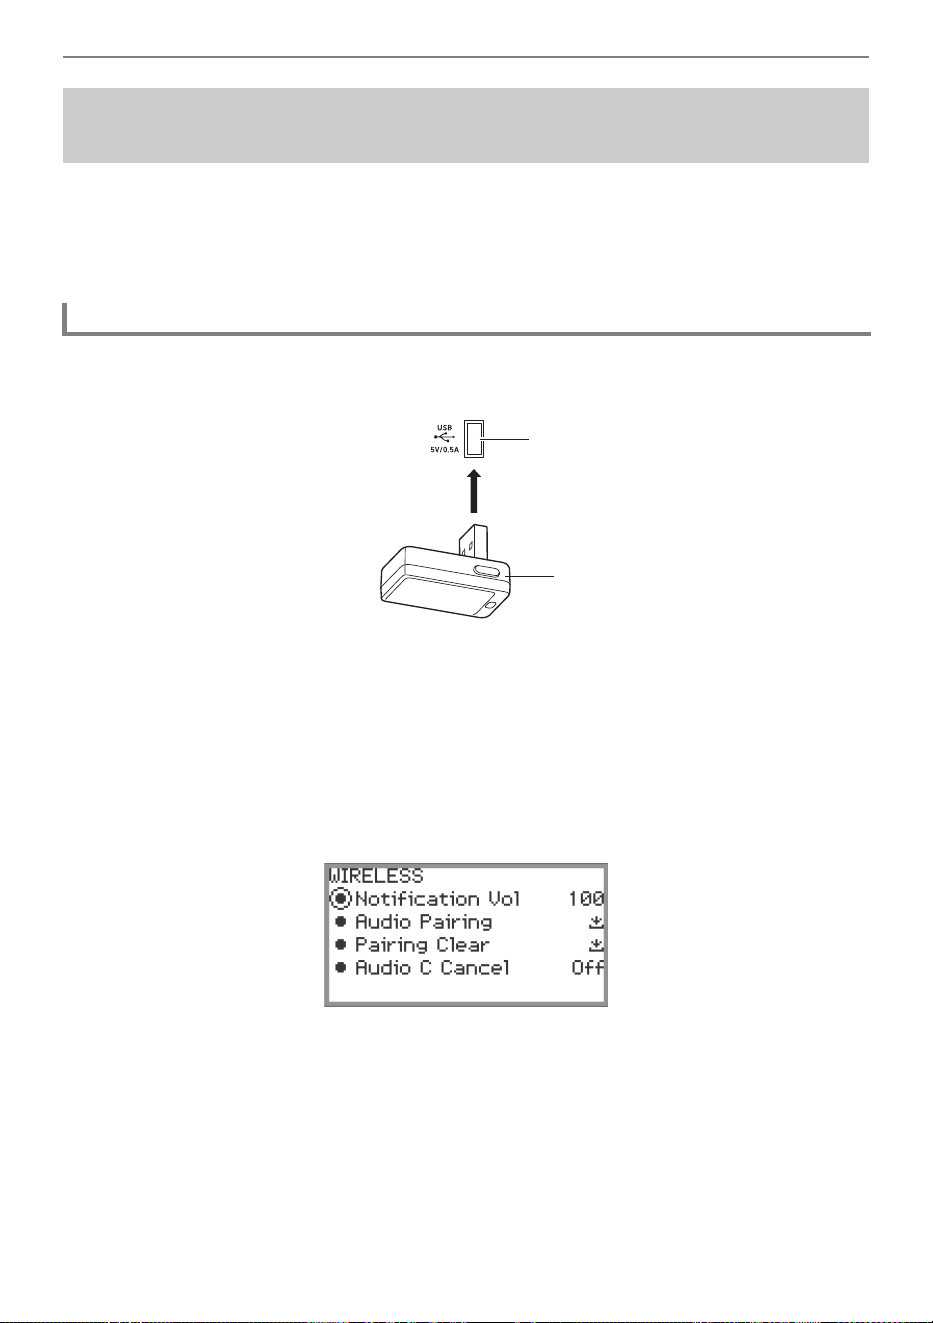
Wireless Connections
EN-152
Connecting this Digital Piano and an external device
*
over Bluetooth audio allows playback from the
external device over the Digital Piano’s speakers. To connect via Bluetooth audio, you must first
perform a procedure called “audio pairing” between the Digital Piano and the external device.
* External devices include Bluetooth audio-compatible smart devices (e.g., iPhones, iPads, Android
smartphones), iPods, MP3 players, etc.
1.
Plug the included Wireless MIDI & Audio Adaptor into the Digital Piano’s USB
Type A port.
2.
Open the settings screen of the external device and turn on the Bluetooth
function if it is off.
3.
Select the “04 Listening” of the F button set. See “To change the F Button Set”
(page EN-32).
4.
Touch and hold the F1 button (ADPTR).
The “WIRELESS” screen appears.
5.
Use the touch ring to select “Audio Pairing” then touch the ENTER button.
“Pairing...” appears on the display of the Digital Piano, and it waits for the connection to be
established.
• If the Digital Piano’s wireless functionality is off, it will automatically turn on.
Connecting the Digital Piano with a Bluetooth Audio
Device
Pairing the Digital Piano with a Bluetooth Audio Device
USB Type A port
Wireless MIDI & Audio Adaptor
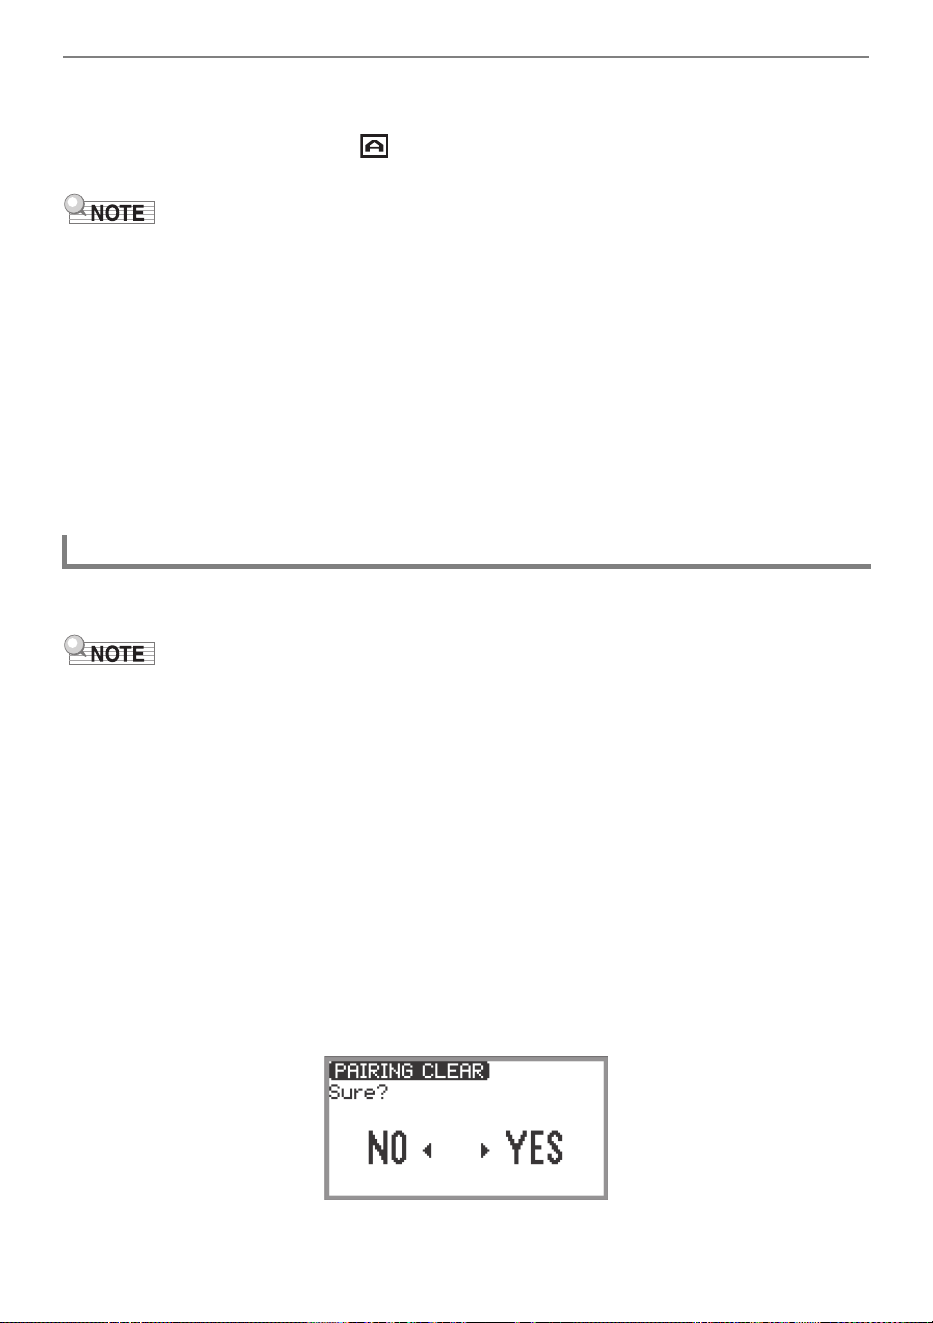
Wireless Connections
EN-153
6.
Select “WU-BT10 AUDIO” on the Bluetooth settings screen of the external
device.
• When pairing is complete, the indicator appears in the upper right corner of the Digital
Piano’s top screen and a notification tone sounds.
• Information regarding the external device connected over Bluetooth audio is registered in the
Wireless MIDI & Audio Adaptor. After the first time, the Bluetooth audio connection will be
established automatically without the above procedure.
• If the Bluetooth audio connection cannot be established, try the following:
(1) Perform the operation described in “Deleting Bluetooth Audio Device Pairing Registration”
(page EN-153).
(2) If the pairing registration information with this Digital Piano remains on the external device,
delete it.
To do so, delete “WU-BT10 AUDIO” from the Bluetooth settings screen on the external device.
For details on how to do this, see the instruction manual of the external device.
(3) Redo the procedure described in “Pairing the Digital Piano with a Bluetooth Audio Device”
(page EN-152).
The following procedure will delete the pairing registration between this Digital Piano and the external
device connected over the Bluetooth audio connection.
• After performing the procedure below, you should also delete the Digital Piano pairing registration
information from external devices that have been connected to this Digital Piano via Bluetooth audio.
To do this, delete “WU-BT10 AUDIO” from the Bluetooth settings screen of the external device. For
details on how to do this, see the instruction manual of the external device.
1.
Plug the included Wireless MIDI & Audio Adaptor into the USB Type A port.
• Bluetooth audio pairing registration information cannot be deleted unless connected.
2.
Select the “04 Listening” of the F button set. See “To change the F Button Set”
(page EN-32).
3.
Touch and hold the F1 button (ADPTR).
The “WIRELESS” screen appears.
4.
Use the touch ring to select “Pairing Clear”, then touch the ENTER button.
A confirmation screen appears. To cancel the operation, touch the left of the touch ring (NO).
Deleting Bluetooth Audio Device Pairing Registration

Wireless Connections
EN-154
5.
To delete the pairing registration information, touch the right of the touch ring
(YES).
“Complete” appears, and the display returns to the “WIRELESS” screen.

EN-155
This section describes the “CASIO MUSIC SPACE” dedicated app, which provides additional ways to
enjoy your Digital Piano.
You can use the following functions on the Digital Piano when linked with the “CASIO MUSIC SPACE”
dedicated app.
• Piano Roll
• Score Viewer
• Music Player
• Live Concert Simulator
• Piano Remote Controller
• Data Center
For details on each function, see the user’s manual of the dedicated app.
Follow the procedure below to use the dedicated app.
1.
Install CASIO MUSIC SPACE on your smart device
• See the “Downloads” section of the website below.
https://support.casio.com/global/en/emi/manual/PX-S6000/
Using the Dedicated App
About the App for Smart Devices (CASIO MUSIC SPACE)
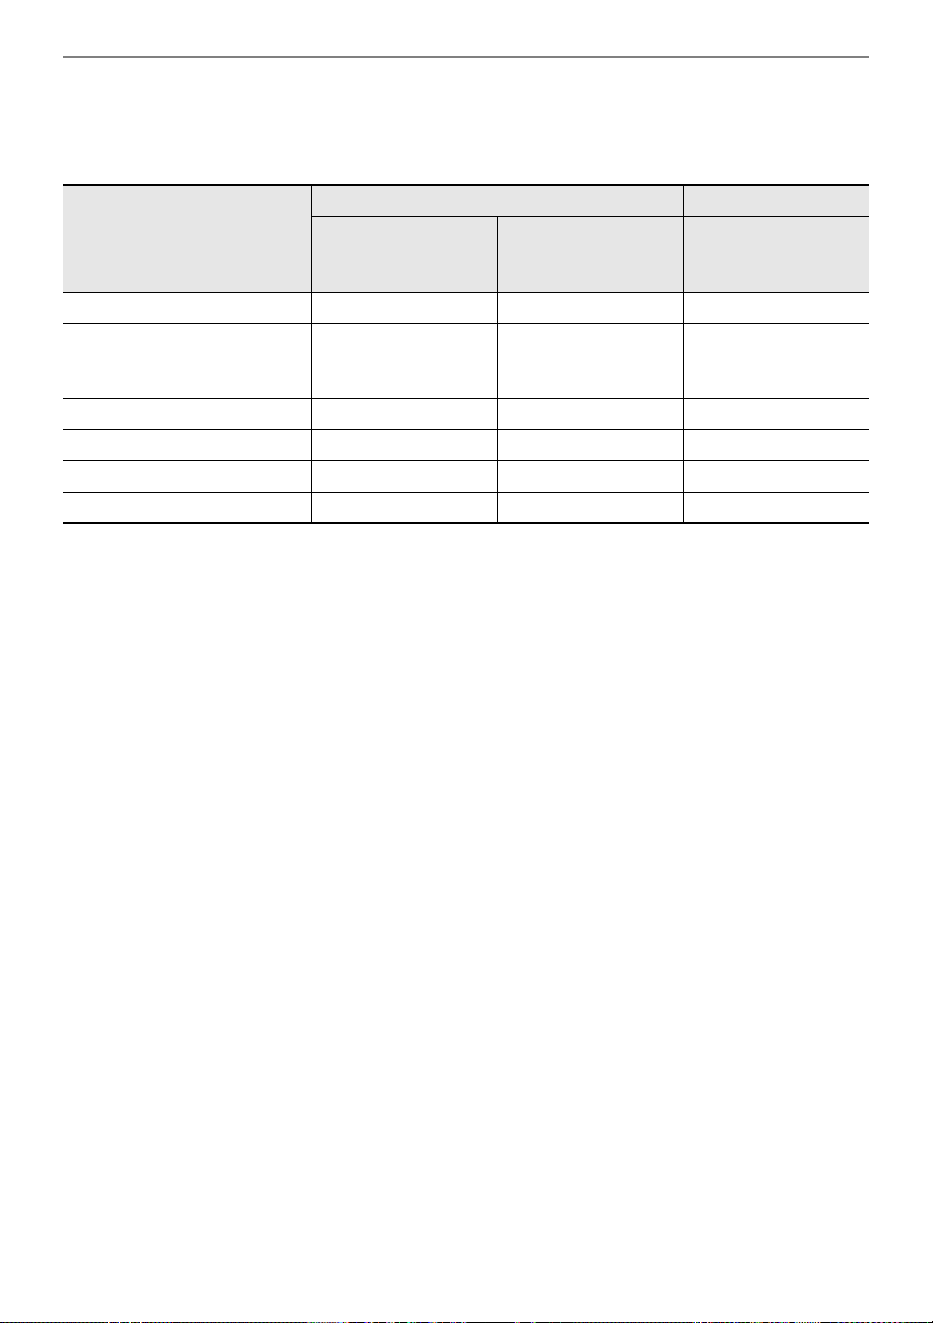
Using the Dedicated App
EN-156
2.
Connect this Digital Piano to your smart device
The available features depends on the connection method.
Never connect the Digital Piano with a Bluetooth Low Energy MIDI device and a USB MIDI device
at the same time.
*1 Use this function to transfer user songs (page EN-106) to the Digital Piano.
*2 See “Connecting the Digital Piano with a Bluetooth Low Energy MIDI Device” (page EN-151).
*3 See “Connecting the Digital Piano with a Bluetooth Audio Device” (page EN-152).
*4 See “Connecting the Digital Piano with a Smart Device via USB MIDI” (page EN-161).
Available features
Wireless connection Cable connection
Bluetooth Low
Energy MIDI
connection
*2
Bluetooth audio
connection
*3
USB MIDI
connection
*4
Piano Roll
*1
✓ — ✓
Score Viewer
✓
(when using the pedal
to turn the page)
✓
✓
(when using the pedal
to turn the page)
Music Player — ✓ —
Live Concert Simulator ✓✓✓
Piano Remote Controller ✓ — ✓
Data Center ✓ — ✓

EN-157
This section describes the connection methods that can be used without using the dedicated app (page
EN-155):
• Play sound from a smart device (Bluetooth audio connection)
Audio playback from a smart device or other Bluetooth audio-compatible device is played through the
Digital Piano’s speakers.
• Connect to a computer or smart device and use MIDI
MIDI data is transmitted between this Digital Piano and a computer or smart device.
• Output the sound of the Digital Piano to an amplifier or other audio equipment (LINE OUT jacks)
Sound from the Digital Piano is played though external equipment via the LINE OUT jacks using
cables.
Connecting this Digital Piano and a smart device
*
over Bluetooth audio allows playback from the smart
device over the Digital Piano’s speakers.
* In addition to smart devices, many Bluetooth audio-compatible devices (iPods, MP3 players, etc.)
can also be connected to this Digital Piano.
1.
Perform audio pairing between this Digital Piano and a smart device (or other
Bluetooth audio-compatible device).
• See “Pairing the Digital Piano with a Bluetooth Audio Device” (page EN-152).
2.
Play the song on the audio paired device.
See “Adjusting the Volume Level, Stereo Pan and Effects for Each Part” (page EN-65).
• By changing the setting value of “MIXER” > “VOLUME” > “Wireless Audio”, you can adjust the
playback volume of audio data relative to the overall volume.
• By changing the setting value of “MIXER” > “HALL/REV.” > “Wireless A Send”, you can adjust the
send value of the Hall Simulator/Reverb of the audio data.
Connecting with External Devices
Playing Sound from a Smart Device on This Digital Piano
(Bluetooth Audio Connection)
Playing Audio from a Smart Device or Other Bluetooth-compatible Device
on this Digital Piano
Adjusting the Volume Level or Effect Depth of Bluetooth Audio (MIXER
Settings)
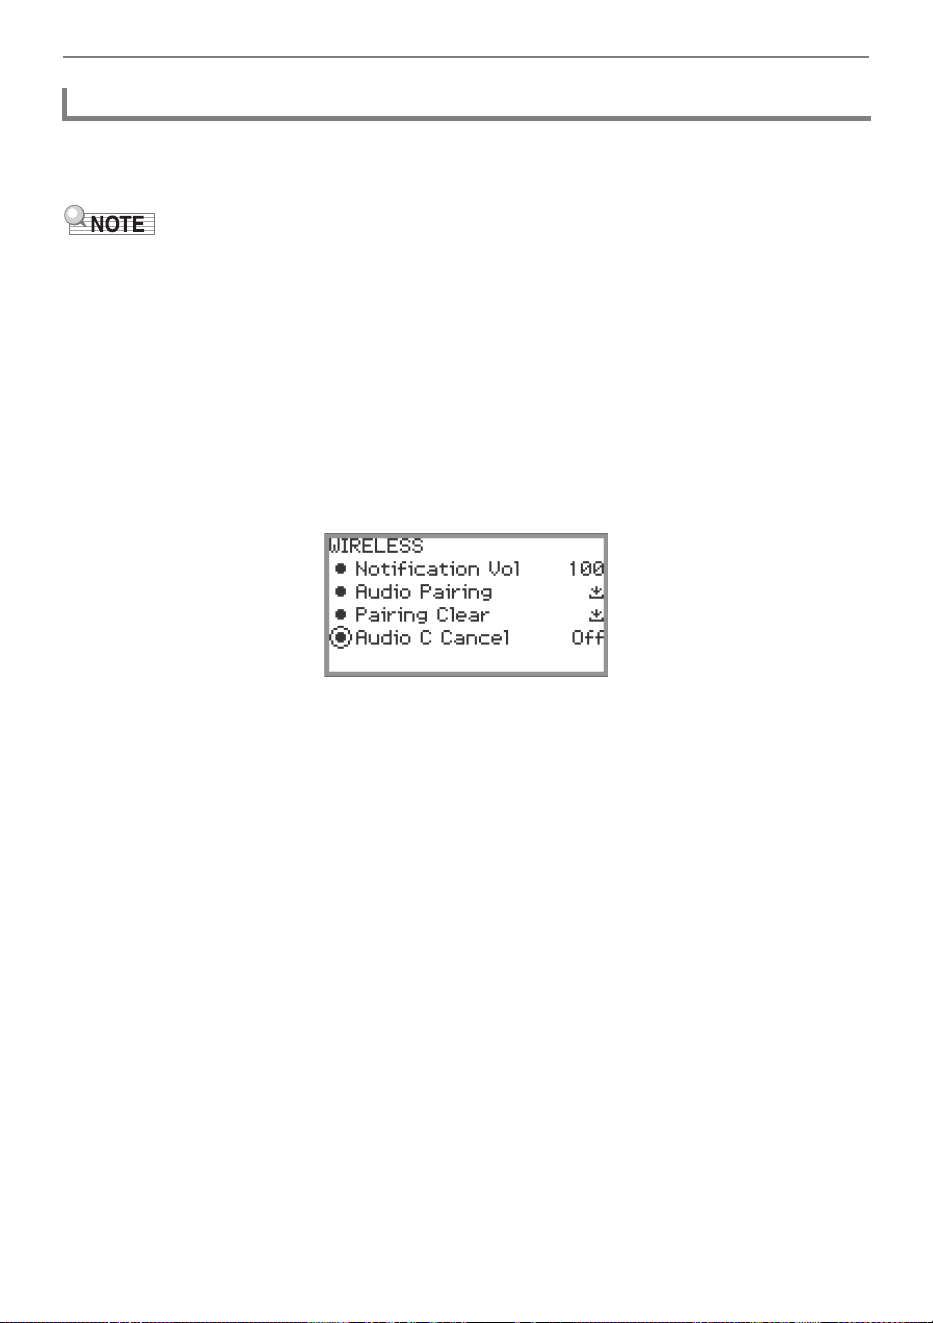
Connecting with External Devices
EN-158
Turning on Audio Center Cancel cuts (reduces or eliminates) vocals in the playback sound. Since this
function cancels the central sound, it may also cut sounds other than vocals. Its effectiveness depends
on the input sound.
• The Audio Center Cancel (page EN-110) when playing back audio data in SONG mode on this
Digital Piano and the Center Cancel in this section differ in terms of settings.
■ To enable or disable Bluetooth audio center cancel
1.
Select “04 Listening” from the F button set. See “To change the F Button Set”
(page EN-32).
2.
Touch and hold the F1 button (ADPTR).
The “WIRELESS” screen appears.
3.
Touch the top or bottom of the touch ring to select “Audio C Cancel”.
4.
Trace the touch ring to toggle the setting value between “On” and “Off”.
Bluetooth Audio Center Cancel (Vocal Cut)
Connecting with External Devices
EN-159
You can send and receive performance information (MIDI data) by connecting the Digital Piano to a
computer or smart device. You can use music software on your computer or a smart device app to
record your performance, or to send MIDI data from your computer or a smart device to the Digital
Piano and play notes on the Digital Piano.
• For detailed MIDI specifications relating to this Digital Piano and the latest support information, visit
the CASIO website below.
https://support.casio.com/global/en/emi/manual/PX-S6000/
• For MIDI-related settings, see “Configuring MIDI Settings” (page EN-148).
■ Minimum Computer System Requirements
The minimum computer system requirements for sending and receiving MIDI data are shown below.
Check to make sure that your computer complies with these requirements before connecting the Digital
Piano to it.
• USB port
• Operating System
Windows 10
*
Windows 11
macOS 10.15, 11, 12, 13
* Windows 10 (32-bit, 64-bit)
• For the latest OS support information, please see the “Operating System Compatibility (Windows/
macOS)” section on our website below.
https://support.casio.com/global/en/emi/manual/PX-S6000/
Using MIDI with a Connected Computer or Smart Device
Connecting the Digital Piano with a Computer via USB MIDI
B
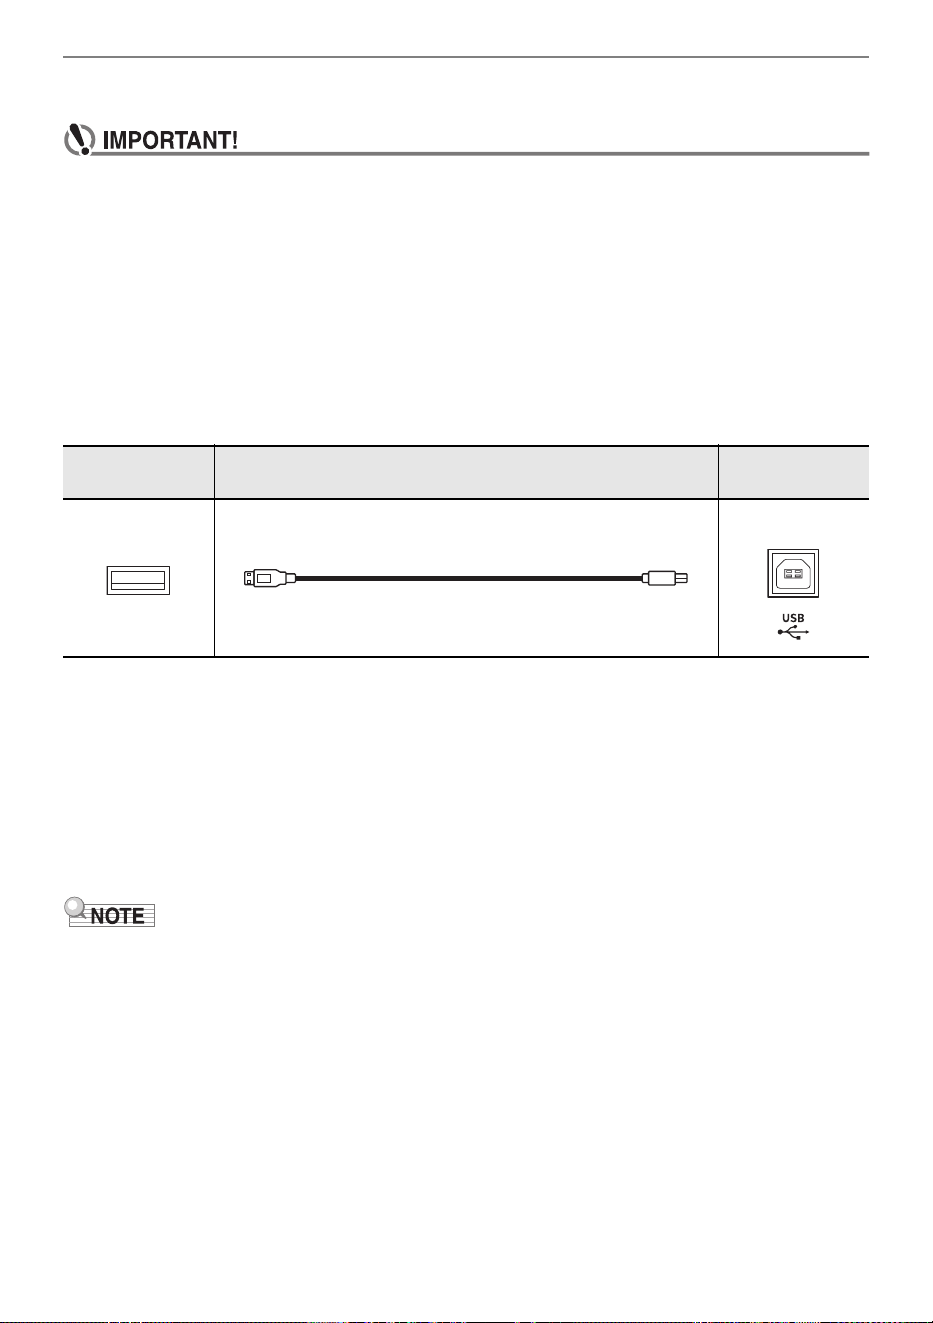
Connecting with External Devices
EN-160
■ To connect the Digital Piano with your computer
• Make sure you follow the steps of the procedure below exactly. Connecting incorrectly can
make data send and receive impossible.
• Be sure to turn on the Digital Piano first before starting up your computer’s music software.
• USB send and receive is disabled during playback of a song.
1.
Turn off the Digital Piano and start up the computer.
• Do not start any music software yet on your computer.
2.
Connect the USB Type B port of the Digital Piano to your computer using a
commercially available USB cable.
• Use a USB 2.0 or 1.1 A-B connector type cable.
3.
Turn on the Digital Piano.
• When connecting for the first time, the driver required to send and receive data is automatically
installed on the computer.
4.
Start the (commercially available) music software on your computer.
5.
Select “CASIO USB-MIDI” as the MIDI device in the settings of your computer’s
music software.
• Refer to the user manual of the music software for information on how to select a MIDI device.
• After one successful connection, the USB cable can be left connected and the computer or the
Digital Piano can be turned on again.
Computer port Connection cable
Digital Piano
port
USB Type A
USB Type B
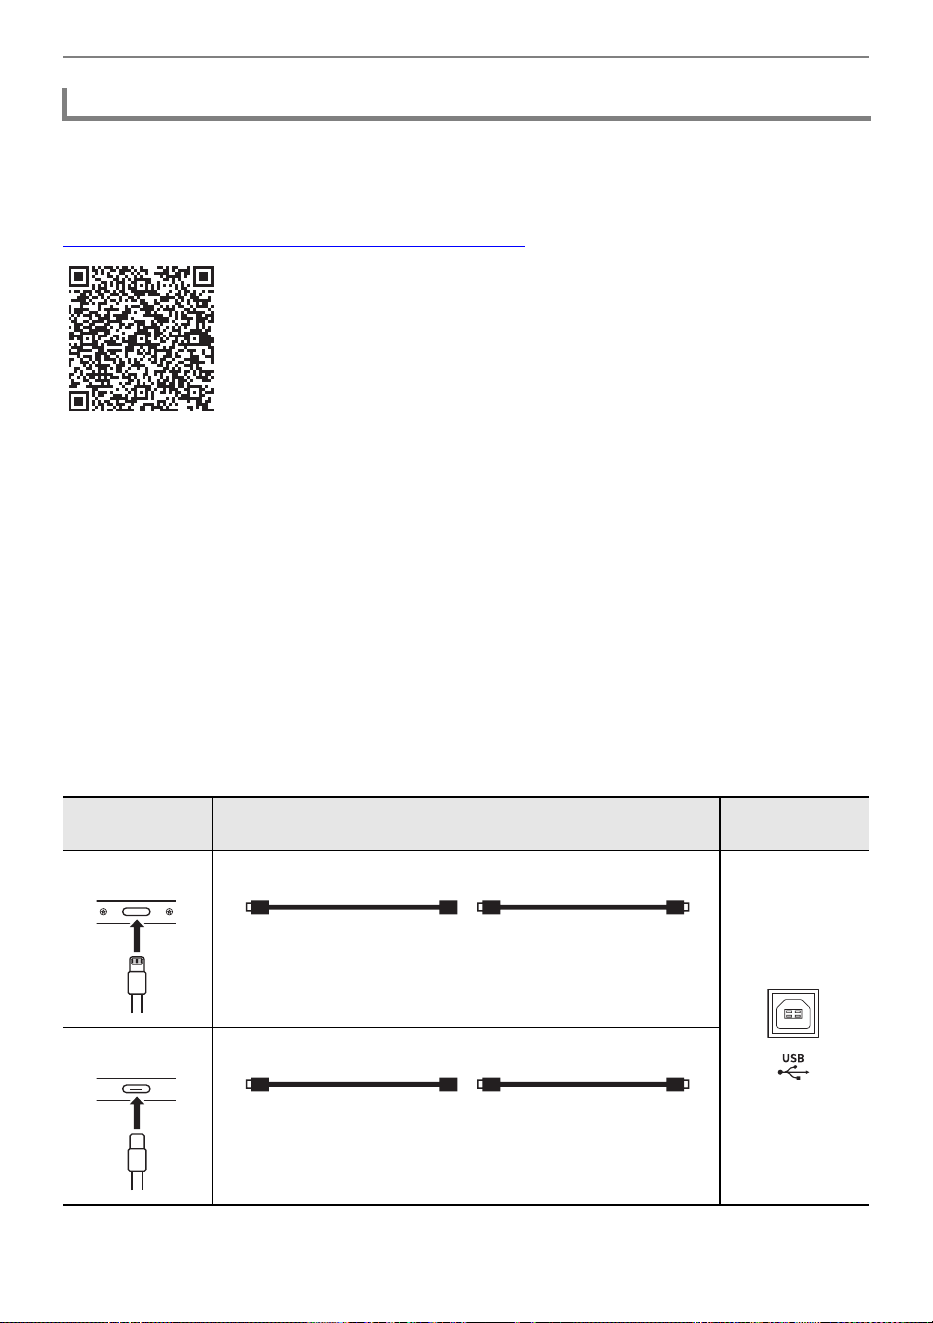
Connecting with External Devices
EN-161
■ Smart Device Operating Environment
You can use MIDI standard apps when the Digital Piano is connected with a smart device.
For a list of devices that can be used, please see the “Operating System Compatibility (iOS/Android)”
section on the CASIO website below.
https://support.casio.com/global/en/emi/manual/PX-S6000/
• We recommend using devices listed in the “Tested devices (USB-MIDI connection)” section.
• Please note that listed devices are not guaranteed to work with all MIDI apps running on the device.
• Depending on the operating environment, it may not be possible to connect correctly.
• Even if the device has been tested, it may not work properly due to device or OS version upgrades,
etc.
■ To connect the Digital Piano with your smart device
• Be sure to use a USB cable that supports data transfer.
• A USB cable exclusively for charging cannot be used for data transfer.
1.
Turn on the Digital Piano and the smart device.
2.
Connect the smart device to the USB Type B port of the Digital Piano using a
connection cable.
iPhone/iPad users
Connecting the Digital Piano with a Smart Device via USB MIDI
Device port Connection cable
Digital Piano
port
Lightning
Apple Lightning -
USB camera adaptor
USB cable
(A-B type)
USB Type B
USB Type C
Apple USB Type C -
USB adaptor
USB cable
(A-B type)
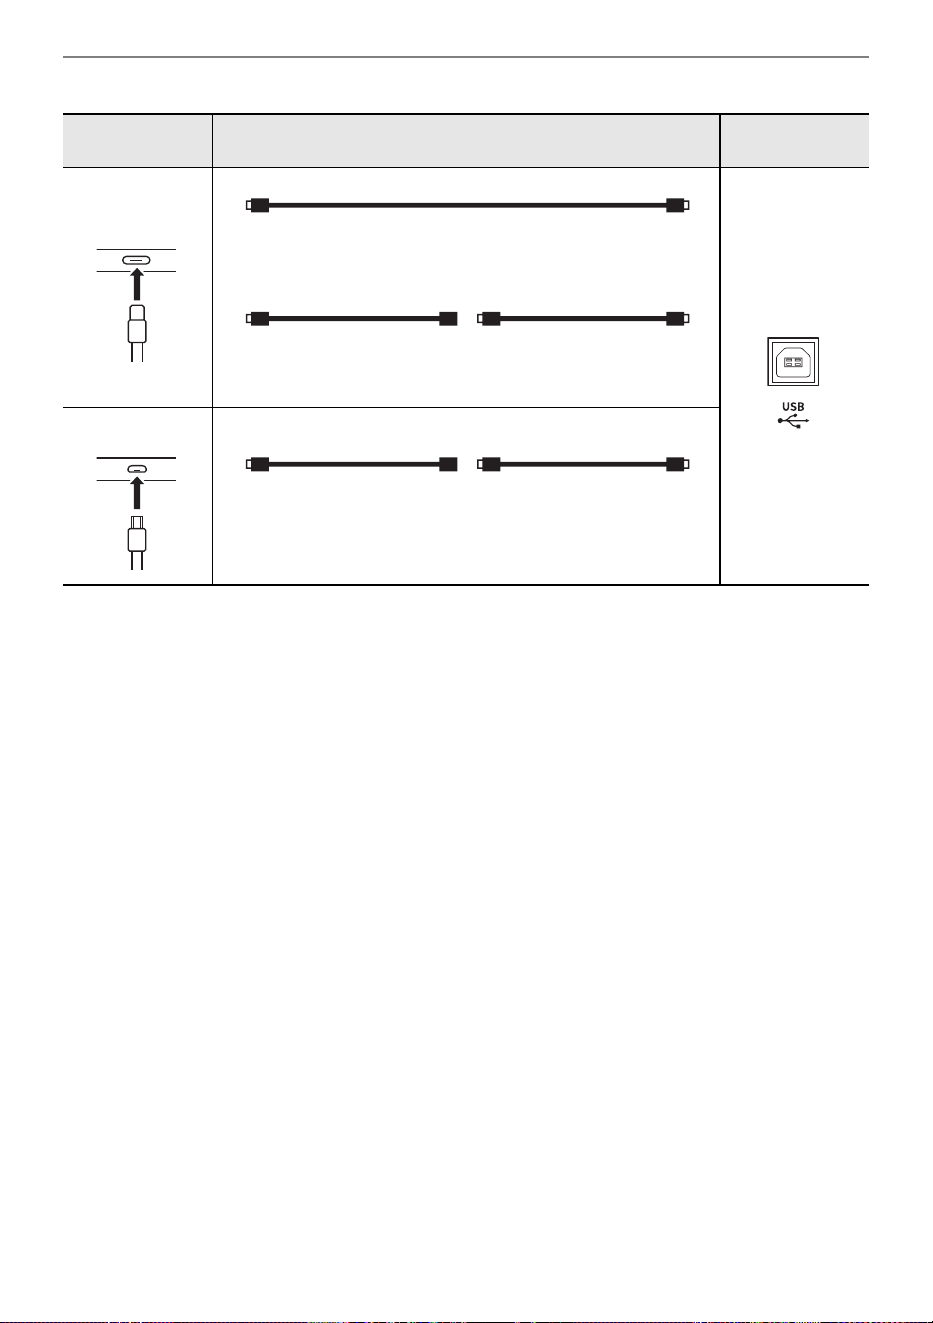
Connecting with External Devices
EN-162
Android users
3.
Launch the MIDI-compatible app on your smart device.
• If you are using CASIO’s dedicated app, the smart device screen will display “Connecting...”.
When a successful connection is made, the message “Connected” will be displayed.
Device port Connection cable
Digital Piano
port
USB Type C
USB Type C -
USB adaptor
USB cable
(A-B type)
USB cable (C-B type)
or
USB Type B
USB Micro-B
USB OTG cable
(micro B-A type)
USB cable
(A-B type)
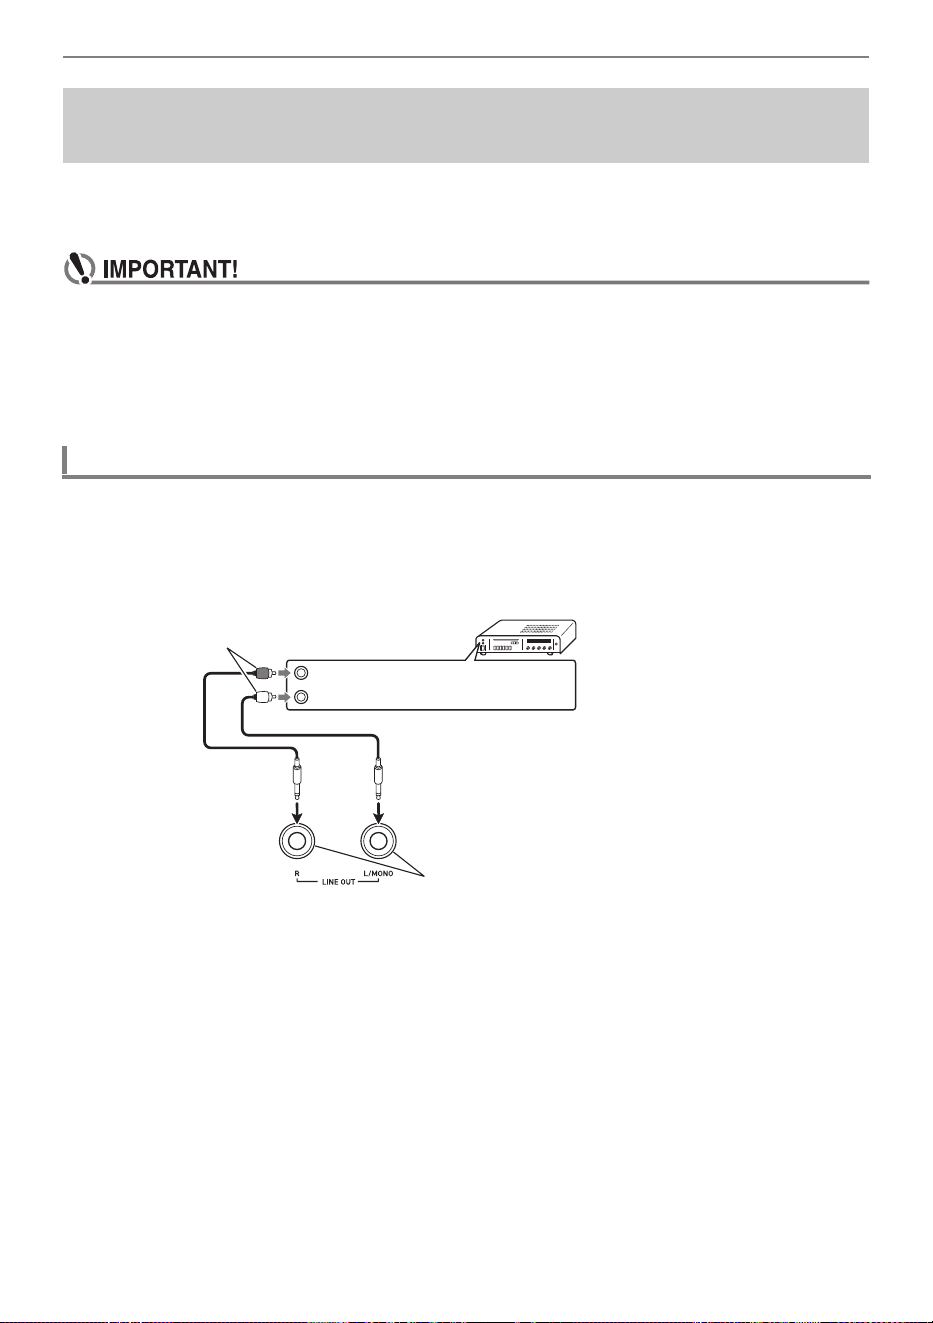
Connecting with External Devices
EN-163
You can connect audio equipment or a music amplifier to the Digital Piano and then play through
external speakers for more powerful volume and better sound quality. Use commercially available cable
for connection.
• Turn off the external device when making connections. After connecting, turn down the
Digital Piano and external device volume levels to their minimum whenever turning power on
or off.
• After connecting, turn on the Digital Piano and then the external device.
• If keyboard notes are distorted when they are sounded from external audio equipment, lower
the Digital Piano’s volume setting.
LINE OUT R jack output is right channel sound, while LINE OUT L/MONO jack output is left
channel sound. Use commercially available cables to connect the external audio equipment to the
Digital Piano’s LINE OUT jacks as shown in the figure below. Normally in this configuration you must
set the audio equipment’s input selector to the setting that specifies the terminal (such as AUX IN) to
which the Digital Piano is connected.
Outputting Digital Piano Notes Through an Amplifier or
Audio Equipment (LINE OUT jacks)
Connecting to Audio Equipment
Audio amplifier AUX IN jacks, etc.
Pin plugs
LINE OUT jacks
(Standard phone jack (TS phone))
RIGHT (Red)
LEFT (White)
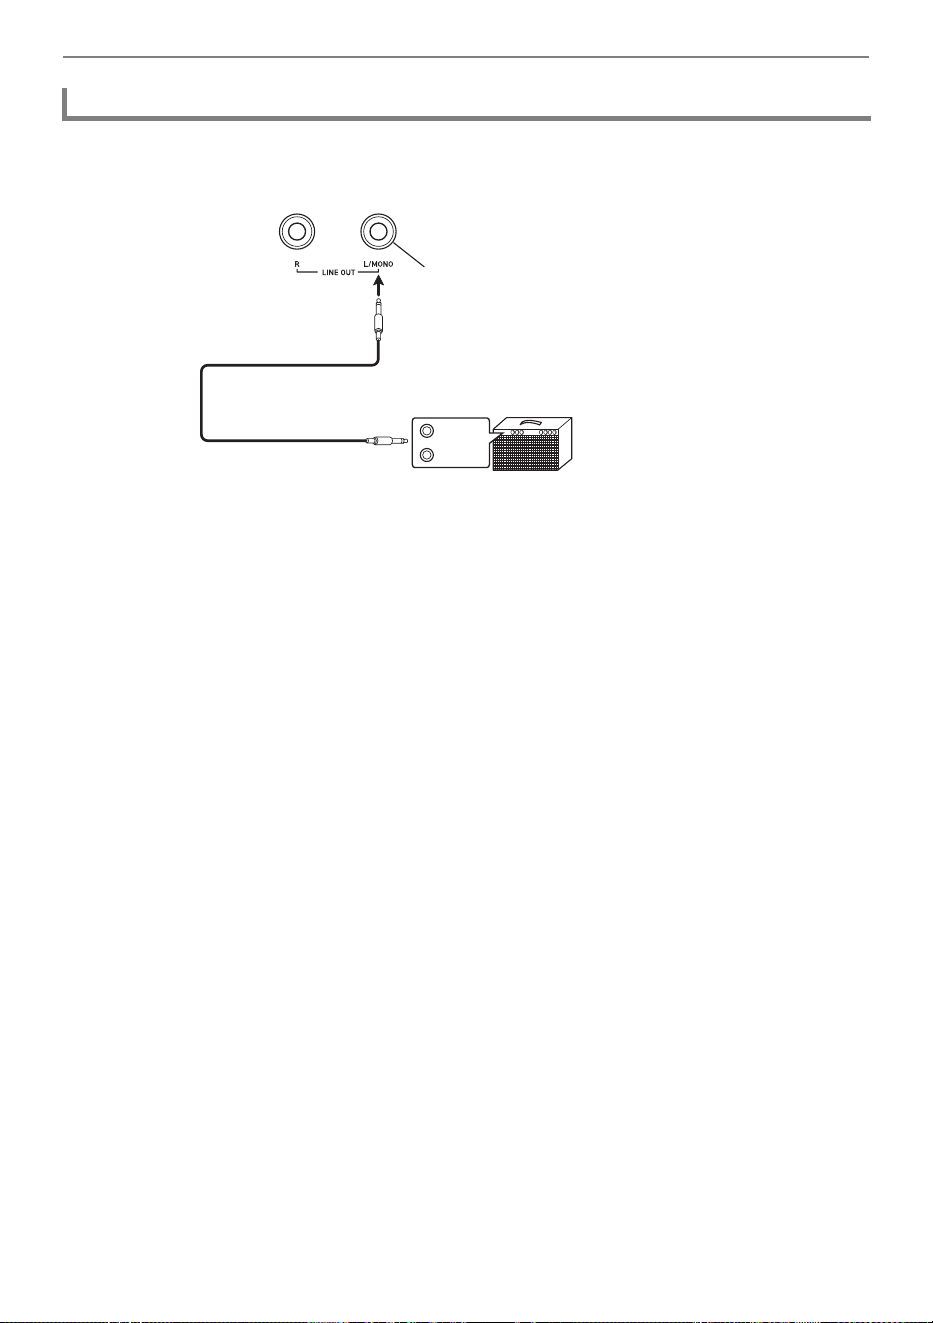
Connecting with External Devices
EN-164
Connecting to the LINE OUT L/MONO jack only outputs a mixture of both channels. Use
commercially available cable to connect the amplifier to the Digital Piano’s LINE OUT L/MONO jack
as shown in the figure below.
Connecting to a Musical Instrument Amplifier
INPUT 1
INPUT 2
LINE OUT L/MONO jacks
(Standard phone jack (TS phone))
Guitar amplifier
Keyboard amplifier, etc.
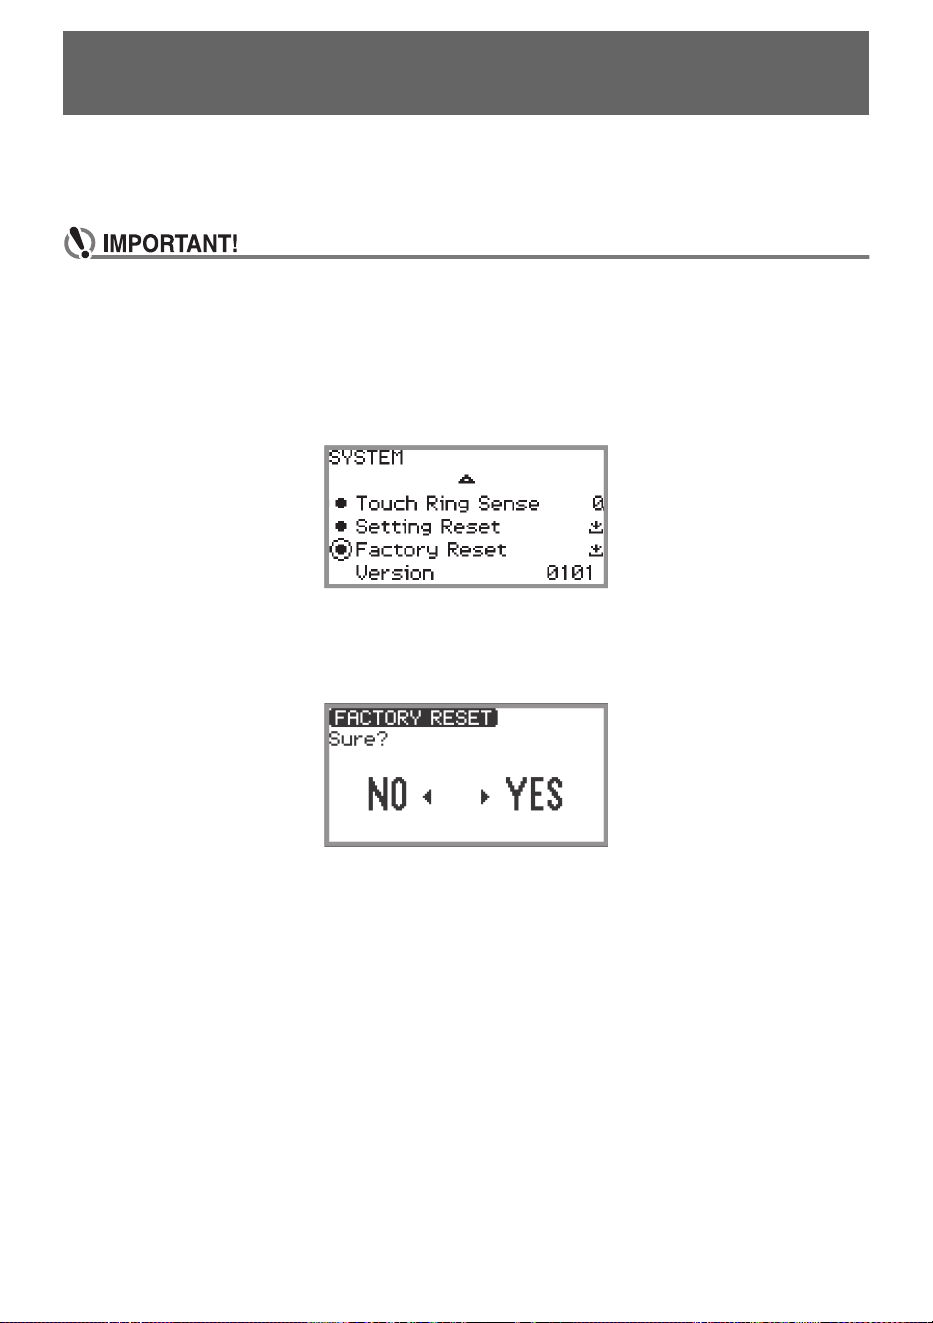
EN-165
All system contents, including data and settings, can be reset to their initial factory defaults.
■ To return all Digital Piano settings and data to their initial factory defaults (Factory
Reset)
• Performing the following will also delete user songs, MIDI recorder songs, registration data
and user F button sets. We recommend saving important data on a USB flash drive (page
EN-143).
1.
Touch the FUNCTION button to display the FUNCTION menu.
2.
Using the touch ring, select “SYSTEM” > “Factory Reset”.
3.
Touch the ENTER button.
A confirmation screen will appear. To cancel the operation, touch the left of the touch ring (NO).
4.
To restore the Digital Piano to its initial factory defaults, touch the right of the
touch ring (YES).
This restarts the Digital Piano, and then the display returns to the top screen.
■ To return all Digital Piano settings to their initial factory defaults (Setting Reset)
This function allows you to restore all settings of the Digital Piano to the initial factory defaults. This
operation resets only the settings and does not delete user songs, MIDI recorder songs or registration
data.
In step 2 of “To return all Digital Piano settings and data to their initial factory defaults (Factory Reset)”
(page EN-165), select “Setting Reset” instead of “Factory Reset”.
Deleting All Data in the Digital Piano’s Internal
Memory

EN-166
● The touch button does not respond.
● No sound is produced when the keyboard keys are pressed.
● The pitch sounds wrong.
Troubleshooting
Reason: a. The buttons were touched with a fingernail or stylus.
The button was touched by a user wearing a glove that is not suitable for use with
touch buttons.
b. The sensitivity of the touch buttons is set too low.
Solution: a. Touch the buttons firmly with bare fingers.
b. Change the sensitivity setting of the touch buttons. See “Setting the Sensitivity of
the Touch Buttons and Touch Ring” (page EN-26).
Reason: a. The volume has been turned down with the volume knob.
b. Headphones are connected. A headphone conversion plug has been left in the
PHONES jack.
c. “Speaker Out” (page EN-20) is set to “Off”.
d. Local control setting is off.
e. The position of the expression pedal connected to the Digital Piano is at the position
where it stops when depressed toward the heel (the minimum value).
Solution: a. Turn the volume knob.
b. Unplug the headphones or conversion plug from the PHONES jack.
c. Set “Speaker Out” to “Auto” or “On”.
d. Turn on the Local Control (page EN-148) setting.
e. If the “Expression” or “Master Vol” function is assigned to the expression pedal,
sound will not be produced when the pedal is in the minimum value heel position.
Press the pedal down toward the toe to increase the volume.
Reason: a. The keyboard transpose setting has been changed from its initial value.
b. The master tuning setting is set to a frequency other than 440.0 Hz.
c. Octave Shift is enabled.
d. The Scale Tuning is set to something other than equal temperament.
e. The pitch bend wheel is not centered.
Solution: a. Reset transpose (page EN-130) to its initial value or turn the power off and then on
again.
b. Set tuning (page EN-130) to 440.0 Hz. Or turn the power off and then on again.
c. Set octave shift (page EN-132) to “0”.
d. Set the Scale Tuning (page EN-133) to “equal temperament”.
e. Make sure nothing is touching the pitch bend wheel.
Troubleshooting
EN-167
● The pedal has no effect.
● The sound does not become louder or softer depending on how I play (touch).
● The sound tone, effects, etc. do not change even after turning the power off and then back on
(the Digital Piano does not return to its initial default settings).
● When connected to a computer, MIDI cannot be sent or received.
● Some tones are the same but have slightly different sound quality and volume depending on
the keyboard position.
● When the buttons are pressed, the sound that is being played is temporarily interrupted or the
sound quality becomes slightly different.
Reason: a. The pedal cable is not properly plugged into the PEDAL UNIT or EXPRESSION/
ASSIGNABLE jack. Or the plug is incompletely plugged in.
b. The pedal type assignment or function assignment to the jack to which the pedal is
connected is incorrect.
Solution: a. Check that the pedal cable is properly connected and that the plug is firmly inserted
into the jack.
b. Change to the correct settings. See “EXPRESSION/ASSIGNABLE jack” (page
EN-68).
Reason: “Touch Response” (page EN-128) is set to “Off”.
Solution: Set “Touch Response” to a setting other than “Off”.
Reason: “Auto Resume” (page EN-17) is set to “On”.
Solution: Turn “Auto Resume” to “Off” and turn the power off and then back on.
Solution: a. Check that the Digital Piano is properly connected to the computer with a USB
cable and that the Digital Piano is correctly selected in the settings of the
computer’s music software.
b. Try turning off the Digital Piano and closing the music software on the computer,
then turn on the Digital Piano and restart the music software on the computer.
Reason: This is not a malfunction, but a result of an electronic process called digital sampling
*
.
* A process whereby several tone registers (low, mid, high, etc.) of the original
instrument are recorded to capture the sound quality in each of the original
instrument sound registers. The samples are then processed to create a single tone.
Reason: When using the Layer function, Duet function, song playback, or recording function,
multiple parts sound at the same time. Pressing the buttons in such cases will
automatically change the internal effect settings specific to the tone and may cause
this phenomenon to occur in some parts, but it is not a malfunction.
Troubleshooting
EN-168
Error Messages
Display Cause Action
Limit
Recording of 1,000 measures or over
was attempted with the MIDI recorder.
Use the MIDI recorder to record up to
bar 999.
The recording time limit was reached
with the audio recorder.
Use the audio recorder to record up to
approximately 25 minutes.
Memory Full
The per-song capacity (320KB) of the
MIDI recorder was reached.
Record within the per-song capacity.
Data Full
The five-song limit was reached with the
MIDI recorder.
Delete a song (page EN-119).
No Media
The USB flash drive is not properly
plugged into the USB Type A port on
the Digital Piano.
Plug the USB flash drive correctly into
the USB Type A port.
The USB flash drive was removed or
inserted during the operation.
Do not touch the USB flash drive during
operation of the Digital Piano.
The USB flash drive is protected. Unprotect the USB flash drive.
The USB flash drive contains antivirus
software.
Use a USB flash drive that does not
contain antivirus software.
No File
There are no loadable/playable files in
the “MUSICDAT” folder.
Move the file you want to load or play to
the “MUSICDAT” folder (page EN-143).
No Data
An attempt was made to save a song
number to the USB flash drive for which
there was no recorded data.
Select a song number that has already
been recorded.
Read Only
An attempt was made to save different
data with the same name as a read-only
file on the USB flash drive.
• Change the name to something else
and save it.
• Remove the read-only attribute from
the file on the USB flash drive and
overwrite the file.
• Use a different USB flash drive.
Not Enough
Memory
If this error appears, there is not enough
free space on the USB flash drive.
Either delete the files stored on the USB
flash drive to free up more space or use
a different USB flash drive.
Troubleshooting
EN-169
* Audio recorder songs are saved with the name “TAKE**” (** is 01 to 99). Whenever recording, data is
automatically created by adding 1 to the highest number of ** in the USB flash drive. Therefore, if
“TAKE99” in the SONG mode screen is marked with “ ” (data of “TAKE99” exists), recording will not
be able to start.
Too Many Files
When recording with the audio recorder,
an attempt was made to start recording
beyond the maximum number of songs
(99), or there is a file called
TAKE99.WAV in the “MUSICDAT”
folder of the USB flash drive.
Use a computer to delete all or some of
TAKE01.WAV to TAKE99.WAV in the
“MUSICDAT” folder or move them to
another folder or drive. When deleting
or moving only some files, give priority
to files with higher numbers
*
.
Not SMF 0/1
An attempt was made to read or play a
file in SMF format 2.
The SMF format that can be read and
played back by the Digital Piano is “0” or
“1”.
Large Size
The size of the SMF file on the USB
flash drive is too large to play on this
Digital Piano.
The Digital Piano can play back SMF
files up to a maximum size of
approximately 320 KB.
Wrong Data
Data on the USB flash drive is
corrupted.
—
Version
The version of the file on the USB flash
drive is not the version supported by
this Digital Piano.
Use a version of the file that is
supported by the Digital Piano.
Format
The format of the USB flash drive is not
compatible with this Digital Piano.
Use a computer or other device to
change the USB flash drive to a format
compatible with this Digital Piano (page
EN-142).
Use another USB flash drive.
The USB flash drive is corrupted. Use another USB flash drive.
No Wireless
Adptr
The Wireless MIDI & Audio Adaptor is
not plugged into the USB Type A port.
Plug the Wireless MIDI & Audio Adaptor
into the USB Type A port.
Display Cause Action
EN-170
Reference
Product Specifications
Model PX-S6000BK
Keyboard 88-key piano keyboard
Settings Hammer Response, Key Off Response
Duet Adjustable tone range (–2 to +2 octaves)
Transpose –12 to 0 to +12 semitones
Octave Shift –2 to 0 to +2 octaves
Sound Source
Number of Tones 350, Layer, Split
Maximum Polyphony 256 notes
Touch Response 5 sensitivity levels, Off
Tuning 415.5Hz to 440.0Hz to 465.9Hz (0.1Hz units)
Temperament Equal temperament plus 16 other types
Piano Position 4 types
Acoustic Simulator
Key Off Simulator, String Resonance, Damper Resonance,
Damper Noise, Key On Action Noise, Key Off Action Noise
Sound Mode Hall simulator (8 types), Reverb (8 types), Surround (3 types)
DSP Built-in to each tone + 100 presets, editable
Effects Chorus (12 types), Brilliance (–12 to 0 to +12)
Microphone Effect 25 types, editable effect parameter settings
Mixer Volume, Pan, Hall Simulator/Reverb Send,
Hall Simulator/Reverb Return, Chorus Send
Demo Song 3
Playback Function (SONG
Mode)
In the MIDI Mode Playable songs: User song
*1
(SMF
*2
, CMF
*3
), MIDI recorder song
(MRF
*4
), song data stored on USB flash drive (SMF
*2
, CMF
*3
)
Playback parts: L+R, L, R
(playback of both tracks at the same time or each track independently)
In the Audio Mode Playable songs: audio recorder song (WAV
*5
), general audio file
(WAV
*5
, MP3
*6
)
Playback functions: Center cancel
Song Volume Adjustable (MIDI Mode and Audio Mode individually)
MIDI Recorder Real-time recording and playback as MIDI data
Number of Songs 5
File Format MRF
*4
Number of Tracks 2
Capacity Approximately 30,000 notes per song (total of two tracks)
Recording Medium Internal memory (built-in flash memory)
Reference
EN-171
Audio Recorder Real-time recording and playback as audio data
Number of Songs 99 (files)
File Format WAV
*5
Maximum Recording Time Approximately 25 minutes per file
Recording Medium USB flash drive
Arpeggiator 50 types
Metronome
Beat Bell Off, 1 to 9 (beats)
Drum Patterns 20 types
Tempo Range 20 to 255
Tempo Markings
9 types
Metronome Volume Level Adjustable
Registration Function 96 sets maximum (4 sets, 24 banks)
Pedals
PEDAL UNIT jack For connection of a separately available pedal unit
Damper (continuously variable), sostenuto (off, on), soft (off, on)
EXPRESSION/
ASSIGNABLE jack
For connection of the included sustain pedal (SP-3), a commercially
available expression pedal or a separately available CASIO sustain
pedal, selectable function (expression, master volume, tempo, layer
balance, damper (off, on), sostenuto (off, on), soft (off, on), arpeggio
hold (off, on), play/stop, sequential recall of setup registrations)
Other Functions Auto Resume, Operation Lock
MIDI MIDI 16-channel multi-timbre receive; GM Level 1 standard
Pitch Bend Wheel Pitch bend range: 0 to 24 semitones
Knobs 2 (function-assignable knobs)
CONTROL Button 1 (function-assignable button)
Inputs/Outputs
PHONES jack Stereo standard phone jack (TRS phone) × 1,
Stereo mini phone jack (Mini TRS phone) × 1
Power 24V DC
LINE OUT R, L/MONO
jacks
Standard phone jack (TS phone) × 2 (Output impedance: 470 Ω,
Output voltage: 1.7 V (RMS) MAX)
MIC IN jack Standard phone jack (TS phone) (Input impedance: 3 kΩ,
Input voltage: 10 mV)
USB Ports Type A, Type B
EXPRESSION/
ASSIGNABLE jack
Stereo standard phone jack (TRS phone)
PEDAL UNIT jack Proprietary jack
Acoustics
Amp output 8 W × 2 + 8 W × 2 (3 W × 2 + 3 W × 2 under battery power)
Speakers 16 cm × 8 cm (oval) × 2 + 16 cm × 8 cm (oval) × 2
Reference
EN-172
*1 Storage of up to 10 songs in the internal memory, up to approximately 320KB per song (Based on
1KB = 1024 bytes, 1MB = 1024
2
bytes)
*2 Standard MIDI file (SMF format 0/1, file name extension: .MID)
*3 CASIO original file format. This file format adds CASIO proprietary data to MIDI data. (file name
extension: .CMF)
*4 MIDI Recorder song file (file name extension: .MRF)
*5 WAV format audio file (Linear PCM, 16-bit, 44.1kHz, stereo, file name extension: .WAV)
*6 MP3 format audio file (MPEG-1 Audio Layer3, 44.1kHz/48kHz, 32-320kbps variable bit rate (VBR),
monaural/stereo, file name extension: .MP3)
*7 Measured values while using eneloop batteries.
eneloop is a registered trademark of Panasonic Group.
• Specifications and designs are subject to change without notice.
Power Supply 2-way
Batteries 8 AA-size alkaline batteries or AA-size rechargeable nickel metal
hydride batteries
Battery Continuous
Operation
Approximately 4 hours (alkaline batteries), approximately 4 hours
(rechargeable nickel metal hydride batteries)
*7
Actual continuous operation time may be shorter due to battery type
and performance type.
AC Adaptor AD-E24250LW
Auto Power Off Approximately four hours (under AC adaptor power) or six minutes
(under battery power) after last operation, can be disabled.
Power Consumption 24V = 20W
Dimensions 134.0 (W) × 24.2 (D) × 10.2 (H) cm
(52 3/4 × 9 1/2 × 4 inch)
Weight Approximately 14.8 kg (32.6 lbs) (Excluding batteries)

Reference
EN-173
■ Environment
• Place the Digital Piano onto a stable and flat surface. If you want to place the Digital Piano on a table
or other surface instead of a separately available stand, place it on a stable and flat surface where
the entire bottom of the Digital Piano fits within that surface.
• To prevent the formation of mold, set up the product in a well-ventilated location where the
temperature and humidity ranges shown below are maintained.
– Recommended temperature range: 15 to 25°C
– Recommended humidity range: 40 to 60% RH
• Do not set up the product in locations subject to extreme variations in temperature and/or humidity.
Doing so can cause metal components to rust, coatings to degrade, and components to warp and
split.
■ User Maintenance
• Wipe the product with a soft, dry cloth. Do not use a tissue, which can cause scratching.
• When soiling is more serious, moisten a soft cloth with a weak solution of water and a mild neutral
detergent, wring out all excess moisture from the cloth, and then wipe the product. After that, wipe
again with a separate soft dry cloth.
• Do not use any cleaning agents, chlorine disinfectants, sanitizing wipes, or other items that include
benzene, organic solvents, alcohol, or other solvents for cleaning. Doing so can cause discoloration,
deformation, paint peeling, cracking, etc.
■ Sterilization and Disinfection
• After wiping the product two or three times with a non-alcohol sanitizing wipe, use a soft, dry cloth to
wipe it dry.
• Note that failure to wipe the product dry can cause streaks to remain.
• If the product is used by multiple parties, hand disinfection before each use is recommended.
■ Included and Optional Accessories
Use only accessories that are specified for use with this product. Use of unauthorized accessories
creates the risk of fire, electric shock, and personal injury.
■ Weld Lines
Lines may be visible on the exterior of the product. These are “weld lines” that result from the plastic
molding process. They are not cracks or scratches.
■ AC Adaptor Handling Precautions
• Never connect the AC adaptor (JEITA Standard, with unified polarity plug) that is specified with this
Digital Piano to any other device besides this Digital Piano.
Doing so creates the risk of malfunction.
• The AC adaptor cannot be repaired. If your AC adaptor malfunctions or becomes damaged, contact
your original retailer or a CASIO Service Center.
• AC adaptor operating environment: Temperature: 0 to 40°C
Humidity: 10% to 90% RH
• Output polarity: &
• Use of a different type AC adaptor can cause smoking or malfunction.
Operating Precautions
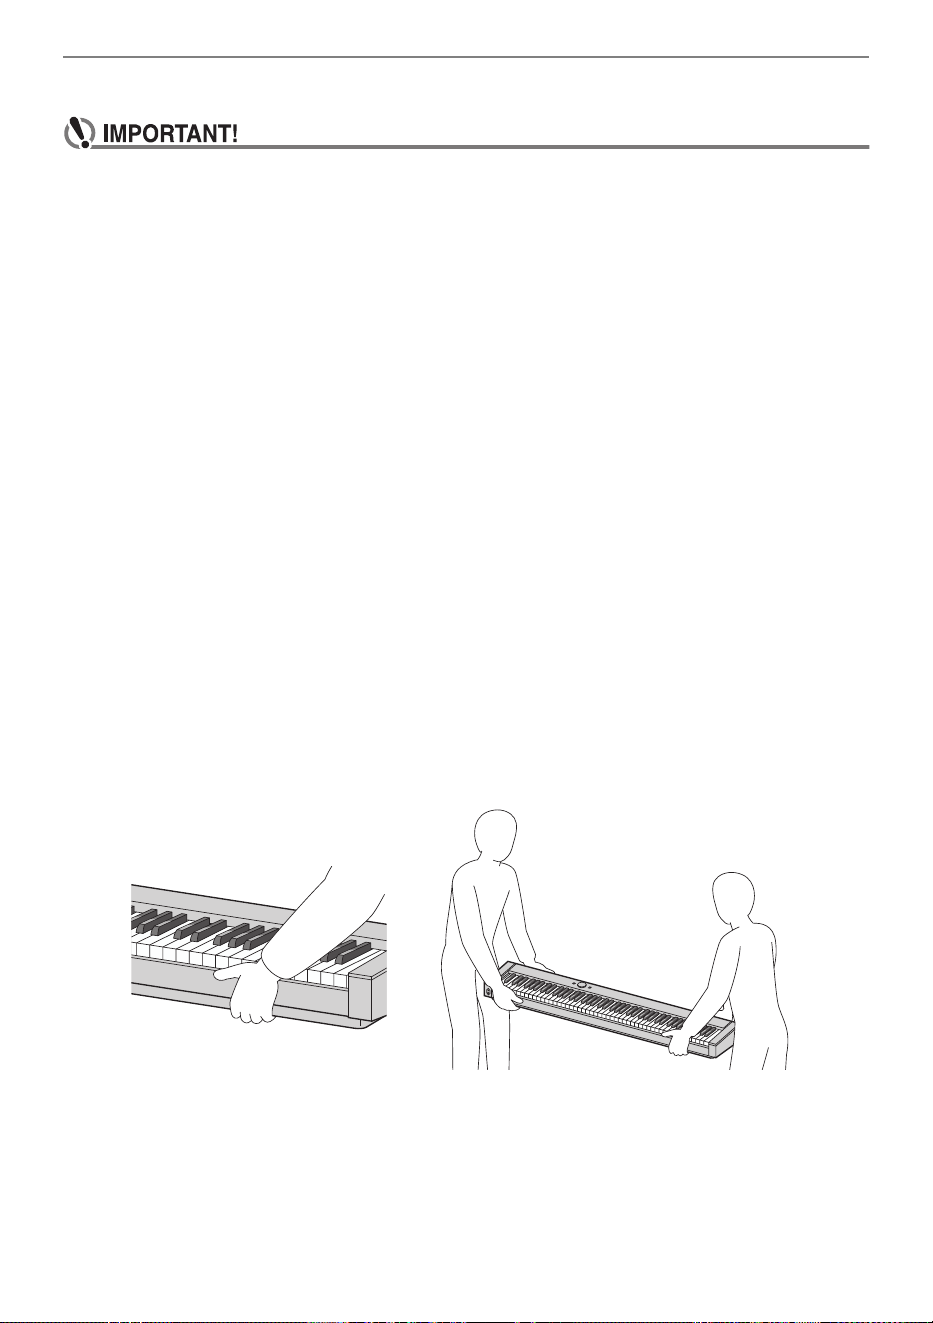
Reference
EN-174
■ Using Batteries
• Close the battery case lid before using the Digital Piano. Failing to do so may cause injury.
• Note that the rear of the Digital Piano around the battery compartment may become hot in
use.
■ Rechargeable Batteries
Note the precautions below when using rechargeable batteries.
(Models that support use of rechargeable batteries only)
• Use Panasonic Group AA-size eneloop rechargeable batteries.
Do not use any other type of batteries.
• Use only the specified charger to charge batteries.
• Rechargeable batteries must be removed from the product for charging.
• For information about using eneloop batteries or their specified charger, be sure to read the user
documentation and precautions that come with each item, and use them only as directed.
Be sure to replace batteries at least once a year, even if there is no indication of low battery power.
Dead rechargeable batteries (eneloop) in particular may deteriorate if they are left in the product.
Remove rechargeable batteries from the product as soon as possible after they go dead.
■ About the front panel
Operating the front panel when it is dusty or dirty may scratch it.
Gently wipe the panel with a soft, clean cloth to remove dust and dirt before use.
Use your fingers to operate the front panel. Using fingernails or sharp objects may scratch the surface.
■ Moving or Installing the Product
When installing or moving this product, be sure to pick it up from below using both hands. Particularly
on models with a stand, this product should always be moved by two adults holding the product level
with one person at each end, after first disconnecting any cables.
Failure to do so could result in personal injury to those around you, the product being dropped, or other
unexpected accidents.
B
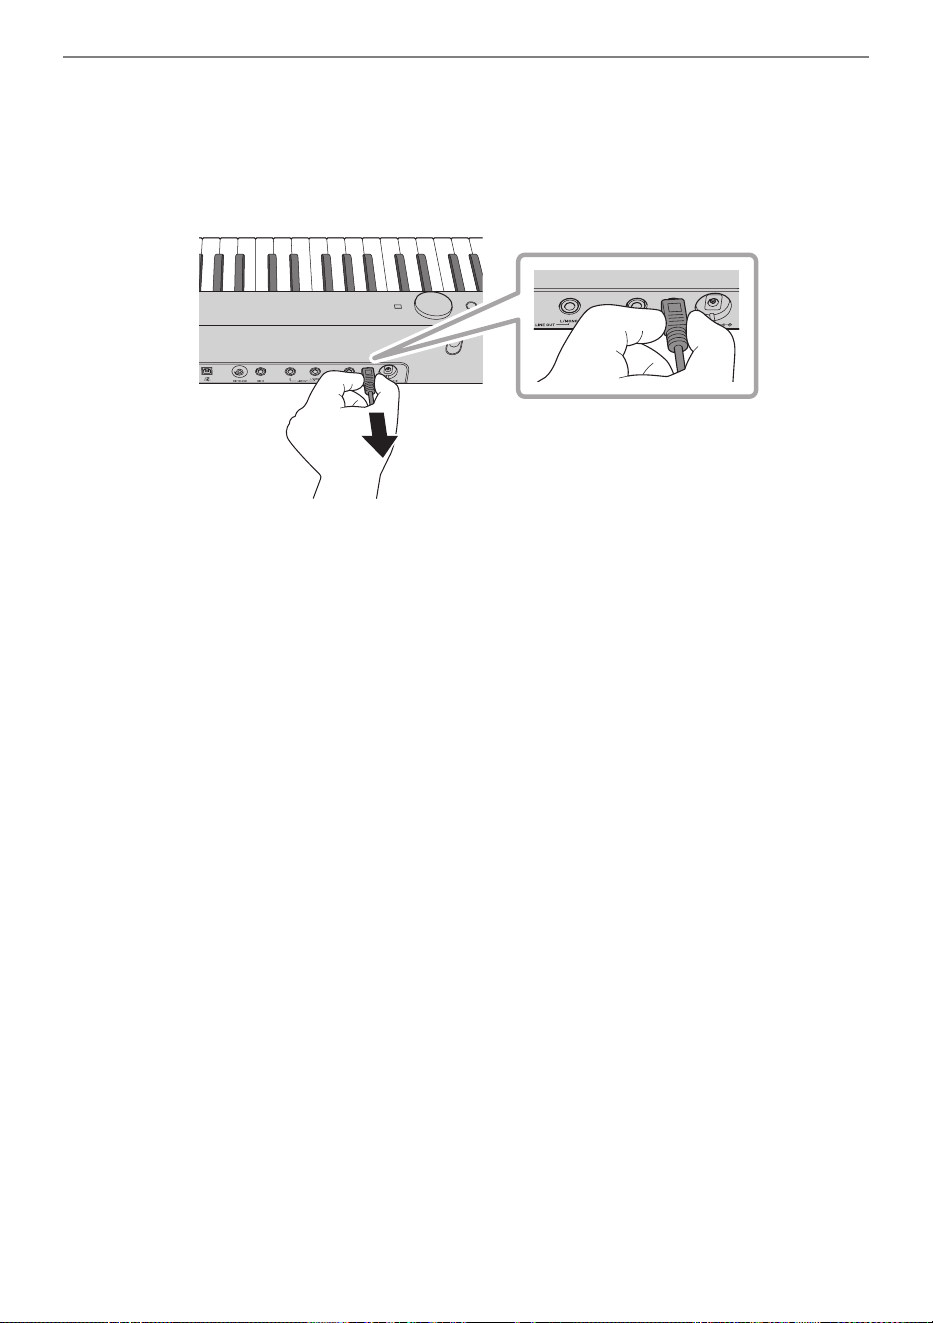
Reference
EN-175
■ Plugging In and Unplugging the Product
• Grasp the base of the plug and keep it level as you push it into or pull it out of the socket.
• Do not unplug it by pulling on the cord.
• Before moving this product, be sure to unplug it from the socket.
Failure to do so could result in an accident or fault.
B
Reference
EN-176
Listed below are all FUNCTION menu item names and setting values and references in this manual.
Some menu items can be called up directly at the touch of a button. The following information is
provided in the “Reference” column of the table below, in the following manner.
• Items below that start with “◆” indicate a button operation.
• Names enclosed in brackets [ ], such as “[WHEEL]”, are the display name of the F button (page
EN-94).
• “FUNCTION + F1” indicates “while touching the FUNCTION button, touch the F1 button”.
While touching the FUNCTION button, touch either up, down, left, or right of the touch ring to recall the
initial value of each menu item.
FUNCTION Menu Items
Menu Item Setting Values Reference
SOUND “Applying Effects” (page EN-49)
ACOUSTIC SIM.
“Adjusting Acoustic Piano Sound
Characteristics (Acoustic Simulator)”
(page EN-59)
(◆[ACSIM])
String Reso.
Tone, Off, 1 - 10
“List of Acoustic Piano Sound Setting Items”
(page EN-60)
Damper Reso.
Damper Noise
Key On Noise
Key Off Noise
EFFECT (◆[EFECT])
Chorus Type Tone, other options
*1
“Using Chorus (Chorus, Flanger, Short Delay)”
(page EN-57)
Brilliance –12 - 0 - +12 “Adjusting Brilliance” (page EN-58)
SOUND MODE
“Using the Sound Mode Effects (Hall
Simulator/Reverb and Surround)”
(page EN-49)
(◆Touch and hold [SMODE])
Sound Mode
Off, Hall/Rev., Surround,
Hall/Rev. + Srnd
“Enabling or Disabling the Hall Simulator/
Reverb and Surround Effects” (page EN-49)
(◆[SMODE])
Hall/Rev. Type Options
*1
“Specifying the Hall Simulator/Reverb Type”
(page EN-50)
Surund Type Type 1 - Type 3 “Specifying the Surround Type” (page EN-51)
DSP
“Configuring DSP Settings” (page EN-53)
(◆Touch and hold [DSP])
DSP Type Options
*5
“Selecting a DSP Type” (page EN-53)
DSP On/Off On, Off
“Configuring DSP Settings” (page EN-53)
M1 - M4 Options
*6
Reference
EN-177
PIANO POSITION (◆[PPOSI])
Piano Position
Standard, Wall, Center,
Table
“Selecting the Piano Position Setting”
(page EN-38)
MIC FX (◆Touch and hold [MICFX])
Mic Fx Type Options
*2
“Specifying the Microphone Effect Type”
(page EN-62)
Fx On/Off On, Off
“Changing Microphone Effect Settings”
(page EN-63)
M1 – M3 Options
*3
MIXER
“Using the Mixer” (page EN-65)
(◆[MIXER])
VOLUME
“Adjusting the Volume Level, Stereo Pan and
Effects for Each Part” (page EN-65)
KB Group
0 - 127 “List of Mixer Setting Items” (page EN-66)
U1 Part
U2 Part
L Part
Audio Song
Wireless Audio
Mic In
MIDI Song
PAN
“Adjusting the Volume Level, Stereo Pan and
Effects for Each Part” (page EN-65)
U1 Part
–64 - 0 - +63 “List of Mixer Setting Items” (page EN-66)
U2 Part
L Part
Mic In
HALL/REV.
“Adjusting the Volume Level, Stereo Pan and
Effects for Each Part” (page EN-65)
Hall/Rev. Return
0 - 127
“List of Mixer Setting Items” (page EN-66)
U1 Part Send
U2 Part Send
L Part Send
AudioSongSend
0 - 127Wireless A Send
Mic In Send
Menu Item Setting Values Reference
Reference
EN-178
CHORUS
“Adjusting the Volume Level, Stereo Pan and
Effects for Each Part” (page EN-65)
U1 Part Send
0 - 127 “List of Mixer Setting Items” (page EN-66)U2 Part Send
L Part Send
KEYBOARD (◆[KEYBD])
TRANSPOSE —
Transpose –12 - 0 - +12
“Changing the Pitch in Semitone Steps
(Transpose)” (page EN-130)
(◆[TRANS])
KBD SETTING —
Touch Response
Off, Light 2, Light 1,
Normal, Heavy 1,
Heavy 2
“Changing Touch Response Sensitivity”
(page EN-127)
Hammer Response
Tone, Off, 1 - 10
“Adjusting the Hammer Response”
(page EN-128)
KeyOff Response Tone, 1 - 3
“Adjusting the Key-off Response”
(page EN-129)
PART OCT SHIFT —
Upper1 Part
–2 - 0 - +2
“Using Octave Shift Separately for Each Part
(Upper 1/Upper 2/Lower)” (page EN-132)
Upper2 Part
Lower Part
PART FINE TUNE —
Upper1 Part
–99 - 0 - +99
“Adjusting the Tuning Separately for Each Part
(Upper 1/Upper 2/Lower) (Part Fine Tune)”
(page EN-131)
Upper2 Part
Lower Part
SCALE TUNING
“Changing the Scale Tuning (Temperament)
of the Keyboard” (page EN-133)
Scale Type Options
*1
“Changing the Scale” (page EN-133)
Scale Base Note C, C{, ... , B}, B
Stretch Tuning Off, On
“Enabling or Disabling Piano Stretch Tuning”
(page EN-134)
SPLIT POINT “Changing the Split Point” (page EN-47)
Split Point A0 - C8 (◆Touch and hold [SPLIT])
Menu Item Setting Values Reference
Reference
EN-179
PEDAL/WHEEL
“Changing the Sound During a Performance”
(page EN-67)
EXP/ASGN. PEDAL
“EXPRESSION/ASSIGNABLE jack”
(page EN-68)
(◆[PEDAL])
Pedal Type
SW, Exp.Type1,
Exp.Type2
“To specify the pedal type” (page EN-68)
Pedal Target Options
*1
“To specify the pedal function” (page EN-69)
Upper1 Part
Off, On
“Enabling/Disabling the Pedal Operation for
Each Part (Upper 1/Upper 2/Lower)”
(page EN-71)
Upper2 Part
Lower Part
Exp Calibration — “Expression Pedal Calibration” (page EN-70)
PEDAL UNIT “PEDAL UNIT jack” (page EN-67)
Upper1 Part
Off, On
“Enabling/Disabling the Pedal Operation for
Each Part (Upper 1/Upper 2/Lower)”
(page EN-71)
Upper2 Part
Lower Part
WHEEL
“Using the Pitch Bend Wheel” (page EN-79)
(◆[WHEEL])
P Bend Range 0 - 24
“Changing the Pitch Bend Range”
(page EN-79)
Upper1 Part
Off, On
“Enabling/Disabling the Pitch Bend Wheel
Operation for Each Part (Upper 1/Upper 2/
Lower)” (page EN-80)
Upper2 Part
Lower Part
KNOB
“Using the Knobs” (page EN-72)
(◆[KNOB])
K1 Assign
Options
*1
(◆FUNCTION + K1)
K2 Assign (◆FUNCTION + K2)
Menu Item Setting Values Reference
Reference
EN-180
CONTROL
“Selecting the Function Assigned to the
CONTROL Button” (page EN-77)
(◆[CTRL])
Control Assign Options
*1
“Selecting the Function Assigned to the
CONTROL Button” (page EN-77)
(◆FUNCTION + CONTROL)
Mod Value 0 - 127
“To change the Modulation settings”
(page EN-78)
Mod Upper1 Part
Off, On
Mod Upper2 Part
Mod Lower Part
F BUTTON SETTING “Editing an F Button Set” (page EN-95)
FB SET NAME EDIT
“Changing the Name of an F Button Set”
(page EN-100)
F BUTTON EDIT
F1 {function}
Options
*1
(◆FUNCTION + F1)
“Assigning a
Function to an F
Button (Creating a
User F Button Set)”
(page EN-95)
F2 {function} (◆FUNCTION + F2)
F3 {function} (◆FUNCTION + F3)
F4 {function} (◆FUNCTION + F4)
FB SET CLEAR “Erasing an F Button Set” (page EN-102)
DUET
“Splitting the Keyboard for Duet Play”
(page EN-135)
(◆Touch and hold [DUET])
Duet Mode Duet On, Duet Pan
“Configuring Duet Settings” (page EN-137)Upper Octave
–2 - 0 - +2
Lower Octave
ARPEGGIATOR —
Pattern Options
*1
“Changing the Arpeggiator Pattern and Other
Settings” (page EN-84)
(◆Touch and hold [ARPEG])
Recommended
Setup
Off, On
Arpeggio Hold Off, On
Upper1 Part Off, On
Upper2 Part Off, On
Lower Part Off, On
Menu Item Setting Values Reference
Reference
EN-181
REGISTRATION
“Saving and Recalling Performance Setups
(Registration)” (page EN-86)
FREEZE
“Freeze Function” (page EN-90)
(◆Touch and hold [FREEZ])
Pedal/Wheel
Off, On “Registration Memory Data” (page EN-92)
Knob/CTRL
Scale Tuning
Touch Response
Sound Mode
Effect
Transpose
Split Point
Arpeggiator
Tempo
Tone
Mixer
BANK NAME EDIT
“Changing a Registration Bank Name”
(page EN-88)
SONG
“Listening to Songs (SONG Mode)”
(page EN-106)
Song Type MIDI, Audio (USB Drv)
“Playing Back MIDI Data or Audio Data”
(page EN-107)
(◆[STYPE])
Audio C Cancel Off, On
“Audio Center Cancel (Vocal Cut)”
(page EN-110)
(◆[STYPE])
METRONOME (◆[METRO])
Tempo 20 - 255
“Changing the Metronome Settings (Tempo,
Beat, Pattern, etc.)” (page EN-81)
Tempo Mark Options
*1
Guide Type Metronome, Drum
Pattern
Bell Off, 1 Beat - 9 Beat /
Options
*1
Volume 0 - 127
While Playing Off, On
While Recording Off, On
Menu Item Setting Values Reference
Reference
EN-182
MEDIA “USB Flash Drive” (page EN-138)
WIRELESS (◆Touch and hold [ADPTR])
Notification Vol 0 - 127 “Notification Tones” (page EN-150)
Audio Pairing —
“Pairing the Digital Piano with a Bluetooth
Audio Device” (page EN-152)
Pairing Clear —
“Deleting Bluetooth Audio Device Pairing
Registration” (page EN-153)
Audio C Cancel Off, On
“Bluetooth Audio Center Cancel (Vocal Cut)”
(page EN-158)
MIDI —
Keyboard Ch 1 - 16
“Configuring MIDI Settings” (page EN-148)Local Control Off, On
Hi-Reso MIDI Out
Off, On
SYSTEM —
Master Tuning 415.5 - 465.9
“Fine Tuning a Pitch (Master Tuning)”
(page EN-130)
Op. Click Volume
0 - 10
“Setting the Volume of the Sound Made When
the Touch Ring is Used (Operation Click
Volume)” (page EN-26)
Panel Light Off, 5, 30, 60,120
“Panel Lights Off”
(page EN-18)
Operation Lock Off, On, Auto
“Operation Lock” (page EN-22)
Speaker Out Off, On, Auto
“Outputting From the Speakers While
Headphones are Connected” (page EN-20)
Headphone Mode
Off, On “Headphone Mode” (page EN-20)
Auto Resume Off, On “Auto Resume” (page EN-17)
Auto Power Off Off, On “Auto Power Off” (page EN-17)
Power On Alert Off, On
“Power On Alert”
(page EN-18)
Battery Type Alkaline, Ni-MH “To select the Battery Type” (page EN-14)
Close-up Off, On “Close-Up Screen” (page EN-29)
LCD Contrast 1 - 17
“Adjusting Display Contrast” (page EN-19)
Menu Item Setting Values Reference

Reference
EN-183
*1 For a list of options, see the “Reference” listed to the right of each item.
*2 See “Microphone Effect Type List” (page EN-226).
*3 See “List of Effects in the Microphone Effects Module” (page EN-227).
*4 The software version of the device is displayed.
*5 See “Preset DSP List” (page EN-184)
*6 See “List of Effects in the DSP Modules” (page EN-187)
Touch Btn Sense –1, 0, +1
“Setting the Sensitivity of the Touch Buttons
and Touch Ring” (page EN-26)
Touch Ring Sense –3 - 0 - +3
“Setting the Sensitivity of the Touch Buttons
and Touch Ring” (page EN-26)
Setting Reset —
“To return all Digital Piano settings to their
initial factory defaults (Setting Reset)”
(page EN-165)
Factory Reset —
“To return all Digital Piano settings and data to
their initial factory defaults (Factory Reset)”
(page EN-165)
Version
*4
——
Menu Item Setting Values Reference
Reference
EN-184
Listed below are the types of DSP and the effects contained in each module from M1 to M4 for each
type.
For more information on the effects listed in the M1 to M4 columns, see “List of Effects in the DSP
Modules” (page EN-187).
DSP List
Preset DSP List
No.
Preset DSP Name
(Display)
M1 M2 M3 M4
1
Mono 1BandEQ
Mono 1-Band EQ
2
Mono 2BandEQ
Mono 2-Band EQ
3
Mono 3BandEQ
Mono 3-Band EQ
4 Stereo1BndEQ
Stereo 1-Band EQ
5 Stereo2BndEQ
Stereo 2-Band EQ
6 Stereo3BndEQ
Stereo 3-Band EQ
7 Tone Control Tone Control
8 Compressor Compressor
9 Limiter Limiter
10 Enhancer Enhancer
11 Phaser Phaser
12 Chorus Chorus
13 Flanger Flanger
14 Tremolo Tremolo
15 Auto Pan Auto Pan
16 Rotary Rotary
17 Drive Rotary Drive Rotary
18 LFO Wah LFO Wah
19 Auto Wah Auto Wah
20 Modeling Wah Modeling Wah
21 Pitch PitchShifter
22 Ring Mod Ring Modulator
23 Piano Effect Piano Effect
24 Distortion Distortion
25 Drive Drive Tone Control
26 Mono IR Mono IR
27 Re-Amp 1 Compressor Mono IR Enhancer Tone Control
28 Re-Amp 2 Compressor Limiter Mono IR Delay
29 Re-Amp 3 Compressor Limiter Mono IR Delay
30 Re-Amp 4 Compressor Limiter Amp Cab Delay
Reference
EN-185
31 Re-Amp 5 Distortion Delay
32 Drive Amp 1
Mono 3-Band EQ
Drive Tone Control Mono IR
33 Drive Amp 2 Drive Tone Control Mono IR Tremolo
34 Drive Amp 3 Drive Tone Control Mono IR AutoPan
35 Drive Amp 4 Drive Tone Control Mono IR Phaser
36 Drive Amp 5 Drive Tone Control Mono IR Flanger
37 Drive Amp 6 Drive Tone Control Mono IR PitchShifter
38 OctaveDrvAmp PitchShifter Drive Tone Control Mono IR
39 PhaseDrvAmp Phaser Drive Tone Control Mono IR
40 DelayDrvAmp Drive Tone Control Mono IR Delay
41 Comp Amp 1 Compressoor Drive
Mono 1-Band EQ
Mono IR
42 Comp Amp 2 Drive Compressoor
Mono 1-Band EQ
Mono IR
43 Deley OD Amp Drive Enhancer Mono IR Delay
44 Wah Drv Amp Modeling Wah Drive Mono IR
45 DelayWahAmp LFO Wah Drive Mono IR Delay
46 Auto Wah Amp Auto Wah Drive Mono IR Delay
47
DriveAmpMod1
Drive Mono IR Phaser Flanger
48
DriveAmpMod2
LFO Wah Drive Mono IR Tremolo
49 S/H DriveAmp LFO Wah Drive Mono IR Auto Pan
50 PhaseDrvAmp2 Drive Mono IR Phaser Delay
51 FlngrDelyAmp Drive Mono IR Flanger Delay
52 PitchModAmp Drive Mono IR PitchShifter Delay
53 Drive Rotary Drive Rotary
54 DrvRotaryEQ Drive Rotary
Stereo 3-Band EQ
55 DrvRotaryPan Drive Rotary Auto Pan
56 PhaserAmpPan Drive Mono IR Phaser Auto Pan
57 FlangrAmpPan Drive Mono IR Flanger Auto Pan
58 ReflctAmpPan Drive Mono IR Reflection Auto Pan
59 DualDriveAmp Drive Drive Mono IR
60 DualDrvAmpDl Drive Drive Mono IR Delay
61 BassAmpAmbi Tone Control Compressor Mono IR Delay
62 Comp Ambi 1 Tone Control Compressor Enhancer Reflection
63 Comp Ambi 2 Tone Control Compressor Mono IR Delay
64 Comp Ambi 3 Drive Compressor Mono IR Delay
65 Comp Ambi 4 Drive Compressor Mono IR Delay
66 EnhanceAmbi1 Drive Enhancer Mono IR Delay
No.
Preset DSP Name
(Display)
M1 M2 M3 M4
Reference
EN-186
67 EnhanceAmbi2 Drive Reflection Mono IR Delay
68 Comp Mod 1 Tone Control Compressor Tremolo Tone Control
69 Comp Mod 2 Tone Control Compressor Phaser Reflection
70 Comp Mod 3 Compressor Flanger Phaser
71 Comp Mod 4 Compressor Tremolo Flanger Delay
72 VibraTremolo Mono IR
Mono 3-Band EQ
Vibraphone Tremolo
Reflection
73 EQ Mod 1 Tone Control Tone Control Phaser Mono IR
74 EQ Mod 2 Tone Control Flanger Tone Control Delay
75 EQ Mod 3 Tone Control Chorus Tone Control Delay
76 EQ Mod 4 Tone Control Tremolo Chorus Delay
77 Double Phase Mono IR Phaser Phaser Enhancer
78 DoubleFlang1 Mono IR Flanger Flanger Tone Control
79 DoubleFlang2 Mono IR Flanger Flanger Phaser
80 Tremolo Spin Tremolo Drive Rotary Tone Control
81 AmbientEnh 1 Enhancer Reflection Delay Tone Control
82 AmbientEnh 2 Tone Control Enhancer Reflection Delay
83 AmbientEnh 3 Tone Control Drive Mono IR Delay
84 AmbientEnh 4 Piano Effect Delay Tone Control
85 AmbientEnh 5 Enhancer Delay Tone Control
86 AmbientEnh 6 Drive Delay Tone Control
87 Pitch Delay Delay Pitch Phaser Auto Pan
88 ReflectDelay Reflection Enhancer Auto Pan Delay
89 Drive Delay Drive Delay Tone Control
90 Pitch Mod 1 Tone Control Phaser Delay Pitch
91 Pitch Mod 2 Pitch Delay Phaser Tone Control
92 Double Enhan Mono IR Enhancer Enhancer
93 Drive Enhan Drive Enhancer Enhancer
94 Reflection 1 Reflection Delay Tone Control
95 Reflection 2 Delay Reflection Enhancer Tone Control
96 Mod Tremolo Phaser Chorus Flanger Tremolo
97 Wah Phase LFO Wah Phaser Delay Tone Control
98 Wah Flanger Flanger Flanger LFO Wah Tone Control
99 Lo Cut EQ Tone Control Tone Control Tone Control
100 Stereo IR+EQ Reflect Stereo IR
Stereo 3-Band EQ
No.
Preset DSP Name
(Display)
M1 M2 M3 M4
Reference
EN-187
Listed below are all the effects included in the DSP modules.
For details on the parameters and setting ranges that can be set for each effect, see “Parameter List of
DSP Module Effects” (page EN-189).
List of Effects in the DSP Modules
Module
Number
Display
DSP Module
Name
Description
Mono 1BandEQ Mono 1-Band EQ This is a single-band monaural equalizer.
Mono 2BandEQ Mono 2-Band EQ This is a dual-band monaural equalizer.
Mono 3BandEQ Mono 3-Band EQ This is a three-band monaural equalizer.
Streo1BandEQ
Stereo 1-Band EQ
This is a single-band stereo equalizer.
Streo2BandEQ
Stereo 2-Band EQ
This is a dual-band stereo equalizer.
Streo3BandEQ
Stereo 3-Band EQ
This is a three-band stereo equalizer.
Tone Control Tone Control
Monaural tone control that adjusts low, mid, and high
frequencies.
Tremolo Tremolo Uses an LFO to shift the volume of the input signal.
Auto Pan Auto Pan Uses an LFO to shift the phase of the input signal.
Compressor Compressor
Compresses the input signal and suppresses level
variation.
Limiter Limiter
Limits the input signal level so it does not rise above
a preset level.
Enhancer Enhancer
Enhances the profiles of the low range and high
range of the input signal.
Phaser Phaser
Produces a distinctive pulsating, broad sound by
using an LFO to change the phase of the input signal
and then mixes it with the original input signal.
Chorus Chorus Gives notes depth and breadth.
Flanger Flanger
Applies wildly pulsating and metallic reverberation to
notes. Enables selection of the LFO waveform.
Rotary Rotary This effect is a rotary speaker simulator.
DriveRotary Drive Rotary
A rotary speaker simulator that makes overdrive
possible.
Pitch PitchShifter This effect transforms the pitch of the input signal.
Ring Mod Ring Modulator
Multiplies the input signal with an internal oscillator
signal to create a metallic sound.
Reflection Reflection
An effect that simulates the initial reflection of
reverberation. Applies acoustic ambiance and
presence to notes.
Delay Delay
Delays the input signal and feeds it back to create a
repeating effect.
Piano Effect Piano Effect An effect suited to acoustic piano play.
LFO Wah LFO Wah
“Wah” effect that can automatically affect the
frequency using an LFO.
Reference
EN-188
Auto Wah Auto Wah
“Wah” effect that can automatically shift the
frequency according to the input signal level.
Modeling Wah Modeling Wah
Simulates various types of wah pedals. An effect that
can automatically shift the frequency according to
the level of the input signal.
Distortion Distortion
Distortion, wah, and amp simulator combined into a
single effect.
Drive Drive Simulates the drive of a musical instrument amplifier.
Amp Cab Amp Cab
Simulates an amp without distortion-generating drive
and speaker cabinet.
VibraTremolo
Vibraphone Tremolo
An effect that simulates the tremolo effect of
vibraphone.
Mono IR Mono IR
Simulates the acoustic characteristics by monaural
IR (Impulse Response) data.
Stereo IR Stereo IR
Simulates the acoustic characteristics by stereo IR
(Impulse Response) data.
Module
Number
Display
DSP Module
Name
Description
Reference
EN-189
Parameter List of DSP Module Effects
Effect
Description Settings
Display
Parameter
Name
Mono 1-Band EQ This is a single-band monaural equalizer.
EQ Freq EQ Frequency Adjusts the center frequency of Equalizer.
*1
(page EN-201)
EQ Gain EQ Gain Adjusts the gain of Equalizer. –12 - 00 - 12
Input Level Input Level Adjusts the input level. 000 - 127
Wet Level Wet Level Adjusts the level of the effect sound. 000 - 127
Dry Level Dry Level Adjusts the level of the direct sound. 000 - 127
Mono 2-Band EQ This is a dual-band monaural equalizer.
EQ1 Freq EQ1 Frequency Adjusts the center frequency of Equalizer 1.
*1
(page EN-201)
EQ1 Gain EQ1 Gain Adjusts the gain of Equalizer 1. –12 - 00 - 12
EQ2 Freq EQ2 Frequency Adjusts the center frequency of Equalizer 2.
*1
(page EN-201)
EQ2 Gain EQ2 Gain Adjusts the gain of Equalizer 2. –12 - 00 - 12
Input Level Input Level Adjusts the input level. 000 - 127
Wet Level Wet Level Adjusts the level of the effect sound. 000 - 127
Dry Level Dry Level Adjusts the level of the direct sound. 000 - 127
Mono 3-Band EQ This is a three-band monaural equalizer.
EQ1 Freq EQ1 Frequency Adjusts the center frequency of Equalizer 1.
*1
(page EN-201)
EQ1 Gain EQ1 Gain Adjusts the gain of Equalizer 1. –12 - 00 - 12
EQ2 Freq EQ2 Frequency Adjusts the center frequency of Equalizer 2.
*1
(page EN-201)
EQ2 Gain EQ2 Gain Adjusts the gain of Equalizer 2. –12 - 00 - 12
EQ3 Freq EQ3 Frequency Adjusts the center frequency of Equalizer 3.
*1
(page EN-201)
EQ3 Gain EQ3 Gain Adjusts the gain of Equalizer 3. –12 - 00 - 12
Input Level Input Level Adjusts the input level. 000 - 127
Wet Level Wet Level Adjusts the level of the effect sound. 000 - 127
Dry Level Dry Level Adjusts the level of the direct sound. 000 - 127
Reference
EN-190
Stereo 1-Band EQ This is a single-band stereo equalizer.
EQ Freq EQ Frequency Adjusts the center frequency of Equalizer.
*1
(page EN-201)
EQ Gain EQ Gain Adjusts the gain of Equalizer. –12 - 00 - 12
Input Level Input Level Adjusts the input level. 000 - 127
Wet Level Wet Level Adjusts the level of the effect sound. 000 - 127
Dry Level Dry Level Adjusts the level of the direct sound. 000 - 127
Stereo 2-Band EQ This is a dual-band stereo equalizer.
EQ1 Freq EQ1 Frequency Adjusts the center frequency of Equalizer 1.
*1
(page EN-201)
EQ1 Gain EQ1 Gain Adjusts the gain of Equalizer 1. –12 - 00 - 12
EQ2 Freq EQ2 Frequency Adjusts the center frequency of Equalizer 2.
*1
(page EN-201)
EQ2 Gain EQ2 Gain Adjusts the gain of Equalizer 2. –12 - 00 - 12
Input Level Input Level Adjusts the input level. 000 - 127
Wet Level Wet Level Adjusts the level of the effect sound. 000 - 127
Dry Level Dry Level Adjusts the level of the direct sound. 000 - 127
Stereo 3-Band EQ This is a three-band stereo equalizer.
EQ1 Freq EQ1 Frequency Adjusts the center frequency of Equalizer 1.
*1
(page EN-201)
EQ1 Gain EQ1 Gain Adjusts the gain of Equalizer 1. –12 - 00 - 12
EQ2 Freq EQ2 Frequency Adjusts the center frequency of Equalizer 2.
*1
(page EN-201)
EQ2 Gain EQ2 Gain Adjusts the gain of Equalizer 2. –12 - 00 - 12
EQ3 Freq EQ3 Frequency Adjusts the center frequency of Equalizer 3.
*1
(page EN-201)
EQ3 Gain EQ3 Gain Adjusts the gain of Equalizer 3. –12 - 00 - 12
Input Level Input Level Adjusts the input level. 000 - 127
Wet Level Wet Level Adjusts the level of the effect sound. 000 - 127
Dry Level Dry Level Adjusts the level of the direct sound. 000 - 127
Effect
Description Settings
Display
Parameter
Name

Reference
EN-191
Tone Control Monaural tone control that adjusts low, mid, and high frequencies.
Low Freq Low Frequency Adjusts the cutoff frequency of Low-range
*2
(page EN-201)
Low Gain Low Gain Adjusts the Low-range gain. –12 - 00 - 12
Mid Freq Mid Frequency Adjusts the center frequency of Mid-range.
*1
(page EN-201)
Mid Gain Mid Gain Adjusts the Mid-range gain. –12 - 00 - 12
High Freq High Frequency Adjusts the cutoff frequency of High-range
*3
(page EN-201)
High Gain High Gain Adjusts the High-range gain. –12 - 00 - 12
Input Level Input Level Adjusts the input level. 000 - 127
Wet Level Wet Level Adjusts the level of the effect sound. 000 - 127
Dry Level Dry Level Adjusts the level of the direct sound. 000 - 127
Tremolo Uses an LFO to shift the volume of the input signal.
Rate LFO Rate Adjusts the LFO rate. 000 - 127
Depth LFO Depth Adjusts the LFO depth. 000 - 127
Waveform LFO Waveform Selects the LFO waveform. Sine,
Triangle,
Trapzoid
Wet Level Wet Level Adjusts the level of the effect sound. 000 - 127
Dry Level Dry Level Adjusts the level of the direct sound. 000 - 127
Auto Pan Uses an LFO to shift the phase of the input signal.
Rate LFO Rate Adjusts the LFO rate. 000 - 127
Depth LFO Depth Adjusts the LFO depth. 000 - 127
Waveform LFO Waveform Selects the LFO waveform. Sine,
Triangle,
Trapzoid,
Trapzoid 1,
Trapzoid 2,
Trapzoid 3,
Trapzoid 4
Manual Manual Adjusts the pan (stereo position). –64 is full left,
0 is center, and +63 is full right.
–64 - 00 - 63
Wet Level Wet Level Adjusts the level of the effect sound. 000 - 127
Dry Level Dry Level Adjusts the level of the direct sound. 000 - 127
Effect
Description Settings
Display
Parameter
Name

Reference
EN-192
Compressor Compresses the input signal and suppresses level variation.
Attack Attack Adjusts the time until compression goes into
effect. A smaller value causes prompt
compressor operation, which suppresses the
attack of the input signal. A larger values delays
compressor operation, which causes the attack
of the input signal to be output as-is.
000 - 127
Release Release Adjusts the time until compression is released
after the input signal drops below a prescribed
level. When an attack feeling is desired (no
compression at the onset of the sound), set this
parameter to as low a value as possible. To
have compression applied at all times, set a
high value.
000 - 127
Ratio Ratio Adjusts the compression ratio of the audio
signal.
1:1, 2:1, 4:1,
8:1, 16:1, 32:1,
Inf:1
Wet Level Wet Level Adjusts the level of the effect sound. Output
volume changes in accordance with the Ratio
setting and the characteristics of the input tone.
000 - 127
Dry Level Dry Level Adjusts the level of the direct sound. 000 - 127
Limiter Limits the input signal level so it does not rise above a preset
level.
Limit Limit Adjusts the volume level of the limit at which
limiting is applied.
000 - 127
Attack Attack Adjusts the time until the compression effect
starts. A smaller value causes prompt limiter
operation, which suppresses the attack of the
input signal. A larger values delays limiter
operation, which causes the attack of the input
signal to be output as-is.
000 - 127
Release Release Adjusts the time until compression is released
after the input signal drops below a prescribed
level.
000 - 127
Wet Level Wet Level Adjusts the level of the effect sound. Output
volume changes in accordance with the Limit
setting and the characteristics of the input tone.
Use this parameter to correct for such changes.
000 - 127
Dry Level Dry Level Adjusts the level of the direct sound. 000 - 127
Effect
Description Settings
Display
Parameter
Name
Reference
EN-193
Enhancer Enhances the profiles of the low range and high range of the input
signal.
Low Freq Low Frequency Adjusts the low range enhancer frequency. 000 - 127
Low Gain Low Gain Adjusts the low range enhancer gain. 000 - 127
High Freq High Frequency Adjusts the high range enhancer frequency. 000 - 127
High Gain High Gain Adjusts the high range enhancer gain. 000 - 127
Input Level Input Level Adjusts the input level. 000 - 127
Wet Level Wet Level Adjusts the level of the effect sound. 000 - 127
Dry Level Dry Level Adjusts the level of the direct sound. 000 - 127
Phaser Produces a distinctive pulsating, broad sound by using an LFO to
change the phase of the input signal and then mixes it with the
original input signal.
Resonance Resonance Adjusts the strength of feedback. 000 - 127
Manual Manual Adjusts the reference phaser shift amount. –64 - 00 - 63
Rate LFO Rate Adjusts the LFO rate. 000 - 127
Depth LFO Depth Adjusts the LFO depth. 000 - 127
Waveform LFO Waveform Selects the LFO waveform. Sine,
Triangle,
Random
Input Level Input Level Adjusts the input level. 000 - 127
Wet Level Wet Level Adjusts the level of the effect sound. 000 - 127
Dry Level Dry Level Adjusts the level of the direct sound. 000 - 127
Chorus Gives notes depth and breadth.
Rate LFO Rate Adjusts the LFO rate. 000 - 127
Depth LFO Depth Adjusts the LFO depth. 000 - 127
Waveform LFO Waveform Selects the LFO waveform. Sine,
Triangle
Feedback Feedback Adjusts the strength of feedback –64 - 00 - 63
Wet Level Wet Level Adjusts the level of the effect sound. 000 - 127
Polarity Polarity Inverts the LFO of one channel. Negative,
Positive
Input Level Input Level Adjusts the input level. 000 - 127
Dry Level Dry Level Adjusts the level of the direct sound. 000 - 127
Effect
Description Settings
Display
Parameter
Name
Reference
EN-194
Flanger Applies wildly pulsating and metallic reverberation to notes.
Enables selection of the LFO waveform.
Rate LFO Rate Adjusts the LFO rate. 000 - 127
Depth LFO Depth Adjusts the LFO depth. 000 - 127
Waveform LFO Waveform Selects the LFO waveform. Sine,
Triangle,
Random
Feedback Feedback Adjusts the strength of feedback –64 - 00 - 63
Wet Level Wet Level Adjusts the level of the effect sound. 000 - 127
Input Level Input Level Adjusts the input level. 000 - 127
Dry Level Dry Level Adjusts the level of the direct sound. 000 - 127
Rotary This effect is a rotary speaker simulator.
Type Type Selects the rotary speaker type. 0 - 3
Speed Speed Switches the speed mode between fast and
slow.
Slow, Fast
Brake Brake Stops speaker rotation. Rotate, Stop
Fall Accel Fall Accel Adjusts acceleration when the speed mode is
switched from fast to slow.
000 - 127
Rise Accel Rise Accel Adjusts acceleration when the speed mode is
switched from slow to fast.
000 - 127
Slow Rate Slow Rate Adjusts the speaker rotation speed in the slow
speed mode.
000 - 127
Fast Rate Fast Rate Adjusts the speaker rotation speed in the fast
speed mode.
000 - 127
Vib/Cho Vibrato/Chorus Selects the vibrato and the chorus type. Off,
Vibrato1,
Chorus 1,
Vibrato2,
Chorus 2,
Vibrato3,
Chorus 3
Wet Level Wet Level Adjusts the level of the effect sound. 000 - 127
Dry Level Dry Level Adjusts the level of the direct sound. 000 - 127
Effect
Description Settings
Display
Parameter
Name
Reference
EN-195
Drive Rotary A rotary speaker simulator that makes overdrive possible.
Type Type Selects the rotary speaker type. 0 - 3
OD Gain Overdrive Gain Adjusts overdrive gain. 000 - 127
OD Level Overdrive Level Adjusts the overdrive output level. 000 - 127
Speed Speed Switches the speed mode between fast and
slow.
Slow, Fast
Brake Brake Stops speaker rotation. Rotate, Stop
Fall Accel Fall Accel Adjusts acceleration when the speed mode is
switched from fast to slow.
000 - 127
Rise Accel Rise Accel Adjusts acceleration when the speed mode is
switched from slow to fast.
000 - 127
Slow Rate Slow Rate Adjusts the speaker rotation speed in the slow
speed mode.
000 - 127
Fast Rate Fast Rate Adjusts the speaker rotation speed in the fast
speed mode.
000 - 127
Vib/Cho Vibrato/Chorus Selects the vibrato and the chorus type. Off,
Vibrato1,
Chorus 1,
Vibrato2,
Chorus 2,
Vibrato3,
Chorus 3
Wet Level Wet Level Adjusts the level of the effect sound. 000 - 127
Dry Level Dry Level Adjusts the level of the direct sound. 000 - 127
PitchShifter This effect transforms the pitch of the input signal.
PitchQuarter Pitch Adjusts the pitch shift amount in quarter tone
steps.
–24 - 00 - 24
High Damp High Damp Adjusts the high-range damp. A smaller number
increases damping.
000 - 127
Feedback Feedback Adjusts the feedback amount. 000 - 127
Input Level Input Level Adjusts the input level. 000 - 127
Wet Level Wet Level Adjusts the level of the effect sound. 000 - 127
Dry Level Dry Level Adjusts the level of the direct sound. 000 - 127
Pitch Fine Fine Adjusts the pitch shift amount. –50 is a quarter
note decrease, while +50 is a quarter note
increase.
–50 - 00 - 50
Effect
Description Settings
Display
Parameter
Name
Reference
EN-196
Ring Modulator Multiplies the input signal with an internal oscillator signal to
create a metallic sound.
OSC Freq OSC Frequency Sets the reference frequency of the internal
oscillator.
000 - 127
Rate LFO Rate Adjusts the LFO rate. 000 - 127
Depth LFO Depth Adjusts the LFO depth. 000 - 127
Tone Tone Adjusts the timbre of the ring modulator input
sound.
000 - 127
Wet Level Wet Level Adjusts the level of the effect sound. 000 - 127
Dry Level Dry Level Adjusts the level of the direct sound. 000 - 127
Reflection An effect that simulates the initial reflection of reverberation.
Applies acoustic ambiance and presence to notes.
Wet Level Wet Level Adjusts the level of the effect sound. 000 - 127
Feedback Feedback Adjusts the repeat of the reflected sound. 000 - 127
Tone Tone Adjusts the tone of the reflected sound. 000 - 127
Input Level Input Level Adjusts the input level. 000 - 127
Dry Level Dry Level Adjusts the level of the direct sound. 000 - 127
Delay Delays the input signal and feeds it back to create a repeating
effect.
Time Delay Time Adjusts the total delay time in 1 ms units. 0001 - 1099
L.Time Ratio Delay Ratio L Adjusts the ratio of the left channel relative to
the total delay time.
000 - 127
R.Time Ratio Delay Ratio R Adjusts the ratio of the right channel relative to
the total delay time.
000 - 127
L.Level Delay Level L Adjusts the level of the left channel. 000 - 127
R.Level Delay Level R Adjusts the level of the right channel. 000 - 127
FeedbackType
Feedback Type Selects the feedback type.
Stereo: Stereo feedback
Cross: Cross feedback
Stereo, Cross
Feedback Lvl
Feedback Adjusts the feedback amount. 000 - 127
High Damp High Damp Adjusts the high-range damp. A smaller number
increases damping.
000 - 127
Tmpo Sync Delay Tempo
Sync
Specifies how the actual total delay time is
synced with tempo.
Off: Uses Delay Time value.
1/4 to 1: Uses value in accordance with number
of beats.
Off, 1/4, 1/3,
3/8, 1/2, 2/3,
3/4, 1
Effect
Description Settings
Display
Parameter
Name
Reference
EN-197
Input Level Input Level Adjusts the input level. 000 - 127
Dry Level Dry Level Adjusts the level of the direct sound. 000 - 127
Wet Level Wet Level Adjusts the level of the effect sound. 000 - 127
Piano Effect An effect suited to acoustic piano play.
Lid Type Lid Type Adjusts how sound resonates in accordance
with the opening state of a piano lid.
Closed,
SemiOpen,
FullOpen
ReflectLevel Reflection Level Adjusts the level of the initial reflection. 000 - 127
Input Level Input Level Adjusts the input level. 000 - 127
Wet Level Wet Level Adjusts the level of the effect sound. 000 - 127
Dry Level Dry Level Adjusts the level of the direct sound. 000 - 127
LFO Wah “Wah” effect that can automatically affect the frequency using an
LFO.
Input Level Input Level Adjusts the input level. The input signal can
become distorted when the level of the sound
being input, the number of chords, or the
Resonance value is large. Adjust this parameter
to eliminate such distortion.
000 - 127
Resonance Resonance Adjusts the strength of feedback 000 - 127
Manual Manual Adjusts the wah filter reference frequency. 000 - 127
Rate LFO Rate Adjusts the LFO rate. 000 - 127
Depth LFO Depth Adjusts the LFO depth. 000 - 127
Waveform LFO Waveform Selects the LFO waveform. Sine,
Triangle,
Random
Wet Level Wet Level Adjusts the level of the effect sound. 000 - 127
Dry Level Dry Level Adjusts the level of the direct sound. 000 - 127
Effect
Description Settings
Display
Parameter
Name
Reference
EN-198
Auto Wah “Wah” effect that can automatically shift the frequency according
to the input signal level.
Input Level Input Level Adjusts the input level. The input signal can
become distorted when the level of the sound
being input, the number of chords, or the
Resonance value is large. Adjust this parameter
to eliminate such distortion.
000 - 127
Resonance Resonance Adjusts the strength of feedback 000 - 127
Manual Manual Adjusts the wah filter reference frequency. 000 - 127
Depth Depth Adjusts the depth of the wah in accordance with
the level of the input signal. Setting a positive
value causes the wah filter to open in direct
proportion with the size of the input signal,
producing a bright sound. Setting a negative
value causes the wah filter to close in direct
proportion with the size of the input signal,
producing a dark sound.
–64 - 00 - 63
Wet Level Wet Level Adjusts the level of the effect sound. 000 - 127
Dry Level Dry Level Adjusts the level of the direct sound. 000 - 127
Modeling Wah Simulates various types of wah pedals. An effect that can
automatically shift the frequency according to the level of the input
signal.
Output Level
Level Adjusts the wah level. 000 - 127
Type Type Selects the wah type. CAE, CRY,
IBZ, VO,
FAT, LIGHT,
7STR, RESO
Manual Manual Adjusts the wah filter reference frequency. 000 - 127
Depth Depth Adjusts the depth of the wah in accordance with
the level of the input signal. Setting a positive
value causes the wah filter to open in direct
proportion with the size of the input signal,
producing a bright sound. Setting a negative
value causes the wah filter to close in direct
proportion with the size of the input signal,
producing a dark sound.
–64 - 00 - 63
Wet Level Wet Level Adjusts the level of the effect sound. 000 - 127
Dry Level Dry Level Adjusts the level of the direct sound. 000 - 127
Effect
Description Settings
Display
Parameter
Name
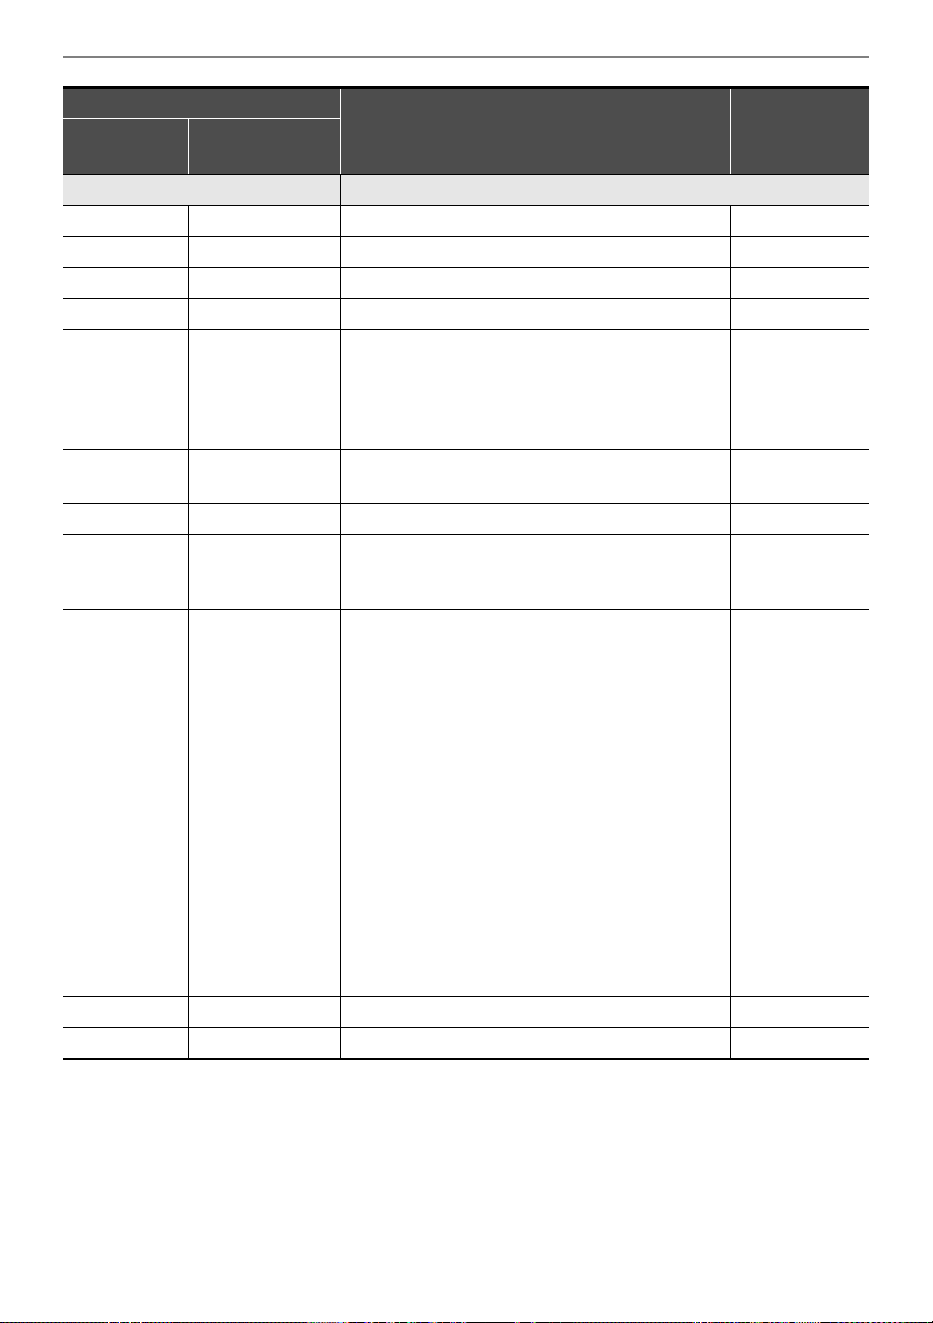
Reference
EN-199
Distortion Distortion, wah, and amp simulator combined into a single effect.
Dist Gain Dist Gain Adjusts the distortion input signal gain. 000 - 127
Dist Level Dist Level Adjusts the distortion output level. 000 - 127
Dist Low Dist Low Adjusts the distortion low-range gain. 000 - 127
Dist High Dist High Adjusts the distortion high-range gain. 000 - 127
Wah Type Wah Type Specifies the wah type. LPF, C-Wah,
V-Wah,
F-Wah,
L-Wah,
H-Wah
Wah Depth Wah Depth Adjusts the depth of the wah in accordance with
the level of the input signal.
–64 - 00 - 63
Wah Manual
Wah Manual Adjusts the wah filter reference frequency. 000 - 127
Routing Routing Specifies the distortion and wah connection. Dist, Wah,
Wah-Dist,
Dist-Wah
Amp Type Amp Specifies the amp type. Bypass,
FD-PRNST,
FD-TWRV1,
RL-J12,
FD-TWD,
FD-DXRV,
VX-AC3,
ML-DC3,
MB-MK1,
MS-STK,
FD-TWRV2,
SL-SLO,
MB-RCTF,
PV-51-SK,
BASS-CMB,
FD-BMAN,
BASS-STK
Wet Level Wet Level Adjusts the level of the effect sound. 000 - 127
Dry Level Dry Level Adjusts the level of the direct sound. 000 - 127
Effect
Description Settings
Display
Parameter
Name
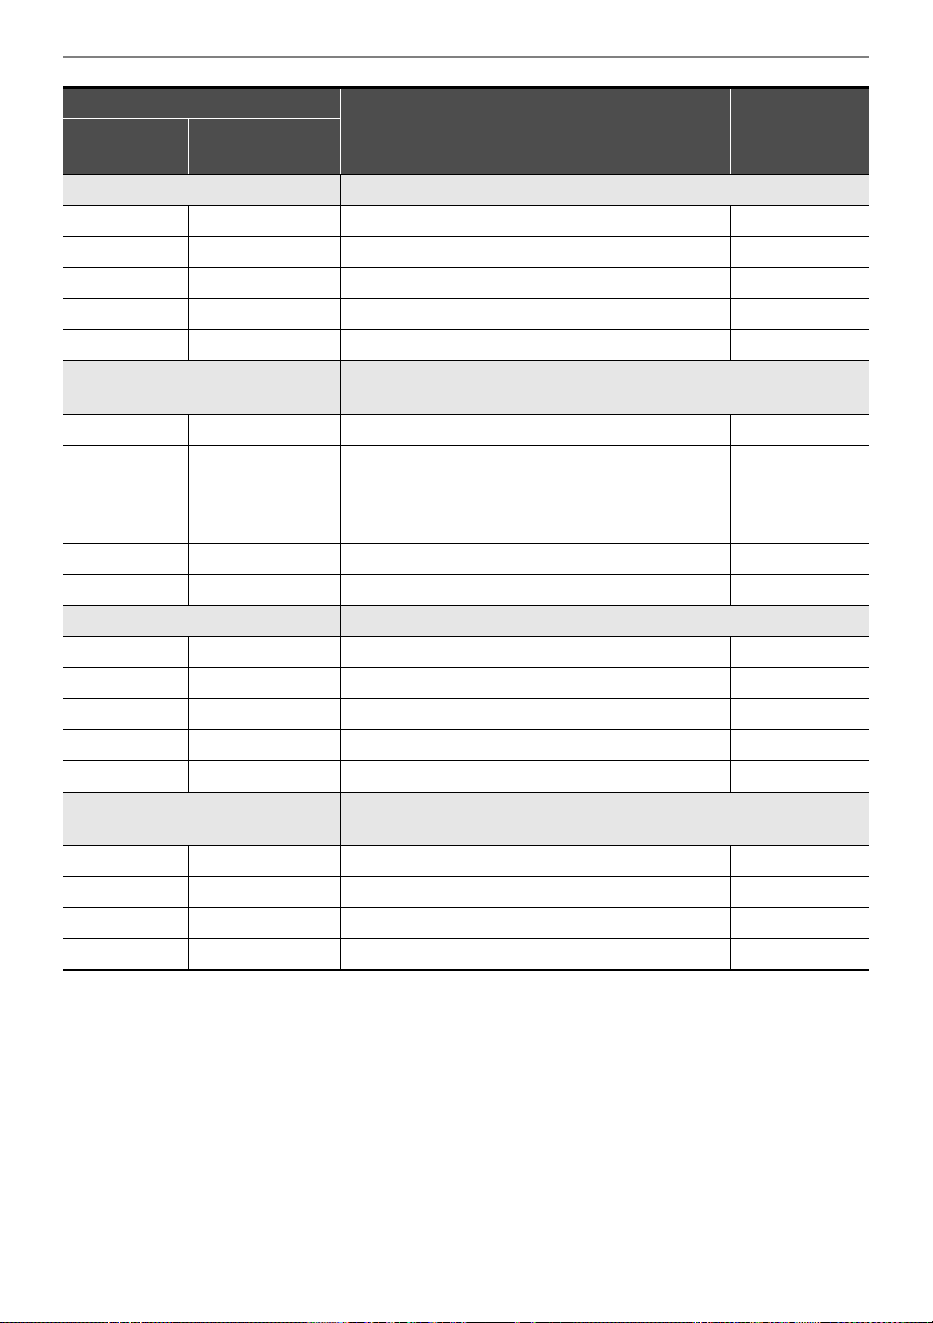
Reference
EN-200
Drive Simulates the drive of a musical instrument amplifier.
Type Drive Type Selects the drive type.
*4
(page EN-201)
Gain Gain Adjusts the driver input signal gain. 000 - 127
Output Level
Level Adjusts the drive output level. 000 - 127
Wet Level Wet Level Adjusts the level of the effect sound. 000 - 127
Dry Level Dry Level Adjusts the level of the direct sound. 000 - 127
Amp Cab Simulates an amp without distortion-generating drive and speaker
cabinet.
Type Type Selects the amp cabinet type. (page EN-202)
Variation Variation Selects a variation that changes the setup of the
currently selected amp. The number of
variations (page EN-202) depends on the amp
type.
1 - 4
Wet Level Wet Level Adjusts the level of the effect sound. 000 - 127
Dry Level Dry Level Adjusts the level of the direct sound. 000 - 127
Vibraphone Tremolo An effect that simulates the tremolo effect of vibraphone.
Rate LFO Rate Adjusts the LFO rate. 000 - 127
Depth LFO Depth Adjusts the LFO depth. 000 - 127
Input Level Input Level Adjusts the input level. 000 - 127
Wet Level Wet Level Adjusts the level of the effect sound. 000 - 127
Dry Level Dry Level Adjusts the level of the direct sound. 000 - 127
Mono IR Simulates the acoustic characteristics by monaural IR (Impulse
Response) data.
Categ Category Selects the IR data category.
*5 *7
Type Type Selects the IR data type.
*6 *8
Wet Level Wet Level Adjusts the level of the effect sound. 000 - 127
Dry Level Dry Level Adjusts the level of the direct sound. 000 - 127
Effect
Description Settings
Display
Parameter
Name
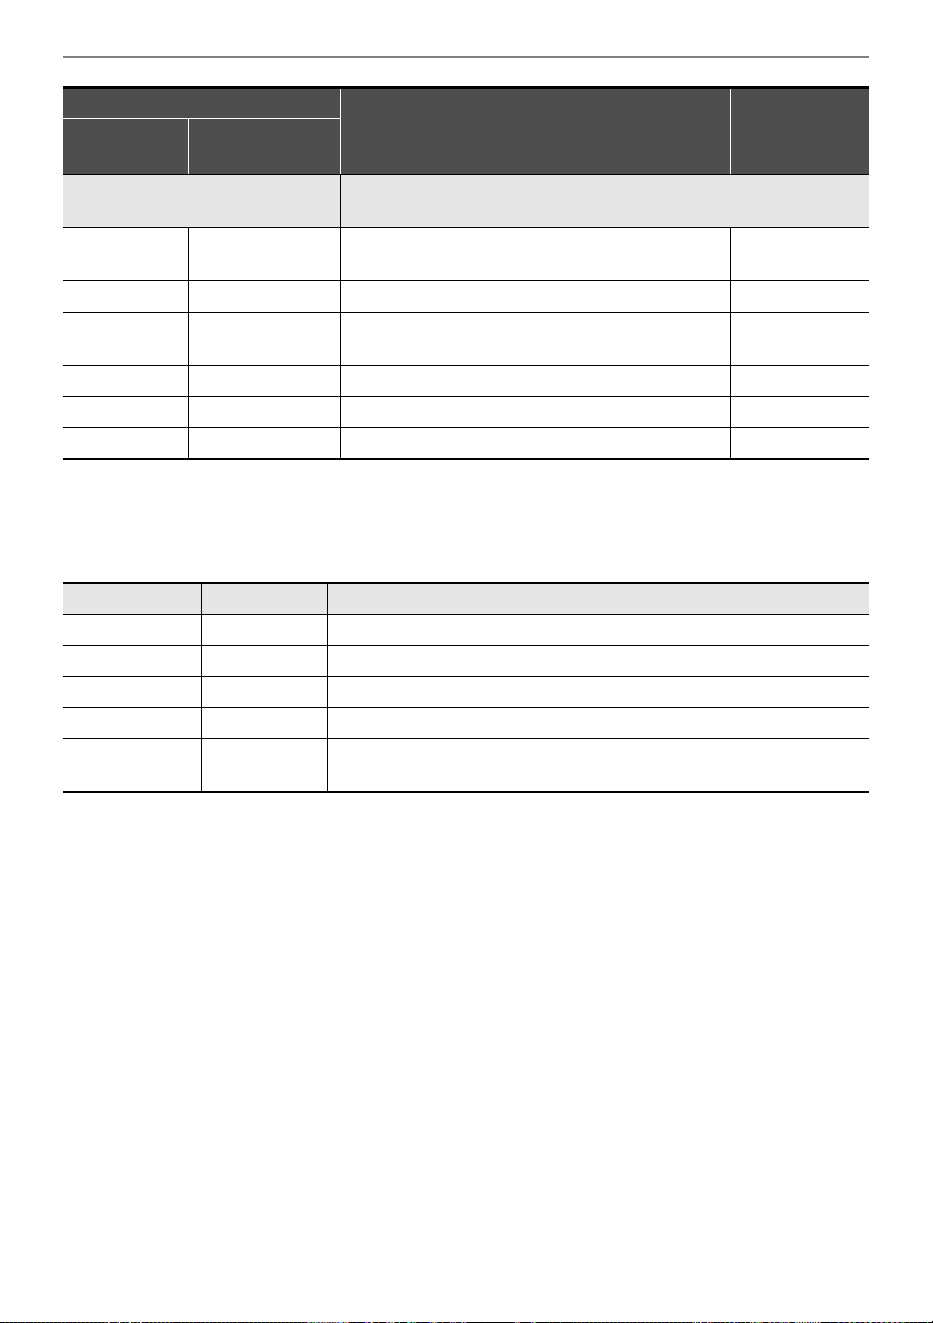
Reference
EN-201
*1 100Hz, 125Hz, 160Hz, 200Hz, 250Hz, 315Hz, 400Hz, 500Hz, 630Hz, 800Hz, 1.0kHz, 1.3kHz,
1.6kHz, 2.0kHz, 2.5kHz, 3.2kHz, 4.0kHz, 5.0kHz, 6.3kHz, 8.0kHz
*2 50Hz, 63Hz, 80Hz, 100Hz, 125Hz, 160Hz, 200Hz, 250Hz, 315Hz, 400Hz, 500Hz, 630Hz, 800Hz
*3 2.0kHz, 2.5kHz, 3.2kHz, 4.0kHz, 5.0kHz, 6.0kHz, 8.0kHz, 10kHz, 13kHz, 16kHz
*4
*5 Refer to the “Category” column of “IR Type List” (page EN-204).
*6 Refer to the “Type” column of “IR Type List” (page EN-204).
*7 26 categories in all.
*8 The number of types differs from categories (1 to 121 types).
Stereo IR Simulates the acoustic characteristics by stereo IR (Impulse
Response) data.
L.Categ Left Category Selects the IR data category of the left
channel.
*5
*7
L.Type Left Type Selects the IR data type of the left channel.
*6 *8
R.Categ Right Category Selects the IR data category of the right
channel.
*5
*7
R.Type Right Type Selects the IR data type of the right channel.
*6 *8
Wet Level Wet Level Adjusts the level of the effect sound. 000 - 127
Dry Level Dry Level Adjusts the level of the direct sound. 000 - 127
Drive Type Display Description
Clean1 - 4 Clean1 - 4 Simulates a clean sound with little distortion.
Crunch1 - 4 Crunch1 - 4 Simulates a crisp crunch sound with little distortion.
Overdrive1 - 4 Overdrv1 - 4 Simulates an overdrive sound with mellow distortion.
Distortion1 - 4 Distort1 - 4 Simulates a hard, straight distortion sound.
Metal1 - 4 Metal1 - 4
Simulates an extreme and weighty distortion sound that is suitable
for heavy metal music.
Effect
Description Settings
Display
Parameter
Name
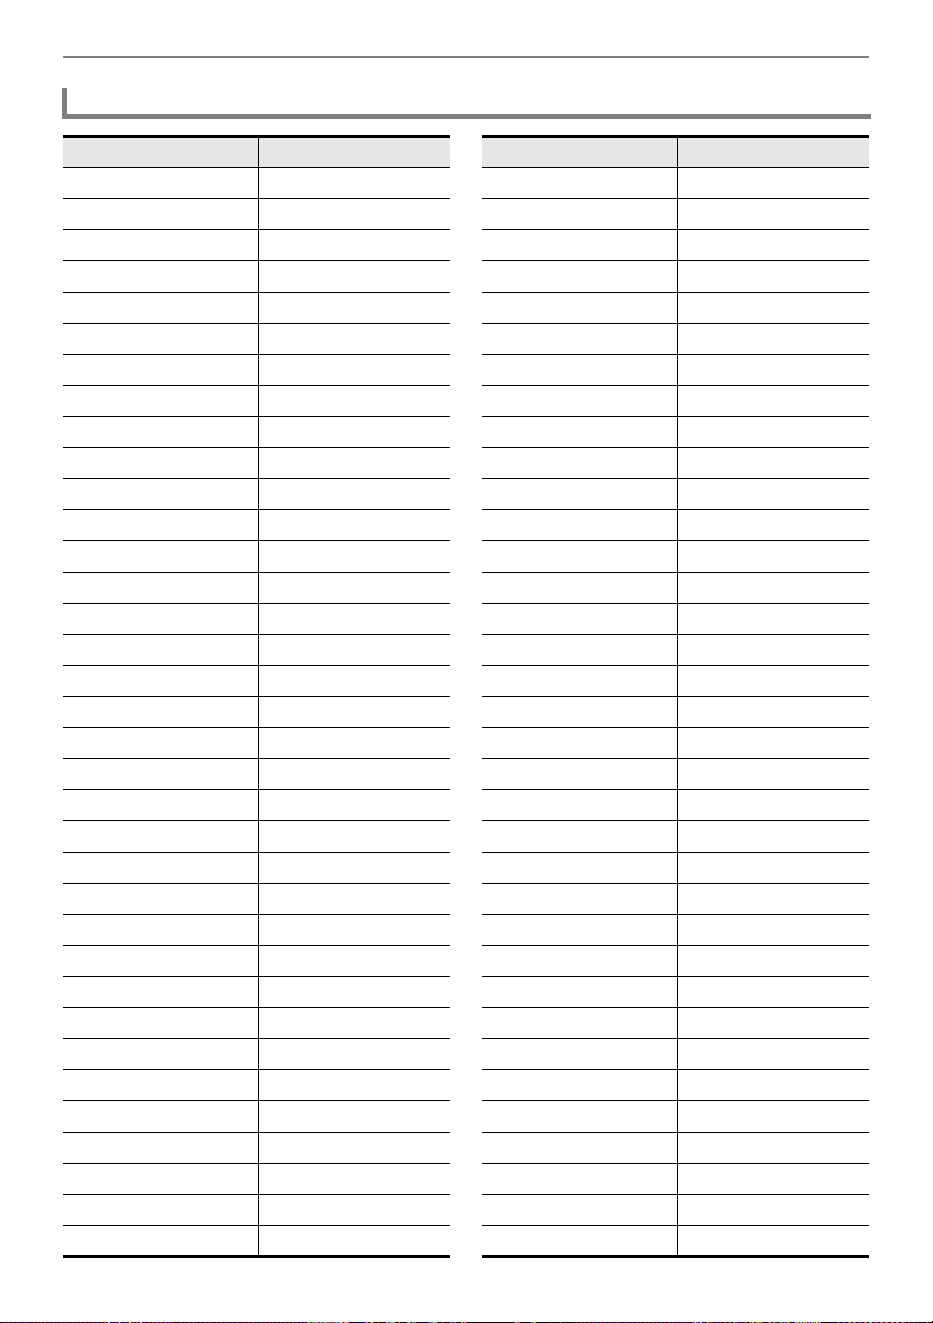
Reference
EN-202
Amp Cab Type List
Display Number of variations
FD-PRNST 1
FD-TWRV1 1
RL-J12 1
FD-TWD 1
FD-DXRV 1
VX-AC3 1
ML-DC3 1
MB-MK1 1
MS-STK 1
FD-TWRV2 1
SL-SLO 1
MB-RCTF 1
PV-51-SK 1
BASS-CMB 1
FD-BMAN 1
BASS-STK 1
65-MQ 3
AD-MP+CA 3
BC-HC30 2
BN-SHV 3
BN-ECS 3
BN-UBR 3
CV-LG3 3
DR-MZ38 2
DZ-V4 2
DZ-HA 2
EG-TWK 4
EG-VEN 3
EN-G15 2
EN-INV 1
EN-BM 1
EN-53+DI 2
EV-51III 4
FD-CHMP 3
FD-TWN 3
FD-TWRV3 3
FU-OD 2
GB-LANC 2
HK-TM18 3
HK-SBL 3
KH-STDT 2
KR-RV 3
LY-IRST 4
MB-MK3 3
MB-F3+DI 3
MB-D5 1
MB-DRCT 4
MB-TX+.5 1
MB-TX+DI 4
MS-VS80 4
MS-J800 4
MS-J2401 2
MS-J2000 3
MS-J2+MB 2
MS-PLX 3
MS-J1+DI 2
MT-CFT 4
OR-O15 4
PN-P7 2
PR-SE3 3
PV-51II 4
PV-65MH 4
RA-NBK 3
RL-J20 2
RL-J120 2
RV-30 2
SA-PS1 4
SL-X8 2
SL-X9 2
SP-1624 3
Display Number of variations
Reference
EN-203
SP-1695 3
SU-BGR3 3
VH-SP6 2
VX-A15 3
VX-A15TB 2
VX-A30 3
VX-A30TB 3
YM-DG8 4
YM-F112 4
YM-F115 4
RD-PET-PRE 4
RD-PET-PRE-TRM 4
RD-MK1-PRE 4
RD-MK1-PRE-TRM 4
RD-MK2-PRE 4
RD-MK2-PRE-TRM 4
RD-DMY-PRE 4
RD-PRE-STWT 4
YM-CP-PRE 4
YM-CP-PRE-TRM 4
WR-200-PRE 4
CLV-TAB-PRE 4
CLV-CMB-PRE 4
LES-CMB-PRE 4
RL-VP-PRE 4
AC-360 2
AP-SV4DI 2
EB-C450 2
FD-BMNtw 2
FD-BMNsv 2
FD-BMNbk 2
FD-STBAS 2
GK-150 3
MK-T501 3
SW-PB20 3
SW-SM50 3
Display Number of variations
RL-CBKB 1
LY-3C-AC 1
AC-SIM 4
AP-EXT-VIN 4
STR-EXT 4
MG-MIN-VCF-NEG 4
MG-MIN-VCF-POS 4
MG-MIN-VCF-TOP 3
MG-MIN-VCF-OVL 4
MG-MIN-VCF-OVL-T 4
SSL-LCUT 4
SSL-LMCUT 4
HI-BST 4
PARA-BST 4
BASFIL-DEP 4
BASFIL-SHL 4
EH-SS-SPRK 4
Display Number of variations
Reference
EN-204
IR Type List
Category
Type
Guitar Amp 1 FD-PRNST
Guitar Amp 1 FD-TWNRV1
Guitar Amp 1 RL-J12
Guitar Amp 1 FD-TWD
Guitar Amp 1 FD-DXRV
Guitar Amp 1 VX-AC3
Guitar Amp 1 ML-DC3
Guitar Amp 1 MB-MK1
Guitar Amp 1 MS-J8
Guitar Amp 1 FD-TWNRV2
Guitar Amp 1 SL-SLO
Guitar Amp 1 MB-RCTF
Guitar Amp 1 PV-51-SK
Guitar Amp 1 65-MQ cl
Guitar Amp 1 65-MQ cr
Guitar Amp 1 65-MQ od
Guitar Amp 1 AD-MP+CAB cl
Guitar Amp 1 AD-MP+CAB ds
Guitar Amp 1 AD-MP+CAB mt
Guitar Amp 1 BC-HC30 cr
Guitar Amp 1 BC-HC30 od
Guitar Amp 1 BN-SHV cl
Guitar Amp 1 BN-SHV od
Guitar Amp 1 BN-SHV ds
Guitar Amp 1 BN-ECS od
Guitar Amp 1 BN-ECS ds
Guitar Amp 1 BN-ECS mt
Guitar Amp 1 BN-UBR cl
Guitar Amp 1 BN-UBR od
Guitar Amp 1 BN-UBR mt
Guitar Amp 1 CV-LG3 cr
Guitar Amp 1 CV-LG3 ds1
Guitar Amp 1 CV-LG3 ds2
Guitar Amp 1 DR-MZ38 cl
Guitar Amp 1 DR-MZ38 cr
Guitar Amp 1 DZ-V4 cr
Guitar Amp 1 DZ-V4 mt
Guitar Amp 1 DZ-HA ds1
Guitar Amp 1 DZ-HA ds2
Guitar Amp 1 EG-TWK cl
Guitar Amp 1 EG-TWK cr
Guitar Amp 1 EG-TWK od
Guitar Amp 1 EG-TWK ds
Guitar Amp 1 EG-VEN cl
Guitar Amp 1 EG-VEN cr
Guitar Amp 1 EG-VEN ds
Guitar Amp 1 EN-G15 cl
Guitar Amp 1 EN-G15 ds
Guitar Amp 1 EN-INV
Guitar Amp 1 EN-BM
Guitar Amp 1 EV-51III cl
Guitar Amp 1 EV-51III od
Guitar Amp 1 EV-51III ds
Guitar Amp 1 EV-51III mt
Guitar Amp 1 FD-CHMP cl
Guitar Amp 1 FD-CHMP cr
Guitar Amp 1 FD-CHMP od
Guitar Amp 1 FD-TWN cl
Guitar Amp 1 FD-TWN cr
Guitar Amp 1 FD-TWN od
Guitar Amp 1 FD-TWRV3 cl
Guitar Amp 1 FD-TWRV3 cr
Guitar Amp 1 FD-TWRV3 od
Guitar Amp 1 FU-OD cr
Guitar Amp 1 FU-OD od
Guitar Amp 1 GB-LANC cl
Guitar Amp 1 GB-LANC od
Guitar Amp 1 HK-TM18 cl
Guitar Amp 1 HK-TM18 cr
Guitar Amp 1 HK-TM18 od
Guitar Amp 1 HK-SBL ds1
Guitar Amp 1 HK-SBL ds2
Category
Type

Reference
EN-205
Guitar Amp 1 HK-SBL ds3
Guitar Amp 1 KH-STDT cl
Guitar Amp 1 KH-STDT od
Guitar Amp 1 KR-RV ds
Guitar Amp 1 KR-RV mt1
Guitar Amp 1 KR-RV mt2
Guitar Amp 1 LY-IRST cl
Guitar Amp 1 LY-IRST cr
Guitar Amp 1 LY-IRST ds
Guitar Amp 1 LY-IRST mt
Guitar Amp 1 MB-MK3 cl
Guitar Amp 1 MB-MK3 od
Guitar Amp 1 MB-MK3 ds
Guitar Amp 1 MB-D5 ds
Guitar Amp 1 MB-DRCT ds
Guitar Amp 1 MB-DRCT mt1
Guitar Amp 1 MB-DRCT mt2
Guitar Amp 1 MB-DRCT mt3
Guitar Amp 1 MB-TX+.5 ds
Guitar Amp 1 MS-VS80 cl
Guitar Amp 1 MS-VS80 cr
Guitar Amp 1 MS-VS80 od
Guitar Amp 1 MS-VS80 ds
Guitar Amp 1 MS-J800 cl
Guitar Amp 1 MS-J800 cr
Guitar Amp 1 MS-J800 ds
Guitar Amp 1 MS-J800 f10
Guitar Amp 1 MS-J2401 od
Guitar Amp 1 MS-J2401 ds
Guitar Amp 1 MS-J2000 cl
Guitar Amp 1 MS-J2000 cr
Guitar Amp 1 MS-J2000 ds
Guitar Amp 1 MS-J2+MB ds
Guitar Amp 1 MS-J2+MB mt
Guitar Amp 1 MS-PLX cr
Guitar Amp 1 MS-PLX od
Guitar Amp 1 MS-PLX ds
Guitar Amp 1 MT-CFT cl1
Category
Type
Guitar Amp 1 MT-CFT cl2
Guitar Amp 1 MT-CFT cr
Guitar Amp 1 MT-CFT od
Guitar Amp 1 OR-O15 cl
Guitar Amp 1 OR-O15 cr
Guitar Amp 1 OR-O15 od
Guitar Amp 1 OR-O15 ds
Guitar Amp 1 PN-P7 cl
Guitar Amp 1 PN-P7 ds
Guitar Amp 1 PR-SE3 cl
Guitar Amp 1 PR-SE3 cr
Guitar Amp 1 PR-SE3 ds
Guitar Amp 2 PV-51II ds1
Guitar Amp 2 PV-51II ds2
Guitar Amp 2 PV-51II ds3
Guitar Amp 2 PV-51II ds4
Guitar Amp 2 PV-65MH cr
Guitar Amp 2 PV-65MH od
Guitar Amp 2 PV-65MH ds1
Guitar Amp 2 PV-65MH ds2
Guitar Amp 2 RA-NBK cl
Guitar Amp 2 RA-NBK cr
Guitar Amp 2 RA-NBK ds
Guitar Amp 2 RL-J20 cl
Guitar Amp 2 RL-J20 ds
Guitar Amp 2 RL-J120 cl
Guitar Amp 2 RL-J120 ds
Guitar Amp 2 RV-30 cl
Guitar Amp 2 RV-30 cr
Guitar Amp 2 SA-PS1 cl
Guitar Amp 2 SA-PS1 od
Guitar Amp 2 SA-PS1 ds
Guitar Amp 2 SA-PS1 mt
Guitar Amp 2 SL-X8 cl
Guitar Amp 2 SL-X8 cr
Guitar Amp 2 SL-X9 ds1
Guitar Amp 2 SL-X9 ds2
Guitar Amp 2 SP-1624 cl
Category
Type

Reference
EN-206
Guitar Amp 2 SP-1624 cr
Guitar Amp 2 SP-1624 od
Guitar Amp 2 SP-1695 cl
Guitar Amp 2 SP-1695 cr
Guitar Amp 2 SP-1695 od
Guitar Amp 2 SU-BGR3 cl
Guitar Amp 2 SU-BGR3 od
Guitar Amp 2 SU-BGR3 ds
Guitar Amp 2 VH-SP6 cl
Guitar Amp 2 VH-SP6 od
Guitar Amp 2 VX-A15 cl
Guitar Amp 2 VX-A15 cr
Guitar Amp 2 VX-A15 od
Guitar Amp 2 VX-A15TB cl
Guitar Amp 2 VX-A15TB cr
Guitar Amp 2 VX-A30 cl
Guitar Amp 2 VX-A30 cr
Guitar Amp 2 VX-A30 od
Guitar Amp 2 VX-A30TB cl
Guitar Amp 2 VX-A30TB cr
Guitar Amp 2 VX-A30TB od
Guitar Amp 2 YM-DG8 cl
Guitar Amp 2 YM-DG8 cr
Guitar Amp 2 YM-DG8 od
Guitar Amp 2 YM-DG8 ds
Guitar Amp 2 YM-F112 cl
Guitar Amp 2 YM-F112 cl 87
Guitar Amp 2 YM-F112 cr
Guitar Amp 2 YM-F112 crD12
Guitar Amp 2 YM-F112 od
Guitar Amp 2 YM-F112 od 87
Guitar Amp 2 YM-F112a3
Guitar Amp 2 YM-F112a5
Guitar Amp 2 YM-F112a5 br
Guitar Amp 2 YM-F112a5 t-
Guitar Amp 2 YM-F112a5 b-
Guitar Amp 2 YM-F112a5 tb-
Guitar Amp 2 YM-F112a5 rv
Category
Type
Guitar Amp 2 YM-F112a5 fu
Guitar Amp 2 YM-F112a7
Guitar Amp 2 YM-F112aX
Guitar Amp 2 YM-F112aX fu
Guitar Amp 2 YM-F112A3
Guitar Amp 2 YM-F112A5
Guitar Amp 2 YM-F112A5 br
Guitar Amp 2 YM-F112A5 t-
Guitar Amp 2 YM-F112A5 b-
Guitar Amp 2 YM-F112A5 tb-
Guitar Amp 2 YM-F112A5 fu
Guitar Amp 2 YM-F112A5fubr
Guitar Amp 2 YM-F112A7
Guitar Amp 2 YM-F112AX
Guitar Amp 2 YM-F112AXfubr
Guitar Amp 2 YM-F112b35
Guitar Amp 2 YM-F112b3X
Guitar Amp 2 YM-F112b55
Guitar Amp 2 YM-F112b5X
Guitar Amp 2 YM-F112b5X br
Guitar Amp 2 YM-F112b5X t-
Guitar Amp 2 YM-F112b5X b-
Guitar Amp 2 YM-F112b5Xtb-
Guitar Amp 2 YM-F112b5X rv
Guitar Amp 2 YM-F112b5X fu
Guitar Amp 2 YM-F112b75
Guitar Amp 2 YM-F112b7X
Guitar Amp 2 YM-F112bX3tb-
Guitar Amp 2 YM-F112bX5
Guitar Amp 2 YM-F112bXX
Guitar Amp 2 YM-F112bXX fu
Guitar Amp 2 YM-F112bXXfub
Guitar Amp 2 YM-F112B3X
Guitar Amp 2 YM-F112B5X
Guitar Amp 2 YM-F112B5X br
Guitar Amp 2 YM-F112B5X t-
Guitar Amp 2 YM-F112B5X b-
Guitar Amp 2 YM-F112B5Xtb-
Category
Type

Reference
EN-207
Guitar Amp 2 YM-F112B5X rv
Guitar Amp 2 YM-F112B7X
Guitar Amp 2 YM-F112BXX
Guitar Amp 2 YM-F112BXXfub
Guitar Amp 2 YM-F115 cl
Guitar Amp 2 YM-F115 clD12
Guitar Amp 2 YM-F115 cr
Guitar Amp 2 YM-F115 cr 87
Guitar Amp 2 YM-F115 od
Guitar Amp 2 YM-F115 odD12
Guitar Amp 3 FRMS-M06dps L
Guitar Amp 3 FRMS-M06dpa R
Guitar Amp 3 MRS-HG06dpa L
Guitar Amp 3 MRS-HG06dpa R
Guitar Amp 3 MS-59SLdpa01L
Guitar Amp 3 MS-59SLdpa01R
Guitar Amp 3 MS-59SLdpa06L
Guitar Amp 3 MS-59SLdpa06R
Guitar Amp 3 MS-59SLdpa15L
Guitar Amp 3 MS-59SLdpa15R
Guitar Amp 3 MAES-60m02rvL
Guitar Amp 3 MAES-60m02rvR
Guitar Amp 3 PEG-60t5m1rvL
Guitar Amp 3 PEG-60t5m1rvR
Guitar Amp 3 FD-PRNC2ful1L
Guitar Amp 3 FD-PRNC2ful1R
Guitar Amp 3 FD-PRNC2ful2L
Guitar Amp 3 FD-PRNC2ful2R
Guitar Amp 3 FD-TRV4c15d6L
Guitar Amp 3 FD-TRV4c15d6R
Guitar Amp 3 GIB-GA06_M1 L
Guitar Amp 3 GIB-GA06_M1 R
Guitar Amp 3 GIB-GA06_M2 L
Guitar Amp 3 GIB-GA06_M2 R
Guitar Amp 3 GIB-GA20_M1 L
Guitar Amp 3 GIB-GA20_M1 R
Guitar Amp 3 GIB-GA20_M2 L
Guitar Amp 3 GIB-GA20_M2 R
Category
Type
Guitar Amp 3 RL-J12-5-L
Guitar Amp 3 RL-J12-5-R
Guitar Amp 3 RL-J12-FlF-L
Guitar Amp 3 RL-J12-FlF-R
Guitar Amp 3 RL-J12-Lo5-L
Guitar Amp 3 RL-J12-Lo5-R
Guitar Amp 3 RL-J12-LCB5-L
Guitar Amp 3 RL-J12-LCB5-R
Guitar Amp 3 RL-J12-Br5-L
Guitar Amp 3 RL-J12-Br5-R
Guitar Amp 3 RL-J12-BrF-L
Guitar Amp 3 RL-J12-BrF-R
Guitar Amp 3 RL-J12-Co5-L
Guitar Amp 3 RL-J12-Co5-R
Guitar Preamp EN-53+DI cl
Guitar Preamp EN-53+DI mt
Guitar Preamp MB-F3+DI cl
Guitar Preamp MB-F3+DI cr
Guitar Preamp MB-F3+DI ds
Guitar Preamp MB-TX+DI cl
Guitar Preamp MB-TX+DI cr
Guitar Preamp MB-TX+DI od
Guitar Preamp MB-TX+DI ds
Guitar Preamp MS-J1+DI cr
Guitar Preamp MS-J1+DI ds
Guitar Preamp YM-F112PRE
Guitar Preamp YM-F115PRE
Guitar Preamp RL-J12PrT-251
Guitar Preamp RL-J12PrT-252
Guitar Preamp RL-J12PrT-253
Guitar Preamp RL-J12PrT-2F
Guitar Preamp RL-J12PrTB2F
Guitar Preamp RL-J12PrT-25c
Guitar Preamp RL-J12PrT-25v
Guitar Preamp RL-J12PrT-2Fc
Guitar Preamp RL-J12PrT-2Fv
Guitar Preamp RL-J12Pr1-25
Guitar Preamp RL-J12Pr1-2F
Category
Type

Reference
EN-208
Guitar Preamp RL-J12Pr1B25
Guitar Preamp RL-J12Pr1B2F
Guitar Preamp RL-J12Pr2B35d
Guitar Preamp RL-J12Pr2-25r
Guitar Preamp RL-J12Pr2B25c
Guitar Preamp RL-J12Pr2B25v
Guitar Preamp RL-J12Sp-5-L
Guitar Preamp RL-J12Sp-5-R
Guitar Preamp RL-J12Sp-F-L
Guitar Preamp RL-J12Sp-F-R
Guitar Preamp RL-J12Sp-Co5L
Guitar Preamp RL-J12Sp-Co5R
Guitar Preamp RL-J12Sp-CB5L
Guitar Preamp RL-J12Sp-CB5R
Guitar Preamp RL-J12Sp-CoFL
Guitar Preamp RL-J12Sp-CoFR
Acou Amp LY-3C-AC
Bass Amp BASS-CMB
Bass Amp FD-BMAN
Bass Amp BASS-STK
Bass Amp AC-360 cl1
Bass Amp AC-360 cl2
Bass Amp EB-C450 cl
Bass Amp EB-C450 cr
Bass Amp FD-BMNtw cr
Bass Amp FD-BMNtw od
Bass Amp FD-BMNsv cl1
Bass Amp FD-BMNsv cl2
Bass Amp FD-BMNbk cl1
Bass Amp FD-BMNbk cl2
Bass Amp FD-STBAS cl1
Bass Amp FD-STBAS cl2
Bass Amp GK-150 cl1
Bass Amp GK-150 cl2
Bass Amp GK-150DI
Bass Amp MK-T501 cl1
Bass Amp MK-T501 cl2
Bass Amp MK-T501 cl3
Category
Type
Bass Amp SW-PB20 cl1
Bass Amp SW-PB20 cl2
Bass Amp SW-PB20 cl3
Bass Amp SW-SM50 cl1
Bass Amp SW-SM50 cl2
Bass Amp SW-SM50 cl3
Bass Preamp AP-SV4DI cl1
Bass Preamp AP-SV4DI cl2
EP Preamp 1 RD-PRE-FF00
EP Preamp 1 RD-PsvCenter
EP Preamp 1 RD-FD-RrSp0L
EP Preamp 1 RD-FD-RrSp0R
EP Preamp 1 RD-FD-RrSp3L
EP Preamp 1 RD-FD-RrSp3R
EP Preamp 1 RD-FD-Sp0L
EP Preamp 1 RD-FD-Sp0R
EP Preamp 1 RD-FD-Sp4L
EP Preamp 1 RD-FD-Sp4R
EP Preamp 1 RD-SvPRE-05-L
EP Preamp 1 RD-SvPRE-05-R
EP Preamp 1 RD-SvPRE-0F-L
EP Preamp 1 RD-SvPRE-0F-R
EP Preamp 1 RD-SvPRE-5F-L
EP Preamp 1 RD-SvPRE-5F-R
EP Preamp 1 RD-SvPRE-FF-L
EP Preamp 1 RD-SvPRE-FF-R
EP Preamp 1 RD-PETPRE cnt
EP Preamp 1 RD-PETPRE tbF
EP Preamp 1 RD-PETPRE lo-
EP Preamp 1 RD-PETPRElo-2
EP Preamp 1 RD-PETPRE nrm
EP Preamp 1 RD-PETPREl-t+
EP Preamp 1 RD-PETPRE t+2
EP Preamp 1 RD-PETPRl-t+2
EP Preamp 1 RD-PETPREtrm1
EP Preamp 1 RD-PETPREtrm2
EP Preamp 1 RD-PETPREtrm3
EP Preamp 1 RD-PETPREtrmf
Category
Type

Reference
EN-209
EP Preamp 1 RD-PETPRE-1FL
EP Preamp 1 RD-PETPRE-1FR
EP Preamp 1 RD-PETPRE-55L
EP Preamp 1 RD-PETPRE-55R
EP Preamp 1 RD-PETPRE-5FL
EP Preamp 1 RD-PETPRE-5FR
EP Preamp 1 RD-PETPRE-FFL
EP Preamp 1 RD-PETPRE-FFR
EP Preamp 1 RD-MK1PRE flt
EP Preamp 1 RD-MK1PRE nrm
EP Preamp 1 RD-MK1PREt+b-
EP Preamp 1 RD-MK1PRE tbF
EP Preamp 1 RD-MK1PRE tb2
EP Preamp 1 RD-MK1PRE tb3
EP Preamp 1 RD-MK1PRE tb5
EP Preamp 1 RD-MK1PRt5b-5
EP Preamp 1 RD-MK1PREtb-3
EP Preamp 1 RD-MK1PREtb-5
EP Preamp 1 RD-MK1PRE vb
EP Preamp 1 RD-MK1PRE fvb
EP Preamp 1 RD-MK1PREsetB
EP Preamp 1 RD-MK1PRE-05L
EP Preamp 1 RD-MK1PRE-05R
EP Preamp 1 RD-MK1PRE-0FL
EP Preamp 1 RD-MK1PRE-0FR
EP Preamp 1 RD-MK1PRE-55L
EP Preamp 1 RD-MK1PRE-55R
EP Preamp 1 RD-MK1PRE-5FL
EP Preamp 1 RD-MK1PRE-5FR
EP Preamp 1 RD-MK2PRE cnt
EP Preamp 1 RD-MK2PRE lo-
EP Preamp 1 RD-MK2PRE hi+
EP Preamp 1 RD-MK2PRE nrm
EP Preamp 1 RD-MK2PRE 0vb
EP Preamp 1 RD-MK2PRE Fvb
EP Preamp 1 RD-MK2PRE hi-
EP Preamp 1 RD-MK2PRE hl-
EP Preamp 1 RD-MK2PRE lo+
Category
Type
EP Preamp 1 RD-MK2PRE-5F
EP Preamp 1 RD-MK2PRE-FF
EP Preamp 1 RD-MK2PREMinF
EP Preamp 1 RD-MK2PRE-0FL
EP Preamp 1 RD-MK2PRE-0FR
EP Preamp 1 RD-MK2PRE-55L
EP Preamp 1 RD-MK2PRE-55R
EP Preamp 1 RD-MK2PRE-5FL
EP Preamp 1 RD-MK2PRE-5FR
EP Preamp 1 RD-MK2PRE-FFL
EP Preamp 1 RD-MK2PRE-FFR
EP Preamp 1 RD-DMYPRE bs+
EP Preamp 1 RD-DMYPREbsmd
EP Preamp 1 RD-DMYPRE ot+
EP Preamp 1 RD-DMYPREovtm
EP Preamp 1 RD-DMYPREovtF
EP Preamp 1 RD-DMYPRE nrm
EP Preamp 1 RD-DMYPREaltB
EP Preamp 1 RD-DMYP-Tpn3L
EP Preamp 1 RD-DMYP-Tpn3R
EP Preamp 1 RD-STWPRE nrm
EP Preamp 1 RD-STWPRE min
EP Preamp 1 RD-STWPRE hi+
EP Preamp 1 RD-STWPRE hiF
EP Preamp 1 RD-STWPREh+l+
EP Preamp 1 RD-STWPREhFl-
EP Preamp 2 WR-200PRE po
EP Preamp 2 WR-200PRE po2
EP Preamp 2 WR-200PRE spo
EP Preamp 2 WR-200PREspo2
EP Preamp 2 WR-200PREtrm1
EP Preamp 2 WR-200PREtrm2
EP Preamp 2 WR-200PREtrpo
EP Preamp 2 WR-200PRtrspo
EP Preamp 2 WR-200PRE-3dB
EP Preamp 2 WR-200PRE-Ful
EP Preamp 2 VV-RdMonFF00
EP Preamp 2 YM-CPPRE nrm
Category
Type
Reference
EN-210
EP Preamp 2 YM-CPPRE flt
EP Preamp 2 YM-CPPRE lo-
EP Preamp 2 YM-CPPRE bs-
EP Preamp 2 YM-CPPRE mid-
EP Preamp 2 YM-CPPRE tb-
EP Preamp 2 YM-CPPREbass+
EP Preamp 2 YM-CPPRE full
EP Preamp 2 YM-CPPREtrm
EP Preamp 2 YM-CPPREtrml-
EP Preamp 2 YM-CPPREtrmm+
EP Preamp 2 YM-CPPREtrmt+
EP Preamp 2 YM-CPPRE-00FL
EP Preamp 2 YM-CPPRE-00FR
EP Preamp 2 YM-CPPRE-05FL
EP Preamp 2 YM-CPPRE-05FR
EP Preamp 2 YM-CPPRE-22FL
EP Preamp 2 YM-CPPRE-22FR
EP Preamp 2 CLV-TABPREful
EP Preamp 2 CLV-TABPREbri
EP Preamp 2 CLV-TABPREtrb
EP Preamp 2 CLV-TABPREsft
EP Preamp 2 CLV-CMBPREnbr
EP Preamp 2 CLV-CMBPREntb
EP Preamp 2 CLV-CMBPREnmd
EP Preamp 2 CLV-CMBPREnsf
EP Preamp 2 CLV-CMBPREmed
EP Preamp 2 CLV-CMBPREsft
EP Preamp 2 CLV-CMBPRmsft
EP Preamp 2 CLV-CMBPRtsft
EP Preamp 2 CLV-CMBPbtsft
Organ Amp LES-Mc1mHnOfL
Organ Amp LES-Mc1mHnOfR
Organ Amp LES-Mc1mHnOnL
Organ Amp LES-Mc1mHnOnR
Organ Amp LES-McHiHnOfL
Organ Amp LES-McHiHnOfR
Organ Amp LES-McHiHnOnL
Organ Amp LES-McHiHnOnR
Category
Type
Organ Amp LES-McLoHnOfL
Organ Amp LES-McLoHnOfR
Organ Amp LES-McLoHnOnL
Organ Amp LES-McLoHnOnR
Organ Amp LES-McMxHnOfL
Organ Amp LES-McMxHnOfR
Organ Amp LES-McMxHnOnL
Organ Amp LES-McMxHnOnR
Inst Amp RL-CBKB
Audio Device SPK-7VINT L
Audio Device SPK-7VINT R
Audio Device SPK-DTOP-2B L
Audio Device SPK-DTOP-2B R
Audio Device SPK-DSCPOOL L
Audio Device SPK-DSCPOOL R
Audio Device SPK-SILmicroL
Audio Device SPK-SILmicroR
Audio Device TOYSP-RNGO L
Audio Device TOYSP-RNGO R
Audio Device TOYSP-SYUBO L
Audio Device TOYSP-SYUBO R
Audio Device MEGAPH-FET L
Audio Device MEGAPH-FET R
Audio Device TV-37 L
Audio Device TV-37 R
Audio Device TV-SAMS-50 L
Audio Device TV-SAMS-50 R
Audio Device RADIO-SallBkL
Audio Device RADIO-SallBkR
Audio Device RADIO-NICO L
Audio Device RADIO-NICO R
Audio Device RADIO-NOVK L
Audio Device RADIO-NOVK R
Audio Device RADIO-TELF L
Audio Device RADIO-TELF R
Audio Device RADIO-TSTR L
Audio Device RADIO-TSTR R
Audio Device RADIO-ZENT L
Category
Type

Reference
EN-211
Audio Device RADIO-ZENT R
Audio Device RECPL-DANS L
Audio Device RECPL-DANS R
Audio Device RECPL-EDN L
Audio Device RECPL-EDN R
Audio Device RECPL-JOPH L
Audio Device RECPL-JOPH R
Audio Device RECPL-REDH L
Audio Device RECPL-REDH R
Audio Device RECPL-REEL L
Audio Device RECPL-REEL R
Audio Device PC-McMini L
Audio Device PC-McMini R
Audio Device PC-LAPTOP15 L
Audio Device PC-LAPTOP15 R
Audio Device TABLT-iPD3 L
Audio Device TABLT-iPD3 R
Audio Device TABLT-9G L
Audio Device TABLT-9G R
Audio Device PHONE-iPh5 L
Audio Device PHONE-iPh5 R
Audio Device PHONE-AK L
Audio Device PHONE-AK R
Audio Device EARP-WH L
Audio Device EARP-WH R
Audio Device HDPH-AV35BL L
Audio Device HDPH-AV35BL R
Audio Device CAR-OPL L
Audio Device CAR-OPL R
Audio Device CAR-SednPassL
Audio Device CAR-SednPassR
Audio Device GNL-Mic-0-L
Audio Device GNL-Mic-0-R
Audio Device GNL-Mic-3-L
Audio Device GNL-Mic-3-R
Audio Device GNL-Mic-6-L
Audio Device GNL-Mic-6-R
Other Preamp LES-CMBPREnrm
Category
Type
Other Preamp LES-CMBPREdrv
Other Preamp LES-CMBPREbas
Other Preamp LES-CMBPREclp
Other Preamp LES-CMBPRE od
Other Preamp LES-CMBPREodF
Other Preamp RL-VPPRE drv
Other Preamp RL-VPPRE ful
Other Preamp RL-VPPRE nrm
Other Preamp RL-VPPRE toff
Other Preamp CountryM-DI
Other Preamp RadiJDV-DI
Other Preamp RadiPro48-DI
Other Preamp RadiPro48-Pad
Other Preamp RetroTube
Other Preamp RetroTubeWt
Other Preamp RetroTubeWtOd
Other Preamp TTNX-LA2-00dB
Other Preamp TTNX-LA2-03dB
Other Preamp NEV-1272-3dbL
Other Preamp NEV-1272-3dbR
Other Preamp NEV-1272-6dbL
Other Preamp NEV-1272-6dbR
Synth Module MG-M-VCF co00
Synth Module MG-M-VCF co01
Synth Module MG-M-VCF co02
Synth Module MG-M-VCF co03
Synth Module MG-M-VCF co04
Synth Module MG-M-VCF co05
Synth Module MG-M-VCF co06
Synth Module MG-M-VCF co07
Synth Module MG-M-VCF co08
Synth Module MG-M-VCF co09
Synth Module MG-M-VCF co10
Synth Module MG-M-VCFco0ol
Synth Module MG-M-VCFco1ol
Synth Module MG-M-VCFco2ol
Synth Module MG-M-VCFco3ol
Synth Module MG-M-VCFco4ol
Category
Type

Reference
EN-212
Synth Module MG-M-VCFco5ol
Synth Module MG-M-VCFco6ol
Synth Module MG-M-VCFco7ol
Synth Module MG-M-VCFco8ol
Synth Module MG-M-VCFco9ol
Synth Module MG-M-VCFc10ol
Synth Module MG-M-VCFc00nk
Synth Module MG-M-VCFc01nk
Synth Module MG-M-VCFc02nk
Synth Module MG-M-VCFc03nk
Synth Module MG-M-VCFc04nk
Synth Module MG-M-VCFc05nk
Synth Module MG-M-VCFc06nk
Synth Module MG-M-VCFc07nk
Synth Module MG-M-VCFc08nk
Synth Module MG-M-VCFc09nk
Synth Module MG-M-VCFc10nk
Synth Module MG-Pha06P-Lo1
Synth Module MG-Pha06P-Hi1
Synth Module MG-Pha12P-Lo1
Synth Module MG-Pha12P-Hi1
Effect 1 AC-SIM-CUB
Effect 1 AC-SIM-CDH
Effect 1 AC-SIM-ZOM1
Effect 1 AC-SIM-ZOM2
Effect 1 APX-EXT-RED
Effect 1 APX-EXT-RED05
Effect 1 APX-EXT-RED07
Effect 1 APX-EXT-RED09
Effect 1 APX-EXT-VIN
Effect 1 APX-EXT-VIN05
Effect 1 APX-EXT-VIN07
Effect 1 APX-EXT-VIN09
Effect 1 APX-A602B-50L
Effect 1 APX-A602B-50R
Effect 1 APX-A602B-90L
Effect 1 APX-A602B-90R
Effect 1 APX-ST2-FlHiL
Category
Type
Effect 1 APX-ST2-FlHiR
Effect 1 APX-ST2-MoHiL
Effect 1 APX-ST2-MoHiR
Effect 1 STR-EXT gin-
Effect 1 STR-EXT gin+
Effect 1 STR-EXT nsgn-
Effect 1 STR-EXTAnsgn-
Effect 1 NSF-EXT gin+
Effect 1 NSF-EXTA gin+
Effect 1 SS-RED cl-off
Effect 1 SS-RED cloff1
Effect 1 SS-RED cloff2
Effect 1 SS-RED cloffS
Effect 1 SS-RED cloffF
Effect 1 SS-RED cl-on
Effect 1 SS-RED cl-on1
Effect 1 SS-RED cl-on2
Effect 1 SS-RED clonSl
Effect 1 SS-RED clonFs
Effect 1 SS-OLD cl-off
Effect 1 SS-OLD cloff1
Effect 1 SS-OLD cloff2
Effect 1 SS-OLD cloffS
Effect 1 SS-OLD cloffF
Effect 1 SS-OLD cl-on
Effect 1 SS-OLD cl-on1
Effect 1 SS-OLD cl-on2
Effect 1 SS-OLD cl-onS
Effect 1 SS-OLD cl-onF
Effect 1 EPX-PRE-DI1
Effect 1 EPX-PRE-DI2
Effect 1 EPX-PRE-Dry1
Effect 1 EPX-PRE-Dry2
Effect 1 EPX-PRELgDI1
Effect 1 EPX-PREShDly1
Effect 1 EPX-PRELgDly1
Effect 1 MAE-Pha-1
Effect 1 MAE-Pha-2
Category
Type

Reference
EN-213
Effect 1 MAE-Pha-Sl
Effect 1 MAE-Pha-Fs
Effect 1 MXO-Pha-1
Effect 1 MX-Cho120012L
Effect 1 MX-Cho120012R
Effect 1 MX-Cho121200L
Effect 1 MX-Cho121200R
Effect 1 MX-Cho121212L
Effect 1 MX-Cho121212R
Effect 1 MX-Cho12FF12L
Effect 1 MX-Cho12FF12R
Effect 1 MX-Pha90-Blk1
Effect 1 MX-Pha90-BlkS
Effect 1 MX-Pha90-Led1
Effect 1 MX-Pha90-LedS
Effect 1 MX-Pha90-Old1
Effect 1 MX-Pha90-OldS
Effect 1 MX-Pha-Blkm 1
Effect 1 MX-Pha-Scrp 1
Effect 1 OBH-Pha 1
Effect 1 OBH-Pha Sl
Effect 1 OBH-Pha Fs1
Effect 2 UVB-PhaCho 1
Effect 2 UVB-PhaChoSl
Effect 2 UVB-PhaChoMo1
Effect 2 UVB-PhaChoMoS
Effect 2 UVB-PhaVib
Effect 2 UVB-PhaVibSl
Effect 2 UVB-PhaVibMoS
Effect 2 SEI-Fuz Soft
Effect 2 SEI-Fuz Hard
Effect 2 SEI-SFuzTonDl
Effect 2 SEI-SFuzTonUp
Effect 2 VX-FuzDown 1
Effect 2 VX-FuzUp 1
Effect 2 BOS-CE1-F5-L
Effect 2 BOS-CE1-F5-R
Effect 2 BOS-CE1-FMaxL
Category
Type
Effect 2 BOS-CE1-FMaxR
Effect 2 BOS-CE1-OvldL
Effect 2 BOS-CE1-OvldR
Effect 2 RL-DIMEN-SW1L
Effect 2 RL-DIMEN-SW1R
Effect 2 RL-DIMEN-SW2L
Effect 2 RL-DIMEN-SW2R
Effect 2 RL-DIMEN-SW3L
Effect 2 RL-DIMEN-SW3R
Effect 2 RL-DIMEN-SW4L
Effect 2 RL-DIMEN-SW4R
Effect 2 TCE-1210St1-L
Effect 2 TCE-1210St1-R
Effect 2 TCE-1210St2-L
Effect 2 TCE-1210St2-R
Effect 3 DEK-Cas-Dk10L
Effect 3 DEK-Cas-Dk10R
Effect 3 DEK-Cas-MdFlL
Effect 3 DEK-Cas-MdFlR
Effect 3 DEK-Cas-BrFlL
Effect 3 DEK-Cas-BrFlR
Effect 3 DEK-Stu-Dk10L
Effect 3 DEK-Stu-Dk10R
Effect 3 DEK-Stu-MdFlL
Effect 3 DEK-Stu-MdFlR
Effect 3 DEK-Stu-BrFlL
Effect 3 DEK-Stu-BrFlR
Effect 3 STEC-AN2-55-L
Effect 3 STEC-AN2-55-R
Effect 3 STEC-AN2-FF-L
Effect 3 STEC-AN2-FF-R
Equalizer 1 Flat
Equalizer 1 SSL lcut00
Equalizer 1 SSL lcut10
Equalizer 1 SSL lcut20
Equalizer 1 SSL lcut40
Equalizer 1 SSL lcut70
Equalizer 1 SSL lcut120
Category
Type

Reference
EN-214
Equalizer 1 SSL lmcut160
Equalizer 1 SSL lmcut200
Equalizer 1 SSL lmcut300
Equalizer 1 SSL lmcut400
Equalizer 1 SSL air med
Equalizer 1 SSL air ful
Equalizer 1 TRB-BSTslight
Equalizer 1 TRB-BST half
Equalizer 1 TRB-BST med
Equalizer 1 TRB-BST full
Equalizer 1 PARA-BST h
Equalizer 1 PARA-BST h+
Equalizer 1 PARA-BST h+m+
Equalizer 1 PARA-BST h++
Equalizer 1 PARA-BST hm
Equalizer 1 PARA-BSThm ms
Equalizer 1 BASFIL flat
Equalizer 1 BASFIL shl00
Equalizer 1 BASFIL shl10
Equalizer 1 BASFIL shl20
Equalizer 1 BASFIL shl30
Equalizer 1 BASFIL shl40
Equalizer 1 BASFIL shl50
Equalizer 1 BASFIL shl60
Equalizer 1 BASFIL shl70
Equalizer 1 BASFIL shl80
Equalizer 1 BASFIL shl90
Equalizer 1 BASFIL dep00
Equalizer 1 BASFIL dep10
Equalizer 1 BASFIL dep20
Equalizer 1 BASFIL dep30
Equalizer 1 BASFIL dep40
Equalizer 1 BASFIL dep50
Equalizer 1 BASFIL dep60
Equalizer 1 BASFIL dep75
Equalizer 1 BASFIL dep90
Equalizer 1 SPRK-EQ w/b
Equalizer 1 SPRK-EQ med
Category
Type
Equalizer 1 SPRK-EQup bas
Equalizer 1 SPRK-EQup w/b
Equalizer 2 E-Hb6Q10-04KL
Equalizer 2 E-Hb6Q10-04KR
Equalizer 2 E-Hb6Q10-05KL
Equalizer 2 E-Hb6Q10-05KR
Equalizer 2 E-Hb6Q10-06KL
Equalizer 2 E-Hb6Q10-06KR
Equalizer 2 E-Hb6Q10-07KL
Equalizer 2 E-Hb6Q10-07KR
Equalizer 2 E-Hb6Q10-08KL
Equalizer 2 E-Hb6Q10-08KR
Equalizer 2 E-Hb6Q10-09KL
Equalizer 2 E-Hb6Q10-09KR
Equalizer 2 E-Hb6Q10-10KL
Equalizer 2 E-Hb6Q10-10KR
Equalizer 2 E-Hb6Q10-11KL
Equalizer 2 E-Hb6Q10-11KR
Equalizer 2 E-Hb6Q10-12KL
Equalizer 2 E-Hb6Q10-12KR
Equalizer 2 E-Hb6Q10-13KL
Equalizer 2 E-Hb6Q10-13KR
Equalizer 2 E-Hb6Q10-14KL
Equalizer 2 E-Hb6Q10-14KR
Equalizer 2 E-Hb6Q10-15KL
Equalizer 2 E-Hb6Q10-15KR
Equalizer 2 E-Hb6Q10-16KL
Equalizer 2 E-Hb6Q10-16KR
Equalizer 2 E-Hb6Q10-17KL
Equalizer 2 E-Hb6Q10-17KR
Equalizer 2 E-Hb6Q10-18KL
Equalizer 2 E-Hb6Q10-18KR
Equalizer 2 E-Hb6Q10-19KL
Equalizer 2 E-Hb6Q10-19KR
Equalizer 2 E-Hb6Q10-20KL
Equalizer 2 E-Hb6Q10-20KR
Equalizer 2 E-Hb6Q14-04KL
Equalizer 2 E-Hb6Q14-04KR
Category
Type

Reference
EN-215
Equalizer 2 E-Hb6Q14-05KL
Equalizer 2 E-Hb6Q14-05KR
Equalizer 2 E-Hb6Q14-06KL
Equalizer 2 E-Hb6Q14-06KR
Equalizer 2 E-Hb6Q14-07KL
Equalizer 2 E-Hb6Q14-07KR
Equalizer 2 E-Hb6Q14-08KL
Equalizer 2 E-Hb6Q14-08KR
Equalizer 2 E-Hb6Q14-09KL
Equalizer 2 E-Hb6Q14-09KR
Equalizer 2 E-Hb6Q14-10KL
Equalizer 2 E-Hb6Q14-10KR
Equalizer 2 E-Hb6Q14-11KL
Equalizer 2 E-Hb6Q14-11KR
Equalizer 2 E-Hb6Q14-12KL
Equalizer 2 E-Hb6Q14-12KR
Equalizer 2 E-Hb6Q14-13KL
Equalizer 2 E-Hb6Q14-13KR
Equalizer 2 E-Hb6Q14-14KL
Equalizer 2 E-Hb6Q14-14KR
Equalizer 2 E-Hb6Q14-15KL
Equalizer 2 E-Hb6Q14-15KR
Equalizer 2 E-Hb6Q14-16KL
Equalizer 2 E-Hb6Q14-16KR
Equalizer 2 E-Hb6Q14-17KL
Equalizer 2 E-Hb6Q14-17KR
Equalizer 2 E-Hb6Q14-18KL
Equalizer 2 E-Hb6Q14-18KR
Equalizer 2 E-Hb6Q14-19KL
Equalizer 2 E-Hb6Q14-19KR
Equalizer 2 E-Hb6Q14-20KL
Equalizer 2 E-Hb6Q14-20KR
Equalizer 2 E-Hb6Q20-04KL
Equalizer 2 E-Hb6Q20-04KR
Equalizer 2 E-Hb6Q20-05KL
Equalizer 2 E-Hb6Q20-05KR
Equalizer 2 E-Hb6Q20-06KL
Equalizer 2 E-Hb6Q20-06KR
Category
Type
Equalizer 2 E-Hb6Q20-07KL
Equalizer 2 E-Hb6Q20-07KR
Equalizer 2 E-Hb6Q20-08KL
Equalizer 2 E-Hb6Q20-08KR
Equalizer 2 E-Hb6Q20-09KL
Equalizer 2 E-Hb6Q20-09KR
Equalizer 2 E-Hb6Q20-10KL
Equalizer 2 E-Hb6Q20-10KR
Equalizer 2 E-Hb6Q20-11KL
Equalizer 2 E-Hb6Q20-11KR
Equalizer 2 E-Hb6Q20-12KL
Equalizer 2 E-Hb6Q20-12KR
Equalizer 2 E-Hb6Q20-13KL
Equalizer 2 E-Hb6Q20-13KR
Equalizer 2 E-Hb6Q20-14KL
Equalizer 2 E-Hb6Q20-14KR
Equalizer 2 E-Hb6Q20-15KL
Equalizer 2 E-Hb6Q20-15KR
Equalizer 2 E-Hb6Q20-16KL
Equalizer 2 E-Hb6Q20-16KR
Equalizer 2 E-Hb6Q20-17KL
Equalizer 2 E-Hb6Q20-17KR
Equalizer 2 E-Hb6Q20-18KL
Equalizer 2 E-Hb6Q20-18KR
Equalizer 2 E-Hb6Q20-19KL
Equalizer 2 E-Hb6Q20-19KR
Equalizer 2 E-Hb6Q20-20KL
Equalizer 2 E-Hb6Q20-20KR
Equalizer 3 E-LoCt00 BypL
Equalizer 3 E-LoCt00 BypR
Equalizer 3 E-LoCt06 BypL
Equalizer 3 E-LoCt06 BypR
Equalizer 3 E-LoCt06 020L
Equalizer 3 E-LoCt06 020R
Equalizer 3 E-LoCt06 030L
Equalizer 3 E-LoCt06 030R
Equalizer 3 E-LoCt06 040L
Equalizer 3 E-LoCt06 040R
Category
Type

Reference
EN-216
Equalizer 3 E-LoCt06 050L
Equalizer 3 E-LoCt06 050R
Equalizer 3 E-LoCt06 060L
Equalizer 3 E-LoCt06 060R
Equalizer 3 E-LoCt06 070L
Equalizer 3 E-LoCt06 070R
Equalizer 3 E-LoCt06 080L
Equalizer 3 E-LoCt06 080R
Equalizer 3 E-LoCt06 090L
Equalizer 3 E-LoCt06 090R
Equalizer 3 E-LoCt06 100L
Equalizer 3 E-LoCt06 100R
Equalizer 3 E-LoCt06 110L
Equalizer 3 E-LoCt06 110R
Equalizer 3 E-LoCt06 120L
Equalizer 3 E-LoCt06 120R
Equalizer 3 E-LoCt06 130L
Equalizer 3 E-LoCt06 130R
Equalizer 3 E-LoCt06 140L
Equalizer 3 E-LoCt06 140R
Equalizer 3 E-LoCt06 150L
Equalizer 3 E-LoCt06 150R
Equalizer 3 E-LoCt06 160L
Equalizer 3 E-LoCt06 160R
Equalizer 3 E-LoCt06 170L
Equalizer 3 E-LoCt06 170R
Equalizer 3 E-LoCt06 180L
Equalizer 3 E-LoCt06 180R
Equalizer 3 E-LoCt06 190L
Equalizer 3 E-LoCt06 190R
Equalizer 3 E-LoCt06 200L
Equalizer 3 E-LoCt06 200R
Equalizer 3 E-LoCt06 210L
Equalizer 3 E-LoCt06 210R
Equalizer 3 E-LoCt06 220L
Equalizer 3 E-LoCt06 220R
Equalizer 3 E-LoCt06 230L
Equalizer 3 E-LoCt06 230R
Category
Type
Equalizer 3 E-LoCt06 240L
Equalizer 3 E-LoCt06 240R
Equalizer 3 E-LoCt06 250L
Equalizer 3 E-LoCt06 250R
Equalizer 3 E-LoCt06 260L
Equalizer 3 E-LoCt06 260R
Equalizer 3 E-LoCt06 270L
Equalizer 3 E-LoCt06 270R
Equalizer 3 E-LoCt06 280L
Equalizer 3 E-LoCt06 280R
Equalizer 3 E-LoCt06 290L
Equalizer 3 E-LoCt06 290R
Equalizer 3 E-LoCt06 300L
Equalizer 3 E-LoCt06 300R
Equalizer 3 E-LoCt06 310L
Equalizer 3 E-LoCt06 310R
Equalizer 3 E-LoCt06 320L
Equalizer 3 E-LoCt06 320R
Equalizer 3 E-LoCt06 330L
Equalizer 3 E-LoCt06 330R
Equalizer 3 E-LoCt06 340L
Equalizer 3 E-LoCt06 340R
Equalizer 3 E-LoCt06 350L
Equalizer 3 E-LoCt06 350R
Equalizer 3 E-LoCt06 360L
Equalizer 3 E-LoCt06 360R
Equalizer 3 E-LoCt06 370L
Equalizer 3 E-LoCt06 370R
Equalizer 3 E-LoCt06 380L
Equalizer 3 E-LoCt06 380R
Equalizer 3 E-LoCt06 390L
Equalizer 3 E-LoCt06 390R
Equalizer 3 E-LoCt06 400L
Equalizer 3 E-LoCt06 400R
Equalizer 3 E-LoCt06 410L
Equalizer 3 E-LoCt06 410R
Equalizer 3 E-LoCt06 420L
Equalizer 3 E-LoCt06 420R
Category
Type

Reference
EN-217
Equalizer 3 E-LoCt06 430L
Equalizer 3 E-LoCt06 430R
Equalizer 3 E-LoCt06 440L
Equalizer 3 E-LoCt06 440R
Equalizer 3 E-LoCt06 450L
Equalizer 3 E-LoCt06 450R
Equalizer 3 E-LoCt06 460L
Equalizer 3 E-LoCt06 460R
Equalizer 3 E-LoCt06 470L
Equalizer 3 E-LoCt06 470R
Equalizer 3 E-LoCt06 480L
Equalizer 3 E-LoCt06 480R
Equalizer 4 E-40Q2-3-04KL
Equalizer 4 E-40Q2-3-04KR
Equalizer 4 E-40Q2-3-05KL
Equalizer 4 E-40Q2-3-05KR
Equalizer 4 E-40Q2-3-06KL
Equalizer 4 E-40Q2-3-06KR
Equalizer 4 E-40Q2-3-07KL
Equalizer 4 E-40Q2-3-07KR
Equalizer 4 E-40Q2-3-08KL
Equalizer 4 E-40Q2-3-08KR
Equalizer 4 E-40Q2-3-09KL
Equalizer 4 E-40Q2-3-09KR
Equalizer 4 E-40Q2-3-10KL
Equalizer 4 E-40Q2-3-10KR
Equalizer 4 E-40Q2-3-11KL
Equalizer 4 E-40Q2-3-11KR
Equalizer 4 E-40Q2-3-12KL
Equalizer 4 E-40Q2-3-12KR
Equalizer 4 E-40Q2-3-13KL
Equalizer 4 E-40Q2-3-13KR
Equalizer 4 E-40Q2-3-14KL
Equalizer 4 E-40Q2-3-14KR
Equalizer 4 E-40Q2-3-15KL
Equalizer 4 E-40Q2-3-15KR
Equalizer 4 E-40Q2-3-16KL
Equalizer 4 E-40Q2-3-16KR
Category
Type
Equalizer 4 E-40Q2-3-17KL
Equalizer 4 E-40Q2-3-17KR
Equalizer 4 E-40Q2-3-18KL
Equalizer 4 E-40Q2-3-18KR
Equalizer 4 E-40Q2-3-19KL
Equalizer 4 E-40Q2-3-19KR
Equalizer 4 E-40Q2-3-20KL
Equalizer 4 E-40Q2-3-20KR
Equalizer 4 E-40Q2-6-04KL
Equalizer 4 E-40Q2-6-04KR
Equalizer 4 E-40Q2-6-05KL
Equalizer 4 E-40Q2-6-05KR
Equalizer 4 E-40Q2-6-06KL
Equalizer 4 E-40Q2-6-06KR
Equalizer 4 E-40Q2-6-07KL
Equalizer 4 E-40Q2-6-07KR
Equalizer 4 E-40Q2-6-08KL
Equalizer 4 E-40Q2-6-08KR
Equalizer 4 E-40Q2-6-09KL
Equalizer 4 E-40Q2-6-09KR
Equalizer 4 E-40Q2-6-10KL
Equalizer 4 E-40Q2-6-10KR
Equalizer 4 E-40Q2-6-11KL
Equalizer 4 E-40Q2-6-11KR
Equalizer 4 E-40Q2-6-12KL
Equalizer 4 E-40Q2-6-12KR
Equalizer 4 E-40Q2-6-13KL
Equalizer 4 E-40Q2-6-13KR
Equalizer 4 E-40Q2-6-14KL
Equalizer 4 E-40Q2-6-14KR
Equalizer 4 E-40Q2-6-15KL
Equalizer 4 E-40Q2-6-15KR
Equalizer 4 E-40Q2-6-16KL
Equalizer 4 E-40Q2-6-16KR
Equalizer 4 E-40Q2-6-17KL
Equalizer 4 E-40Q2-6-17KR
Equalizer 4 E-40Q2-6-18KL
Equalizer 4 E-40Q2-6-18KR
Category
Type

Reference
EN-218
Equalizer 4 E-40Q2-6-19KL
Equalizer 4 E-40Q2-6-19KR
Equalizer 4 E-40Q2-6-20KL
Equalizer 4 E-40Q2-6-20KR
Equalizer 4 E-001Lo12 L
Equalizer 4 E-001Lo12 R
Equalizer 4 E-001Lo16 L
Equalizer 4 E-001Lo16 R
Equalizer 4 E-002LoMd12 L
Equalizer 4 E-002LoMd12 R
Equalizer 4 E-002LoMd16 L
Equalizer 4 E-002LoMd16 R
Equalizer 4 E-003HiMd12 L
Equalizer 4 E-003HiMd12 R
Equalizer 4 E-003HiMd16 L
Equalizer 4 E-003HiMd16 R
Equalizer 4 E-004Hi12 L
Equalizer 4 E-004Hi12 R
Equalizer 4 E-004Hi16 L
Equalizer 4 E-004Hi16 R
Song 1 S-Albeniz L
Song 1 S-Albeniz R
Song 1 S-Bch-FrnchL
Song 1 S-Bch-FrnchR
Song 1 S-Bch-FrnchEL
Song 1 S-Bch-FrnchER
Song 1 S-Bet-Sn2301L
Song 1 S-Bet-Sn2301R
Song 1 S-Bet-Sn2302L
Song 1 S-Bet-Sn2302R
Song 1 S-Bet-Sn2303L
Song 1 S-Bet-Sn2303R
Song 1 S-Bet-Sn3201L
Song 1 S-Bet-Sn3201R
Song 1 S-Bet-Sn3202L
Song 1 S-Bet-Sn3202R
Song 1 S-Biz-HorrowL
Song 1 S-Biz-HorrowR
Category
Type
Song 1 S-Brm-HangarL
Song 1 S-Brm-HangarR
Song 1 S-Brm-IntermL
Song 1 S-Brm-IntermR
Song 1 S-Brm-VWaltzL
Song 1 S-Brm-VWaltzR
Song 1 S-Brm-VariatL
Song 1 S-Brm-VariatR
Song 1 S-Chp-Etude9L
Song 1 S-Chp-Etude9R
Song 1 S-Chp-EtudeFL
Song 1 S-Chp-EtudeFR
Song 1 S-Chp-MazulkL
Song 1 S-Chp-MazulkR
Song 1 S-Chp-TarantL
Song 1 S-Chp-TarantR
Song 1 S-Chp-WaltzDL
Song 1 S-Chp-WaltzDR
Song 1 S-Chp-WalzDbL
Song 1 S-Chp-WalzDbR
Song 1 S-Chp-WaltzGL
Song 1 S-Chp-WaltzGR
Song 1 S-Deb-Etude L
Song 1 S-Deb-Etude R
Song 1 S-Deb-Pre113L
Song 1 S-Deb-Pre113R
Song 1 S-Deb-PreludL
Song 1 S-Deb-PreludR
Song 1 S-Gsh-NobodyL
Song 1 S-Gsh-NobodyR
Song 1 S-Gsh-TheManL
Song 1 S-Gsh-TheManR
Song 1 S-Grn-Goya L
Song 1 S-Grn-Goya R
Song 1 S-Grg-Lyric L
Song 1 S-Grg-Lyric R
Song 1 S-Hyd-SonataL
Song 1 S-Hyd-SonataR
Category
Type

Reference
EN-219
Song 1 S-Lzt-Annee L
Song 1 S-Lzt-Annee R
Song 1 S-Lzt-Etude L
Song 1 S-Lzt-Etude R
Song 1 S-Lzt-Garop L
Song 1 S-Lzt-Garop R
Song 1 S-Lzt-Valse L
Song 1 S-Lzt-Valse R
Song 1 S-Prk-Etude L
Song 1 S-Prk-Etude R
Song 1 S-Rvl-Valse L
Song 1 S-Rvl-Valse R
Song 1 S-Scl-SonataL
Song 1 S-Scl-SonataR
Song 1 S-Sch-Inter L
Song 1 S-Sch-Inter R
Song 1 S-Sch-KinderL
Song 1 S-Sch-KinderR
Song 1 S-Sch-Scene L
Song 1 S-Sch-Scene R
Song 1 S-Tch-SeasonL
Song 1 S-Tch-SeasonR
Song 2 S-AllMyLov L
Song 2 S-AllMyLov R
Song 2 S-AllTheTngsL
Song 2 S-AllTheTngsR
Song 2 S-BegnTheBegL
Song 2 S-BegnTheBegR
Song 2 S-BirdLndSuiL
Song 2 S-BirdLndSuiR
Song 2 S-CountryIntL
Song 2 S-CountryIntR
Song 2 S-Country L
Song 2 S-Country R
Song 2 S-FutureMem L
Song 2 S-FutureMem R
Song 2 S-Hubris L
Song 2 S-Hubris R
Category
Type
Song 2 S-IllNevSmilL
Song 2 S-IllNevSmilR
Song 2 S-ItsTalkTwnL
Song 2 S-ItsTalkTwnR
Song 2 S-LadyBGood L
Song 2 S-LadyBGood R
Song 2 S-LovBloom L
Song 2 S-LovBloom R
Song 2 S-MistyCd L
Song 2 S-MistyCd R
Song 2 S-MistyRe L
Song 2 S-MistyRe R
Song 2 S-MyFavor L
Song 2 S-MyFavor R
Song 2 S-MySongInt L
Song 2 S-MySongInt R
Song 2 S-MySong L
Song 2 S-MySong R
Song 2 S-OneOclk L
Song 2 S-OneOclk R
Song 2 S-RusanLulbyL
Song 2 S-RusanLulbyR
Song 2 S-SundaySng L
Song 2 S-SundaySng R
Song 2 S-ThtOldFeelL
Song 2 S-ThtOldFeelR
Song 2 S-WhatNotSo L
Song 2 S-WhatNotSo R
Song 2 S-WhereWereUL
Song 2 S-WhereWereUR
Song 2 S-KJKolnP1 L
Song 2 S-KJKolnP1 R
Song 2 S-KJKolnP2 L
Song 2 S-KJKolnP2 R
Song 2 S-KJKolnP3 L
Song 2 S-KJKolnP3 R
Song 2 S-KJKolnP4 L
Song 2 S-KJKolnP4 R
Category
Type

Reference
EN-220
Song 2 S-SoftAs L
Song 2 S-SoftAs R
Song 2 S-SpkLike L
Song 2 S-SpkLike R
Song 2 S-Longing L
Song 2 S-Longing R
Song 2 S-Woods L
Song 2 S-Woods R
Song 2 S-CoronationL
Song 2 S-CoronationR
Song 2 S-Entertain L
Song 2 S-Entertain R
Song 2 S-Fatrances L
Song 2 S-Fatrances R
Song 2 S-MapleLfDryL
Song 2 S-MapleLfDryR
Song 2 S-MapleLfHalL
Song 2 S-MapleLfHalR
Song 2 S-NumbFum L
Song 2 S-NumbFum R
Song 2 S-Paragon L
Song 2 S-Paragon R
Song 2 S-RiffsSp L
Song 2 S-RiffsSp R
Song 2 S-SingRain L
Song 2 S-SingRain R
Song 2 S-SomeStool L
Song 2 S-SomeStool R
Song 2 S-Spaghetti L
Song 2 S-Spaghetti R
Song 3 S-Bhm-Tst L
Song 3 S-Bhm-Tst R
Song 3 S-Bhm-Edt L
Song 3 S-Bhm-Edt R
Song 3 S-Bhm-PfTst L
Song 3 S-Bhm-PfTst R
Song 3 S-Bhm-PfTst0L
Song 3 S-Bhm-PfTst0R
Category
Type
Song 3 S-Bhm-PfTs1bL
Song 3 S-Bhm-PfTs1bR
Song 3 S-Bhm-PfTst1L
Song 3 S-Bhm-PfTst1R
Song 3 S-Bhm-PfTst2L
Song 3 S-Bhm-PfTst2R
Song 3 S-Bhm-IntF1 L
Song 3 S-Bhm-IntF1 R
Song 3 S-Bhm-IntF2 L
Song 3 S-Bhm-IntF2 R
Song 3 S-Bhm-IntNz1L
Song 3 S-Bhm-IntNz1R
Song 3 S-Bhm-IntNz2L
Song 3 S-Bhm-IntNz2R
Song 3 S-Bhm-IntNz3L
Song 3 S-Bhm-IntNz3R
Song 3 S-BhmRePfFltL
Song 3 S-BhmRePfFltR
Song 3 S-Clk-IntFltL
Song 3 S-Clk-IntFltR
Song 3 S-BhmRe-F1 L
Song 3 S-BhmRe-F1 R
Song 3 S-BhmRe-F2 L
Song 3 S-BhmRe-F2 R
Song 3 S-BhmRe-Nz L
Song 3 S-BhmRe-Nz R
Song 3 S-BhmReFul12L
Song 3 S-BhmReFul12R
Song 3 S-BhmRe-Flt L
Song 3 S-BhmRe-Flt R
Song 3 S-BhmJp-Pf06L
Song 3 S-BhmJp-Pf06R
Song 3 S-BhmJpPfFltL
Song 3 S-BhmJpPfFltR
Song 3 S-BhmJpInt12L
Song 3 S-BhmJpInt12R
Song 3 S-BhmJpFul12L
Song 3 S-BhmJpFul12R
Category
Type

Reference
EN-221
Song 3 S-BhmJp-Flt L
Song 3 S-BhmJp-Flt R
Song 3 S-ImgIntFlt L
Song 3 S-ImgIntFlt R
Song 3 S-ImgFulFlt L
Song 3 S-ImgFulFlt R
Song 3 S-Img-Int12 L
Song 3 S-Img-Int12 R
Song 3 S-Img-Ful12 L
Song 3 S-Img-Ful12 R
Song 3 S-ImgCd-Int L
Song 3 S-ImgCd-Int R
Song 3 S-ImgCd-Ful L
Song 3 S-ImgCd-Ful R
Song 3 S-ImgNw-Int L
Song 3 S-ImgNw-Int R
Song 3 S-ImgNw-Ful L
Song 3 S-ImgNw-Ful R
Song 3 S-ImgRe-Int L
Song 3 S-ImgRe-Int R
Song 3 S-ImgRe-Ful L
Song 3 S-ImgRe-Ful R
Song 3 S-LdyM-Int12L
Song 3 S-LdyM-Int12R
Song 3 S-LdyM-Int14L
Song 3 S-LdyM-Int14R
Song 3 S-LdyM-A12 L
Song 3 S-LdyM-A12 R
Song 3 S-LdyM-B12 L
Song 3 S-LdyM-B12 R
Song 3 S-LdyMIntFltL
Song 3 S-LdyMIntFltR
Song 3 S-LdyM-Flt L
Song 3 S-LdyM-Flt R
Song 3 S-LdyM-Ful10L
Song 3 S-LdyM-Ful10R
Song 3 S-LdyMBc-IntL
Song 3 S-LdyMBc-IntR
Category
Type
Song 3 S-LdyMBc-FulL
Song 3 S-LdyMBc-FulR
Song 3 S-LdyM1c-IntL
Song 3 S-LdyM1c-IntR
Song 3 S-LdyM1c-FulL
Song 3 S-LdyM1c-FulR
Song 3 S-LdyMEdFl12L
Song 3 S-LdyMEdFl12R
Song 3 S-LIB-Flt L
Song 3 S-LIB-Flt R
Song 3 S-LIBBc-Int L
Song 3 S-LIBBc-Int R
Song 3 S-LIBBc-Ful L
Song 3 S-LIBBc-Ful R
Song 3 S-LIBCd-Int L
Song 3 S-LIBCd-Int R
Song 3 S-LIBCd-Ful L
Song 3 S-LIBCd-Ful R
Song 3 S-LIBmIntFltL
Song 3 S-LIBmIntFltR
Song 3 S-LIBMo-Int L
Song 3 S-LIBMo-Int R
Song 3 S-LIBMoInt16L
Song 3 S-LIBMoInt16R
Song 3 S-LIBMo-Ful L
Song 3 S-LIBMo-Ful R
Song 3 S-LIBsIntFltL
Song 3 S-LIBsIntFltR
Song 3 S-LIBStInt16L
Song 3 S-LIBStInt16R
Song 4 S-ClkCd-Int1L
Song 4 S-ClkCd-Int1R
Song 4 S-ClkCd-Int2L
Song 4 S-ClkCd-Int2R
Song 4 S-ClkCd-Ful L
Song 4 S-ClkCd-Ful R
Song 4 S-Clk-IntFltL
Song 4 S-Clk-IntFltR
Category
Type

Reference
EN-222
Song 4 S-Clk-FulFltL
Song 4 S-Clk-FulFltR
Song 4 S-Clk-FInt12L
Song 4 S-Clk-FInt12R
Song 4 S-Clk-Full12L
Song 4 S-Clk-Full12R
Song 4 S-PfManPfFltL
Song 4 S-PfManPfFltR
Song 4 S-PfMan-Int L
Song 4 S-PfMan-Int R
Song 4 S-PfMan-Ful L
Song 4 S-PfMan-Ful R
Song 4 S-PfMan-Flt L
Song 4 S-PfMan-Flt R
Song 4 S-PfManInt12L
Song 4 S-PfManInt12R
Song 4 S-PfMan-Ful6L
Song 4 S-PfMan-Ful6R
Song 4 S-VInsIntRe9L
Song 4 S-VInsIntRe9R
Song 4 S-VInsCdPFltL
Song 4 S-VInsCdPFltR
Song 4 S-VInsCd-IntL
Song 4 S-VInsCd-IntR
Song 4 S-VInsCd-FulL
Song 4 S-VInsCd-FulR
Song 4 S-VInsCd-FltL
Song 4 S-VInsCd-FltR
Song 4 S-VInsRePFltL
Song 4 S-VInsRePFltR
Song 4 S-VInsRe-IntL
Song 4 S-VInsRe-IntR
Song 4 S-VInsReInt9L
Song 4 S-VInsReInt9R
Song 4 S-VInsRe-FulL
Song 4 S-VInsRe-FulR
Song 4 S-VInsRe-FltL
Song 4 S-VInsRe-FltR
Category
Type
Song 4 S-VInsRe-Fl6L
Song 4 S-VInsRe-Fl6R
Song 4 S-VInsReFl12L
Song 4 S-VInsReFl12R
Song 4 S-UrSgIntFltL
Song 4 S-UrSgIntFltR
Song 4 S-UrSg-Int12L
Song 4 S-UrSg-Int12R
Song 4 S-UrSg-1VFltL
Song 4 S-UrSg-1VFltR
Song 4 S-UrSg-1V06 L
Song 4 S-UrSg-1V06 R
Song 4 S-UrSgFulFltL
Song 4 S-UrSgFulFltR
Song 4 S-UrSg-Ful6 L
Song 4 S-UrSg-Ful6 R
Song 4 S-UrSg-Ful8 L
Song 4 S-UrSg-Ful8 R
Song 4 S-UrSg-Ful10L
Song 4 S-UrSg-Ful10R
Song 4 S-UrSgCd-IntL
Song 4 S-UrSgCd-IntR
Song 4 S-UrSgCd-FulL
Song 4 S-UrSgCd-FulR
Song 4 S-UrSgPs-IntL
Song 4 S-UrSgPs-IntR
Song 4 S-UrSgPs-FulL
Song 4 S-UrSgPs-FulR
Song 4 S-HTS-PfFlt L
Song 4 S-HTS-PfFlt R
Song 4 S-HTS-Int06 L
Song 4 S-HTS-Int06 R
Song 4 S-HTS-Int12 L
Song 4 S-HTS-Int12 R
Song 4 S-HTS-FulFltL
Song 4 S-HTS-FulFltR
Song 4 S-HTS-Full12L
Song 4 S-HTS-Full12R
Category
Type

Reference
EN-223
Song 4 S-Mst-10 L
Song 4 S-Mst-10 R
Song 4 S-Mst-12 L
Song 4 S-Mst-12 R
Song 4 S-MplR1-12 L
Song 4 S-MplR1-12 R
Song 4 S-MplR2-12 L
Song 4 S-MplR2-12 R
Song 4 S-MplR3-12 L
Song 4 S-MplR3-12 R
Song 4 S-MplHi-12 L
Song 4 S-MplHi-12 R
Song 4 S-SLY-Int12 L
Song 4 S-SLY-Int12 R
Song 4 S-SLY-Ful9 L
Song 4 S-SLY-Ful9 R
Song 4 S-ThM-FulHi7L
Song 4 S-ThM-FulHi7R
Song 4 S-SLY-FulHi9L
Song 4 S-SLY-FulHi9R
Song 4 S-ThMCd-Pf9 L
Song 4 S-ThMCd-Pf9 R
Song 4 S-ThMCd-Hi10L
Song 4 S-ThMCd-Hi10R
Song 4 S-WLT-4 L
Song 4 S-WLT-4 R
Song 4 S-WLT-Hi7 L
Song 4 S-WLT-Hi7 R
Song 4 S-WLT-PfHi10L
Song 4 S-WLT-PfHi10R
Song 5 S-GrtLoveIntL
Song 5 S-GrtLoveIntR
Song 5 S-GrtLove L
Song 5 S-GrtLove R
Song 5 S-JstWay L
Song 5 S-JstWay R
Song 5 S-JstWayReInL
Song 5 S-JstWayReInR
Category
Type
Song 5 S-JstWayRe L
Song 5 S-JstWayRe R
Song 5 S-MySwtBstInL
Song 5 S-MySwtBstInR
Song 5 S-MySwtBst L
Song 5 S-MySwtBst R
Song 5 S-MySwtCdIn L
Song 5 S-MySwtCdIn R
Song 5 S-MySwtCd L
Song 5 S-MySwtCd R
Song 5 S-MySwtCpIn L
Song 5 S-MySwtCpIn R
Song 5 S-MySwtCp L
Song 5 S-MySwtCp R
Song 5 S-NtLkThsIntL
Song 5 S-NtLkThsIntR
Song 5 S-NtLkThs L
Song 5 S-NtLkThs R
Song 5 S-SvMyLovIntL
Song 5 S-SvMyLovIntR
Song 5 S-SvMyLov L
Song 5 S-SvMyLov R
Song 5 S-CzyAftIntL
Song 5 S-CzyAftIntR
Song 5 S-CzyAft L
Song 5 S-CzyAft R
Song 5 S-CzyAftReInL
Song 5 S-CzyAftReInR
Song 5 S-CzyAftRe L
Song 5 S-CzyAftRe R
Song 5 S-SumMadCdInL
Song 5 S-SumMadCdInR
Song 5 S-SumMadCd L
Song 5 S-SumMadCd R
Song 5 S-SumMadReInL
Song 5 S-SumMadReInR
Song 5 S-SumMadRe L
Song 5 S-SumMadRe R
Category
Type

Reference
EN-224
Song 5 S-NoQtrUsIntL
Song 5 S-NoQtrUsIntR
Song 5 S-NoQtrUs L
Song 5 S-NoQtrUs R
Song 5 S-NoQtrJpIntL
Song 5 S-NoQtrJpIntR
Song 5 S-NoQtrJp L
Song 5 S-NoQtrJp R
Song 5 S-NoQtrReIntL
Song 5 S-NoQtrReIntR
Song 5 S-NoQtrRe L
Song 5 S-NoQtrRe R
Song 5 S-ImNtOly1InL
Song 5 S-ImNtOly1InR
Song 5 S-ImNtOly1 L
Song 5 S-ImNtOly1 R
Song 5 S-ScientstInL
Song 5 S-ScientstInR
Song 5 S-Scientst L
Song 5 S-Scientst R
Song 5 S-SkyFullStrL
Song 5 S-SkyFullStrR
Song 5 S-Som1LkIn L
Song 5 S-Som1LkIn R
Song 5 S-Som1LkInHiL
Song 5 S-Som1LkInHiR
Song 5 S-Som1Lk L
Song 5 S-Som1Lk R
Song 5 S-StayInt L
Song 5 S-StayInt R
Song 5 S-Stay L
Song 5 S-Stay R
Song 5 S-1000miIn L
Song 5 S-1000miIn R
Song 5 S-1000miInDwL
Song 5 S-1000miInDwR
Song 5 S-1000mi L
Song 5 S-1000mi R
Category
Type
Song 5 S-1000miUpGnL
Song 5 S-1000miUpGnR
Song 5 S-WhenLvTkInL
Song 5 S-WhenLvTkInR
Song 5 S-WhenLvTk L
Song 5 S-WhenLvTk R
Song 5 S-UArReasnInL
Song 5 S-UArReasnInR
Song 5 S-UArReasn L
Song 5 S-UArReasn R
Song 5 S-Crystal L
Song 5 S-Crystal R
Song 5 S-Matrix L
Song 5 S-Matrix R
Song 5 S-NowHeSngs L
Song 5 S-NowHeSngs R
Song 5 S-ReturnToInL
Song 5 S-ReturnToInR
Song 5 S-ReturnTo L
Song 5 S-ReturnTo R
Song 5 S-Steps L
Song 5 S-Steps R
Song 5 S-WhatGame L
Song 5 S-WhatGame R
Song 5 S-Windows L
Song 5 S-Windows R
Song 5 S-CarolineInL
Song 5 S-CarolineInR
Song 5 S-Caroline L
Song 5 S-Caroline R
Song 5 S-Dreamers L
Song 5 S-Dreamers R
Song 5 S-LogicSong L
Song 5 S-LogicSong R
Category
Type
Reference
EN-225
Listed below are the types of microphone effects and the effects contained in each module from M1 to
M3 for each type.
For more information on the effects listed in the M1 to M3 columns, see “List of Effects in the
Microphone Effects Module” (page EN-227).
Microphone Effects List
Microphone Effect Type List
No.
Microphone Effect
Type Name
(Displayed)
M1 M2 M3
1 Powerful Mono 3-Band EQ Mono 3-Band EQ Delay
2 Presence Mono 3-Band EQ Mono 3-Band EQ Delay
3 Clear Mono 3-Band EQ Mono 3-Band EQ Delay
4 Soft Limiter Mono 3-Band EQ Delay
5 Rock Limiter Mono 3-Band EQ Delay
6 Bright Enh Enhancer Mono 3-Band EQ Delay
7 Presence Enh Enhancer Mono 3-Band EQ Delay
8 AmbientDelay Mono 3-Band EQ Mono 3-Band EQ Delay
9 Short Delay Mono 3-Band EQ Mono 3-Band EQ Delay
10 Echo Mono 3-Band EQ Mono 3-Band EQ Delay
11 Middle Delay Mono 3-Band EQ Mono 3-Band EQ Delay
12 Long Delay Mono 3-Band EQ Mono 3-Band EQ Delay
13 Pan Delay Mono 3-Band EQ Auto Pan Delay
14 Chorus Mono 3-Band EQ Chorus Delay
15 Phaser Mono 3-Band EQ Phaser Delay
16 Deep Phaser Mono 3-Band EQ Phaser Delay
17 PhaserChorus Mono 3-Band EQ Phaser Chorus
18 FlangerDelay Mono 3-Band EQ Flanger Delay
19 FlangerPhase Mono 3-Band EQ Flanger Phaser
20 Upper Octave Mono 3-Band EQ PitchShifter Delay
21 Lower Octave Mono 3-Band EQ PitchShifter Delay
22 Tremolo Mono 3-Band EQ Tremolo Delay
23 Vibrato Mono 3-Band EQ Chorus Delay
24 Distortion Drive Mono 3-Band EQ Mono 3-Band EQ
25 RingMod LoFi Drive Ring Modulator Mono 3-Band EQ
Reference
EN-226
Listed below are all the effects included in the Microphone Effects module.
For details on the parameters and setting ranges that can be set for each effect, see “Parameter List of
Module Effects” (page EN-228).
List of Effects in the Microphone Effects Module
No. Display Name Description
Mono 3BandEQ Mono 3-Band EQ This is a three-band monaural equalizer.
Tremolo Tremolo Shifts the volume of the input signal using an LFO.
Auto Pan Auto Pan
Shifts the continual left-right panning of the input
signal using an LFO.
Limiter Limiter
Limits the input signal level so it does not rise above
a preset level.
Enhancer Enhancer
Enhances the profiles of the low range and high
range of the input signal.
Phaser Phaser
Produces a distinctive pulsating, broad sound by
using an LFO to change the phase of the input signal
and then mixes it with the original input signal.
Chorus Chorus Gives notes depth and breadth.
Flanger Flanger
Applies wildly pulsating and metallic reverberation to
notes. Selects the LFO waveform.
Pitch PitchShifter This effect transforms the pitch of the input signal.
Ring Mod Ring Modulator
Multiplies the input signal with an internal oscillator
signal to create a metallic sound.
Delay Delay
Delays the input signal and feeds it back to create a
repeating effect.
Drive Drive Simulates the drive of a musical instrument amplifier.
Reference
EN-227
Parameter List of Module Effects
Effect
Description Settings
Display
Parameter
Name
Mono 3-Band EQ This is a three-band monaural equalizer.
EQ1 Freq EQ1 Frequency Adjusts the center frequency of Equalizer 1.
*1
EQ1 Gain EQ1 Gain Adjusts the gain of Equalizer 1. –12 - 00 - 12
EQ2 Freq EQ2 Frequency Adjusts the center frequency of Equalizer 2.
*1
EQ2 Gain EQ2 Gain Adjusts the gain of Equalizer 2. –12 - 00 - 12
EQ3 Freq EQ3 Frequency Adjusts the center frequency of Equalizer 3.
*1
EQ3 Gain EQ3 Gain Adjusts the gain of Equalizer 3. –12 - 00 - 12
Input Level Input Level Adjusts the input level. 000 - 127
Wet Level Wet Level Adjusts the level of the effect sound. 000 - 127
Dry Level Dry Level Adjusts the level of the direct sound. 000 - 127
Tremolo Shifts the volume of the input signal using an LFO.
Rate LFO Rate Adjusts the LFO rate. 000 - 127
Depth LFO Depth Adjusts the LFO depth. 000 - 127
Waveform LFO Waveform Selects the LFO waveform. Sine, Triangle,
Trapezoid
Wet Level Wet Level Adjusts the level of the effect sound. 000 - 127
Dry Level Dry Level Adjusts the level of the direct sound. 000 - 127
Auto Pan Shifts the continual left-right panning of the input signal using an
LFO.
Rate LFO Rate Adjusts the LFO rate. 000 - 127
Depth LFO Depth Adjusts the LFO depth. 000 - 127
Waveform LFO Waveform Selects the LFO waveform. Sine, Triangle,
Trapezoid 1,
Trapezoid 2,
Trapezoid 3,
Trapezoid 4
Manual Manual Adjusts the pan (stereo position). –64 is full left,
0 is center, and +63 is full right.
–64 - 00 - 63
Wet Level Wet Level Adjusts the level of the effect sound. 000 - 127
Dry Level Dry Level Adjusts the level of the direct sound. 000 - 127
Reference
EN-228
Limiter Limits the input signal level so it does not rise above a preset
level.
Limit Limit Adjusts the volume level of the limit at which
limiting is applied.
000 - 127
Attack Attack Adjusts the time until the compression effect
starts. A smaller value causes prompt limiter
operation, which suppresses the attack of the
input signal. A larger values delays limiter
operation, which causes the attack of the input
signal to be output as-is.
000 - 127
Release Release Adjusts the time until compression is released
after the input signal drops below a prescribed
level.
000 - 127
Wet Level Wet Level Adjusts the level of the effect sound. Output
volume changes in accordance with the Limit
setting and the characteristics of the input tone.
Use this parameter to correct for such changes.
000 - 127
Dry Level Dry Level Adjusts the level of the direct sound. 000 - 127
Enhancer Enhances the profiles of the low range and high range of the input
signal.
Low Freq Low Frequency Adjusts the low range enhancer frequency. 000 - 127
Low Gain Low Gain Adjusts the low range enhancer gain. 000 - 127
High Freq High Frequency Adjusts the high range enhancer frequency. 000 - 127
High Gain High Gain Adjusts the high range enhancer gain. 000 - 127
Input Level Input Level Adjusts the input level. 000 - 127
Wet Level Wet Level Adjusts the level of the effect sound. 000 - 127
Dry Level Dry Level Adjusts the level of the direct sound. 000 - 127
Phaser Produces a distinctive pulsating, broad sound by using an LFO to
change the phase of the input signal and then mixes it with the
original input signal.
Resonance Resonance Adjusts the strength of feedback. 000 - 127
Manual Manual Adjusts the reference phaser shift amount. –64 - 00 - 63
Rate LFO Rate Adjusts the LFO rate. 000 - 127
Depth LFO Depth Adjusts the LFO depth. 000 - 127
Waveform LFO Waveform Selects the LFO waveform. Sine, Triangle,
Random
Input Level Input Level Adjusts the input level. 000 - 127
Wet Level Wet Level Adjusts the level of the effect sound. 000 - 127
Dry Level Dry Level Adjusts the level of the direct sound. 000 - 127
Effect
Description Settings
Display
Parameter
Name
Reference
EN-229
Chorus Gives notes depth and breadth.
Rate LFO Rate Adjusts the LFO rate. 000 - 127
Depth LFO Depth Adjusts the LFO depth. 000 - 127
Waveform LFO Waveform Selects the LFO waveform. Sine, Triangle
Feedback Feedback Adjusts the strength of feedback. –64 - 00 - 63
Wet Level Wet Level Adjusts the level of the effect sound. 000 - 127
Polarity Polarity Inverts the LFO of one channel. Negative,
Positive
Input Level Input Level Adjusts the input level. 000 - 127
Dry Level Dry Level Adjusts the level of the direct sound. 000 - 127
Flanger Applies wildly pulsating and metallic reverberation to notes.
Selects the LFO waveform.
Rate LFO Rate Adjusts the LFO rate. 000 - 127
Depth LFO Depth Adjusts the LFO depth. 000 - 127
Waveform LFO Waveform Selects the LFO waveform. Sine, Triangle,
Random
Feedback Feedback Adjusts the strength of feedback. –64 - 00 - 63
Wet Level Wet Level Adjusts the level of the effect sound. 000 - 127
Input Level Input Level Adjusts the input level. 000 - 127
Dry Level Dry Level Adjusts the level of the direct sound. 000 - 127
PitchShifter This effect transforms the pitch of the input signal.
PitchQuarter PitchQuarter Adjusts the pitch shift amount in quarter tone
steps.
–24 - 00 - 24
High Damp High Damp Adjusts the high-range damp. A smaller number
increases damping.
000 - 127
Feedback Feedback Adjusts the feedback amount. 000 - 127
Input Level Input Level Adjusts the input level. 000 - 127
Wet Level Wet Level Adjusts the level of the effect sound. 000 - 127
Dry Level Dry Level Adjusts the level of the direct sound. 000 - 127
Pitch Fine Pitch Fine Adjusts the pitch shift amount. –50 is a quarter
note decrease, while +50 is a quarter note
increase.
–50 - 00 - 50
Effect
Description Settings
Display
Parameter
Name

Reference
EN-230
Ring Modulator Multiplies the input signal with an internal oscillator signal to
create a metallic sound.
OSC Freq OSC Frequency Sets the reference frequency of the internal
oscillator.
000 - 127
Rate LFO Rate Adjusts the LFO rate. 000 - 127
Depth LFO Depth Adjusts the LFO depth. 000 - 127
Tone Tone Adjusts the timbre of the ring modulator input
sound.
000 - 127
Wet Level Wet Level Adjusts the level of the effect sound. 000 - 127
Dry Level Dry Level Adjusts the level of the direct sound. 000 - 127
Delay Delays the input signal and feeds it back to create a repeating
effect.
Time Delay Time Adjusts the total delay time in 1 ms units. 0001 - 1099
L.Time Ratio Delay Ratio L Adjusts the ratio of the left channel relative to
the total delay time.
000 - 127
R.Time Ratio Delay Ratio R Adjusts the ratio of the right channel relative to
the total delay time.
000 - 127
L.Level Delay Level L Adjusts the level of the left channel. 000 - 127
R.Level Delay Level R Adjusts the level of the right channel. 000 - 127
FeedbackType
Feedback Type Selects the feedback type.
Stereo: Stereo feedback
Cross: Cross feedback
Stereo, Cross
Feedback Lvl
Feedback Adjusts the feedback amount. 000 - 127
High Damp High Damp Adjusts the high-range damp. A smaller number
increases damping.
000 - 127
Tmpo Sync Delay Tempo
Sync
Specifies how the actual total delay time is
synced with tempo.
Off: Uses Delay Time value.
1/4 to 1: Uses value in accordance with number
of beats.
Off, 1/4, 1/3,
3/8, 1/2, 2/3,
3/4, 1
Input Level Input Level Adjusts the input level. 000 - 127
Dry Level Dry Level Adjusts the level of the direct sound. 000 - 127
Wet Level Wet Level Adjusts the level of the effect sound. 000 - 127
Effect
Description Settings
Display
Parameter
Name
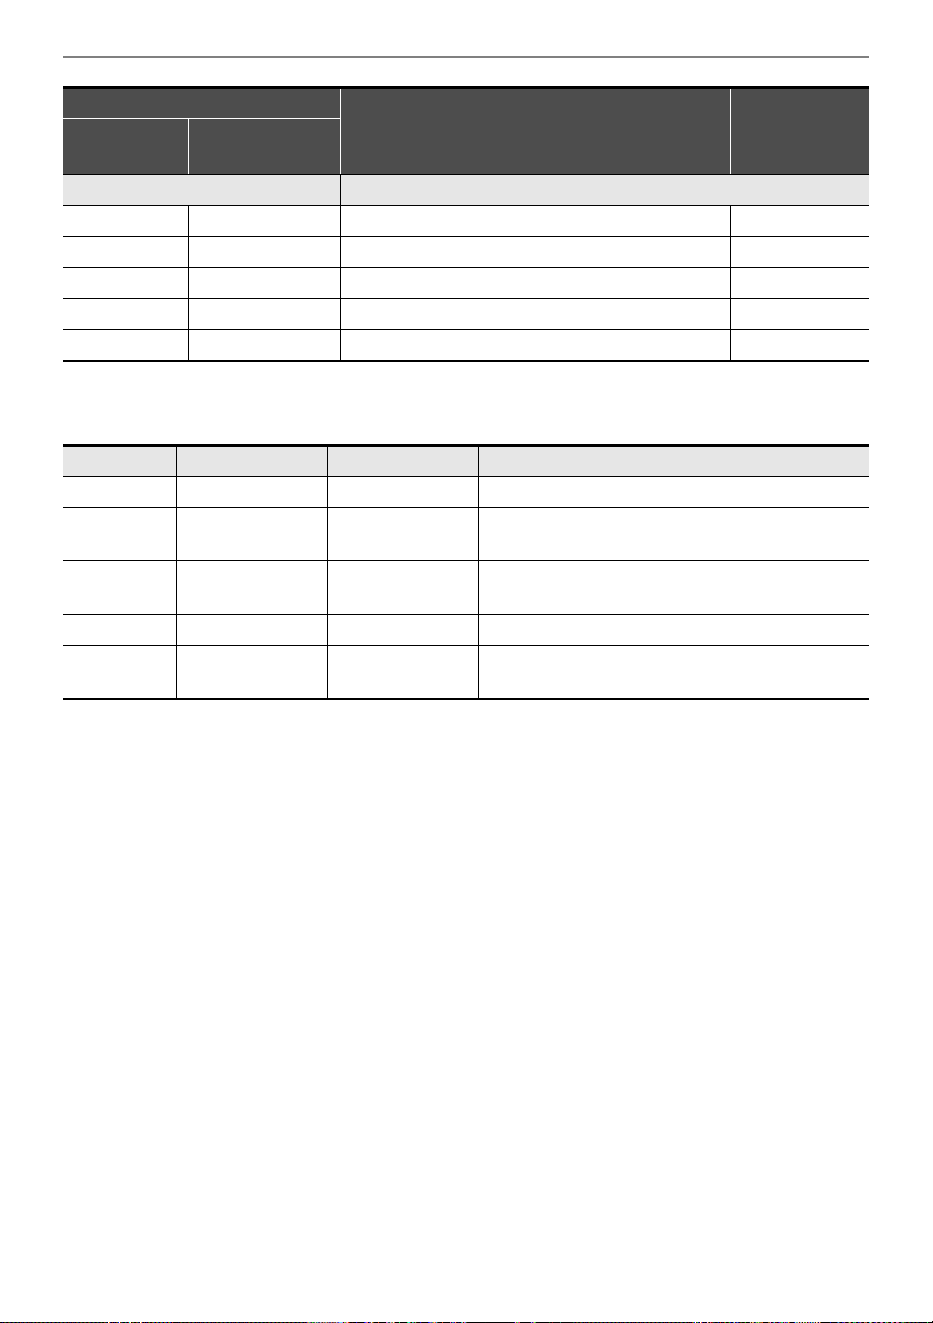
Reference
EN-231
*1 100Hz, 125Hz, 160Hz, 200Hz, 250Hz, 315Hz, 400Hz, 500Hz, 630Hz, 800Hz, 1.0kHz, 1.3kHz,
1.6kHz, 2.0kHz, 2.5kHz, 3.2kHz, 4.0kHz, 5.0kHz, 6.3kHz, 8.0kHz
*2
Drive Simulates the drive of a musical instrument amplifier.
Type Drive Type Selects the drive type.
*2
1 - 20
Gain Gain Adjusts the driver input signal gain. 000 - 127
Output Level
Level Adjusts the drive output level. 000 - 127
Wet Level Wet Level Adjusts the level of the effect sound. 000 - 127
Dry Level Dry Level Adjusts the level of the direct sound. 000 - 127
Settings Drive Type Display Description
1 - 4 Clean1 - 4 Clean 1 - 4 Simulates a clean sound with little distortion.
5 - 8 Crunch1 - 4 Crunch 1 - 4
Simulates a crisp crunch sound with little
distortion.
9 - 12 Overdrive1 - 4 Overdrive 1 - 4
Simulates an overdrive sound with mellow
distortion.
13 - 16 Distortion1 - 4 Distort 1 - 4 Simulates a hard, straight distortion sound.
17 - 20 Metal1 - 4 Metal 1 - 4
Simulates an extreme and weighty distortion
sound that is suitable for heavy metal music.
Effect
Description Settings
Display
Parameter
Name
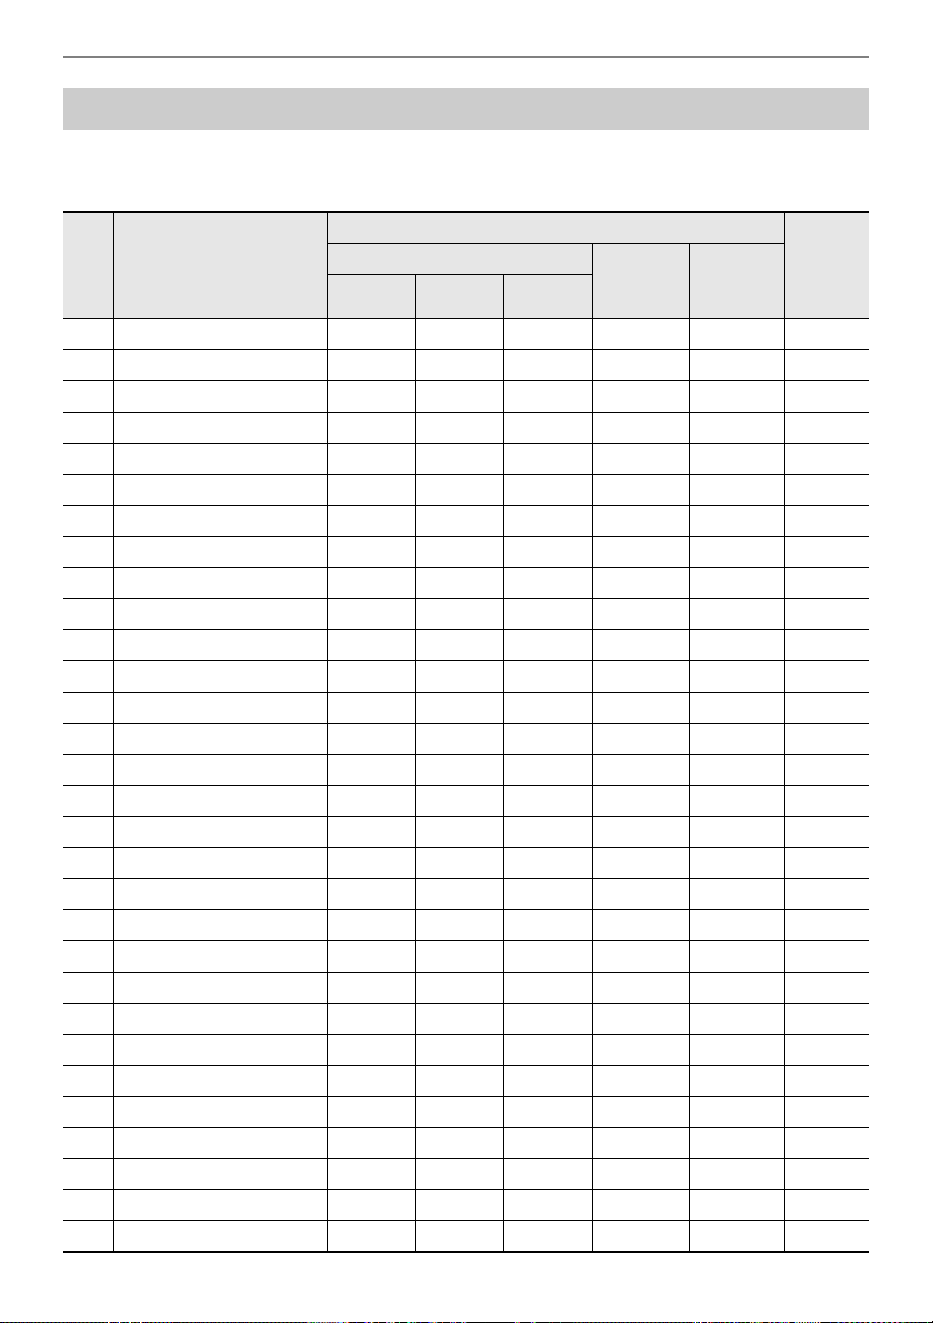
Reference
EN-232
Listed below are the Arpeggiator patterns. When the “Recommended Setup” is “On”, when the
Arpeggiator is switched from off to on, or when “Pattern” is switched while the Arpeggiator is on, the
“Recommended Setup” listed are automatically applied.
Arpeggiator List
No.
Pattern Name
(Pattern)
Recommended Setup
Remarks
The Arpeggiator’s target part
Split Point
sound
name
*1
Arpeggio
Hold
Upper 1 Upper 2 Lower
01 Piano Sequence 1 ✓ F{3
*2
02 Piano Sequence 2 ✓ C5 ✓
*2
03 Piano Sequence 3 ✓ F{3 ✓
*2
04 Piano Sequence 4 ✓ F{3 ✓
*2
05 Piano Sequence 5 ✓ F{3
06
Piano Triplet Sequence
✓ F{3
*2
07 Piano Odd Sequence ✓ F{3 ✓
*2
08 Chordal Phrase 1 ✓ F{3 ✓
09 Chordal Phrase 2 ✓ F{3 ✓
*2
10 Chordal Phrase 3 ✓ F{3 ✓
*2
11 Ambient FX 1 ✓ F{3 ✓
*2
12 Ambient FX 2 ✓ F{3 ✓
*2
13 Single Note Sequence ✓ F{3
14 Lower EP Phrase ✓ C3 ✓
15 Layered EP Phrase ✓ F{3 ✓
16 Layered EP Arpeggio ✓ F{3 ✓
17 Layered Arpeggio 1 ✓ F{3 ✓
18 Layered Arpeggio 2 ✓ F{3 ✓
*2
19 Layered Arpeggio 3 ✓ F{3 ✓
*2
20 Layered Arpeggio 4 ✓ F{3 ✓
21 Synth Sequence ✓ F{2 ✓
22 Lower Strings Phrase ✓ C3 ✓
23 Walking Bass ✓ C3 ✓
24 Simple Bass ✓ C3 ✓
25 Odd Phrase Bass ✓ C3 ✓
26 Latin Piano ✓✓ F{3 ✓
27 Screw Up ✓✓ F{3
28 Screw Down ✓✓ F{3
29 Skip Up ✓✓ F{3
30 Skip Down ✓✓ F{3
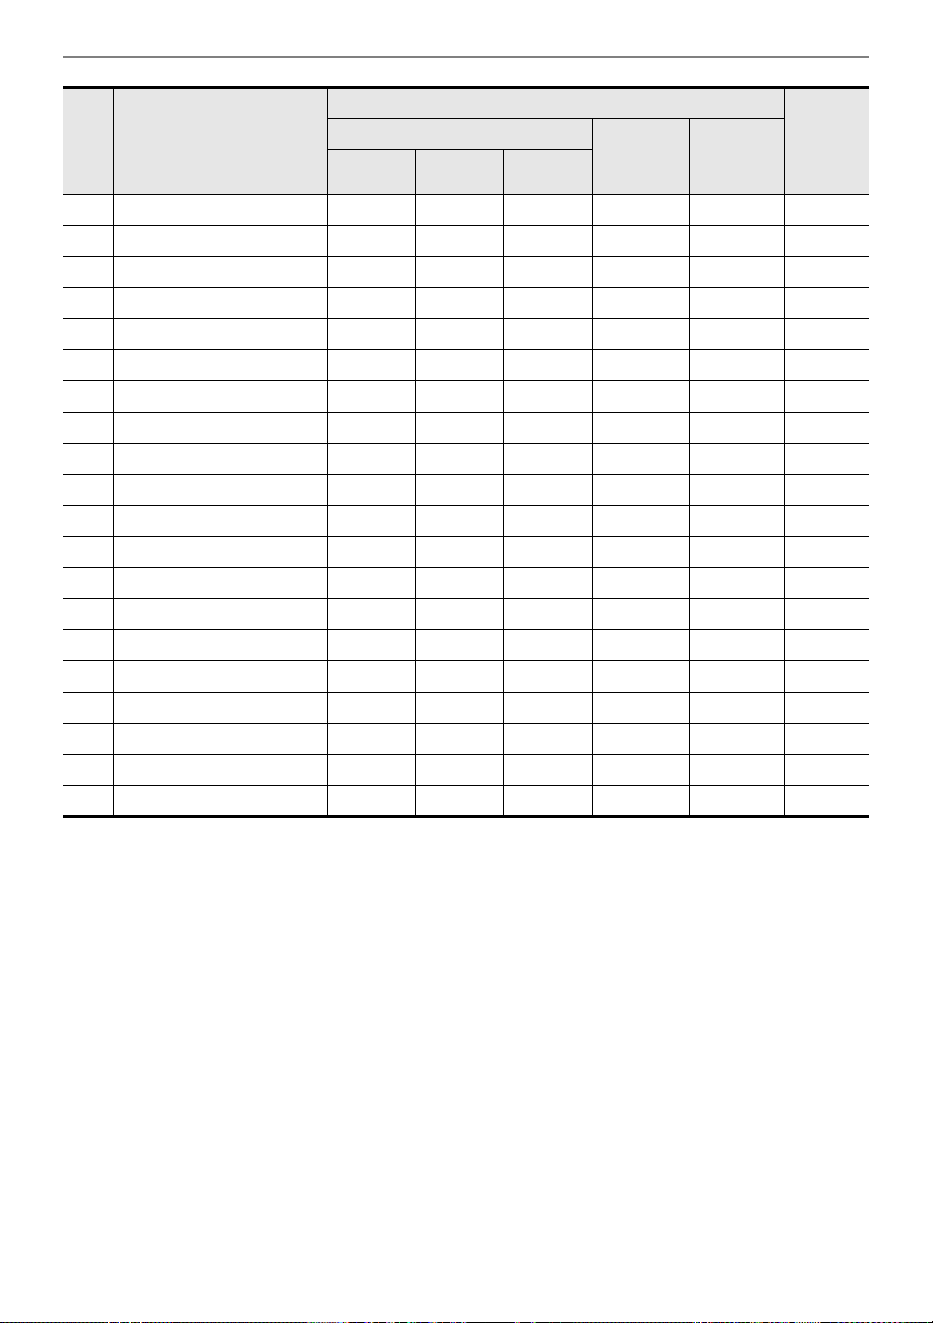
Reference
EN-233
*1 When “Recommended Setup” is “On”, the Split Point is automatically set to the keyboard key in this
row when switching patterns. Therefore, the key range in which the Arpeggiator is reproduced
varies with the pattern.
*2 These patterns have the appropriate sustain effect added to the notes played by the Arpeggiator.
31 Up Up Down ✓✓ F{3
32 Down Down Up ✓✓ F{3
33 Sequence Line 1 ✓✓ F{3
34 Sequence Line 2 ✓✓ F{3
35 Sequence Line 3 ✓✓ F{3
36 Arpeggio 2Octave ✓✓ F{ 3
*2
37 9th Arpeggio ✓✓ F{ 3
38 Ragtime ✓✓ F{3
39 8 Beat ✓ F{3
40 12/8 ✓✓ F{3
41 Waltz ✓✓ F{3
42 Shuffle Pop ✓ F{3 ✓
*2
43 Up 1Octave 1 ✓✓ F{3
44 Up 2Octave 1 ✓✓ F{3
45 Up 1Octave 2 ✓✓ F{3
46 Up 2Octave 2 ✓✓ F{3
47 Down 1Octave 1 ✓✓ F{3
48 Down 2Octave 1 ✓✓ F{3
49 Down 1Octave 2 ✓✓ F{3
50 Down 2Octave 2 ✓✓ F{3
No.
Pattern Name
(Pattern)
Recommended Setup
Remarks
The Arpeggiator’s target part
Split Point
sound
name
*1
Arpeggio
Hold
Upper 1 Upper 2 Lower
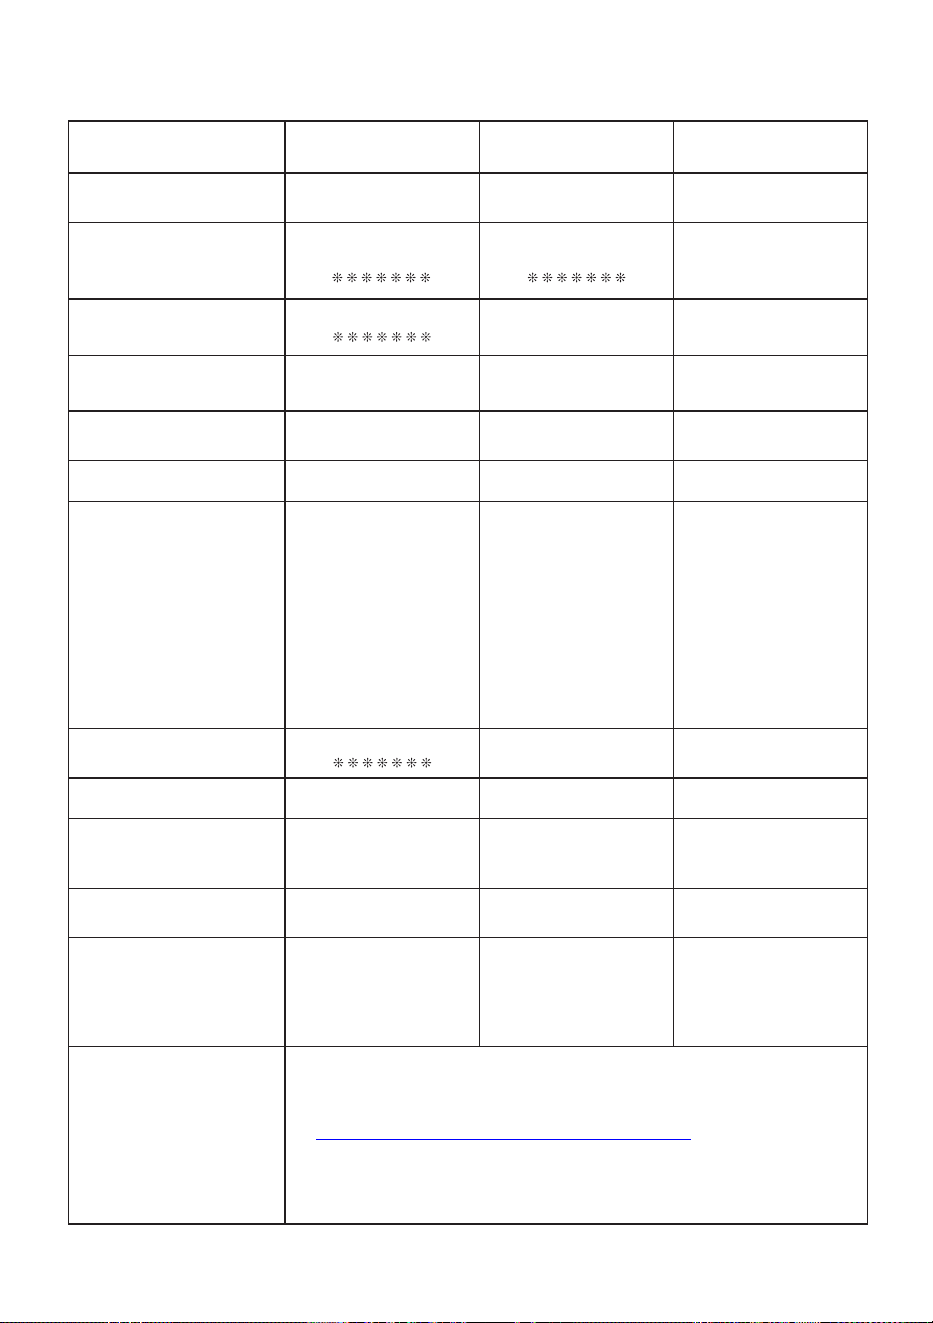
Function Transmitted Recognized Remarks
Basic
Channel
1
1 - 16
1 - 16
1 - 16
Default
Changed
Note
Number
0 - 127
0 - 127
*
1
0 - 127
True voice
Program
Change True #
After
Touch
Control
Change
X
X
X
O
Pitch Bender
OO
Exclusive
O
Key’s
Ch’s
Velocity
O
9nH v = 1 - 127
O 9nH v = 0, 8nH v = 0 - 127
O 9nH v = 1 - 127
O 8nH v = 0 - 127
Note ON
Note OFF
Mode
Mode 3
X
Mode 3
X
Default
Messages
Altered
System
Common
X
X
X
X
X
X
Song Pos
Song Sel
Tune
Aux
Messages
Remarks
X
X
X
X
X
X
O
O
X
O
O
X
All sound off
Reset all controller
Local ON/OFF
All notes OFF
Active Sense
System Reset
System
Real Time
X
X
X
X
Clock
Commands
0, 32
1
5
6, 38
7
10
11
64
65
66
67
71
72
73
74
76
77
78
84
88
91
93
94
100, 101
Mode 1 : OMNI ON, POLY
Mode 3 : OMNI OFF, POLY
Mode 2 : OMNI ON, MONO
Mode 4 : OMNI OFF, MONO
O : Yes
X
: No
O
O
O
O
O
O
O
O
O
O
O
X
O
X
X
X
X
X
X
O
O
O
X
O
*
3
*
2
*
2
*
2
*
2
*
2
*
4
*
3
O
O
O
O
O
O
O
O
O
O
O
O
O
O
O
O
O
O
O
O
O
O
O
O
*
3
*
3
OO
0 - 127
Model: PX-S6000 Version : 1.0
Bank select LSB/MSB
Modulation
Portamento time
Data entry LSB/MSB
Volume
Pan
Expression
Hold 1
Portamento switch
Sostenuto
Soft pedal
Filter resonance
Release time
Attack time
Brightness
Vibrato rate
Vibrato depth
Vibrato delay
Portamento control
High resolution velocity prefix
Reverb send level
Chorus send level
Delay send level
RPN LSB/MSB
*
3
O
*
3
MIDI Implementation Chart
*1: Depends on tone.
*2: Depends on the setup of the pedal connected to the EXPRESSION/ASSIGNABLE
jack.
*3: For details about RPN and system exclusive messages, see MIDI Implementation at
https://support.casio.com/global/en/emi/manual/PX-S6000/
*4: Depends on the knobs and the CONTROL button settings.
• The MIDI messages marked with “x” in the “Transmitted” column of the above chart
may be output along with certain operations.

MA2311-B
PXS6000-E-2B