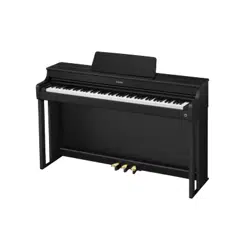
PX
-
S3100
Initial Setup
Preparing a Power Supply Turning Power On or Off Using a Pedal Using Headphones
Selecting a Tone and Playing Registering a Setup
Selecting a Single Tone Layering Two Tones Splitting the Keyboard Between
Two Tones
Registering and Restoring a Setup
(Registration)
Changing the Pitch
Connecting with a Smart
Device
Fine Tuning a Pitch (Tuning) Changing the Pitch in Octave Units
(Octave Shift)
Changing the Scale Tuning
(Temperament) of the Keyboard
Linking with a Smart Device
(APP Function)
Using Effects
Using the Sound Mode Effects
(Hall Simulator/Reverb and
Surround)
Using a DSP Using Chorus Adjusting Acoustic Piano
Sound Characteristics
(Acoustic Simulator)
Recording Performances in Real-Time Using Auto Accompaniment and Auto Arpeggio Play
Using the MIDI Recorder to Record
Performances
Using the Audio Recorder to
Record Performances
Using Auto Accompaniment Using the Arpeggiator
• When the Digital Piano is being operated on battery power only, notes may sound distorted when performing or playing back
a song at maximum volume. This is due to the difference between AC adaptor power and battery power, and does not
indicate Digital Piano malfunction. If you notice distortion, switch to AC adaptor power or lower the volume level.
Cove
r
USER’S GUIDE
EN
EN-1
Included and Optional Accessories
Use only accessories that are specified for use with this Digital Piano.
Use of unauthorized accessories creates the risk of fire, electric shock, and personal injury.
• You can get information about accessories that are sold separately for this product from the CASIO catalog available from
your retailer, and from the CASIO website.
https://support.casio.com/global/en/emi/manual/PX-S3100/
• Any reproduction of the contents of this manual, either in part or its entirety, is prohibited. Except for your own, personal
use, any other use of the contents of this manual without the consent of CASIO is prohibited under copyright laws.
• IN NO EVENT SHALL CASIO BE LIABLE FOR ANY DAMAGES WHATSOEVER (INCLUDING, WITHOUT LIMITATION,
DAMAGES FOR LOSS OF PROFITS, BUSINESS INTERRUPTION, LOSS OF INFORMATION) ARISING OUT OF THE
USE OF OR INABILITY TO USE THIS MANUAL OR PRODUCT, EVEN IF CASIO HAS BEEN ADVISED OF THE
POSSIBILITY OF SUCH DAMAGES.
• The contents of this manual are subject to change without notice.
• The actual appearance of the product may be different from that shown in the illustrations in this User’s Guide.
• The Bluetooth
®
word mark and logos are registered trademarks owned by Bluetooth SIG, Inc. and any use of such marks by
CASIO COMPUTER CO., LTD. is under license. Other trademarks and trade names are those of their respective owners.
• Company and product names used in this manual may be registered trademarks of others.
EN-2
Overview and Setup EN-3
General Guide. . . . . . . . . . . . . . . . . . . . . . . . . . . . . EN-3
Preparing a Power Supply . . . . . . . . . . . . . . . . . . . EN-5
Turning Power On or Off . . . . . . . . . . . . . . . . . . . . . EN-6
Using a Pedal . . . . . . . . . . . . . . . . . . . . . . . . . . . . . EN-7
DAMPER PEDAL Jack . . . . . . . . . . . . . . . . . . . . . . . . EN-7
PEDAL UNIT jack . . . . . . . . . . . . . . . . . . . . . . . . . . . . EN-8
EXPRESSION/ASSIGNABLE Jack. . . . . . . . . . . . . . . EN-8
Using Headphones . . . . . . . . . . . . . . . . . . . . . . . . EN-10
Using the Included Wireless MIDI & audio
adaptor. . . . . . . . . . . . . . . . . . . . . . . . . . . . . . . . EN-10
Operations Common to All Modes EN-11
Touch Button Operations . . . . . . . . . . . . . . . . . . . EN-11
FUNCTION Mode Menu Operations . . . . . . . . . . . EN-13
Text Character Input . . . . . . . . . . . . . . . . . . . . . . . EN-13
Digital Piano Operations EN-14
Listening to Demo Play . . . . . . . . . . . . . . . . . . . . . EN-14
Selecting a Tone . . . . . . . . . . . . . . . . . . . . . . . . . . EN-14
Selecting a Single Tone . . . . . . . . . . . . . . . . . . . . . . EN-14
Layering Two Tones . . . . . . . . . . . . . . . . . . . . . . . . . EN-15
Splitting the Keyboard Between Two Tones . . . . . . . EN-16
Configuring Layer and Split Settings . . . . . . . . . . . . . EN-17
Adjusting the Overall Volume Level of the
Keyboard Performance Parts . . . . . . . . . . . . . . . . EN-18
Changing Keyboard Response to Touch Pressure
(Touch Response) . . . . . . . . . . . . . . . . . . . . . . . EN-18
Changing the Pitch . . . . . . . . . . . . . . . . . . . . . . . . EN-19
Changing the Pitch in Semitone Steps
(Transpose) . . . . . . . . . . . . . . . . . . . . . . . . . . . . . . EN-19
Fine Tuning a Pitch (Tuning) . . . . . . . . . . . . . . . . . . . EN-20
Changing the Pitch in Octave Units (Octave Shift) . . EN-20
Using the Sound Mode Effects
(Hall Simulator/Reverb and Surround). . . . . . . . EN-21
Using a DSP . . . . . . . . . . . . . . . . . . . . . . . . . . . . . EN-23
Using Chorus . . . . . . . . . . . . . . . . . . . . . . . . . . . . EN-25
Using Brilliance . . . . . . . . . . . . . . . . . . . . . . . . . . . EN-25
Adjusting Acoustic Piano Sound Characteristics
(Acoustic Simulator). . . . . . . . . . . . . . . . . . . . . . EN-25
Using the Knobs . . . . . . . . . . . . . . . . . . . . . . . . . . EN-26
Using the Pitch Bend Wheel . . . . . . . . . . . . . . . . . EN-27
Using the Arpeggiator . . . . . . . . . . . . . . . . . . . . . . EN-27
Splitting the Keyboard for Duet Play . . . . . . . . . . . EN-28
Changing the Scale Tuning (Temperament)
of the Keyboard . . . . . . . . . . . . . . . . . . . . . . . . . EN-30
Using Auto Accompaniment . . . . . . . . . . . . . . . . . EN-31
Selecting a Rhythm . . . . . . . . . . . . . . . . . . . . . . . . . . EN-31
Playing Auto Accompaniment . . . . . . . . . . . . . . . . . . EN-31
Auto Accompaniment Pattern Variations. . . . . . . . . . EN-32
Triggering Auto Accompaniment Play with
Accompaniment Keyboard Input
(Synchro Start). . . . . . . . . . . . . . . . . . . . . . . . . . . . EN-33
Using the Keyboard to Control the
Auto Accompaniment Pattern
(Keyboard Controller Mode) . . . . . . . . . . . . . . . . . EN-34
Selecting a Chord Input Mode . . . . . . . . . . . . . . . . . . EN-34
Using One-Touch Preset . . . . . . . . . . . . . . . . . . . . . . EN-36
Using Auto Harmonize . . . . . . . . . . . . . . . . . . . . . . . EN-37
Changing the Auto Accompaniment and
Song Tempo . . . . . . . . . . . . . . . . . . . . . . . . . . . .EN-38
Using Music Preset. . . . . . . . . . . . . . . . . . . . . . . . .EN-38
Registering and Restoring a Setup
(Registration) . . . . . . . . . . . . . . . . . . . . . . . . . . . .EN-40
Registering and Recalling a Setup . . . . . . . . . . . . . . EN-41
Using a Pedal to Cycle Through Multiple Setups
(Sequential Pedal Recall) . . . . . . . . . . . . . . . . . . . EN-42
Using the MIDI Recorder to Record
Performances . . . . . . . . . . . . . . . . . . . . . . . . . . .EN-43
Recording and Playing Back Keyboard Play. . . . . . . EN-45
Configuring Recording Settings (Pre-count,
Metronome, Beat, Punch-in Measure). . . . . . . . . . EN-48
Deleting a MIDI Recorder Song . . . . . . . . . . . . . . . . EN-49
Using the Audio Recorder to Record
Performances . . . . . . . . . . . . . . . . . . . . . . . . . . .EN-49
Listening to Songs (MIDI Player) . . . . . . . . . . . . . .EN-51
Configuring Function Settings
(FUNCTION Mode) . . . . . . . . . . . . . . . . . . . . . . .EN-53
Using Operation Lock . . . . . . . . . . . . . . . . . . . . . . .EN-59
Configuring MIDI Settings. . . . . . . . . . . . . . . . . . . .EN-59
Deleting All Data in Digital Piano Memory . . . . . . .EN-60
USB Flash Drive EN-60
Supported USB Flash Drives . . . . . . . . . . . . . . . . .EN-60
USB Flash Drive and USB Type A Port
Handling Precautions . . . . . . . . . . . . . . . . . . . . .EN-61
Connecting a USB Flash Drive to and
Detaching It from the Digital Piano . . . . . . . . . . .EN-61
Formatting a USB Flash Drive . . . . . . . . . . . . . . . .EN-62
USB Flash Drive Operations. . . . . . . . . . . . . . . . . .EN-62
Using a Computer to Copy General Song Data
to a USB Flash Drive . . . . . . . . . . . . . . . . . . . . . .EN-65
Storing Standard Audio Data (WAV Files) to a
USB Flash Drive . . . . . . . . . . . . . . . . . . . . . . . . .EN-65
Linking with a Smart Device
(APP Function) EN-66
Connecting with a Smart Device . . . . . . . . . . . . . . . . EN-66
Troubleshooting EN-68
Error Messages . . . . . . . . . . . . . . . . . . . . . . . . . . .EN-70
Reference EN-71
Product Specifications . . . . . . . . . . . . . . . . . . . . . .EN-71
Fingering Guide . . . . . . . . . . . . . . . . . . . . . . . . . . .EN-73
Chord Example List . . . . . . . . . . . . . . . . . . . . . . . .EN-75
Versatile Tone Map. . . . . . . . . . . . . . . . . . . . . . . . .EN-77
Knob Set List . . . . . . . . . . . . . . . . . . . . . . . . . . . . .EN-78
DSP Effect List . . . . . . . . . . . . . . . . . . . . . . . . . . . .EN-79
Preset DSP List . . . . . . . . . . . . . . . . . . . . . . . . . . . . . EN-79
DSP Module List . . . . . . . . . . . . . . . . . . . . . . . . . . . . EN-81
DSP Parameter List. . . . . . . . . . . . . . . . . . . . . . . . . . EN-82
MIDI Implementation Chart
Contents

EN-3
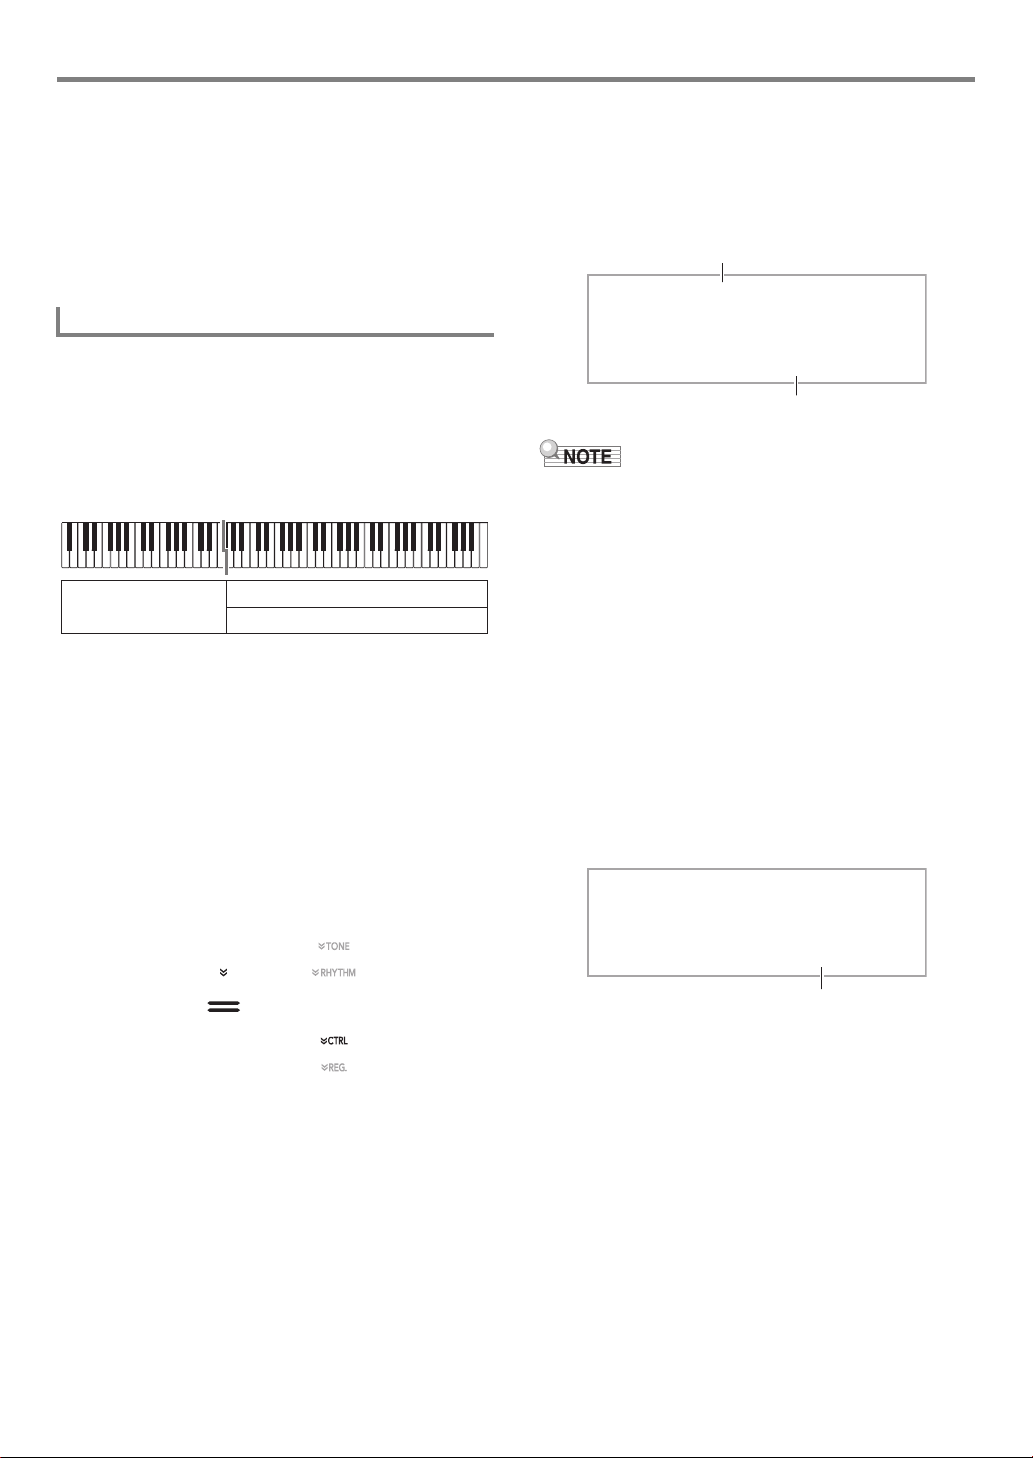
■ Front Panel
Touch Buttons
Turning on Digital Piano power causes all of the touch buttons to light, except for the 1P (Power) button. The above illustration
shows when all buttons and their text are lit. During actual operation, only the buttons that are currently enabled and the applicable
text are lit or flashing.
Overview and Setup
General Guide
cn
cm
1 2
9
bp
bk bl bm bn bo
co
bq br bs bt ck cl
34 567 8
C1
C2 C3 C4 C5 C6 C7 C8A0
Front
Bluetooth
®
Indicator *
* Bluetooth Indicator
Under initial default settings, turning on power without the Wireless MIDI &
audio adaptor attached will cause the Bluetooth indicator to blink momentarily
to inform you that the Wireless MIDI & audio adaptor is not attached.

Overview and Setup
EN-4
■ Back
cp USB Type B port
cq USB Type A port
cr DAMPER PEDAL jack
cs PEDAL UNIT jack
ct AUDIO IN jack
dk LINE OUT R, L/MONO jacks
dl EXPRESSION/ASSIGNABLE jack
dm DC 12V terminal
■ Preparing the Music Stand
1 P (Power) button
2 Volume knob
3 Mode selector button (RHYTHM, ACCOMP,
SONG)
4 INTRO, PART button
5 NORMAL/FILL-IN, s button
6 VARIATION/FILL-IN, d button
7 SYNCHRO/ENDING, k button
8 START/STOP, a button
9 Display
bk –, U button
bl +, I button
bm TEMPO, ENTER button
bn SOUND MODE, DEMO button
bo REC0 button
bp ^, EXIT, $
FUNCTION button
bq - cl TONE category, RHYTHM category buttons
bq DSP, BANK button
br TRANSPOSE, Area 1 button
bs KNOB, Area 2 button
bt ARPEG., Area 3 button
ck SPLIT, Area 4 button
cl LAYER, STORE button
cm Knob (K1), Knob (K2)
cn PITCH BEND wheel
co PHONES jacks
cr cs ct dl dmcp cq dk
Music stand
EN-5
Overview and Setup
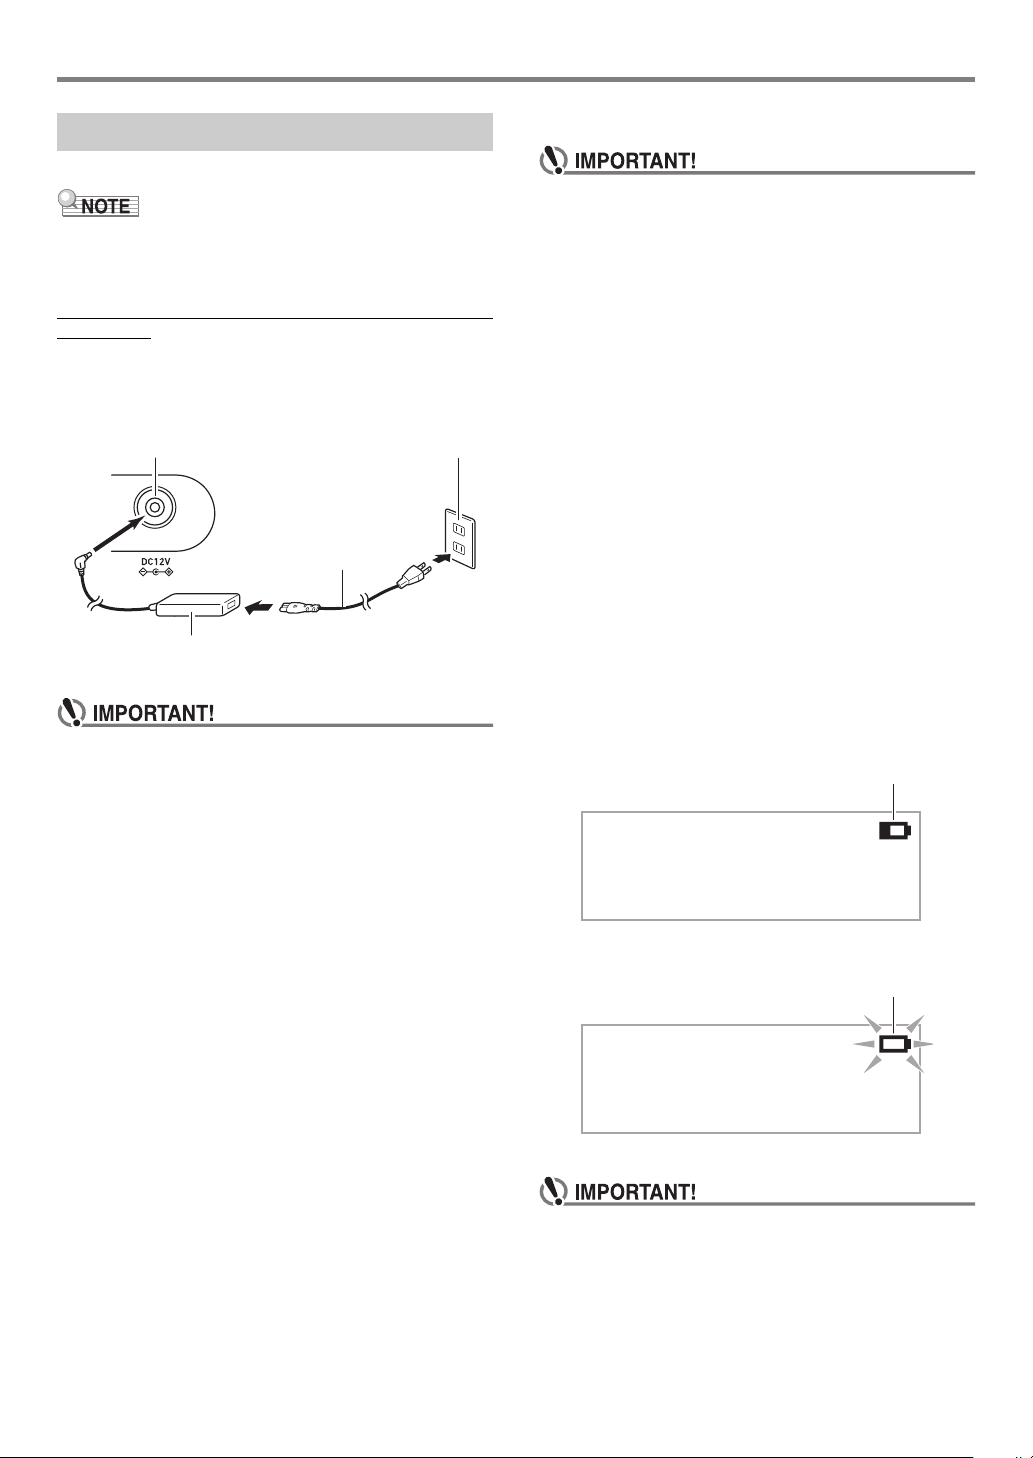
Your Digital Piano uses an AC adaptor for power.
• Though this Digital Piano supports battery operation, use of
an AC adaptor is generally recommended.
■ Using the AC Adaptor
Make sure that you use only the AC adaptor specified for this
Digital Piano. Use of a different type AC adaptor can cause
smoking or malfunction.
• Never connect the AC adaptor (JEITA Standard, with
unified polarity plug) that comes with this Digital Piano
to any other device besides this Digital Piano. Doing so
creates the risk of malfunction.
• Be sure to turn off Digital Piano power before
connecting or disconnecting the AC adaptor.
• The AC adaptor will become warm to the touch after
very long use. This is normal and does not indicate
malfunction.
■ Using Batteries
• Be sure to turn off power before loading batteries.
• It is up to you to prepare six commercially available
alkaline batteries.
• Note the following precautions while the Digital Piano
is turned upside down to load batteries.
− Take care to avoid injury due to pinching your
fingers under the Digital Piano.
− Do not allow the Digital Piano to tip over or otherwise
be subjected to strong impact. Impact can damage
the volume knob and keyboard keys.
1.
Open the battery cover on the bottom of the
Digital Piano.
2.
Load six AA-size batteries into the battery
compartment.
Make sure the positive + and negative - ends of the
batteries are facing as marked on the Digital Piano.
3.
Insert the tabs of the battery cover into the
holes on the side of the battery compartment,
and close the cover.
■ Low Battery and Replace Battery Notifications
A battery icon appears on the display to let you know when
battery power is getting low.
Low Battery Indicator
Replace Battery Indicator
• Using the Digital Piano while batteries are very low can
cause it to turn off suddenly. This can cause data
stored in Digital Piano memory to be corrupted or lost.
Preparing a Power Supply
Specified AC Adaptor: AD-A12150LW
(JEITA Standard plug)
Household power outlet
AC adaptor
dm DC 12V
Power cord
[
TONE
]
PIANO
T : 120
001 :GrPnoConce r t
Low battery icon (not flashing)
[
TONE
]
PIANO
T : 120
001 :GrPnoConce r t
Replace battery icon (flashing)

Overview and Setup
EN-6
1.
Before turning on power, rotate the 2 volume
knob as far as it will go in the direction shown
in the illustration below.
2.
Press the 1P (Power) button to turn on
power.
The message “Welcome” will appear momentarily,
followed by the tone name display. This indicates that the
Digital Piano is ready for use.
• After pressing 1P (Power) to turn on power, do not
press any pedal until the Digital Piano is ready to play
(the tone name display appears).
• Power may not turn on if you press the 1P (Power)
button too lightly. This does not indicate malfunction. If
this happens, apply more pressure when you press the
1P (Power) button.
3.
Use the 2 volume knob to adjust volume.
4.
To turn off power, hold down the 1P (Power)
button until “Bye” appears on the display.
• Pressing the 1P (Power) button to turn off power actually
puts the Digital Piano into a standby state. Minute amounts
of current continue to flow within the Digital Piano in the
standby state. If you do not plan to use the Digital Piano for
a long time or if there is a lightning storm in your area, be
sure to unplug the AC adaptor from the power outlet.
• Turning off power normally causes the tone number and
other settings to return to their initial defaults. You can
enable Auto Resume, which will save most settings when
power is turned off.
• If Auto Resume is disabled, turning off power will initialize
settings, except for those below.
Tuning, LCD contrast, pairing information (Bluetooth
connection logs), Bluetooth notification tone volume level,
expression/assignable pedal type, expression/assignable
pedal calibration, touch button sensitivity
■ Power On Alert
After about six minutes of non-operation while the Digital
Piano is being powered by its AC adaptor, the Power On Alert
function will cause touch button lights to turn on and off
sequentially to remind you that power is on.
Button lights will return to normal if you touch a button, play
something on the keyboard, or perform some other operation.
To turn off power, hold down the 1P (Power) button until
“Bye” appears on the display.
• Use FUNCTION parameter 112 (“Power On Alert”) to
enable or disable Power On Alert. For information about
FUNCTION parameters, see “
Configuring Function
Settings (FUNCTION Mode)
” (page EN-53).
• If you are using batteries to power the Digital Piano, power
will turn off automatically after about six minutes of non-
use. See “
Auto Power Off” (page EN-6).
■ Adjusting Display Contrast
Use FUNCTION parameter
114 (“LCD Contrast”) to adjust
display contrast. For information about FUNCTION
parameters, see “
Configuring Function Settings (FUNCTION
Mode)
” (page EN-53).
■ Operation Lock
Operation lock can be used to prevent operational errors
during performances by disabling button operations. For
details, see “
Using Operation Lock” (page EN-59).
■ Returning to Initial Factory Defaults
You can use Factory Reset to return the Digital Piano’s stored
data and settings to their initial factory defaults any time you
want. For more information, see “
To return all Digital Piano
settings and data to their initial factory defaults (Factory
Reset)
” (page EN-60).
■ Auto Power Off
This Digital Piano is designed to turn off automatically to avoid
wasting power after no operation is performed for a preset
amount of time. The Auto Power Off trigger time is about four
hours when power is being supplied by the AC adaptor, or six
minutes under battery power.
• You can disable Auto Power Off to ensure that power does
not turn off automatically during a concert, etc. To disable
Auto Power Off, select “Off” for FUNCTION parameter
111
(“Auto Power Off”). For information about FUNCTION
parameters, see “
Configuring Function Settings
(FUNCTION Mode)
” (page EN-53).
• Auto Power Off is disabled while Bluetooth audio is being
used.
Turning Power On or Off

EN-7
Overview and Setup
Your Digital Piano has three jacks for connection of pedals.
*1 Included pedal (SP-3) or separately available CASIO
sustain pedal.
*2 See “
To specify the pedal type” (page EN-9).
• Pedals connected to the cr DAMPER PEDAL jack,
dl EXPRESSION/ASSIGNABLE jack, and cs PEDAL
UNIT jack can be used simultaneously.
• You can also use a pedal to switch the Digital Piano
registration setup. For details, see “
Using a Pedal to Cycle
Through Multiple Setups (Sequential Pedal Recall)
” (page
EN-42).
Connect the supplied pedal (SP-3) to the cr DAMPER
PEDAL jack.
Back
■ To change the function of the pedal connected to
the DAMPER PEDAL jack
You can use FUNCTION parameter
37 (“Pedal Target”) to
select one of the settings below.
• For information about FUNCTION parameters, see
“Configuring Function Settings (FUNCTION Mode)” (page
EN-53).
Using a Pedal
Jack Connectable Pedal
cr DAMPER
PEDAL
Switch type pedal*
1
cs PEDAL UNIT Separately available SP-34 pedal unit
(three pedals: damper, soft, and
sostenuto).
dl EXPRESSION/
ASSIGNABLE
Switch type pedal,*
1
expression
pedal*
2
DAMPER PEDAL Jack
cr DAMPER PEDAL jack (Standard jack (6.3mm))
SP-3
This setting
(displayed):
Does this:
Sustain Sustains notes played while the pedal is
depressed, even if the keyboard key is
subsequently released. Organ and
other tones that are sustained as long
as keyboard key are depressed
continue to sound as long as the pedal
is depressed.
Sostenuto Sustains only the notes of the keys that
are depressed when the pedal is
pressed until the pedal is released,
even if the keyboard keys are released
first.
Soft Slightly lowers and softens notes played
while the pedal is depressed.
Arpeggio Hold When the arpeggiator (page
EN-27) is
enabled, arpeggiator hold can be
enabled or disabled when the pedal is
depressed.
Play/Stop Performs the same operations as the
8a button.
Fill-in Plays a fill-in when the pedal is
depressed while an Auto
Accompaniment is playing.

Overview and Setup
EN-8
Use the cs PEDAL UNIT jack to connect a separately
available Pedal Unit (SP-34). You can then use the pedals for
expression that is similar to that available on an acoustic
piano.
■ SP-34 Pedal Functions
● Damper Pedal
Pressing the damper pedal while playing will cause the notes
you play to reverberate. The SP-34 pedal also supports half-
pedal operation, so pressing the pedal part way applies only a
partial damper effect.
● Soft Pedal
Pressing this pedal suppresses notes played on the keyboard
after the pedal was pressed, and makes them sound softer.
● Sostenuto Pedal
Only the notes of the keys that are depressed when this pedal
is pressed are sustained, even if the keyboard keys are
released, until the pedal is released.
Use the dl EXPRESSION/ASSIGNABLE jack to connect a
commercially available expression pedal or a CASIO sustain
pedal (included SP-3 or separately available pedal).
Perform one of the operations below depending on the pedal
that is being connected.
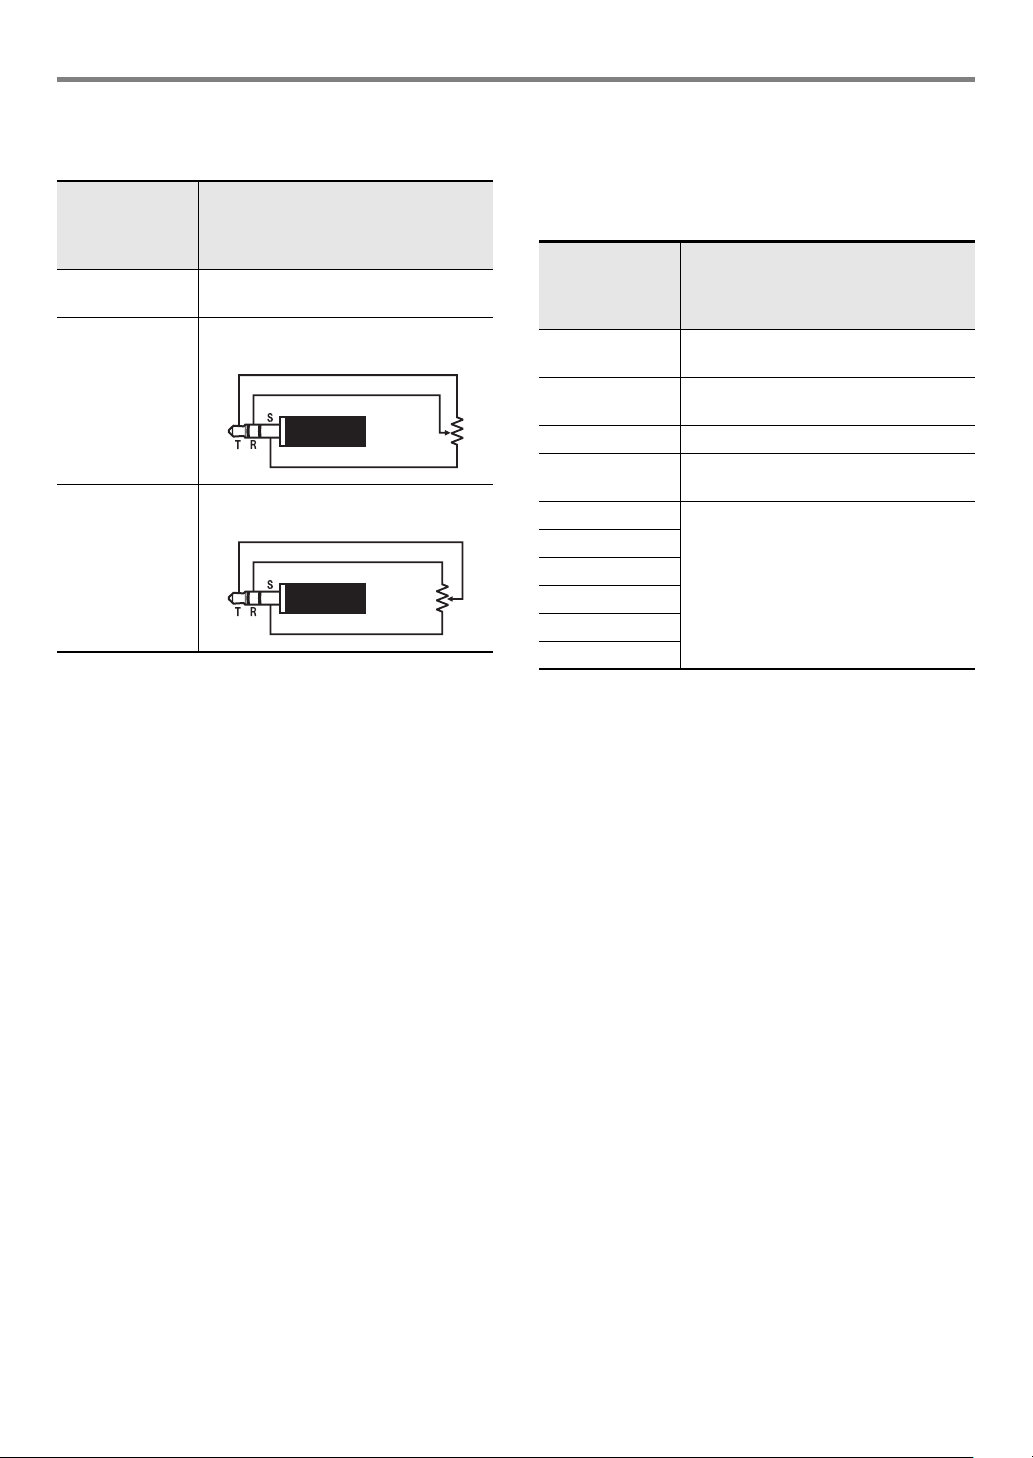
■ Connectable Expression Pedals
• Maximum resistance value: 10kΩ±20% to 50kΩ±20%
• Use of a pedal whose operation has been confirmed (see
below) is recommended.
Operation Confirmed Pedals (Polarity Type 2)
Roland EV-5 (Set minimum volume to 0.)
KURZWEIL CC-1
FATAR VP-25, VP-26
PEDAL UNIT jack
Soft Pedal
Sostenuto Pedal
Damper Pedal
EXPRESSION/ASSIGNABLE Jack
For this type
of pedal:
Perform this operation:
Switch type
pedal
(1) Use the procedure under “
To specify the
pedal type
” (page EN-9) to select “SW”.
(2) Use the procedure under “
To specify the
pedal function
” (page EN-9) to select a
switch type pedal setting.
Expression
pedal
(1) Use the procedure under “
To specify the
pedal type
” (page EN-9) to select a
polarity type that matches the pedal
being connected.
(2) Use the procedure under “
To specify the
pedal function
” (page EN-9) to select an
expression pedal setting.
(3) Perform the procedure under
“
Expression Pedal Calibration” (page
EN-9).
EN-9
Overview and Setup
■ To specify the pedal type
You can use FUNCTION parameter
42 (“Pedal Type”) to
select one of the settings below.
• Note that the expression pedal polarity type depends on the
manufacturer. When connecting an expression pedal,
select “Exp.Type1” or “Exp.Type2” in accordance with its
polarity type.
• For information about FUNCTION parameters, see
“
Configuring Function Settings (FUNCTION Mode)” (page
EN-53).
■ To specify the pedal function
You can use FUNCTION parameter
43 (“Pedal Target”) to
select one of the settings below. The settings from
“Expression” to “Layer Balance” are expression pedal
settings, while the settings from “Sustain” to “Fill-in” are switch
type (CASIO sustain) pedal settings.
• For information about FUNCTION parameters, see
“
Configuring Function Settings (FUNCTION Mode)” (page
EN-53).
■ Expression Pedal Calibration
When connecting an expression pedal to the
dl EXPRESSION/ASSIGNABLE jack for the first time,
perform the calibration operation below.
1.
Connect an expression pedal to the
dl EXPRESSION/ASSIGNABLE jack.
2.
Hold down the bp^ button until “[FUNCTION]”
appears on the display.
This enters the FUNCTION Mode.
3.
Use the bk U and bl I buttons to display
“PEDAL/WHEEL” and then touch bm ENTER.
4.
Use the bk U and bl I buttons to display
“EXP/ASGN PEDAL” and then touch
bm ENTER.
5.
Use the bk U and bl I buttons to display
“Exp Calibration” and then touch bm ENTER.
This displays “Sure?”. If you want to cancel the operation
at this point, touch bk – here.
Select this
setting
(displayed
setting name):
To connect this type of pedal:
SW Switch type pedal (CASIO sustain
pedal)
Exp.Type1 Polarity Type 1 (see the illustration
below) expression pedal
Exp.Type2 Polarity Type 2 (see the illustration
below) expression pedal
Select this
setting
(displayed
setting name):
To assign this function to the pedal:
Expression Expression (MIDI Control Change 11)
control
Master Volume Overall Digital Piano volume level
control
Tempo Tempo control
Layer Balance Upper1 part and Upper2 part volume
level balance control
Sustain
Same as “Sustain” to “Fill-in” under “
To
change the function of the pedal
connected to the DAMPER PEDAL
jack
” (page EN-7).
Sostenuto
Soft
Arpeggio Hold
Play/Stop
Fill-in

Overview and Setup
EN-10
6.
Touch bl + to start adjustment.
7.
While “Highest” is displayed, press the top of
the pedal down as far as it will go and then
touch bm ENTER.
8.
While “Lowest” is displayed, press the bottom
of the pedal down as far as it will go and then
touch bm ENTER.
The message “Complete” will appear when the operation
is complete.
9.
To exit the FUNCTION mode, hold down
bp EXIT until “[FUNCTION]” disappears from
the display.
Using headphones cuts off output from the built-in speakers,
which means you can practice playing even late at night
without disturbing others.
• Be sure to turn down the volume level before connecting
headphones to the co PHONES jack.
• Headphones do not come with the Digital Piano.
• Use commercially available headphones. See page
EN-1
for information about options.
• Do not listen to very high volume output over
headphones for long period. Doing so creates the risk
of hearing damage.
• If you are using headphones that require an adaptor
plug, make sure you do not leave the adaptor plugged
in when you unplug the headphones. If you do, nothing
will sound from the speakers when you play.
■ To output from the speakers while headphones
are connected
While FUNCTION parameter
109 (“Speaker Out”) is enabled
(“On”), sound will be output from the speakers even if
headphones are connected to the PHONES jack. For
information about FUNCTION parameters, see “
Configuring
Function Settings (FUNCTION Mode)
” (page EN-53).
To pair this product with a Bluetooth
®
wireless technology-
capable external device, you need to plug the Wireless MIDI &
audio adaptor into the Digital Piano’s cq USB Type A port.
• Turn off the Digital Piano before disconnecting the
Wireless MIDI & audio adaptor.
• When connecting to a Bluetooth-capable external device,
refer to the “Wireless MIDI & audio adaptor, Audio and
Computer Connection Guide” on the CASIO website.
• The Wireless MIDI & audio adaptor may not be sold in
certain countries or geographic areas.
Using Headphones
co PHONES jacks (Stereo mini jack (3.5mm))
Using the Included Wireless MIDI
& audio adaptor
Wireless MIDI & audio adaptor
cq USB Type A port

EN-11
• Unless otherwise specifically noted, all of the procedures in this manual assume that the Digital Piano is in its initial
power on state (immediately after you turn on power). If you run into problems with a procedure, turn Digital Piano
power off and back on, and then try performing the procedure again.
• Note that turning off Digital Piano power during a procedure causes any pending unsaved data to be deleted.
Turning on Digital Piano power causes touch buttons to light.
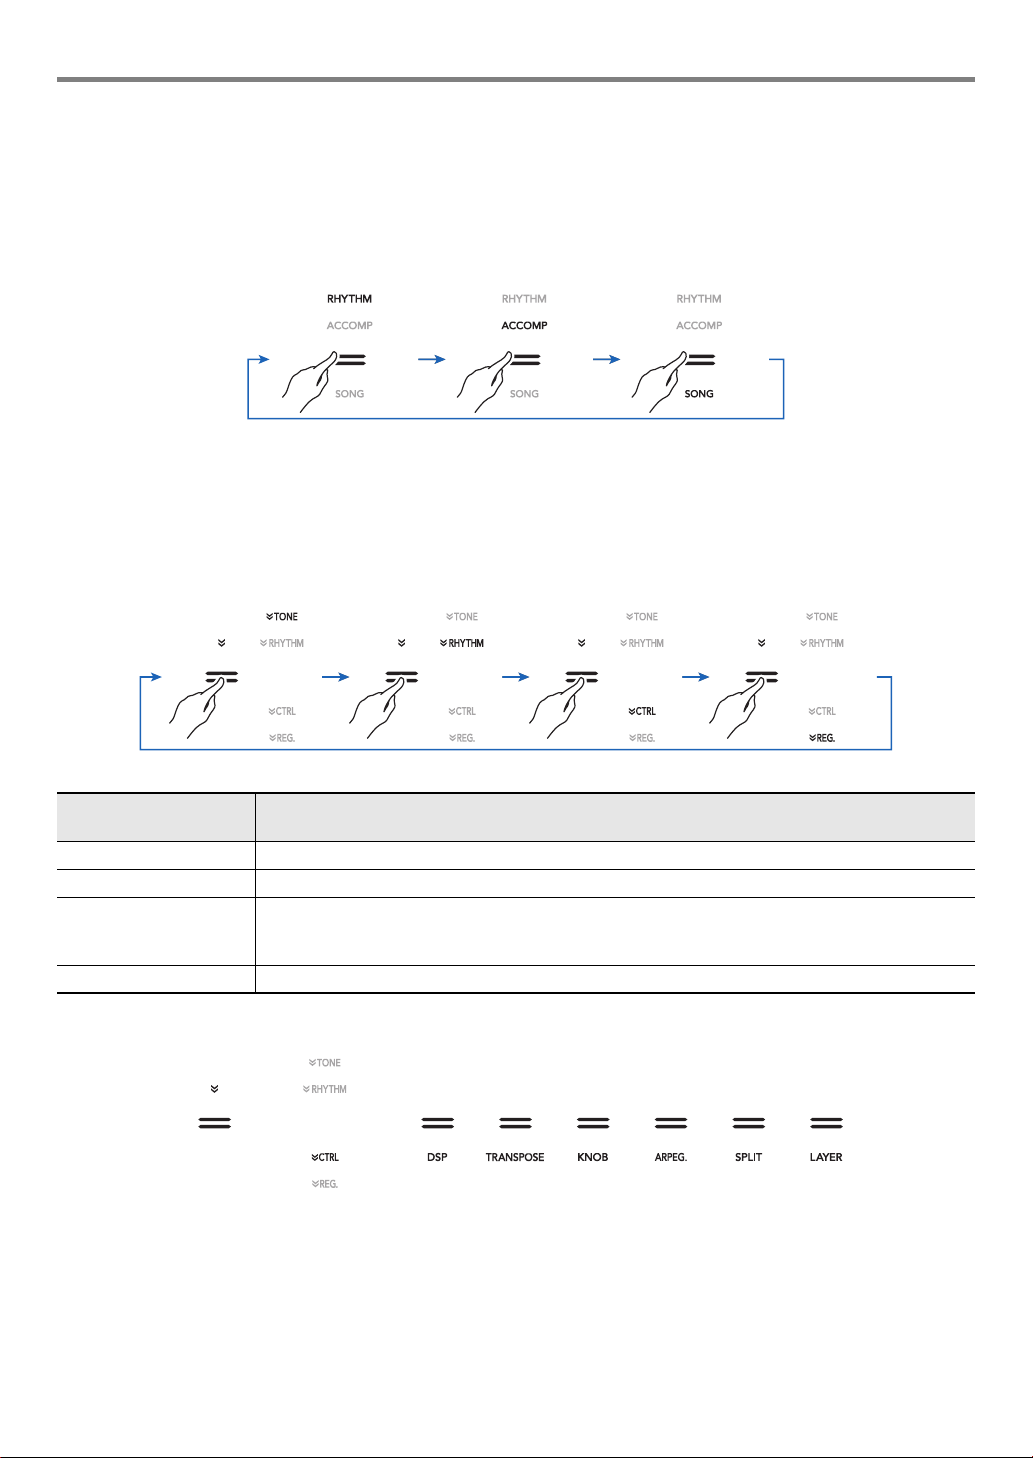
• The buttons and button text that is lit depends on the current operational status of the Digital Piano. For example, turning on
Digital Piano power automatically enters the RHYTHM mode,*
1
so the buttons and text shown below become lit.
• Touching the 3 mode selector button twice will enter the SONG Mode,*
1
which changes the lighting as shown below.
Only the enabled buttons and text indicating available functions are lit or flashing.
*1 For information about these modes, see “
Mode Selector Button” (page EN-12).
*2 In the illustrations of this manual, unlit indicator text above and/or below a button is grey. Lit indicator text is black.
• When operating a touch button, touch it firmly with a bare finger. Touch buttons will not respond if you touch them
while wearing gloves.
• If a touch button does not respond, perform the steps below to increase touch button sensitivity.
(1) Turn off the Digital Piano.
(2) While holding down the C8 keyboard key (the one on the far right), press the 1P (Power) button.
• Keep the C8 keyboard key depressed until the “Welcome” message appears on the display. You do not need to
keep the 1P (Power) button depressed.
■ Touch Button Sensitivity Setting
Use FUNCTION parameter
115 (“Touch Btn Sense”) to adjust the sensitivity of the touch buttons. For information about
FUNCTION parameters, see “
Configuring Function Settings (FUNCTION Mode)” (page EN-53).
Operations Common to All Modes
Touch Button Operations
3 Mode selector button
*
2
EN-12
Operations Common to All Modes
■ Mode Selector Button
Your Digital Piano has three modes, which are described below.
Touch the 3 mode selector button to cycle between the three modes.
An indicator above or below the mode selector button will light to indicate the currently selected mode. Other mode names are not
displayed.
■ ^ Button
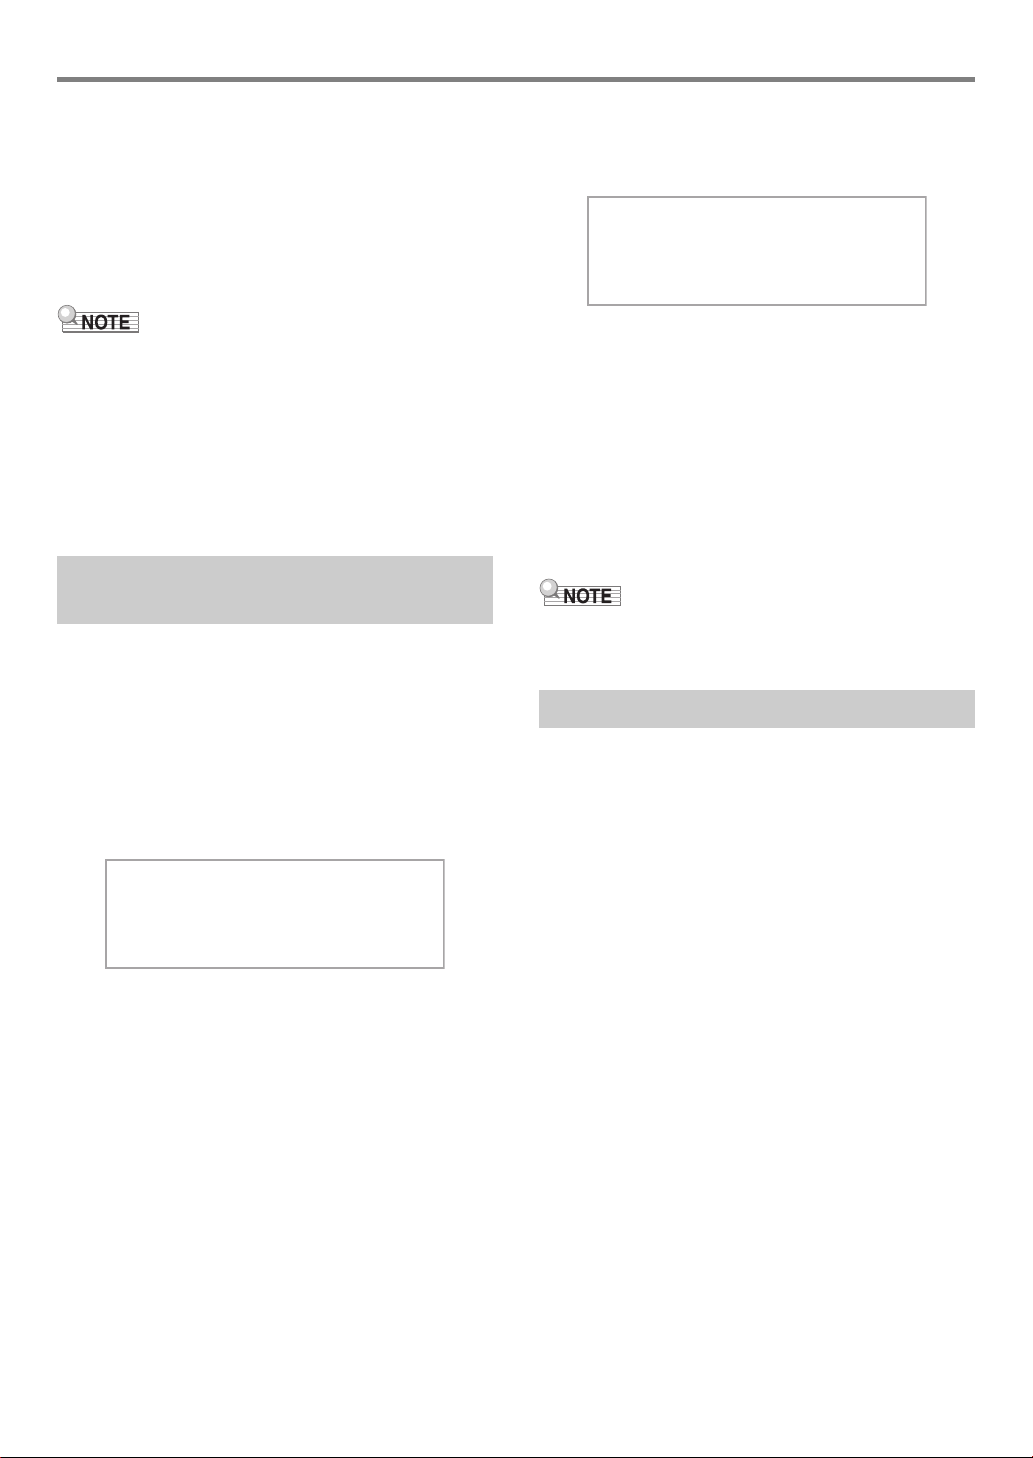
You can use the bp^ button to cycle between four different function types for the six buttons (bq to cl) on the right side of the
Digital Piano’s front panel.
Touch bp^ to cycle between the different function types. An indicator to the right of the bp^ button will light to indicate the
currently selected function type.
Example: Buttons bq to cl are configured as shown below when “CTRL” is selected (lit).
RHYTHM Mode: This is the mode for most basic operations. In addition to normal keyboard play use this mode to perform most
other Digital Piano operations.
ACCOMP Mode: This mode is for playing Auto Accompaniment with chords. See “
Using Auto Accompaniment” (page EN-31).
SONG Mode: Use this mode to play back songs. See “Listening to Songs (MIDI Player)” (page EN-51).
While this function
name is lit:
Buttons bq through cl perform these operations:
TONE Tone category selection (page
EN-14)
RHYTHM Rhythm category selection (page
EN-31)
CTRL DSP selection (page
EN-23), transpose setting changes (page EN-19), knob set selection (page
EN-26), arpeggiator (page EN-27) /auto harmonize (page EN-37) setting change, split and layer
setting changes (page
EN-17)
REG. Registration operations (page
EN-40)
EN-13
Operations Common to All Modes
■ Touch Button Light Auto Off
To save power, you can configure a setting that will turn off all
button lights, except for the 3 mode selector button, after a
certain period of non-operation. Use FUNCTION parameter
107 (“Panel Light”) to specify the amount of non-operation
time (in seconds) until lights turn off, or you can specify that
lights should remain lit (initial default). For information about
FUNCTION parameters, see “
Configuring Function Settings
(FUNCTION Mode)
” (page EN-53).
• To turn the touch button lights back on, touch the 3 Mode
selector button.
• Turning on the Digital Piano under battery power only
(without AC adaptor power) will cause the Panel Light
Setting to change automatically to 60 seconds to conserve
power. You can change the Panel Light Setting if you want.
• Turning off the Digital Piano, connecting the AC adaptor,
and turning power back on will automatically cause “Off” to
be selected for the Panel Light Setting (if Auto Resume is
disabled).
You can use the FUNCTION Mode menu to perform a wide
range of Digital Piano setting operations. The example below
explains how the selection of setting menu items (parameters)
is presented in this manual.
Example:
1.
Hold down the bp^ button until “[FUNCTION]”
appears on the display.
This enters the FUNCTION Mode.
2.
Use the bk U and bl I buttons to select the
following menu items in sequence:
“KEYBOARD” 3 “Touch Response”.
The actual operations performed in step 2 are those below.
2-1.
Use the bk U and bl I buttons to display
“KEYBOARD” and then touch bm ENTER.
2-2.
Use the bk U and bl I buttons to display
“Touch Response” and then touch
bm ENTER.
For details about the FUNCTION Menu configuration and
operations, see “
Configuring Function Settings (FUNCTION
Mode)
” (page EN-53).
• You can exit the FUNCTION Mode at any time by holding
down bp EXIT until “[FUNCTION]” disappears from the
display.
Use the procedure below when you need to change the name
of data saved on a USB flash drive or to input other text.
■ To change a character
1.
Use the bk U and bl I buttons to move the
cursor to the position of the character you
want to change, and then touch bm ENTER.
This enters the character editing mode.
2.
Use the bk – and bl + buttons, or cm (K1)
knob to change the currently selected
character.
3.
To apply your edit, touch bm ENTER.
This exits the character editing mode.
FUNCTION Mode Menu
Operations
[
FUNCT I ON
]
<
SOUND
>
Text Character Input
[
FUNCT I ON
]
–
No r
m
al
+
Touch Res
p
onse
EN-14
■ To insert a character
1.
Use the bk U and bl I buttons to move the
cursor to the position where you want to insert
a character.
2.
Touch bs Area 2.
This inserts “A” at the cursor position and enters the
character editing mode.
• At this time you can change the “A” to a different
character if you want. To do so, perform the procedure
under “
To change a character” from step 2.
■ To delete a character
1.
Use the bk U and bl I buttons to move the
cursor to the position of the character you
want to delete.
2.
Touch br Area 1.
■ To save edited text
1.
Touch cl STORE.
■ Supported Input Characters
Input of the characters shown in the table below is supported
when saving a file to a USB flash drive.
• When saving a file to a USB flash drive, you will be able to
use up to 231 characters for a file name.
• If you use this procedure to edit the file name of a file on a
FAT32 formatted USB flash drive, you will not be able to
input some of the characters shown above.
You can use the procedure below to play back the six built-in
demo songs in sequence.
1.
Hold down the bp^ button until “DEMO”
under the bn DEMO button starts to flash.
2.
Touch bn DEMO.
This causes the bn DEMO button light and “DEMO”
indicator to turn off, which indicates demo play standby.
At this time, the display will show “1: Demo Song”.
• You can also use the bk – and bl + buttons to switch
between songs. This operation can be performed while
playback is in progress.
3.
To start demo play, touch 8a or
bm ENTER.
• After this, you can pause and resume demo play by
touching 8a or bm ENTER.
4.
To exit demo play standby, touch bp EXIT.
• If Auto Power Off (page EN-6) is enabled, power will turn off
automatically at the applicable trigger time after a period of
non-use, even if demo play is being performed.
Your Digital Piano comes with a large collection of tones. You
can select a tone and play it on the keyboard.
■ Tone Categories
The tones of your Digital Piano are divided among six
categories, which you can access using TONE category
buttons bq through cl. Each of the six categories is divided
further into sub-categories, and touching the TONE category
button for a particular category will cycle in sequence between
its sub-categories.
For details about tone categories and sub-categories, and the
names of tones included in each sub-category, refer to the
separate “Built-in Music Data Lists”.
0
A
N
[
i
v
!
1
B
O
]
j
w
#
2
C
P
^
k
x
$
3
D
Q
_
l
y
%
4
E
R
`
m
z
&
5
F
S
a
n
{
'
6
G
T
b
o
}
(
7
H
U
c
p
~
)
8
I
V
d
q
+
9
J
W
e
r
,
;
K
X
f
s
-
=
L
Y
g
t
.
@
M
Z
h
u
Digital Piano Operations
Listening to Demo Play
Selecting a Tone
Selecting a Single Tone

EN-15
Digital Piano Operations
■ To select a tone
1.
Use the bp^ button to cycle through settings
until the “^TONE” indicator to the right of the
button is lit.
The currently selected tone category name and tone
name will be shown on the display.
2.
Use TONE category buttons bq through cl to
select a tone category.
• Touching one of the TONE category buttons switches
to the tone that was selected the last time that tone
category was exited.
• Each touch of the TONE category button of the
currently selected tone category will cycle to the next
sub-category of that category.
3.
Use the bk – and bl + buttons to select a tone.
• To jump to the first tone in the current category, touch
bk – and bl + at the same time.
■ Guitar Tones
The built-in guitar tones of this Digital Piano include strum
noise and other sound effects that are applied in accordance
with the pitch (note number) and/or intensity (velocity) of the
notes being played.
■ Versatile Tones
The Digital Piano’s built-in tones include “versatile tones”
(three guitar tones, two bass tones, and two brass tones) that
can be used for creating computer music. Versatile tones
assign performance sounds that are characteristic of a
particular musical instrument (such as a guitar glissando, fret
noise, etc.) to each keyboard key (note) and velocity. For
information about the sounds assigned for each versatile tone
and velocity, see “
Versatile Tone Map” (page EN-77).
Layering makes it possible to sound with two different tones at
the same time. The tone that is layered onto another tone is
the “Upper2 part tone”, which in this manual is referred to as
the “Upper2 tone”. The tone upon which the Upper2 tone is
layered is the “Upper1 part tone”, which is referred to as the
“Upper1 tone”.
■ To layer two tones
1.
Use the procedure under “To select a tone”
(page EN-15) to select the Upper1 tone.
2.
Use the bp^ button to cycle through settings
until the “^CTRL” indicator to the right of the
button is lit.
3.
Touch cl LAYER to enable the layer function,
which is indicated by “LY” on the display.
4.
Use the bp^ button to cycle through settings
until the “^TONE” indicator to the right of the
button is lit. Next, perform the operation under
“
To select a tone” (page EN-15) to select the
Upper2 tone.
• You can adjust the volume of the Upper1 and Upper2 parts,
and configure other part settings. For details, see
“
Configuring Layer and Split Settings” (page EN-17).
[
TONE
]
PIANO
T : 120
001 :GrPnoConce r t
Tone name Category name
Layering Two Tones
Upper1
Upper2
[
TONE
]
U2 STR I NGS
T : 120 LY
002 :
M
el low Str.1
Layer enabled indicator
“Upper2” indicator
Digital Piano Operations
EN-16
■ To unlayer the keyboard
1.
Use the bp^ button to cycle through settings
until the “^CTRL” indicator to the right of the
button is lit.
2.
Touch cl LAYER so the “LY” indicator
disappears from the display.
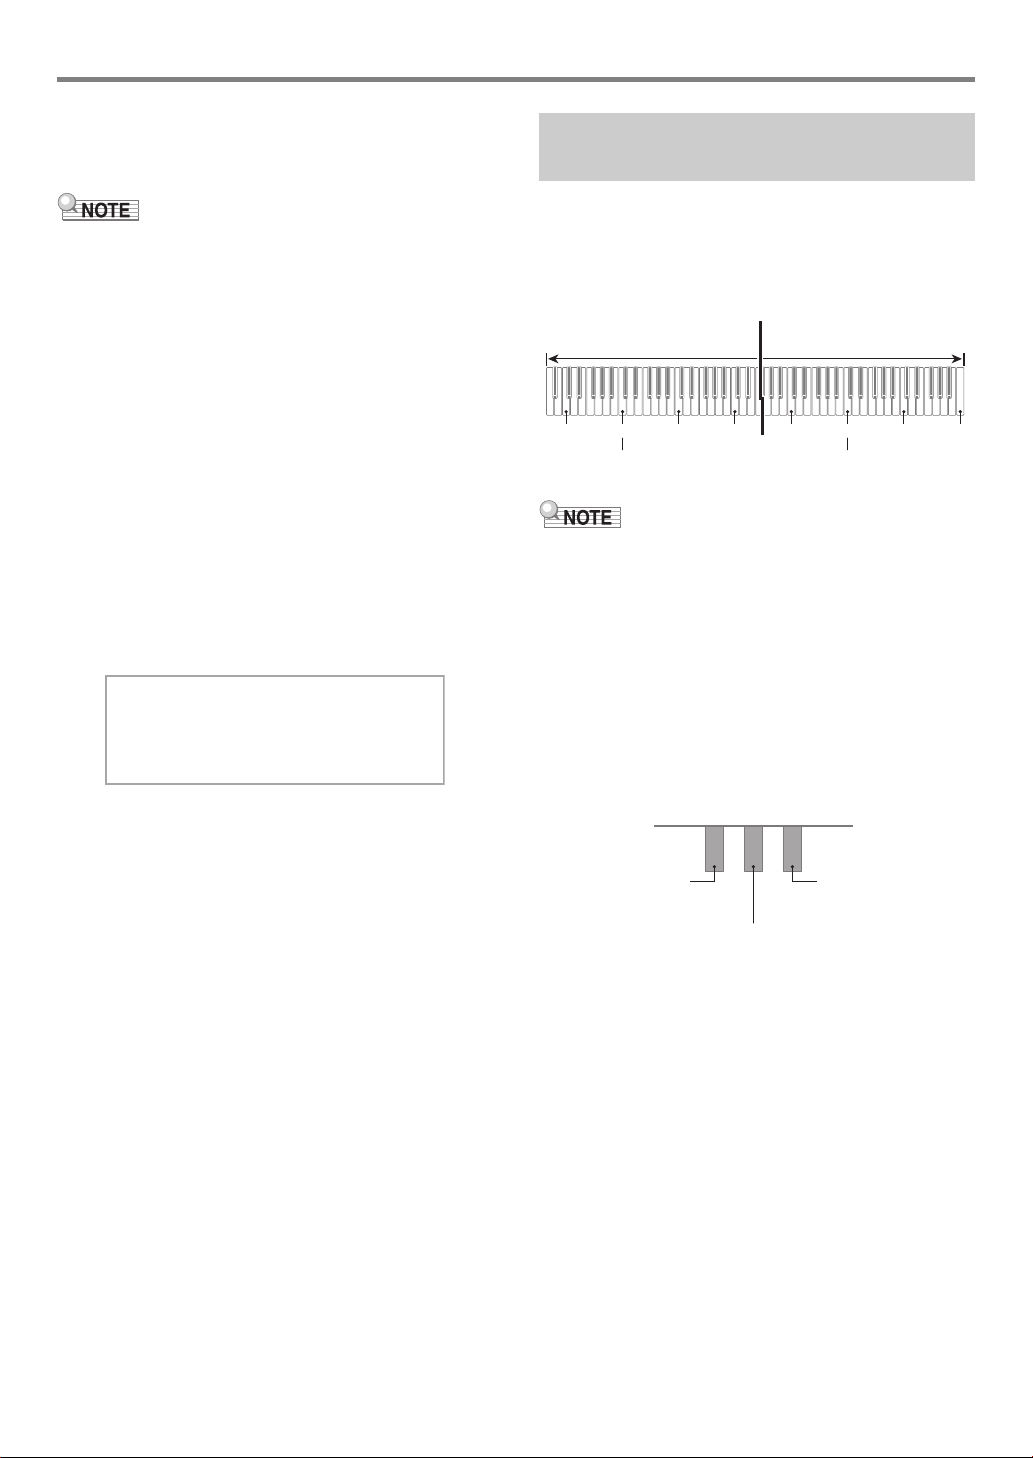
You can use the lower range and upper range of the keyboard
to sound two different tones. When the keyboard is split
between a left side and a right side range, the tone assigned
to the lower (left side) range is the “Lower part tone”, which is
referred to as the “Lower tone” in this manual. The tone
assigned to the upper (right side) range is called the “Upper1
tone” or “Upper2 tone” (when the keyboard is layered with the
Upper2 tone).
Under initial default settings, the lowest note of the upper
range (split point) is at F{3.
■ To split the keyboard between two different
tones
1.
Use the procedure under “To select a tone”
(page EN-15) to select the upper range
(Upper1) tone.
2.
Use the bp^ button to cycle through settings
until the “^CTRL” indicator to the right of the
button is lit.
3.
Touch ck SPLIT to enable the split function,
which is indicated by “SP” on the display.
4.
Use the bp^ button to cycle through settings
until the “^TONE” indicator to the right of the
button is lit. Next, perform the operation under
“
To select a tone” (page EN-15) to select the
Lower tone.
• To use split and layer at the same time, perform the
procedure above and then continue with steps 2 through 4
under “
To layer two tones” (page EN-15).
• You can individually adjust the volumes of the Lower part,
Upper1 part and Upper2 part, and configure other part
settings. For details, see “
Configuring Layer and Split
Settings
” (page EN-17).
■ To change the split point
1.
Use the bp^ button to cycle through settings
until the “^CTRL” indicator to the right of the
button is lit.
2.
Hold down ck SPLIT as you press the
keyboard key you want to specify as the lowest
note of the upper range (right) keyboard. This
makes it the split point.
3.
Release ck SPLIT.
This sets the split point.
Splitting the Keyboard Between Two Tones
Lower
Upper1
Upper2
[
TONE
]
LOTHERS
T : 120 SP
059 :Acous .Bass 1
Split enabled indicator
“Lower” indicator
[
CTRL
]
KNOB
S P . P O I N T : F 3
|
F # 3
01 :Fi l ter
Split point note name
EN-17
Digital Piano Operations
■ To unsplit the keyboard
1.
Use the bp^ button to cycle through settings
until the “^CTRL” indicator to the right of the
button is lit.
2.
Touch ck SPLIT so the “SP” indicator
disappears from the display.
You can individually configure volume level, octave shift, and
tuning settings for the Upper1, Upper2, and Lower parts. You
can also specify whether or not pedal and/or cn PITCH
BEND wheel operations should affect each part.
■ To change the volume level, octave shift, and
tuning settings of each part
Use FUNCTION parameters
14 (PART VOLUME), 18 (PART
OCT SHIFT), and
22 (PART FINE TUNE) to configure each
setting. For information about FUNCTION parameters, see
“
Configuring Function Settings (FUNCTION Mode)” (page
EN-53).
■ To enable or disable pedal operations and pitch
bend wheel operations for each part
Use FUNCTION parameters
36 (DAMPER PEDAL), 41 (EXP/
ASGN PEDAL),
48 (PEDAL UNIT), and 52 (WHEEL) to
configure each setting. For information about FUNCTION
parameters, see “
Configuring Function Settings (FUNCTION
Mode)
” (page EN-53).
*1 The On/Off setting selected here is applied only while the
“Sustain”, “Sostenuto”, or “Soft” setting in the table under
“
To change the function of the pedal connected to the
DAMPER PEDAL jack
” (page EN-7) is selected. In all
other cases, the effect (or function) assigned to the pedal
is applied, regardless of what is selected here.
*2 The On/Off setting selected here is applied only while the
“Expression”, “Sustain”, “Sostenuto”, or “Soft” setting in the
table under “
To specify the pedal type” (page EN-9) is
selected. In all other cases, the effect (or function)
assigned to the pedal is applied, regardless of what is
selected here.
Configuring Layer and Split Settings
Parameter Name
(Displayed)
Use this
setting
(displayed):
To do this:
PART VOLUME
3Upper1 Part,
Upper2 Part,
Lower Part
0 - 127 Adjust the volume
level of each part.
PART OCT SHIFT
3Upper1 Part,
Upper2 Part,
Lower Part
–2 - +2 Specify the octave
shift amount of each
part.
PART FINE TUNE
3Upper1 Part,
Upper2 Part,
Lower Part
–99 - +99 Specify, in 1-cent
steps, the pitch of
each part.
Parameter Name
(Displayed)
Use this
setting
(displayed):
To do this:
PEDAL UNIT
3Upper1 Part,
Upper2 Part,
Lower Part
On, Off Specify whether or not
the three pedals
connected to the
cs PEDAL UNIT
jack should be applied
to each part.
DAMPER PEDAL
3Upper1 Part,
Upper2 Part,
Lower Part
On, Off Specify whether or not
the pedal connected
to the cr DAMPER
PEDAL jack should
be applied to each
part.*
1
EXP/ASGN PEDAL
3Upper1 Part,
Upper2 Part,
Lower Part
On, Off Specify whether or not
the pedal connected
to the
dl EXPRESSION/
ASSIGNABLE jack
should be applied to
each part.*
2
WHEEL
3Upper1 Part,
Upper2 Part,
Lower Part
On, Off Specify whether or not
the cn PITCH BEND
wheel effect should be
applied to each part.
Digital Piano Operations
EN-18
The following types of sounds are output by your Digital
Piano: keyboard performance,* auto accompaniments, song
playback, and sounds input from an external source. Each of
these sounds can be controlled and adjusted individually.
* Keyboard performance includes all parts: Upper1, Upper2,
and Lower.
■ To adjust the volume of the keyboard
1.
Hold down the bp^ button until “[FUNCTION]”
appears on the display.
This enters the FUNCTION Mode.
2.
Use the bk U and bl I buttons to select the
following menu items in sequence:
“KEYBOARD” 3 “KeyboardVolume”.
3.
Use the bk – and bl + buttons, or cm (K1)
knob to change the setting.
• You can set the volume within the range of 0 to 127.
• To return to the initial default setting, touch bk – and
bl + at the same time.
4.
To exit the FUNCTION mode, hold down
bp EXIT until “[FUNCTION]” disappears from
the display.
• To adjust volume levels other than the keyboard volume
level, use the FUNCTION parameters below.
– Auto Accompaniment volume: “Accomp Volume” (
75)
– MIDI song volume: “MIDI Volume” (
85)
– Audio song volume: “Audio Volume” (
86)
– Bluetooth audio input volume level: “Audio Volume” (
95)
– AUDIO IN jack input volume level: “Volume” (
98)
For information about FUNCTION parameters, see
“
Configuring Function Settings (FUNCTION Mode)” (page
EN-53).
Touch Response alters tone volume in accordance with
keyboard pressure (speed). This provides you some of the
same expressivity you get on an acoustic piano.
Adjusting the Overall Volume Level of the
Keyboard Performance Parts
[
FUNCT I ON
]
–
127
+
Ke
y
boa rdVo l u
m
e
Changing Keyboard Response to
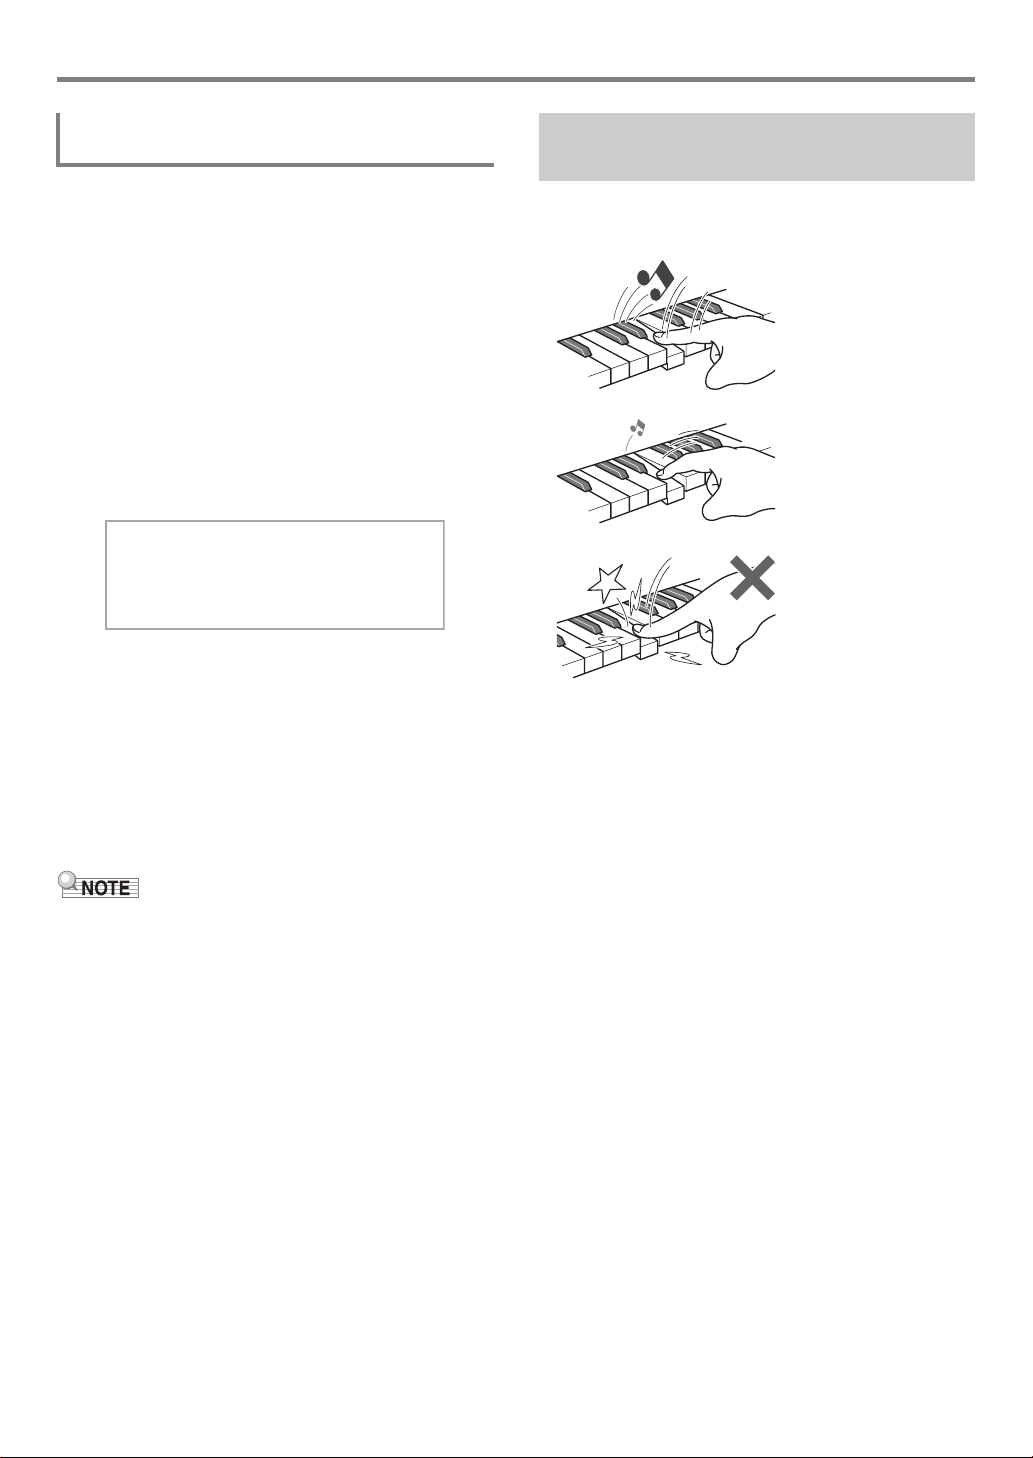
Touch Pressure (Touch Response)
Pressing fast produces
louder notes.
Pressing slowly
produces softer notes.
Do not try to use too
much pressure.
EN-19
Digital Piano Operations
■ To change touch response sensitivity
1.
Hold down the bp^ button until “[FUNCTION]”
appears on the display.
This enters the FUNCTION Mode.
2.
Use the bk U and bl I buttons to select the
following menu items in sequence:
“KEYBOARD” 3 “Touch Response”.
3.
Use the bk – and bl + buttons, or cm (K1)
knob to change the setting.
4.
To exit the FUNCTION mode, hold down
bp EXIT until “[FUNCTION]” disappears from
the display.
Transpose lets you raise or lower the overall pitch of the
Digital Piano in semitone steps. You can use this feature to
raise or lower the keyboard key and to play a piece in a key
that is more comfortable for you, or to adjust to a key that
better matches a vocalist, etc.
■ To change the transpose setting
1.
Use the bp^ button to cycle through settings
until the “^CTRL” indicator to the right of the
button is lit.
2.
Touch br TRANSPOSE.
The currently selected transpose setting value will be
shown on the display.
3.
Use the bk – and bl + buttons to change the
setting.
• You can change the pitch of the keyboard within the
range of –12 to +12 semitones.
• To return to the initial default setting, touch bk – and
bl + at the same time.
This setting
(displayed):
Does this:
Disabled (Off) Disables Touch Response. Sound
volume is fixed, regardless of key
press speed.
Light (Light2)
Makes production of a louder
sound easier, so touch feels
lighter than “Normal”.
(Light1)
Normal (Normal) Specifies normal sensitivity.
(Heavy1)
Makes production of a louder
sound more difficult, so touch
feels heavier than “Normal”.
Heavy (Heavy2)
[
FUNCT I ON
]
–
No r
m
al
+
Touch Res
p
onse
Changing the Pitch
Changing the Pitch in Semitone Steps
(Transpose)
[
CTRL
]
TRANSPOSE
T : 120
00
Digital Piano Operations
EN-20
Use the tuning feature when you need to adjust the pitch
slightly to play along with another musical instrument.
• The tuning feature specifies the frequency of the A4 note.
You can set a frequency within the range of 415.5 to
465.9 Hz. The initial default setting is 440.0 Hz.
• You can change the frequency in 0.1 Hz steps.
■ To change the tuning setting
1.
Hold down the bp^ button until “[FUNCTION]”
appears on the display.
This enters the FUNCTION Mode.
2.
Use the bk U and bl I buttons to select the
following menu items in sequence: “SYSTEM”
3 “Master Tuning”.
3.
Use the bk – and bl + buttons, or cm (K1)
knob to change the setting.
• To return to the initial default setting, touch bk – and
bl + at the same time.
4.
To exit the FUNCTION mode, hold down
bp EXIT until “[FUNCTION]” disappears from
the display.
You can use the procedure below to raise or lower pitch in
octave units. In the explanation here, we will assume that
layer and split are not being used, and octave shift the
keyboard tone (Upper1 part).
• When layer and/or split is being used, you can specify
separate octave shift settings for each part (Upper1,
Upper2, Lower). For details about the settings of each part,
see “
Configuring Layer and Split Settings” (page EN-17).
■ To octave shift the Upper1 part
1.
Disable both layer and split if they are enabled.
• See “
To unlayer the keyboard” (page EN-16) and “To
unsplit the keyboard
” (page EN-17).
2.
Hold down the bp^ button until “[FUNCTION]”
appears on the display.
This enters the FUNCTION Mode.
3.
Use the bk U and bl I buttons to select the
following menu items in sequence:
“KEYBOARD” 3 “PART OCT SHIFT” 3
“Upper1 Part”.
This displays the Upper1 part octave shift setting screen.
4.
Use the bk – and bl + buttons, or cm (K1)
knob to change the setting.
• You can shift the octave within the range of –2 to +2.
• To return to the initial default setting, touch bk – and
bl + at the same time.
5.
To exit the FUNCTION mode, hold down
bp EXIT until “[FUNCTION]” disappears from
the display.
Fine Tuning a Pitch (Tuning)
Changing the Pitch in Octave Units (Octave
Shift)
[
FUNCT I ON
]
–
0
+
<
U
pp
e r 1 P a r t
>

EN-21
Digital Piano Operations
You can use bn SOUND MODE to enable and disable the
effects described below.
● Hall Simulator/Reverb
Hall Simulator and Reverb are both effects that change the
reverberation of the sound.
● Surround
The Surround effect creates acoustics that make the sound
from the speakers seem like it is coming from multiple
directions (virtual surround). This effect is great when
outputting audio from an external source* through the Digital
Piano’s speakers.
* Audio input from a Bluetooth connected smart device or an
audio device connected to the Digital Piano’s ct AUDIO
IN jack.
• The initial power on default setting is Hall Simulator/reverb
enabled and Surround disabled.
• The Surround effect is not applied to the output from the
Digital Piano’s co PHONES jacks or dk LINE OUT R, L/
MONO jacks.
■ To enable or disable the Hall Simulator/Reverb
and Surround effects
1.
Touch bn SOUND MODE.
• Each touch will cycle between the settings, and the
current setting is indicated by the LED lights as shown
below.
■ To specify the Hall Simulator/Reverb type
1.
Hold down bn SOUND MODE until “[SOUND
MODE]” appears on the display, and then
release the button.
2.
After confirming that “Hall/Rev. Type” is
displayed, touch bm ENTER.
The name of the currently selected Hall Simulator/
Reverb type will be shown on the display.
3.
Use the bk – and bl + buttons to select the
hall simulator/reverb type.
● Hall Simulator
Using the Sound Mode Effects
(Hall Simulator/Reverb and
Surround)
Hall
Simulator
The hall simulator effect simulates the rich
clarity, unconstrained brilliance, and other
distinctive acoustic characteristics of world-
famous concert halls and structures.
Reverb Reverb simulates ambient spaces, such as a
room or hall.
Type (displayed) Description
N.Y.Club Manhattan music club
Opera Hall Uniquely shaped Sydney Concert Hall
Berlin Hall Berlin arena type classic concert hall
BritishStadium Large outdoor stadium in the London
suburbs
Hall Simulator/
Reverb enabled
Surround disabled
Hall Simulator/
Reverb enabled
Surround enabled
Hall Simulator/
Reverb disabled
Surround disabled
[
SOUND
M
ODE
]
<
H a l l / R e v . T
yp
e
>
Digital Piano Operations
EN-22
● Reverb
• To return to the initial default setting (Hall 3), touch
bk – and bl + at the same time.
4.
After the setting is the way you want, touch
bp EXIT as many times as required until
“[SOUND MODE]” disappears from the display.
■ To adjust the depth of the hall simulator/reverb
effect
1.
Hold down bn SOUND MODE until “[SOUND
MODE]” appears on the display, and then
release the button.
2.
Use the bk U and bl I buttons to display one
of the setting items below and then touch
bm ENTER.
3.
Use the bk – and bl + buttons to change the
setting.
• You can specify a value from 0 to 127. The larger the
value, the greater the effect depth.
4.
When the setting you want is selected, touch
bp EXIT.
5.
Repeat steps 2 through 4 as required.
6.
After the setting is the way you want, touch
bp EXIT.
■ To specify the Surround type
1.
Hold down bn SOUND MODE until “[SOUND
MODE]” appears on the display, and then
release the button.
2.
Use the bk U and bl I buttons to display
“Surround Type” and then touch bm ENTER.
The name of the currently selected surround type will be
shown on the display.
3.
Use the bk – and bl + buttons to select the
surround type (Type 1 or Type 2).
4.
After the setting is the way you want, touch
bp EXIT as many times as required until
“[SOUND MODE]” disappears from the display.
Type (displayed) Description
Room 1
Simulates the reverberation of a room.
Room 2
Room 3
Large Room
Hall 1
Simulates the reverberation of a small
hall.
Hall 2
Hall 3
Stadium Simulates the reverberation of a
stadium.
With this menu
item (displayed):
You can do this:
Hall/Rev. Depth Adjust the depth of the Hall Simulator
and Reverb effects applied to the
Digital Piano’s built-in sound source.
AudioInHallDepth Adjust the depth of the Hall Simulator
and Reverb effects applied to audio
input from an audio device connected
to the Digital Piano’s ct AUDIO IN
jack.

EN-23
Digital Piano Operations
A DSP (Digital Signal Processor) is a type of effect that is
connected between the sound source and output. Included
are equalizer, tremolo, limiter, wah, etc. In addition to the
default DSPs*
1
assigned to each of the tones, your Digital
Piano also offers a selection of 100 preset DSPs*
2
from which
to choose. You can also configure DSP parameter settings.
*1 DSPs that are pre-assigned to each tone based on
suitability. Some tones do not have a default DSP
assigned.
*2 DSP in addition to the default DSPs, which can be
assigned to any tone.
■ To select a DSP
1.
Use the procedure under “To select a tone”
(page EN-15) to select a tone.
2.
Use the bp^ button to cycle through settings
until the “^CTRL” indicator to the right of the
button is lit.
3.
Touch bq DSP.
This displays the name of the DSP assigned to the tone
you selected (Upper1 tone) in step 1 of this procedure.
• If the current DSP is the default, the word “Tone” will
be shown on the display.
4.
Use the bk – and bl + buttons to select a DSP.
• For the names of all the selectable preset DSPs and
their contents (DSP modules), see “
Preset DSP List”
(page
EN-79). For information about DSP modules,
see “
Configuring DSP Settings” (page EN-23).
• To return to the initial default DSP, touch bk – and
bl + at the same time.
• Even if layer and/or split is enabled, the display that
appears in step 3 above shows the name of the DSP
assigned to Upper1 tone.
■ Configuring DSP Settings
The steps below are the general procedure for configuring
DSP settings.
(1) Select the default DSP or preset DSP whose settings you
want to configure.
(2) Select one of the DSP modules in the DSP you selected.
(3) Configure the settings of the parameters in the DSP
module you selected.
● Example: One DSP module: Preset DSP No.1
“Mono 1BandEQ”
● Example: Four DSP modules: Preset DSP No.27
“Re-Amp 1”
If the DSP whose settings you are configuring consists of four
modules and you want to change all of their settings, repeat
steps (2) and (3) four times, once for each module. For details
on the full procedure, see “
To configure DSP settings” (page
EN-24).
• Note that any changes you make to DSP settings are
cleared whenever you turn off Digital Piano power. If
you want to retain DSP changes you make, use the
registration function (page
EN-40) to save the setup so
you can recall it later.
Using a DSP
[
CTRL
]
DSP
T : 120
000 : Tone
Sound Source Output
Sound Source
Output
Mono 1EQ
Compressor Amp Cab
Enhancer ToneCtrl
Digital Piano Operations
EN-24
■ To configure DSP settings
1.
Use the procedure under “To select a DSP”
(page EN-23) to select the DSP whose settings
you want to configure.
2.
Hold down bq DSP until “[DSP SETTING]”
appears on the display.
This enters the DSP setting mode and displays “DSP On/
Off”.
• “DSP On/Off” specifies whether or not a DSP should
be applied to a tone. After confirming that “On” is
selected for this setting, proceed to step 3. “DSP On/
Off” is always “On” if you selected a preset DSP in step
1 of this procedure.
• If you selected a default DSP (indicated by “Tone” on
the display), the default setting here is “Off”, which
means the DSP is not being applied. If this setting is
“Off”, touch bp EXIT to return to step 1 and select a
different tone and/or DSP. Or you can use the steps
below to change the “DSP On/Off” setting to “On”.
Selecting “On” here will make preset DSP 1 the target
of any setting changes you configure.
(1) After confirming that “DSP On/Off” is displayed,
touch bm ENTER.
(2) Use the bk – and bl + buttons to change the setting
to “On”.
(3) Touch bp EXIT.
3.
Use the bk U and bl I buttons to select a
DSP module and then touch bm ENTER.
This displays one of the parameters of the DSP module
you selected.
4.
Use the bk U and bl I buttons to display the
parameter whose setting you want to change
and then touch bm ENTER.
This enters the parameter editing mode.
5.
Use the bk – and bl + buttons to change the
parameter setting.
• To return to the initial default parameter setting, touch
bk – and bl + at the same time.
6.
When the setting is the value you want, touch
bp EXIT.
7.
Repeat steps 4 through 6 as required. When
the settings are the way you want, touch
bp EXIT.
This returns to the DSP module display in step 3 of this
procedure.
8.
Repeat steps 3 through 7 as required.
9.
To exit the DSP setting mode, touch bp EXIT.
[
DSP SETT I NG
]
<
DSP On / O f f
>
[
DSP SETT I NG
]
<
W
etLeve l
>
[
DSP SETT I NG
]
–
040
+
W
et Leve l

EN-25
Digital Piano Operations
Chorus is a function that adds depth and breadth to notes.
To select a chorus setting, use FUNCTION parameter
9
(“Chorus Type”) to select one of the settings below.
* Specifies the initial setting of each tone.
For information about FUNCTION parameters, see
“
Configuring Function Settings (FUNCTION Mode)” (page
EN-53).
Brilliance can be used to make a sound brighter or mellower.
You can use FUNCTION parameter
10 (“Brilliance”) to adjust
brilliance within the range of –3 to +3. A setting of +1 or
greater gives notes a brighter feel, while –1 or less makes
notes sound more mellow. For information about FUNCTION
parameters, see “
Configuring Function Settings (FUNCTION
Mode)
” (page EN-53).
The tones of your Digital Piano have built-in elements that
give them the reverberation characteristics of an acoustic
piano. You can use the procedure below to adjust the
characteristics of notes.
■ To adjust acoustic piano sound characteristics
1.
Hold down the bp^ button until “[FUNCTION]”
appears on the display.
This enters the FUNCTION Mode.
2.
Use the bk U and bl I buttons to select the
following menu items in sequence: “SOUND”
3 “ACOUSTIC SIMU.”.
3.
Use the bk U and bl I buttons to display the
setting item you want to configure and then
touch bm ENTER.
• For more information about setting items and their
settings, see the “
List of Acoustic Piano Sound Setting
Items
” (page EN-26).
4.
Use the bk – and bl + buttons to change the
setting.
5.
Touch bp EXIT.
6.
Repeat steps 3 through 5 for each of the items
whose setting you want to configure.
7.
To exit the FUNCTION mode, hold down
bp EXIT until “[FUNCTION]” disappears from
the display.
Using Chorus
This setting
(displayed):
Chorus Type:
Tone* Tone
Chorus 1 Chorus 1
Chorus 2 Chorus 2
Chorus 3 Chorus 3
Chorus 4 Chorus 4
FB Chorus Feedback Chorus
Deep Chorus Deep Chorus
Flanger 1 Flanger 1
Flanger 2 Flanger 2
Flanger 3 Flanger 3
Flanger 4 Flanger 4
Short Delay 1 Short Delay 1
Short Delay 2 Short Delay 2
Using Brilliance
Adjusting Acoustic Piano Sound
Characteristics (Acoustic
Simulator)

Digital Piano Operations
EN-26
■ List of Acoustic Piano Sound Setting Items
The digital piano has two knobs that you can use
to change the tone, effect, and another
parameter settings in real time.
■ To select the functions (knob sets)
assigned to the knobs
• Regardless of the position of cm (K1) and
(K2) knobs, parameter settings are
unchanged immediately after you change to
another knob set. Settings are not changed
until you perform a knob operation after
changing the knob set.
1.
Use the bp^ button to cycle through settings
until the “^CTRL” indicator to the right of the
button is lit.
2.
Touch bs KNOB.
The name of the currently selected knob set will be
shown on the display.
• For information about parameters assigned to the cm
(K1) and (K2) knobs by each knob set, see “
Knob Set
List
” (page EN-78).
3.
Use the bk – and bl + buttons to select a knob
set.
• To return to the initial default setting, touch bk – and
bl + at the same time.
Setting (Display) Available Options
String Resonance
(String Reso.)
Playing on an acoustic piano
causes the strings that are
harmonics of the played strings
to resonate. You can select
one of the string resonance
settings in the column to the
right.
Tone: Specifies the initial
setting of each
tone.
Off: Disables String
Resonance.
1-4: The greater the
value, the stronger
the String
Resonance.
Damper Resonance
(Damper Reso.)
Pressing the damper pedal on
an acoustic piano opens all 88
of the strings, causing all of the
strings that are harmonics of
the strings that are played to
resonate. You can select one
of the damper resonance
settings in the column to the
right.
Tone: Specifies the initial
setting of each
tone.
Off: Disables Damper
Resonance.
1-4: The greater the
value, the stronger
the Damper
Resonance.
Damper Noise
(Damper Noise)
Damper noise is a slight
metallic ringing sound that is
generated as the damper of an
acoustic piano separates from
the wires pedal when the
damper pedal is pressed. You
can use the settings in the
column to the right to adjust the
volume of the damper noise.
Tone: Specifies the initial
setting of each
tone.
Off: Mutes Damper
Noise.
1-4: The greater the
value, the greater
the noise volume.
Key On Action Noise
(Key On Noise)
When the keys of an acoustic
piano are tapped with
extremely light pressure, piano
mechanism operation sound
(noise) is produced without the
hammers reaching the strings.
You can use the settings in the
column to the right to adjust the
volume of the noise.
Tone: Specifies the initial
setting of each
tone.
Off: Mutes Key On
Action Noise.
1-4: The greater the
value, the greater
the noise volume.
Key Off Action Noise
(Key Off Noise)
Releasing the keyboard keys of
acoustic piano generates piano
mechanism operation sound
(noise). You can use the
settings in the column to the
right to adjust the volume of the
noise.
Tone: Specifies the initial
setting of each
tone.
Off: Mutes Key Off
Action Noise.
1-4: The greater the
value, the greater
the noise volume.
Using the Knobs
[
CTRL
]
KNOB
T : 120
01 :Fi l ter
EN-27
Digital Piano Operations
■ To initialize all parameter settings that can be
configured with knob operations
• The procedure below returns all parameter settings in the
“
Knob Set List” (page EN-78) to the Digital Piano’s initial
defaults.
1.
Use the bp^ button to cycle through settings
until the “^CTRL” indicator to the right of the
button is lit.
2.
Hold down the bs KNOB button until “Sure?”
appears on the display.
3.
To initialize, touch bl +. To exit this operation
without initializing, touch bk –.
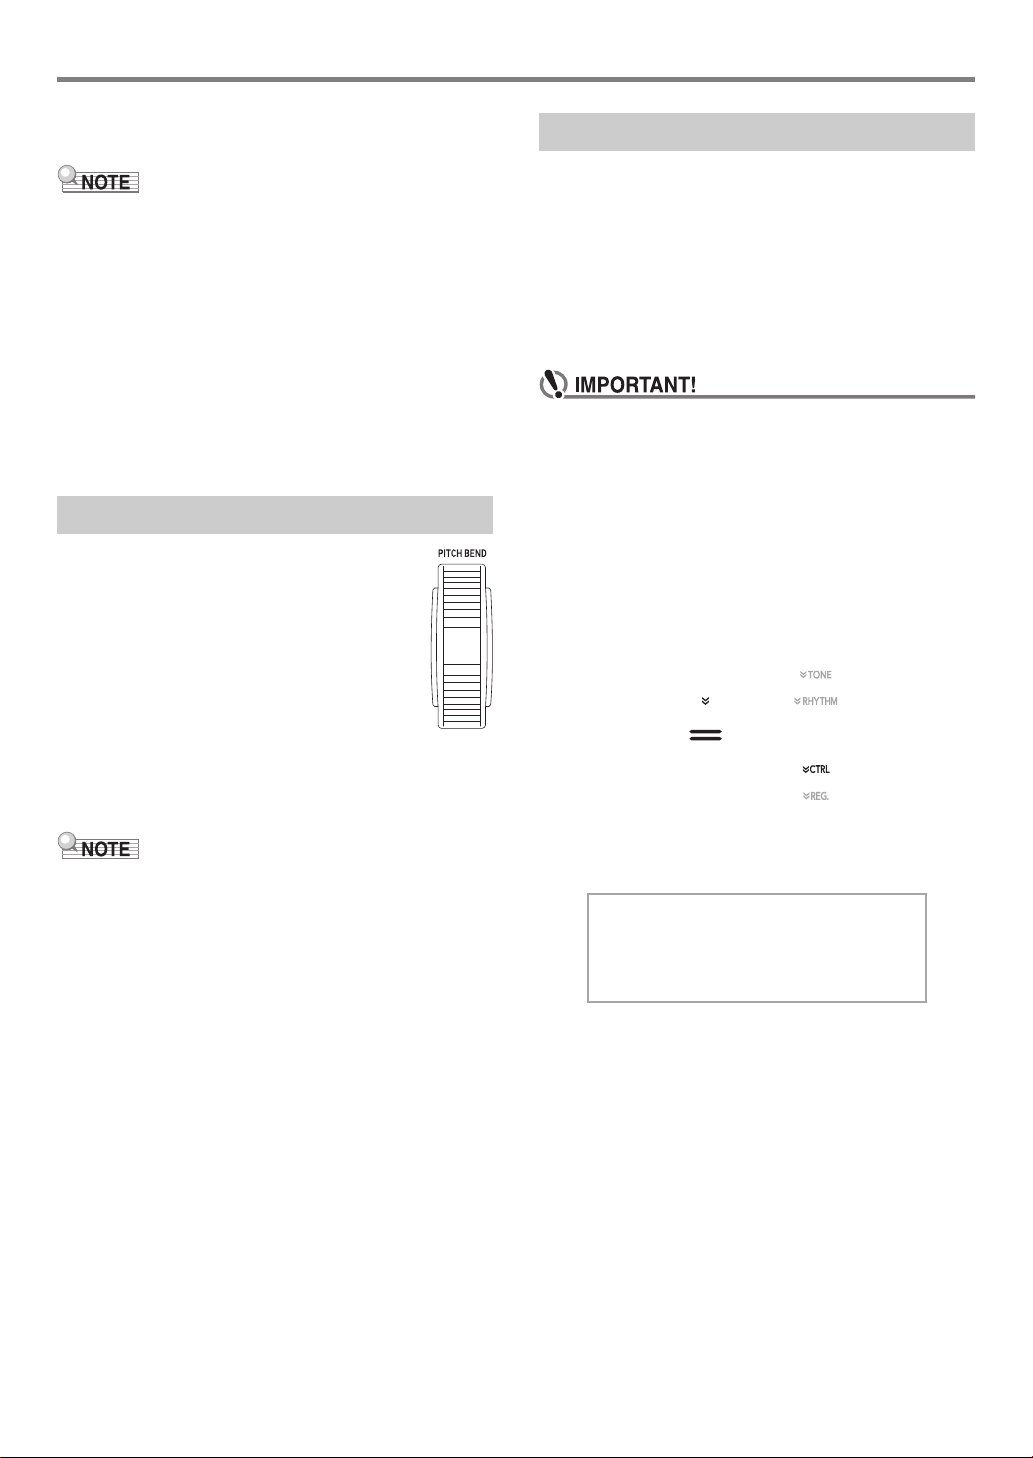
You can use the pitch bend wheel to slide the pitch
of notes smoothly upwards and downwards. This
capability makes it possible to reproduce
saxophone and electric guitar choking effects.
1.
While playing a note on the keyboard,
rotate the cn PITCH BEND wheel on
the left of the keyboard upwards or
downwards.
The amount the note bends depends on how
much you rotate the pitch bend wheel.
• Do not touch the wheel as you turn on the
keyboard.
• You can use FUNCTION parameter 53 (“P Bend Range”) to
specify the amount of pitch change at maximum rotation in
either direction. For information about FUNCTION
parameters, see “
Configuring Function Settings
(FUNCTION Mode)
” (page EN-53).
With the arpeggiator, you can play various arpeggios and
other phrases automatically by simply pressing keys on the
keyboard. You can select from a number of different arpeggio
options, including playing arpeggios from a chord, playing
various phrases automatically, and more.
• A single button is used to control the arpeggiator and auto
harmonize (page
EN-37). Because of this, auto harmonize
cannot be used while the arpeggiator is in use.
■ To enable the arpeggiator
• If “AH” appears instead of “AR” when you touch the
bt ARPEG. button in step 2 of the procedure below,
you will need to change the function assigned to the
bt ARPEG. button. Select “Arpeggiator” for
FUNCTION parameter
79 (“Type Select”). For
information about FUNCTION parameters, see
“
Configuring Function Settings (FUNCTION Mode)”
(page
EN-53).
1.
Use the bp^ button to cycle through settings
until the “^CTRL” indicator to the right of the
button is lit.
2.
To enable the arpeggiator, touch bt ARPEG.
This will cause “AR” to appear on the display.
• Playing a chord or single note on the keyboard will
play back the currently selected arpeggio.
Using the Pitch Bend Wheel
Using the Arpeggiator
[
CTRL
]
KNOB
T : 120 AR
01 :Fi l ter
Digital Piano Operations
EN-28
3.
To disable the arpeggiator, touch bt ARPEG.
This will cause “AR” to disappear from the
display.
• Enabling FUNCTION parameter 80 (“Arpeggio Hold”)
causes the arpeggio pattern to continue playing even after
you release the keyboard keys of the chord.
• You can use FUNCTION parameter
81 (“Arpeggio Part”) to
specify whether the arpeggiator sounds for both the Upper1
and Upper2 parts when the keyboard is layered with two
tones (page
EN-15), or for the Upper1 part only.
• For information about FUNCTION parameters, see
“
Configuring Function Settings (FUNCTION Mode)” (page
EN-53).
■ To select an arpeggiator type
1.
Perform steps 1 and 2 of the procedure under
“To enable the arpeggiator” (page EN-27) to
enable the arpeggiator.
2.
Hold down the bt ARPEG. button until
“ARPEG.” appears on the display.
This causes the currently selected arpeggiator type to
appear in line two of the display.
3.
Use the bk – and bl + buttons to select an
arpeggiator type.
• While the arpeggiator type is displayed, holding down
the bt ARPEG. button until the tone name display
appears will select the tone that is recommended for
the displayed arpeggiator type.
• For details about arpeggiator types, refer to the
separate “Built-in Music Data Lists”.
You can split the keyboard in the center for duet play so the
left and right sides have the same ranges. The Duet Mode is
the perfect way to conduct lessons, with the teacher playing
on the left side as the student plays the same song on the
right side.
• You can change the ranges of the left and right keyboards
in octave units from their initial default settings. This comes
in handy, for example, if the initial default range is not
enough when one person is playing the left hand part and
another person is playing the right hand part. For
information about the setting operation, see “
To change the
octaves of the duet keyboards
” (page EN-29).
■ Pedal Operation when Playing a Duet
• If you are using the separately available SP-34 Pedal Unit,
the left outer pedal is the left keyboard damper pedal, while
the right outer pedal is the right keyboard damper pedal.
Only the damper pedal for the right keyboard supports half-
pedal operations.
• To use the supplied SP-3 Pedal as a damper pedal that
affects both the left keyboard and right keyboard, connect it
to the cr DAMPER PEDAL jack. In the Duet Mode, this
pedal functions as a damper pedal, regardless of the effect
type assigned to it with the procedure under “
To change the
function of the pedal connected to the DAMPER PEDAL
jack” (page EN-7). Half-pedal operation is not supported in
this case.
• If you connect the supplied SP-3 pedal to the
dl EXPRESSION/ASSIGNABLE jack, it can be used as
a soft pedal for both the left and right keyboards.
[
CTRL
]
ARPEG.
T : 120 AR
001 :Sc rew U
p
Splitting the Keyboard for Duet
Play
C3 C4 C5 C6 C3 C4 C5 C6
Split point
Left keyboard Right keyboard
(middle C) (middle C)
Left side damper pedal
Left and right side
damper pedal
Right side damper pedal
(Half-pedal operation
supported)
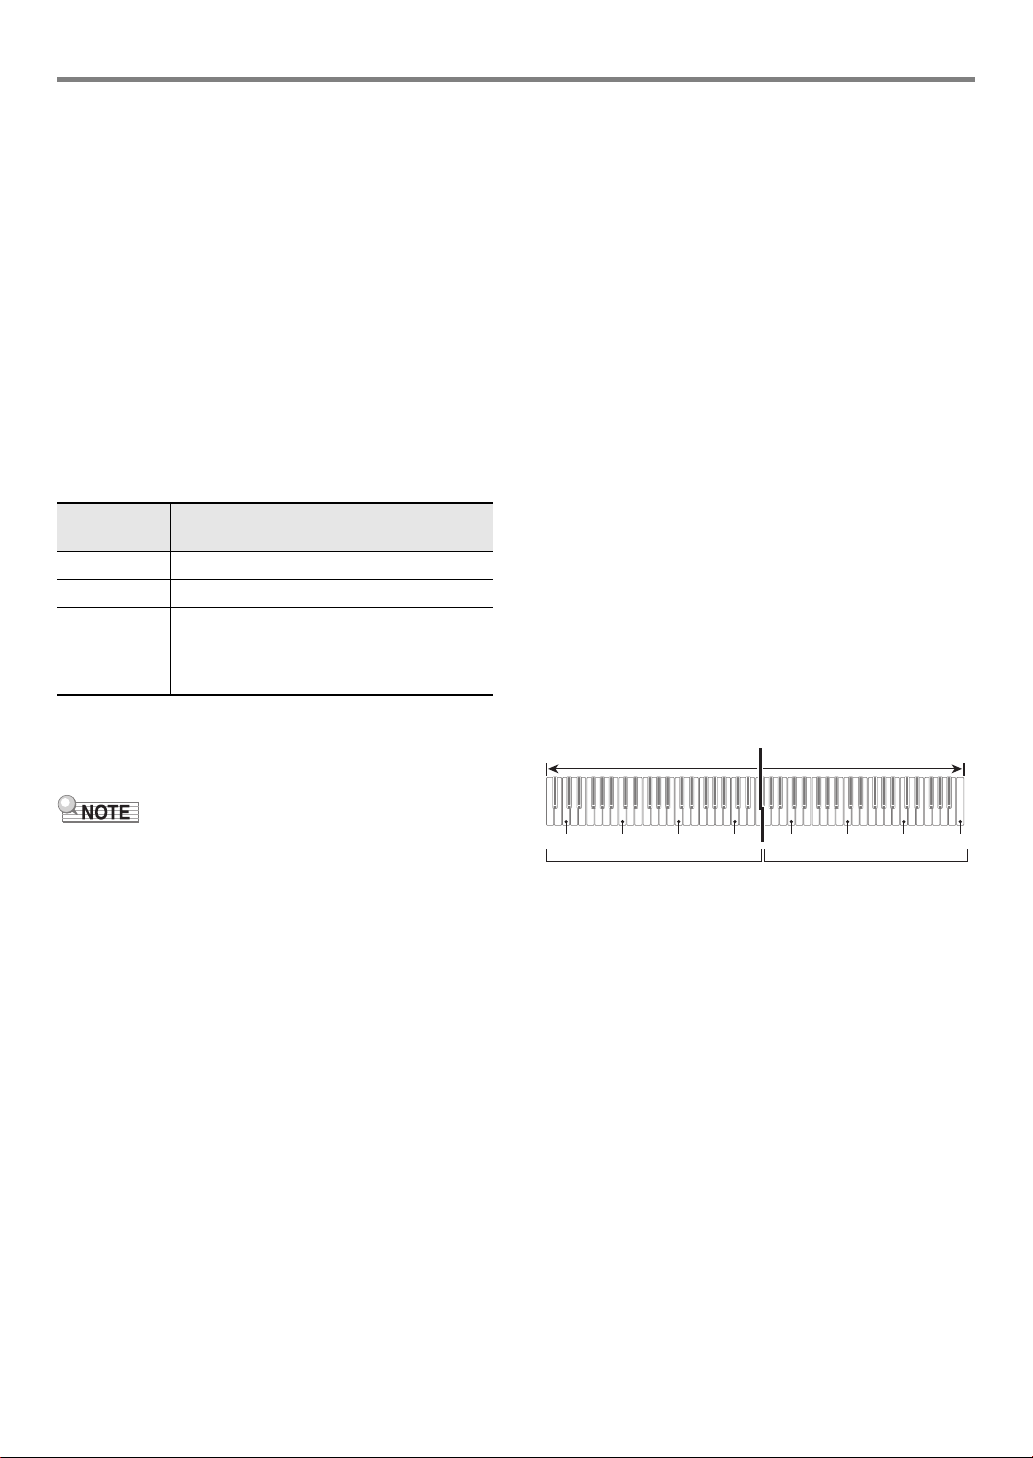
EN-29
Digital Piano Operations
■ To use the Duet Mode
1.
Hold down the bp^ button until “[FUNCTION]”
appears on the display.
This enters the FUNCTION Mode.
2.
Use the bk U and bl I buttons to select the
following menu items in sequence:
“KEYBOARD” 3 “DUET”.
3.
After confirming that “Duet Mode” is displayed,
touch bm ENTER.
4.
Use the bk – and bl + buttons to change the
Duet Mode setting.
• To use the Duet Mode, select either “On” or “Pan” for
this setting. To exit the Duet Mode and return to
normal keyboard play, select “Off”.
5.
To exit the FUNCTION mode, hold down
bp EXIT until “[FUNCTION]” disappears from
the display.
• Some settings become fixed and cannot be changed while
in the Duet Mode.
• The following effects cannot be used while “Pan” is
selected for the Duet Mode setting: Hall Simulator/Reverb
(page
EN-21), Surround (page EN-21), Chorus (page
EN-25), Acoustic Simulator (page EN-25).
• In the Duet Mode, the knob set (page
EN-26) is
automatically changed to 12 Kbd/Acmp Vol. This knob set
is fixed, and cannot be changed.
■ To change the octaves of the duet keyboards
1.
Perform steps 1 and 2 under “To use the Duet
Mode” (page EN-29).
2.
Use the bk U and bl I buttons to display
“Upper Octave” (right-side keyboard) or
“Lower Octave” (left-side keyboard) and then
touch bm ENTER.
3.
Use the bk – and bl + buttons to change the
setting.
• You can specify the right-side keyboard octave while
“Upper Octave” is displayed, and the left-side
keyboard octave while “Lower Octave” is displayed.
• Increasing the setting value by one raises by one
octave, while lowering the value by one lowers by one
octave. The initial default for both settings is 0.
• You can shift the octave of each keyboard within the
range of –2 to +2 octaves.
4.
Touch bp EXIT.
5.
Repeat steps 2 through 4 of this procedure as
required to specify settings for both
keyboards.
Example:
Specifying 0 for “Upper Octave” and 1 for “Lower Octave”
results in the keyboard octaves shown below.
6.
To exit the FUNCTION mode, hold down
bp EXIT until “[FUNCTION]” disappears from
the display.
This setting
(displayed):
Does this:
Off Exits the Duet Mode.
On Enters the Duet Mode.
Pan Outputs left-side keyboard notes from the
left speaker and right-side keyboard notes
from the right speaker while in the Duet
Mode.
C4 C5 C6 C7 C3 C4 C5 C6
Left keyboard Right keyboard
1 octave higher than initial setting Unchanged
Digital Piano Operations
EN-30
You can change the scale of the keyboard from the standard
equal temperament to another tuning that is more suitable for
playing Indian music, Arabic music, classical music, etc. You
can select from among the 17 preset scales described below.
■ To change the scale
1.
Hold down the bp^ button until “[FUNCTION]”
appears on the display.
This enters the FUNCTION Mode.
2.
Use the bk U and bl I buttons to select the
following menu items in sequence:
“KEYBOARD” 3 “SCALE TUNING” 3 “Scale
Type”.
3.
Use the bk – and bl + buttons, or cm (K1)
knob to select a scale setting.
• You can select any one of the scales shown in the
table below.
4.
If you want to change the base note of the
scale, perform the steps below.
• You do not need to perform these steps if you want to
use the default base note setting (C).
(1) Touch bp EXIT.
(2) Use the bk U and bl I buttons to display “Scale
Base Note” and then touch bm ENTER.
(3) Use the bk – and bl + buttons, or cm (K1) knob to
select a base note setting.
5.
To exit the FUNCTION mode, hold down
bp EXIT until “[FUNCTION]” disappears from
the display.
■ To use the current scale notes for Auto
Accompaniments
Use FUNCTION parameter
30 to enable (“On”) or disable
(“Off”) “Accomp Scale”. Enabling this setting will apply the
scale and base note selected using the operation under “
To
change the scale
” (page EN-30) to Auto Accompaniments.
For information about FUNCTION parameters, see
“
Configuring Function Settings (FUNCTION Mode)” (page
EN-53).
■ To enable or disable piano stretch tuning
1.
Hold down the bp^ button until “[FUNCTION]”
appears on the display. Then release the
button.
This enters the FUNCTION mode.
2.
Use the bk U and bl I buttons to select the
following menu items in sequence:
“KEYBOARD” 3 “SCALE TUNING” 3
“Stretch Tuning”.
3.
Use the bk – and bl + buttons to configure the
Stretch Tuning setting.
Changing the Scale Tuning
(Temperament) of the Keyboard
This setting (displayed): Selects this scale:
Equal Equal Temperament
Pure Major Pure Major
Pure Minor Pure Minor
Pythagorean Pythagorean
Kirnberger 3 Kirnberger 3
Werckmeister Werckmeister
Mean-Tone Mean-Tone
Rast Rast
Bayati Bayati
Hijaz Hijaz
Saba Saba
Dashti Dashti
Chahargah Chahargah
Segah Segah
Gurjari Todi Gurjari Todi
Chandrakauns Chandrakauns
Charukeshi Charukeshi
Displayed Setting Name Description
Off Disables piano stretch tuning.
On Enables piano stretch tuning.

EN-31
Digital Piano Operations
With Auto Accompaniment, simply select an accompaniment
pattern. Each time you play a chord with your left hand the
appropriate accompaniment will play automatically. It’s like
having a personal backup group along with you wherever you
go.
■ Rhythms and Categories
The rhythms of your Digital Piano are divided among six
categories, which you can access using RHYTHM category
buttons bq through cl. Each of the six categories is divided
further into sub-categories, and touching the RHYTHM
category button for a particular category will cycle in
sequence between its sub-categories.
For details about rhythm categories and sub-categories, and
the names of rhythms included in each sub-category, refer to
the separate “Built-in Music Data Lists”.
■ To select a rhythm
1.
Use the bp^ button to cycle through settings
until the “^RHYTHM” indicator to the right of
the button is lit.
The names of the currently selected rhythm category and
rhythm will be shown on the display.
2.
Use RHYTHM category buttons bq through cl
to select a RHYTHM category.
• Touching one of the RHYTHM category buttons
switches to the rhythm that was selected the last time
that rhythm category was exited.
• Each touch of the RHYTHM category button of the
currently selected rhythm category will cycle to the
next sub-category of that category.
3.
Use the bk – and bl + buttons to select a
rhythm.
• To jump to the first rhythm in the current category,
touch bk – and bl + at the same time.
The Auto Accompaniments of this Digital Piano consist of a
“rhythm part” (drums and percussion) and a “chord part”
(various musical instruments). When playing an Auto
Accompaniment, you can sound the rhythm part only, or you
can sound both parts at the same time.
■ To play the rhythm part only
• The rhythm part is the foundation of each Auto
Accompaniment. Your Digital Piano comes with a variety of
built-in rhythms, including 8-beat and waltz. Use the
procedure below to play the basic rhythm part.
1.
Use the 3 mode selector button to cycle
through settings until the “RHYTHM” (RHYTHM
Mode) indicator is lit.
2.
Use the procedure under “To select a rhythm”
(page EN-31) to select the rhythm you want.
3.
Touch 8 START/STOP.
This starts normal pattern (page
EN-32) rhythm play.
• The yellow and red LEDs above the 8 START/
STOP button will flash in time with the rhythm (yellow
for beat 1, red for the remaining beats of each
measure).
4.
Play along with the rhythm.
5.
To stop rhythm play, touch 8 START/STOP
again.
• In step 3 of the above procedure, you can also touch one of
the buttons below to start rhythm pattern play.
– 4 INTRO … Starts play with an intro pattern.
– 5 NORMAL/FILL-IN … Starts normal pattern play.
– 6 VARIATION/FILL-IN … Starts play of a variation
pattern.
For information about the different rhythm (Auto
Accompaniment) patterns, see “
Auto Accompaniment
Pattern Variations
” (page EN-32).
Using Auto Accompaniment
Selecting a Rhythm
[
RHYTH
M
]
POPS
T : 120
01 :E.Funk Po
p
Rhythm name Category name
Playing Auto Accompaniment
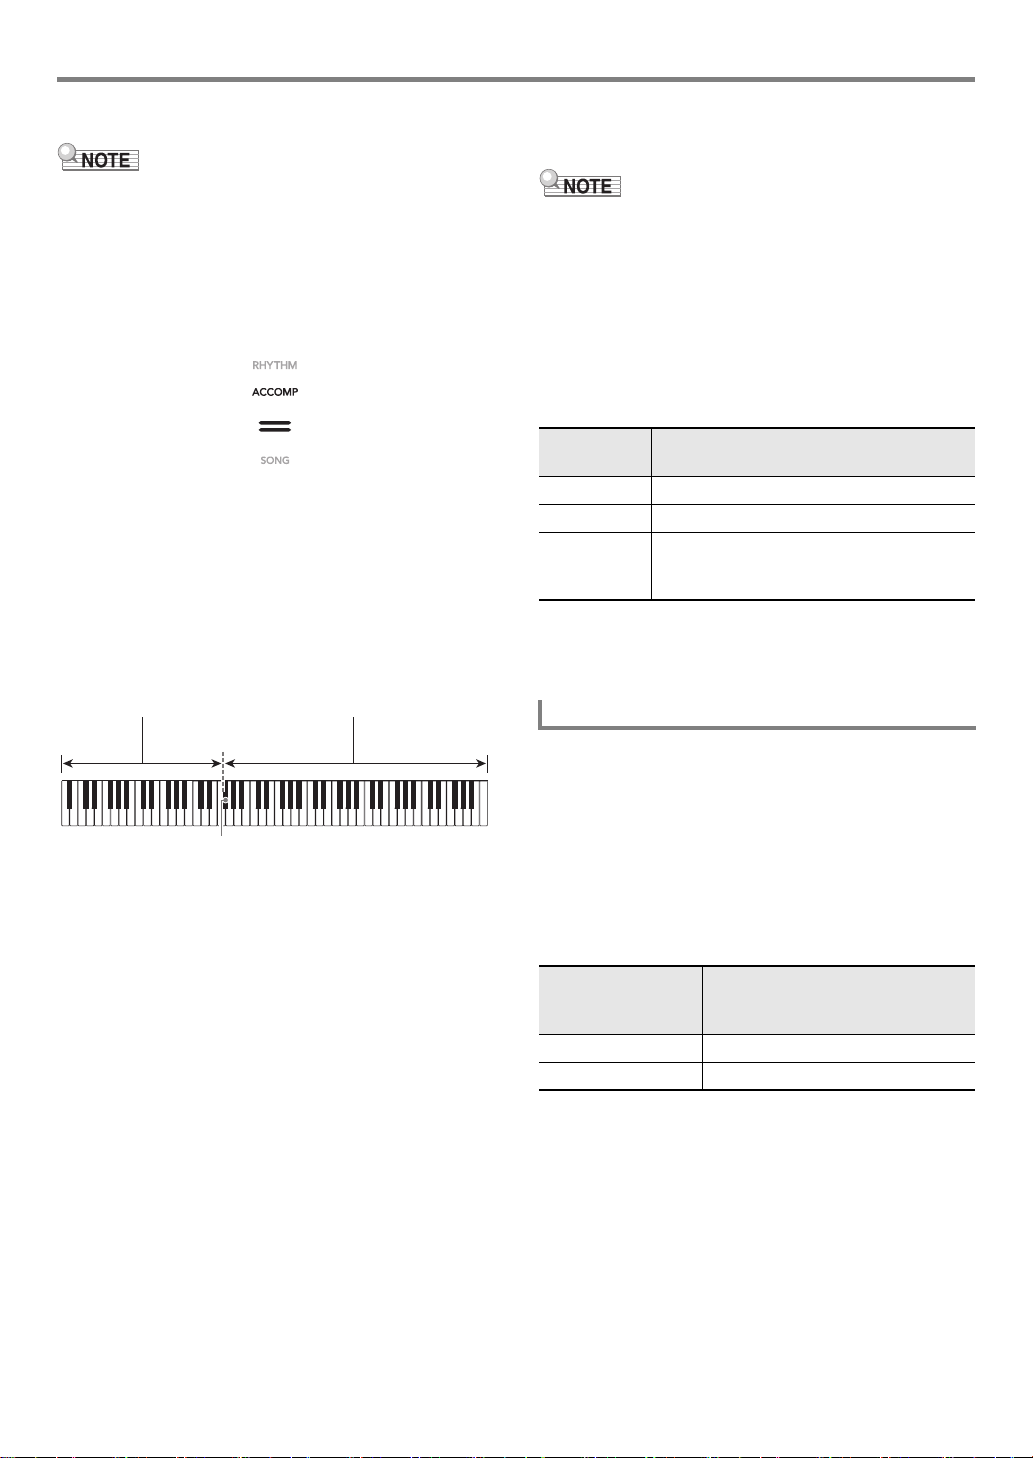
Digital Piano Operations
EN-32
■ To play Auto Accompaniment with chords
• Playing a chord with your left hand automatically adds bass
and harmony accompaniment parts to the currently
selected rhythm. It is just like having your own personal
back up group on call.
1.
Use the 3 mode selector button to cycle
through settings until the “ACCOMP”
(ACCOMP Mode) indicator is lit.
2.
Start play of the rhythm part.
• For information about how to select a rhythm and start
playing it, see steps 2 and 3 under “
To play the rhythm
part only
” (page EN-31).
3.
Use the accompaniment keyboard to play
chords.
This will cause bass and harmony Auto Accompaniment
parts to be added to the rhythm part.
Example:
Pressing D-F
#
-A-C on the accompaniment keyboard
4
Accompaniment for the D-F
#
-A-C chord (D7) sounds.
• You can use the split point to change the size of the
accompaniment keyboard range (page
EN-16).
4.
Play other chords with left hand as you play
the melody with your right hand.
• You can use “CASIO Chord” or other simplified chord
input modes to play chords. See “
Selecting a Chord
Input Mode
” (page EN-34).
5.
To stop Auto Accompaniment, touch
8 START/STOP.
• With the above procedure, you finger chords to be played
by the Auto Accompaniment. You also can use music
presets to sound Auto Accompaniment using a chord
progression based on the music genre you want to perform,
without inputting chords. For details, see “
Using Music
Preset
” (page EN-38).
■ Metronome Accompaniment Patterns
The accompaniment patterns below produce metronome
sounds only, without a bass or chord part. This is true even if
you finger a chord.
■ To change the Auto Accompaniment Tempo
See “
Changing the Auto Accompaniment and Song Tempo”
(page
EN-38).
Generally, the progress of a musical piece starts with an intro,
transitions to verses that are interspersed with interludes and
other changes, and then returns to the main theme before
reaching an ending. The Digital Piano’s Auto Accompaniment
function provides a selection of accompaniment patterns that
are suited to the progress of a musical composition.
■ Normal and Variation
This is an accompaniment pattern that can be used in the
verse or chorus of a piece. A variation repeats anywhere from
one measure to multiple measures.
F{3
Accompaniment keyboard Melody keyboard
Split point
This rhythm
number:
Selects this metronome sound:
BALLAD: 39 Sounds a click for all beats.
BALLAD: 40 Sounds a bell for all beats.
BALLAD:
41 to 48
Two beats to nine beats per measure.
The first beat of each measure is a bell
sound, while the remaining beats are clicks.
Auto Accompaniment Pattern Variations
To play this
accompaniment
pattern:
Do this:
Normal Touch 5 NORMAL/FILL-IN.
Variation Touch 6 VARIATION/FILL-IN.

EN-33
Digital Piano Operations
■ Fill-in
These accompaniment patterns are used to insert short one-
or two-measure fill-ins into a piece. A fill-in pattern starts to
play as soon as you touch one of the fill-in buttons (see
below). Accompaniment play returns to the original normal or
variation pattern from beat one after the one- or two-measure
fill-in is complete.
■ Intro
This is an accompaniment pattern that can be used at the
beginning of a song. Normal accompaniment pattern play will
start after the measures of the intro accompaniment pattern is
complete.
■ Ending
This is an accompaniment pattern that can be used at the end
of a piece. After a multiple-measure ending sounds, Auto
Accompaniment ends.
Use the procedure below to configure the Digital Piano to start
Auto Accompaniment play as soon as you press a keyboard
key.
■ To trigger Auto Accompaniment play with chord
keyboard input
1.
While Auto Accompaniment play is stopped,
touch 7 SYNCHRO/ENDING.
This enters synchro start standby, which is indicated by
the LEDs above the 8 START/STOP button flashing
between yellow and red.
• If you want to start with an intro, touch 4 INTRO
here.
• If you want to start with a variation, touch
6 VARIATION/FILL-IN here.
2.
Finger a chord on the accompaniment
keyboard.
This starts Auto Accompaniment.
• To exit synchro start standby, touch 7 SYNCHRO/
ENDING.
To play this
accompaniment
pattern:
Do this:
Normal Fill-in While a normal pattern is playing,
touch 5 NORMAL/FILL-IN.
Variation Fill-in While a variation pattern is playing,
touch 6 VARIATION/FILL-IN.
To play this
accompaniment
pattern:
Do this:
Intro Touch 4 INTRO.
To play this
accompaniment
pattern:
Do this:
Ending While an Auto Accompaniment is
playing, touch 7 SYNCHRO/
ENDING.
Triggering Auto Accompaniment Play with
Accompaniment Keyboard Input (Synchro
Start)
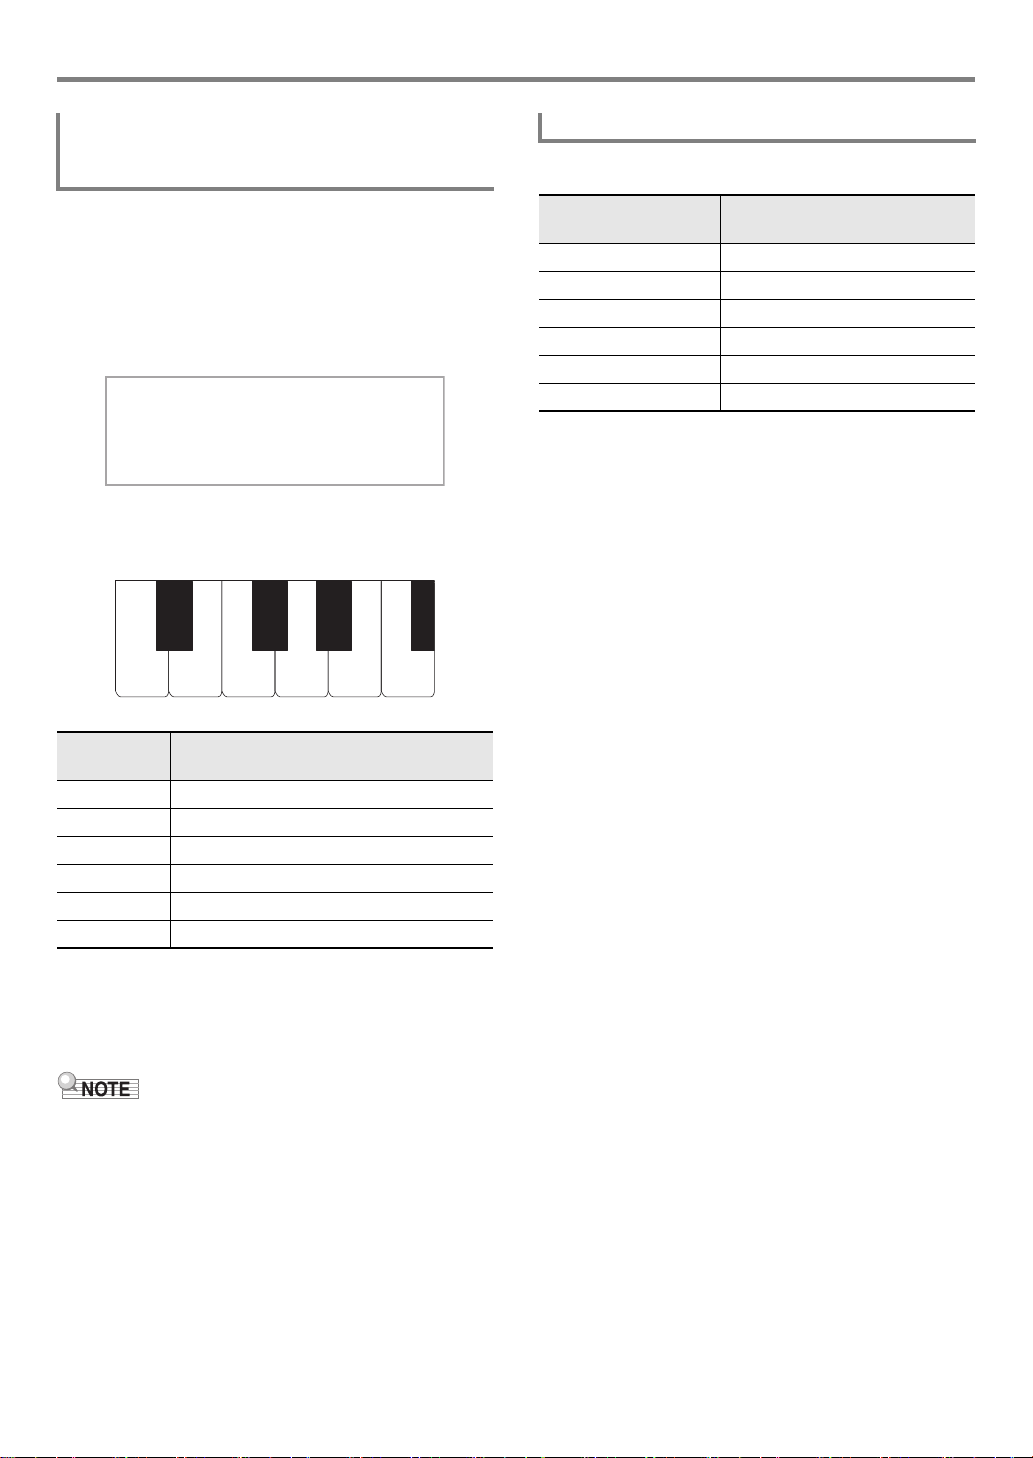
Digital Piano Operations
EN-34
You can use the six leftmost white keyboard keys to start and
stop accompaniment pattern play, to switch between patterns,
etc.
■ To enter the keyboard controller mode
1.
Hold down the 3 mode selector button until
“KC” appears on the display.
• This enters the Keyboard Controller Mode and assigns
the button operations shown below to the leftmost
white keyboard keys.
* Toggles between the RHYTHM and ACCOMP modes only.
2.
To exit the Keyboard Controller Mode, hold
down the 3 mode selector button until “KC”
disappears from the display.
• In the Keyboard Controller Mode, no note sounds when you
press a keyboard key in the range of A0 to F1 (including the
black keys).
You can use FUNCTION parameter
76 (“Chord Mode”) to
select one of the six chord input modes below.
For information about FUNCTION parameters, see
“
Configuring Function Settings (FUNCTION Mode)” (page
EN-53).
Using the Keyboard to Control the Auto
Accompaniment Pattern (Keyboard
Controller Mode)
Keyboard
Key
Button
A0 3 Mode selector button*
B0 4 INTRO button
C1 5 NORMAL/FILL-IN button
D1 6 VARIATION/FILL-IN button
E1 7 SYNCHRO/ENDING button
F1 8 START/STOP button
[
RHYTH
M
]
POPS
T : 120 KC
01 :E.Funk Po
p
C1 D1 E1 F1A0 B0
Selecting a Chord Input Mode
This setting
(displayed):
Selects this chord input mode:
CASIO Chord CASIO CHORD
Fingered 1 FINGERED 1
Fingered 2 FINGERED 2
Fg On Bass FINGERED ON BASS
Fg Assist FINGERED ASSIST
Full Range FULL RANGE CHORD
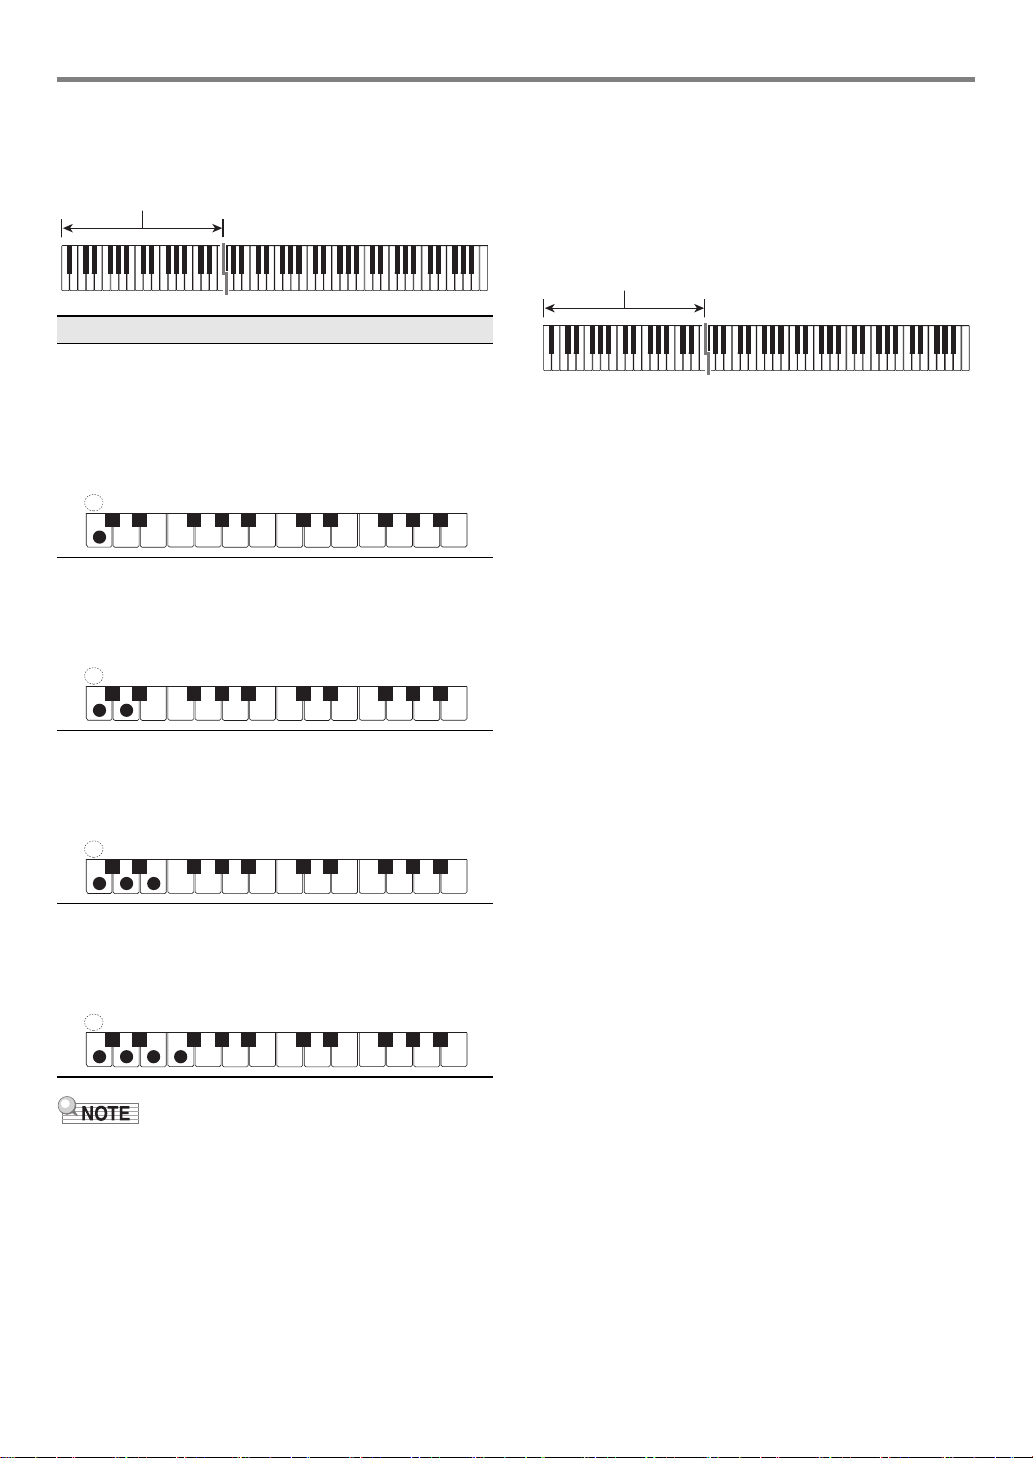
EN-35
Digital Piano Operations
■ CASIO CHORD
With CASIO CHORD, you can use simplified fingerings to
play the four types of chords described below.
• When playing a minor, seventh, or minor seventh chord, it
makes no different whether the additional keys you press
are black or white.
■ FINGERED
With these input modes, you play chords on the
accompaniment keyboard using their normal chord fingerings.
Some chord forms are abbreviated, and can be fingered with
one or two keys.
See page
EN-73 for information about chords that are
supported and how they are fingered on the keyboard.
● FINGERED 1
Play the component notes of the chord on the keyboard.
● FINGERED 2
Unlike FINGERED 1, 6th input is not possible. m7 or m7
b
5
is
input.
● FINGERED ON BASS
Unlike FINGERED 1, allows input of fraction chords with the
lowest keyboard note as the base note.
Chord Type
Major Chords
Pressing a single accompaniment area key in the CASIO
CHORD mode will play the major chord whose name is
marked above the key. All of the accompaniment area keys
that are marked with the same chord name play exactly the
same chord.
Example: C (C Major)
Minor Chords
To play a minor chord, press the accompaniment area key
that corresponds to the major chord, while also pressing one
other accompaniment area key to the right.
Example: Cm (C Minor)
Seventh Chords
To play a seventh chord, press the accompaniment area key
that corresponds to the major chord, while also pressing two
other accompaniment area keys to the right.
Example: C7 (C Seventh)
Minor Seventh Chords
To play a minor seventh chord, press the accompaniment
area key that corresponds to the major chord, while also
pressing three other accompaniment area keys to the right.
Example: Cm7 (C Minor Seventh)
Accompaniment keyboard
A
C
C
DE F F
#
E
#
G
AB
B
C
C
DE F
E
#
A
C
C
DE F F
#
E
#
G
AB
B
C
C
DE F
E
#
A
C
C
DE F F
#
E
#
G
AB
B
C
C
DE F
E
#
A
C
C
DE F F
#
E
#
G
AB
B
C
C
DE F
E
#
Accompaniment keyboard

Digital Piano Operations
EN-36
● FINGERED ASSIST
Produces an effect that is different from FINGERED 1 when
two or three keys are pressed. Pressing a root key and any
key to the left of the root key plays a seventh chord, while a
black key plays a minor chord. Pressing both a white and
black key together plays a minor seventh chord.
• In addition to FINGERED 1, you can also use the methods
below to play the three types of chords described below.
■ FULL RANGE CHORD
With this mode, you can use the full range of the keyboard to
play chords and the melody.
See page
EN-73 for information about chords that are
supported.
With One-Touch Preset, the Digital Piano automatically
configures optimal tone, tempo, and other settings in
accordance with the rhythm pattern you select.
■ To recall a one-touch preset
1.
Use the 3 mode selector button to cycle
through setting until the “RHYTHM” or
“ACCOMP” indicator is lit.
2.
Use the procedure under “To select a rhythm”
(page EN-31) to select the rhythm you want.
3.
Hold down the cl BALLAD button until the
display changes from the rhythm name to the
tone name.
This will automatically apply the One-Touch Preset
settings in accordance with the rhythm pattern that is
currently selected. At this time, the Digital Piano will go
into Auto Accompaniment synchro start standby (page
EN-33).
Chord Type
Minor Chords
To play a minor chord, press the accompaniment keyboard
key that specifies the major chord, while also adding the
closest black key to the left of the major chord key.
Example: Cm (C Minor)
Seventh Chords
To play a seventh chord, press the accompaniment
keyboard key that specifies the major chord, while also
adding the closest white key to the left of the major chord
key.
Example: C7 (C Seventh)
Minor Seventh Chords
To play a minor seventh chord, press the accompaniment
keyboard key that specifies the major chord, while also
adding the closest white and black keys to the left of the
major chord key.
Example: Cm7 (C Minor Seventh)
A
C
C
DE F F
#
E
#
G
AB
B
C
C
DE F
E
#
A
C
C
DE F F
#
E
#
G
AB
B
C
C
DE F
E
#
A
C
C
DE F F
#
E
#
G
AB
B
C
C
DE F
E
#
Accompaniment keyboard / Melody keyboard
Using One-Touch Preset
or

EN-37
Digital Piano Operations
Auto Harmonize lets you add harmony to melody notes you
play with your right hand for more melodic depth. You can
select any one of 12 Auto Harmonize types.
• A single button is used to control auto harmonize and the
arpeggiator (page
EN-27). Because of this, the arpeggiator
cannot be used while auto harmonize is in use.
■ To enable auto harmonize
• If “AR” appears instead of “AH” when you touch the
bt ARPEG. button in step 2 of the procedure below,
you will need to change the function assigned to the
bt ARPEG. button. Select “A.Harmo.” for FUNCTION
parameter
79 (“Type Select”). For information about
FUNCTION parameters, see “
Configuring Function
Settings (FUNCTION Mode)
” (page EN-53).
1.
Use the bp^ button to cycle through settings
until the “^CTRL” indicator to the right of the
button is lit.
2.
To enable auto harmonize, touch bt ARPEG.
This will cause “AH” to appear on the display.
• Fingering a chord on the accompaniment keyboard as
you play the melody on the Melody keyboard (Upper
part keyboard) will add chords to your melody play.
3.
To disable auto harmonize, touch bt ARPEG.
This will cause “AH” to disappear from the
display.
■ To select the Auto Harmonize type
1.
Perform steps 1 and 2 under “To enable auto
harmonize” (page EN-37) to enable auto
harmonize.
2.
Hold down the bt ARPEG. button until
“A.HARMO” appears on the display.
This causes the currently selected auto harmonize type
to appear in line two of the display.
3.
Use bk – and bl + buttons to select an auto
harmonize type.
Using Auto Harmonize
[
CTRL
]
KNOB
T : 120 AH
01 :Fi l ter
Type (displayed) Description
01: Duet 1 Adds close (separated by 2 to 4
degrees) 1-note harmony below the
melody note.
02: Duet 2 Adds open (separated by more than 4
to 6 degrees) 1-note harmony below the
melody note.
03: Country Adds country style harmony.
04: Octave Adds the note from the next lower
octave.
05: 5th Adds the fifth degree note.
06: 3-Way Open Adds 2-note open harmony, for a total
of three notes.
07: 3-Way Close Adds 2-note close harmony, for a total
of three notes.
08: Strings Adds harmony that is optimal for strings.
09: 4-Way Open Adds 3-note open harmony, for a total
of four notes.
10: 4-Way Close Adds 3-note close harmony, for a total
of four notes.
11: Block Adds block chord notes.
12: Big Band Adds big band style harmony.
[
CTRL
]
A. HAR
M
O
T : 120 AH
01 :Due t 1

Digital Piano Operations
EN-38
There are two ways to change the tempo (beats per minute)
setting: using buttons to specify a tempo value, and tapping a
beat with a keyboard key or a pedal.
• You can specify use of a letter (T) or an icon (2) as the
display indicator to the left of the tempo value. To specify
the indicator type, use FUNCTION parameter
113 (“Tempo
Indicator”). For information about FUNCTION parameters,
see “
Configuring Function Settings (FUNCTION Mode)”
(page
EN-53).
■ To specify a tempo value
1.
Touch bm TEMPO.
The current tempo value will be shown on the display.
2.
Use the bk – and bl + buttons to adjust the
tempo value.
• You can specify a tempo value in the range of 20 to
255.
• To return the currently selected song, rhythm pattern,
or music preset to its recommended tempo setting,
touch bk – and bl + at the same time.
3.
To exit the setting screen, touch bm TEMPO or
bp EXIT.
■ To use the keyboard key or a pedal to adjust the
tempo
1.
Hold down the bm TEMPO button.
This causes “TAP” to appear to the right of [TEMPO] on
the display.
2.
Press a keyboard key or a pedal at least twice
in succession.
• This will set a tempo that corresponds to the speed at
which you pressed the keyboard key or pedal.
3.
Release bm TEMPO.
• You can use the above steps to set an approximate
tempo and then use the steps under “
To specify a
tempo value
” to fine tune the setting.
• Note that an expression pedal cannot be used to set a
tempo using the above procedure.
Selecting a Music Preset instantly changes the Digital Piano
to a preset setup (tone, rhythm, chord progression, etc.) for
play of songs of various genres/categories. The press of a
button sets up the Digital Piano so those songs sound exactly
the way you thought they should. See the separate “Built-in
Music Data Lists” for a complete list of the 310 Music Presets
that are available.
■ To perform using a music preset
1.
Use the 3 mode selector button to cycle
through setting until the “RHYTHM” or
“ACCOMP” indicator is lit.
2.
Use the bp^ button to cycle through settings
until the “^RHYTHM” indicator to the right of
the button is lit.
3.
Hold down the bq POPS button until “[MUSIC
PRESET]” appears on the display.
This enters the Music Preset Mode and causes the 3
mode selector button “ACCOMP” indicator to flash.
• The name and number of the currently selected music
preset will be shown on the display.
• This enters synchro start standby, which is indicated
by the flashing yellow and red LEDs above the
8 START/STOP button.
Changing the Auto
Accompaniment and Song Tempo
[
TE
M
PO
]
T : 120
120
Using Music Preset
or
[
M
US I C PRESET
]
T : 124
001 :So f t Po
p
Music preset number Music preset name
EN-39
Digital Piano Operations
4.
Use the bk – and bl + buttons to select a
music preset number.
This changes the displayed music preset name. At the
same time, settings are recalled for the tone, rhythm,
chord progression, and data that matches the genre or
melody indicated by the name.
• You can also change tone, rhythm, DSP, and other
settings as required. To do so, use the bp^ button to
select the type of functions assigned to buttons bq to
cl. Each touch of bp^ cycles to the next function
type, and the current selection is indicated by the
indicator that is lit to the right of the button: “^TONE”,
“^RHYTHM”, or “^CTRL”.
• To return to the music preset selection screen (the
screen in step 3 of this procedure) after touching
bp^, touch the 3 mode selector button.
5.
Touch 8 START/STOP.
This starts Auto Accompaniment play in accordance with
the preset chord progression.
• Instead of the button operations above, you can also
start Auto Accompaniment play by playing something
on the accompaniment keyboard. Note, however, that
pressing an accompaniment keyboard key will start the
preset chord progression. The accompaniment
keyboard cannot be used to specify chords, in this
case.
6.
Play along on the keyboard with the Auto
Accompaniment.
7.
To stop Auto Accompaniment, touch
8 START/STOP or 7 SYNCHRO/ENDING.
8.
To exit the Music Preset Mode, display the
music preset selection screen and then touch
the 3 mode selector button
• At this time the tone and rhythm settings configured by
the Music Preset Mode remain in effect.
• The accompaniment pattern operations below can be used
during a performance with a music preset. See “
Auto
Accompaniment Pattern Variations
” (page EN-32) and
“
Using the Keyboard to Control the Auto Accompaniment
Pattern (Keyboard Controller Mode)
” (page EN-34). Note,
however, that the function of keyboard key A0 is disabled in
the Keyboard Controller Mode.
• The registration function (page
EN-40) cannot be used in
the Music Preset Mode.
■ To change a music preset tempo
See “
Changing the Auto Accompaniment and Song Tempo”
(page
EN-38).
■ To change the key of a chord progression
You can use FUNCTION parameter
77 (“MP Key Shift”) to
change the chord progression key. For information about
FUNCTION parameters, see “
Configuring Function Settings
(FUNCTION Mode)
” (page EN-53).

Digital Piano Operations
EN-40
You can use the registration function to register the setup of
the Digital Piano (tone, rhythm, and other settings). You can
recall a registered setup as required to perform a particular
song, etc.
• Registration operations can be performed in the RHYTHM
Mode (page
EN-12) or ACCOMP Mode (page EN-12).
• Registration operations cannot be performed in the SONG
Mode (page
EN-12), while demo play (page EN-14), music
presets (page
EN-38), or any setting operation (page
EN-53) is in progress.
■ Setup Storage Locations
Setup registrations are stored in memory locations that are
divided into 24 banks. Each bank has four storage areas,
which means you can register up to 96 setups (24 banks × 4
areas).
• Use the bq BANK button to specify a bank.
• Specify an area using the br Area 1 to ck Area 4 buttons.
■ Registration Memory Data
*1 The “Freeze” column shows the names of parameters
included in the “FREEZE” directory (FUNCTION
parameter
58). For details, see “Freeze Function” (page
EN-42).
*2 Special setting item for cm (K1) and (K2) knob operations.
For information about knob settings that can be registered
in a setup, see “
Knob Set List” (page EN-78).
■ Saving to an External Device
Setups saved using registration can be saved to a USB flash
drive in bank units. See “
USB Flash Drive Operations” (page
EN-62).
Registering and Restoring a
Setup (Registration)
Area 1
…
Area 4
Bank 1 Setup 1-1
…
Setup 1-4
Bank 2 Setup 2-1
…
Setup 2-4
.
.
.
.
.
.
Bank 24 Setup 24-1
…
Setup 24-4
bq
br bs bt ck
Setting Items Freeze*
1
Rhythm number, mode selection
(ACCOMP Mode or RHYTHM Mode),
synchro start standby, Auto
Accompaniment settings (chord input
mode, Auto Accompaniment volume)
Accompaniment
Tempo Tempo
Tone numbers (Upper1, Upper2, Lower),
Layer enable/disable, Split enable/
disable, DSP (type, parameter),
keyboard volume setting, part settings
(volume, octave shift, fine tune), duet
setting
Tone
Split point Split Point
Auto harmonize/arpeggiator (enable/
disable, type, other settings)
Arpeg./A.Harmo.
Transpose Transpose
Scale settings (type, base note, Stretch
Tuning, Auto Accompaniment scale)
Scale Tuning
Touch Response settings Touch Response
Chorus type, brilliance settings Effect
Hall simulator/reverb (enable/disable,
type, depth), surround (enable/disable,
type)
Sound Mode
Damper pedal function, expression/
assignable pedal function, pitch bend
range, part settings (Pedal Unit, damper
pedal, expression/assignable pedal,
pitch bend wheel)
Pedal/Wheel
Knob settings*
2
Knob
EN-41
Digital Piano Operations
■ To register a setup
• Specifying a bank and area that already has data stored
to it in the procedure below causes the recorded data
to be deleted. For information about banks and areas,
see “
Setup Storage Locations” (page EN-40).
1.
Use the 3 mode selector button to cycle
through settings until the “RHYTHM” or
“ACCOMP” indicator is lit.
2.
Configure the Digital Piano with the setup you
want to register.
3.
Use the bp^ button to cycle through settings
until the “^REG.” indicator to the right of the
button is lit.
4.
Select bank you want to use as the registration
destination.
• Touch bq BANK to cycle to the next bank number.
• Use the bk – and bl + buttons to select a bank
number.
5.
Select the area where you want to store the
setup.
While holding down cl STORE, touch an area button
from br Area 1 to ck Area 4.
This causes “Sure?” to appear on the display.
• To exit setup registration at this time, touch bk –.
6.
To register the setup, touch bl +.
This completes the registration operation and displays
“Complete”.
■ To recall a registered setup
1.
Use the 3 mode selector button to cycle
through settings until the “RHYTHM” or
“ACCOMP” indicator is lit.
2.
Use the bp^ button to cycle through settings
until the “^REG.” indicator to the right of the
button is lit.
3.
Enable or disable the freeze function as
required.
• The “FZ” indicator on the display indicates that the
freeze function is enabled. There is no indicator when
the function is disabled. To toggle the freeze function
setting between enabled (“FZ” displayed) and disabled
(“FZ” not displayed), hold down the bq BANK button.
• For details about the freeze function, see “
Freeze
Function
” (page EN-42).
4.
Use bq BANK, or bk – and bl + to select the
bank of the setup you want to recall.
Registering and Recalling a Setup
or
[
REG I STRAT I ON
]
Bank : 02
Bank number
[
STORE
]
2-1
–
NO YES
+
Su r e?
Bank number - Area number
[
REG I STRAT I ON
]
FZ
Bank : 02
Digital Piano Operations
EN-42
5.
Touch one of the buttons from br Area 1
through ck Area 4 to select the area where the
setup you want to recall is located.
This recalls the setup.
• This causes the Digital Piano’s settings to change in
accordance with the setup you recalled.
■ Freeze Function
Recalling a registered setup normally overwrites all of the
settings shown under “
Registration Memory Data” (page
EN-40). You can also use the freeze function to specify
particular settings that should not be overwritten when a setup
registration is recalled.
For FUNCTION parameter numbers
59 to 70 (parameters
included in
58 “FREEZE”) select either “On” (maintain current
setting) or “Off” (overwrite current setting) to specify what
should happen when a setup is recalled.
• For information about what settings are maintained when
“On” is selected for a FUNCTION parameter number, see
“
Registration Memory Data” (page EN-40).
• For information about FUNCTION parameters, see
“
Configuring Function Settings (FUNCTION Mode)” (page
EN-53).
You can configure Digital Piano settings so each press of a
pedal scrolls through and selects setups you registered with
the registration function.
■ To specify the pedal for recalling setups
1.
Hold down the bp^ button until “[FUNCTION]”
appears on the display.
This enters the FUNCTION Mode.
2.
Use the bk U and bl I buttons to select the
following menu items in sequence:
“REGISTRATION” 3 “SEQ PED RECALL”.
3.
Use the bk U and bl I buttons to select a
pedal jack and then touch bm ENTER.
4.
Use the bk – and bl + buttons to change the
pedal jack setting.
• For information about pedal operations that can be
performed while each setting is selected, see “
To play
using the sequential pedal recall function
” (page
EN-43).
• Specifying “Inc” or “Dec” for a jack will cause the pedal
connected to it to function as a registration setup recall
pedal only. Any functions assigned to the jack by
“Damper Target” (page
EN-7) or “Exp/Asgn Target”
(page
EN-9) will be disabled for that jack.
5.
To exit the FUNCTION mode, hold down
bp EXIT until “[FUNCTION]” disappears from
the display.
[
REG I STRAT I ON
]
AREA 1
Bank : 02
Using a Pedal to Cycle Through Multiple
Setups (Sequential Pedal Recall)
To select this pedal jack: Display this:
cr DAMPER PEDAL jack Damper Pedal
dl EXPRESSION/ASSIGNABLE jack Exp/Asgn Pedal
To do this: Display this:
Enable pedal recall so setups scroll
forward
Inc
Enable pedal recall so setups scroll
back
Dec
Disable pedal recall Off
EN-43
Digital Piano Operations
■ To play using the sequential pedal recall function
1.
Connect the included pedal or a separately
available CASIO sustain pedal to the jack for
which you specified “Inc” or “Dec” in step 4 of
the procedure under “
To specify the pedal for
recalling setups” (page EN-42).
2.
At the point when you want to recall the
registration setup, press the pedal.
When “Inc” is specified:
• Each short-press and release of the pedal cycles
forward through registration setup bank numbers and
area numbers (1-1, 1-2, 1-3, 1-4, 2-1, 2-2…).
• Each long-press and release of the pedal cycles back
through registration setups (2-2, 2-1, 1-4, 1-3…).
When “Dec” is specified:
• Each short-press and release of the pedal cycles back
through registration setup bank numbers and area
numbers (24-4, 24-3, 24-2, 24-1, 23-4, 23-3…).
• Each long-press and release of the pedal cycles
forward through registration setups (23-3, 23-4, 24-1,
24-2…).
■ To disable the sequential pedal recall function
Perform the procedure under “
To specify the pedal for
recalling setups
” (page EN-42). In step 4 of the procedure,
display the “Off” setting.
The MIDI recorder records Digital Piano keyboard play as
MIDI data. Recorded data is stored as SONG Mode (page
EN-12) song numbers 11 through 15.
• You can have up to five recorded songs in memory.
• Three-track multi-track recording is supported for each
song.
• A maximum of approximately 30,000 notes (total for three
tracks) can be recorded for each song.
• CASIO COMPUTER CO., LTD. takes no responsibility
for any damages, lost profits, or claims by third parties
arising from the deletion of recorded data due to
malfunction, repair, or for any other reason.
■ How the Digital Piano records your performances
(MIDI Recorder)
Your Digital Piano has two recorders: a MIDI recorder and an
audio recorder. Instead of audio (audio data), the MIDI
recorder described in this section records keyboard
performance information (keyboard key press and release,
touch pressure, etc.) as MIDI data.* The size of MIDI data is
much smaller when compared with audio data, making it
easier to edit later on a computer, etc.
* MIDI
MIDI is short for “Musical Instrument Digital Interface”. It is a
universal standard that makes it possible for musical
instruments, computers, and other devices to exchange
performance information (keyboard key press/release, touch
pressure, etc.) regardless of manufacturer. Performance data
in this case is called “MIDI data”.
■ Recorder Tracks and Recorded Data
The MIDI recorder of the Digital Piano is a three-track multi-
track recorder.
Recorder track types are a system track and two solo tracks,
and the data that can be recorded depends on the track type.
• System Track: The system track can be used to record
keyboard play using Auto Accompaniment. Layer, split, and
other keyboard settings can also be recorded.
• Solo Track 1, Solo Track 2: A solo track can be used to
record keyboard play using a single tone (Upper1).
These tracks can be overdubbed as shown below.
Using the MIDI Recorder to
Record Performances
System Record Playback Playback
Solo 1 (Empty)
Record Playback
Solo 2 (Empty) (Empty)
Record
Digital Piano Operations
EN-44
■ Recorded Data for Each Track
The symbols below are used in the “System” column to indicate items that can be recorded to the system track, and in the “Solo”
column to indicate items that can be recorded to solo tracks 1 and 2.
*1 Damper, soft, sostenuto, expression
*2 Upper1 part only
■ Saving to an External Device
After you create a recording with the Digital Piano, you can save the resulting data to a USB flash drive. See “
USB Flash Drive
Operations
” (page EN-62).
: Recorded
× : Not recorded
Operation or Setting System Solo
Tempo ×
Beat ×
Rhythm Number ×
Rhythm Controller Operations ×
Accompaniment Volume ×
Accompaniment Keyboard
Operations
×
Scale Settings ×
Stretch Tuning ×
Accomp Scale On/Off ×
Duet Settings ×
Keyboard Volume ×
Hall Simulator/Reverb
On/Off ×
Type ×
Depth ×
Surround Settings ×
Chorus Type ×
Brilliance ×
Acoustic Simulator Settings ×
Keyboard Operations
Upper1
Upper2 ×
Lower ×
Auto Harmonize ×
Arpeggiator
Tone Number
Upper1
Upper2 ×
Lower ×
DSP
Pedal Operation*
1
Octave Shift *
2
Part Volume *
2
Fine Tuning *
2
Pitch Bend Wheel Operations
Pitch Bend Range
Knob operations
Cut Off Frequency
Resonance
Brilliance ×
Reverb Send
Chorus Send
Attack Time
Release Time
Vibrato Rate
Vibrato Depth
Delay Vibrato Time
Portamento Time
Modulation Depth
Layer Volume Balance *
2
Upper2 Fine Tune ×
Upper1 Pan
Upper2 Pan ×
Lower Volume ×
Lower Pan ×
Keyboard Chorus Send *
2
Keyboard Reverb Send *
2
Keyboard Volume ×
Accompaniment Volume ×
Song Volume × ×
DSP Parameter 1
DSP Parameter 2
Operation or Setting System Solo

EN-45
Digital Piano Operations
• When the remaining recordable note count is 100 or
lower during recording, the bo REC0 button will flash.
When the remaining recordable note count becomes
zero, recording will stop automatically and the
bo REC0 button light will stop flashing and turn off.
• Should power fail during recording, all of the data in
the track you are recording will be deleted.
■ Getting Ready to Use the MIDI Recorder
Your Digital Piano has two recorders: a MIDI recorder and an
audio recorder. Depending on the type of data you want to
record or play back, you first need to select the MIDI Mode or
Audio Mode.
• The MIDI recorder can be used while the Digital piano is in
the MIDI Mode. If the Digital Piano is in the Audio Mode,
perform the procedure below (Step 1) to switch to the MIDI
Mode.
• Note that the Digital Piano is in the MIDI Mode under initial
default settings, so the operation below (Step 1) is not
necessary if you have not changed the setting.
1.
Perform the steps below to put the Digital
Piano into the MIDI Mode.
(1) Hold down the bp^ button until “[FUNCTION]”
appears on the display.
This enters the FUNCTION Mode.
(2) Use the bk U and bl I buttons to select the
following menu items in sequence: “SONG” 3
“Song Type”.
(3) Use the bk – and bl + buttons to change the setting
to “MIDI”.
(4) To exit the FUNCTION mode, hold down bp EXIT
until “[FUNCTION]” disappears from the display.
2.
If required, perform the procedure under “To
configure recording settings” (page EN-48).
• You can configure the settings below. This operation is
not necessary if you plan to use initial default settings.
Beats (Default: 4), Metronome (Default: Mute), Pre-
count (Default: Mute)
■ Operations that Start Recording
While the MIDI recorder or audio recorder (page
EN-49) is in
record standby, any one of the operations below will start
recording.
• Playing something on the keyboard
• Pressing a pedal
• Operating the cn PITCH BEND wheel, cm (K1) knob, or
(K2) knob
• Touching 8 START/STOP, 5 NORMAL/FILL-IN,
6 VARIATION/FILL-IN, or 4 INTRO
• Recalling a Registration Memory setup (page
EN-41)
■ To record to the system track
• Before performing the procedure below, read the section
titled “
Getting Ready to Use the MIDI Recorder” (page
EN-45).
• The procedure below records to the system track of the
lowest numbered MIDI recorder area (song numbers 11 to
15) that does not yet have anything recorded.
1.
Configure the tone, rhythm, effects, tempo, and
other settings you want to use during
recording.
• For setting items that can be recorded at the beginning
of a recording, see the “System” column in the table
under “
Recorded Data for Each Track” (page EN-44).
2.
Touch bo REC0.
This enters record standby, indicated by bo REC0
flashing red.
• To cancel recording, touch bo REC0 again.
• If the MIDI recorder already has the maximum
allowable number of songs recorded, the message
“Data Full” will appear on the display, and the Digital
Piano will exit record standby. If this happens, use the
procedure under “
To delete a MIDI recorder song”
(page
EN-49) to delete song data you no longer need
to make room.
3.
To start recording, play something on the
keyboard or touch 8 START/STOP.*
This causes bo REC0 to stop flashing and remain lit
red, which indicates that recording is in progress.
* Recording can also be started using other operations.
For details, see “
Operations that Start Recording”
(page
EN-45).
4.
To stop recording, touch bo REC0.
• This will automatically enter the SONG Mode, with
what you just recorded selected for playback.
5.
To play back the song you just recorded, touch
8a.
Recording and Playing Back Keyboard Play
Digital Piano Operations
EN-46
■ To select a track number before recording
1.
Use the 3 mode selector button to cycle
through settings until the “SONG” (SONG
Mode) indicator is lit.
2.
Use the bk – and bl + buttons to select a song
number.
• Song numbers 11 through 15 are MIDI recorder areas.
If necessary, you can touch 8a to check whether
or not the selected area already has something
recorded to it.
• To record to the song number you select here, perform
the procedure under “
To record to the system track”
(page
EN-45). If the system track of the selected song
number already has recorded data, it will be
overwritten by the new recording.
■ To overdub record a solo track over a recorded
system track
• If you are performing the procedure below immediately
following the procedure under “
To record to the system
track
” (page EN-45), you do not need to enter the SONG
Mode or select a song. Therefore, you should skip steps 1
and 2 below.
1.
Use the 3 mode selector button to cycle
through settings until the “SONG” (SONG
Mode) indicator is lit.
2.
Use the bk – and bl + buttons to select the
song number of a MIDI recorder song that was
recorded to the system track.
• Song numbers 11 through 15 are for songs recorded
with the MIDI recorder. If necessary, you can touch
8a to play back the song and check its contents.
3.
Configure tone and other settings you want to
use for recording.
• For setting items that can be recorded at the beginning
of a recording, see the “Solo” column in the table
under “
Recorded Data for Each Track” (page EN-44).
4.
Touch bo REC0.
This enters record standby, indicated by bo REC0
flashing red.
5.
Hold down the bo REC0 button until “[MIDI
REC SETTING]” appears on the display.
6.
After confirming that “Rec Track” is displayed,
touch bm ENTER.
7.
Use the bk – and bl + buttons to select a
track.
• The display will show “Solo 1” or “Solo 2” depending
on the solo track you select.
8.
To start recording, play something on the
keyboard or touch 8 START/STOP.*
This simultaneously starts playback of the system track
and recording to the solo track you selected in step 7
above.
This causes bo REC0 to stop flashing and remain lit
red, which indicates that recording is in progress.
* Recording can also be started using other operations.
For details, see “
Operations that Start Recording”
(page
EN-45).
9.
To stop recording, touch bo REC0.
10.
To play back the song you just recorded, touch
8a.
• This will play back the contents of both the system
track and the solo track.
• If you want to overdub record the other solo track,
perform steps 3 through 10 again, selecting the
remaining (unrecorded) solo track in step 7.
[
M
IDI REC SETTING
]
–
Sys t e
m
+
Rec Tr ack
EN-47
Digital Piano Operations
■ To re-record part of a recorded track (punch-in
recording)
• You can use punch-in recording to re-record a particular
section in a specific track in a MIDI recorder song.
• If you want, you can specify the start measure for playback
during punch-in recording. If you do not specify a start
measure, playback will start from the first measure of the
song. For more information, see “
Configuring Recording
Settings (Pre-count, Metronome, Beat, Punch-in Measure)
”
(page
EN-48).
1.
Specify the song number of the MIDI recorder
song that contains the track you want to re-
record.
(1) Use the 3 mode selector button to cycle through
settings until the “SONG” (SONG Mode) indicator is
lit.
(2) Use the bk – and bl + buttons to select a song
number.
• Song numbers 11 through 15 are for songs
recorded with the MIDI recorder. If necessary, you
can touch 8a to play back the song and check
its contents.
2.
Touch bo REC0.
This enters record standby, indicated by bo REC0
flashing red.
3.
Hold down the bo REC0 button until “[MIDI
REC SETTING]” appears on the display.
4.
Select the track you want to re-record.
(1) After confirming that “Rec Track” is displayed, touch
bm ENTER.
(2) Use the bk – and bl + buttons to select a track.
(3) Touch bp EXIT.
5.
Select punch-in recording as the track
recording type.
(1) Use the bk U and bl I buttons to display “Rec
Type” and then touch bm ENTER.
(2) Use the bk – and bl + buttons to select “Punch In”.
6.
Touch 8 START/STOP.
This starts song playback.
• To stop punch-in recording, touch 8 START/STOP
again.
7.
When playback reaches the point from which
you want to re-record, start playing on the
keyboard.
This starts recording and causes the red bo REC0 light
to change from flashing to lit.
• You can also start recording by touching bo REC0.
In this case, rests are inserted at the beginning of the
song until you start playing something on the
keyboard.
8.
To stop recording, touch bo REC0.
• The above procedure re-records the track you select in
step 4, from the point you started recording in step 7
until you stop recording in step 8.
To select this track: Display this:
System Track System
Solo Track 1 Solo 1
Solo Track 2 Solo 2

Digital Piano Operations
EN-48
The settings shown below are available for recording.
■ To configure recording settings
1.
Touch bo REC0.
This enters record standby, indicated by bo REC0
flashing red.
2.
Hold down the bo REC0 button until “[MIDI
REC SETTING]” appears on the display.
3.
Use the bk U and bl I buttons to display the
item (“Precount”, “Metronome”, “Beat”,
“PunchInMeasure”) whose setting you want to
change and then touch bm ENTER.
4.
Use the bk – and bl + buttons to change the
setting.
5.
Touch bp EXIT.
• For multiple settings, repeat steps 3 through 5 above
for each item you want to configure.
6.
After the setting is the way you want, touch
bo REC0.
Configuring Recording Settings (Pre-count,
Metronome, Beat, Punch-in Measure)
Displayed
Setting
Description and Options
Precount Specifies whether or not to sound a pre-
count to signal the start of recording.
Off: Pre-count does not sound.
Recording starts as soon as you
touch 8 START/STOP or when
you play something on the keyboard.
1 Measure / 2 Measure:
A one-measure or two-measure pre-
count sounds when you touch
8 START/STOP or play
something on the keyboard while in
record standby. If you start recording
by touching 8 START/STOP,
recording will start after the pre-
count, along with playback of the
rhythm pattern. If you start by playing
something on the keyboard,
recording will start after the pre-
count, without playing the rhythm
pattern.
Metronome Specifies whether or not the metronome
should sound during recording.
On: Metronome sounds during recording.
Off: Metronome does not sound during
recording.
Beat Specifies the metronome beat during
recording.
0: 1 beat. While the metronome is
sounding during recording, all beats
are a click sound.
1: 1 beat. While the metronome is
sounding during recording, all beats
are a bell sound.
2 to 9: 2 beats to 9 beats. Specifies the
number of beats per measure.
While the metronome is sounding
during recording, the first beat of
each measure is a bell sound
while all remaining beats in the
measure are a click sound.
PunchInMeasure Specifies from which measure playback
should start when performing punch-in
recording (page
EN-47). For example, if
you want to re-record from measure 28,
you could start playback from measure
24. That way you would need to listen to
only four measures of recording before
starting the punch-in operation.
You can specify a measure number in
the range of 001 (beginning of the song)
to 999 (the maximum number of
measures allowed in a song).
Displayed
Setting
Description and Options
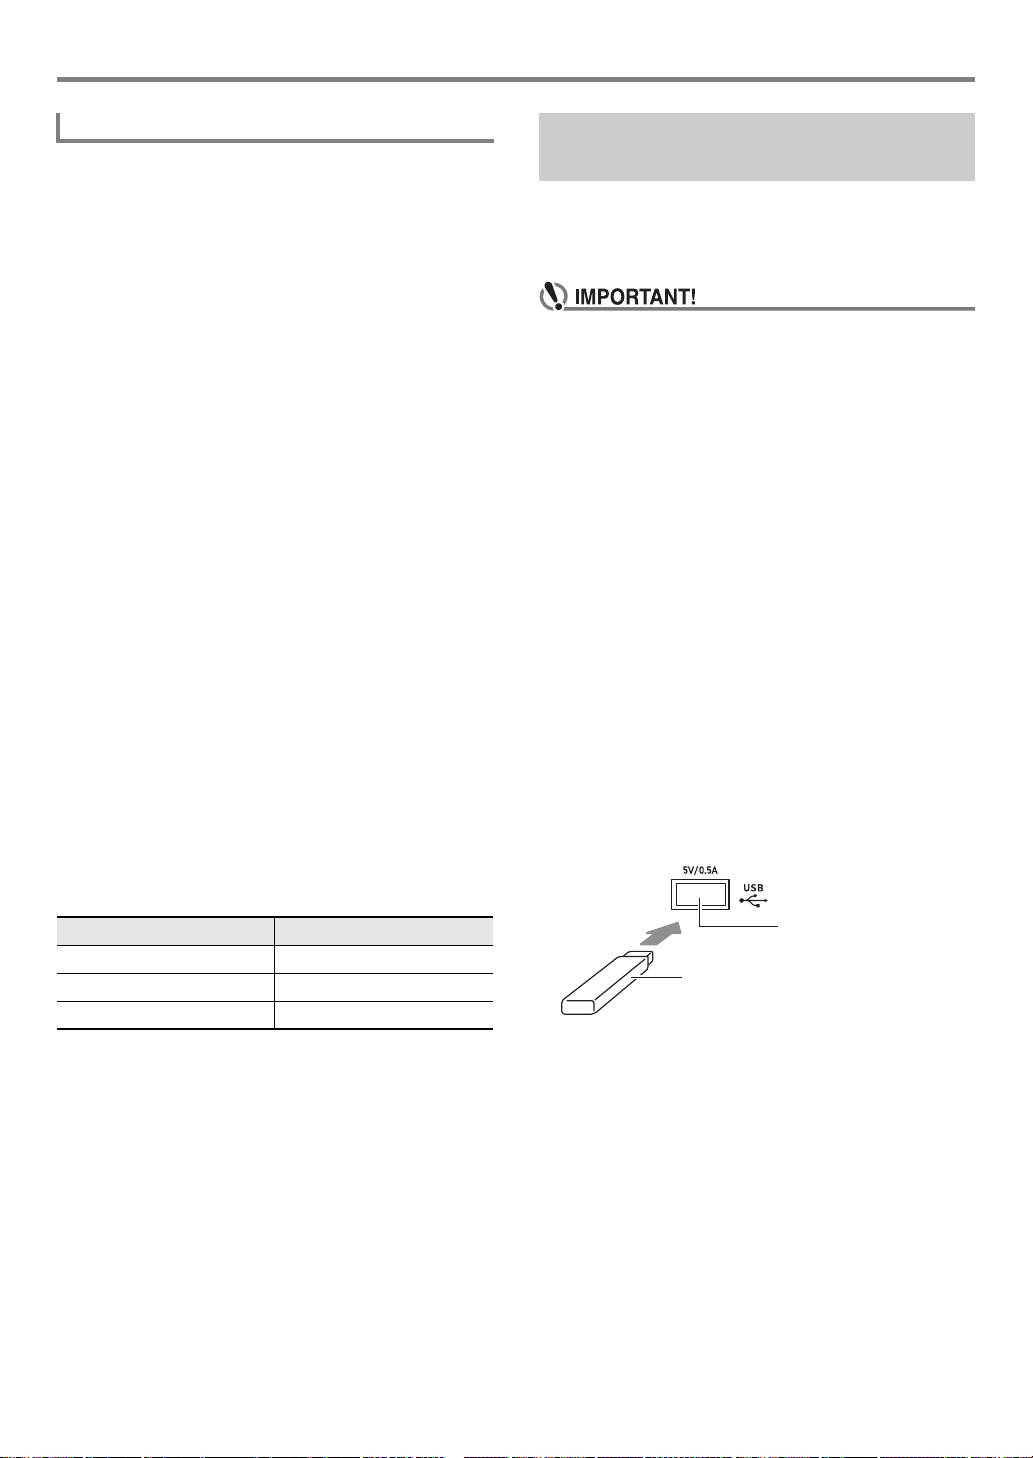
EN-49
Digital Piano Operations
Use the procedures in this section to delete a single song in
its entirety, or a particular track of a song.
■ To delete a MIDI recorder song
1.
Use the 3 mode selector button to cycle
through settings until the “SONG” (SONG
Mode) indicator is lit.
2.
Use the bk – and bl + buttons to select the
song number of the MIDI recorder song you
want to delete.
• Song numbers 11 through 15 are for songs recorded
with the MIDI recorder. If necessary, you can touch
8a to play back the song and check its contents.
3.
Hold down the bo REC0 button until “Song
Clear” appears on the display.
4.
Touch bm ENTER.
This causes “Sure?” to appear on the display.
5.
To delete the song, touch bl +. To exit this
operation without deleting anything, touch
bk –.
■ To delete a particular MIDI recorder track
1.
Perform steps 1 through 3 under “To delete a
MIDI recorder song” (page EN-49).
2.
Use the bk U and bl I buttons to display
“Track Clear” and then touch bm ENTER.
3.
Use the bk U and bl I buttons to display the
track you want to delete.
4.
Touch bm ENTER.
This displays “Sure?”
5.
To delete the track, touch bl +. To exit this
operation without deleting anything, touch
bk –.
The audio recorder records Digital Piano keyboard play as
audio data. Recordings are stored as WAV files (linear PCM,
16bit, 44.1kHz, stereo) to the USB flash drive in the Digital
Piano’s cq USB Type A port.
• Never remove the USB flash drive while Audio
Recorder recording or playback is in progress. Doing
so can corrupt the data on the USB flash drive and
damage the cq USB Type A port.
• For precautions when handling a USB flash drive, see
“
USB Flash Drive” (page EN-60).
• For information about the USB flash drive formats
supported by your Digital Piano, see “
Supported USB
Flash Drives
” (page EN-60).
■ To prepare to use the audio recorder
1.
Perform the steps below to put the Digital
Piano into the Audio Mode.*
(1) Hold down the bp^ button until “[FUNCTION]”
appears on the display.
This enters the FUNCTION Mode.
(2) Use the bk U and bl I buttons to select the
following menu items in sequence: “SONG” 3
“Song Type”.
(3) Use the bk – and bl + buttons to change the setting
to “Audio”.
(4) To exit the FUNCTION mode, hold down bp EXIT
until “[FUNCTION]” disappears from the display.
2.
Insert the USB flash drive into the Digital
Piano’s cq USB Type A port.
• Carefully push the USB flash drive in as far as it will
go. Do not use undue force when inserting the USB
flash drive.
• When the Digital Piano detects the USB flash drive,
the message “MOUNTING” will appear on the display.
Do not perform any operation while this message is
displayed. Wait until it disappears.
* Your Digital Piano has two recorders: a MIDI recorder and
an audio recorder. Depending on the type of data you want
to record or play back, you first need to select the MIDI
Mode or Audio Mode.
Deleting a MIDI Recorder Song
To delete this track: Display this:
System Track System
Solo Track 1 Solo 1
Solo Track 2 Solo 2
Using the Audio Recorder to
Record Performances
cq USB Type A port
USB flash drive
Digital Piano Operations
EN-50
■ To record a keyboard performance onto a USB
flash drive
1.
Perform the procedure under “To prepare to
use the audio recorder” (page EN-49).
2.
Touch bo REC0.
This enters record standby, indicated by bo REC0
flashing red.
The Digital Piano will enter the RHYTHM Mode at this
time if it is in the SONG Mode.
• To cancel recording, touch bo REC0 again.
3.
To start recording, play something on the
keyboard or touch 8 START/STOP.*
This causes bo REC0 to stop flashing and remain lit
red, which indicates that recording is in progress.
* Recording can also be started using other operations.
For details, see “
Operations that Start Recording”
(page
EN-45).
• The maximum allowable recording time with the audio
recorder is approximately 25 minutes, after which recording
will stop automatically. bo REC0 will start to flash to let
you know when you are running out of recording time, so
end your recording as soon as possible after flashing starts.
4.
To stop recording, touch bo REC0.
• This will store the recording as a WAV file to the USB
flash drive. Files are automatically assigned names in
sequence from “TAKE01.WAV” through
“TAKE99.WAV”.
• The Digital Piano will automatically switch to the
SONG Mode with the file it just stored selected for
playback.
5.
To play back the song you just recorded, touch
8a.
■ To select and playback a file recorded with the
audio recorder
1.
Perform the procedure under “To prepare to
use the audio recorder” (page EN-49).
2.
Use the 3 mode selector button to cycle
through settings until the “SONG” (SONG
Mode) indicator is lit.
3.
Use the bk – and bl + buttons to select the file
you want to play.
4.
To start playback, touch 8a.
• Playback stops automatically when the end of the file
is reached. To stop playback part way through, touch
8a.
■ To delete a file recorded with the audio recorder
1.
Perform the procedure under “To prepare to
use the audio recorder” (page EN-49).
2.
Use the 3 mode selector button to cycle
through settings until the “SONG” (SONG
Mode) indicator is lit.
3.
Use the bk – and bl + buttons to select the file
you want to delete.
4.
Hold down bo REC0 until “Sure?” appears on
the display.
5.
To delete the file, touch bl +. To exit this
operation without deleting anything, touch
bk –.
EN-51
Digital Piano Operations
Your Digital Piano has a MIDI player that can play back the
MIDI file types described below.
■ Playable songs
■ Getting Ready to Use the MIDI player
Your Digital Piano has two players: a MIDI player and an
audio player. Depending on the type of data you want to
record or play back, you first need to select the MIDI Mode or
Audio Mode.
• The MIDI player can be used while the Digital piano is in the
MIDI Mode. If the Digital Piano is in the Audio Mode,
perform the procedure below to switch to the MIDI Mode.
• Note that the Digital Piano is in the MIDI Mode under initial
default settings, so the operation below is not necessary if
you have not changed the setting.
1.
Perform the steps below to put the Digital
Piano into the MIDI Mode.
(1) Hold down the bp^ button until “[FUNCTION]”
appears on the display.
This enters the FUNCTION Mode.
(2) Use the bk U and bl I buttons to select the
following menu items in sequence: “SONG” 3
“Song Type”.
(3) Use the bk – and bl + buttons to change the setting
to “MIDI”.
(4) To exit the FUNCTION mode, hold down bp EXIT
until “[FUNCTION]” disappears from the display.
■ To select and play back a song
1.
If you want to play a song stored on a USB
flash drive, insert the drive into the Digital
Piano’s cq USB Type A port.
• After mounting of the USB flash drive is complete, the
Digital Piano will start to read a list of songs on the
drive, which is indicated by the message “WAIT” on
the display. Wait until the read operation is complete.
• For precautions when handling a USB flash drive, see
“
USB Flash Drive” (page EN-60).
2.
Use the 3 mode selector button to cycle
through settings until the “SONG” (SONG
Mode) indicator is lit.
3.
Use the bk – and bl + buttons to select a song
number.
• Selecting some songs will initially cause “LOADING” to
be displayed. This indicates that data is being loaded.
Listening to Songs (MIDI Player)
Song Type Description
User songs You can add up to 10 songs to Digital Piano
memory as user songs (Song Number 1
through 10). To add user song data (up to
320 KB per song of data that is playable by
this Digital Piano), store it on a USB drive or
smart device and then transfer the song
data to Digital Piano memory. For details,
see “
USB Flash Drive Operations” (page
EN-62) and “Linking with a Smart Device
(APP Function)
” (page EN-66).
MIDI recorder
songs
Songs recorded with the Digital Piano’s
MIDI recorder. See “
Using the MIDI
Recorder to Record Performances
” (page
EN-43).
USB memory
songs
You can easily play standard MIDI files
(SMF format 0/1) or CASIO MIDI files (CMF
format) saved on a USB flash drive without
importing them into the Digital Piano user
song area. For information about how to
store song data, see “
Using a Computer to
Copy General Song Data to a USB Flash
Drive
” (page EN-65).
Song Number Song Type
1 to 10 User songs
11 to 15 MIDI recorder songs
16 to 999 USB memory songs

Digital Piano Operations
EN-52
4.
To start playback of the selected song, touch
8a.
• The yellow and red LEDs above the 8a button will
flash in time with the beat (yellow for beat 1, red for the
remaining beats of each measure).
• The operations below can be performed while
playback is in progress.
• Playback ends automatically when the end of the song
is reached.
■ To play a song with one of hand parts muted (for
practice of the muted part)
• This procedure can be used for a user song or a song on a
USB flash drive.
1.
Perform steps 1 and 2 under “Getting Ready to
Use the MIDI player” (page EN-51).
2.
If you want, you could use the procedure under
“Changing the Auto Accompaniment and Song
Tempo” (page EN-38) to specify the tempo.
3.
Use the 4 PART button to select the part you
want to mute.
• Each touch of 4 PART cycles through the playback
part settings. The currently selected playback part(s) is
indicated by the “L” and “R” indicators that appear in
the bottom of the display.
4.
To start playback, touch 8a.
• Play the muted part along with the playback.
• You can also change the tempo setting during
playback.
• Playback will stop automatically when the end of the
song is reached. To stop playback of a song part way
through, touch 8a.
• When playing back a standard MIDI file (SMF format)
stored on a USB flash drive, channel 3 will be assigned to
the left-hand part while channel 4 will be assigned to the
right-hand part.
■ To import song settings as keyboard
performance settings
• The procedure below can be used to import the settings
below, which are recorded at the beginning of a selected
song, as keyboard performance settings.
Tempo, hall simulator/reverb settings (On/Off, type, depth),
surround settings (MIDI recorder songs only), chorus type,
brilliance setting (MIDI recorder songs only), scale setting
(MIDI recorder songs only)
1.
Perform steps 1 and 2 under “Getting Ready to
Use the MIDI player” (page EN-51).
2.
Hold down the 3 mode selector button until
“COMPLETE” appears on the display.
This imports the settings of the selected song as
keyboard performance settings.
■ To delete a user song
1.
Use the 3 mode selector button to cycle
through settings until the “SONG” (SONG
Mode) indicator is lit.
2.
Use the bk – and bl + buttons to select the
song number (1 to 10) of the user song you
want to delete.
• If necessary, you can touch 8a to play back the
song and check its contents.
3.
Hold down the bo REC0 button until “Sure?”
appears on the display.
4.
To delete the song, touch bl +. To exit this
operation without deleting anything, touch
bk –.
To do this: Perform this operation:
Stop playback Touch 8a.
Pause playback Touch 7 k.
Change playback
tempo (speed).
See “
Changing the Auto
Accompaniment and Song Tempo
”
(page
EN-38).
Skip forward one
measure.
Touch 6d.
Fast forward Hold down 6d.
Skip back one
measure.
Touch 5s.
Fast backward Hold down 5s.
This indicator Means this:
LR Both the left- and right-hand parts play.
L Just the left-hand part plays, with the right-
hand part muted.
R Just the right-hand part plays, with the left-
hand part muted.
Both the left- and right-hand parts muted.
EN-53
Digital Piano Operations
The FUNCTION Mode makes it possible to configure function settings using a menu format. There are two types of menu items:
directories and parameters.
The table below shows a representative example of some menu items provided in the FUNCTION Mode. Items marked “(DIR)” in
the table are directories, while all of the other items are parameters.
For a list of all the directories and parameters included in the FUNCTION Mode, See “
FUNCTION Mode Menu Items” (page
EN-55).
■ To change FUNCTION parameter settings
1.
Referring to “FUNCTION Mode Menu Items” (page EN-55), check the parameters whose settings you
want to change and their top directories.
2.
Hold down the bp^ button until “[FUNCTION]” appears on the display.
This enters the FUNCTION Mode and displays its top menu.
• The FUNCTION Mode top menu screen shows “[FUNCTION]” in the top line, and the name of the currently selected
directory in line 2. Directory names are all-caps.
Configuring Function Settings (FUNCTION Mode)
Directory : A directory is a group of multiple parameters.
Parameter : A parameter is an actual configurable setting. After you select the “Touch Response” parameter, for example, you can
change its setting as desired.
Parameter Name or Directory Name Display Settings
Sound (DIR) SOUND –
Acoustic Simulator (DIR) ACOUSTIC SIMU. –
String Resonance String Reso. Tone, Off, 1 - 4
Damper Resonance Damper Reso. Tone, Off, 1 - 4
Damper Noise Damper Noise Tone, Off, 1 - 4
Key On Action Noise Key On Noise Tone, Off, 1 - 4
Key Off Action Noise Key Off Noise Tone, Off, 1 - 4
Effect (DIR) EFFECT –
Chorus Type Chorus Type Tone, 1 - 12
...
...
...
[
FUNCT I ON
]
<
SOUND
>
Directory name
EN-54
Digital Piano Operations
3.
Display the name of the parameter whose setting you want to change.
• For example, to display the “Chorus Type” parameter, you need to navigate through multiple directories in the following
sequence: “SOUND” (directory) 3 “EFFECT” (directory) 3 “Chorus Type” (parameter). Perform the procedure below.
(1) Use the bk U and bl I buttons to display “SOUND” and then touch bm ENTER.
• This enters the “SOUND” directory.
(2) Use the bk U and bl I buttons to display “EFFECT” and then touch bm ENTER.
• This enters the “EFFECT” directory.
(3) Use the bk U and bl I buttons to display “Chorus Type”.
• To exit the current directory and return to the level above it, touch bp EXIT.
4.
After displaying the parameter name, touch bm ENTER.
This displays the parameter setting editing screen, with the parameter’s current setting shown in line 3.
5.
Use the bk – and bl + buttons, or cm (K1) knob to change the setting.
• To return to the initial default setting, touch bk – and bl + at the same time.
6.
After the setting is the way you want, exit the parameter editing screen by touching bp EXIT.
7.
To exit the FUNCTION Mode, hold down bp EXIT until “[FUNCTION]” disappears from the display.
• The above steps are the basic procedure of the FUNCTION Mode. Some items included in the FUNCTION Mode require
operations that are different from those above. Refer to the information below.
For information about this item: Go here:
Operation Lock “
Using Operation Lock” (page EN-59)
Setting Reset “
To return all Digital Piano settings to their initial factory defaults (Setting Reset)” (page
EN-60)
Factory Reset “
To return all Digital Piano settings and data to their initial factory defaults (Factory
Reset)
” (page EN-60)
[
FUNCT I ON
]
–
Tone
+
Cho r us T
yp
e

EN-55
Digital Piano Operations
■ FUNCTION Mode Menu Items
• For information about general procedures for changing the settings in the list below, see “
To change FUNCTION parameter
settings
” (page EN-53).
• A function whose name has “(DIR)” at the end is a directory, which contains multiple sub-directories and parameters.
No. Parameter Name or Directory Name Display Settings
1 Sound (DIR) SOUND –
2
Acoustic Simulator (DIR) ACOUSTIC SIMU. –
3
String Resonance String Reso. Tone, Off, 1 - 4
4
Damper Resonance Damper Reso. Tone, Off, 1 - 4
5
Damper Noise Damper Noise Tone, Off, 1 - 4
6
Key On Action Noise Key On Noise Tone, Off, 1 - 4
7
Key Off Action Noise Key Off Noise Tone, Off, 1 - 4
8
Effect (DIR) EFFECT –
9
Chorus Type Chorus Type See page EN-25
10 Brilliance Brilliance –3 - +3
11
Keyboard (DIR) KEYBOARD –
12
Touch Response Touch Response See page EN-19
13 Keyboard Volume KeyboardVolume 0 - 127
14
Part Volume (DIR) PART VOLUME –
15
Upper1 Part Upper1 Part 0 - 127
16
Upper2 Part Upper2 Part 0 - 127
17
Lower Part Lower Part 0 - 127
18
Part Octave Shift (DIR) PART OCT SHIFT –
19
Upper1 Part Upper1 Part –2, –1, 0, +1, +2
20
Upper2 Part Upper2 Part –2, –1, 0, +1, +2
21
Lower Part Lower Part –2, –1, 0, +1, +2
22
Part Fine Tuning (DIR) PART FINE TUNE –
23
Upper1 Part Upper1 Part –99 - 0 - +99
24
Upper2 Part Upper2 Part –99 - 0 - +99
25
Lower Part Lower Part –99 - 0 - +99
26
Scale Tuning (DIR) SCALE TUNING –
27
Scale Type Scale Type See page EN-30
28 Scale Base Note Scale Base Note C - B
29
Stretch Tuning Stretch Tuning On, Off
30
Accompaniment Scale Accomp Scale On, Off
31
Duet (DIR) DUET –
32
Duet Mode Duet Mode Off, On, Pan
33
Right-Side Keyboard Octave Upper Octave –2 - +2
34
Left-Side Keyboard Octave Lower Octave –2 - +2
EN-56
Digital Piano Operations
35 Pedal/Wheel (DIR) PEDAL/WHEEL –
36
Damper pedal (DIR) DAMPER PEDAL –
37
Pedal Target Pedal Target See page EN-7
38 Upper1 Part Upper1 Part On, Off
39
Upper2 Part Upper2 Part On, Off
40
Lower Part Lower Part On, Off
41
Expression/assignable pedal (DIR) EXP/ASGN PEDAL –
42
Pedal Type Pedal Type See page EN-9
43 Pedal Target Pedal Target See page EN-9
44 Upper1 Part Upper1 Part On, Off
45
Upper2 Part Upper2 Part On, Off
46
Lower Part Lower Part On, Off
47
Expression Pedal Calibration Exp Calibration See page EN-9
48 Pedal Unit (DIR) PEDAL UNIT –
49
Upper1 Part Upper1 Part On, Off
50
Upper2 Part Upper2 Part On, Off
51
Lower Part Lower Part On, Off
52
Pitch Bend Wheel (DIR) WHEEL –
53
Pitch Bend Range P Bend Range 0 - 24
54
Upper1 Part Upper1 Part On, Off
55
Upper2 Part Upper2 Part On, Off
56
Lower Part Lower Part On, Off
57
Registration (DIR) REGISTRATION –
58
Freeze Target (DIR) FREEZE –
59
Pedal/Wheel Pedal/Wheel On, Off
60
Knob Knob On, Off
61
Scale Tuning Scale Tuning On, Off
62
Touch Response Touch Response On, Off
63
Sound Mode Sound Mode On, Off
64
Effect Effect On, Off
65
Transpose Transpose On, Off
66
Split Point Split Point On, Off
67
Arpeggiator/Auto Harmonize Arpeg./A.Harmo. On, Off
68
Tempo Tempo On, Off
69
Auto Accompaniment Accompaniment On, Off
70
Tone Tone On, Off
71
Sequential Pedal Recall (DIR) SEQ PED RECALL –
72
Damper Pedal Damper Pedal Inc, Dec, Off
73
Expression/assignable Pedal Exp/Asgn Pedal Inc, Dec, Off
No. Parameter Name or Directory Name Display Settings
EN-57
Digital Piano Operations
74 Auto Accompaniment (DIR) ACCOMPANIMENT –
75
Accomp Volume Accomp Volume 0 - 127
76
Chord Mode Chord Mode See page EN-34
77 Music Preset Key Shift MP Key Shift –5 - 0 - +6
78
Arpeggiator/Auto Harmonize (DIR) ARPEG./A.HARMO. –
79
Type Select Type Select A.Harmo., Arpeggiator
80
Arpeggio Hold Arpeggio Hold On, Off
81
Arpeggio Part Arpeggio Part Upper1&2, Upper1
82
Song (DIR) SONG –
83
Song Type Song Type MIDI, Audio
84
MIDI Song Metronome MIDI Metronome On, Off
85
MIDI Song Volume MIDI Volume 0 - 127
86
Audio Song Volume Audio Volume 0 - 127
87
Audio Song Center Cancel Audio C Cancel On, Off
88
Media (DIR) MEDIA See page EN-62
89 Wireless (DIR) WIRELESS –
90
Wireless Function Adaptor On, Off
91
Connection Status Connection Stat *
1
92
Notification Volume Level Notification Vol 0 - 127
93
Pairing Audio Pairing *
1
94
Pairing Information (Connection History) Reset Pairing Clear *
1
95
Input Audio Volume Level Audio Volume 0 - 127
96
Input Audio Center Cancel Audio C Cancel On, Off
97
Audio Input (DIR) AUDIO IN JACK –
98
Input Audio (AUDIO IN jack) Volume Level Volume 0 - 127
99
Input Audio (AUDIO IN jack) Center Cut Center Cancel On, Off
100
MIDI (DIR) MIDI –
101
Keyboard Channel Keyboard Chan 1 - 16
102
Local Control Local Control On, Off
103
Hi-Reso Velocity MIDI Out Hi-Reso MIDI Out On, Off
104
Accomp MIDI Out Accomp MIDI Out On, Off
No. Parameter Name or Directory Name Display Settings
EN-58
Digital Piano Operations
*1 Refer to the separate “Wireless MIDI & audio adaptor, Audio and Computer Connection Guide”.
*2 Specify whether to use the letter T (Letter) or the icon 2 (Icon) as the on-screen tempo indicator. The note icon displayed when
“Icon” is selected does not indicate any note value.
105
System (DIR) SYSTEM –
106
Tuning Master Tuning 415.5 - 465.9
107
Panel Light Setting Panel Light Off, 5, 30, 60, 120 (Seconds)
108
Operation Lock Operation Lock On, Off, Auto
109
Speaker Out Speaker Out On, Off, Auto
110
Auto Resume Auto Resume On, Off
111
Auto Power Off Auto Power Off On, Off
112
Power On Alert Power On Alert On, Off
113
Tempo Indicator Tempo Indicator Letter, Icon*
2
114
LCD Contrast LCD Contrast 1 - 17
115
Touch Button Sensitivity Touch Btn Sense –1 - 0 - +1
116
Setting Reset Setting Reset See page EN-60
117 Factory Reset Factory Reset See page EN-60
118 Version Information Version –
No. Parameter Name or Directory Name Display Settings
EN-59
Digital Piano Operations
Operation Lock disables button operations, except for the
1P (Power) button and the button operations required to
unlock operations. While Auto is selected for Operation Lock,
button operations are disabled during performances.*
* Pressing any key or pedal is interpreted as the start of a
performance and causes operation to be locked.
■ To lock operations
1.
Hold down the bp^ button until “[FUNCTION]”
appears on the display.
This enters the FUNCTION Mode.
2.
Use the bk U and bl I buttons to select the
following menu items in sequence: “SYSTEM”
3 “Operation Lock”.
3.
Use the bk – and bl + buttons to change the
displayed setting from “Off” or “Auto” to “On”.
4.
To exit the FUNCTION mode, hold down
bp EXIT until “[FUNCTION]” disappears from
the display.
■ To unlock operations
1.
Hold down the bp^ button until “[FUNCTION]”
appears on the display.
This enters the FUNCTION Mode.
The display appears as shown below when an operation
is locked.
2.
Use the bk – and bl + buttons to change the
displayed setting from “On” to “Off” or “Auto”.
3.
To exit the FUNCTION mode, hold down
bp EXIT until “[FUNCTION]” disappears from
the display.
Use the FUNCTION parameters below to change the Digital
Piano’s MIDI settings. For information about FUNCTION
parameters, see “
Configuring Function Settings (FUNCTION
Mode)
” (page EN-53).
Using Operation Lock
[
FUNCT I ON
]
–
On
+
O
p
erat ion Lock
Configuring MIDI Settings
Setting FUNCTION Parameter
Keyboard Channel
This setting specifies a channel
from 1 through 16 as the MIDI
channel that can be used for
sending data to an external
device.
Keyboard Chan
(number
101)
Local Control
When this setting is turned off,
performance information (MIDI
data) is sent from the Digital
Piano, but no Digital Piano
sound is output. This setting is
for when you only want to send
MIDI data to an external device.
Local Control
(number
102)
Hi-Reso Velocity MIDI Out
This setting enables/disables
high-resolution MIDI output of
touch pressure (velocity) when
keyboard keys are pressed.
Hi-Reso MIDI Out
(number
103)
Accomp MIDI Out
Enabling this setting outputs
Auto Accompaniment
information as MIDI data.
Accomp MIDI Out
(number
104)
EN-60
You can use the procedure below to delete all data, and reset
settings and other system contents to return them to their
initial factory defaults.
■ To return all Digital Piano settings and data to
their initial factory defaults (Factory Reset)
• This procedure also deletes user songs, MIDI recorder
song data, and registration data. Saving important data
to a USB flash drive (page
EN-63) is recommended
before performing this procedure.
1.
Hold down the bp^ button until “[FUNCTION]”
appears on the display.
2.
Use the bk U and bl I buttons to display
“SYSTEM” and then touch bm ENTER.
3.
Use the bk U and bl I buttons to display
“Factory Reset” and then touch bm ENTER.
This displays “Sure?”
4.
To return the Digital Piano to its factory default
settings, touch bl +. To cancel this operation
without changing settings, touch bk –.
■ To return all Digital Piano settings to their initial
factory defaults (Setting Reset)
You can use the FUNCTION Mode to return all Digital Piano
settings to their initial factory defaults.
In step 3 of the procedure under “
To return all Digital Piano
settings and data to their initial factory defaults (Factory
Reset)
” (page EN-60), select “Setting Reset” in place of
“Factory Reset” and then touch bm ENTER.
Your Digital Piano supports the use of a commercially
available USB flash drive to perform the operations below.
Playing Back Song Data from a USB Flash Drive
Standard song data (MIDI files) that has been stored on a
USB flash drive with a computer can be played on your Digital
Piano.
• For information about how to store song data on a USB
flash drive, see “
Using a Computer to Copy General Song
Data to a USB Flash Drive
” (page EN-65).
• For information about the song data playback operation,
see “
Listening to Songs (MIDI Player)” (page EN-51).
Recording a Performance to a USB Flash Drive
See “
Using the Audio Recorder to Record Performances”
(page
EN-49) for information about how to record audio data
produced by performances on your Digital Piano to a USB
flash drive.
Saving and Importing Data
Data recorded with your Digital Piano (MIDI recorder songs,
registration setups, etc.) can be stored on a USB flash drive.
Data that has been stored with the Digital Piano, as well as
other data that is supported by the Digital Piano (user songs,
etc.) can be imported from a USB flash drive. For details, see
“
USB Flash Drive Operations” (page EN-62).
Capacity: 32GB or less recommended
• Operation of the above type of USB flash drive has
been confirmed, but this does not guarantee operation.
• Use a FAT (FAT32 or exFAT) format USB flash drive.
• You may not be able to use a USB flash drive that is
recognized as multiple drives on your computer.
• A USB flash drive that is recognized as a CD-ROM on
your computer is not supported.
• A USB flash drive with an anti-virus function and/or
security functions is not supported.
Deleting All Data in Digital Piano
Memory
USB Flash Drive
Supported USB Flash Drives
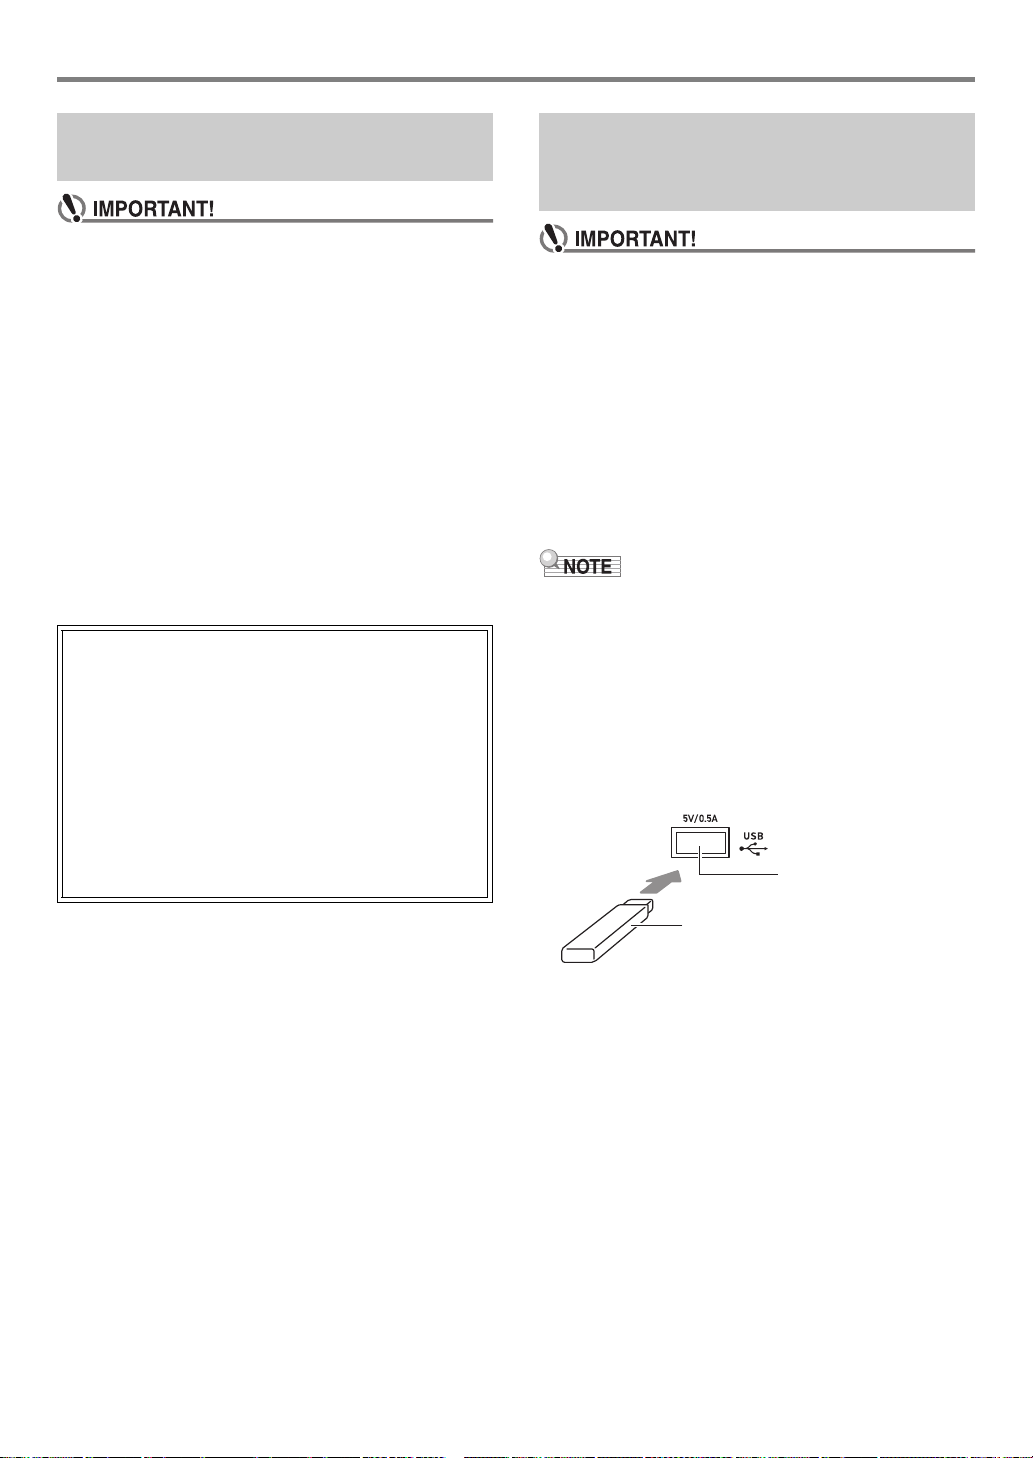
EN-61
USB Flash Drive
• Be sure to observe the precautions provided in the
documentation that comes with the USB flash drive.
• Avoid using a USB flash drive under the conditions
below. Such conditions can corrupt data stored on the
USB flash drive.
− Areas subjected to high temperature, high humidity,
or corrosive gas
− Areas subjected to strong electrostatic charge and
digital noise
• Never remove the USB flash drive while data is being
written to or loaded from it. Doing so can corrupt the
data on the USB flash drive and damage the cq USB
Type A port.
• A USB flash drive can become warm after very long
use. This is normal and does not indicate malfunction.
• Static electricity conducted to the cq USB Type A port
from your hand or from a USB flash drive can cause
malfunction of the Digital Piano. If this happens, turn
the Digital Piano off and then back on again.
• When you perform a USB flash drive operation or turn
on the Digital Piano while a USB flash drive is plugged
in, the Digital Piano initially needs to perform a
“mounting” sequence to prepare for data exchange
with the USB flash drive. Digital Piano operations may
be momentarily disabled while a mounting sequence is
being performed. The message “MOUNTING” is
displayed while the USB flash drive is being mounted.
It may take up to 10 or 20 seconds or even longer for a
USB flash drive to be mounted. Do not attempt to
perform any operation on the Digital Piano while a
mounting sequence is in progress. A USB flash drive
needs to be mounted each time it is connected to the
Digital Piano.
• Mounting a USB flash drive on the Digital Piano will create
a folder named MUSICDAT in the drive’s root directory if a
MUSICDAT folder does not already exist there. Use this
folder when exchanging data between the Digital Piano and
USB flash drive.
■ To connect a USB flash drive
1.
As shown in the illustration below, insert the
USB flash drive into the Digital Piano’s cq USB
Type A port.
• Carefully push the USB flash drive in as far as it will
go. Do not use undue force when inserting the USB
flash drive.
■ To disconnect a USB flash drive
1.
After checking to make sure that the message
“MOUNTING” or “Wait” is not on the display
(indicating a read or write operation being
performed), pull the USB flash drive straight
out of the cq USB Type A port.
USB Flash Drive and USB Type A
Port Handling Precautions
Copyrights
You are allowed to use recordings for your own personal
use. Any reproduction of an audio or music format file,
without the permission of its copyright holder, is strictly
prohibited under copyright laws and international
treaties. Also, making such files available on the Internet
or distributing them to third parties, regardless of
whether such activities are conducted with or without
compensation, is strictly prohibited under copyright laws
and international treaties. CASIO COMPUTER CO.,
LTD. shall not be held in any way liable for any use of
this Digital Piano that is illegal under copyright laws.
Connecting a USB Flash Drive to
and Detaching It from the Digital
Piano
cq USB Type A port
USB flash drive

USB Flash Drive
EN-62
• Be sure to format a USB flash drive on the Digital Piano
before using it for the first time.
• Formatting a USB flash drive deletes all data currently
stored on it. Before formatting a USB flash drive, make
sure it does not have any valuable data stored on it.
• The format operation performed by this Digital Piano is
a “quick format”. If you want to completely delete all of
the data in USB flash drive, format it on your computer
or some other device.
• In the case of an exFAT format USB flash drive, the
number of importable files may be limited if long file
names are used.
■ To format a USB flash drive
1.
Insert the USB flash drive to be formatted into
the Digital Piano’s cq USB Type A port.
2.
Hold down the bp^ button until “[FUNCTION]”
appears on the display.
3.
Use the bk U and bl I buttons to display
“[MEDIA]” and then touch bm ENTER.
This enters the MEDIA Mode.
4.
Use the bk U and bl I buttons to display
“Format” and then touch bm ENTER.
This displays “Sure?”
5.
To execute the format, touch bl +.
• To cancel the operation, touch bk –.
• Touching bl + starts formatting and displays the
message “Wait” (operation in progress). Do not
perform any operation while this message is displayed.
“Complete” is displayed after the operation is
complete.
6.
To exit the MEDIA mode, hold down bp EXIT
until “[MEDIA]” disappears from the display.
The section provides information about the operations below.
• Saving Digital Piano Data to a USB Flash Drive
• Importing Data (Files) from a USB Flash Drive to Digital
Piano Memory
• Renaming Digital Piano Importable Data (Files) on a USB
Flash Drive
• Deleting Digital Piano Importable Data (Files) on a USB
Flash Drive
■ Data Types
Data types supported by your Digital Piano are those shown
in the table below. The text in the “Displayed Type Name”
column is displayed for the data type on the Digital Piano’s
LCD.
● Digital Piano 3 USB flash drive
The data below can be stored to a USB flash drive from Digital
Piano memory.
* MIDI recorder song, Registration, User Song
● USB Flash Drive 3 Digital Piano
The data below can be imported to Digital Piano memory from
a USB flash drive.* This data can also be renamed and
deleted using Digital Piano operations.
* Though audio data can be renamed and deleted, it cannot
be imported into Digital Piano memory.
• Even if a file name has one of the extensions shown in
the table below, you may not be able to import it into
Digital Piano memory if the data was created with a
non-compatible device, etc.
Formatting a USB Flash Drive USB Flash Drive Operations
Data Type
Displayed
Type Name
File Name
Extension
MIDI recorder song Record Song MRF, MID
Registration (Bank unit) Reg Mem Bank RBK
All user data in Digital
Piano memory*
All DAL
Data Type
Displayed
Type Name
File Name
Extension
User Song User Song CMF, MID
(SMF format
0/1)
MIDI recorder song Record Song MRF
Registration (Bank unit) Reg Mem Bank RBK
All the above data All DAL
Audio data* Audio WAV

EN-63
USB Flash Drive
■ To save Digital Piano data to a USB flash drive
1.
Insert the USB flash drive into the Digital
Piano’s cq USB Type A port.
2.
Hold down the bp^ button until “[FUNCTION]”
appears on the display.
3.
Use the bk U and bl I buttons to display
“[MEDIA]” and then touch bm ENTER.
This enters the MEDIA Mode.
4.
Use the bk U and bl I buttons to display
“Save” and then touch bm ENTER.
5.
Use the bk U and bl I buttons to display a
sub-menu item of options that correspond to
the type of data being saved.
• See the “Displayed Type Name” column in the table
under “Digital Piano 3 USB flash drive” (page
EN-62).
6.
Touch bm ENTER.
• If “All” is selected in step 5, step 7 is not required.
Proceed to step 8.
7.
Use the bk – and bl + buttons to select the
data to be saved, and then touch bm ENTER.
This will display a default file name based on the type of
data you selected.
• If you selected “Record Song” in step 5 of this
procedure, you must specify the file type here. Use the
bk U and bl I buttons to display “MRF” (Digital
Piano format) or “MID” (SMF format) and then touch
bm ENTER.
8.
Rename the file, if you want.
• For information about text editing, see “
Text Character
Input
” (page EN-13).
• To exit text editing and return to step 7, touch
bp EXIT while the bk U and bl I buttons are
displayed (for cursor movement). If you previously
made changes to the file name, the message
“Cancel?” will appear. Touch bl + to exit editing.
9.
To apply the new file name, touch cl STORE.
This displays “Sure?”
• The message “Replace?” will appear if there is already
data with the same name in the MUSICDAT folder on
the USB flash drive. If this happens, touching bl + in
step 10 below will overwrite the existing data with the
new data.
10.
Touch bl + to save.
• To cancel the operation, touch bk –.
• Touching bl + displays “Wait” (operation in progress).
Do not perform any operation while this message is
displayed. “Complete” is displayed after the operation
is complete.
11.
To exit the MEDIA mode, hold down bp EXIT
until “[MEDIA]” disappears from the display.
■ To load data from a USB flash drive to Digital
Piano memory
1.
Perform steps 1, 2, and 3 under “To save
Digital Piano data to a USB flash drive” (page
EN-63).
2.
Use the bk U and bl I buttons to display
“Load” and then touch bm ENTER.
3.
Use the bk U and bl I buttons to display a
sub-menu item of options that correspond to
the type of data being imported.
• See the “Displayed Type Name” column in the table
under “USB Flash Drive 3 Digital Piano” (page
EN-62).
4.
Touch bm ENTER.
This displays a file name of data that can be imported.
5.
Use the bk – and bl + buttons to select the
data you want to import into Digital Piano
memory.
• If “All” is selected in step 3, steps 6 and 7 below are
not required. Proceed to step 8.
6.
Touch bm ENTER.
7.
Use the bk – and bl + buttons to specify the
number of the user area where imported data
should be stored.
8.
Touch bm ENTER.
This causes “Sure?” or “Replace?” to appear on the
display.
• If “Replace?” appears, touching bl + in step 9 below
will overwrite the existing user area data with the
imported data.
9.
Touch bl + to import.
• To cancel the operation, touch bk –.
• Touching bl + displays “Wait” (operation in progress).
Do not perform any operation while this message is
displayed. “Complete” is displayed after the operation
is complete.
10.
To exit the MEDIA mode, hold down bp EXIT
until “[MEDIA]” disappears from the display.

USB Flash Drive
EN-64
■ To delete USB flash drive data
1.
Perform steps 1, 2, and 3 under “To save
Digital Piano data to a USB flash drive” (page
EN-63).
2.
Use the bk U and bl I buttons to display
“Delete” and then touch bm ENTER.
3.
Use the bk U and bl I buttons to display a
sub-menu item that correspond to the type of
data being deleted, and then touch bm ENTER.
• See the “Displayed Type Name” column in the table
under “USB Flash Drive 3 Digital Piano” (page
EN-62).
4.
Use the bk – and bl + buttons to select the
data to be deleted, and then touch bm ENTER.
This displays “Sure?”
5.
To delete the data, touch bl +.
• To cancel the operation, touch bk –.
• Touching bl + displays “Wait” (operation in progress).
Do not perform any operation while this message is
displayed. “Complete” is displayed after the operation
is complete.
6.
To exit the MEDIA mode, hold down bp EXIT
until “[MEDIA]” disappears from the display.
■ To rename USB flash drive data
1.
Perform steps 1, 2, and 3 under “To save
Digital Piano data to a USB flash drive” (page
EN-63).
2.
Use the bk U and bl I buttons to display
“Rename” and then touch bm ENTER.
3.
Use the bk U and bl I buttons to display a
sub-menu item that correspond to the type of
data being renamed, and then touch
bm ENTER.
• See the “Displayed Type Name” column in the table
under “USB Flash Drive 3 Digital Piano” (page
EN-62).
4.
Use the bk – and bl + buttons to select the
data to be renamed, and then touch
bm ENTER.
5.
Rename the file.
• For information about text editing, see “
Text Character
Input
” (page EN-13).
• To exit text editing and return to step 4, touch
bp EXIT while the bk U and bl I buttons are
displayed (for cursor movement). If you previously
made changes to the file name, the message
“Cancel?” will appear. Touch bl + to exit editing.
6.
To apply the new file name, touch cl STORE.
This displays “Sure?”
• The message “Replace?” will appear if there is already
data with the same name on the USB flash drive. If this
happens, touching bl + in step 7 below will overwrite
the existing data with the new data.
7.
To change the name, touch bl +.
• To cancel the operation, touch bk –.
• Touching bl + displays “Wait” (operation in progress).
Do not perform any operation while this message is
displayed. “Complete” is displayed after the operation
is complete.
8.
To exit the MEDIA mode, hold down bp EXIT
until “[MEDIA]” disappears from the display.

EN-65
USB Flash Drive
You can use the same operations as those for built-in songs
to play back files of the formats below, which are stored in the
MUSICDAT folder.
• Standard MIDI files (SMF format 0/1) or CASIO MIDI files
(CMF format)
1.
Connect the USB flash drive to your computer.
2.
Create a folder named MUSICDAT in the root
directory of the USB flash drive.
• This step is not required if there is already a
MUSICDAT folder in the USB flash drive’s root
directory.
3.
Copy song data you want to play back on the
Digital Piano to the MUSICDAT folder.
• For information about the song data playback
operation, see “
Listening to Songs (MIDI Player)”
(page
EN-51).
Performing a record operation with the Digital Piano’s audio
recorder creates a folder named MUSICDAT on the USB flash
drive. WAV files are stored in the MUSICDAT folder,
automatically assigning them names from TAKE01.WAV to
TAKE99.WAV. You also can connect a USB flash drive to a
computer and change the names of audio data (WAV) files to
the format “TAKEXX*.WAV”, and move them to the
MUSICDAT folder. Then you will be able to play them back on
the Digital Piano.
* XX = 01 to 99
Supported WAV format (Linear PCM, 16bit, 44.1 kHz, stereo)
Using a Computer to Copy
General Song Data to a USB Flash
Drive
Storing Standard Audio Data
(WAV Files) to a USB Flash Drive

EN-66
You can use the APP Function to connect the Digital Piano with a phone, tablet or other smart device and perform the operations
described below.
• Control the Digital Piano from a smart device (Piano Remote Controller)
• Transfer music data from a smart device
■ To download the smart device app
Download the smart device app from the CASIO website and install it on the smart device you want to use.
https://support.casio.com/global/en/emi/manual/PX-S3100/
There are two ways to connect with a smart device: connect via the Bluetooth function and/or use a commercially available USB
cable.
• If you are using a CASIO smart device app, do not have the Digital Piano connected with the smart device using the
Bluetooth function and a USB cable at the same time.
■ Using the Bluetooth Function to Link the Digital Piano with a Smart Device
You can use the Wireless MIDI & audio adaptor for the Bluetooth function linking.
1.
Referring to “To download the smart device app” (page EN-66), install the app on the smart device.
2.
Plug the Wireless MIDI & audio adaptor into the Digital Piano’s cq USB Type A port (page EN-10).
• After connecting the smart device to the Digital Piano, use the smart device app to perform operations. For details about
operations, refer to the user documentation of the app.
• Do not perform any Digital Piano operation while it is in the process of connecting with the smart device app.
• With a Bluetooth connection, some communication environments and use of smart device functions may cause a
noticeable sound distortion. If this happens, try the countermeasures below.
− Refer to the app’s user documentation for information about MIDI playback quality.
− If your smart device is connected by Wi-Fi to another device, turn off the smart device Wi-Fi.
− Use a cable connection instead of Bluetooth.
Linking with a Smart Device (APP Function)
Connecting with a Smart Device
Wireless MIDI & audio adaptor
Smart Device cq USB Type A port

EN-67
Linking with a Smart Device (APP Function)
■ Using a Cable to Connect the Digital Piano with a Smart Device
1.
Referring to “To download the smart device app” (page EN-66), install the app on the smart device.
2.
Use a commercially available USB cable to connect the smart device port to the Digital Piano cp USB
Type B port.
• After connecting the smart device to the Digital Piano, use the smart device app to perform operations. For details about
operations, refer to the user documentation of the app.
• Put the mobile device you will connect with into its Airplane Mode or otherwise disable device communications.
• When connecting a smart device to the Digital Piano, do not connect both a USB cable and an audio cable at the same
time.
• Connect using a USB cable that is no more than two meters long.

EN-68
● Nothing happens when I touch a touch button.
● No sound is produced when I press a keyboard key.
● The Digital Piano emits a loud sound and suddenly
turns off.
● The pitch of the Digital Piano is off.
● Nothing happens when I press a pedal.
● Nothing happens when I start an Auto Accompaniment.
Troubleshooting
Cause:
a. Wearing glove or touching with a fingernail or stylus.
b. Incorrect touch button sensitivity setting.
Action:
a. When operating a touch button, touch it firmly with a
bare finger.
b. Perform the steps below to increase touch button
sensitivity.
(1) Turn off the Digital Piano.
(2) While holding down the C8 keyboard key (the one
on the far right), press the 1P (Power) button.
• Keep the C8 keyboard key depressed until the
“Welcome” message appears on the display. You
do not need to keep the 1P (Power) button
depressed.
Cause:
a. The 2 volume knob setting is too low.
b. Headphones or an adaptor plug is plugged into one of
the co PHONES jacks.
c. MIDI Local control is turned off.
d. The Digital Piano is in the Keyboard Controller Mode, so
keys A0 through F1 are functioning as a “controller
keys”.
Action:
a. Rotate the 2 volume knob.
b. Disconnect whatever is connected to the co PHONES
jacks.
c. Turn on the Local control setting (page
EN-59).
d. Exit the Keyboard Controller Mode.
Action:
Replace the batteries with new ones or switch over to AC
adaptor power (page
EN-5).
Cause:
a. The current transpose setting of the keyboard is
something other than the default setting.
b. The Digital Piano’s tuning setting is something other
than “440.0Hz”.
c. Octave shift is enabled.
d. The current scale setting is something other than “Equal
Temperament”.
Action:
a. Return transpose (page
EN-19) to its initial default
setting.
b. Change the tuning setting to “440.0Hz” (page
EN-20).
c. Change the octave shift setting to 0 (page
EN-20).
d. Change the scale setting to “Equal Temperament”.
Cause:
a. The pedal cord is not connected correctly to the
cr DAMPER PEDAL jack, cs PEDAL UNIT jack, or
dl EXPRESSION/ASSIGNABLE jack, or the plug is
not plugged in completely.
b. The wrong pedal type or function is assigned to the jack
where the pedal is connected.
Action:
a. Confirm that the pedal cord is connected correctly, and
that the plug is inserted as far as it will go.
b. Configure settings correctly. See “DAMPER PEDAL
Jack
” (page EN-7) and “EXPRESSION/ASSIGNABLE
Jack
” (page EN-8).
Cause:
a. With rhythms 29 to 38 in the BALLAD category, nothing
will sound if you do not play a chord on the keyboard.
b. The Auto Accompaniment volume level is set to 0.
c. Some error occurred.
Action:
a. Try playing a chord on the keyboard (page
EN-32).
b. Check the Auto Accompaniment volume level (page
EN-18) and adjust it, if necessary.
c. Try turning the Digital Piano off and then back on again
(page
EN-6), which will initialize its settings.
EN-69
Troubleshooting
● Tones and/or effects sound strange. Note intensity
does not change even though I alter key pressure.
Turning power off and then back on again does not
eliminate the problem.
● I cannot transfer data after connecting the Digital Piano
to a computer.
● A tone’s quality and volume sounds slightly different
depending where it is played on the keyboard.
● Touching a button causes the note that is sounding
cuts out momentarily or a slight change in how effects
are applied.
● Abnormal sounds are produced only when I play on the
left-side keyboard.
Cause:
Auto Resume is enabled.
Action:
Disable Auto Resume (FUNCTION parameter
110). Next,
turn the Digital Piano off and then back on again.
Action:
a. Check to make sure that the USB cable is connected to
the Digital Piano and computer, and that the correct
device is selected with your computer’s music software.
b. Turn off the Digital Piano and then exit the music
software on your computer. Next, turn the Digital Piano
back on and then restart the music software on your
computer.
Cause:
This is an unavoidable result of the digital sampling
process,* and does not indicate malfunction.
* Multiple digital samples are taken for the low range,
middle range, and high range of the original musical
instrument. Because of this, there may be very slight
differences in tonal quality and volume between sample
ranges.
Cause:
This happens when the sounds of multiple parts are
sounding at the same time while using layer, using the
Duet Mode, playing back a built-in song, recording, etc.
Pressing a button when one of these conditions exists will
cause the effect setting that is built into the tone to change
automatically, which causes notes to cut out momentarily
or causes a slight change in how effects are being applied.
Cause:
The Digital Piano is in the ACCOMP Mode, so the left-side
keyboard functions as an accompaniment keyboard.
Action:
Use the mode selector button to enter the RHYTHM Mode.

EN-70
Troubleshooting
Error Messages
Display Cause Action
Limit • You are attempting to record more than 999
measures with the MIDI recorder.
• You are attempting to record more than
approximately 25 minutes with the audio recorder.
• Keep MIDI recorder recordings up to 999 measures
long.
• Keep audio recorder recordings within
approximately 25 minutes.
Memory Full You are attempting a recording that exceeds the
allowable per-song limit.
Keep song recordings with the allowable per-song
limit.
Data Full You are attempting to record more than 5 multi-track
songs.
Delete some of the songs in memory.
No Media The USB flash drive is not plugged correctly into the
cq USB Type A port.
Correctly plug the USB flash drive into the cq USB
Type A port.
The USB flash drive was removed while some
operation was in progress.
Do not remove the USB flash drive while any operation
is in progress.
The USB flash drive is write-protected. Write-enable the USB flash drive.
The USB flash drive is protected by anti-virus
software.
Use a USB flash drive that is not protected by anti-
virus software.
No File There is no loadable or playable file in the MUSICDAT
folder.
Move the file you want to load into the MUSICDAT
folder or the file you want to play into the MUSICDAT
folder (page
EN-65).
Read Only A read-only file with the same name you are trying to
use is already stored on USB flash drive.
• Change the name and then save the new data.
• Remove the read-only attribute from the existing
USB flash drive file and overwrite it with the new
data.
• Use a different USB flash drive.
Media Full There is not enough space available on the USB flash
drive.
Delete some of the files on the USB flash drive to
make room for new data or use a different USB flash
drive.
Too Many Files You are attempting to start a record operation with the
audio recorder when there are already 99 audio
recorder songs in the MUSICDAT folder. This error
occurs whenever there is a file named TAKE99.WAV
(page
EN-50) in the MUSICDAT folder on the USB
flash drive.
Use a computer to move files named TAKE01.WAV
through TAKE99.WAV from the MUSICDAT folder to
another folder or drive.
Not SMF 0/1 You are attempting to play back SMF Format 2 song
data.
Playback of SMF Format 0 or Format 1 only is
supported.
Large Size The SMF file on the USB flash drive cannot be played
because it is too big.
Playback of SMF files up to approximately 320 KB in
size is supported.
Wrong Data The USB flash drive data is corrupted. –
Version The USB flash drive file version is not supported by the
Digital Piano.
Use a file whose version is supported by the Digital
Piano.
Format The USB flash drive format is not compatible with this
Digital Piano.
• Use a computer or other device to change the USB
flash drive format to something that is compatible
with the Digital Piano (page
EN-62).
• Use a different USB flash drive.
USB flash drive memory is corrupted. Use a different USB flash drive.
No Wireless
Adptr
The Wireless MIDI & audio adaptor is not plugged into
the cq USB Type A port.
Plug the Wireless MIDI & audio adaptor into the
cq USB Type A port.
EN-71
Reference
Product Specifications
Model PX-S3100BK
Keyboard 88-key piano keyboard
Duet Adjustable tone range (–2 to +2 octaves)
Transpose –12 to 0 to +12 semitones
Octave shift –2 to 0 to +2 octaves
Sound Source
Number of Tones 700, Layer, Split
Maximum polyphony 192 notes
Touch Response 5 sensitivity levels, Off
Tuning 415.5Hz to 440.0Hz to 465.9Hz (0.1Hz units)
Temperament Equal temperament plus 16 other types
Acoustic Simulator Hammer response, Key off response, String resonance, Damper resonance,
Damper noise, Key on action noise, Key off action noise
Sound Mode Hall simulator (4 types), Reverb (8 types), Surround (2 types)
Other Effects Chorus (12 types), DSP (built in to some tones + 100 presets, editable),
Brilliance (–3 to 0 to 3)
Demo Song 6
Playback Function (SONG Mode)
In the MIDI Mode Downloaded (user) song playback
• Storage of up to 10 songs in built-in flash memory
• Up to approximately 320KB per song
(Based on 1KB = 1024 bytes, 1MB = 1024
2
bytes)
MIDI recorder song playback
USB flash drive song data (SMF) playback
Part mute: L, R, L+R
In the Audio Mode Audio recorder recording and playback
Center cancel
Song Volume Adjustable (for both MIDI Mode, Audio Mode)
MIDI Recorder Real-time recording and playback as MIDI data
Number of Songs 5
Number of Tracks 3
Capacity Approximately 30,000 notes per song (total of three tracks)
Data storage Built-in flash memory
Audio Recorder Real-time recording and playback as audio data
Number of songs 99 (files)
File format WAV (linear PCM, 16bit, 44.1kHz, stereo)
Maximum recording time Approximately 25 minutes per file
Recording medium USB Flash Drive
Auto Accompaniment
Built-in Rhythms 200
One Touch Preset 200
Auto Harmonize 12 types
Auto Accompaniment Volume Level Adjustable
Music Preset 310
Arpeggiator 100 types
Metronome Provided as rhythm type
Beat bell Off, 1 to 9 (beats)
Tempo Range 20 to 255
Metronome Volume Level Adjustable (as Auto Accompaniment volume level)
Registration Function 96 sets maximum (4 sets, 24 banks)
EN-72
Reference
• Specifications and designs are subject to change without notice.
Pedals
DAMPER PEDAL jack For connection of the included pedal (SP-3) or a separately available CASIO
sustain pedal, selectable function (sustain (off, on), sostenuto (off, on), soft (off,
on), arpeggio hold (off, on), play/stop, fill-in)
PEDAL UNIT jack For connection of a separately available pedal unit (SP-34), simultaneous use of
three pedals (Sustain (off, half, on), sostenuto (off, on), soft (off, on))
EXPRESSION/ASSIGNABLE jack For connection of a separately available expression pedal, the included pedal (SP-
3), or a separately available CASIO sustain pedal, selectable function (expression,
master volume, tempo, layer balance, sustain (off, on), sostenuto (off, on), soft (off,
on), arpeggio hold (off, on), play/stop, fill-in)
Other Functions Auto Resume, Operation Lock
MIDI 16-channel multi-timbre receive
Pitch Bend Wheel Pitch bend range: 0 to 24 semitones
Knobs 2
Knob sets (knob function presets): 14
Inputs/Outputs
PHONES jacks Stereo mini jacks (3.5mm) × 2
Power 12V DC
AUDIO IN jack Stereo mini jack (3.5mm)
Input impedance: 10kΩ
Input voltage: 200mV
LINE OUT R, L/MONO jacks Standard jacks (6.3mm) × 2
Output impedance: 2.3kΩ
Output voltage: 1.3V (RMS) MAX
USB port Type A, Type B
DAMPER PEDAL jack Standard jack (6.3mm)
EXPRESSION/ASSIGNABLE jack Standard jack (6.3mm)
PEDAL UNIT jack Proprietary jack
Acoustics
Amp output 8W + 8W
Speakers 16cm × 8cm (oval) × 2
Power Supply 2-way
Batteries 6 AA-size alkaline batteries
Continuous Operation: Approximately 2 hours
Playback of built-in demo tunes on alkaline batteries
Actual continuous operation time may be shorter due to battery type and
performance type.
AC Adaptor AD-A12150LW
Auto Power Off Approximately four hours (under AC adaptor power) or six minutes (under battery
power) after last operation, can be disabled.
Power Consumption 12V=15W
Dimensions 132.2 (W) × 23.2 (D) × 10.2 (H) cm (52 1/16 × 9 1/8 × 4 inch)
Weight Approximately 11.4kg (25.1 lbs) (without batteries)

EN-73
Reference
■ FINGERED 1, FINGERED 2 Chords
*1 With FINGERED 2, interpreted as Am7.
*2 With FINGERED 2, interpreted as Am7
b
5
.
*3 Inverted form not supported in some cases.
*4 These fingerings are special fingerings for Digital Piano
chord input, and so they are not suitable for normal
keyboard play.
*5 Chord consisting of root and 5th only.
*6 Not a standard chord, but used when you want Auto
Accompaniment with the root note only, or the root with an
octave added.
Fingering Guide
C
Cm
Cdim
Caug
*3
C
5
Csus4
*3
Csus2
*3
C7
CmM7
Cdim7
*3
C6
*1
*3
Cm6
*2
*3
CaugM7
CdimM7
Caug7
Cm7
*3
CM7
Cm7
5
*3
CM7
5
C7sus4
C7
5
*3
*4*4
*4
*4
*4
*4
Cmadd9
C69
*3
Cm69
*3
Cadd9
Cm7
(9)
C7
(
9)
C7
(#9)
C7
(#11)
CM7
(9)
Cm7
(11)
*3
CmM7
(9)
C7
(
13)
C7
(13)
C8
*6
C7
(9)
C5
*5

Reference
EN-74
■ FINGERED ON BASS, FULL RANGE CHORD
In addition to the chords that can be fingered with
FINGERED 1 and FINGERED 2, the chords below also are
recognized.
• With FINGERED ON BASS, the lowest note fingered is
interpreted as the base note. Inverted forms are not
supported.
• With FULL RANGE CHORD, when the lowest note fingered
is a certain distance from the neighboring note, the chord is
interpreted as a fraction chord.
• Unlike FINGERED 1, 2, and FINGERED ON BASS, FULL
RANGE CHORD requires pressing of at least three keys to
form a chord.
C
C
D
C
F
C
F
C
G
C
A
C
A
C
Gm
C
Am
C
B
m
C
Ddim
C
Fdim
C
FM7
C
A
M7
C
F
m7
5
C
Gdim
C
Adim
C
Bdim
C
A
7
C
F7
C
Fm7
C
B
C
C
m
C
Dm
C
Fm
C
zzzzz zz z z z
Bm
C
zz zz zz z
A
m
C
F
m
C
zzzzz zz
Gm7
C
A
add9
C
zz z z
G7
C
zz
C
dim
C
F
dim
C
A
dim
C
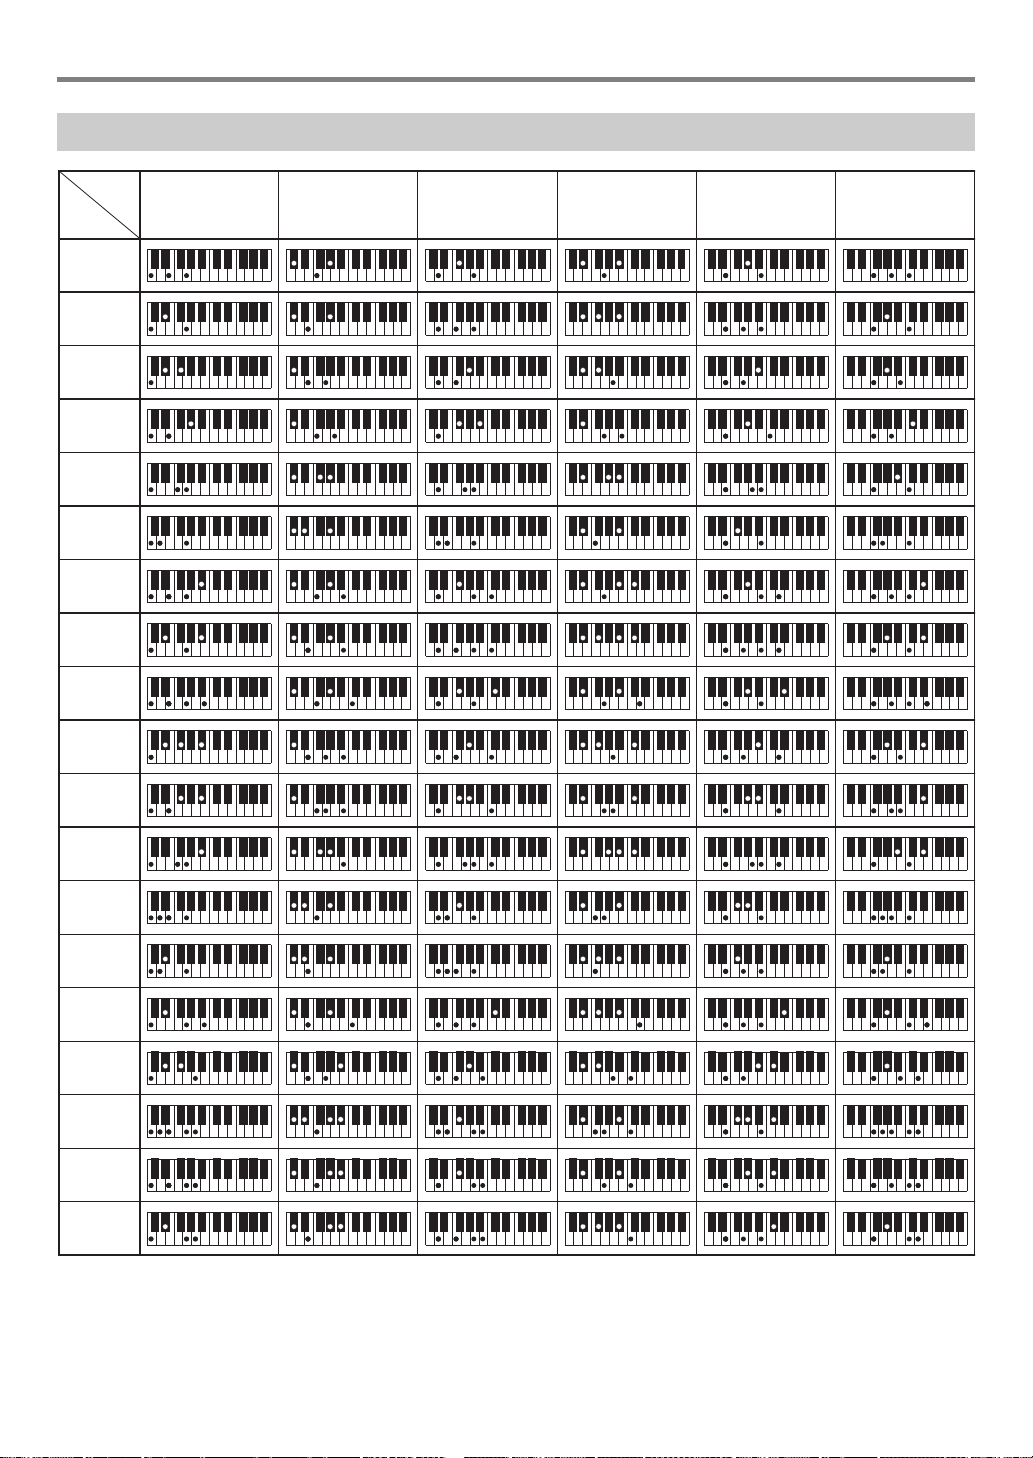

EN-77
Reference
Versatile Tone Map
OTHERS: 056 VERSATILE NYLON GUITAR
OTHERS: 057 VERSATILE STEEL GUITAR
OTHERS: 058 VERSATILE SINGLE COIL
E.GUITAR
OTHERS: 107 VERSATILE ELECTRIC BASS 1
OTHERS: 108 VERSATILE ELECTRIC BASS 2
OTHERS: 144 VERSATILE BRASS 1
OTHERS: 145 VERSATILE BRASS 2
Key Velocity Sound
C-1 - B6 1-30 Normal mp
31-60 Normal mf
61-75 Ghost Note
76-90 Mute
91-105 Hammering
106-120 Glissando
121-127 Open Harmonics
C7 1-127 Strum 1
C{7 1-127 Strum 2
D7 1-127 Strum 3
E}7 1-127 Strum 4
E7 1-127 Strum 5
F7 1-127 Strum 6
F{7 1-127 Strum 7
G7 1-127 Strum 8
A}7 1-127 Strum 9
A7 1-127 Strum 10
B}7 1-127 Strum 11
B7 1-127 Strings Slap 1
C8 1-127 Strings Slap 2
C{8 1-127 Strings Slap 3
D8 1-127 Strings Slap 4
E}8 1-127 Strings Slap 5
E8 1-127 Body 1
F8 1-127 Body 2
F{81-127 Body 3
G8 1-127 Body 4
A}81-127 Body 5
A8 1-127 Body 6
B}81-127 Body 7
B8 1-127 Body 8
C9 1-127 Fret Noise1
C{9 1-127 Fret Noise2
D9 1-127 Fret Noise3
E}9 1-127 Fret Noise4
E9 1-127 Fret Noise5
F9 1-127 Head String1
F{9 1-127 Head String2
G9 1-127 Head String3
Key Velocity Sound
C-1 - B6 1-30 Normal mp
31-60 Normal mf
61-75 Ghost Note
76-90 Mute
91-105 Hammering
106-120 Glissando
121-127 Open Harmonics
C7 1-127 Strum 1
C{7 1-127 Strum 2
D7 1-127 Strum 3
E}7 1-127 Strum 4
E7 1-127 Strum 5
F7 1-127 Strum 6
F{7 1-127 Strum 7
G7 1-127 Strum 8
A}7 1-127 Strum 9
A7 1-127 Strings Slap 1
B}7 1-127 Strings Slap 2
B7 1-127 Strings Slap 3
C8 1-127 Strings Slap 4
C{8 1-127 Strings Slap 5
D8 1-127 Strings Slap 6
E}8 1-127 Strings Slap 7
E8 1-127 Body 1
F8 1-127 Body 2
F{8 1-127 Body 3
G8 1-127 Body 4
A}8 1-127 Body 5
A8 1-127 Body 6
B}8 1-127 Body 7
B8 1-127 Body 8
C9 1-127 Fret Noise1
C{9 1-127 Fret Noise2
D9 1-127 Fret Noise3
E}9 1-127 Fret Noise4
E9 1-127 Fret Noise5
F9 1-127 Head String1
F{9 1-127 Head String2
G9 1-127 Head String3
Key Velocity Sound
C-1 - B6 1-30 Normal mp
31-60 Normal mf
61-75 Ghost Note
76-90 Mute
91-105 Hammering
106-120 Glissando
121-127 Open Harmonics
C7 1-127 Strum 1
C{7 1-127 Strum 2
D7 1-127 Strum 3
E}7 1-127 Strum 4
E7 1-127 Strum 5
F7 1-127 Strum 6
F{7 1-127 Strum 7
G7 1-127 Strum 8
A}7 1-127 Strum 9
A7 1-127 Strum 10
B}7 1-127 Strum 11
B7 1-127 Strum 12
C8 1-127 Strum 13
C{8 1-127 Strum 14
D8 1-127 Low Ghost Note 1
E}8 1-127 Low Ghost Note 2
E8 1-127 Low Ghost Note 3
F8 1-127 Low Ghost Note 4
F{8 1-127 Low Ghost Note 5
G8 1-127 Low Ghost Note 6
A}8 1-127 Low Ghost Note 7
A8 1-127 Low Ghost Note 8
B}8 1-127 Low Ghost Note 9
B8 1-127 Low Ghost Note 10
C9 1-127 Fret Noise1
C{9 1-127 Fret Noise2
D9 1-127 Fret Noise3
E}9 1-127 Fret Noise4
E9 1-127 Fret Noise5
F9 1-127 Fret Noise6
F{9 1-127 Fret Noise7
G9 1-127 Fret Noise8
Key Velocity Sound
C-1 - B6 1-60 Normal mf
61-80 Normal ff
81-120 Ghost Note
121-127 Slap
C7 1-127 Gliss 1
C{7 1-127 Gliss 2
D7 1-127 Gliss 3
E}7 1-127 Gliss 4
E7 1-127 Gliss 5
F7 1-127 Gliss 6
F{7 1-127 Gliss 7
G7 1-127 Fret Noise 1
A}7 1-127 Fret Noise 2
Key Velocity Sound
C-1 - B6 1-60 Normal mf
61-80 Normal ff
81-120 Ghost Note
121-127 Slap
C7 1-127 Gliss 1
C{7 1-127 Gliss 2
D7 1-127 Gliss 3
E}7 1-127 Gliss 4
E7 1-127 Gliss 5
F7 1-127 Gliss 6
F{7 1-127 Gliss 7
G7 1-127 Fret Noise 1
A}7 1-127 Fret Noise 2
Key Velocity Sound
C-1 - G9 1-20 Normal mf
21-40 Normal f
41-60 Normal ff
61-80 Attack
81-90 Schoop
91-100 Shake
101-110 Falls Fast mf
111-120 Falls Fast f
121-127 Gliss up
Key Velocity Sound
C-1 - G9 1-30 Normal f
31-60 Normal ff
61-75 Attack
76-90 Schoop
91-105 Shake
106-120 Falls Fast f
121-127 Gliss up
EN-78
Reference
*1 Names of parameters included in the 58 “FREEZE” directory (“Freeze Function”, page EN-42). If you do not want settings made
with the knobs to be replaced when a registration function setup is recalled, select “On” as the settings of the FUNCTION
parameters in this column (Knob:
60, Effect: 64, Tone: 70, Accompaniment: 69).
For information about FUNCTION parameters, see “
Configuring Function Settings (FUNCTION Mode)” (page EN-53).
*2 The parameters affected by this knob set are two parameters that are automatically selected as being the most applicable to the
currently selected DSP (“
Using a DSP”, page EN-23). DSP Parameter 1 and DSP Parameter 2 are fixed according to the
selected DSP. For example, when preset DSP “15. Auto Pan” is selected, DSP Parameter 1 is LFO Rate, and DSP Parameter
2 is Manual.
Knob Set List
No.
Knob Set
(displayed)
(K1) knob (K2) knob
Applicable Part
Parameter Freeze*
1
Parameter Freeze*
1
1 Filter Cut Off Frequency Knob Resonance Knob Upper1
2 Brilliance/Rev Brilliance Effect Reverb Send Knob Upper1
3 Up1 Cho/Rev Chorus Send Effect Reverb Send Sound Mode Upper1
4 Amp Envelope Attack Time Knob Release Time Knob Upper1
5 Vibrato Vibrato Rate Knob Vibrato Depth Knob Upper1
6 Delay Vibrato Delay Vibrato Time Knob Vibrato Depth Knob Upper1
7 Porta./Mod. Portamento Time Knob Modulation Depth Knob Upper1
8 Layer Modify Layer Volume Balance Tone Upper2 Fine Tune Knob Upper1, Upper2
9 Layer Panning Upper1 Pan Knob Upper2 Pan Knob Upper1, Upper2
10 Lower Modify Lower Volume Tone Lower Pan Knob Lower
11 Kbd Cho/Rev Keyboard Chorus Send Effect Keyboard Reverb Send Sound Mode Upper1, Upper2,
Lower
12 Kbd/Acmp Vol. Keyboard Volume Tone Accompaniment Volume Accompaniment Upper1, Upper2,
Lower
13 Kbd/Song Vol. Keyboard Volume Tone Song Volume – Upper1, Upper2,
Lower
14 DSP Param.*
2
DSP Parameter 1 Tone DSP Parameter 2 Tone Upper1
EN-79
Reference
DSP Effect List
Preset DSP List
No.
DSP Name
(Display)
Module 1 Module 2 Module 3 Module 4
1 Mono 1BandEQ Mono 1-Band EQ
2 Mono 2BandEQ Mono 2-Band EQ
3 Mono 3BandEQ Mono 3-Band EQ
4 Stereo1BndEQ Stereo 1-Band EQ
5 Stereo2BndEQ Stereo 2-Band EQ
6 Stereo3BndEQ Stereo 3-Band EQ
7 Tone Control Tone Control
8 Compressor Compressor
9 Limiter Limiter
10 Enhancer Enhancer
11 Phaser Phaser
12 Chorus Chorus
13 Flanger Flanger
14 Tremolo Tremolo
15 Auto Pan Auto Pan
16 Rotary Rotary
17 Drive Rotary Drive Rotary
18 LFO Wah LFO Wah
19 Auto Wah Auto Wah
20 Modeling Wah Modeling Wah
21 Pitch Pitch Shifter
22 Ring Mod Ring Modulator
23 Piano Effect Piano Effect
24 Distortion Distortion
25 Drive Drive Tone Control
26 Amp Cab Amp Cab
27 Re-Amp 1 Compressor Amp Cab Enhancer Tone Control
28 Re-Amp 2 Compressor Limiter Amp Cab Delay
29 Re-Amp 3 Compressor Limiter Amp Cab Mono 2-Band EQ
30 Re-Amp 4 Compressor Limiter Amp Cab Delay
31 Re-Amp 5 Distortion Delay
32 Drive Amp 1 Mono 3-Band EQ Drive Tone Control Amp Cab
33 Drive Amp 2 Drive Tone Control Amp Cab Tremolo
34 Drive Amp 3 Drive Tone Control Amp Cab AutoPan
35 Drive Amp 4 Drive Tone Control Amp Cab Phaser
36 Drive Amp 5 Drive Tone Control Amp Cab Flanger
37 Drive Amp 6 Drive Tone Control Amp Cab Pitch Shifter
38 OctaveDrvAmp Pitch Shifter Drive Tone Control Amp Cab
39 PhaseDrvAmp Phaser Drive Tone Control Amp Cab
40 DelayDrvAmp Drive Tone Control Amp Cab Delay
41 Comp Amp 1 Compressoror Drive Mono 1-Band EQ Amp Cab
42 Comp Amp 2 Drive Compressoror Mono 1-Band EQ Amp Cab
43 Deley OD Amp Drive Enhancer Amp Cab Delay
44 Wah Drv Amp Modeling Wah Drive Amp Cab
45 DelayWahAmp LFO Wah Drive Amp Cab Delay
46 Auto Wah Amp Auto Wah Drive Amp Cab Delay
47 DriveAmpMod1 Drive Amp Cab Phaser Flanger
48 DriveAmpMod2 LFO Wah Drive Amp Cab Tremolo
49 S/H DriveAmp LFO Wah Drive Amp Cab Auto Pan
50 PhaseDrvAmp2 Drive Amp Cab Phaser Delay
51 FlngrDelyAmp Drive Amp Cab Flanger Delay

EN-80
Reference
52 PitchModAmp Drive Amp Cab Pitch Shifter Delay
53 Drive Rotary Drive Rotary
54 DrvRotaryEQ Drive Rotary Stereo 3-Band EQ
55 DrvRotaryPan Drive Rotary Auto Pan
56 PhaserAmpPan Drive Amp Cab Phaser Auto Pan
57 FlangrAmpPan Drive Amp Cab Flanger Auto Pan
58 ReflctAmpPan Drive Amp Cab Reflection Auto Pan
59 DualDriveAmp Drive Drive Mono 2-Band EQ Amp Cab
60 DualDrvAmpDl Drive Drive Amp Cab Delay
61 BassAmpAmbi Tone Control Compressor Amp Cab Delay
62 Comp Ambi 1 Tone Control Compressor Enhancer Reflection
63 Comp Ambi 2 Tone Control Compressor Amp Cab Delay
64 Comp Ambi 3 Drive Compressor Amp Cab Delay
65 Comp Ambi 4 Drive Compressor Amp Cab Delay
66 EnhanceAmbi1 Drive Enhancer Amp Cab Delay
67 EnhanceAmbi2 Drive Reflection Amp Cab Delay
68 Comp Mod 1 Tone Control Compressor Tremolo Tone Control
69 Comp Mod 2 Tone Control Compressor Phaser Reflection
70 Comp Mod 3 Tone Control Compressor Flanger Phaser
71 Comp Mod 4 Compressor Tremolo Flanger Delay
72 Comp Mod 5 Compressor Tremolo Phaser Delay
73 EQ Mod 1 Tone Control Tone Control Phaser Amp Cab
74 EQ Mod 2 Tone Control Flanger Tone Control Delay
75 EQ Mod 3 Tone Control Chorus Tone Control Delay
76 EQ Mod 4 Tone Control Tremolo Chorus Delay
77 Double Phase Amp Cab Phaser Phaser Enhancer
78 DoubleFlang1 Amp Cab Flanger Flanger Tone Control
79 DoubleFlang2 Amp Cab Flanger Flanger Phaser
80 Tremolo Spin Tremolo Drive Rotary Tone Control
81 AmbientEnh 1 Enhancer Reflection Delay Tone Control
82 AmbientEnh 2 Tone Control Enhancer Reflection Delay
83 AmbientEnh 3 Tone Control Drive Amp Cab Delay
84 AmbientEnh 4 Piano Effect Delay Tone Control
85 AmbientEnh 5 Enhancer Delay Tone Control
86 AmbientEnh 6 Drive Delay Tone Control
87 Pitch Delay Delay Pitch Shifter Phaser Auto Pan
88 ReflectDelay Reflection Enhancer Auto Pan Delay
89 Drive Delay Drive Delay Tone Control
90 Pitch Mod 1 Tone Control Phaser Delay Pitch Shifter
91 Pitch Mod 2 Pitch Shifter Delay Phaser Tone Control
92 Double Enhan Amp Cab Enhancer Enhancer
93 Drive Enhan Drive Enhancer Enhancer
94 Reflection 1 Reflection Delay Tone Control
95 Reflection 2 Delay Reflection Enhancer Tone Control
96 Mod Tremolo Phaser Chorus Flanger Tremolo
97 Wah Phase LFO Wah Phaser Delay Tone Control
98 Wah Flanger Flanger Flanger LFO Wah Tone Control
99 Lo Cut EQ Tone Control Tone Control Tone Control
100 Hi Cut EQ Tone Control Tone Control Tone Control
No.
DSP Name
(Display)
Module 1 Module 2 Module 3 Module 4

EN-81
Reference
DSP Module List
Module
Number
Module Name Display Description
Mono 1-Band EQ Mono 1EQ This is a single-band monaural equalizer.
Mono 2-Band EQ Mono 2EQ This is a dual-band monaural equalizer.
Mono 3-Band EQ Mono 3EQ This is a three-band monaural equalizer.
Stereo 1-Band EQ Streo1EQ This is a single-band stereo equalizer.
Stereo 2-Band EQ Streo2EQ This is a dual-band stereo equalizer.
Stereo 3-Band EQ Streo3EQ This is a three-band stereo equalizer.
Tone Control ToneCtrl
Provides monaural tone control for adjusting low-range, mid-range, and
high-range frequencies.
Tremolo Tremolo Shifts the volume of the input signal using an LFO.
Auto Pan Auto Pan Shifts the continual left-right panning of the input signal using an LFO.
Compressor Compress
Compresses the input signal, which can have the effect of suppressing level
variation.
Limiter Limiter Limits the input signal level so it does not rise above a preset level.
Enhancer Enhancer Enhances the profiles of the low range and high range of the input signal.
Phaser Phaser
Produces a distinctive pulsating, broad sound by using an LFO to change
the phase of the input signal and then mixes it with the original input signal.
Chorus Chorus Gives notes depth and breadth.
Flanger Flanger
Applies wildly pulsating and metallic reverberation to notes. Selects the LFO
waveform.
Rotary Rotary This effect is a rotary speaker simulator.
Drive Rotary DriveRot This is a rotary speaker simulator that makes overdrive possible.
Pitch Shifter Pitch This effect transforms the pitch of the input signal.
Ring Modulator Ring Mod
Multiplies the input signal with an internal oscillator signal to create a metallic
sound.
Reflection Reflect
Simulates the initial reflection of reverberation. Applies acoustic ambiance
and presence to notes.
Delay Delay Delays the input signal and feeds it back to create a repeating effect.
Piano Effect Piano This effect is suited to acoustic piano play.
LFO Wah LFO Wah
This is a “wah” effect that can automatically affect the frequency using an
LFO.
Auto Wah Auto Wah
This is a “wah” effect that can automatically shift the frequency in
accordance with the level of the input signal.
Modeling Wah ModelWah
Simulates various types of wah pedals. This effect can automatically shift
the frequency in accordance with the level of the input signal.
Distortion Distort Distortion, wah, and amp simulator combined into a single effect.
Drive Drive Simulates the drive of a musical instrument amplifier.
Amp Cab Amp Cab Simulates the amp and speaker cabinet without drive and distortion.
EN-82
Reference
DSP Parameter List
Module Name
Description Settings
Display Parameter Data
Mono 1-Band EQ
This is a single-band monaural equalizer.
EQ Freq EQ Frequency Adjusts the center frequency of Equalizer. *
1
EQ Gain EQ Gain Adjusts the gain of Equalizer. –12 to 00 to 12
In Level Input Level Adjusts the input level. 000 to 127
WetLevel Wet Level Adjusts the level of the effect sound. 000 to 127
DryLevel Dry Level Adjusts the level of the direct sound. 000 to 127
Mono 2-Band EQ
This is a dual-band monaural equalizer.
EQ1 Freq EQ1 Frequency Adjusts the center frequency of Equalizer 1. *
1
EQ1 Gain EQ1 Gain Adjusts the gain of Equalizer 1. –12 to 00 to 12
EQ2 Freq EQ2 Frequency Adjusts the center frequency of Equalizer 2. *
1
EQ2 Gain EQ2 Gain Adjusts the gain of Equalizer 2. –12 to 00 to 12
In Level Input Level Adjusts the input level. 000 to 127
WetLevel Wet Level Adjusts the level of the effect sound. 000 to 127
DryLevel Dry Level Adjusts the level of the direct sound. 000 to 127
Mono 3-Band EQ
This is a three-band monaural equalizer.
EQ1 Freq EQ1 Frequency Adjusts the center frequency of Equalizer 1. *
1
EQ1 Gain EQ1 Gain Adjusts the gain of Equalizer 1. –12 to 00 to 12
EQ2 Freq EQ2 Frequency Adjusts the center frequency of Equalizer 2. *
1
EQ2 Gain EQ2 Gain Adjusts the gain of Equalizer 2. –12 to 00 to 12
EQ3 Freq EQ3 Frequency Adjusts the center frequency of Equalizer 3. *
1
EQ3 Gain EQ3 Gain Adjusts the gain of Equalizer 3. –12 to 00 to 12
In Level Input Level Adjusts the input level. 000 to 127
WetLevel Wet Level Adjusts the level of the effect sound. 000 to 127
DryLevel Dry Level Adjusts the level of the direct sound. 000 to 127
Stereo 1-Band EQ
This is a single-band stereo equalizer.
EQ Freq EQ Frequency Adjusts the center frequency of Equalizer. *
1
EQ Gain EQ Gain Adjusts the gain of Equalizer. –12 to 00 to 12
In Level Input Level Adjusts the input level. 000 to 127
WetLevel Wet Level Adjusts the level of the effect sound. 000 to 127
DryLevel Dry Level Adjusts the level of the direct sound. 000 to 127
EN-83
Reference
Stereo 2-Band EQ
This is a dual-band stereo equalizer.
EQ1 Freq EQ1 Frequency Adjusts the center frequency of Equalizer 1. *
1
EQ1 Gain EQ1 Gain Adjusts the gain of Equalizer 1. –12 to 00 to 12
EQ2 Freq EQ2 Frequency Adjusts the center frequency of Equalizer 2. *
1
EQ2 Gain EQ2 Gain Adjusts the gain of Equalizer 2. –12 to 00 to 12
In Level Input Level Adjusts the input level. 000 to 127
WetLevel Wet Level Adjusts the level of the effect sound. 000 to 127
DryLevel Dry Level Adjusts the level of the direct sound. 000 to 127
Stereo 3-Band EQ
This is a three-band stereo equalizer.
EQ1 Freq EQ1 Frequency Adjusts the center frequency of Equalizer 1. *
1
EQ1 Gain EQ1 Gain Adjusts the gain of Equalizer 1. –12 to 00 to 12
EQ2 Freq EQ2 Frequency Adjusts the center frequency of Equalizer 2. *
1
EQ2 Gain EQ2 Gain Adjusts the gain of Equalizer 2. –12 to 00 to 12
EQ3 Freq EQ3 Frequency Adjusts the center frequency of Equalizer 3. *
1
EQ3 Gain EQ3 Gain Adjusts the gain of Equalizer 3. –12 to 00 to 12
In Level Input Level Adjusts the input level. 000 to 127
WetLevel Wet Level Adjusts the level of the effect sound. 000 to 127
DryLevel Dry Level Adjusts the level of the direct sound. 000 to 127
Tone Control
Provides monaural tone control for adjusting low-range, mid-range, and high-range
frequencies.
Low Freq Low Frequency Adjusts the cutoff frequency of Low-range. *
2
Low Gain Low Gain Adjusts the Low-range gain. –12 to 00 to 12
Mid Freq Mid Frequency Adjusts the center frequency of Mid-range. *
1
Mid Gain Mid Gain Adjusts the Mid-range gain. –12 to 00 to 12
HighFreq High Frequency Adjusts the cutoff frequency of High-range. *
3
HighGain High Gain Adjusts the High-range gain. –12 to 00 to 12
In Level Input Level Adjusts the input level. 000 to 127
WetLevel Wet Level Adjusts the level of the effect sound. 000 to 127
DryLevel Dry Level Adjusts the level of the direct sound. 000 to 127
Module Name
Description Settings
Display Parameter Data

EN-84
Reference
Tremolo
Shifts the volume of the input signal using an LFO.
Rate LFO Rate Adjusts the LFO rate. 000 to 127
Depth LFO Depth Adjusts the LFO depth. 000 to 127
Waveform LFO Waveform Selects the LFO waveform. Sine, Triangle,
Trapzoid
WetLevel Wet Level Adjusts the level of the effect sound. 000 to 127
DryLevel Dry Level Adjusts the level of the direct sound. 000 to 127
Auto Pan
Shifts the continual left-right panning of the input signal using an LFO.
Rate LFO Rate Adjusts the LFO rate. 000 to 127
Depth LFO Depth Adjusts the LFO depth. 000 to 127
Waveform LFO Waveform Selects the LFO waveform. Sine, Triangle,
Trapzoid
Manual Manual Adjusts the pan (stereo position). –64 is full left, 0 is center, and
+63 is full right.
–64 to 00 to 63
WetLevel Wet Level Adjusts the level of the effect sound. 000 to 127
DryLevel Dry Level Adjusts the level of the direct sound. 000 to 127
Compressor
Compresses the input signal, which can have the effect of suppressing level variation.
Attack Attack Adjusts the time until compression goes into effect. A smaller
value causes prompt compressor operation, which suppresses
the attack of the input signal. A larger values delays compressor
operation, which causes the attack of the input signal to be
output as-is.
000 to 127
Release Release Adjusts the time until compression is released after the input
signal drops below a prescribed level. When an attack feeling is
desired (no compression at the onset of the sound), set this
parameter to as low a value as possible. To have compression
applied at all times, set a high value.
000 to 127
Ratio Ratio Adjusts the compression ratio of the audio signal. 1:1, 2:1, 4:1, 8:1,
16:1, 32:1, Inf:1
WetLevel Wet Level Adjusts the level of the effect sound. Output volume changes in
accordance with the Ratio setting and the characteristics of the
input tone.
000 to 127
DryLevel Dry Level Adjusts the level of the direct sound. 000 to 127
Module Name
Description Settings
Display Parameter Data

EN-85
Reference
Limiter
Limits the input signal level so it does not rise above a preset level.
Limit Limit Adjusts the volume level of the limit at which limiting is applied. 000 to 127
Attack Attack Adjusts the time until the compression effect starts. A smaller
value causes prompt limiter operation, which suppresses the
attack of the input signal. A larger values delays limiter operation,
which causes the attack of the input signal to be output as-is.
000 to 127
Release Release Adjusts the time until compression is released after the input
signal drops below a prescribed level.
000 to 127
WetLevel Wet Level Adjusts the level of the effect sound. Output volume changes in
accordance with the Limit setting and the characteristics of the
input tone. Use this parameter to correct for such changes.
000 to 127
DryLevel Dry Level Adjusts the level of the direct sound. 000 to 127
Enhancer
Enhances the profiles of the low range and high range of the input signal.
Low Freq Low Frequency Adjusts the low range enhancer frequency. 000 to 127
Low Gain Low Gain Adjusts the low range enhancer gain. 000 to 127
HighFreq High Frequency Adjusts the high range enhancer frequency. 000 to 127
HighGain High Gain Adjusts the high range enhancer gain. 000 to 127
In Level Input Level Adjusts the input level. 000 to 127
WetLevel Wet Level Adjusts the level of the effect sound. 000 to 127
DryLevel Dry Level Adjusts the level of the direct sound. 000 to 127
Phaser
Produces a distinctive pulsating, broad sound by using an LFO to change the phase of
the input signal and then mixes it with the original input signal.
Resonanc Resonance Adjusts the strength of feedback. 000 to 127
Manual Manual Adjusts the reference phaser shift amount. –64 to 00 to 63
Rate LFO Rate Adjusts the LFO rate. 000 to 127
Depth LFO Depth Adjusts the LFO depth. 000 to 127
Waveform LFO Waveform Selects the LFO waveform. Sine, Triangle,
Random
In Level Input Level Adjusts the input level. 000 to 127
WetLevel Wet Level Adjusts the level of the effect sound. 000 to 127
DryLevel Dry Level Adjusts the level of the direct sound. 000 to 127
Module Name
Description Settings
Display Parameter Data
EN-86
Reference
Chorus
Gives notes depth and breadth.
Rate LFO Rate Adjusts the LFO rate. 000 to 127
Depth LFO Depth Adjusts the LFO depth. 000 to 127
Waveform LFO Waveform Selects the LFO waveform. Sine, Triangle
Feedback Feedback Adjusts the strength of feedback. –64 to 00 to 63
WetLevel Wet Level Adjusts the level of the effect sound. 000 to 127
Polarity Polarity Inverts the LFO of one channel. Negative, Positive
In Level Input Level Adjusts the input level. 000 to 127
DryLevel Dry Level Adjusts the level of the direct sound. 000 to 127
Flanger
Applies wildly pulsating and metallic reverberation to notes. Selects the LFO waveform.
Rate LFO Rate Adjusts the LFO rate. 000 to 127
Depth LFO Depth Adjusts the LFO depth. 000 to 127
Waveform LFO Waveform Selects the LFO waveform. Sine, Triangle,
Random
Feedback Feedback Adjusts the strength of feedback. –64 to 00 to 63
WetLevel Wet Level Adjusts the level of the effect sound. 000 to 127
In Level Input Level Adjusts the input level. 000 to 127
DryLevel Dry Level Adjusts the level of the direct sound. 000 to 127
Rotary
This effect is a rotary speaker simulator.
Type Type Selects the rotary speaker type. 0 to 3
Speed Speed Switches the speed mode between fast and slow. Slow, Fast
Brake Brake Stops speaker rotation. Rotate, Stop
FallAcel Fall Accel Adjusts acceleration when the speed mode is switched from fast
to slow.
000 to 127
RiseAcel Rise Accel Adjusts acceleration when the speed mode is switched from slow
to fast.
000 to 127
SlowRate Slow Rate Adjusts the speaker rotation speed in the slow speed mode. 000 to 127
FastRate Fast Rate Adjusts the speaker rotation speed in the fast speed mode. 000 to 127
Vib/Cho Vibrato/Chorus Selects the vibrato and the chorus type. Off, Vibrato1,
Chorus 1, Vibrato2,
Chorus 2, Vibrato3,
Chorus 3
WetLevel Wet Level Adjusts the level of the effect sound. 000 to 127
DryLevel Dry Level Adjusts the level of the direct sound. 000 to 127
Module Name
Description Settings
Display Parameter Data
EN-87
Reference
Drive Rotary
This is a rotary speaker simulator that makes overdrive possible.
Type Type Selects the rotary speaker type. 0 to 3
OD Gain Overdrive Gain Adjusts overdrive gain. 000 to 127
OD Level Overdrive Level Adjusts the overdrive output level. 000 to 127
Speed Speed Switches the speed mode between fast and slow. Slow, Fast
Brake Brake Stops speaker rotation. Rotate, Stop
FallAcel Fall Accel Adjusts acceleration when the speed mode is switched from fast
to slow.
000 to 127
RiseAcel Rise Accel Adjusts acceleration when the speed mode is switched from slow
to fast.
000 to 127
SlowRate Slow Rate Adjusts the speaker rotation speed in the slow speed mode. 000 to 127
FastRate Fast Rate Adjusts the speaker rotation speed in the fast speed mode. 000 to 127
Vib/Cho Vibrato/Chorus Selects the vibrato and the chorus type. Off, Vibrato1,
Chorus 1, Vibrato2,
Chorus 2, Vibrato3,
Chorus 3
WetLevel Wet Level Adjusts the level of the effect sound. 000 to 127
DryLevel Dry Level Adjusts the level of the direct sound. 000 to 127
Pitch Shifter
This effect transforms the pitch of the input signal.
Pitch Pitch Adjusts the pitch shift amount in quarter tone steps. –24 to 00 to 24
HighDamp High Damp Adjusts the high-range damp. A smaller number increases
damping.
000 to 127
Feedback Feedback Adjusts the feedback amount. 000 to 127
In Level Input Level Adjusts the input level. 000 to 127
WetLevel Wet Level Adjusts the level of the effect sound. 000 to 127
DryLevel Dry Level Adjusts the level of the direct sound. 000 to 127
Fine Fine Adjusts the pitch shift amount. –50 is a quarter note decrease,
while +50 is a quarter note increase.
–50 to 00 to 50
Ring Modulator
Multiplies the input signal with an internal oscillator signal to create a metallic sound.
OSC Freq OSC Frequency Sets the reference frequency of the internal oscillator. 000 to 127
Rate LFO Rate Adjusts the LFO rate. 000 to 127
Depth LFO Depth Adjusts the LFO depth. 000 to 127
Tone Tone Adjusts the timbre of the ring modulator input sound. 000 to 127
WetLevel Wet Level Adjusts the level of the effect sound. 000 to 127
DryLevel Dry Level Adjusts the level of the direct sound. 000 to 127
Module Name
Description Settings
Display Parameter Data
EN-88
Reference
Reflection
Simulates the initial reflection of reverberation. Applies acoustic presence to notes.
WetLevel Wet Level Adjusts the level of the effect sound. 000 to 127
Feedback Feedback Adjusts the repeat of the reflected sound. 000 to 127
Tone Tone Adjusts the tone of the reflected sound. 000 to 127
In Level Input Level Adjusts the input level. 000 to 127
DryLevel Dry Level Adjusts the level of the direct sound. 000 to 127
Delay
Delays the input signal and feeds it back to create a repeating effect.
Time Delay Time Adjusts the total delay time in 1 ms units. 0001 to 1099
TmRatioL Delay Ratio L Adjusts the ratio of the left channel relative to the total delay time. 000 to 127
TmRatioR Delay Ratio R Adjusts the ratio of the right channel relative to the total delay
time.
000 to 127
Level L Delay Level L Adjusts the level of the left channel. 000 to 127
Level R Delay Level R Adjusts the level of the right channel. 000 to 127
FdbkType Feedback Type Selects the feedback type.
Stereo: Stereo feedback
Cross: Cross feedback
Stereo, Cross
Fdbk Lvl Feedback Adjusts the feedback amount. 000 to 127
Hi Damp High Damp Adjusts the high-range damp. A smaller number increases
damping.
000 to 127
TmpoSync Delay Tempo
Sync
Specifies how the actual total delay time is synced with tempo.
Off: Uses Delay Time value.
1/4 to 1: Uses value in accordance with number of beats.
Off, 1/4, 1/3, 3/8, 1/2,
2/3, 3/4, 1
In Level Input Level Adjusts the input level. 000 to 127
DryLevel Dry Level Adjusts the level of the direct sound. 000 to 127
WetLevel Wet Level Adjusts the level of the effect sound. 000 to 127
Piano Effect
This effect is suited to acoustic piano play.
Lid Type Lid Type Adjusts how sound resonates in accordance with the opening
state of a piano lid.
Closed, SemiOpen,
FullOpen
RefLevel Reflection Level Adjusts the level of the initial reflection. 000 to 127
In Level Input Level Adjusts the input level. 000 to 127
WetLevel Wet Level Adjusts the level of the effect sound. 000 to 127
DryLevel Dry Level Adjusts the level of the direct sound. 000 to 127
Module Name
Description Settings
Display Parameter Data

EN-89
Reference
LFO Wah
This is a “wah” effect that can automatically affect the frequency using an LFO.
In Level Input Level Adjusts the input level. The input signal can become distorted
when the level of the sound being input, the number of chords, or
the Resonance value is large. Adjust this parameter to eliminate
such distortion.
000 to 127
Resonanc Resonance Adjusts the strength of feedback. 000 to 127
Manual Manual Adjusts the wah filter reference frequency. 000 to 127
Rate LFO Rate Adjusts the LFO rate. 000 to 127
Depth LFO Depth Adjusts the LFO depth. 000 to 127
Waveform LFO Waveform Selects the LFO waveform. Sine, Triangle,
Random
WetLevel Wet Level Adjusts the level of the effect sound. 000 to 127
DryLevel Dry Level Adjusts the level of the direct sound. 000 to 127
Auto Wah
This is a “wah” effect that can automatically shift the frequency in accordance with the
level of the input signal.
In Level Input Level Adjusts the input level. The input signal can become distorted
when the level of the sound being input, the number of chords, or
the Resonance value is large. Adjust this parameter to eliminate
such distortion.
000 to 127
Resonanc Resonance Adjusts the strength of feedback. 000 to 127
Manual Manual Adjusts the wah filter reference frequency. 000 to 127
Depth Depth Adjusts the depth of the wah in accordance with the level of the
input signal. Setting a positive value causes the wah filter to open
in direct proportion with the size of the input signal, producing a
bright sound. Setting a negative value causes the wah filter to
close in direct proportion with the size of the input signal,
producing a dark sound.
–64 to 00 to 63
WetLevel Wet Level Adjusts the level of the effect sound. 000 to 127
DryLevel Dry Level Adjusts the level of the direct sound. 000 to 127
Module Name
Description Settings
Display Parameter Data
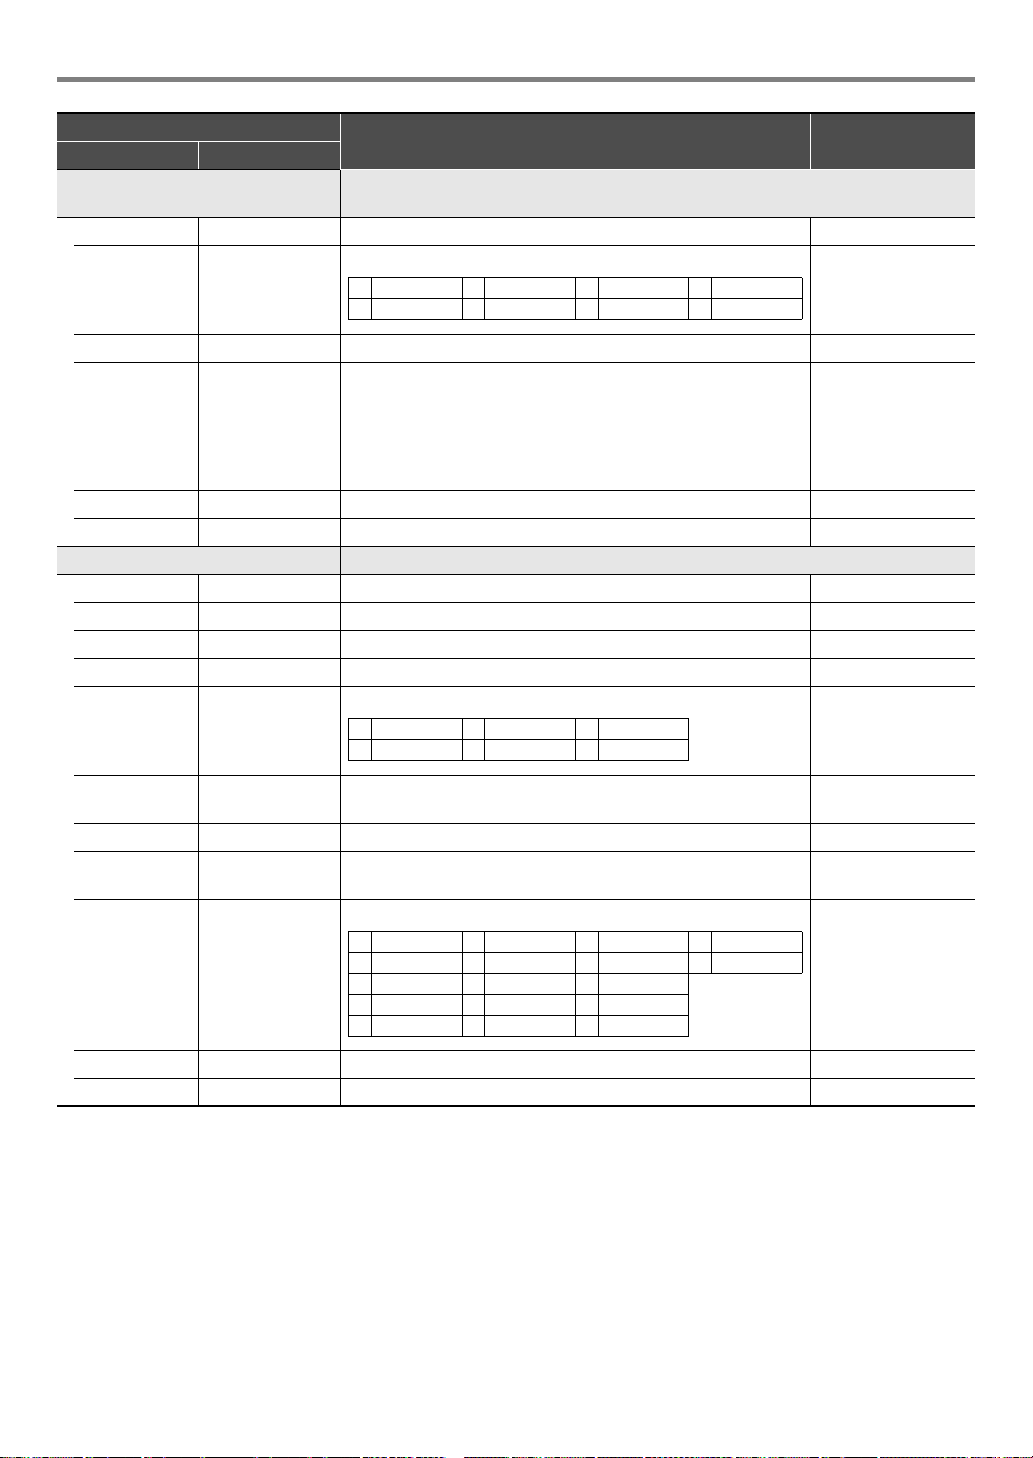
EN-90
Reference
Modeling Wah
Simulates various types of wah pedals. This effect can automatically shift the frequency
in accordance with the level of the input signal.
OutLevel Level Adjusts the wah level. 000 to 127
Type Type Selects the wah type. 1 to 8
Manual Manual Adjusts the wah filter reference frequency. 000 to 127
Depth Depth Adjusts the depth of the wah in accordance with the level of the
input signal. Setting a positive value causes the wah filter to open
in direct proportion with the size of the input signal, producing a
bright sound. Setting a negative value causes the wah filter to
close in direct proportion with the size of the input signal,
producing a dark sound.
–64 to 00 to 63
WetLevel Wet Level Adjusts the level of the effect sound. 000 to 127
DryLevel Dry Level Adjusts the level of the direct sound. 000 to 127
Distortion
Distortion, wah, and amp simulator combined into a single effect.
DistGain Dist Gain Adjusts the distortion input signal gain. 000 to 127
Dist Lvl Dist Level Adjusts the distortion output level. 000 to 127
Dist Low Dist Low Adjusts the distortion low-range gain. 000 to 127
DistHigh Dist High Adjusts the distortion high-range gain. 000 to 127
Wah Type Wah Type Specifies the wah type. 1 to 6
WahDepth Wah Depth Adjusts the depth of the wah in accordance with the level of the
input signal.
–64 to 00 to 63
Wah Manu Wah Manual Adjusts the wah filter reference frequency. 000 to 127
Routing Routing Specifies the distortion and wah connection. Dist, Wah, Wah-Dist,
Dist-Wah
Amp Amp Specifies the amp type. 0 to 16
WetLevel Wet Level Adjusts the level of the effect sound. 000 to 127
DryLevel Dry Level Adjusts the level of the direct sound. 000 to 127
Module Name
Description Settings
Display Parameter Data
1 CAE 3 IBZ 5 FAT 7 7STR
2 CRY 4 VO 6 LIGHT 8 RESO
1 LPF 3 V-Wah 5 L-Wah
2 C-Wah 4 F-Wah 6 H-Wah
0 Bypass 5 FD-DXRV 10 FD-TWRV2 15 FD-BMAN
1 FD-PRNST 6 VX-AC3 11 SL-SLO 16 BASS-STK
2 FD-TWRV1 7 ML-DC3 12 MB-RCTF
3 RL-J12 8 MB-MK1 13 PV-51-SK
4 FD-TWD 9 MS-STK 14 BASS-CMB
EN-91
Reference
*1 100Hz, 125Hz, 160Hz, 200Hz, 250Hz, 315Hz, 400Hz, 500Hz, 630Hz, 800Hz, 1.0kHz, 1.3kHz, 1.6kHz, 2.0kHz, 2.5kHz, 3.2kHz,
4.0kHz, 5.0kHz, 6.3kHz, 8.0kHz
*2 50Hz, 63Hz, 80Hz, 100Hz, 125Hz, 160Hz, 200Hz, 250Hz, 315Hz, 400Hz, 500Hz, 630Hz, 800Hz
*3 2.0kHz, 2.5kHz, 3.2kHz, 4.0kHz, 5.0kHz, 6.0kHz, 8.0kHz, 10kHz, 13kHz, 16kHz
*4
Drive
Simulates the drive of a musical instrument amplifier.
Type Drive Type Selects the drive type.*
4
1 to 20
Gain Gain Adjusts the driver input signal gain. 000 to 127
OutLevel Level Adjusts the drive output level. 000 to 127
WetLevel Wet Level Adjusts the level of the effect sound. 000 to 127
DryLevel Dry Level Adjusts the level of the direct sound. 000 to 127
Amp Cab
Simulates the amp and speaker cabinet without drive and distortion.
Type Type Selects the amp cabinet type.*
5
1 to 92
Vari Variation Selects a variation that changes the setup of the currently
selected amp. The number of variations*
5
depends on the amp
type.
1 to 4
WetLevel Wet Level Adjusts the level of the effect sound. 000 to 127
DryLevel Dry Level Adjusts the level of the direct sound. 000 to 127
Settings Drive Type Display Description
1 to 4 Clean1 to 4 Clean1 to 4 Simulates a clean sound with little distortion.
5 to 8 Crunch1 to 4 Crunch1 to 4 Simulates a crisp crunch sound with little distortion.
9 to 12 Overdrive1 to 4 Overdrv1 to 4 Simulates an overdrive sound with mellow distortion.
13 to 16 Distortion1 to 4 Distort1 to 4 Simulates a hard, straight distortion sound.
17 to 20 Metal1 to 4 Metal1 to 4 Simulates an extreme and weighty distortion sound that is suitable for
heavy metal music.
Module Name
Description Settings
Display Parameter Data
EN-92
Reference
*5 (V: Number of variations)
Settings V Display
11FD-PRNST
21FD-TWRV1
31RL-J12
41FD-TWD
51FD-DXRV
6 1 VX-AC3
7 1 ML-DC3
81MB-MK1
91MS-STK
10 1 FD-TWRV2
11 1 SL-SLO
12 1 MB-RCTF
13 1 PV-51-SK
14 1 BASS-CMB
15 1 FD-BMAN
16 1 BASS-STK
17 3 65-MQ
18 3 AD-MP+CA
19 2 BC-HC30
20 3 BN-SHV
21 3 BN-ECS
22 3 BN-UBR
23 3 CV-LG3
24 2 DR-MZ38
25 2 DZ-V4
26 2 DZ-HA
27 4 EG-TWK
28 3 EG-VEN
29 2 EN-G15
30 1 EN-INV
31 1 EN-BM
32 2 EN-53+DI
33 4 EV-51III
34 3 FD-CHMP
35 3 FD-TWN
36 3 FD-TWRV3
37 2 FU-OD
38 2 GB-LANC
39 3 HK-TM18
40 3 HK-SBL
41 2 KH-STDT
42 3 KR-RV
43 4 LY-IRST
44 3 MB-MK3
45 3 MB-F3+DI
46 1 MB-D5
47 4 MB-DRCT
48 1 MB-TX+.5
Settings V Display
49 4 MB-TX+DI
50 4 MS-VS80
51 4 MS-J800
52 2 MS-J2401
53 3 MS-J2000
54 2 MS-J2+MB
55 3 MS-PLX
56 2 MS-J1+DI
57 4 MT-CFT
58 4 OR-O15
59 2 PN-P7
60 3 PR-SE3
61 4 PV-51II
62 4 PV-65MH
63 3 RA-NBK
64 2 RL-J20
65 2 RL-J120
66 2 RV-30
67 4 SA-PS1
68 2 SL-X8
69 2 SL-X9
70 3 SP-1624
71 3 SP-1695
72 3 SU-BGR3
Settings V Display
73 2 VH-SP6
74 3 VX-A15
75 2 VX-A15TB
76 3 VX-A30
77 3 VX-A30TB
78 4 YM-DG8
79 2 AC-360
80 2 AP-SV4DI
81 2 EB-C450
82 2 FD-BMNtw
83 2 FD-BMNsv
84 2 FD-BMNbk
85 2 FD-STBAS
86 3 GK-150
87 3 MK-T501
88 3 SW-PB20
89 3 SW-SM50
90 1 RL-CBKB
91 1 LY-3C-AC
92 4 AC-SIM
Settings V Display

Function Transmitted Recognized Remarks
Basic
Channel
1 - 16
1 - 16
1 - 16
1 - 16
Default
Changed
Note
Number
0 - 127
0 - 127
*
1
0 - 127
True Voice
After
Touch
Control
Change
X
X
O
X
O
Pitch Bender
O
Key’s
Ch’s
Velocity
O
9nH v = 1 - 127
O
8nH v = 0 - 127, 9nH v = 0
O
9nH v = 1 - 127
O
8nH v = 64
Note ON
Note OFF
Mode
Mode 3
X
Mode 3
X
Default
Messages
Altered
0
1
5
6, 38
7
10
11
64
65
66
67
71
72
73
Bank select
Modulation
Portamento time
Data entry LSB, MSB
Volume
Pan
Expression
Hold 1
Portamento switch
Sostenuto
Soft pedal
Filter resonance
Release time
Attack time
Model: PX-S3100 Version : 1.0
O
O
O
O
O
X
O
O
O
O
O
O
O
O
*
2
*
3
*
2
*
3
*
4
*
6
*
2
*
3
*
3
*
2
*
3
*
3
*
3
*
2
*
3
*
2
*
3
*
2
*
3
O
O
O
O
O
O
O
O
O
O
O
O
O
O
*
4
MIDI Implementation Chart
Program
Change
OO
0 - 127:True #
System Exclusive
O
System
Common
X
X
X
X
X
X
: Song Pos
: Song Sel
: Tune
Aux
Messages
Notes
X
X
X
X
O
X
*
6
*
6
O
O
X
O
O
X
: All Sound Off
:
Reset All Controller
: Local ON/OFF
: All Notes OFF
: Active Sense
: System Reset
System
Real Time
X
X
X
X
: Clock
: Commands
74
76
77
78
84
88
91
93
94
100, 101
Filter cutoff
Vibrato rate
Vibrato depth
Vibrato delay
Portamento control
High resolution velocity prefix
Reverb send level
Chorus send level
Delay send level
RPN LSB, MSB
Mode 1 : OMNI ON, POLY
Mode 3 : OMNI OFF, POLY
Mode 2 : OMNI ON, MONO
Mode 4 : OMNI OFF, MONO
O : Yes
X : No
O
O
O
O
X
O
O
O
X
O
*
2
*
3
*
2
*
3
*
2
*
3
*
2
*
3
*
5
*
2
*
2
*
6
*
2
*
4
O
O
O
O
O
O
O
O
O
O
*
4
*
4
O
*
4
*1: Depends on tone.
*2: Output in accordance with knob set setting.
*3: Output in accordance with pedal effect setting.
*4: For details about RPN and system exclusive messages, see MIDI Implementation at
https://world.casio.com/.
*5: Note ON only
*6: Output along with certain operations.

MA2107-A
PXS3100-E-3A