Loading ...
Loading ...
Loading ...

16
9.1 Setting Up a Wireless Alarm Network
Creating an interconnected wireless alarm network is a simple process, with intelligent “self-enrollment” features, and
user-friendly voice prompts.
A. REMOVE ALL DEVICES FROM THEIR PACKAGING
B. POWER UP ALL DEVICES
• Locate the red wheel on the back of the device. Turn the red wheel to
the “ON” position on ALL devices using the white tool included with the
Quick Start Guide, or a standard screwdriver.
• Once powered, the light rings will glow red and voice message will
announce, “Ready to connect. Follow Quick Start instructions.”
NOTE: If no further steps are taken within 15 minutes of initial power up, a voice prompt, “No devices found, not
connected” will be heard once, and the wireless function will turn off. The unit will then perform as a standard stand
alone alarm. See Section 9.3 for re-activating wireless.
C. PICK ONE DEVICE
NOTE: This chosen device will be the “Coordinator” of the wireless alarm
network. Keep this unit separated from the others. For best results, after
wireless setup is complete, install the Coordinator in a central location.
Press and hold the button on only the Coordinator until you hear two beeps. Release button. You will hear “Searching for
other devices”.
• The light will pulse and device will sound a continuous “Sonar” ping until step E is complete.
Figure 9.1-C
DON'T press buttons
on other devices
“Searching for
other devices.”
Hold for
5 seconds
Figure 9.1-B
ON
PERMANENTLY
DISABLE and
DISCHARGE
alarm
Break
tab
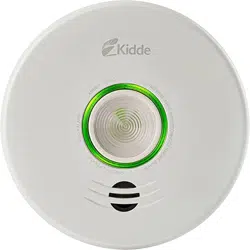
SMOKE ALARM: 3 long beeps, repeating
CO ALARM: 4 quick beeps, repeating
STANDBY: Green LED blink every 60s
FAULT: Amber LED blink with chirp every 30s
LOW BATTERY: Amber LED blink every 5s, chirp every 60s
END OF UNIT LIFE: Amber LED blink every 5s, chirp twice every 30s
Push button to test weekly.
See user guide for more information
USE ACTIVATION
TOOL OR SCREWDRIVER
Loading ...
Loading ...
Loading ...