Loading ...
Loading ...
Loading ...
13
Capacitance Testing
WARNING
A capacitor stores an electrical charge
and may still be energized after being
removed. ALWAYS turn off all power
to the circuit before removing the
capacitor. Make sure to wear proper
protective equipment.
This test sends a current of 2.1V through
a diode or a semiconductor junction, then
measures the voltage drop across the junction.
1. Insert the black test lead into the COM
terminal, and the red test lead in to the
terminal.
2. Turn off all power to the circuit, then
remove the capacitor from the circuit.
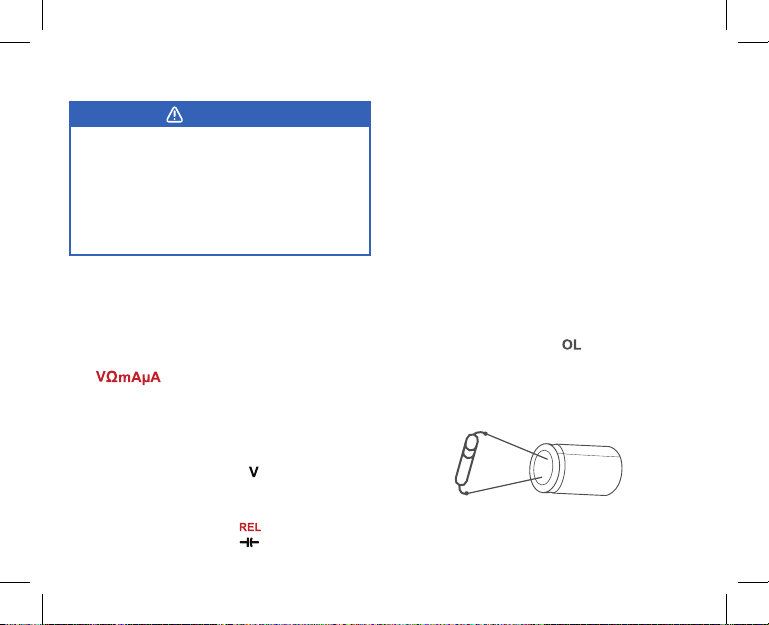
3. Safely discharge the capacitor by touching
both ends of the capacitor to a resistor or
a piece of metal. [Figure 3.1]
4. Set the rotary switch to to test the
capacitor to ensure it is completely
discharged (see Voltage Measurement,
page 10).
5. Turn the rotary dial to .
6. Connect the test leads to the capacitor.
The negative end is often marked on the
side of the capacitor. Hold the test leads
until the reading on the display stabilizes.
Figure 3.1
Note:
• When measuring low capacitance values,
the Relative Mode can be used to remove
the capacitance of the test leads. Press
SEL/REL while on the capacitance
testing range to switch to the Relative
Mode.
• It will take longer for the reading on the
LCD to stabilize when testing a large-
capacity capacitor.
• The LCD will read “ ” to indicate
whether the capacitor has shorted out or
if it has exceeded the maximum range.
Loading ...
Loading ...
Loading ...