Loading ...
Loading ...
Loading ...
Connection methods
-
14
-
Owner’s Manual
Tio1608-D
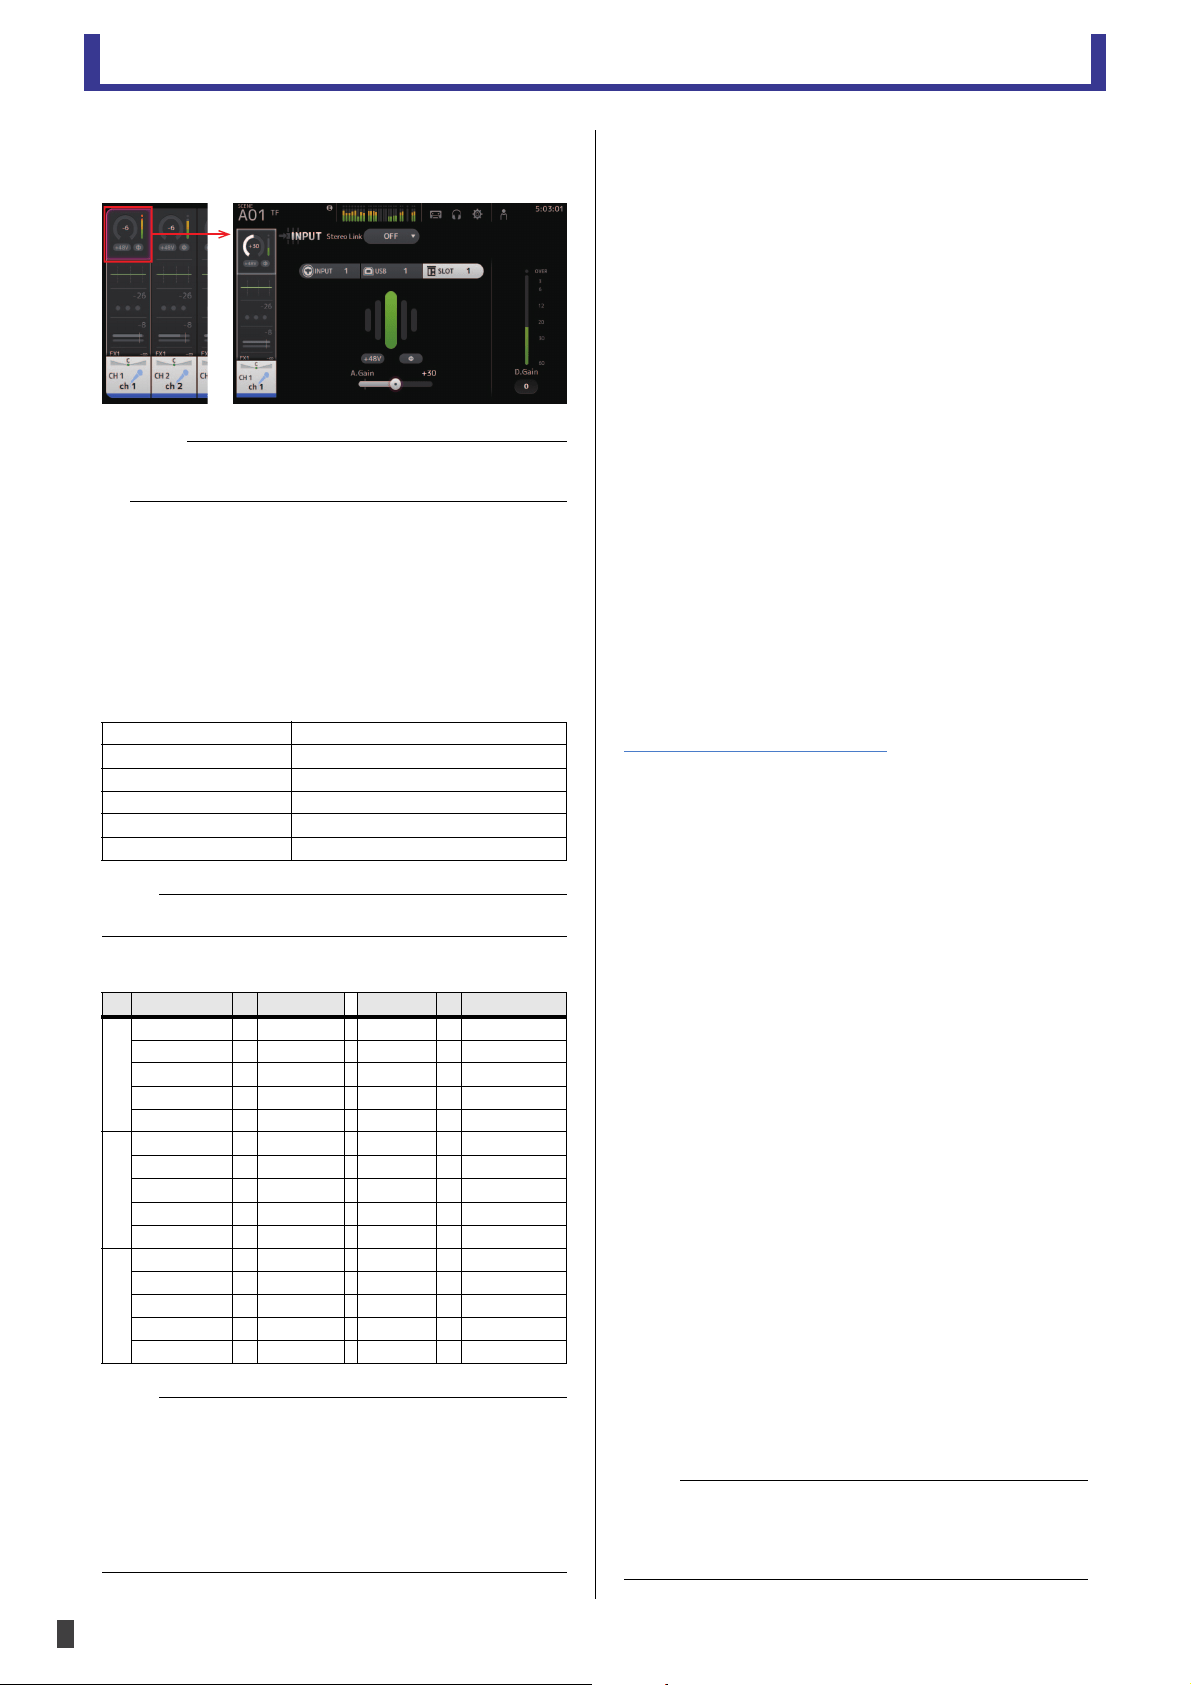
7. To assign the Tio1608-D inputs to the TF series
mixing console, set the input select on the console's
INPUT screen to "SLOT".
8. Adjust the input gain and other settings as
necessary.
Quick config is now complete.
Settings configured by Quick Config
Quick Config applies the following settings.
• Dante settings
• Patching
Manual setup
You can configure your devices manually if you do not want
to use Quick Config.
Tio1608-D procedure
1. With the unit turned off, set the [QUICK CONFIG]
switch on the front panel to the [OFF] position.
2. Refer to the information on page 11 - 12 and set the
DIP switches to the desired positions.
3. Set the [UNIT ID] switch on the front panel to the
desired position.
4. Use Ethernet cables to connect the Tio1608-D to
your Dante device.
5. Turn each device on.
Dante settings
When using manual setup, use Dante Controller to
configure Dante settings.
Dante Controller is a computer program that you can use to
configure Dante network settings and audio signal patching
settings. It is available for download at the website below.
(Dante Controller v3.2.1 or later is compatible with
Tio1608-D.)
http://www.yamahaproaudio.com/
For information about Dante Controller, refer to the Dante
Controller documentation.
When using manual setup, you will need to use Dante
Controller to configure the following settings at a minimum.
(You can configure other settings as desired.)
• Input and output patching settings (Network View
Routing)
• Clock master settings (Network View Clock Status)
• Sampling frequency settings (Device View Config)
Head amp control
You can use a Yamaha digital mixer or other device to
control the Tio1608-D head amp.
When the unit is connected to a TF series mixing console,
you can control the unit's head amp just as you would adjust
the console's head amp.
When using a CL or QL series digital mixer, you can control
or use the following parameters.
•HA gain
• +48 V phantom power on/off
• HPF on/off
• HPF frequency cutoff adjustment
• Mute off
• +48 V phantom power master on/off display
• Analog input level meter display
• Firmware version display
• Device identify
• Dante SYSTEM and SYNC indicator information
NOTE
You can use the menu in the console's INPUT screen to switch
the inputs selected for the current FADER BANK.
Word clock 48 kHz (slave), no pull up/down
Latency 0.5 ms
Encoding 24-bit PCM
SECONDARY port mode Daisy chain
Patching Refer to the table below
IP address Previous setting is used
NOTE
Quick Config does not configure analog input parameters.
Tio input TF input TF output Tio output
#1 ID 1, Input 1 Channel 1 AUX 1 ID 1, Output 1
ID 1, Input 2 Channel 2 : :
::AUX 6 ID 1, Output 6
ID 1, Input 16 Channel 16 Stereo L ID 1, Output 7
Stereo R ID 1, Output 8
#2 ID 2, Input 1 Channel 17 AUX 7 ID 2, Output 1
ID 2, Input 2 Channel 18 : :
::
AUX 12 ID 2, Output 6
ID 2, Input 16 Channel 32 Stereo L ID 2, Output 7
Stereo R ID 2, Output 8
#3 ID 3, Input 1 Channel 33 AUX 13 ID 3, Output 1
ID 3, Input 2 Channel 34 : :
::AUX 18 ID 3, Output 6
ID 3, Input 8 Channel 40 AUX 19 ID 3, Output 7
AUX 20 ID 3, Output 8
NOTE
• Even if only UNIT ID 2 or 3 is used, channels are patched as
shown above based on the UNIT ID number.
• After you have used Quick Config to configure the settings, you
can use Dante Controller to change the individual settings.
However, each time the Tio1608-D is turned on, Dante Controller
settings will be replaced by the Quick Config settings. For this
reason, we recommend that you turn Quick Config off if you are
using Dante Controller.
NOTE
When the Dante SECONDARY port mode (page 12) is set to
"Redundant connection", the head amp control function is only
available via the [PRIMARY] Dante connector. The [SECONDARY]
Dante connector is not available for this function.
Loading ...
Loading ...
Loading ...