Loading ...
Loading ...
Loading ...
Device features
-
11
-
Owner’s Manual
Tio1608-D
English
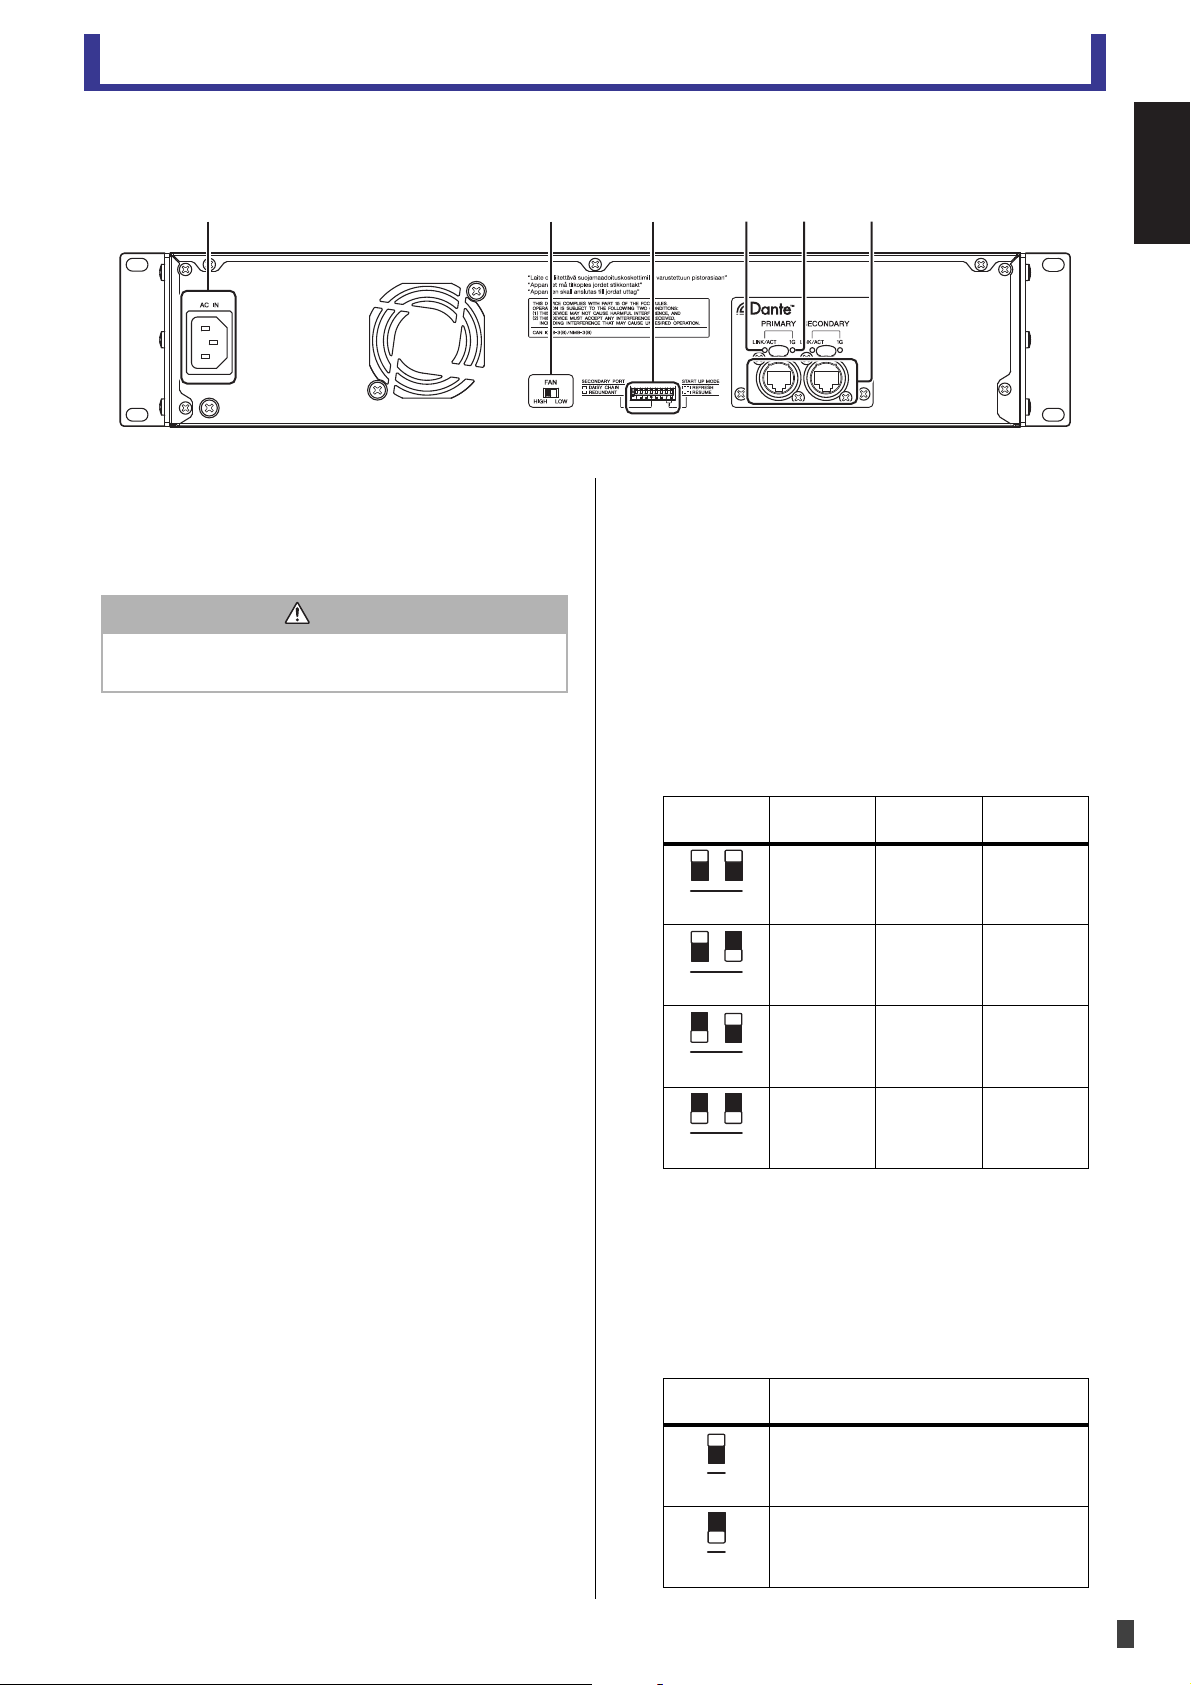
Rear panel
1 AC IN connector
Connect the included power cord. When connecting
to a power outlet, first connect the power cord to the
unit, then connect the power cord to the power
outlet.
2 [FAN] switch
Allows you to set the unit's internal cooling fan to run
at high or low speed. The switch is set at the factory to
[LOW], but as long as the unit is operated within the
specified ambient temperature range either the
[LOW] or [HIGH] setting can be used. The [HIGH]
setting is recommended if the ambient temperature is
high, if the unit is in direct sunlight (even if the
ambient temperature is within the specified operating
range), and in any situation in which fan noise is not
a problem. When mounting three or more units
without leaving space between each unit, set each
unit's fan speed to HIGH.
You can change the switch position while the unit is
turned on.
3 DIP switches
Determines the unit's start up mode.
Make sure that the unit is turned off before adjusting
the DIP switches. If you adjust the switches while the
unit is turned on, the new switch positions are not
applied.
The following information explains how the DIP
switch positions.
• Switch 1 and 2 (unit ID)
These DIP switches, along with the [UNIT ID] switch,
determine the unit's UNIT ID when Quick Config is
not used.
The UNIT ID is determined as follows.
When Quick Config is used, these switches are
disabled.
• Switch 3 (initialize mode)
This DIP switch is used to reset the unit to its factory
default settings.
After the unit is reset, it starts up using the system
mode that corresponds to the position of switches 7
and 8.
ձղճյնմ
Caution
Make sure the unit is turned off before connecting or
disconnecting the power cord.
Switch
position
[UNIT ID]
switch = 1
[UNIT ID]
switch = 2
[UNIT ID]
switch = 3
01 02 03
04 05 06
07 08 09
0A 0B 0C
Switch
position
Initialize mode
Initialize mode is off (unit will not be reset
when it is turned on)
Initialize mode is on (unit will be reset
when it is turned on)
1 2
1 2
1
2
1
2
3
3
Loading ...
Loading ...
Loading ...