
Loading ...
Loading ...
Loading ...
Section 3— ASSembly & Set-Up6
Reverse Clutch Control
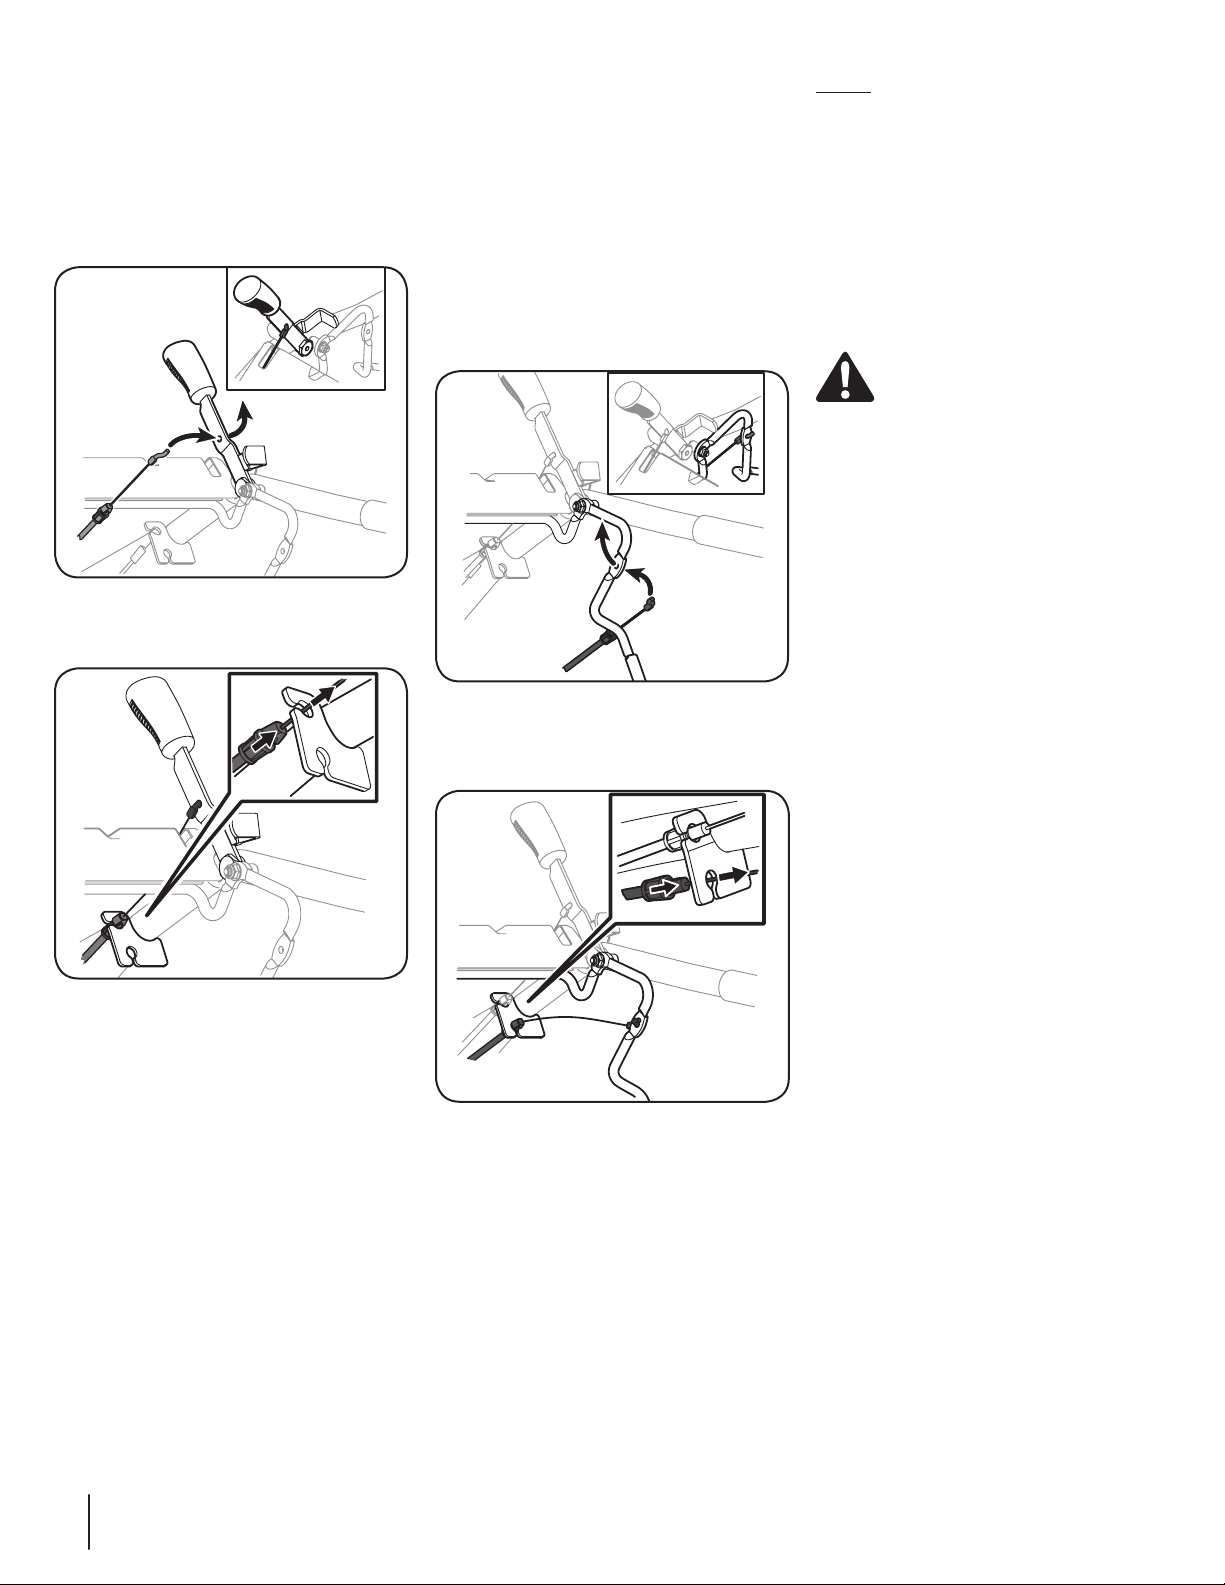
1. Carefully unwrap the reverse clutch control
cable (red) from its shipping position and
route it up the right side handle. Position the
cable so that it rests above the small groove
on the handle assembly in front of the reverse
drive handle. See Figure 3-5.
2. Insert the cable z-fitting into the slot in the
control panel from the inside of the handle
outward. See inset in Figure 3-5.
Red
Figure 3-5
3. Snap the cable tab into place in the upper hole
on the handle cable bracket. See Figure 3-6.
Figure 3-6
4. Test the function of the reverse clutch control
cable by pulling the knob back and releasing
it. The knob should return to its neutral
position against the tapered bushing. If it
does not return when released contact your
local authorized dealer or the TROY-BILT
Technical Service Department for technical
assistance.
Set-Up
Tires
Use a tire pressure gauge to check the air pressure
in both tires. Deflate or inflate both tires equally to
between 15 PSI and 20 PSI. Be sure that both tires
are inflated equally or the tiller will pull to one side.
Gas & Oil Fill-Up
Service the engine with gasoline and oil as
instructed in the Engine Operator’s Manual packed
separately with your tiller. Read the instructions
carefully.
Warning! Use extreme care when
handling gasoline. Gasoline is extremely
flammable and the vapors are explosive.
Never fuel the machine indoors or while
the engine is hot or running. Extinguish
cigarettes, cigars, pipes and any other
sources of ignition.
Transmission Gear Oil
The transmission was filled with gear oil at the
factory. However, be sure to check the oil level
at this time to make certain it is correct. See the
Maintenance & Adjustments Section for instructions
on checking and adding transmission gear oil.
Forward Clutch Cable
1. Carefully free the forward clutch control
levers from their shipping position by
removing any fasteners (rubber bands, tape,
etc.) that may secure the forward clutch
control levers during shipping.
NOTE: The control handles should hang
beneath the handlebars.
2. The forward clutch control cable (black) is
hanging loosely near the right-side wheel.
Being careful not to kink or stretch the cable,
route the cable on top of the lower handle
and under the handle panel then insert the
z-connector into the hole at the end of the
forward clutch control linkage going from the
outside inward. See Figure 3-7.
Black
Figure 3-7
3. Snap the cable tab into place in the lower hole
on the handle cable bracket. See Figure 3-8.
Figure 3-8
Loading ...
Loading ...
Loading ...