
Loading ...
Loading ...
Loading ...
6. Preparation Instructions
Important: Before assembling and installing this
product, read and understand all the safety instructions
listed in this manual.
6.1 Assembling the Dehumidier
WARNING! This product is heavy. For your
safety, Draper Tools recommends that this
product is assembled by two people.
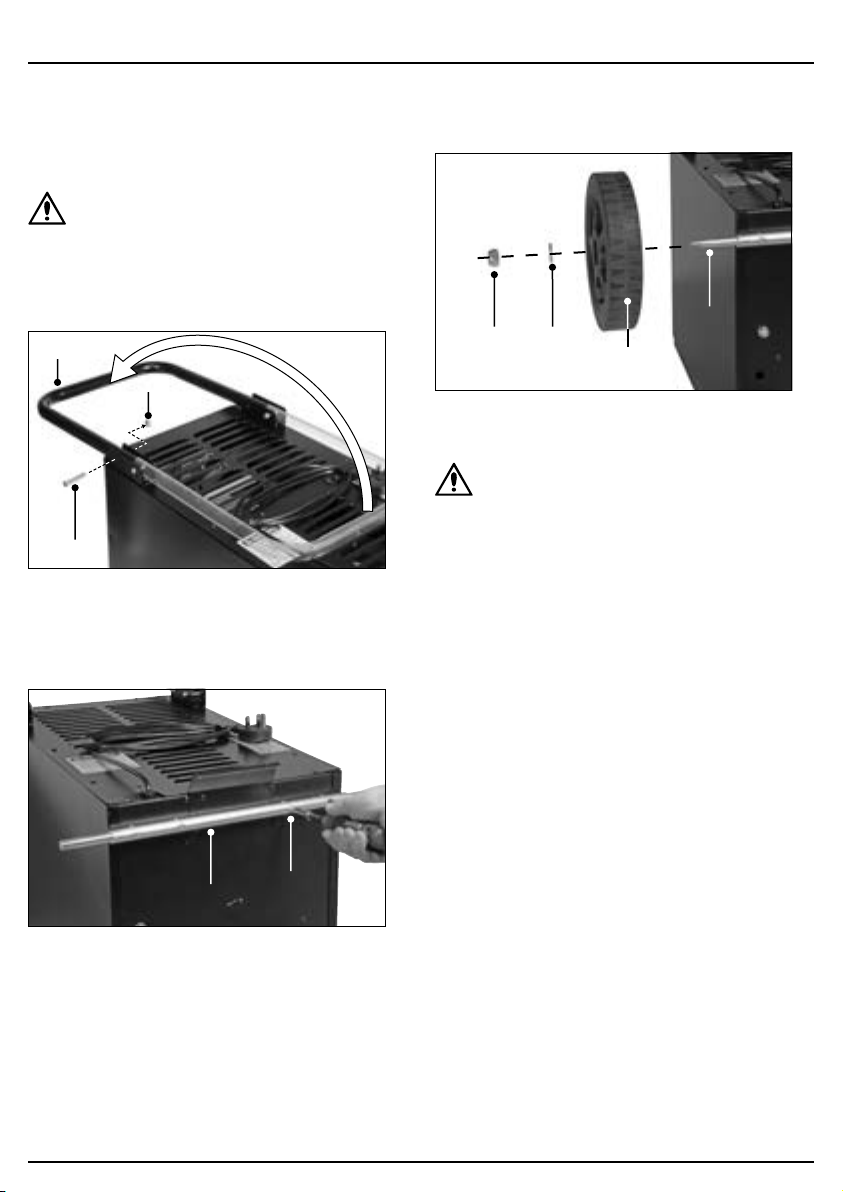
1. Unfold the transport handle (6) and secure it in place
using the four M6 × 35mm bolts (D) and two M6 nuts
(H).
1 Fig.
(6)
(D)
(H)
2. Carefully tip the dehumidier unit onto its front face.
3. Align the axle (B) with the base of the unit and secure
it in place using the four M6 × 28mm bolts (E).
2 Fig.
(B)
(E)
4. Place a wheel (C) onto each end of the axle and secure
them in place using the M12 washers (F) and M12
nuts (G).
3 Fig.
(G) (F)
(C)
(B)
5. Carefully tip the unit into its upright position.
CAUTION! After assembly or tipping the
dehumidier for any reason, allow it to rest in an
upright position for at least 2 HOURS before
connecting it to mains power.
6.2 Selecting a Drainage Mode
The dehumidier features two drainage modes:
• Manual (internal water tank)
• Continuous
Manual Drainage Mode
The dehumidier is supplied with a removable internal
water tank (7) and will automatically operate in manual
drainage mode. When the water tank is full, the unit
switches o automatically until the tank is emptied.
Important: Ensure that the water tank outlet is securely
sealed when operating in manual drainage mode.
– 10 –
Loading ...
Loading ...
Loading ...