Loading ...
Loading ...
Loading ...
The Automower
®
Connect app has Long-range
cellular connectivity, Wi-Fi connectivity and Short-range
Bluetooth
®
connectivity.
3.5.3.1 To install the Automower
®
Connect app
1. Download the Automower
®
Connect app on your
mobile device.
2. Sign up for a Husqvarna account in the
Automower
®
Connect app.
3. An e-mail is sent to the registered e-mail address.
Follow the instructions in the e-mail in less than 24
hours to validate your account.
4. Log in to your Husqvarna account in the
Automower
®
Connect app.
3.5.4 To start the product for the first time
When the product is set to ON for the first time, there
are some basic settings to do before the product can
start to operate.
1. Push the jog wheel for 3 seconds to set the
product to ON.
Note: The Bluetooth
®
pairing operation mode
of the product is enabled for 3 minutes. If the
pairing operation between the product and the
mobile device is not completed correctly, use the
jog wheel to select Bluetooth
®
to enable it again.
2. Enter the factory PIN code.
3. Log on to your Husqvarna account in the
Automower
®
Connect app.
4. Start Bluetooth
®
on your mobile device.
5. Select
My mowers
in the Automower
®
Connect
app, and add your product.
6. Follow the instructions in the Automower
®
Connect
app.
3.5.5 To install the charging station
CAUTION: Do not make new holes in
the charging station plate.
CAUTION: Do not put your feet on the
baseplate of the charging station.
WARNING: Make sure that the plugs of
the low-voltage cable and the power supply
unit are clean and dry before you connect
them.
When connecting the power supply, only use a power
outlet that is connected to an residual-current (RCD)
device.
1. Read and understand the instructions about the
charging station. Refer to
To examine where to put
the charging station on page 11
.
2. Put the charging station in the selected area.
Note: Do not attach the charging station to the
ground with the screws until the guide wire is
installed. Refer to
To install the guide wire on page
18
.
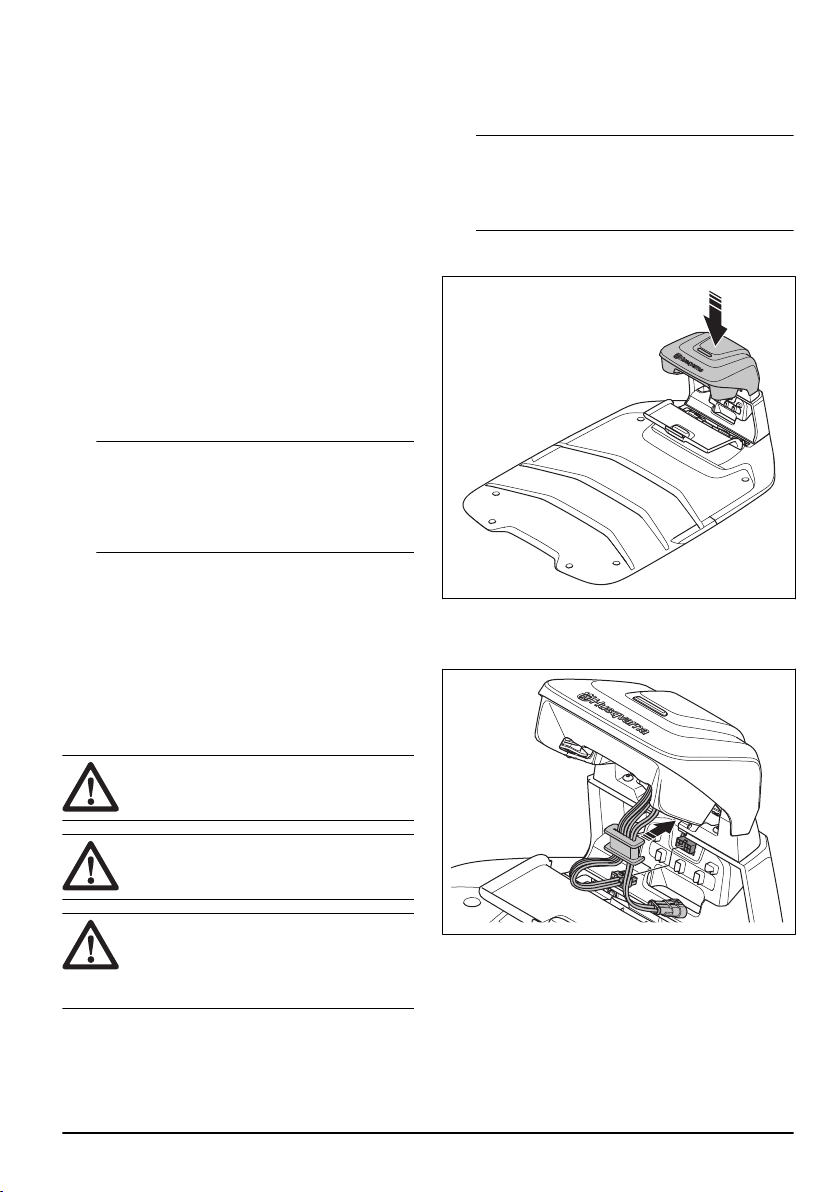
3. Open the hatch on the front of the charging station.
4. Attach the top of the charging station.
5. Tilt the top of the charging station.
6. Put the grommet with the cables into position.
7. Connect the cable to the charging station.
8. Connect the low-voltage cable to the charging
station.
9. Close the hatch on the front of the charging
station.
10. Put the power supply at a minimum height of 30
cm / 12 in.
2071 - 001 - 29.03.2023
Installation - 17
Loading ...
Loading ...
Loading ...