Loading ...
Loading ...
Loading ...
To make the connection easier between the guide wire
and the boundary wire, it is recommended to make an
eyelet where the guide wire will be connected. Make the
eyelet with approximately 20 cm / 8 in. of the boundary
wire.
Note: Make a blueprint of the work area before you
install the boundary wire and guide wire.
A
B
C
E
D
F
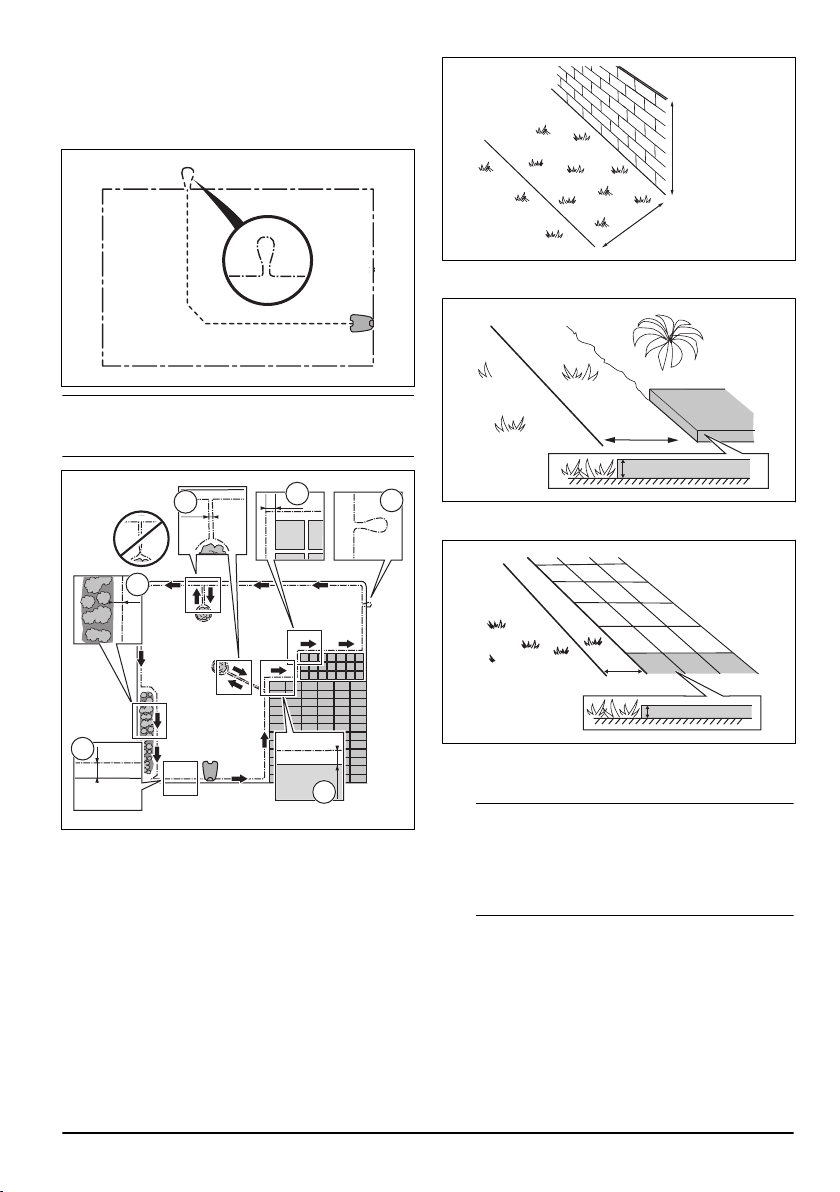
• Put the boundary wire around all of the work area
(A). Adapt the distance between the boundary wire
and obstacles.
• Put the boundary wire 35 cm / 14 in. (B) from an
obstacle that is more than 5 cm / 12 in. high.
35 cm /14
"
> 5 cm / 2
"
• Put the boundary wire 30 cm / 12 in. (C) from an
obstacle that is 1-5 cm / 0.4-2 in. high.
1-5 cm / 0.4 - 2"
30 cm / 12"
• Put the boundary wire 10 cm / 4 in. (D) from an
obstacle that is less than 1 cm / 0.4 in. high.
10 cm / 4"
max 1 cm / 0.4"
• If you have a paving stone path that is in level with
the lawn, put the boundary wire below the paving
stone.
Note:
If the paving stone is minimum 30 cm / 12
in. wide, use the factory setting for the
Drive Past
Wire
function to cut all the grass adjacent to the
paving stone. Refer to
Drive Past Wire function on
page 22
.
• If you make an island, put the boundary wire that
runs to and from the island near together (E). Put
the wires in the same stake. Refer to
To make an
island on page 14
.
• Make an eyelet (F) where the guide wire is to be
connected to the boundary wire.
2071 - 001 - 29.03.2023
Installation - 13
Loading ...
Loading ...
Loading ...