Loading ...
Loading ...
Loading ...
Installation
Connecting the Water Supply
(select models)
Materials Needed
• '/4" outer diameter flexible copper tubing
• Shut-off valve (requires a '/4" hole to be drilled into
water supply line before valve attachment)
• Adjustable wrench
• '/_" hex nut driver
Note
• Add 8' to tubing length needed to reach water
supply for creation of service loop.
.
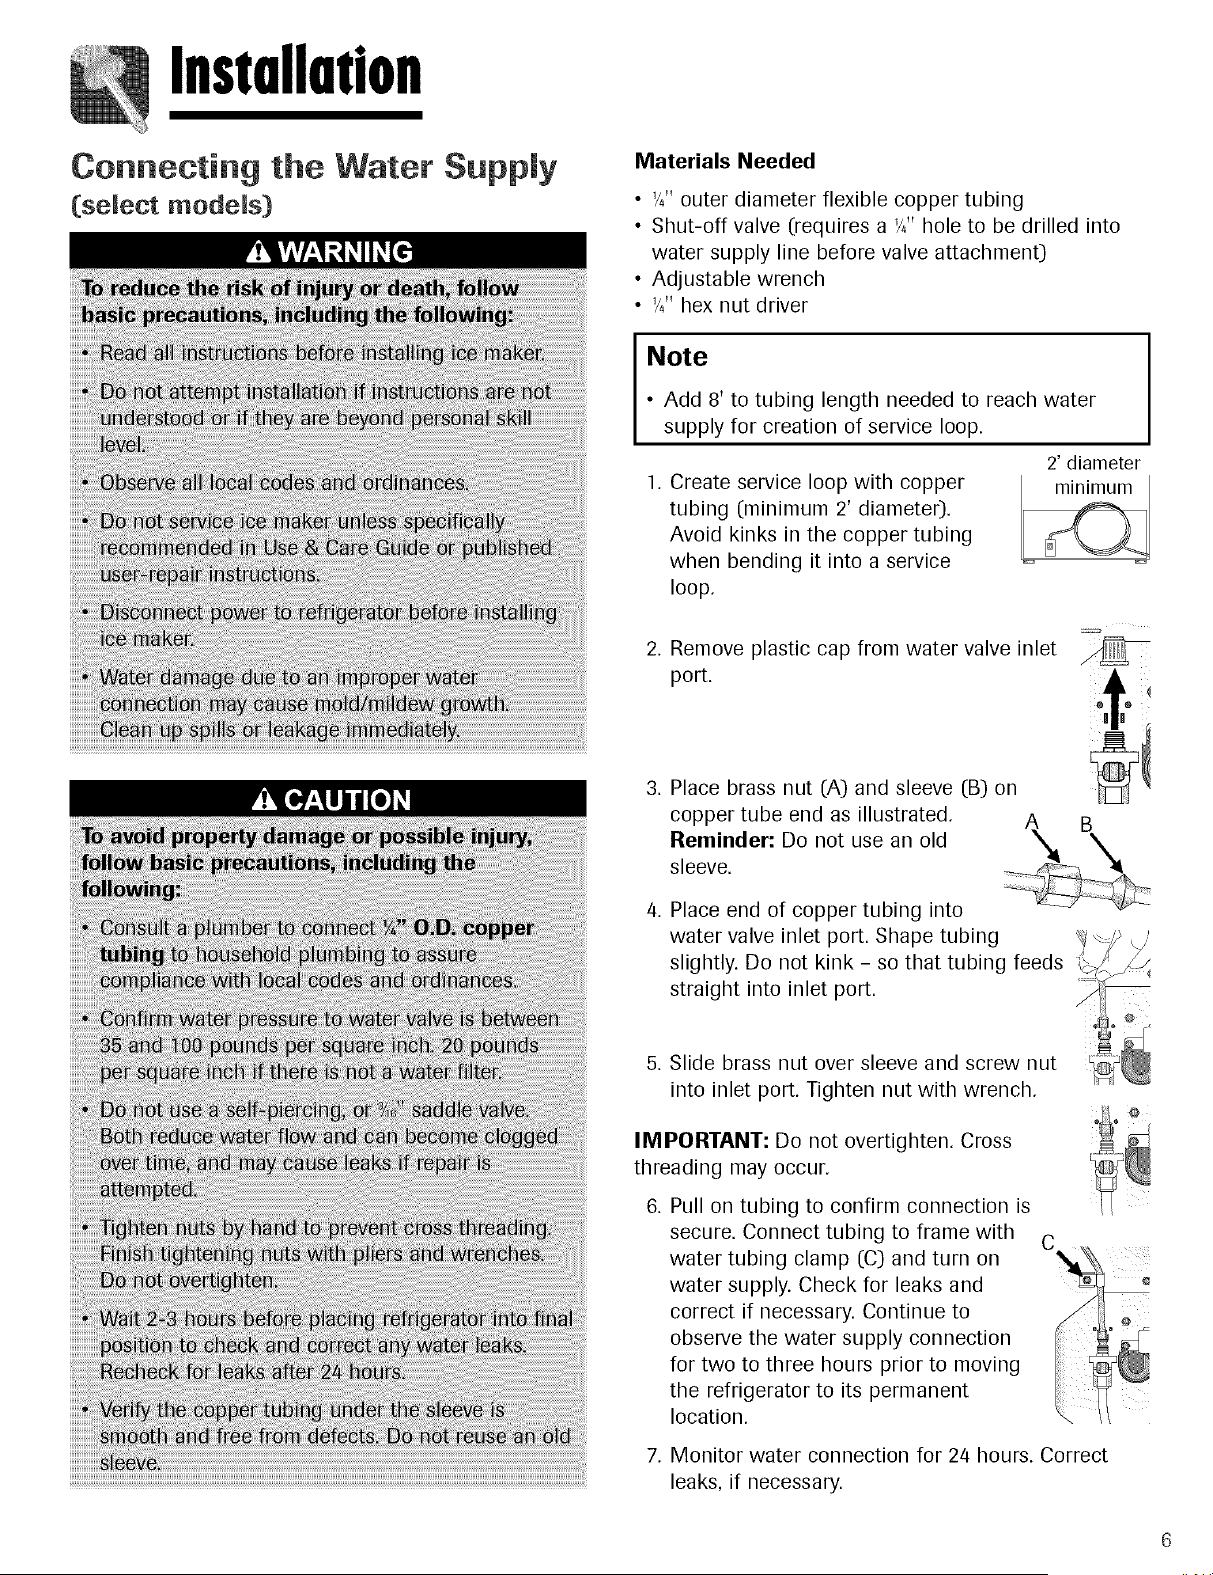
Create service loop with copper
tubing (minimum 2' diameter).
Avoid kinks in the copper tubing
when bending it into a service
loop.
2' diameter
,
,
Remove plastic cap from water valve inlet
port.
Place brass nut (A) and sleeve (B) on
copper tube end as illustrated.
Reminder: Do not use an old
sleeve.
A
B
.
Place end of copper tubing into
water valve inlet port. Shape tubing
slightly. Do not kink - so that tubing feeds
straight into inlet port.
5. Slide brass nut over sleeve and screw nut
into inlet port. Tighten nut with wrench.
IMPORTANT: Do not overtighten. Cross
threading may occur.
,
Pull on tubing to confirm connection is
secure. Connect tubing to frame with
C
water tubing clamp (C) and turn on
water supply. Check for leaks and
correct if necessary. Continue to
observe the water supply connection
for two to three hours prior to moving
the refrigerator to its permanent
location.
7. Monitor water connection for 24 hours. Correct
leaks, if necessary.
Loading ...
Loading ...
Loading ...