Loading ...
Loading ...
Loading ...
Your lawn mower has been completely assembled at the factory, except for the Grass Catcher and Grass
Catcher Frame. Toset-up and attach Grass Catcher, follow the instructionsunder "TO UNFOLD HANDLE"
and "GRASS CATCHER".
The following parts are included not assembled:
I Grass Catcher Frame
I Grass Catcher Top
1 Grass Catcher Bottom
I Battery Charger
1 Hardware Package
HOWTOSET-UPYOURMOWER
TO UNFOLD HANDLE
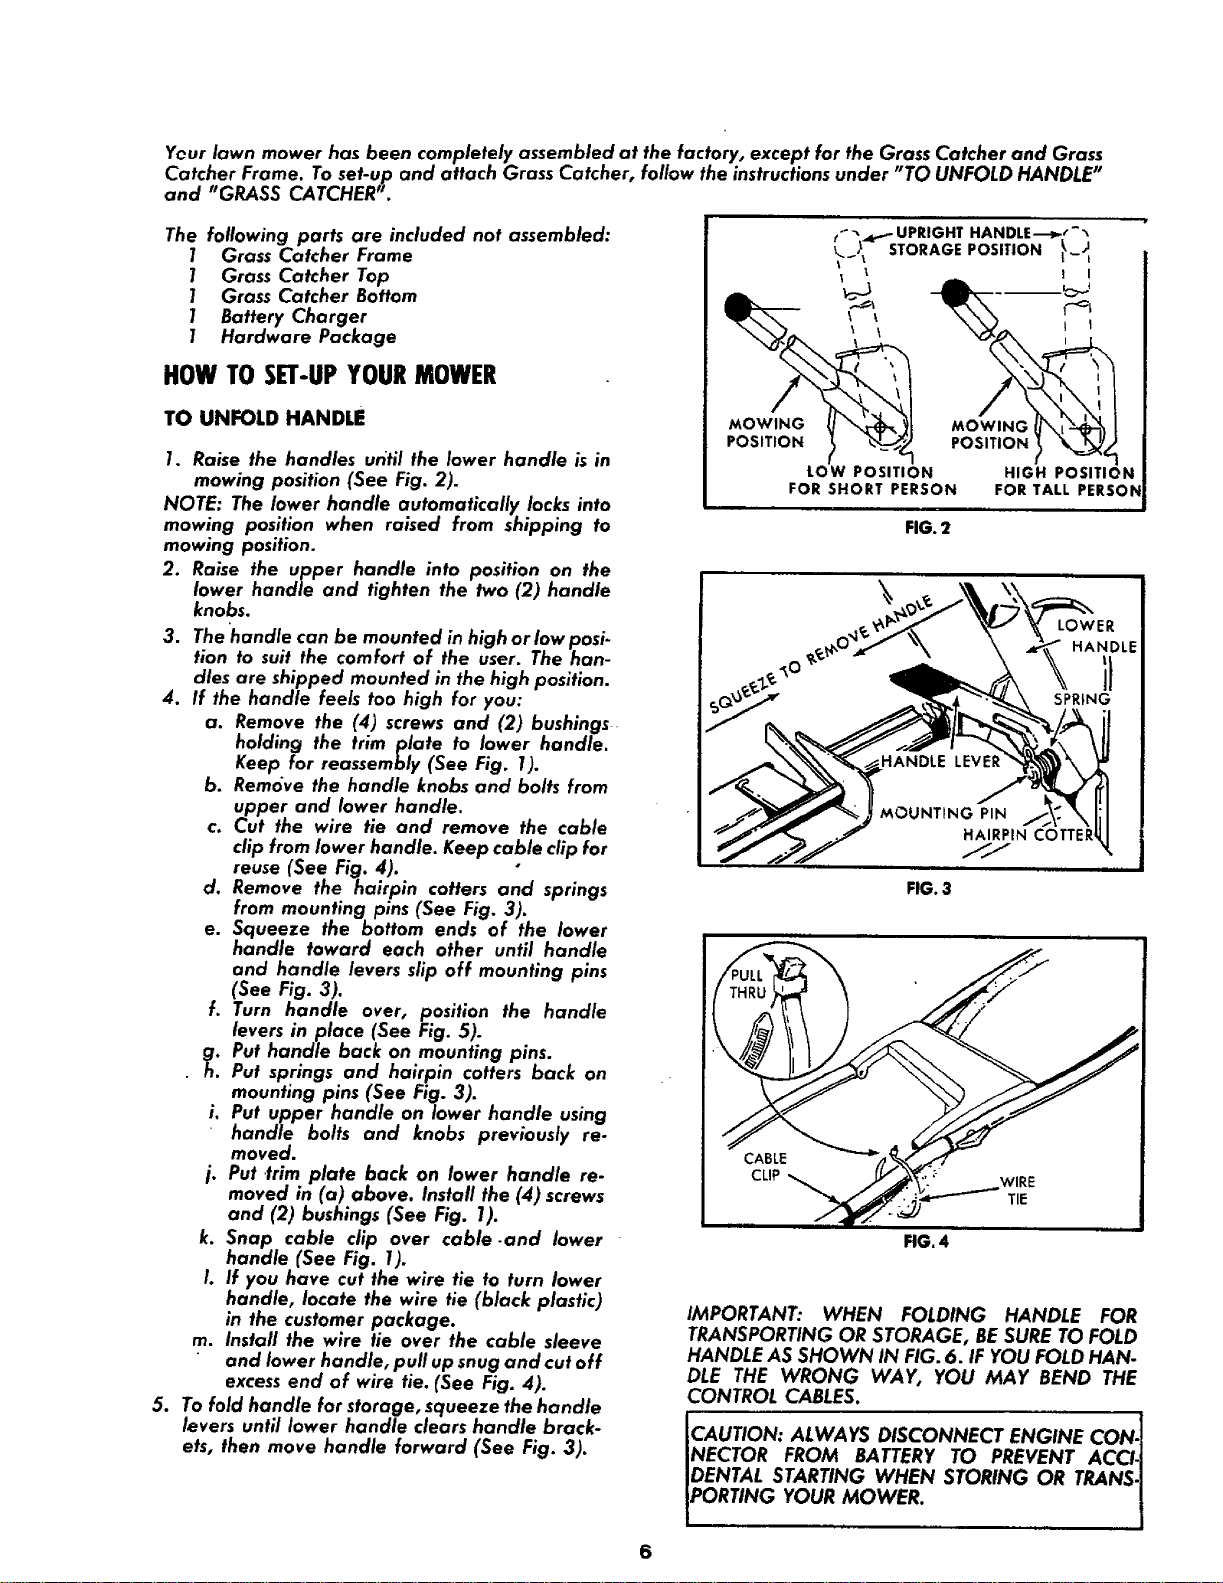
1. Raise the handles uritii the lower handle is in
mowing position (See Fig. 2).
NOTE: The lower handle automatically locks into
mowing position when raised from shipping to
mowing position.
2. Raise the upper handle into position on the
lower handle and tighten the two (2) handle
knobs.
3. The handle can be mounted in high or low posi-
tion to suit the comfort of the user. The han-
dles are shipped mounted in the high position.
4. If the handle feels too high for you:
a. Remove the (4) screws and (2) bushings
holding the trim plate to lower handle.
Keep for reassembly (See Fig. 1).
b. Remove the handle knobs and bolts from
upper and lower handle.
c. Cut the wire tie and remove the cable
clip from lower handle. Keep cable clip for
reuse (See Fig. 4).
d. Remove the hairpin cotters and springs
from mounting pins (See Fig. 3).
e. Squeeze the bottom ends of the lower
handle toward each other until handle
and handle levers slip off mounting pins
(See Fig. 3).
f. Turn handle over, position the handle
levers in place (See Fig. 5).
g. Put handle back on mounting pins.
h. Put springs and hairpin cotters back on
mounting pins (See Fig. 3).
i. Put upper handle on lower handle using
" handle bolts and knobs previously re-
moved.
j. Put trim plate back on lower handle re-
moved in (a) above. Install the (4) screws
and (2) bushings (See Fig. 1).
k. Snap cable clip over cable-and lower
handle (See Fig. 1).
!. If you have cut the wire tie to turn lower
handle, locate the wire tie (black plastic)
in the customer package.
m. Install the wire tie over the cable sleeve
and lower handle, pull up snug and cutoff
excess end of wire tie. (See Fig. 4).
5. Tofold handle for storage, squeeze the handle
levers until lower handle clears handle brack-
ets, then move handle forward (See Fig. 3).
t_'_._ - UPRIGHT HANDLE-_r-'_
'_._ STORAGE PO51TION }-_
t_
1
1
POSmON
LOW POSITION
FOR SHORT PERSON
! I
.O VlNO
POSITION} x,2 L
HIGH POSITION
FOR TALL PERSON
FIG. 2
\
LOWER
HANDLE
SPR_NG
MOUNTING PIN
HAIRPIN COTTER
//-
FIG. 3
CABLE
CLIP
FIG. 4
WIRE
TIE
IMPORTANT: WHEN FOLDING HANDLE FOR
TRANSPORTING OR STORAGE, BESURE TO FOLD
HANDLE AS SHOWN IN FIG. 6. IF YOU FOLD HAN-
DLE THE WRONG WAY, YOU MAY BEND THE
CONTROL CABLES.
CAUTION: ALWAYS DISCONNECT ENGINE CON-]
NECTOR FROM BATTERY TO PREVENT ACCI-I
DENTAL STARTING WHEN STORING OR TRANS-I
PORTING YOUR MOWER. I
!
G
Loading ...
Loading ...
Loading ...