Loading ...
Loading ...
Loading ...
HOW TO USEYOURMOWER{€om'D)
TO PREPARE BATTERY
NOTE: YOUR BATTERYMUST BE CHARGED BE-
FORE YOU CAN START YOUR MOWER.
I. Connect battery charger connector (male) to
the battery connector (female) as shown in
Fig.13.
2. Plug the battery charger into 110 Volt-A.C.
outlet (See Fig.13).
3. Leave the battery charger connected for 24
hours before initially starting your engine.
4. After charging, connect engine connector to
battery connector (See Fig. 14).
Your engine has an integral alternator for partial
charging. Connect your battery charger to charge
battery as required.
THE ENGINE ALTERNATOR WILL NOT CHARGE A
DISCHARGED BATTERY.
At the end of the mowing season the battery
should be charged for 48 hours to protect the bat-
tery during winter storage.
ICAUTION:ALWAYSDISCONNECTTHEENG,NEI
ICONNECTORFROMTHEBATTERYCONNECTORI
FOPREVENTACCIDENTALSTARTINGWHENt
IT NSPORTINGORSTORINGYOURMOWERJ
FTERTHEMOWINGSEASON. I
TO START ENGINE
NOTE: THE CONTROL BARMUST BE DEPRESSED
TO THEHANDLE TO STARTAND RUN THEENGINE.
NOTE: Thecarburetor has a fixed fuel mixture and
has a primer to assiststarting.
I. Check oil level; check gasoline level and make
sure spark plug wire is attached.
2. Move engine control lever to "HI" position (See
Fig.12).
3. When starting a co/d engine, push the primer
five (5) times before attempting to start the
engine. Use sharp pushes and wait several
secondsbetween each push (See Fig. 12).
4. Repeat step 3 above as required.
NOTE: In cooler weather the need to repeat prim-
ing procedures may be necessary, when weather
is warmer over priming may result in flooding.
If you do flood engine wait a few minutes before
repeating priming procedures.
it is not normally necessary to use the primer to
start warm engine.
5. Position yourself at the handle, operator posi-
tion.
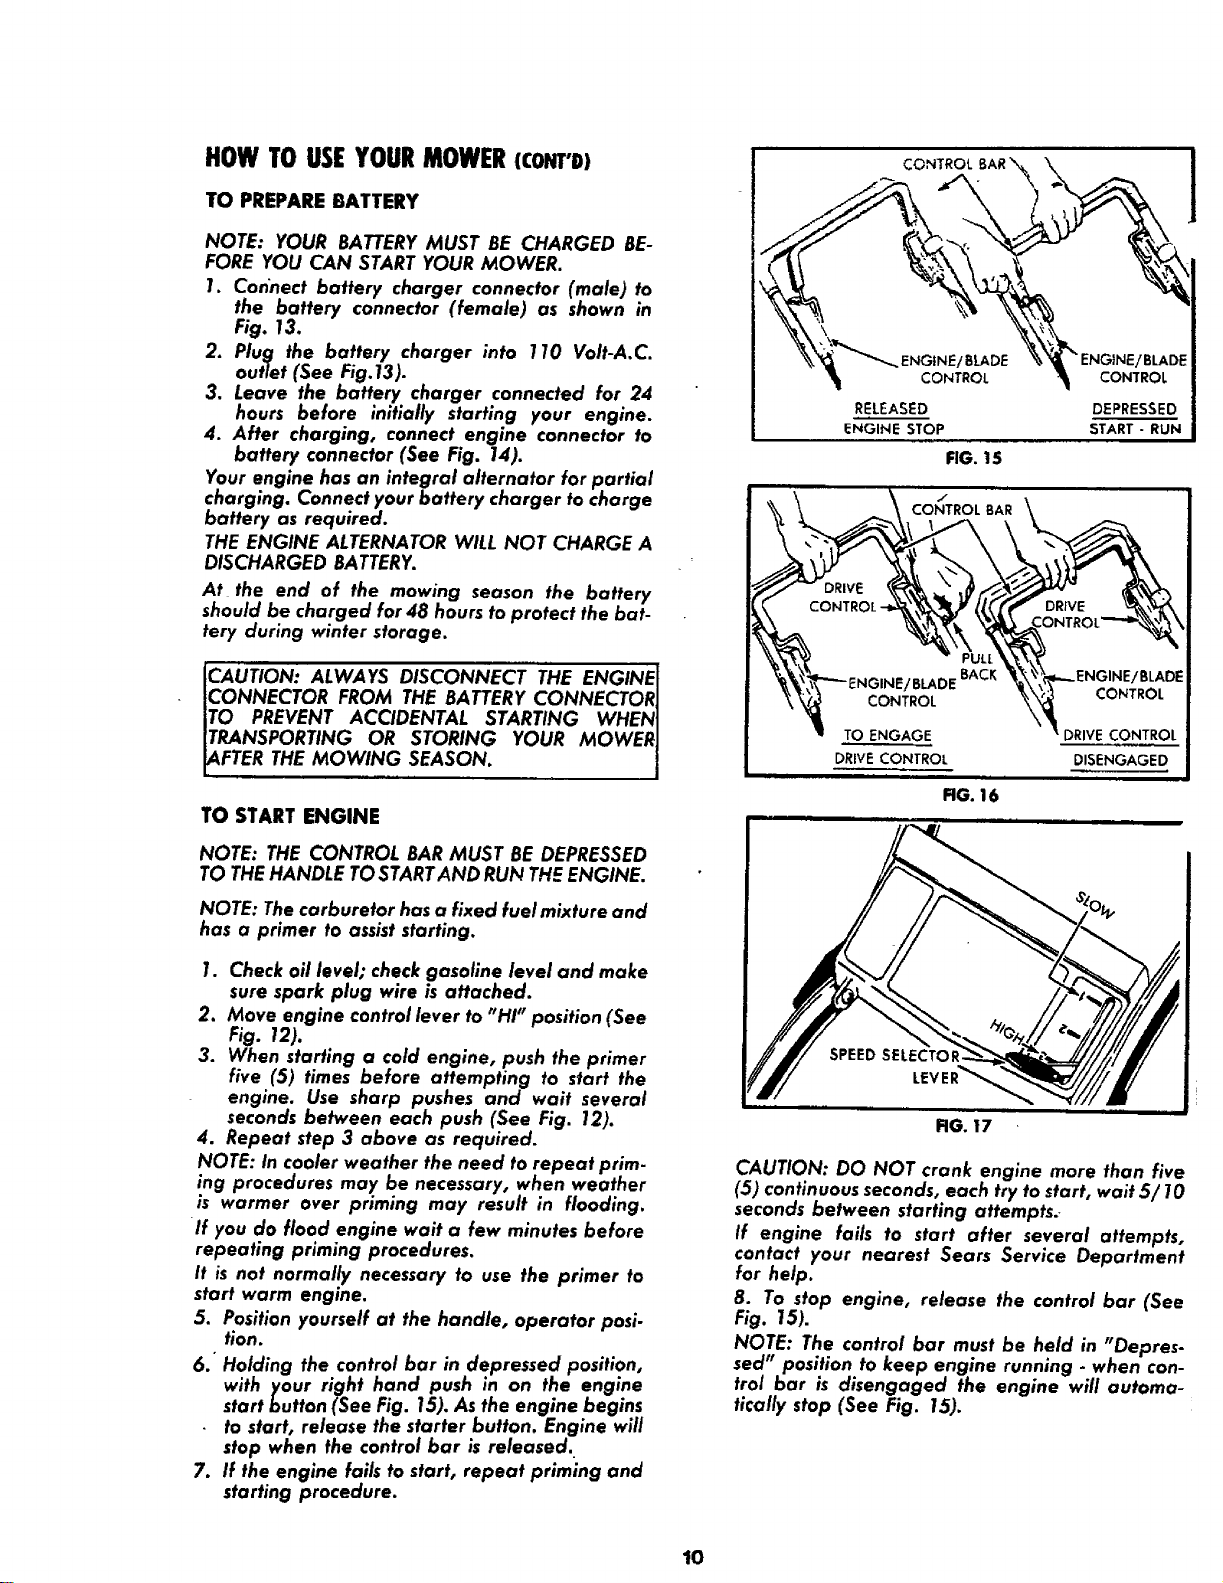
6. Holding the control bar in depressed position,
with your right hand push in on the engine
start button (See Fig. 15). As the engine begins
to start, release the starter button. Engine will
stop when the control bar is released.
7. If the engine fails to start, repeat priming and
starting procedure.
CONTROtBAR%, \
_l CONTROL _ CONTROL
RELEASED DEPRESSED
ENGINE STOP START- RUN
FIG.15
L_=___ CON/TROL BAR
__,_"_" ENGINE! BLADE BACK
DRIVE CONTROL DISENGAGED
i i
FIG.16
SPEED SEI
FIG. I7
CAUTION: DO NOT crank engine more than five
(5) continuous seconds, each try to start, wait 5/10
seconds between starting attempts.
If engine fails to start after several attempts,
contact your nearest Sears Service Department
for help.
8. To stop engine, release the control bar (See
Fig.15).
NOTE: The control bar must be held in "Depres-
sed" position to keep engine running - when con-
trol bar is disengaged the engine will automa-
tically stop (See Fig. 15).
10
Loading ...
Loading ...
Loading ...