Runners for accessories (the level is indicated on the wall of the cooking compartment)
Removable Inner Door Glass
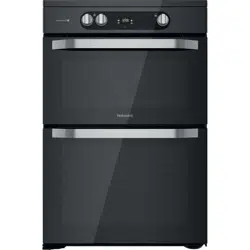
Main oven door
CONTROL PANEL HOB
On/Off button
Cooking level selected
Zone selection indicator
Cooking zone selection button
Special function icon
Timer indicators active for the selected zone
Cooking time indicator
Activate timer button
Power and cooking time adjustment buttons
Indicator light – function active
My menu button/Key lock button – 3 seconds
CONTROL PANEL
FIRST TIME USE DAILY USE
MAIN OVEN
To heat the oven turn the knob clockwise, selecting the require temperature between 80°C (176°F) and 230°C (450°F) as recommended in the temperature chart. The pilot light will immediately come on and remain on until the oven reaches the required temperature. This light will then automatically go off and on during cooking as the oven thermostat maintains the correct temperature.
Since a circulaire fan oven heats up more quickly,and generally cooks food at a lower temperature than a conventional oven, pre-heating is often unnecessary.However, foods such as bread, scones,Yorkshire pudding,do benefit from being placed in a pre-heated oven. The 'oven temperature charts' are a guide only, giving approximate cooking temperatures and times.To suit personal taste and requirements, it may be necessary to increase or decrease temperatures by 10°C.
Unless otherwise indicated in the charts food should be placed in a cold oven, i.e. without pre-heating. If food is placed in an already hot oven, the suggested cooking time should be reduced, depending on the type and quantity of food being cooked.
Oven positions Since the distribution of heat in the circulaire fan oven is very even, most foods will cook satisfactorily on any shelf position, but the shelves should be evenly spaced. The top oven rod shelf can be used in the main oven when cooking large quantities of food.
Food or utensils should Never be placed directly an the floor of the oven for cooking. Never use more than 4 shelves in the oven as air circulation will be seriously restricted.To ensure oven circulation do not use meat pans larger than 390 x 300mm (15"x12") and baking trays no larger than 330 255mm (13"x 10"), these should be positioned centrally on the oven shelf. Food should not be placed directly on the floor of the oven. To avoid unnecessary cleaning, rod shelves which are not in use, should be removed from the oven.
Temperature and time When all four shelves are used to cook large quantities of food for home freezing or parties, it be necessary to increase the cooking times given in the temperature charts by a few minutes, to allow f loss of heat due to extra time taken to load the oven, and the larger mass of food. Baking trays should ha equal gap at either side of the oven.
TOP OVEN
The top oven should be used to cook small quantities of food.The oven is designed so that the grill element operates at a reduced heat output, this is combined with a heating element situated underneath the floor of the oven.
To ensure even cooking of the food it is important that cooking utensils are positioned correctly on the oven shelf so that the element is directly above.
There are two cooking positions, the shelf placed on runner 1 or 2 (from the base), do not use shelves upside down.
Food/utensils must not be placed directly on the oven floor. There should always be at least 25mm (1in) between the top of the food and the grill element. Warning: Items stored in top oven will get hot when main oven is in use.
Operation While the top oven is heating up, the pilot light will come on and remain on until the oven reaches the required temperature. The pilot light will automatically go on and off during cooking as the thermostat maintains the correct temperature. Do not use the grill pan as a meat pan in the top oven as air circulation will be seriously restricted. Top oven as a warming compartment for plates Place the plates/dishes on the shelf, positioned on runner 1, turn top oven control to 100°C for 10-15 minutes.Never use grill control.
When the cooker is first used an odour may be emitted, When first using the cooker ensure that the room is well this will cease after a period of use. ventilated (e.g. open a window or use an extractor fan) and that persons who may be sensitive to the odour avoid any fumes. It is suggested that any pets be removed from the room until the smell has ceased. This odour is due to temporary finish on oven liners and elements and also any moisture absorbed by the insulation.
FIRST TIME USE
POWER MANAGEMENT
At the time of purchase, the hob is set to the maximum possible power. Adjust the setting in relation to the limits of the electrical system in your home as described in the following paragraph. N.B: Depending on the power selected for the hob, some of the cooking zone power levels and functions (e.g. boil or quick reheating) could be automatically limited, in order to prevent the selected limit from being exceeded.
To set the power of the hob:
Once you have connected the device to the mains power supply, you can set the power level within 60 seconds. Press the ”+” button for at least 3 seconds. The display shows . Confirm by pressing .
The last power level selected appears on the display. Use the ”+” and ”−” buttons to select the desired power level. The power levels available are: 2.5 kW – 4.0 kW – 6.0 kW – 7.2 kW. Confirm by pressing . The power level selected will stay in the memory even if the power supply is interrupted. To change the power level, disconnect the appliance from the mains for at least 60 seconds, then plug it back in and repeat the steps above.
If an error occurs during the setting sequence, the symbol will appear, and you will hear a beep. If this happens, repeat the operation. If the error persists, contact the After-Sales Service.
ACOUSTIC SIGNAL ON / OFF
To switch the acoustic signal on/off:
Connect the hob to the power supply;
Wait for the switch-on sequence;
Within 60 seconds, press the buttons ”+” and simultaneously for at least 5 seconds.
DEMO MODE (reheating deactivated, see section on ”Troubleshooting”) To switch the demo mode on and off:
Connect the hob to the power supply;
Wait for the switch-on sequence.
Within 60 seconds, press the cooking zone selection buttons in the top left and top right simultaneously for at least 3 seconds (as shown below);
”DE” will show on the display.
DAILY USE
SWITCHING THE HOB ON/OFF
To turn the hob on, press the power button for around 1 second. To turn the hob off, press the same button again, and all cooking zones will be deactivated.
POSITIONING
Locate the desired cooking zone by referring to the position symbols. Do not cover the control panel symbols with the cooking pot.
Please note: In the cooking zones close to the control panel, it is advisable to keep pots and pans inside the markings (taking both the bottom of the pan and the upper edge into consideration, as this tends to be larger). This prevents excessive overheating of the keypad. When grilling or frying, please use the rear cooking zones wherever possible.
ACTIVATING/DEACTIVATING COOKING ZONES AND ADJUSTING POWER LEVELS
To activate the cooking zones:
Select the pre-selected cooking zone by pressing the corresponding zone selection button. The display will show level ”0”. Each cooking zone has different power levels that can be adjusted using the ”+”/”−” buttons, from a minimum of 1 to a maximum of 9. Some cooking zones have a quick reheating function (Booster), shown on the display with the letter ”P”.
To deactivate the cooking zones:
Select the cooking zone to be switched off by pressing the corresponding zone selection button (a dot will light up on the display, to the bottom right of the power level indicator). Press the ”−” to set the level to ”0”. To switch off immediately, press and hold the zone selection button for 3 minutes. The cooking zone is deactivated and the residual heat indicator ”H” appears on the display
CONTROL PANEL LOCK
To lock the settings and prevent it being switched on accidentally, press and hold the My menu/Key lock button for 3 seconds. A beep and a warning light above the symbol indicate that this function has been activated. The control panel is locked except for the switching off function (). To unlock the controls, repeat the activation procedure.
TIMER
The timer enables a cooking time to be set for all of the zones.
To activate the timer: Select the cooking zone for which you wish to set the timer. Press the button with the clock icon and set the desired time, using the ”+” and ”−” buttons. The timer LED for the zone in use will be illuminated. A few seconds after the last touch, the timer will start the countdown and the dot on the display that indicates that the seconds are passing will flash. When the set time is up, an acoustic signal will sound and the cooking zone will switch off automatically. After selecting the zone and the clock icon, the time can be changed at any point, and several timers can be activated simultaneously. The timer always shows the time set for the selected area, or the shortest remaining time. When more than one timer is active, the flashing LED indicates the zone for which the cooking time is visible on the display. To set the timer for another zone, repeat the above steps.
To deactivate the timer: Select the cooking zone for which you wish to deactivate the timer. Press and hold the ”−” button until ”0:0” shows on the display, or press the button with the clock icon () for 3 seconds.
FUNCTIONS
MY MENU
The “My menu“ button activates the special functions. Place the pot in position and select the cooking zone. Press the “My menu“ button. The display of the selected area will show “A“. To deactivate the special function, select the cooking zone and press the “My menu“ button again.
MELTING
This function allows you to bring food to the ideal temperature for melting and to maintain the condition of the food without risk of burning. This method is ideal, as it does not damage delicate foods such as chocolate, and prevents them from sticking to the pot.
KEEP WARM
This feature allows you to keep your food at an ideal temperature, usually after cooking is complete, or when reducing liquids very slowly. Ideal for serving foods at the perfect temperature.
SLOW COOKING
This function is ideal for maintaining a simmering temperature, allowing you to cook food for long periods with no risk of burning. Ideal for long cooking recipes (rice, sauces, roasts) with liquid sauces.
BOILING
This function allows you to bring water to the boil and keep it boiling, with lower energy consumption. About 2 litres of water (preferably at room temperature) should be placed in the pan, and left uncovered. In all cases, users are advised to monitor the boiling water closely, and check the amount of water remaining regularly
INDICATORS
POT INCORRECTLY POSITIONED OR MISSING
This symbol appears if the pot is not suitable for induction cooking, is not positioned correctly or is not of an appropriate size for the cooking zone selected. If no pot is detected within 30 seconds of making the selection, the cooking zone switches off.
RESIDUAL HEAT
If the display shows ”H”, the cooking zone is still hot. When the cooking zone cools down, the display goes off.
COOKING TABLE
USING THE OVEN
To select a function, turn the Top Oven/Grill Selection Knob to the symbol for the function you require, then select the required temperature by turning the Top Oven/Grill Temperature Knob.
MAIN OVEN - FAN COOKING
This control switches on the main oven. Fan Cooking - Turn the control clockwise and select any temperature between 80°C and Max. As the control is turned the fan will start. The main oven light will immediately come on. The thermostat light indicates that the main oven is heating. When it turns off, the temperature inside the oven has reached the setting made with the main oven knob. At this point, the light will turn on and off as the oven maintains the temperature at a constant level. The fan and the oven interior light will remain on throughout cooking. The heat for fan cooking in the main oven is provided by an element situated at the back of the oven, around the fan. Fan cooking is ideal for large poultry or joints of meat, reducing cooking times and often eliminating the need for pre-heating the oven. It is also ideal for batch cooking where food is cooked on more than one level, because the forced circulation of hot air gives aneven temperature from the top to the bottom of the oven.
FORCED AIR For cooking different foods on multiple shelves (maximum of four) at the same time. This function can be used to cook different foods without odours being transferred from one food to another.
TOP OVEN
CONVENTIONAL For cooking any kind of dish on one shelf only.
BOTTOM This function can be used to finish cooking filled pies or to thicken soups. Use this function the last 10/15 minutes of cooking.
HALF GRILL For grilling small food like bacon or toasting bread. The grill pan is placed on top of the top oven cavity shelf. The shelf position can be adjusted to allow for grilling different types of food.
GRILL For grilling steaks, kebabs and sausages, cooking vegetables au gratin or toasting bread. When grilling meat, we recommend using a drip tray to collect the cooking juices: Position the pan on of the levels below the wire shelf and add 200 ml o drinking water.
The number and type of accessories may vary depending on which model is purchased. Other accessories that are not supplied can be purchased separately from the After-sales Service.
The grill pan handle is detachable from the pan to facilitate cleaning and storage. Fix the pan handle securely before use:
Fit the handle to the grill pan so that the external ‘hooks’ embrace the edge of the pan (fig. 1)
Make sure that the middle part of the handle fits exactly the protruding support of the pan (fig .2) and holds the pan from the bottom.
The food must be placed on the rack in the grill pan. Position the grill pan on top of the oven rack. The best results are achieved following the cooking table. Pouring a little water into the grill pan will make the collection of grease particles more efficient and prevent the formation of smoke.
To Set the Clock
After connecting to the power supply or after a power cut, the display will flash 12:00 AM and start counter up.
1. Use the '-' and '+' buttons to set the time. If you press, and hold any of the buttons the numbers will scroll quicker making it easier to set the required time. 2. After 3 seconds the numbers stops flashing and the time is set.
The clock can be set with the oven on or off assuming that a programmed cooking time has not been set.
1. Press and hold the [clock] button (2 seconds) till the UI bip, the [clock] icon start to flashing. 2. Use the '-' and '+' buttons to set the time. If you press and hold any of the buttons the numbers will scroll quicker making it easier to set the required time. 3 After 3 seconds or by pressing the [clock] button the numbers stops flashing. the time is set and the ":" start flashing.
Programming the Cooking Duration Upper/Lower cavity
Cavity button [upper] or [lower]
Press the [upper] or [lower] cavity button the [cook time] icon start blinking and 00:00 is displayed, after 3 seconds without interaction. the upper display come back to clock.
Use the '-' and '+' buttons to set the cooking time. If you press and hold any of the buttons the numbers will scroll quicker making it easier to set the required time. After 3 seconds the [cook time] icon stops flashing and the time is set.
The ":" start flashing and the countdown start.
When cooking time expires "End" is displayed, the related cavity switch off and the bleep will sound.
Turn the function knob to OFF position, press the [upper] or [lower] cavity button, the display will show the other cavity state or the clock.
Setting the Delay of Cooking Mode
Set a cooking time
Press [upper/lower cavity] button, 00:00 is displayed and [delay] icon start blinking, after 3 seconds without interaction the cooking time start counting down.
Use the '-' and '+' buttons to set the delay time. If you press and hold any of the buttons the numbers will scroll quicker making it easier to set the required time.
After 3 seconds without interaction the [delay time] icon stops flashing and the delay time is set.
The ":" start flashing and countdown start.
Cancelling the Programme
During cooking time counting down
Press and hold '-' and '+' buttons for 3 seconds, the display show the day time (upper display) or switch off (lower display)
During delay phase
Press and hold '-' and '+' buttons for 3 seconds, the display show the cook time and countdown start.
Clock button functions
Continued pressing will loop displayed information on the display with appropriated icon:
day time
upper cavity end time of cooking process, including delay if setted (if not running skip status)
lower cavity end time of cooking process, including delay if setted (if not running skip status) After 3 seconds without interaction the display come back to the running state.
CLEANING AND MAINTENANCE
TURN OFF THE MAIN SWITCH AND ENSURE THE COOKER IS COLD BEFORE CLEANING. BEFORE SWITCHING ON AGAIN, ENSURE THAT ALL CONTROLS ARE IN THE OFF POSITION.
Do not use steam cleaning equipment. Use protective gloves during all operations. Carry out the required operations when the oven is cold. Disconnect the appliance from the power supply. Do not use wire wool, abrasive scourers or abrasive/corrosive cleaning agents, as these could damage the surfaces of the appliance.
Disconnect the appliance from the power supply.
CLEANING THE INDUCTION
Do not use abrasive sponges or scouring pads as they may damage the glass.
After each use, clean the hob (when it is cool) to remove any deposits and stains from food residue.
A surface that is not kept suitably clean may reduce the sensitivity of control panel buttons.
Use a scraper only if residues are stuck to the hob. Follow the scraper manufacturer's instructions to avoid scratching the glass.
Sugar or foods with a high sugar content can damage the hob and must be immediately removed.
Salt, sugar and sand could scratch the glass surface.
Use a soft cloth, absorbent kitchen paper or a special hob cleaner (follow the Manufacturer’s instructions).
Spills of liquid in the cooking zones can cause the pots to move or vibrate.
After cleaning the hob, dry thoroughly
CLEANING THE OVEN SURFACE
CLEANING THE OVEN SURFACE
Clean the surfaces with a damp microfibre cloth. If they are very dirty, add a few drops of pH-neutral detergent. Dry them with a dry cloth.
Do not use corrosive or abrasive detergents. If any of these products inadvertently comes into contact with the surfaces of the appliance, clean immediately with a damp microfibre cloth.
INTERIOR SURFACES
After every use, leave the oven to cool and then clean it, preferably while it is still warm, to remove any deposits or stains caused by food residues To dry any condensation that has formed as a result of cooking foods with a high water content, let the oven to cool completely and then wipe it with a cloth or sponge.
Clean the glass in the door with a suitable liquid detergent.
ACCESSORIES Soak the accessories in a washing-up liquid solution after use, handling them with oven gloves if they are still hot. Food residues can be removed using a washing-up brush or a sponge.
REPLACING THE LIGHT
Disconnect the oven from the power supply.
Unscrew the cover from the light, replace the bulb and screw the cover back on the light.
Reconnect the oven to the power supply Note: Use 40 W/230 V type The bulb used in the product is specifically designed for domestic appliances and is not suitable for general room lighting within the home (EC Regulation 244/2009). Light bulbs are available from our After-sales Service. - Do not handle bulbs with your bare hands as your fingerprints could damage them. Do not use the oven until the light cover has been refitted.
CATALYTIC CLEANING
These are panels coated with a special enamel, which is able to absorb the fat released by food as it cooks. This enamel is quite strong, so that the various accessories (racks, dripping pans, etc.) can slide along them without damaging them. White marks may appear on the surfaces; these are not a cause for concern. Nevertheless, the following should be avoided: -scraping the enamel with sharp objects (a knife,for example) -using detergents or abrasive materials.
Cleaning the glass door with 2 panels
TOP OVEN DOORS
Open the door to 30°. Removing the retaining bar depress carefully the clips on both sides of the bar. Pull the trim up gently until the retainer is released.
Carefully slide the first inner glass towards you. taking care not to allow the glass to fall.
Now the external glass panel can be washed. Ensure the glass panel is not subjected subjected subjected subjected subjected to any sharp mechanical mechanical mechanical mechanical mechanical blows. Take particular care not to damage the inner surface which is coated with a heat reflective layer. After cleaning, rinse and dry with a soft cloth. For slight soiling the inner glass panel may be cleaned, while still warm, without removing it from the door. Oven must not be operated with inner door glass removed.
To reassemble the oven doors proceed with inserting the glass panels in the reverse order, pushing gently every panel directly into the liners, so that the warning sign printed on the glass is correctly legible.
TROUBLESHOOTING
What to do if...
Possible reasons
Solutions
The oven is not working.
Power cut. Disconnection from the mains.
Check for the presence of mains electrical power and whether the oven is mains connected to the electricity supply. Turn off the oven and restart it to see if the fault persists.
USEFUL TIPS
HOW TO READ THE COOKING TABLE The table lists the best function, accessories and level to use to cook various different types of food. Cooking times start from the moment food is placed in the oven, excluding preheating (where required). Cooking temperatures and times are approximate and depend on the amount of food and the type of accessory used. Use the lowest recommended settings to begin with and, if the food is not cooked enough, then switch to higher settings. Use the accessories supplied and preferably dark-coloured metal cake tins and baking trays. You can also use Pyrex or stoneware pans and accessories, but bear in mind that cooking times will be slightly longer.


 .
.  .
. symbol will appear, and you will hear a beep. If this happens, repeat the operation. If the error persists, contact the After-Sales Service.


 CONTROL PANEL LOCK
 ). To unlock the controls, repeat the activation procedure.
 TIMER
TIMER ) for 3 seconds.
 MY MENU
 MELTING
 KEEP WARM
 SLOW COOKING
 BOILING
 POT INCORRECTLY POSITIONED OR MISSING
 RESIDUAL HEAT
 FORCED AIR
  CONVENTIONAL
 BOTTOM
  HALF GRILL
 GRILL
GRILL


