Loading ...
Loading ...
Loading ...
STABILIZE MACHINE
To ensure sufficient upright stability of the machine it
should be bolted to floor, bench or worktable. For
this purpose 6mm holes are provided in the
machine's base. Mounting hardware not provided.
(see Figure 9).
Figure 9 - Stabilize Machine
USE SUITABLE DUST COLLECTOR
The band saw has a 2 _" dust port included (see
Figure 10).
It is recommended that when in use, the band saw is
connected to a suitable dust collector.
Figure 10- Dust Port
MOTOR
The band saw is supplied with a 1/3 HP Motor.
The 120 Volt AC motor has the following specifications:
Horsepower ........................................... 1/3
Voltage ............................................... 120
Amperes .............................................. 3.5
Hertz .................................................. 60
Phase .............................................. Single
RPM ................................................. 1720
WARNING: All electrical connections must be
performed by a qualified electrician.
ELECTRICAL CONNECTIONS
WARNING: Make sure unit is off and disconnected
from power source any time wiring is inspected.
POWER SOURCE
Band Saw is prewired for 120 volt, 60 HZ power source.
The motor is designed for operation on the voltage and
frequency specified. Normal loads will be handled safe-
ly on voltages not more than 10% above or below the
specified voltage.
Running the unit on voltages which are not within the
range may cause overheating and motor burn-out.
Heavy loads require that the voltage at motor terminals
be no less than the voltage specified. Power supply to
the motor is controlled by a single pole toggle switch.
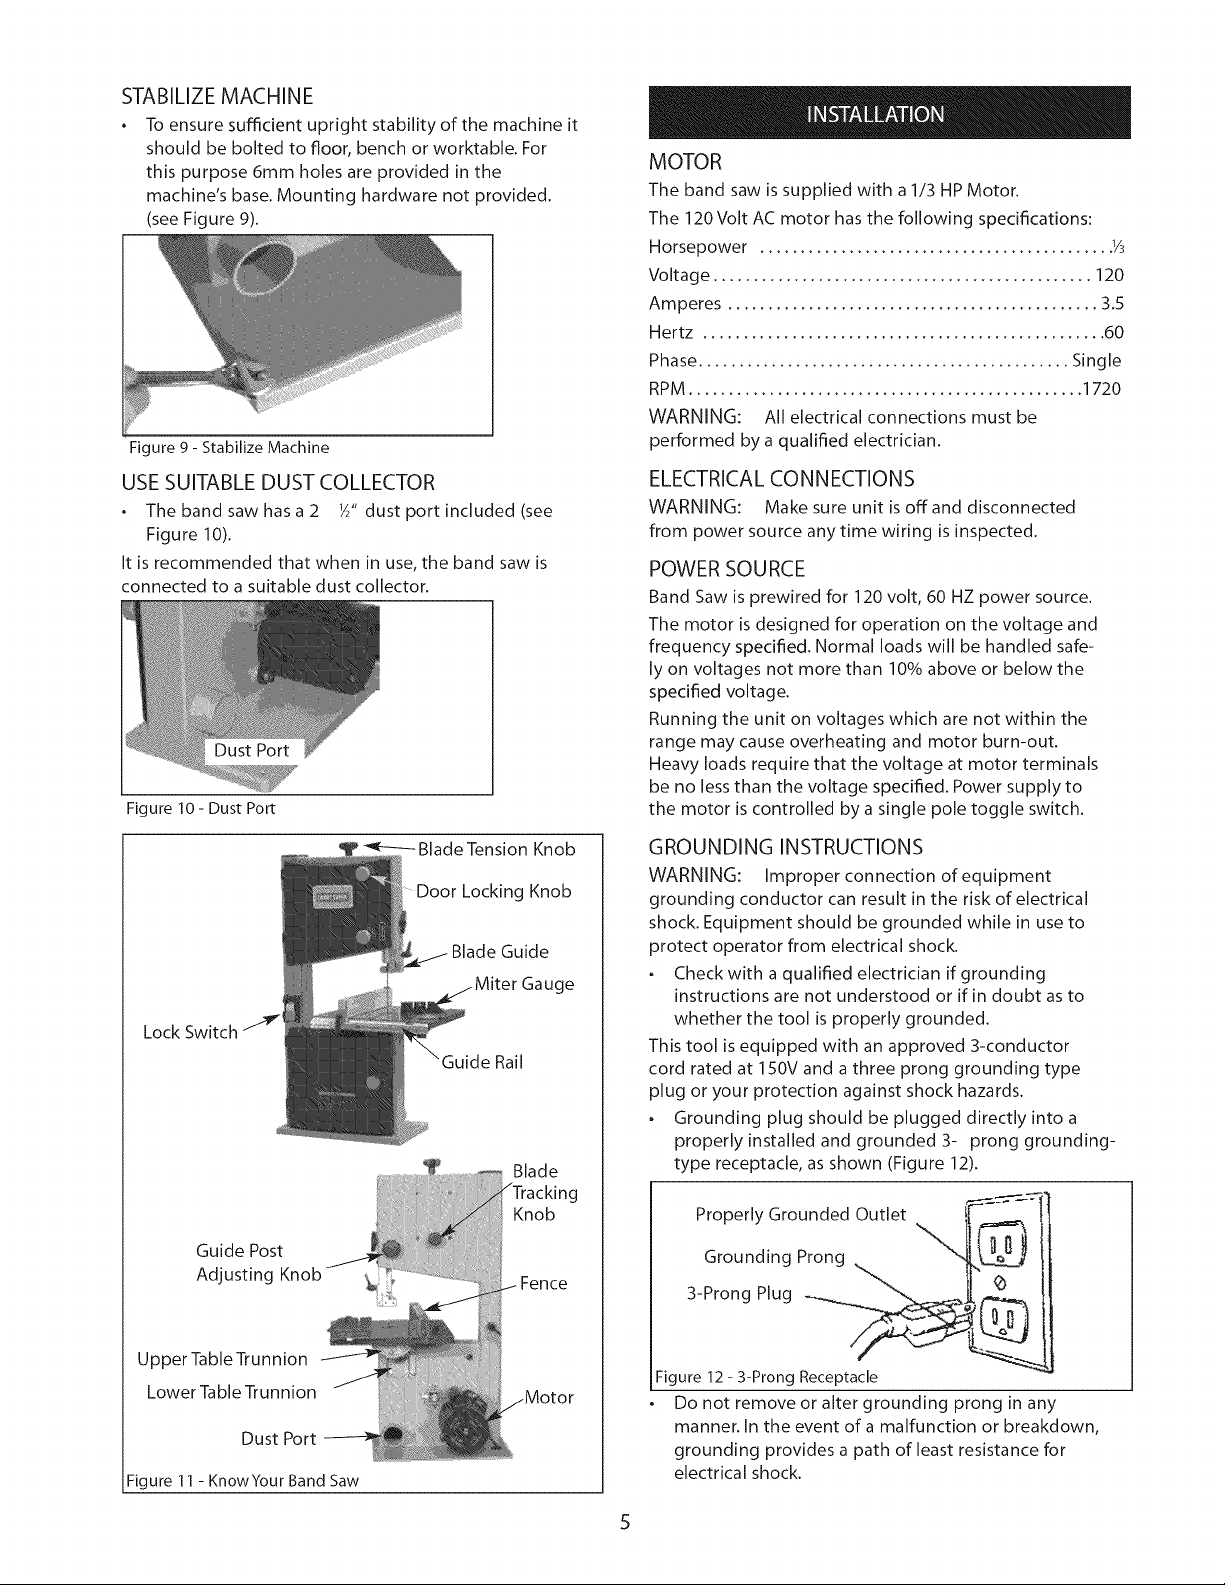
Lock Switch
Guide Post
Adjusting
Upper Table Trunnion
Lower Table Trunnion
Dust Port
Figure 11- KnowYour Band Saw
Blade Tension Knob
Locking Knob
Guide
ge
Rail
Blade
Knob
GROUNDING INSTRUCTIONS
WARNING: Improper connection of equipment
grounding conductor can result in the risk of electrical
shock. Equipment should be grounded while in use to
protect operator from electrical shock.
Check with a qualified electrician if grounding
instructions are not understood or if in doubt as to
whether the tool is properly grounded.
This tool is equipped with an approved 3-conductor
cord rated at 150V and a three prong grounding type
plug or your protection against shock hazards.
Grounding plug should be plugged directly into a
properly installed and grounded 3- prong grounding-
type receptacle, as shown (Figure 12).
Grounded Outlet _-_'_-'___
Properly __
Grounding Prong
3-Prong Plug
Figure 12- 3-Prong Receptacle
Do not remove or alter grounding prong in any
manner. In the event of a malfunction or breakdown,
grounding provides a path of least resistance for
electrical shock.
Loading ...
Loading ...
Loading ...