Loading ...
Loading ...
Loading ...
location and function of controls
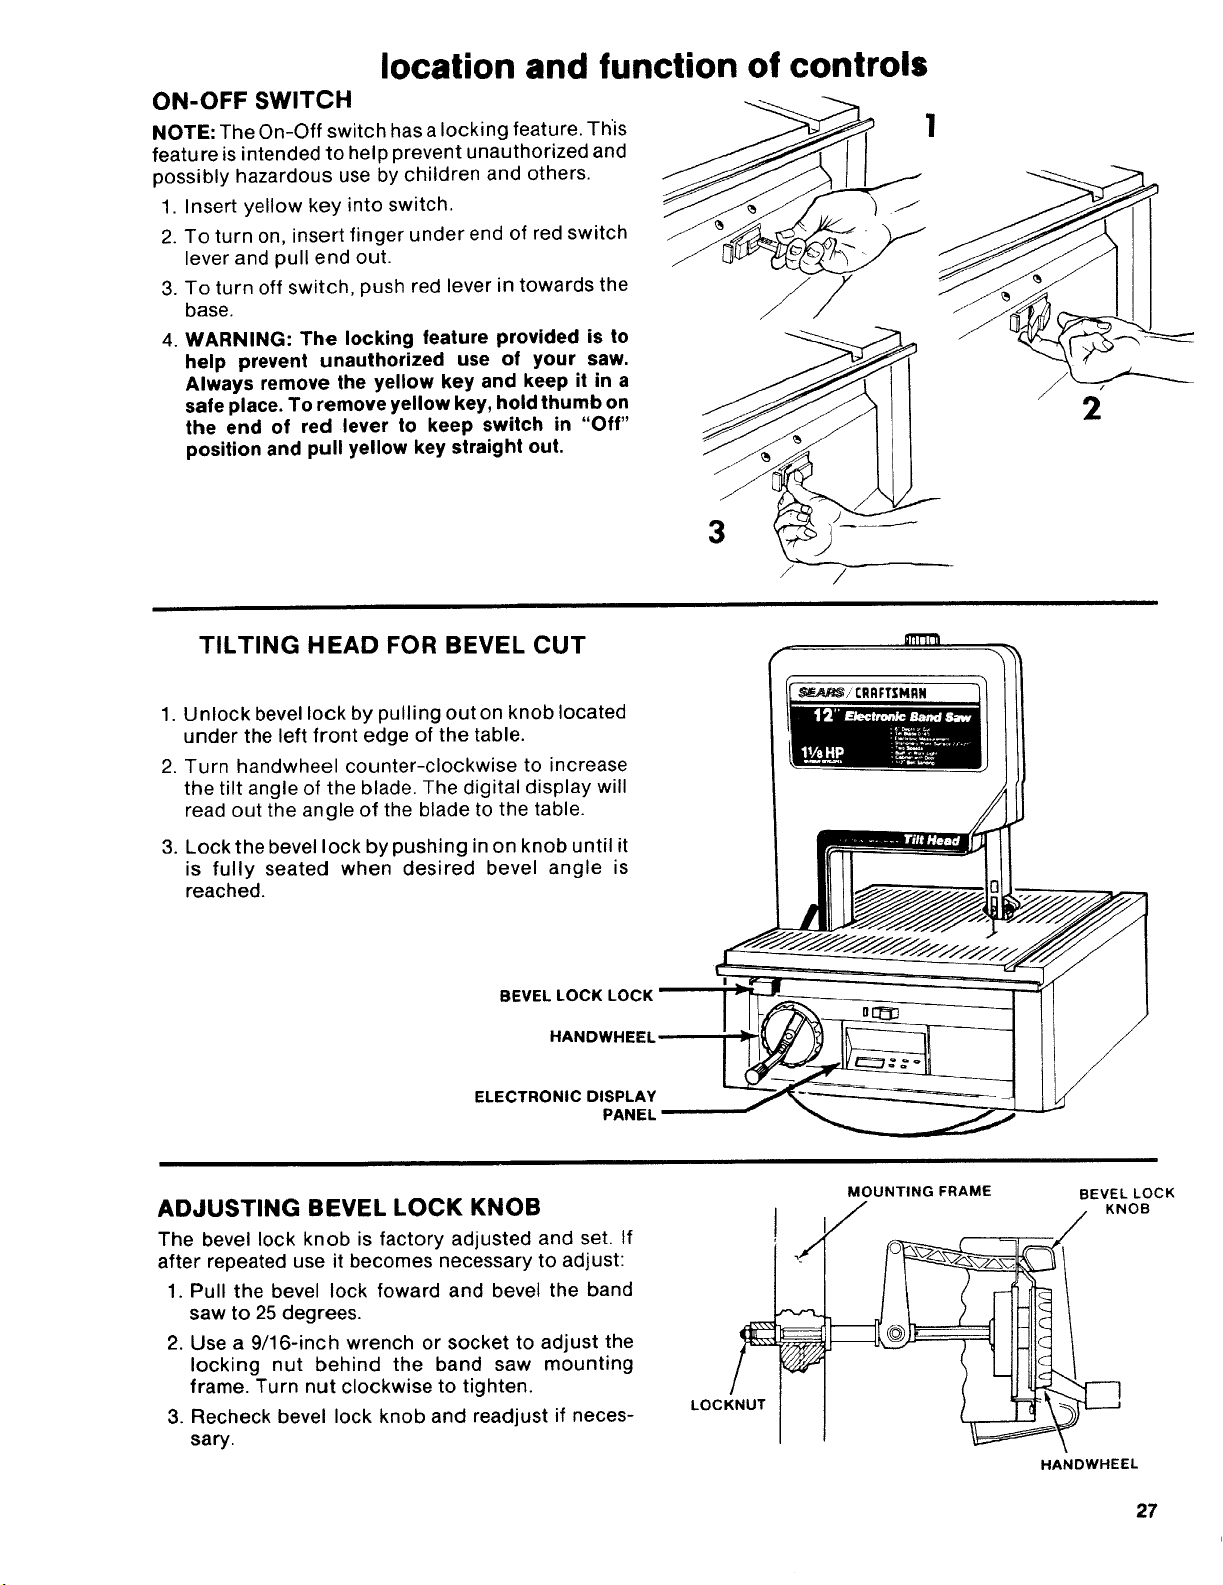
ON-OFF SWITCH
NOTE: The On-Off switch has a locking feature. This
feature is intended to help prevent unauthorized and
possibly hazardous use by children and others.
1. Insert yellow key into switch. ") _--
2. To turn on, insert finger under end of red switch
lever and pull end out.
3. To turn off switch, push red lever in towards the
base.
4. WARNING: The locking feature provided is to
help prevent unauthorized use of your saw.
Always remove the yellow key and keep it in a
safe place. To remove yellow key, hold thumb on
the end of red lever to keep switch in "Off"
position and pull yellow key straight out.
!
3
/
TILTING HEAD FOR BEVEL CUT
1. Unlock bevel lock by pulling outon knob located
under the left front edge of the table.
2. Turn handwheel counter-clockwise to increase
the tilt angle of the blade. The digital display will
read out the angle of the blade to the table.
3. Lock the bevel lock by pushing in on knob until it
is fully seated when desired bevel angle is
reached.
IMRN
BEVEL LOCK LOCK
HANDWH!
ELECTRONIC DISPLAY
PANEL
ADJUSTING BEVEL LOCK KNOB
The bevel lock knob is factory adjusted and set. If
after repeated use it becomes necessary to adjust:
1. Pull the bevel lock foward and bevel the band
saw to 25 degrees.
2. Use a 9/16-inch wrench or socket to adjust the
locking nut behind the band saw mounting
frame. Turn nut clockwise to tighten.
3. Recheck bevel lock knob and readjust if neces-
sary.
9
LOCKNUT
MOUNTING FRAME
/
BEVEL LOCK
KNOB
/
I22
HANDWHEEL
27
Loading ...
Loading ...
Loading ...