Loading ...
Loading ...
Loading ...
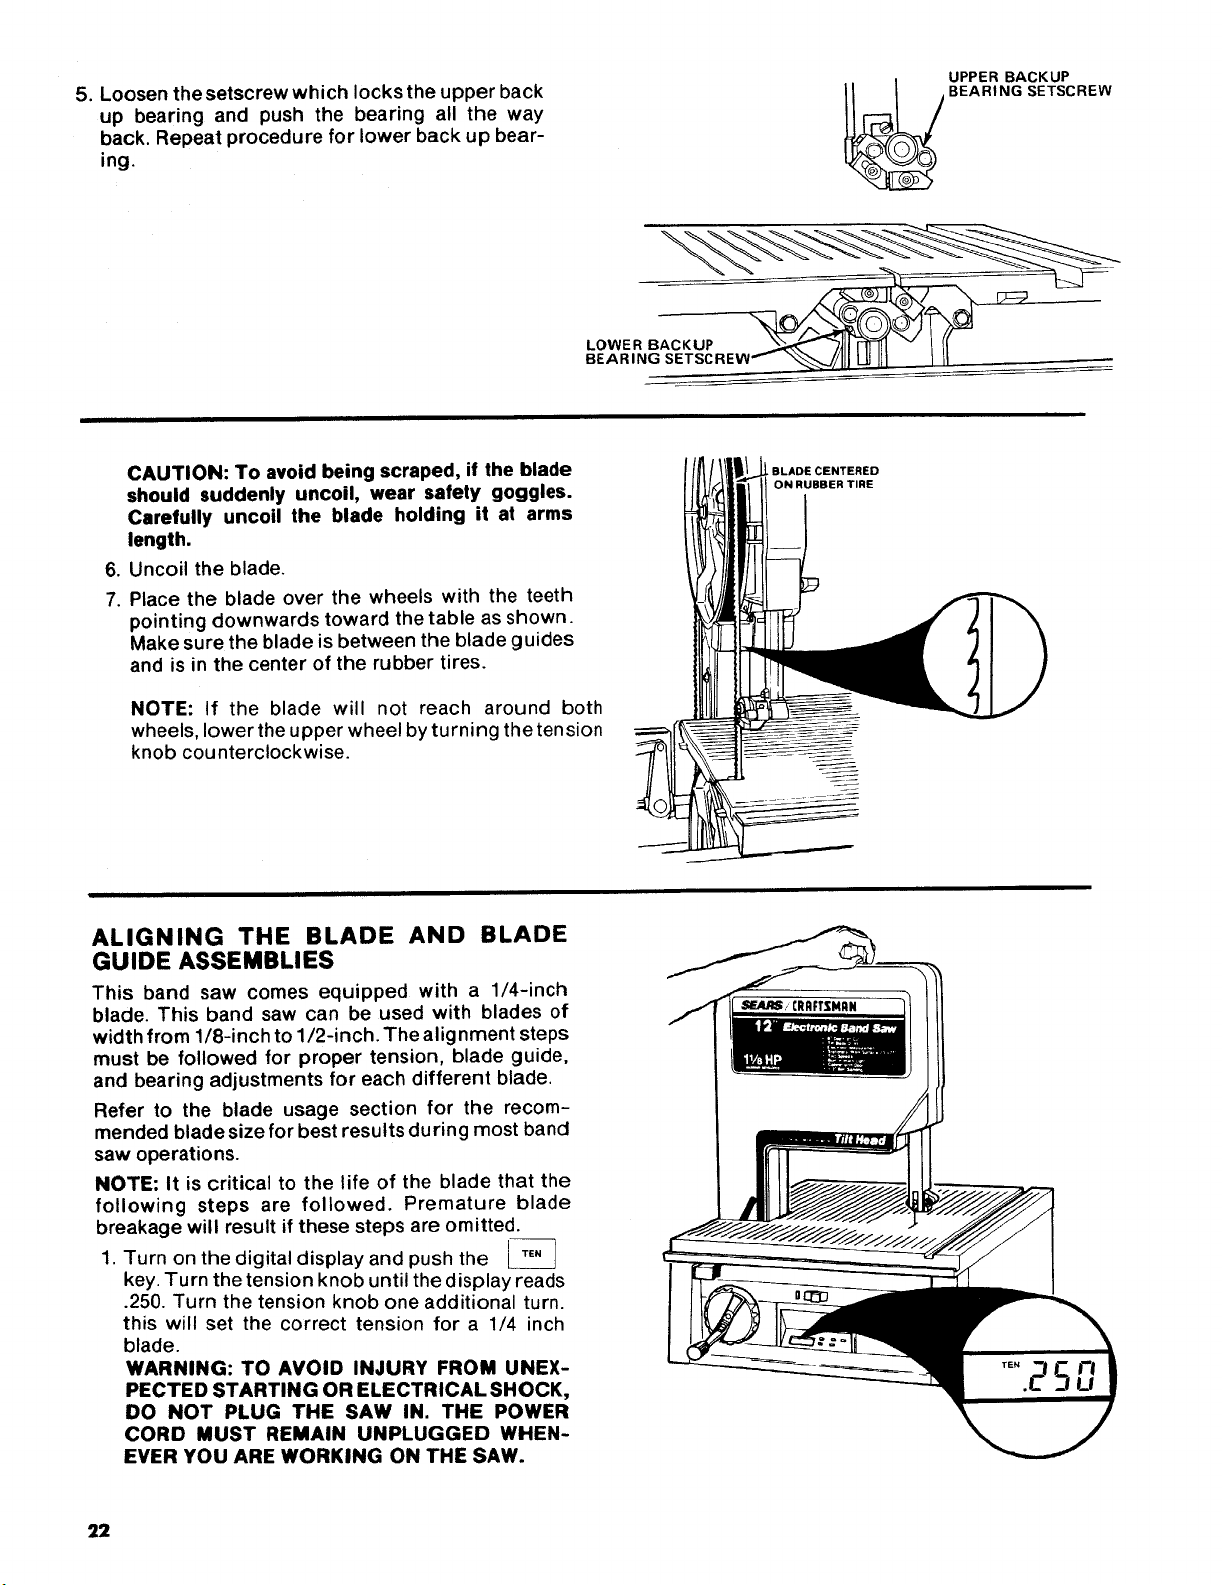
5. Loosen the setscrew which locks the upper back
up bearing and push the bearing all the way
back. Repeat procedure for lower back up bear-
ing.
UPPER BACKUP
_ BEARING SETSCREW
.
7.
CAUTION: To avoid being scraped, if the blade
should suddenly uncoil, wear safety goggles.
Carefully uncoil the blade holding it at arms
length.
Uncoil the blade.
Place the blade over the wheels with the teeth
pointing downwards toward the table as shown.
Make sure the blade is between the blade guides
and is in the center of the rubber tires.
NOTE: If the blade will not reach around both
wheels, lower the upper wheel by turning the tension
knob counterclockwise.
BLADE CENTERED
ON RUBBER TIRE
ALIGNING THE BLADE AND BLADE
GUIDE ASSEMBLIES
This band saw comes equipped with a 1/4-inch
blade. This band saw can be used with blades of
width from 1/8-inch to 1/2-inch. The alignment steps
must be followed for proper tension, blade guide,
and bearing adjustments for each different blade.
Refer to the blade usage section for the recom-
mended blade size for best results du ring most band
saw operations.
NOTE; It is critical to the life of the blade that the
following steps are followed. Premature blade
breakage will result if these steps are omitted.
i "3
1. Turn on the digital display and push the
key. Turn the tension knob until the display reads
.250. Turn the tension knob one additional turn.
this will set the correct tension for a 1/4 inch
blade.
WARNING: TO AVOID INJURY FROM UNEX-
PECTED STARTING OR ELECTRICAL SHOCK,
DO NOT PLUG THE SAW IN. THE POWER
CORD MUST REMAIN UNPLUGGED WHEN-
EVER YOU ARE WORKING ON THE SAW.
22
Loading ...
Loading ...
Loading ...