Loading ...
Loading ...
Loading ...
assembly and alignment
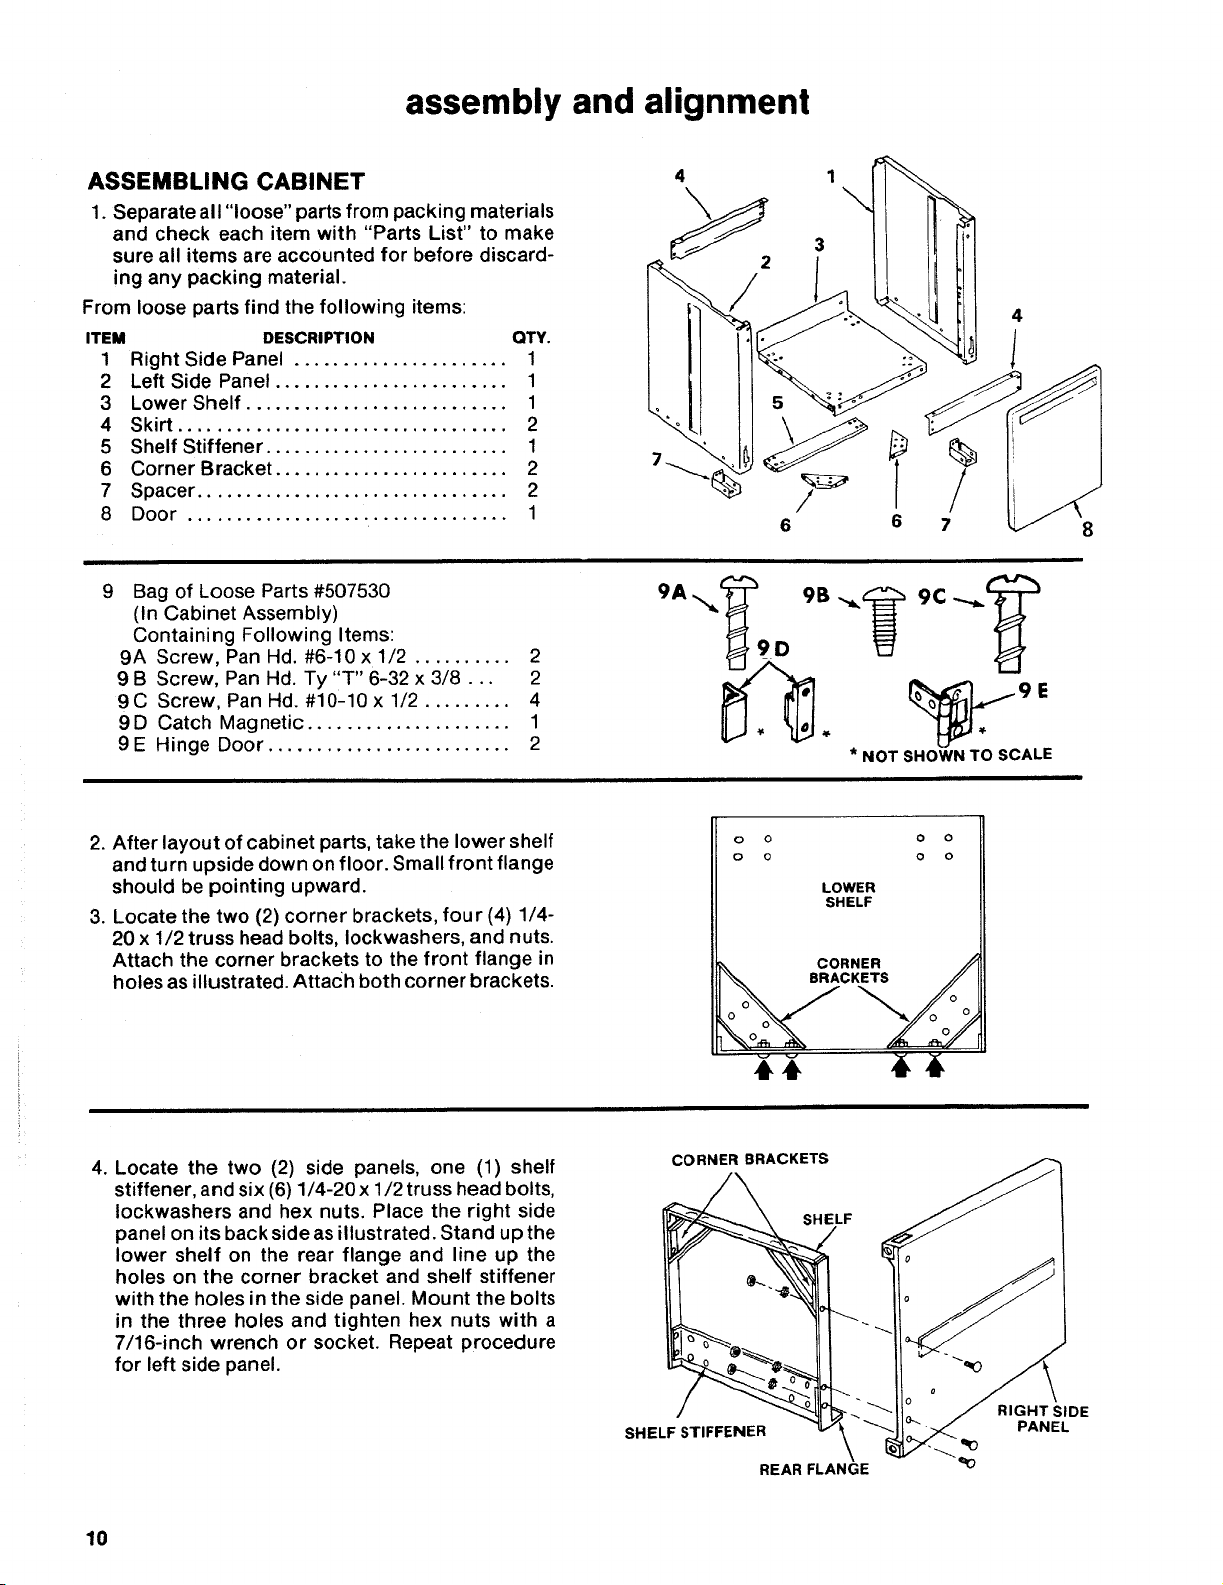
ASSEMBLING CABINET
1. Separate all "loose" parts from packing materials
and check each item with "Parts List" to make
sure all items are accounted for before discard-
ing any packing material.
From loose parts find the following items:
ITEM
1
2
3
4
5
6
7
8
DESCRIPTION QTY.
Right Side Panel ...................... 1
Left Side Panel ........................ 1
Lower Shelf ........................... 1
Skirt .................................. 2
Shelf Stiffener ......................... 1
Corner Bracket ........................ 2
Spacer ................................ 2
Door ................................. 1
4
2
9 Bag of Loose Parts #507530
(In Cabinet Assembly)
Containing Following Items:
9A Screw, Pan Hd. #6-10 x 1/2 .......... 2
9 B Screw, Pan Hd. Ty "T" 6-32 x 3/8... 2
9 C Screw, Pan Hd. #10-10 x 1/2 ......... 4
9D Catch Magnetic ..................... 1
9E Hinge Door ......................... 2
%
* NOT SHOWN TO SCALE
8
m
2. After layout of cabinet parts, take the lower shelf
and turn upside down on floor. Small front flange
should be pointing upward.
3. Locate the two (2) corner brackets, four (4) 1/4-
20 x 1/2 truss head bolts, Iockwashers, and nuts.
Attach the corner brackets to the front flange in
holes as illustrated. Attach both corner brackets.
o
o
O O
O O
LOWER
SHELF
CORNER ,_
BRACKETS 7/_
.
Locate the two (2) side panels, one (1) shelf
stiffener, and six (6) 1/4-20 x 1/2 truss head bolts,
Iockwashers and hex nuts. Place the right side
panel on its back side as illustrated. Stand up the
lower shelf on the rear flange and line up the
holes on the corner bracket and shelf stiffener
with the holes in the side panel. Mount the bolts
in the three holes and tighten hex nuts with a
7/16-inch wrench or socket. Repeat procedure
for left side panel.
CORNER BRACKETS
SHELF
SHELF STIFFENER
REAR FLANGE
RIGHT SIDE
PANEL
10
Loading ...
Loading ...
Loading ...