Loading ...
Loading ...
Loading ...
17
3. Reinstallthelterintheoriginalposition.
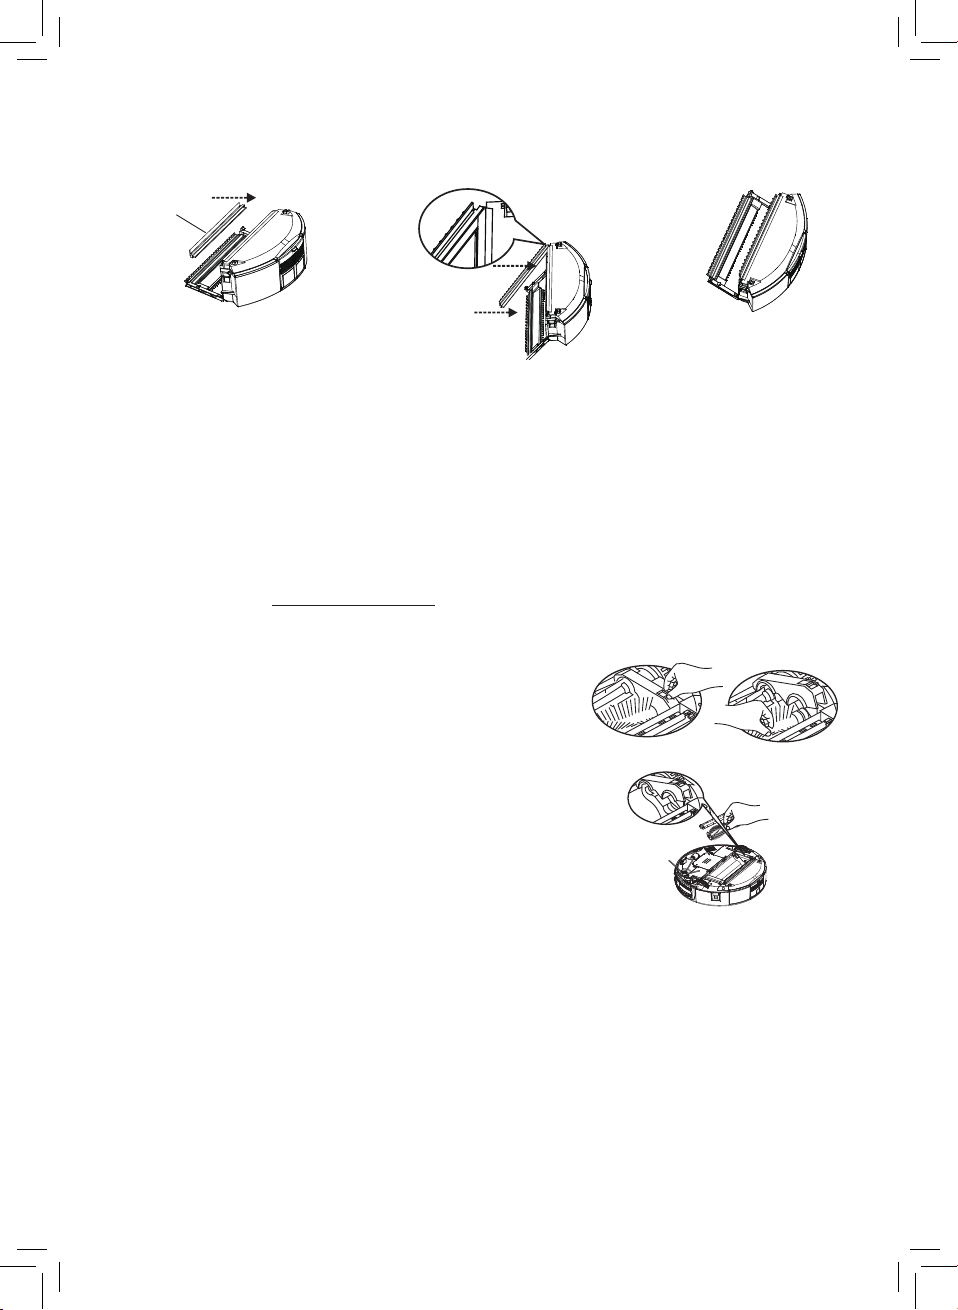
Tip: The rubber cleaning head may fall off when you clean the dust bin. Reinstall as shown below:
1. Position the dustbin and rubber cleaning head as per Figure 1.
2. Placeoneendofthecleaningheadontotheclearcoverofthedustbin,makesurethe
rubberonthecleaningheadisfacingupwardsandconnectitwiththedustbin.(Refer
topicture2).
3. Pushthecleaningheadontotheclearcoverbypressingitinwiththepalmofyourhand.
4. The rubber cleaning head is a user replaceable spare part.
CLEANING THE MAIN BRUSH AND FLOOR BRUSH:
CLEAN BRUSHES AFTER EVERY USE TO MAINTAIN CLEANING PERFORMANCE AND
PROLONG THE LIFE OF YOUR R-Vac.
1. Removethedustbin(seepage15).
2. Openthelockingbarbypressingtheredlatchandlift.
(seeFigure1)
3. Liftthemainbrush&oorbrushupandawayfromthe
vacuum.(seeFigure2&3)
4. For the main brush, use the cleaning brush to remove
hair and dust.
5. Ifthereishair,yarnandothertwistedobjectsaround
thebrushes,carefullycutthemusingscissorsand
gentlypullthemoffthebrushesbyhand.
6. Removethecircularrubberbearingontheendofeach
brush and remove any dust or hair build up. Replace
by pushing it back onto the brush end.
7. Tore-installthemainbrush&oorbrushintothevacuum,alignthedriveendsofthebrushes
withthelugsontheoppositesideofthelockingtab,placethebrushesintotheiroriginal
position then close the locking tab until it clicks securely into place.
NOTE: If the locking tab cannot be closed, check that the circular rubber bearings have
correctly located into their corresponding recesses.
Rubber cleaning head
Figure 1 Figure 2 Figure 3
Rubber cleaning head
Figure 1
Figure 2
Figure 3
Loading ...
Loading ...
Loading ...