Loading ...
Loading ...
Loading ...
12
5. Press the “SET” button, then press “<”.
6. Thesquarearoundanumberatthetopofthescreenwillthenbegintoash.
7. Press the “˄” and “˅” buttons to scroll through the weekdays.
8. Select the days you would like to schedule your vacuum to clean by pressing the “OK”
button;thiswillunderlineyournumber.Alternatively,pressthe“ALL”buttonifyouwouldlike
to schedule the vacuum to clean every day.
IMPORTANT: Your R-Vac will continue to clean at the scheduled time, even if the bin is full
or the brushes require cleaning. You should empty your dust bin and clean the brushes
after every clean.
NOTE: Underlined numbers represent days that are scheduled.
NOTE: You can also press the “OK” button to deselect days.
SPEED selection:
Your R-Vac is tted with a variable speed function which allows the speed of your robot vacuum
to be set to one of two levels. The standard setting is fast which maximises area coverage. For
areas where extra vacuuming is required, you may wish to select the slow setting to allow the
R-Vac to provide a more concentrated clean by passing over areas at a slower speed.
To vary your R-Vac’s speed, press the “SPEED” button on the remote control Select fast
or
slow
mode using the remote control.
NOTE: The default speed setting of the vacuum is fast mode.
DIRECTION buttons:
Use the direction buttons to steer your R-Vac to a desired location.
CAUTION: Do not drive the R-Vac in reverse towards drop-offs or ledges. The edge/drop
detection sensors only function when the vacuum is travelling in the forward direction
SPACE ISOLATOR:
Tip
: Place the space isolator against the wall, or it might be easily moved by the cleaner from
side or back of the space isolator, which would cause the machine cleans the confined area.
Space Isolator:
Tip: You should check code before using the Space Isolator; otherwise it will fail to work.
Steps of code check:
A : Turn off the cleaner, and turn on the Space Isolator (with power indicator on);
B : Keep holding the code check button on the Space Isolator;(
Tip:
the code check button
is inside the hole, you need to use auxiliary tools when hold the button
)
C : Turn on the cleaner;
D: After the cleaner toots 2 or 3 times,
2 or 3 times,
release the code check button, then the code
check set is finished successfully.
★ Note: If you fail to hear toot twice during the code check, just repeat the above process.
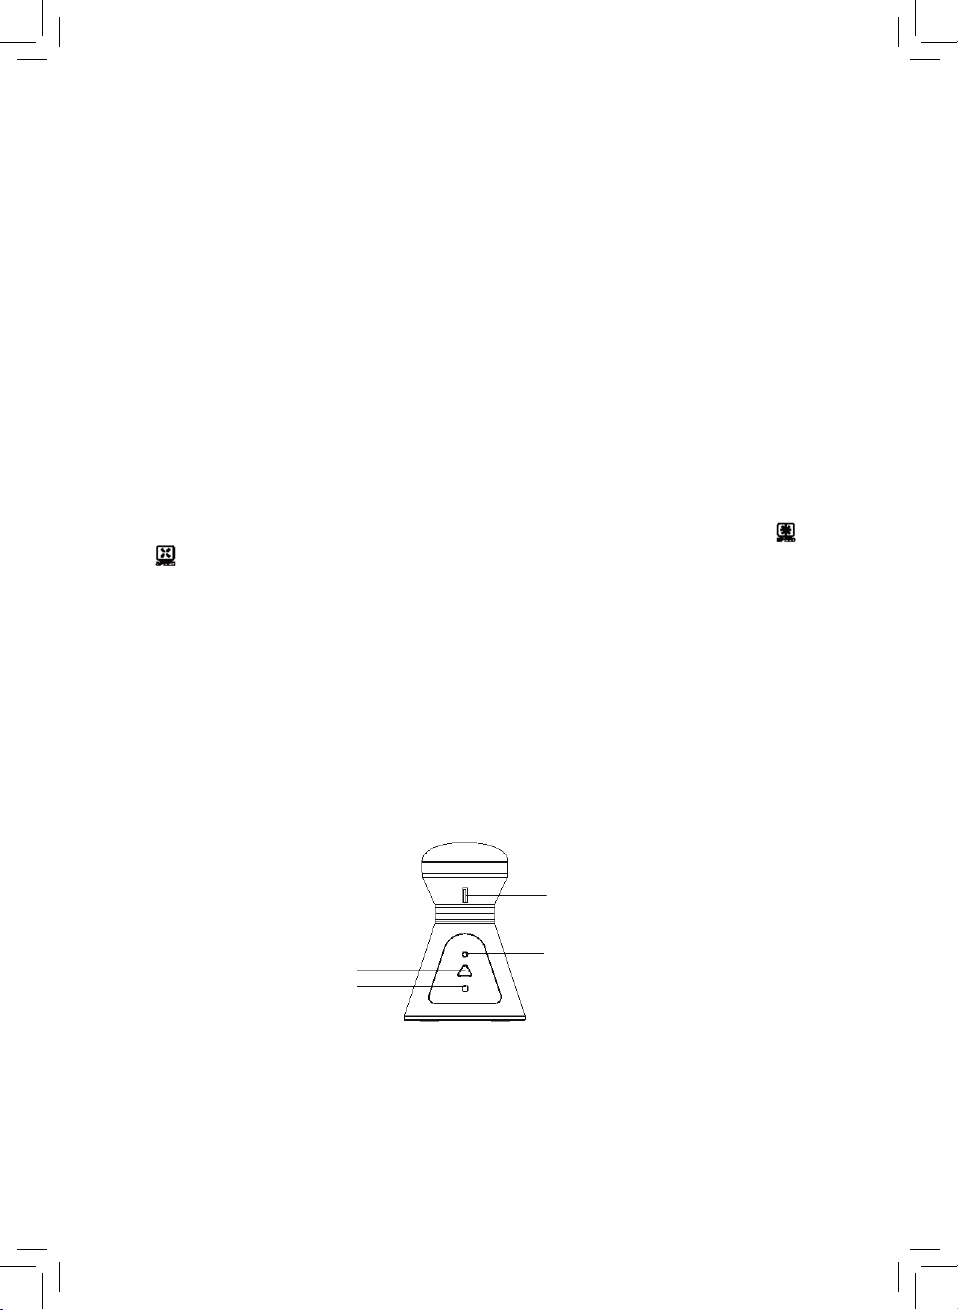
Signal transmitter
Power indicator light
Internal synchronise button
Power switch
The Space Isolator is synchronised with your vacuum cleaner prior to purchase.
Loading ...
Loading ...
Loading ...