Loading ...
Loading ...
Loading ...
10 Section 6 — Maintenance
with tabs.
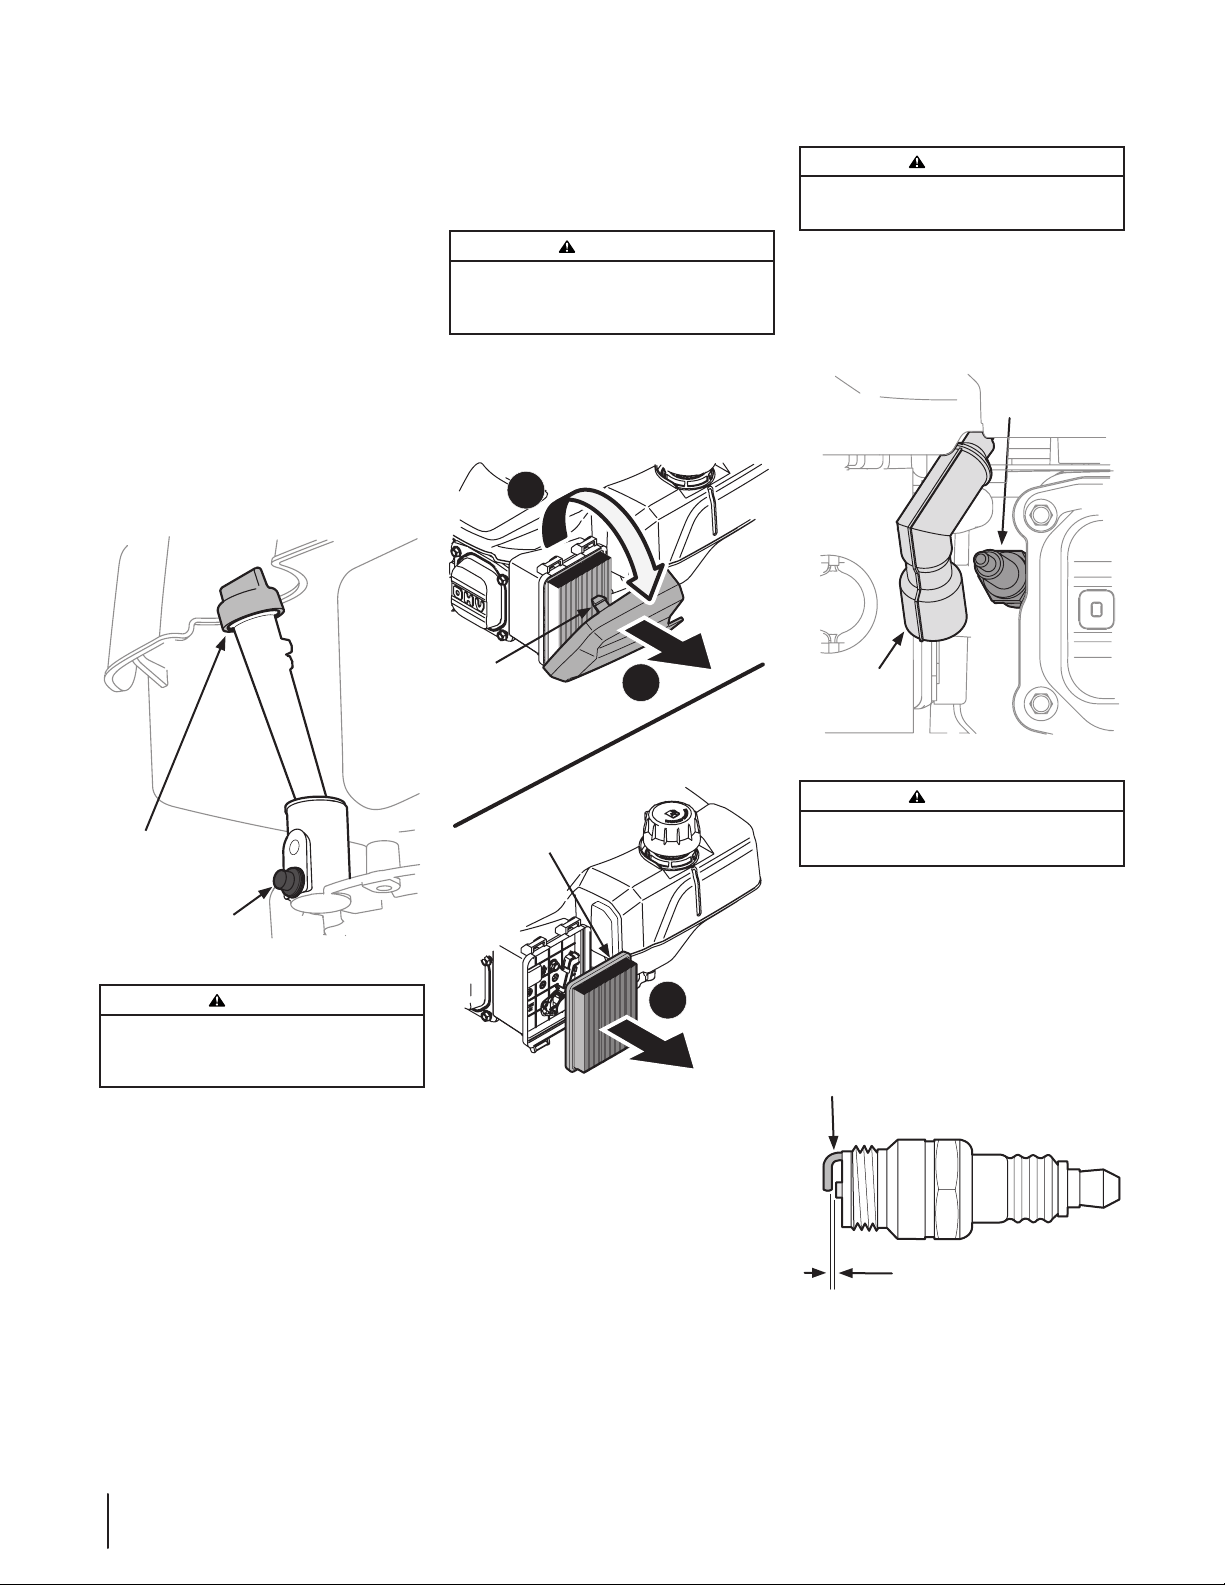
Spark Plug Service
WARNING!
DO NOT check for spark with spark plug removed.
DO NOT crank engine with spark plug removed.
To ensure proper engine operation, the spark
plug must be properly gapped and free of
deposits.
1. Remove the spark plug boot and use a
spark plug wrench to remove the plug.
See Figure 6-3.
Spark Plug
Spark Plug
Boot
Figure 6-3
WARNING!
If the engine has been running, the muffler will be
very hot. Be careful not to touch the muffler.
2. Visually inspect the spark plug. Discard
the spark plug if there is apparent wear,
or if the insulator is cracked or chipped.
Clean the spark plug with a wire brush if
it is to be reused.
3. Measure the plug gap with a feeler
gauge. Correct as necessary by bending
side electrode. See Figure 6-4. The gap
should be set to 0.030 in.
Electrode
0.030 in.
Figure 6-4
4. Check that the spark plug washer is in
it on the ground.
Air Filter Service
Paper filters cannot be cleaned and must be
replaced once a year or every 100 operating
hours; more often if used in extremely dusty
conditions.
WARNING!
Never use gasoline or low flash point solvents for
cleaning the air filter element. A fire or explosion
could result.
IMPORTANT: Never run the engine without the
air filter. Rapid engine wear will result.
1. Press down on the tabs securing the air
filter cover. Pull back and remove the
cover. See Figure 6-2.
Tab
Paper Element
1
2
3
Figure 6-2
2. Remove the paper element. To loosen
debris, gently tap the filter on a hard
surface. If the filter is excessively dirty or
damaged, replace with a new filter.
3. Insert the cover’s bottom tabs into slots
in bottom of base.
4. Tilt the cover up into place and secure
Oil Service
• Check oil level regularly.
• Be sure correct oil level is maintained.
Check every five hours or daily before
starting engine. See oil checking
procedure in the Operation section.
Oil Change
IMPORTANT: Be sure to check engine on a level
surface with the engine stopped. Drain the oil
while the engine is still warm to assure rapid
and complete draining.
NOTE: Select engines are equipped with an
oil drain located on the rear of the engine. For
these engines see the equipment manual for oil
change procedure.
1. Remove all fuel from tank by running
engine until it stops from lack of fuel.
2. Remove drain plug and allow oil to drain
into a suitable container. See Figure 6-1.
Oil Fill Cap
Drain Plug
Figure 6-1
WARNING!
Before tipping engine or equipment to drain oil,
drain fuel from tank by running engine until fuel
tank is empty.
3. Reinstall the drain plug and tighten it
securely.
4. Refill with the recommended oil and
check the oil level. Refer to page 5 in the
Set-Up section.
5. Reinstall the oil fill cap securely.
IMPORTANT: Used motor oil may cause skin
cancer if repeatedly left in contact with the skin
for prolonged periods. Although this is unlikely
unless you handle used oil on a daily basis, it is
still advisable to thoroughly wash your hands
with soap and water as soon as possible after
handling used oil.
NOTE: Please dispose of used motor oil
in a manner that is compatible with the
environment. We suggest you take it in a sealed
container to your local service station for
reclamation. Do not throw it in the trash or pour
Loading ...
Loading ...
Loading ...