Loading ...
Loading ...
Loading ...
PREPARING YOUR SAW FOR USE
i i H III IIII I{ I
A. •GETTING READY
1. READ YOUR OPERATOR'S MANUAL
YourOperator's Manual has been developed tohelp
. you prepare your saw for use and to understand its
•safe operation, tt _s irnport,3nt that you mad your
;manuat ¢ornptete_yto become familiar with the unit
before you begin assembly or attempt operation.
2. HAVE THE FOLLOWING AVAILABLE:
a. Protective gloves
b, ApproVed, marked, fuel container.
Regular unleaded gasoline. (See "Fueling
Your Engine;')
d, Two-cycle engine oil provided with unit.
e. Bar and Chain Lubricant. (See "Bar and-
Chain Lubricant")
f. Screnc_rovided with your unit. Usethe
long end of the toolas a slotted screwdriver, the
srnaJIpipe end as a socket wrench, and the
larger pipe end to remove the spark plug.
g. PhifiipsScrewdriver.
' . i i iiiiiii i i" i " i i i Jl,,, ,
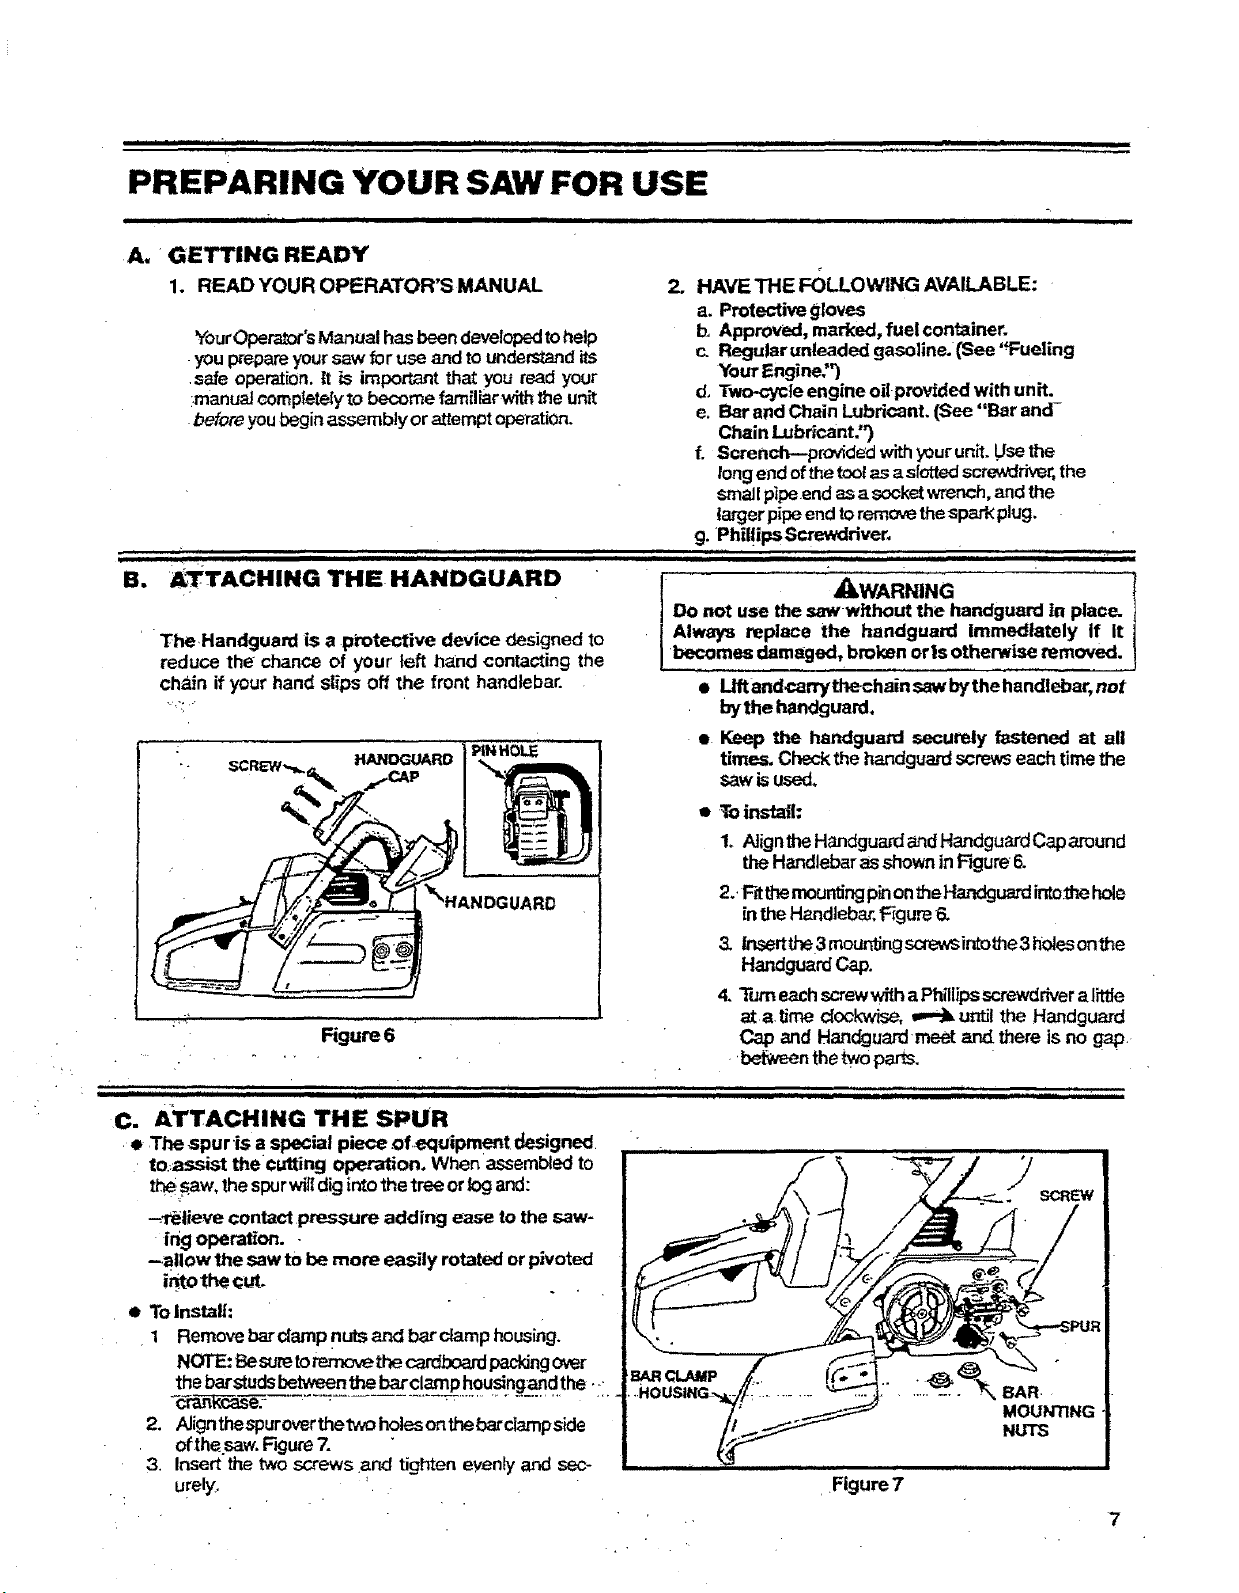
B' ATTACHING THE HANDGUARD ............ :...........................:...................... "
_WARNING I
DOnot use thesaw without the handguard in place.
Always replace the handguafd immediately if It
The.Handguard is a protective device designed to Jbecomes damaged, bmi0enorls otherwise n_moved,
reduce the chance of your left h_nd contactingthe
chain ifyour hand SlipsOffthe fronthandlebar. • Llftandcarrythechainsawbythehandlebar, not
.:r bythe handguard.
• Keep the handguatd securely fastened at all
times, Checkthe handguardscrewseachtimethe
sawisused.
%
C. ATTACHING THE SPUR
e The ,spuris a special piece ofequipment designed
to,assist the cuffing operation. When assembledto
tl_ _saw,the spurwif{diginto the treeorlog and:
-_lr_lievecontact pressure adding ease to the saw-
[ngoperation.
-allow thesaw to be more easily rotated or pivoted
i_o the cut.
• ToInstall:
1 Removebarclampnutsand bar ctamphousing.
NOTE:Besureto_ thecardboardpecldngover
thebarstudsbetweenthebarclamphousingandthe ._-
2. Align thespuroverthetwo hol_ onthebardampside
of the_.saw,F_jure7.
3. Insert the two screws and tighten evenlyand sec-
urely
• Toinstath
1. AtigntheHandguan_andHandguardCaparound
theHandlebarasshowninRgure 6.
2. RtthemountingpinontheHandguazdinto_'_hole
intheHandlebar.F_gure6.
3. lrksertthe3 mountingsaev,sintothe3 h01eson/_e
HandguardCap.
4. "rumeachscrewwitha Ph{liipsscrewdrivera littie
at a.time dock'wise,_--'JLuntilthe Handguard
Cap and Handguardmeet and there isno gap.
_n thetwo pans.
,,,,,, ,'I"',"''" ,,,,i-,, i ,............
Figure7
Loading ...
Loading ...
Loading ...