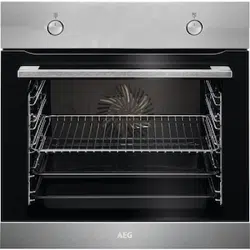
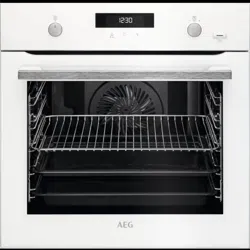
User Manual for AEG BSE782380M
Table of Contents
HOW TO TURN OVEN ON AND OFF
Control panel

 ON / OFF : Press and hold to turn the oven on and off.
 Menu : Lists the oven functions.
 Favourites : Lists the favourite settings.
 Display : Shows the current settings of the oven.
 Lamp switch : To turn the lamp on and off.
 Fast Heat Up : To turn on and off the function: Fast Heat Up.

Touch the surface with finger‐ tip.

Slide fingertip over the sur‐ face.

Touch the surface for 3 sec‐ onds.
Display
 After turning on, the display shows the main screen with the heating function and the default temperature.
 If you do not use the oven for 2 minutes, the display goes to standby.
 When you cook, the display shows the set functions and other available options.
BEFORE FIRST USE

Display with key functions set.
A. Time of day
B. START/STOP
C. Temperature
D. Heating functions
E. Timer
F. Food sensor (selected models only)

 WARNING! Refer to Safety chapters.
Initial Cleaning


First connection
The display shows welcome message after the first connection. You have to set: Language, Display brightness, Key tones, Buzzer volume, Water hardness, Time of day.
 Preheat the empty oven before the first use.
Step 1 Remove all accessories and removable shelf supports from the oven.
Step 2 Set the maximum temperature for the function:  . Let the oven operate for 1 h.
Step 3 Set the maximum temperature for the function: . Let the oven operate for 15 min.
 The oven can emit an odour and smoke during preheating. Make sure that the room is ventila‐ ted.
How to set: Water hardness
When you connect the oven to the mains you have to set the water hardness level. Use the test paper supplied with the steam set.

DAILY USE
You can change the water hardness level in the menu: Settings / Setup / Water hardness.
The table shows water hardness range (dH) with the corresponding level of Calcium deposit and the water classification. Adjust the water hardness level according to the table.

When the tap water hardness level is 4, fill the water drawer with still bottled water.
WARNING! Refer to Safety chapters.
How to set: Heating functions
Step 1 Turn on the oven. The display shows the default heating function.
Step 2 Press the symbol of the heating function to enter the submenu.
Step 3 Select the heating function and press: . The display shows: temperature.
Step 4 Set: temperature. Press: .
Step 5 Press:  . Food Sensor - you can plug the sensor at any time before or during cooking.
 - press to turn off the heating function.
Step 6 Turn off the oven.
Take a shortcut!

How to set: Steamify - Steam heating function
Step 1 Turn on the oven. Select the symbol of the heating function and press it to enter the submenu.
Step 2 Press . Set the steam heating function.
Step 3 Press: . The display shows the temperature settings.
Step 4 Set the temperature. Type of the steam heating function depends on the set tempera‐ ture.
Steam for Steaming 50 - 100 °C For steaming vegetables, grains, legumes, seafood, terrines and spoon desserts.
Steam for Stewing 105 - 130 °C For cooking stewed and braised meat or fish, bread and poultry, as well as cheesecakes and casseroles.
Steam for Gentle Crisping 135 - 150 °C For meat, casseroles, stuffed vegetables, fish and gratin. Owing to the combination of steam and heat the meat gets a juicy and tender texture along with a crusty surface. If you set the timer, grill function turns on automati‐ cally in the last minutes of the cooking process to give dish a gentle gratin.
Steam for Baking and Roasting 155 - 230 °C For roasted and baked dishes meat, fish, poultry, fil‐ led puff pastry, tarts, muffins, gratin, vegetables and bakery dishes. If you set the timer and put the food on the first level, bottom heat function turns on automatically in the last minutes of the cooking process to give dish a crispy bottom.
Step 5 Press: .
Step 6 Press the cover of the water drawer to open it.
Step 7 Fill the water drawer with cold water to the maximum level (around 950 ml) until the signal sounds or the display shows the message. The water supply is sufficient for ap‐ proximately 50 min. Do not fill the water drawer over its maximum capacity. There is a risk of water leakage, overflow and furniture damage.
WARNING! Use only cold tap water. Do not use filtered (demineralised) or distil‐ led water. Do not use other liquids. Do not pour flammable or alco‐ holic liquids into the water drawer.
Step 8 Push the water drawer to its initial position.
Step 9 Press: . Steam appears after approximately 2 min. When the oven reaches the set tempera‐ ture, the signal sounds.
Step 10 When the water drawer runs out of water, the signal sounds. Refill the water drawer.
Step 11 Turn off the oven.
Step 12 Empty the water drawer after cooking ends. Refer to "Care and Cleaning" chapter, Tank emptying.
Step 13 Residual water can condensate in the cavity. After cooking, carefully open the oven door. When the oven is cold, dry the cavity with a soft cloth.
Take a shortcut!

How to set: Assisted Cooking
Every dish in this submenu has a recommended function and temperature. You can adjust the time and the temperature. For some of the dishes you can also cook with:
• Weight Automatic
• Food Sensor
The degree to which a dish is cooked:
• Rare or Less
• Medium
• Well done or More
Step 1 Turn on the oven.
Step 2 Press .
.
Step 3 Press . Enter: Assisted Cooking.
Step 4 Choose a dish or a food type.
Step 5 Press.
Take a shortcut!

Heating functions
STANDARD
 To grill thin pieces of food and to toast bread.
 To roast large meat joints or poultry with bones on one shelf position. To make gratins and to brown.
 To bake on up to three shelf positions at the same time and to dry food. Set the temperature 20 - 40 °C lower than for Conventional Cooking.
 To make convenience food (e.g., french fries, potato wedges or spring rolls) crispy.
 To bake and roast food on one shelf position.
 To bake pizza. To make intensive browning and a crispy bottom.
 To bake cakes with crispy bottom and to preserve food.
SPECIALS
 To preserve vegetables (e.g., pickles).
 To dry sliced fruit, vegetables and mushrooms.
 To preheat plates for serving
 To defrost food (vegetables and fruit). The defrosting time depends on the amount and size of the frozen food.
 For dishes such as lasagna or potato gratin. To make gratins and to brown.
 To prepare tender, succulent roasts.
 To keep food warm.
 This function is designed to save energy during cooking. When you use this function, the temperature in the cavity may differ from the set temper‐ ature. The residual heat is used. The heating power may be reduced. For more information refer to "Daily Use" chapter, Notes on: Moist Fan Bak‐ ing.
STEAM
 Use steam for steaming, stewing, gentle crisping, baking and roasting.
 Food reheating with steam prevents surface drying. Heat is distributed in a gentle and even way, which allows to recover taste and aroma of food as just prepared. This function can be used to reheat food directly on a plate. You can reheat more than one plate at the same time, using differ‐ ent shelf positions.
 Use this function to prepare bread and bread rolls with a very good pro‐ fessional-like result in terms of crispiness, colour and crust gloss.
 To speed up the rising of the yeast dough. It prevents dough surface from drying and keeps the dough elastic.
 For steaming vegetables, side dishes, fish
 The function is suitable for cooking delicate dishes like custards, flans, ter‐ rines and fish.
 The function is suitable for meat, poultry, oven dishes and casseroles. Thanks to the combination of steam and heat, meat gets a tender and jui‐ cy texture along with a crusty surface.
Notes on: Moist Fan Baking
This function was used to comply with the energy efficiency class and ecodesign requirements. Tests according to BS EN 60350-1.
CLOCK FUNCTIONS
The oven door should be closed during cooking so that the function is not interrupted and the oven operates with the highest energy efficiency possible. When you use this function the lamp automatically turns off after 30 sec. For the cooking instructions refer to "Hints and tips" chapter, Moist Fan Baking. For general energy saving recommendations refer to "Energy Efficiency" chapter, Energy Saving.
Cooking time To set the length of cooking. Maximum is 23 h 59 min.
End action To set what happens when the timer ends counting.
Delayed start To postpone the start and / or end of cooking.
Time extension To extend cooking time.
Reminder To set a countdown. Maximum is 23 h 59 min. This function has no ef‐ fect on the operation of the oven.
Uptimer Monitors how long the function operates. Uptimer - you can turn it on and off.
How to set: Clock functions
How to set the clock
Step 1 Press: Time of day.
Step 2 Set the time. Press .
How to set cooking time
Step 1 Choose the heating function and set the temperature.
Step 2 Press .
.
Step 3 Set the time. Press.
Take a shortcut!

How to choose end option
Step 1 Choose the heating function and set the temperature.
Step 2 Press .
Step 3 Set the cooking time.
Step 4 Press .
.
Step 5 Press: End action.
Step 6 Choose the preferred: End action.
Step 7 Press. Repeat the action until the display shows the main screen.
How to delay start of cooking
Step 1 Set the heating function and the temperature.
Step 2 Press .
Step 3 Set the cooking time.
Step 4 Press .
Step 5 Press: Delayed start.
Step 6 Choose the value.
Step 7 Press. Repeat the action until the display shows the main screen.
How to extend cooking time
When 10% of cooking time is left and the food seems not to be ready, you can extend cooking time. You can also change the heating function.
How to extend cooking time
Press +1min to extend the cooking time.
How to change timer settings
Step 1 Press .
Step 2 Set the timer value.
Step 3 Press .
You can change the set time during cooking at any time.
HOW TO USE: ACCESSORIES
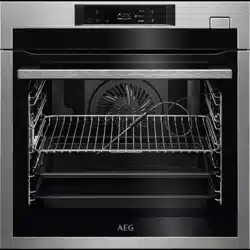
Inserting accessories
A small indentation at the top increases safety. The indentations are also anti-tip devices. The high rim around the shelf prevents cookware from slipping of the shelf.
Wire shelf: Push the shelf between the guide bars of the shelf support.

Baking tray / Deep pan: Push the tray between the guide bars of the shelf support.

Wire shelf, Baking tray / Deep pan: Push the tray between the guide bars of the shelf support and the wire shelf on the guide bars above.

Using Trivet and Grill- / Roasting pan
WARNING! Be careful when you remove the accessories from a hot oven. There is a risk of burns.
You can use the trivet to roast larger pieces of meat or poultry on one shelf position.
Step 1 Put the trivet into the deep pan so that the supports of the wire shelf point up.

Step 2 Put the deep pan into the oven on the necessary shelf position. You can use the trivet to grill flat dishes in large quantities and to toast.
Step 1 Put the trivet into the deep pan so that the supports of the wire shelf point down.

Step 2 Put the deep pan into the oven on the necessary shelf position.
Food Sensor
Food Sensor- measures the temperature inside the food. You can use it with every heating function.
There are two temperatures to be set:
 The oven temperature: minimum 120 °C.
 The core temperature.
For the best cooking results:
- Ingredients should be at room temperature.
- Do not use it for liquid dishes.
- During cooking it must remain in the dish.
The oven calculates an approximate end of cooking time. It depends on the quantity of food, the set oven function and the temperature.
How to use: Food Sensor
Step 1 Turn on the oven.
Step 2 Set a heating function and, if necessary, the oven temperature.
Step 3 Insert: Food Sensor.
Meat, poultry and fish
Insert the tip of Food Sensor into the centre of meat, fish, in the thickest part if possible. Make sure that at least 3/4 of Food Sensor is inside of the dish.
Casserole
Insert the tip of Food Sensor exactly in the centre of the casserole. Food Sensor should be stabi‐ lized in one place during baking. Use a solid in‐ gredient to achieve that. Use the rim of the bak‐ ing dish to support the silicone handle of Food Sensor. The tip of Food Sensor should not touch the bottom of a baking dish.
Step 4 Plug Food Sensor into the socket at the front of the oven. The display shows the current temperature of: Food Sensor.
Step 5 - press to set the core temperature of the sensor.
Step 6 - press to set the preferred option:
• Sound alarm - when food reaches the core temperature, the signal sounds.
• Sound alarm and stop cooking - when food reaches the core temperature, the signal sounds and the oven stops.
Step 7 Select the option and repeatedly press: to go to main screen.
Step 8 Press: . When food reaches the set temperature, the signal sounds. You can choose to stop or to continue cooking to make sure the food is well done.
Step 9 Remove Food Sensor plug from the socket and remove the dish from the oven.
WARNING! There is a risk of burns as Food Sensor becomes hot. Be careful when you unplug it and remove it from the food.
Take a shortcut!

ADDITIONAL FUNCTIONS
How to save: Favourites
You can save your favourite settings, such as the heating function, the cooking time, the temperature or the cleaning function. You can save 3 favourite settings.
Step 1 Turn on the oven.
Step 2 Select the preferred setting.
Step 3 Press: . Select: Favourites.
Step 4 Select: Save current settings.
Step 5 Press + to add the setting to the list of: Favourites. Press .
 - press to reset the setting.
 - press to cancel the setting.
Function lock
This function prevents an accidental change of the heating function.
Step 1 Turn on the oven.
Step 2 Set a heating function.
Step 3  - press at the same time to turn on the function.
To turn off the function repeat step 3.
Automatic switch-off
For safety reasons the oven turns off after some time, if a heating function works and you do not change any settings.

The Automatic switch-off does not work with the functions: Light, Food sensor, End time, Slow Cooking.
Cooling fan
When the oven operates, the cooling fan turns on automatically to keep the surfaces of the oven cool. If you turn off the oven, the cooling fan can continue to operate until the oven cools down.
HINTS AND TIPS
Cooking recommendations
The temperature and cooking times in the tables are guidelines only. They depend on the recipes and the quality and quantity of the ingredients used. Your oven may bake or roast differently to the oven you had before. The hints below show recom‐ mended settings for temperature, cooking time and shelf position for specific types of the food. If you cannot find the settings for a special recipe, look for the similar one. For more cooking recommendations refer to cooking tables on our website. To find the Cooking Hints check the PNC number on the rating plate on the front frame of the oven cavity.
Moist Fan Baking
For the best results follow suggestions listed in the table below.


CARE AND CLEANING
WARNING! Refer to Safety chapters.
Notes on cleaning
Cleaning Agents
- Clean the front of the oven with a soft cloth with warm water and a mild detergent.
- Use a cleaning solution to clean metal surfaces.
- Clean stains with a mild detergent.
Everyday Use
- Clean the cavity after each use. Fat accumulation or other residue may cause fire.
- Do not store the food in the oven for longer than 20 minutes. Dry the cavity with a soft cloth after each use.
Accessories
- Clean all accessories after each use and let them dry. Use a soft cloth with warm water and a mild detergent. Do not clean the accessories in a dishwasher.
- Do not clean the non-stick accessories using abrasive cleaner or sharp-edged objects.
How to remove: Shelf supports
Remove the shelf supports to clean the oven.
Step 1 Turn off the oven and wait until it is cold.
Step 2 Carefully pull the shelf supports up and out of the front catch.
Step 3 Pull the front end of the shelf support away from the side wall.
Step 4 Pull the supports out of the rear catch.
Install the shelf supports in the opposite sequence.

How to use: Steam Cleaning
Before you start:
- Turn off the oven and wait until it is cold.
- Remove all accessories and re‐movable shelf supports.
- Clean the bottom of the cavity and the inner door glass with a soft cloth with warm water and a mild detergent.
Step 1 Fill the water drawer to the maximum level until the signal sounds or the display shows the message.
Step 2 Select: Menu / Cleaning.

Step 3 Press . Follow the instruction on the display. The signal sounds when the cleaning ends.
Step 4 Press any symbol to turn off the signal.
 When this function works, the lamp is off.
When the cleaning ends:
- Turn off the oven.
- When the oven is cold, dry the cavity with a soft cloth.
- Leave the oven door open and wait until the cavity is dry.
TROUBLESHOOTING
WARNING! Refer to Safety chapters.
What to do if...


Power cut always stops cleaning. Repeat cleaning if it's interrupted by power failure.
How to manage: Error codes
When the software error occurs, the display shows error message. In this section, you will find the list of the problems that you can handle on your own.