Loading ...
Loading ...
Loading ...
Setting Oven Features
Setting the clock
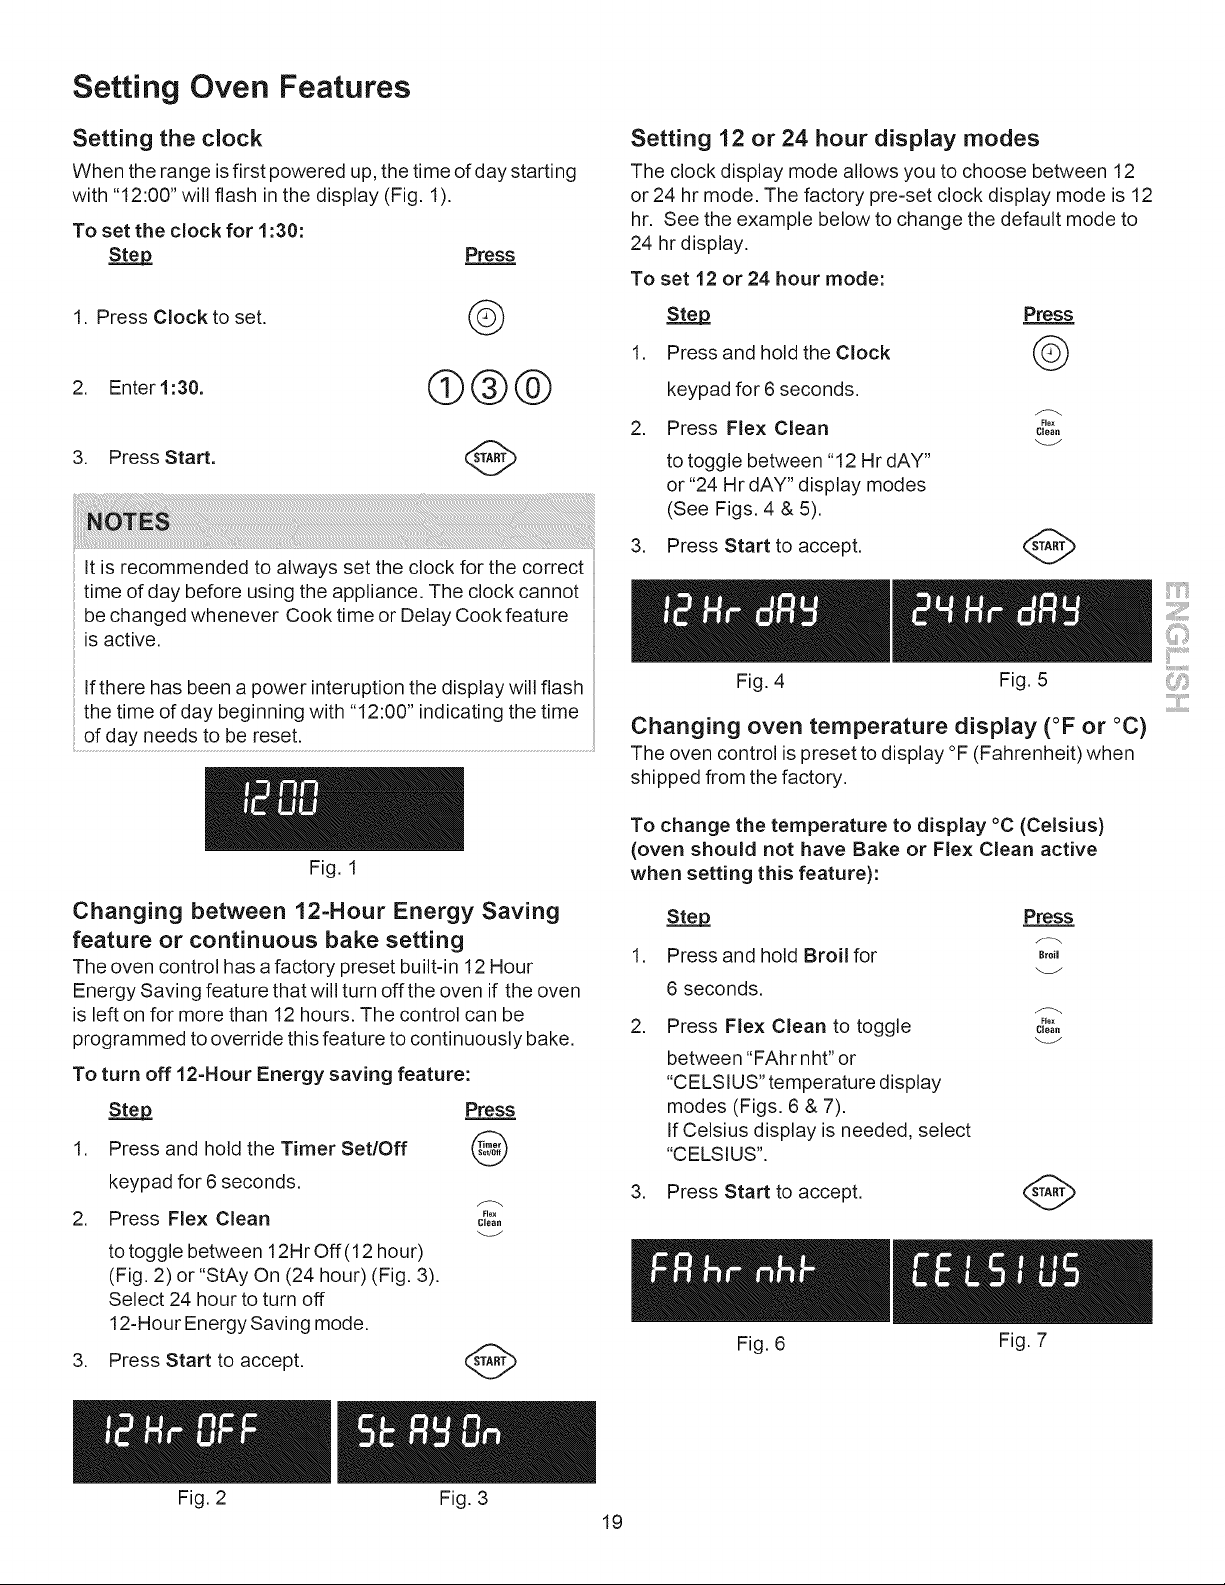
When the range is first powered up. the time of day starting
with "12:00" will flash in the display (Fig. 1).
To set the clock for 1:30:
Step
1. Press Clock to set.
2. Enter1:30.
3. Press Start.
Press
©
®@@
It is recommended to always set the clock for the correct
time of day before using the appliance. The clock cannot
be changed whenever Cook time or Delay Cook feature
is active.
If there has been a power interuption the display will flash
the time of day beginning with "12:00" indicating the time
of day needs to be reset.
Fig. 1
Changing between 12=Hour Energy Saving
feature or continuous bake setting
The oven control has a factory preset built-in 12 Hour
Energy Saving feature that will turn off the oven if the oven
is left on for more than 12 hours. The control can be
programmed to override this feature to continuously bake.
To turn off 12=Hour Energy saving feature:
Step Press
1. Press and hold the Timer Set/Off @
keypad for 6 seconds.
2. Press Flex Clean c_o_,
to toggle between 12Hr Off (12 hour)
(Fig. 2) or "StAy On (24 hour) (Fig. 3).
Select 24 hour to turn off
12-Hour Energy Saving mode.
3. Press Start to accept.
v
Setting 12 or 24 hour display modes
The clock display mode allows you to choose between 12
or 24 hr mode. The factory pre-set clock display mode is 12
hr. See the example below to change the default mode to
24 hr display.
To set 12 or 24 hour mode:
Step Press
1. Press and hold the Clock @
keypad for 6 seconds.
2. Press Flex Clean c,oo.
to toggle between "12 Hr dAY"
or "24 Hr dAY" display modes
(See Figs. 4 & 5).
3. Press Start to accept.
V
Fig. 4 Fig. 5 ',:i
Changing oven temperature display (°F or °C)
The oven control is preset to display °F (Fahrenheit) when
shipped from the factory.
To change the temperature to display °C (Celsius)
(oven should not have Bake or Flex Clean active
when setting this feature):
.
Step Press
Press and hold Broil for B,o,
6 seconds.
2. Press Flex Clean to toggle c_o,,
between "FAhr nht" or
"CELSIUS" temperature display
modes (Figs. 6 & 7).
If Celsius display is needed, select
"CELSIUS".
3. Press Start to accept.
Fig. 6 Fig. 7
Fig. 2 Fig. 3
19
Loading ...
Loading ...
Loading ...