Loading ...
Loading ...
Loading ...
Door Removal/Reversal Instructions
iMPORTANT
There are instructions for three handle styles on the following pages. To ensure proper installation
of all three handle styles, review these instructions and pictures thoroughly prior to handle
installation,
Additionally, before installing handles, make sure the door swing is correct. Seethe Door
Removal/Reversal instructions in this Use & Care Guide.
_ CAUTION
Wear gloves and safety goggles. Useextreme CAUTION when installingthese
handles. The rounded end of the handles may be sharp.
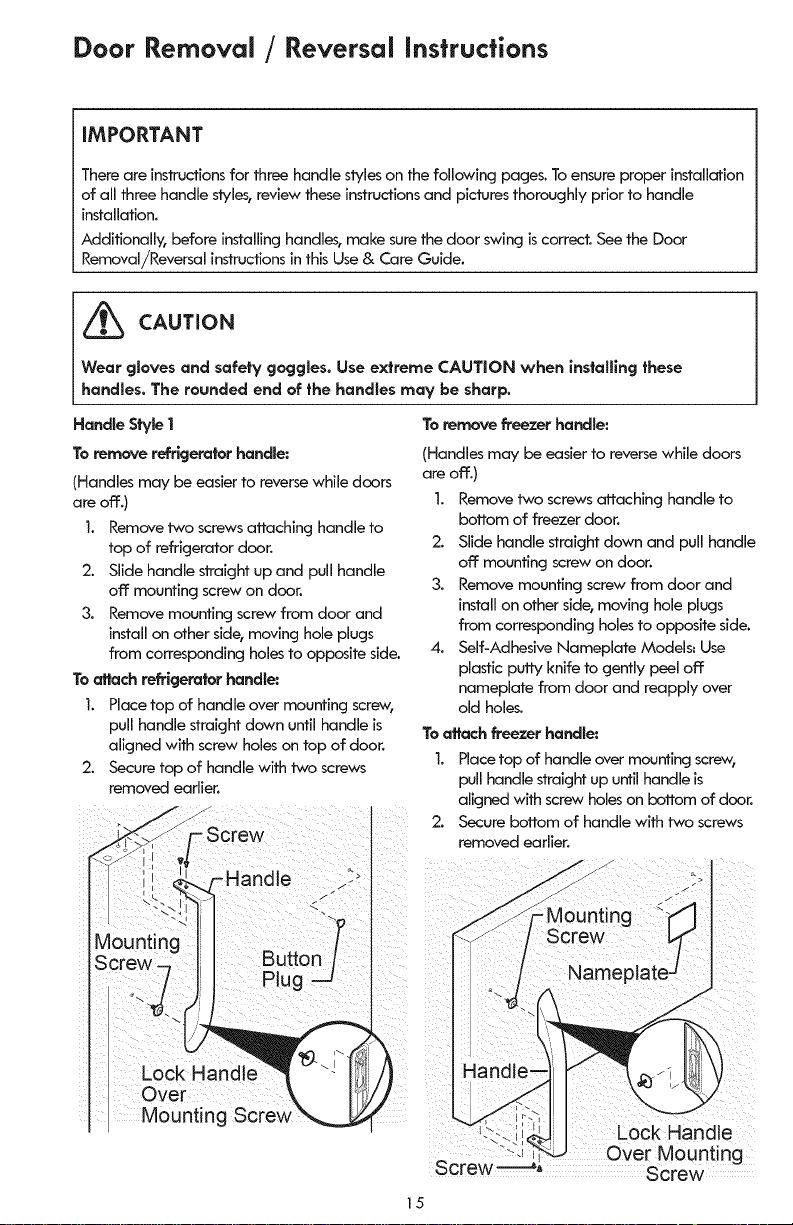
Handle Style 1
To remove refrigerator handle:
(Handles may be easier to reverse while doors
areoff.)
1. Remove two screws attaching handle to
top of refrigerator door.
2. Slide handle straight up and pull handle
off mounting screw on door.
3. Remove mounting screw from door and
install on other side, moving hole plugs
from corresponding holes to opposite side.
To aNach refrigerator handle:
1. Place top of handle over mounting screw,
pull handle straight down until handle is
aligned with screw holes on top of door.
2. Secure top of handle with two screws
removed earlier.
Over
Mounting Screw
To remove freezer handle:
(Handles may be easier to reverse while doors
areoff.)
1. Remove two screwsattachinghandleto
bottom of freezer door.
2. Slide handle straight down and pull handle
off mounting screw on door.
3. Remove mounting screw from door and
installon other side, moving hole plugs
from corresponding holes to opposite side.
4. Self-Adhesive Nameplate Models: Use
plastic putty knife to gently peel off
nameplate from door and reapply over
old holes.
To attach freezer handle:
1. Place top of handle over mounting screw,
pull handle straight up until handle is
aligned with screw holeson bottom of door.
2. Secure bottom of handle with two screws
removed earlier.
Lock Handle
_-_ Over Mounting
Screw -------_. Screw
15
Loading ...
Loading ...
Loading ...