Loading ...
Loading ...
Loading ...
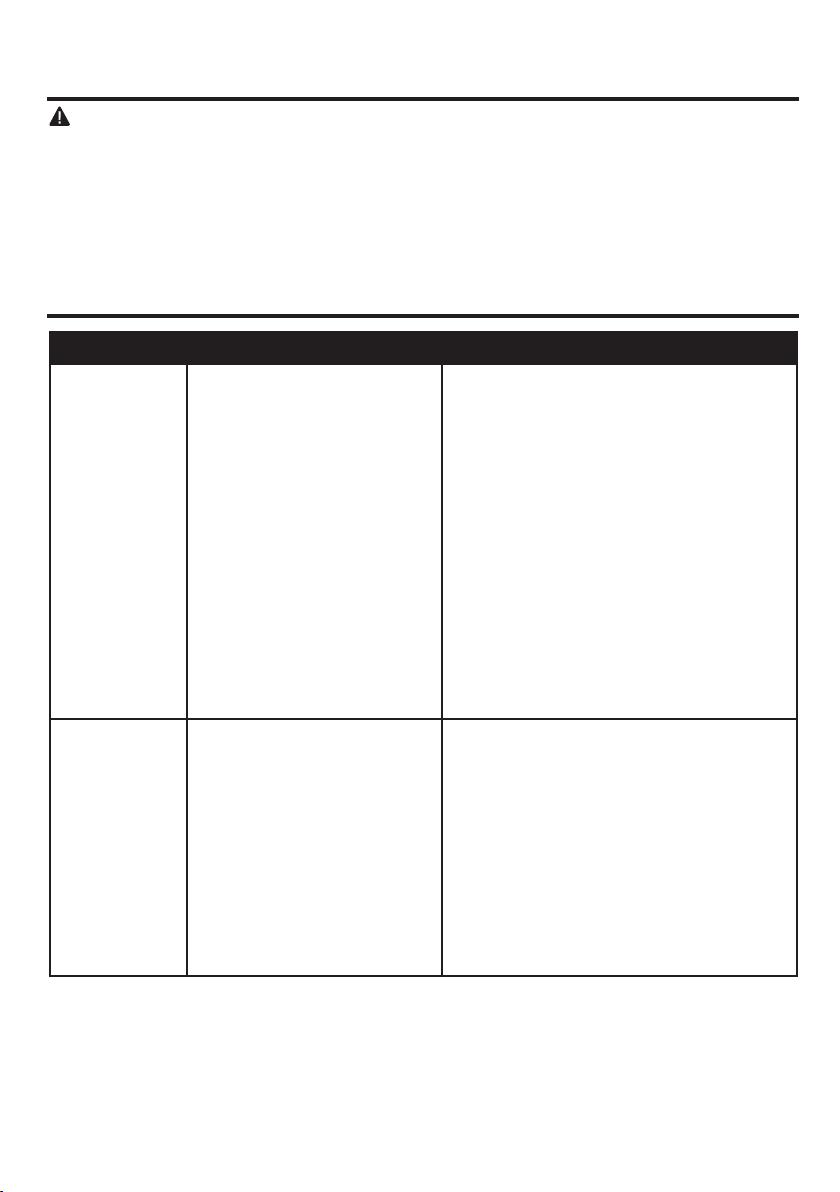
1. Set screws are loose. 1. Tighten all set screws.
2. Using non-approved speed control. 2. Some fan motors are sensitive to signals from solid-
state varible speed controls. DO NOT USE a solid-
state variable speed control.
3. Normal noise. 3. Allow "break-in" period of 24 hours. Most noises
associated with a new fan will disappear after this
period.
4. Wire connectors inside switch
housing rattling.
4. Check
to make sure wire connectors in switch
housing are not rattling against each other or against
the interior wall of the switch housing.
5. Cracked blade. 5. Replace blades.
6. The distance from canopy to ceiling
is too great.
6. Make sure upper canopy is a short distance from
ceiling. It should not touch the ceiling.
7. Glass
is not secure. 7. Secure the glass.
1. Hanger bracket and/or ceiling outlet
box is not securely fastened.
1. Tighten the hanger bracket screws to the outlet box,
and/or secure outlet box.
2. Set screw in downrod assembly is
loose.
2. Tighten the set screw in the downrod assembly.
seated in canopy tabs.
3. Fan hanger ball is not properly 3. Turn power off, support the fan very carefully, and
check that the hanger ball is properly seated.
4. Set screw in motor coupling is loose. 4. Raise motor coupling up and tighten set screws
securely.
5. Blade is loose. 5. Check that all blades are screwed firmly into blade
holders.
Fan sounds noisy
Fan wobbles
15
CARE AND MAINTENANCE
TROUBLESHOOTING
Important: Shut off main power supply before beginning any maintenance. Do not use water or a
damp cloth to clean the ceiling fan.
. At least twice each year, tighten all screws and lower canopy to check mounting plate screws.
. Clean fan housing with only a soft brush or lint-free cloth to avoid scratching the finish. Clean blades
with a lint-free cloth. You may occasionally apply a light coat of furniture polish to wood blades for
added protection.
PROBABLE CAUSE CORRECTIVE ACTION
PROBLEM
Loading ...
Loading ...
Loading ...