Loading ...
Loading ...
Loading ...
10
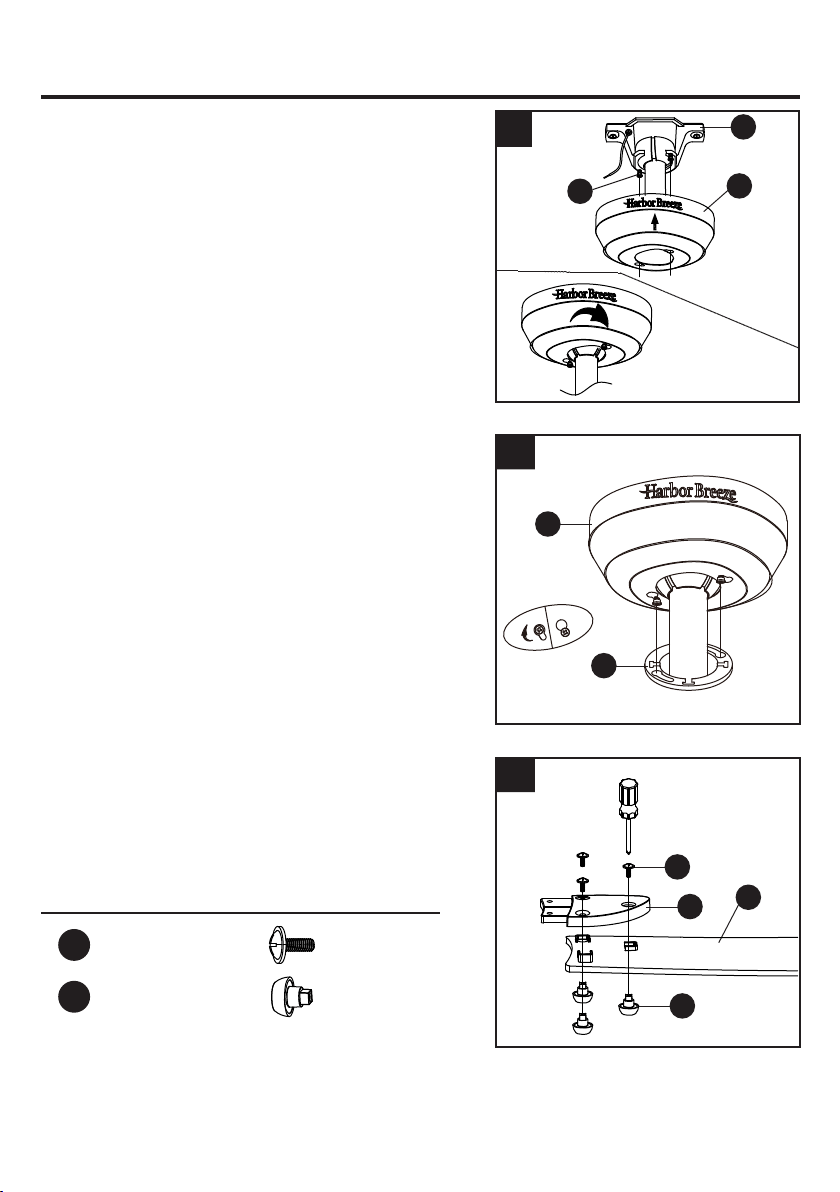
1. Loosen (but do not remove) the two preassembled
mounting screws (N) on mounting bracket (A) that align
with the slotted holes on canopy (C). Lift canopy (C) up
so slotted holes engage loosened screw heads on
mounting bracket (A), then twist canopy (C) clockwise,
then tighten all screws securely.
2. Raise canopy cover (D) over the mounting screws visible
in canopy (C). Rotate canopy cover (D) clockwise until it
locks into place. You may need to adjust the mounting
screws until the canopy (C) and canopy cover (D) have
a snug fit.
3. Attach blade (H) under blade arm (G) using three (3)
decorative nuts (CC) and three (3) blade screws (AA).
Repeat for remaining blades (H), blade arms (G),
decorative nuts (CC) and three (3) blade screws (AA).
2
Hardware Used
Blade Screw x 15
x 15
AA
Decorative Nut
CC
1
N
A
C
D
C
3
G
H
AA
CC
FINAL INSTALLATION INSTRUCTIONS
Loading ...
Loading ...
Loading ...