Loading ...
Loading ...
Loading ...
14
OPERATING INSTRUCTIONS
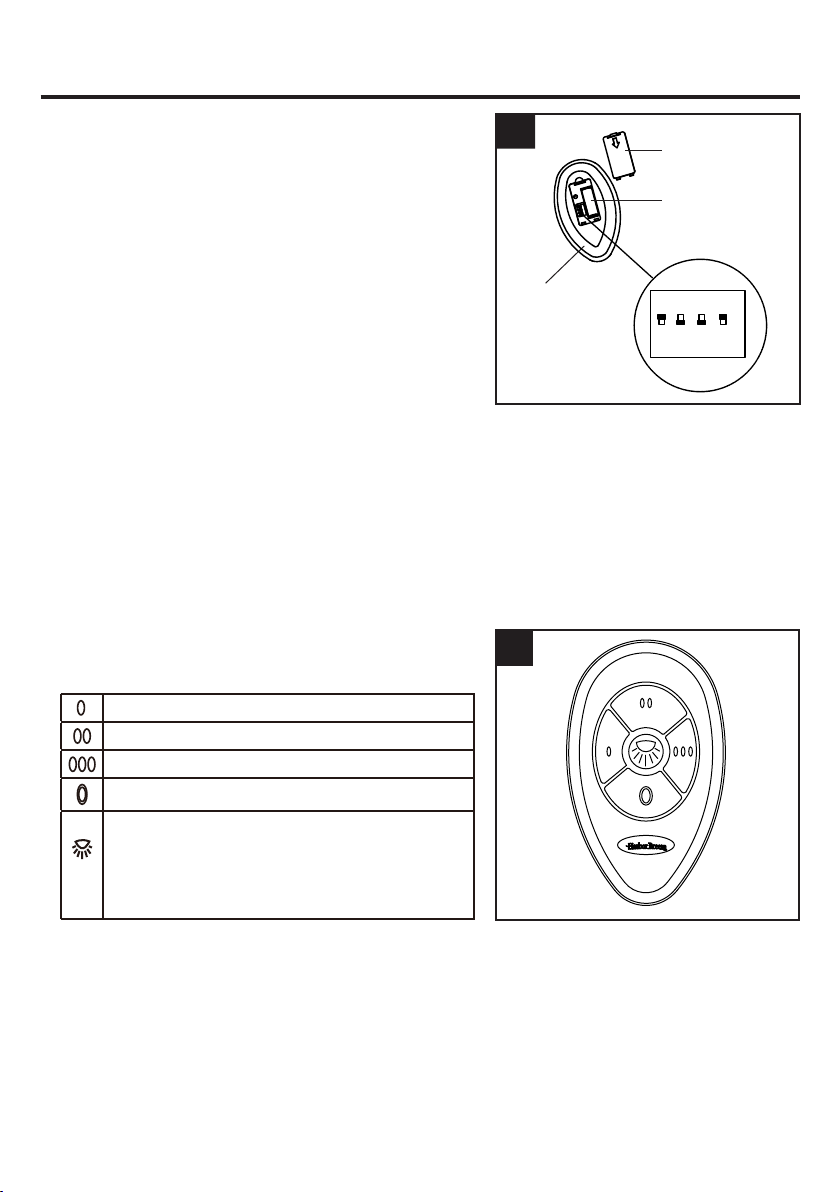
2. The remote unit has 16 different code combinations. To
prevent possible interference from the other remote
units, simply change the combination code in the
remote by following the set up procedures listed below.
a.)Remove the remote control battery cover to expose
the remote dip switches. Use a small ballpoint pen (not
included) to set the dip switches to either up or down.
NOTE:
Factory setting is all up. Do not use this
position.
b.)Install the 23A 12V battery (included) and replace
the battery cover you previously removed.
c.)Restore power to the fan, press and hold the “Light”
button until the light flashes (on/off) 3 times and will
stay on, then the control and speed setting process is
complete.
NOTE:
You must press the “Light” button within 30
seconds of restoring power to the fan.
d.)If programming is unsuccessful, retry the above
instructions.
NOTE:
Remove batteries if remote has not been used
for a long period of time in order to avoid damage.
Store remote away from excessive heat or humidity.
3. The buttons on the remote control the fan speed and
light as follows:
Note: This receiver has a preset memory function;
when the switch is turned OFF, the control will
remember the light intensity and fan speed. When the
switch is turned ON, the light and fan will resume
operation as they were prior to the switch being turned
OFF.
2
Low speed
Medium speed
High speed
Turn the fan off
Press the light key quickly and turn the light ON
or OFF.
Press and hold to dim light.
The light will cycle from bright to dim to bright
until button is released.
Remote
Battery Cover
Battery
2
1
3
4
ON
DIP
3
Loading ...
Loading ...
Loading ...