Loading ...
Loading ...
Loading ...
9
INSTALLATION INSTRUCTIONS
Unpack the Range
Remove shipping materials, tape, and lm from range.
Keepshipping pallet under range. Remove oven racks, and parts
package from inside oven. Remove grates from top of oven.
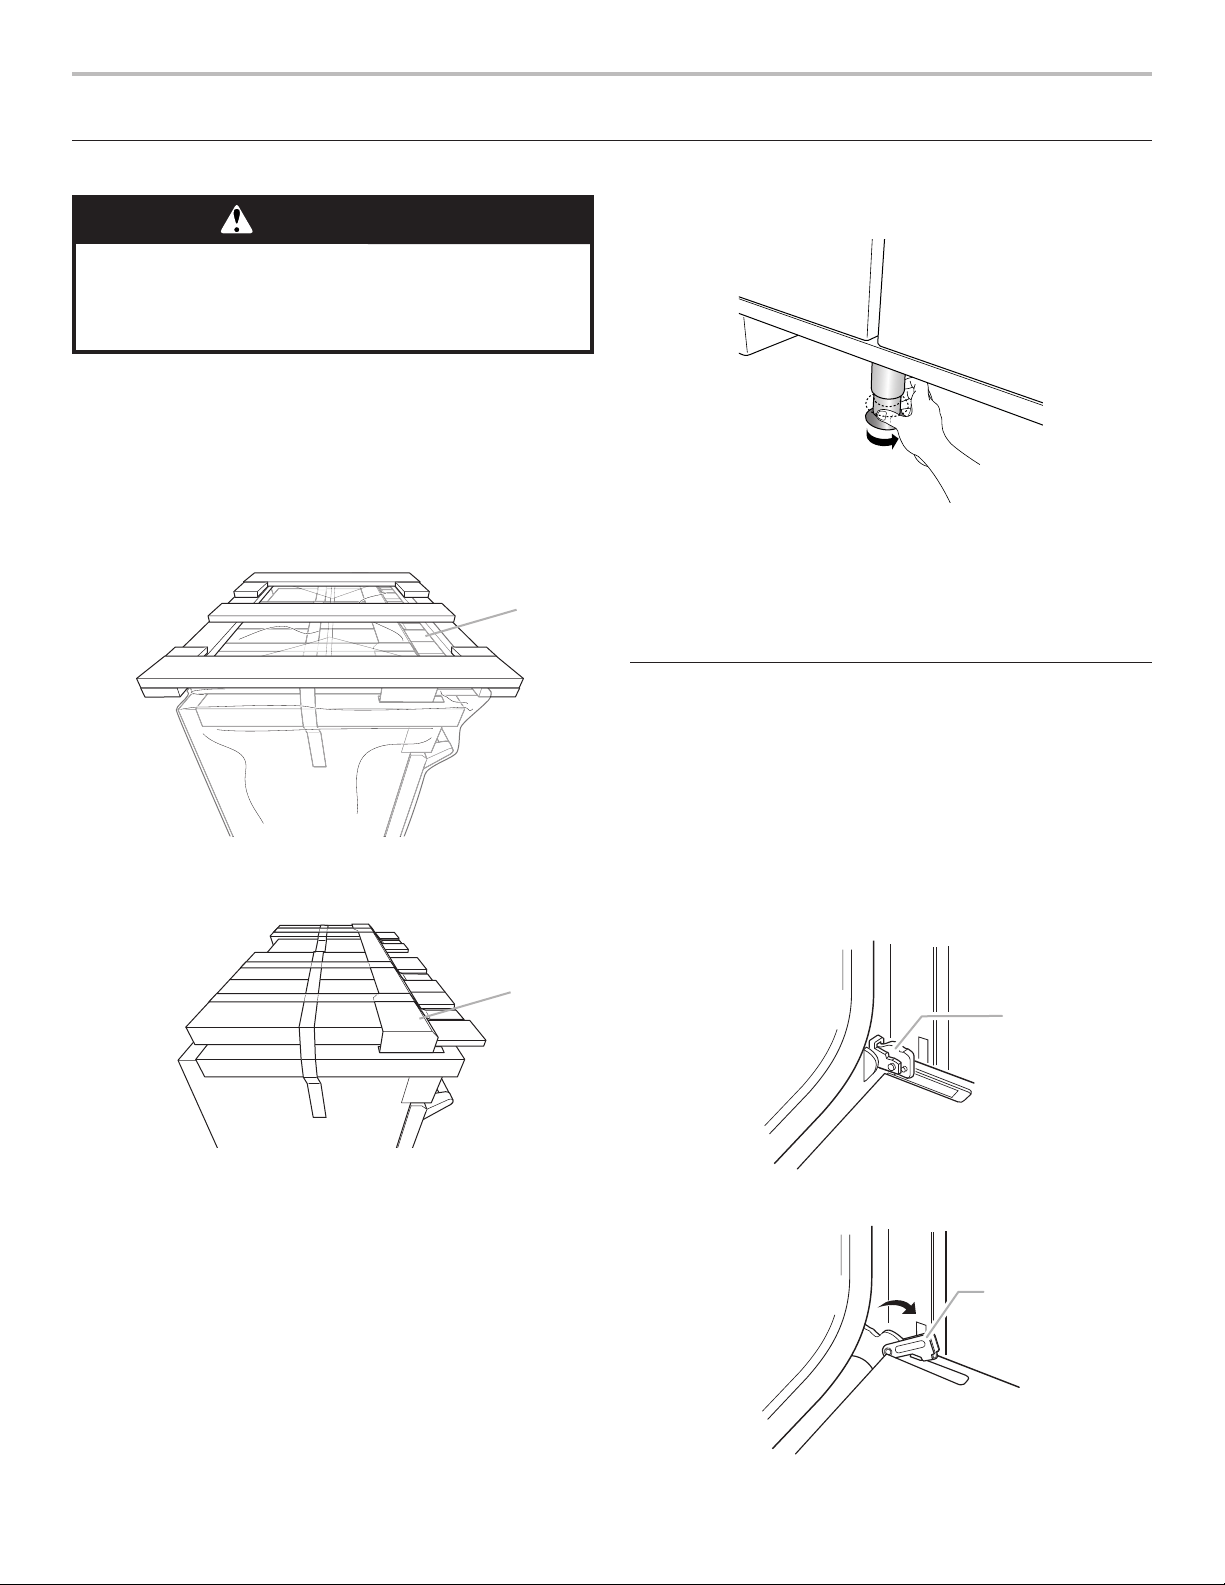
Remove Kick Plate
1. Your range will have the kick plate packaged on top of the
unit.
a. Remove kick plate from top of range and grate pack.
b. Lay kick plate to the side to avoid scratching.
2. For 48" (121.9 cm) models only, rotate center support
counterclockwise off the pallet until it stops.
NOTE: This support is used only for shipping and is not
needed for installation.
3. Lay a piece of cardboard from packaging on the oor behind
range. Using two or more people, rmly grasp each side of
range. Lift range up about 3" (8.0 cm) and move it back until
range is off shipping pallet. Set range oncardboard to avoid
damaging oor.
Remove Door
Door Removal
■ Do not remove the side door spacers until the range is ready
to install. Removing the door spacers could allow the door to
shift, damaging the door latch.
■ Do not lift or move the range by the door handle(s) or control
panel.
■ Prior to installing the range, you will need to remove the oven
door(s). Prepare a surface where you will place the door(s).
This surface should be at and covered with a soft blanket,
or use the corner posts from the packaging material.
WARNING
Excessive Weight Hazard
Use two or more people to move and install range.
Failure to do so can result in back or other injury.
In packaging
A. Kick plate
A
Packaging removed
A. Kick plate
A
B
A
A. Oven door hinge in the locked position
B. Oven door hinge in the unlocked position
Loading ...
Loading ...
Loading ...