Loading ...
Loading ...
Loading ...
13
■ Check that the gas shut-off valves are set to the
openposition.
■ Check that burner caps are properly positioned on
burnerbases.
Repeat startup. If a burner does not light at this point, contact
your dealer or authorized service company for assistance.
Flame Height
The range ame should be a steady blue ame.
NOTE: Flame heights are factory set. If they don’t appear
correct, please contact your service provider.
Burner
NOTE: Dual Stacked burner shown.
Level Range
NOTE: Range must be level for satisfactory baking performance.
1. Place rack in oven.
2. Place level on rack and check levelness of the range, rst
side to side, then front to back.
3. If range is not level, adjust the leveling rods. Using a wrench,
turn leveling rods located behind the kick plate to level range
and to raise or lower range to the desired countertop height.
NOTE: All roller feet must be off the oor upon nal installation.
NOTE: Turning clockwise raises the unit, whereas turning
counterclockwise lowers the unit.
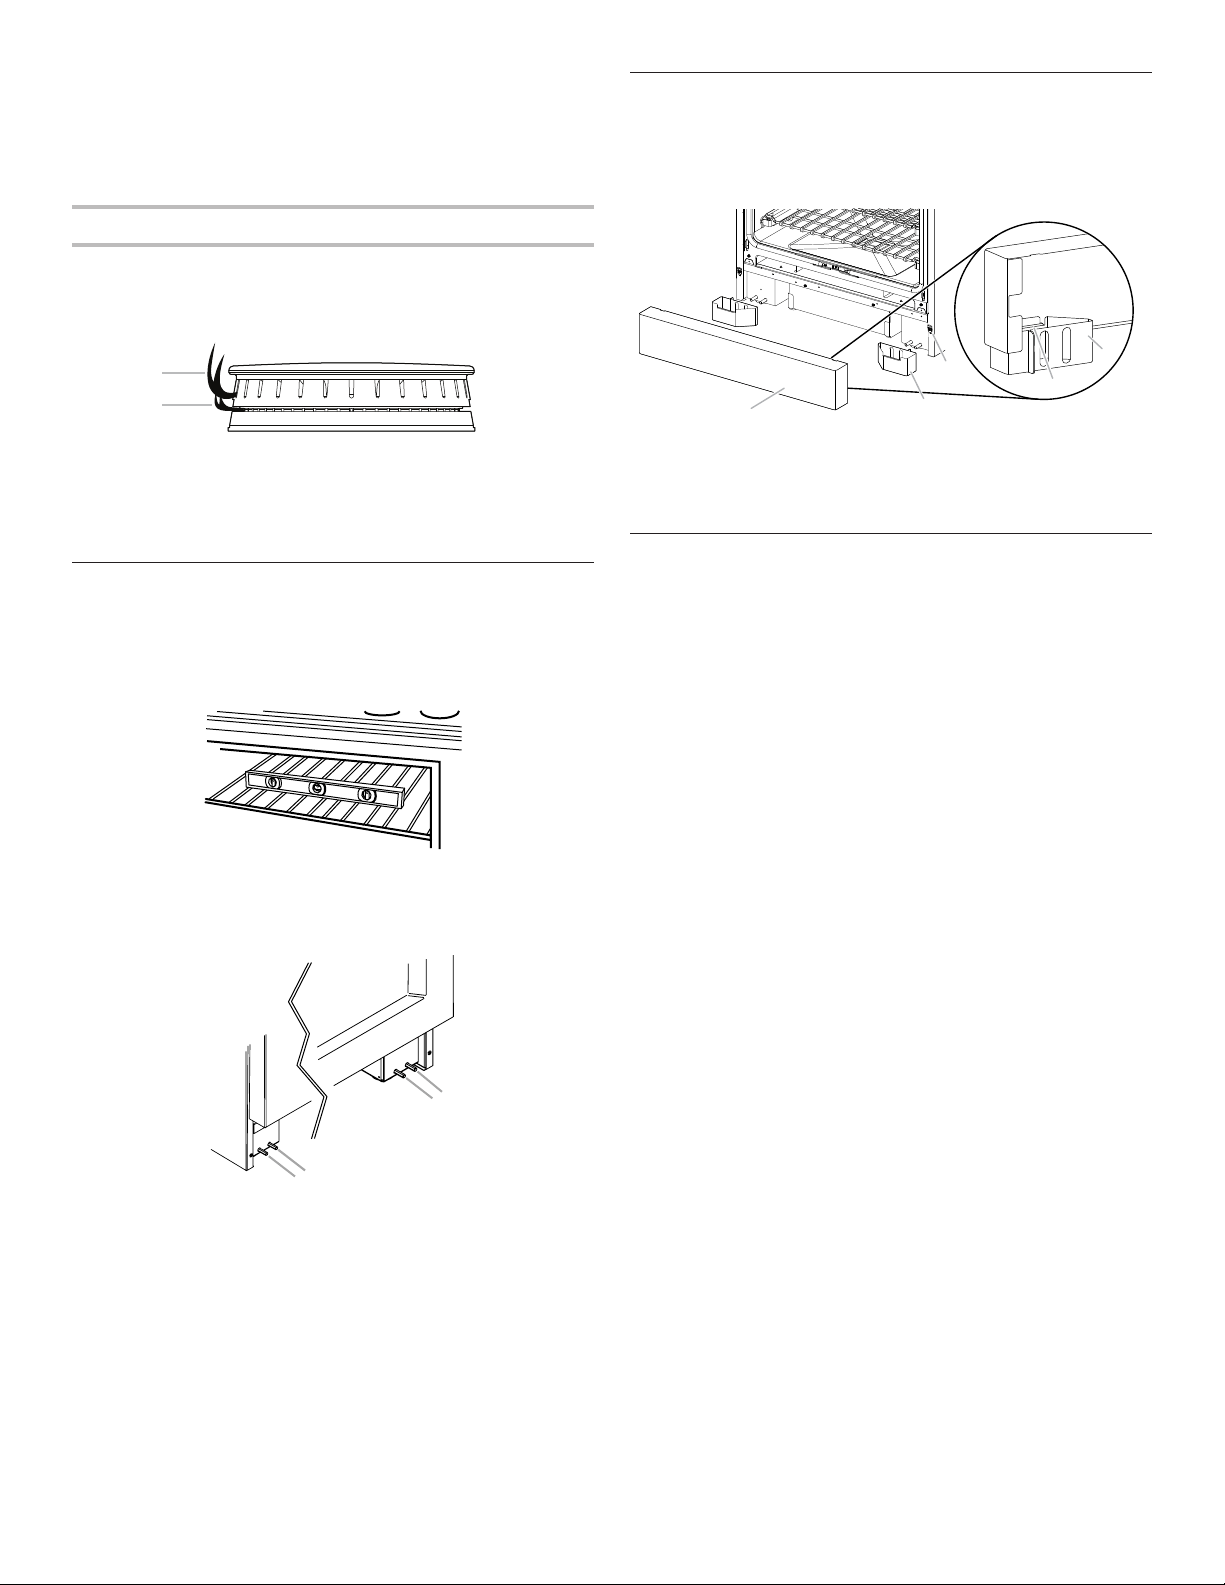
Install Kick Plate
NOTE: Door must be removed in order to remove or replace kick
plate. Refer to the “Remove Door” section.
Align kick plate over the kick plate slots and push kick plate
down.
Complete Installation
1. Check that all parts are now installed. If there is an extra
part, go back through the steps to see which step was
skipped.
2. Check that you have all of your tools.
3. Dispose of/recycle all packaging materials.
4. For oven use and cleaning, read the Use and Care Guide.
Check Operation of Oven(s)
1. Turn power on.
2. Start a Bake cycle. See the Use and Care Guide for
operating instructions.
If oven(s) does not operate, check the following:
■ Household fuse is intact and tight or circuit breaker
hasnot tripped.
■ Electrical supply is connected.
■ See the “Troubleshooting” section in the Use and Care
Guide.
3. When oven has been on for 10–15 minutes, open the oven
door and feel for heat.
If you do not feel heat, turn off the oven and contact a
qualied technician.
If you need Assistance or Service:
Please reference the “Assistance or Service” section of the
Useand Care Guide or contact the dealer from whom you
purchased your range.
A. Upper (main) ame
B. Lower (simmer) ame
B
A
A
A
B
B
A. Rear leveling rod
B. Front leveling rod
A
B
D
C
D
A. Kick plate
B. Kick plate tab
C. Kick plate slot
D. Feet
Loading ...
Loading ...
Loading ...