Loading ...
Loading ...
GROUNDING INSTRUCTIONS
This too! shou}d be grounded while in use to protect
the operator from electricshock, Thetool is equipped
with a three-conductor cord and three-prong
grounding type plug to fit the proper grounding type
receptacle. The green (or green and yellow) con-
ductor in the cord is the grounding wire, Never
connect the green (or green and yellow) wire to a
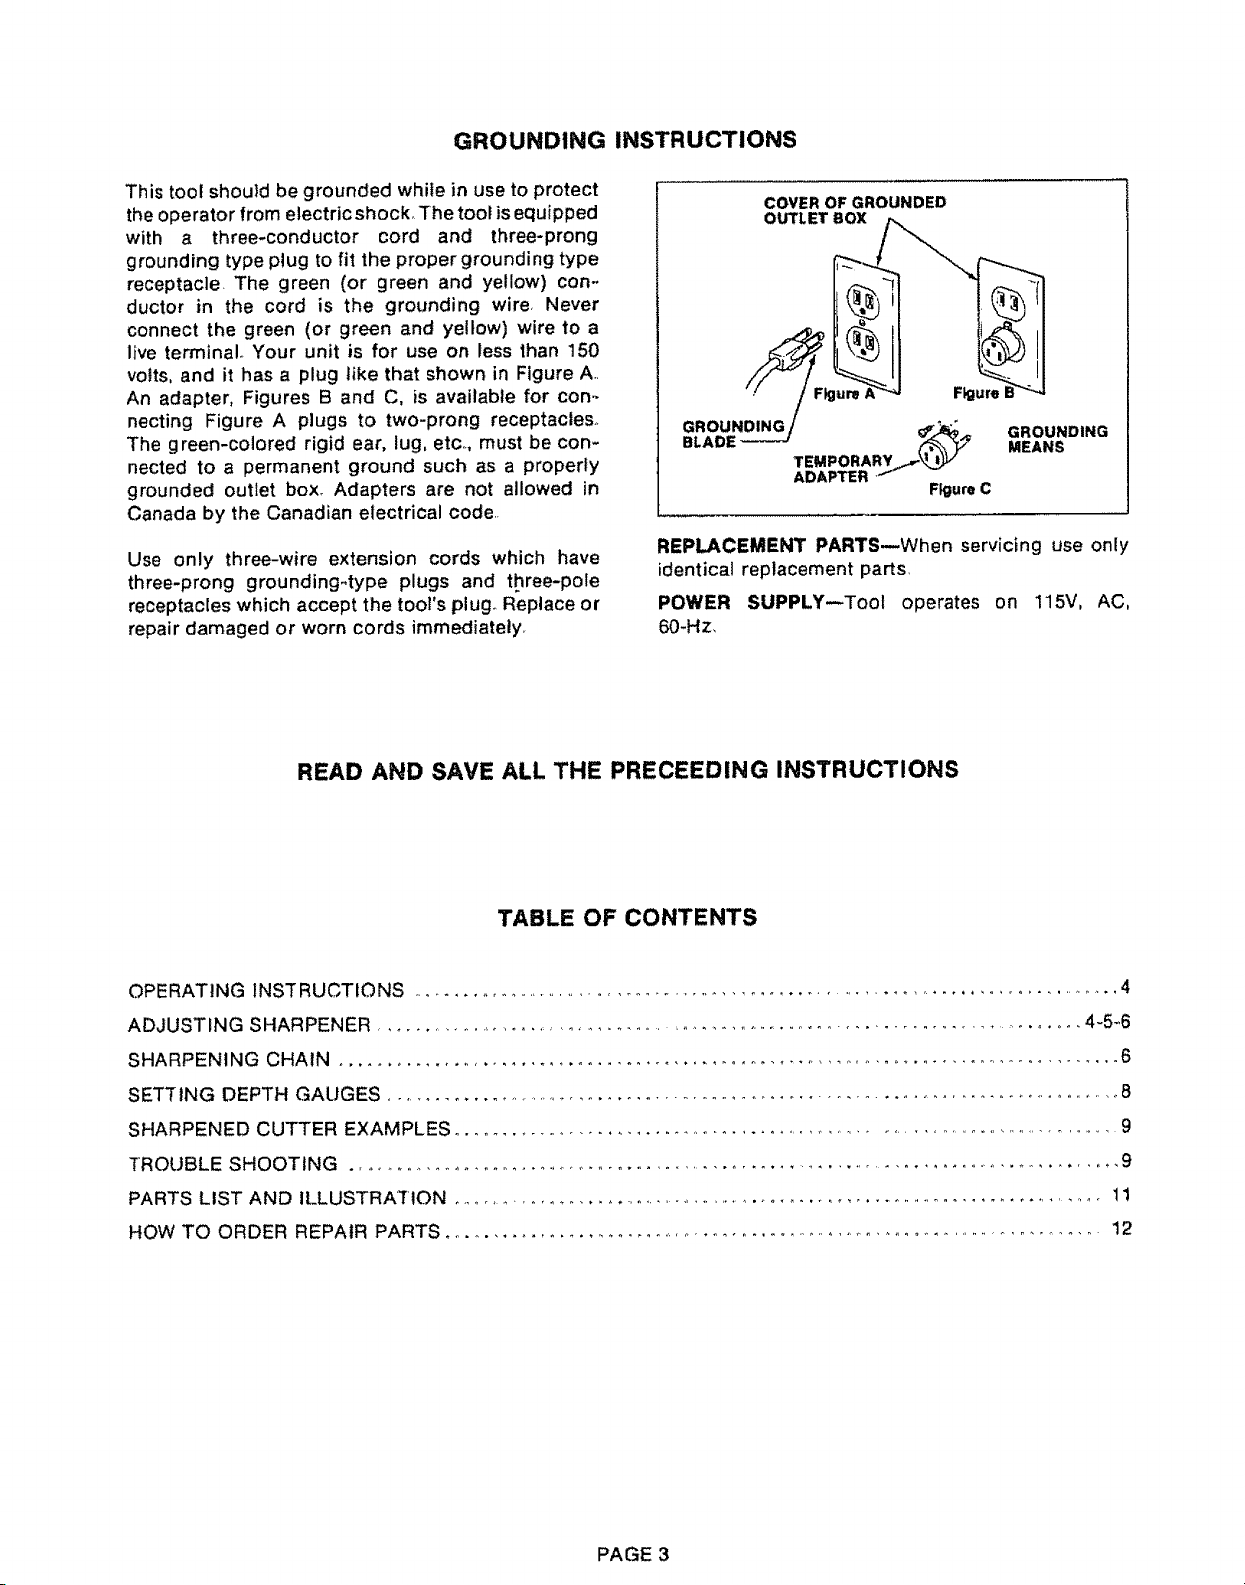
live terminal. Your unit is for use on less than 150
volts, and it has a plug like that shown in Figure A,,
An adapter, Figures B and C, is available for con_
necting Figure A plugs to two-prong receptacles°
The green-colored rigid ear, lug, etc,., must be con-
nected to a permanent ground such as a properly
grounded outlet box, Adapters are not allowed in
Canada by the Canadian electrical code..
Use only three-wire extension cords which have
three-prong grounding-type plugs and three-pole
receptacles which accept the toot's plugo Replace or
repair damaged or worn cords immediately_
COVER OF GROUNDED
OUTLET BOX
GROUNDING _._ "',_ GROUNDING
BLADE _..f_ MEANS
TEMPORARY
ADAPTER I
Figure C
REPLACEMENT PARTS--When servicing use only
identica! replacement parts,
POWER SUPPLY_Tool operates on 115V, AC,
60-Hz,
READ AND SAVE ALL THE PRECEEDING INSTRUCTIONS
TABLE OF CONTENTS
OPERATING INSTRUCTIONS ...................................................................................... 4
ADJUSTING SHARPENER ........................................................................................... 4-5_6
SHARPENING CHAIN .................................................................................. 6
SETTtNG DEPTH GAUGES ....................................................................................... 8
SHARPENED CUTTER EXAMPLES ..................................................................................... 9
TROUBLE SHOOTING ........................................................................................ 9
PARTS LIST AND ILLUSTRATION .................................................................................... 11
HOW TO ORDER REPAIR PARTS .............................................................................. 12
PAGE 3
Loading ...
Loading ...
Loading ...