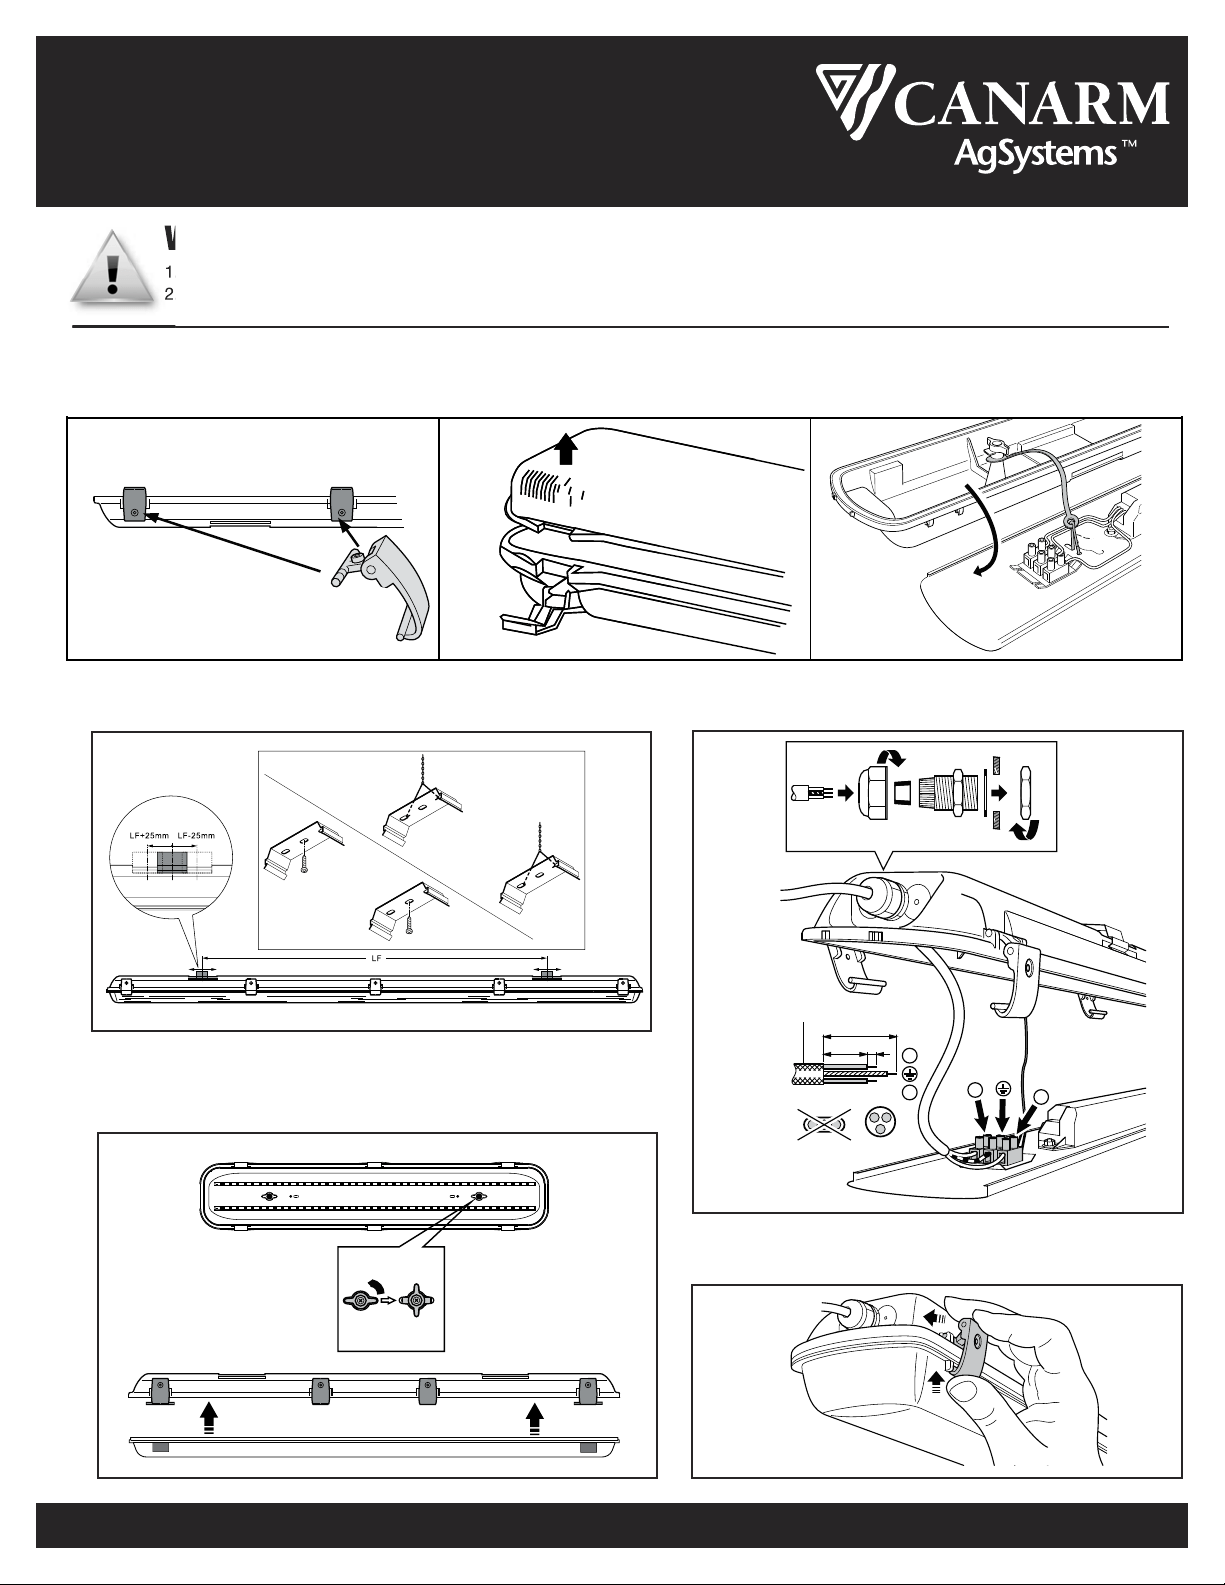
INSTALLING LED VAPOR PROOF LIGHT
1. Carefully remove the PC cover through opening the metal clip, then remove aluminum plate through rotating the plastic knob.
LED Vapor Proof Light
INSTALLATION INSTRUCTIONS / PLEASE READ AND SAVE THESE INSTRUCTIONS
LED_Vapor_Proof_Light-M 10/03/16 Page 1 of 2
①
1. Turn off electrical power before starting installation of light fixture.
2. All local building and electrical codes must be followed.
WARNINGS AND SAFETY PRECAUTIONS
②
820
35
?-10
L
N
N
L
3
1
4
2
Min. 3x 1mm
2
H05RN-F
2. Screw two pieces metal bracket (packed in the accessory bag)
to ceiling; install the housing to the metal bracket.
4. Screw two pieces metal bracket (packed in the accessory bag)
to ceiling; install the housing to the metal bracket.
5. Screw two pieces metal bracket (packed in the accessory
bag) to ceiling; install the housing to the metal bracket.
3. Install the end cap, connect wiring to terminal block of
the light through the cable entry hole.
④
LED Vapor Proof Light
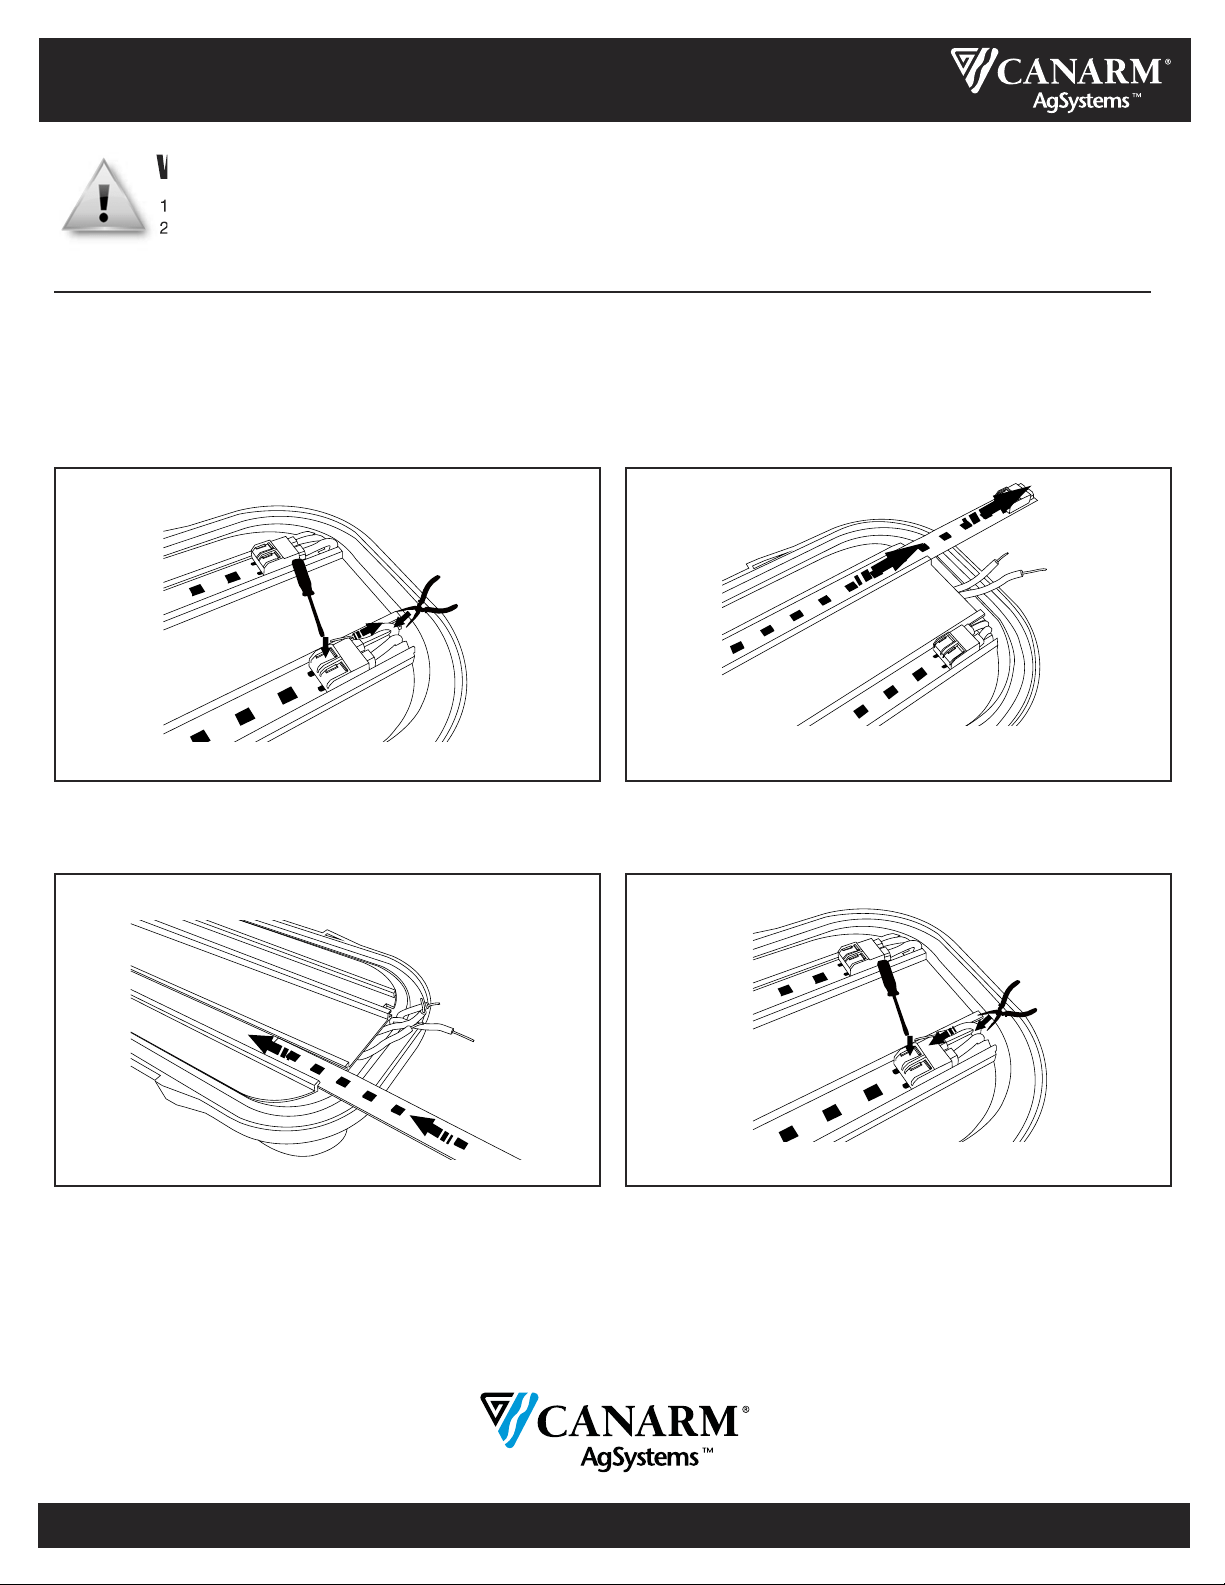
REPLACING THE LED STRIP
1. Press the terminal block at the end of each strip, and pull
out the wire.
1. Turn off electrical power before starting installation of light fixture.
2. All local building and electrical codes must be followed.
WARNINGS AND SAFETY PRECAUTIONS
2. Pull out the LED strip from the aluminum plate the direction
of arrow.
3. Replace a new LED strip to the aluminum plate, inserting
follow the direction of the arrow.
4. Connect the wire to the terminal block of LED strip,matching
the “+” and “-” poles.
-
+
LED_Vapor_Proof_Light-M 10/03/16 Page 2 of 2
CANARM LTD. - CORPORATE HEAD OFFICE
2157 Parkedale Avenue, PO Box 367
Brockville, Ontario Canada K6V 5V6
Tel: (613) 342-5424; Fax: (613) 342-8437
[email protected] www.canarm.com
CANARM BSM – ARTHUR MANUFACTURING FACILITY
#7686 Concession 16, RR#4
Arthur, Ontario Canada N0G1A0
Tel: (519) 848-3910; Fax: (519) 848-3948
