Loading ...
Loading ...
Loading ...
6 INSTALLATION Built-in Cooking
installation
Cabinet construction for your appliance
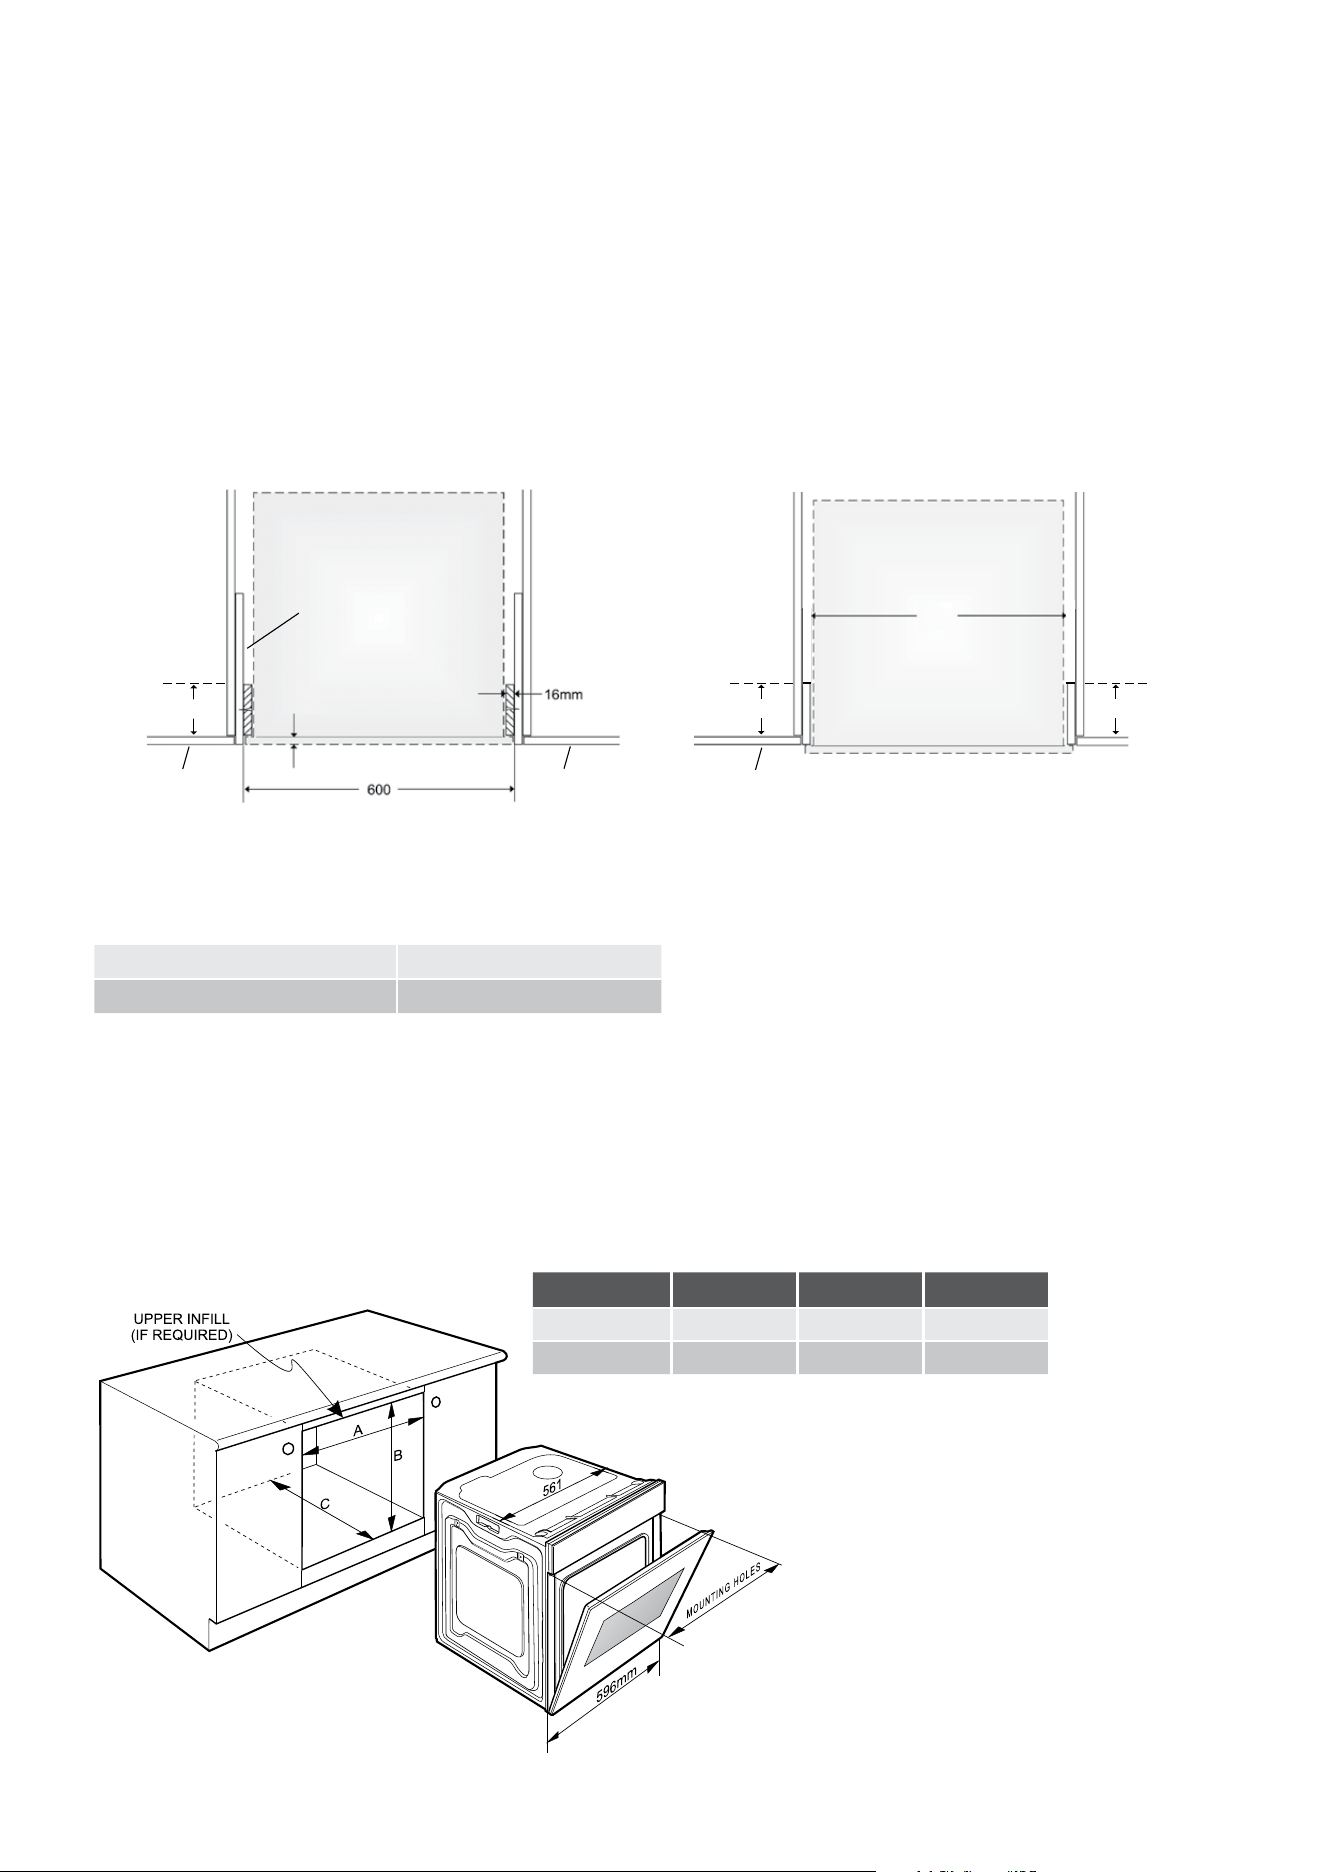
For the best integration within a kitchen, install this appliance in
a standard 600mm wide cupboard that gives a flush fit with the
surrounding cupboard fronts (figure A). A recess of 20mm is ideal.
This appliance it can also be installed using a proud fit with the
surrounding cupboard (figure B).
NOTE: Your appliance must be mounted on a flat, horizontal
surface for the full width and depth of the product.
Underbench ovens
Your underbench oven looks best when the control panel is directly
under the benchtop. An upper infill panel may have to be added
if the cooktop placed above the benchtop is too deep.
Refer to cooktop installation instructions for required clearance
between cooktop and oven.
Oven dimensions
Figure A – Flush fit (top view) Figure B – Proud fit (top view)
Underbench Oven
597 x 596 x 573mm (HxWxD)
Separate Grill Wall Oven
890 x 596 x 573mm (HxWxD)
Cleat
Cupboard
door
Cupboard
door
Infill panel
20mm
100mm max
Cupboard front
100mm max 100mm max
561
NOTE: If a powerpoint is fitted it must be
accessible with the appliance installed.
A B C
Flush fit (mm)
600 600 581(min)
Proud fit (mm)
565 590 560 (min)
installation
Hard wiring detail
1. Remove terminal cover plate from rear panel of appliance.
2. Fit wires through hole in cover plate and make connections
to terminals.
3. Engage wires into plastic clip. Secure plastic clip with two
long silver screws (supplied in separate bag).
4. Replace cover plate onto rear panel.
Plastic clip
securing points.
Plastic clips
Second active wire only
required (optional) for
multi-phase products.
Separate grill wall oven & pizza oven
caution
NOTE: Dimension “D”.
A requirement for all separate grill wall ovens and all Duo ovens – for proper ventilation there must be a gap at the bottom
rear of the cabinet. This must be a full width opening 20mm deep.
A B C D
Flush fit (mm) 600 893 581(min)
20
Proud fit (mm) 565 885 560 (min)
20
D
B
A
C
561
596
Mounting holes
Use black installation
screws supplied
Recommended
650 min
B
D (200mm)
C (581mm)
(893mm)
Flush fit
section view
Built-in Cooking INSTALLATION 7
Loading ...
Loading ...
Loading ...