Loading ...
Loading ...
Loading ...
before operating your
appliance for the first time
before operating your
appliance for the first time
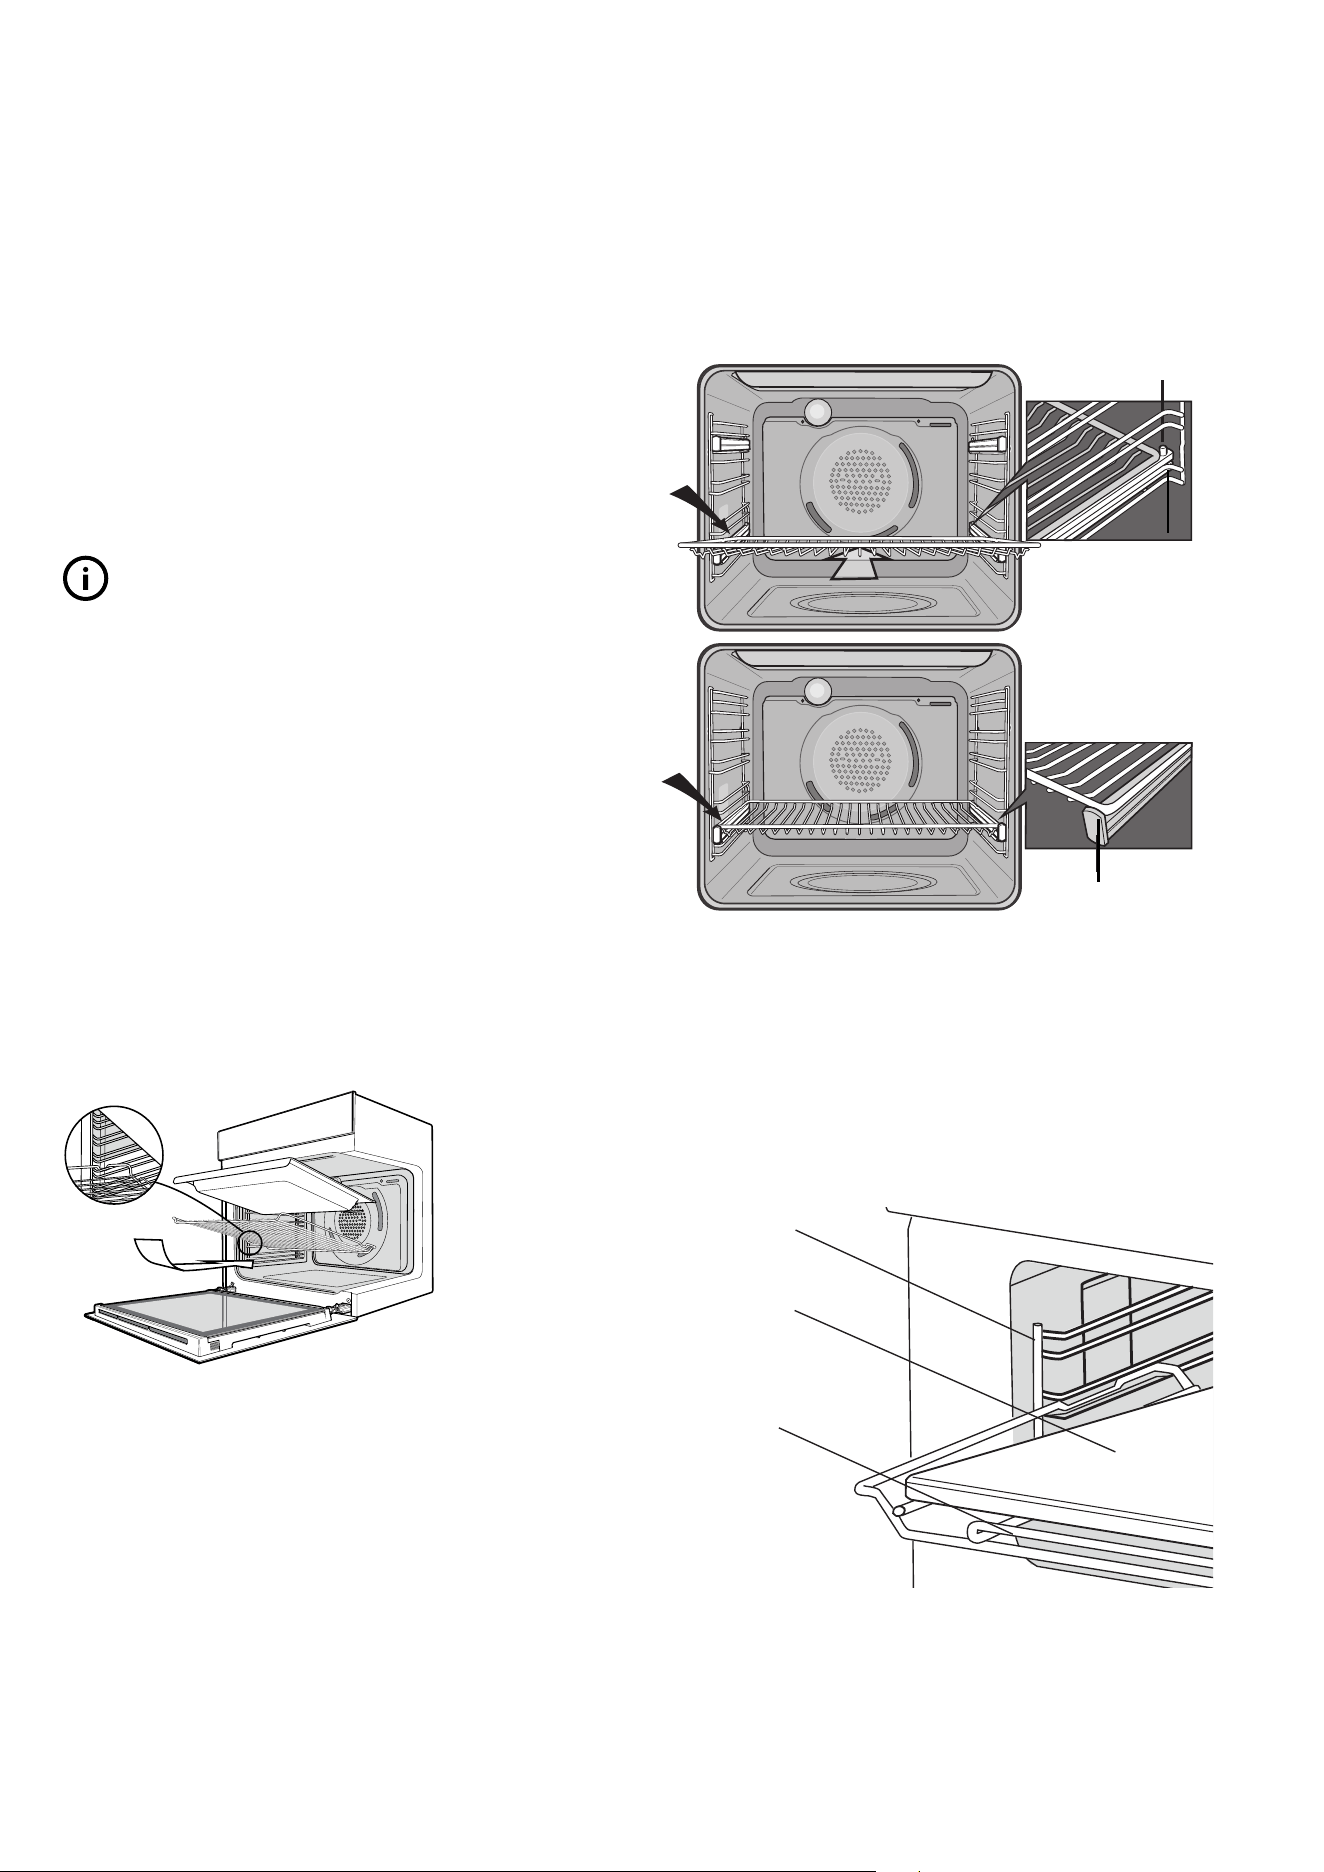
Front post
Bac k post
Pizza Stone (CVE624 and SVE624)
• Insert the pizza rack into the grill side racks (lower oven)
as shown in the image below.
• Note the orientation of the pizza rack. Refer to the image
below.
• Carefully place the pizza stone inside the pizza rack.
10 BEFORE OPERATING YOUR APPLIANCE Built-in Cooking Built-in Cooking BEFORE OPERATING YOUR APPLIANCE 11
Installing your oven accessories
The type of oven accessories you receive is dependant on
the model you have purchased.
1. Shelves and trays
caution
Ensure the shelves are inserted in the correct orientation,
otherwise you may damage the appliance.
Your oven comes with formed “easy clean” shelf supports.
The shelves are designed to travel freely on the shelf supports
without being pulled out accidentally. Make sure you have
the shelf in the correct orientation before you slide it in.
Otherwise it could become jammed.
• Locate the rear edge of the shelf in the recess between
2 formed shelf supports. See diagram below.
NOTE: The top ‘ledge’ is not a shelf position.
note the orientation of the
side and rear features
• With the front edge raised, begin to slide the shelf into the
oven. Lower the front edge as you push the shelf fully in.
• The grill/baking tray for underbench oven models sits into
a wire carrier that fits into the oven exactly like the shelves.
• The grill/baking tray for separate grill wall oven models
slides into the wire runners in a similar manner.
• When fully inserted, the shelf/tray should not interfere
with the closed oven door.
2. Slides (Telescopic runners CVE602 only)
1. Obtain left hand side rack and left hand slide - see image
to identify.
2. Fit slide rear clips to the rear of wire at an angle as
shown below.
1
2
3. Push slide front clip over wire until secure.
CLICK !
3
3. Main oven wire side racks (where applicable)
The side racks attach to each side of your oven. There is
a left hand and right hand version (see image below for
details).
• Insert the rear peg into the rear access hole provided,
ensuring that the peg is fully inserted.
• Then locate the front peg into the front access hole
and push in firmly.
Front Peg
Rear Peg
Left Hand
Side Rack
4. Separate grill side racks (where applicable)
Separate grill wall ovens come with side racks that are to
be fitted to the smaller lower grill/oven.
The fitment of the side racks for a seperate grill is the same
as that for the main oven. Refer to previous section.
Shelves and trays (CVEP604 and CVE602)
important
The shelves are designed so that they have maximum travel
but cannot be accidentally pulled right out. The trays are
designed the same way and fit straight into the side racks.
To fit a shelf or tray to side racks:
• Locate the rear edge of the shelf/tray inbetween 2 guide
rails of the side rack - see diagram. Ensure the same rail
positions on both sides of the oven are being engaged.
• With the front edge raised, begin to slide the shelf into
the oven.
• Once the detents have passed the front edge of the side
rack, the shelf can be pushed fully in.
• The grill/baking tray for separate grill wall oven models
slides into the wire runners in a similar manner.
• When fully inserted the shelf/tray should not interfere
with the closed oven door.
• Remove extra trays and dishes before roasting or baking.
To fit a shelf or tray to telescopic slides (where fitted):
• With the slides fully pushed in, push the shelf or tray along
the top of the slide until it hits the back post.
• Drop the front of the shelf or tray onto the slide ensuring
it sits behind the front post of the slide.
• When fully inserted the shelf/tray should not interfere with
the closed oven door.
NOTE: Shelves and accessories must be removed when
using pyrolytic cleaning function.
Grill Side Rack
Pizza Stone
Pizza Rack
Front peg Rear Peg
L = Left hand side
R = Right hand side
Loading ...
Loading ...
Loading ...