Loading ...
Loading ...
Loading ...
B. iNSTALL LEVELING LEGS
Leveling your dryer correctly will
reduce operating noise and provide
improved drying performance.
STEP 1. Take two of the cardboard
corners from the carton. Place them
on the floor in back of the dryer.
STEP 2. Firmly grasp the body of the
dryer (not the top or console panel).
Gently lay dryer on the cardboard corners.
STEP 5. Stand the dryer up and move
it close to its final location. Leave enough
room to connect the exhaust vent.
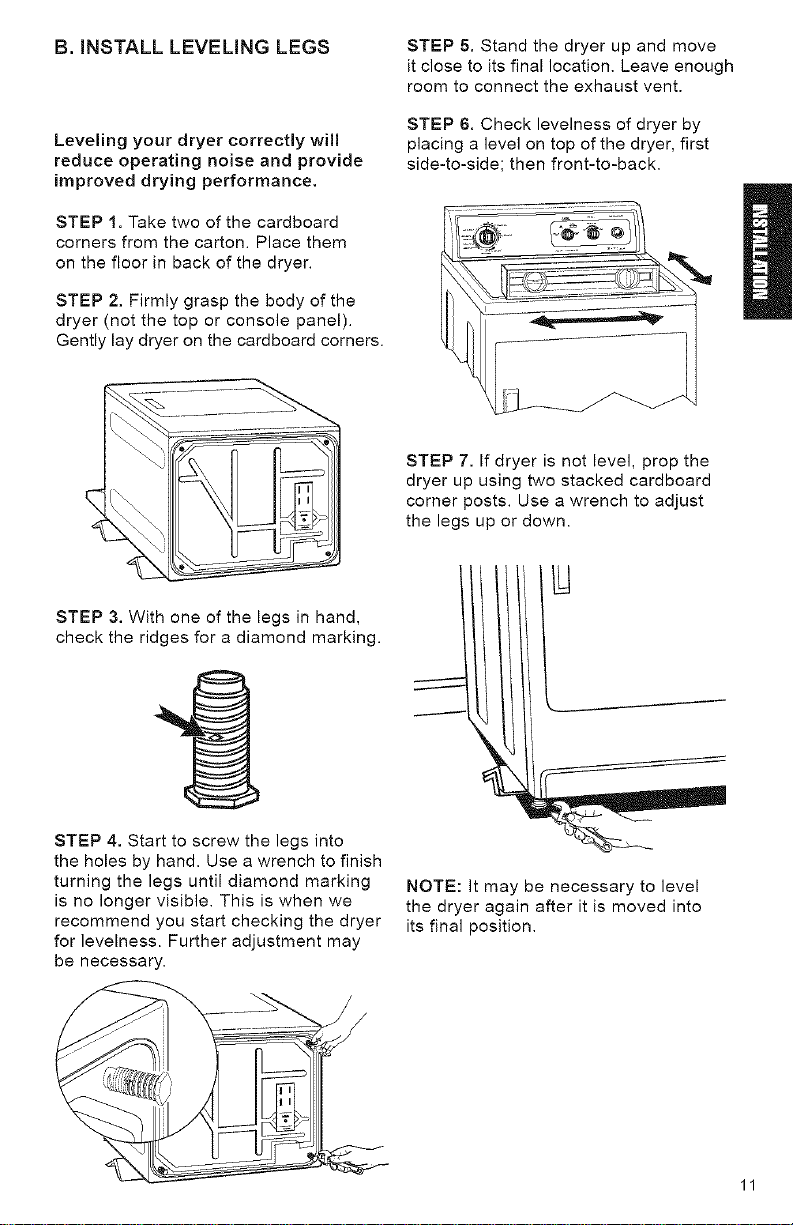
STEP 6. Check levelness of dryer by
placing a level on top of the dryer, first
side-to-side; then front-to-back.
STEP 3. With one of the legs in hand,
check the ridges for a diamond marking.
STEP 4. Start to screw the legs into
the holes by hand. Use a wrench to finish
turning the legs until diamond marking
is no longer visible. This is when we
recommend you start checking the dryer
for levelness. Further adjustment may
be necessary.
STEP 7. If dryer is not level, prop the
dryer up using two stacked cardboard
corner posts. Use a wrench to adjust
the legs up or down.
NOTE: It may be necessary to level
the dryer again after it is moved into
its final position.
11
Loading ...
Loading ...
Loading ...