Loading ...
Loading ...
Loading ...
HDMI2 (4K)
AV INPUT
ANT. IN
HDMI3 (4K)
HDMI4 (4K)
OPTICAL
USB
5V 500mA
ETHERNET
HDMI1 4K (eARC)
HEADPHONE
USB
5V 500mA
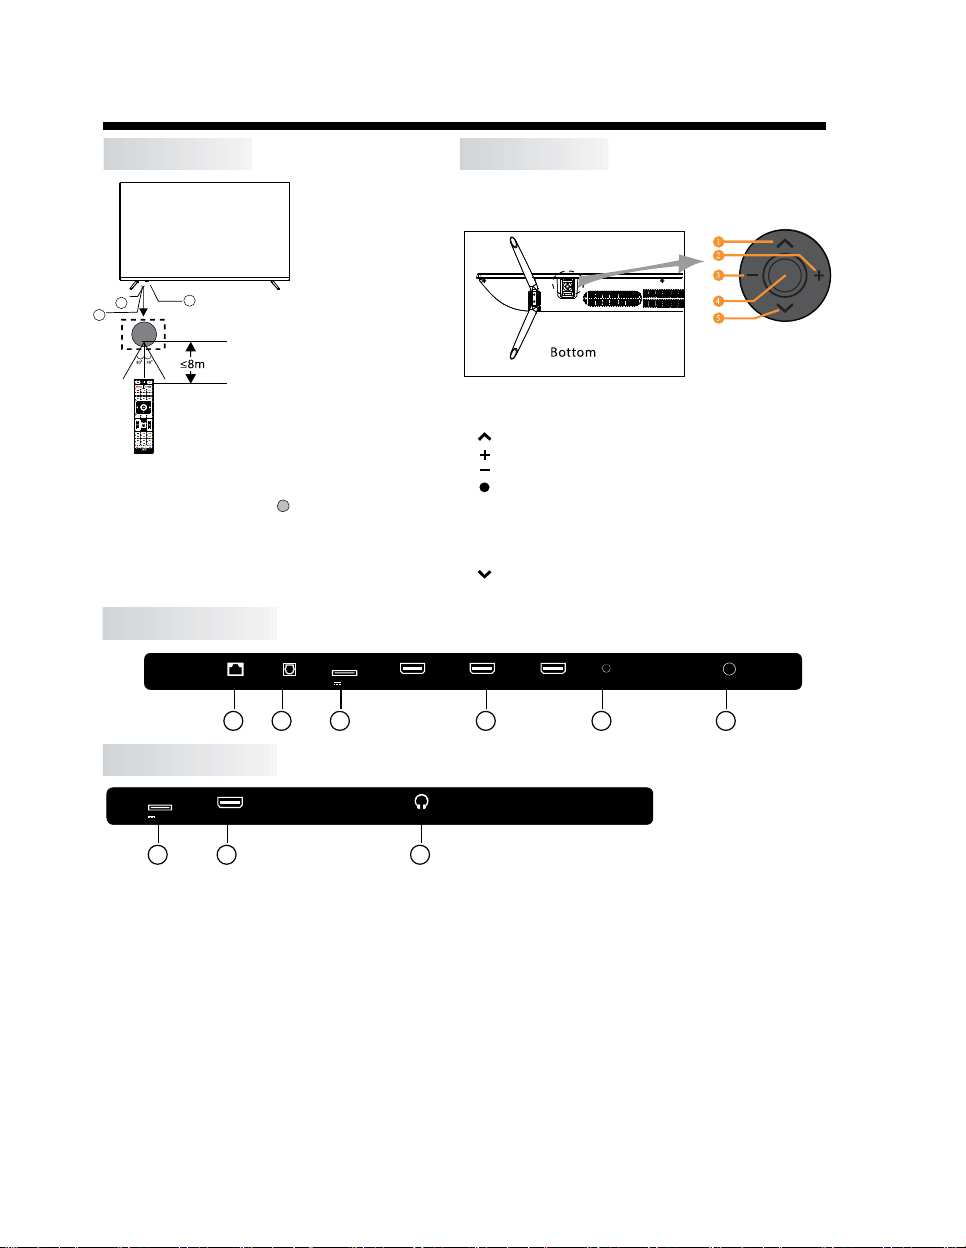
INSTALLATION
FRONT PANEL
REAR AV CONNECTIONS
1
REAR AV CONNECTIONS (SIDE)
1: Remote control sensor
1, ETHERNET: Connect the Network Interface.
2, OPTICAL: Optical Digital Audio ouput.
3, USB: Plug in your USB memory device (eg. USB stick) for PVR recording or to play compatible files that are
stored in it.
4, HDMI: Connect to the HDMI ouput jack of up to 4 external video sources (eg. DVD player / games console /
bluray player).
5, AV INPUT: Connect to the AV OUT jack of your external video source device(eg. DVD player)*
6, ANT.IN: Connect the antenna or 75 Ohm coaxial cable to receive TV signal.
7, HEADPHONE: Connect headphones here. Note that connecting headphones will mute the sound from
the TVs built-in speakers.
* Use the connector cable provided to convert the mini AV port to RCA inputs.
2: Indicator LED: RED STANDBY
3: Keyboard
3
2
1
-9-
RM-C 340 9
The control buttons on the TV are located on the bottom
of the TV near the LED indicator.
KEYBOARD
Control Key
1. : Select the next channel or move up.
2. : Increase the volume level or move right.
3. : Decrease the volume level or move left.
5. : Select the previous channel or move down.
4. : When TV is on standby, press to turn on.
When TV is on, press to enter the menu.
Use the joystick to navigate around the interface
and press to enter the highlighted item.
When TV is on, press and hold to put TV on standby.
3 4 7
2 3 4 5 6
Loading ...
Loading ...
Loading ...