Loading ...
Loading ...
Loading ...
33
www.napoleongrills.com
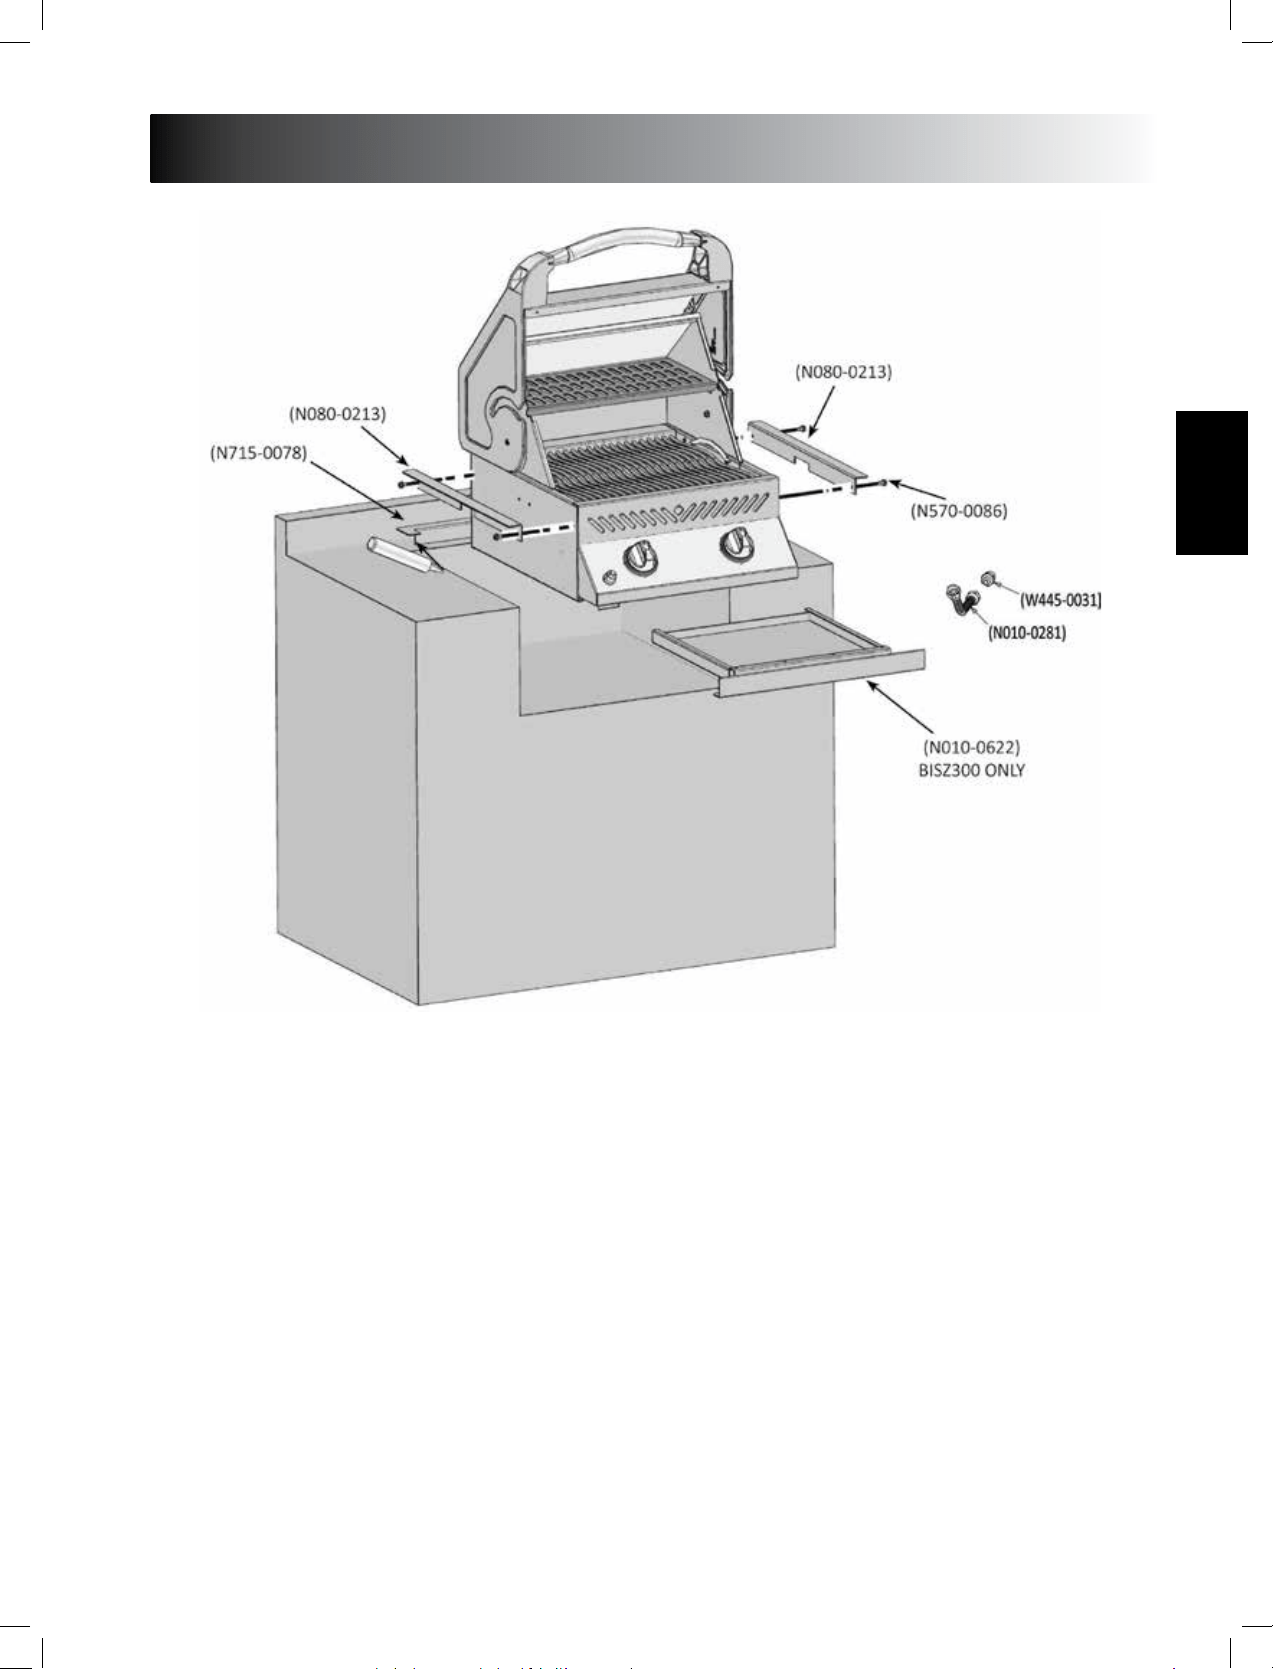
This grill is designed for masonry, non-combusble enclosures only, and must be installed and serviced by a
qualied installer to local codes.
1. Aach side mounng brackets to each side of the grill using #14 x 1/2” screws (N570-0086).
2. Lay the rear trim piece across the back of the opening. To keep it in place, a dab of silicone may be applied
to each wing of the rear trim.
3. Lower the unit in place. A exible metal connector is included to simplify the installaon of the unit.
Connect this connector to the 3/8” are ng on the end of the manifold. Connect the other end of the
connector to the gas piping. Ensure that the connector does not pass through a wall, oor, ceiling or paron,
and is protected from damage.
4. The enre installaon must be leak tested before operang the unit.
Ce gril est conçu pour des cabinets INCOMBUSTIBLES OU EN MAÇONNERIE seulement et doit être installé et
entretenu par un installateur qualié selon les codes locaux.
1. Fixez les supports de xaon latéraux à chaque côté du gril à l’aide des vis #14 x 1/2” (N570-0086).
2. Placez la moulure arrière le long de l’arrière de l’ouverture. Pour la maintenir en place, vous pouvez
appliquer un peu de silicone sur chaque ailee de la moulure arrière.
3. Abaissez l’appareil en place. Un raccord exible métallique est inclus an de faciliter l’installaon de
l’appareil. Branchez ce raccord au raccord évasé de 3/8” situé à l’extrémité du collecteur. Branchez l’autre
extrémité du raccord à la conduite de gaz. Assurez-vous que le raccord ne passe pas à travers un mur, un
plancher, un plafond ou une cloison et qu’il soit protégé contre tout dommage.
4. L’installaon complète doit être vériée pour des fuites avant de faire fonconner l’appareil.
Loading ...
Loading ...
Loading ...