Loading ...
Loading ...
Loading ...

EN-6
EN
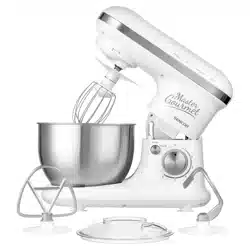
Food Mixer
STM 3620WH / STM 3621GR / STM 3624RD
2021 05/2021
PLANETARY MIXING SYSTEM
• The planetary mixing system is based on the principle of dual rotation of the attachment. The attachment
rotates anticlockwise along the inner perimeter of the bowl while rotating around its own axis in the opposite
direction. This ensures that ingredients inside the bowl are processed thoroughly and evenly.
BEFORE FIRST USE
1. Take the appliance and its accessories out of the packaging materials.
2. Thoroughly wash all parts that are intended to come into contact with food (kneading hook A1, whisk A2,
beater A3, the stainless steel mixing bowl A4 and pouring shield A6 using warm water and aneutral kitchen
detergent. Then rinse them with clean water and dry thoroughly with ane wiping cloth.
SELECTING ATTACHMENT TYPES
ATTACHMENT TYPE PURPOSE OF USE
Kneading hook A1
It is used for kneading and preparing heavy and thick doughs containing yeast, e.g.
bread dough.
Beater A3
It is used for mixing medium heavy and lighter doughs not containing yeast, for mixing
sauces, creams, llings, etc.
Whisk A2
It is used for whisking whole eggs or egg whites, whipped cream, light doughs, foamy
creams, etc. Do not use it for mixing heavy and thick doughs.
ASSEMBLING AND DISASSEMBLING THE APPLIANCE
• Before you start assembling or disassembling the food mixer, check that it is turned o and disconnected from
the el. power socket.
1. Inserting the mixing bowl
1.1 Place the food mixer on an even, dry surface, for example on akitchen workbench.
1.2 Release the arm A8 by pressing the PUSH button A9 and tilt it upwards. The arm A8 is locked in the open
position when the PUSH button A9 slides out together with an audible click.
1.3 Place the stainless steel bowl A4 into the hole in the base unit A5 and secure it in place by turning it clockwise.
When the bowl A4 is properly attached, it is not possible to lift it o the base unit A5.
2. Attaching an attachment (kneading hook, beater or whisk)
2.1 If you decide to use the pouring shield A6, then it is necessary to attach it prior to mounting an attachment.
Carefully seat the pouring shield A6 on to the tilt-out arm and secure it in the locked position by turning it
anticlockwise.
2.2 When attaching an attachment, the arm A8 must be secured in the open position, see point 1.2 in chapter
Inserting the mixing bowl. Attach one of the attachments to the T-shaped shaft of the mixing head A7 so
that the shaft ts into the hole on the attachment. Push the attachment towards the mixing head A7 turn it
anticlockwise to secure it to the shaft.
2.3 With one hand, hold the attachment and gently pull it downwards. If it is properly secured to the shaft, it will not
come o.
2.4 If you will not be immediately placing ingredients into the mixing bowl A4, press the PUSH button A9 and tilt
the arm A8 to the horizontal position. When the arm A8 is tilted to the horizontal position, the PUSH button
A9 will slide out accompanied by an audible click.
Loading ...
Loading ...
Loading ...